


11 Auckland Villa Renovation Ideas That Keep the Character
11 Villa Renovation Ideas That Update an Auckland Villa Without Wrecking the Character
Quick answer: The best villa renovation ideas modernise the back of the house, leave the front alone, and treat original features — sash windows, kauri floors, scotia, ceiling roses — as design assets rather than problems. In Auckland’s Special Character Areas, what you do to the streetscape will likely need resource consent, so plan the modern bits at the rear and the heritage work to the front.
You buy the villa for the bay window. The kauri floors hiding under the carpet. The 3-metre stud heights and the scotia detail. And then you live in it for a winter, and you realise the sash window in the front bedroom hasn’t opened since the Lange government, the fireplace was bricked over by the previous owner, and the kitchen still feels like it’s in a separate building.
This is the renovation tension every villa owner in Grey Lynn, Ponsonby, Mt Eden, Devonport, Westmere, Herne Bay, Kingsland and Freemans Bay knows. Modernise it for the way people actually live now — without losing what made you buy it in the first place. We’ve worked on a lot of Auckland villas over the years, and we’ve watched plenty of well-intended renovations strip out exactly the thing the buyers next door are paying a premium for.
So here are eleven ideas we’d actually do — paired with what we’d never do — drawn from real projects across the inner-Auckland villa belt. Costs are 2026 figures. Consent context is grounded in the Auckland Unitary Plan, specifically the Special Character Areas Overlay that covers most of the suburbs your villa probably sits in.

Before You Start: The Auckland Council Bit You Need to Know
Most Auckland villas sit inside the Special Character Areas Overlay (SCA) under the Auckland Unitary Plan. That’s the planning rule that controls what you can do to the parts of the house people see from the street.
It’s worth understanding the difference between two things people often blur:
- Special Character Areas Overlay (Chapter D18 of the Unitary Plan) — covers groups of streets and suburbs where the collective look matters. Most of Grey Lynn, Ponsonby, Freemans Bay and large parts of Mt Eden, Herne Bay, Devonport, Parnell and Epsom are in it. Triggers resource consent for external changes that affect the streetscape.
- Historic Heritage Overlay (HHO) — applies to individually scheduled buildings, not whole streets. Stricter rules, harder process, fewer houses affected.
The practical version: if you can see it from the street, assume the SCA cares about it. Roof pitch, weatherboard profile, window joinery style, verandah, front fence height — all in scope. Internal renovations, rear extensions hidden behind the main roofline, anything inside the back half of the section — generally fine.
Important note: Check your specific property on the Auckland Council GIS Viewer before planning anything external. The SCA boundaries don’t follow obvious streetscape logic — your villa may be in, your neighbour might be out.
1. Restore the Sash Windows Before You Replace Them
The original kauri sash windows are the single most distinctive feature on most Auckland villas. They’re also, in most cases, completely fixable.
A sash window that won’t open isn’t ruined — it’s usually one of three things. Painted shut after a careless interior repaint. Sash cord broken inside the box frame. Counterweights out of balance after a previous glass replacement. All three are repairable in a single tradesperson’s visit.
Sash cord replacement in Auckland sits at around $400–$550 per window. Easing a stuck top sash is generally cheaper. Compare that to $1,200–$2,500 to remove and replace one timber sash window with modern aluminium double-glazing, and the maths gets clearer fast — especially when you factor in the streetscape question.
For thermal performance, the modern move is retrofit double glazing into the existing sash: same frame, same proportions, same streetscape, modern glass. Slimline double-glazed units (12mm overall) fit most original sash frames without altering the joinery. EECA’s Warmer Kiwi Homes programme doesn’t cover windows directly, but pairing this with insulation gives you the thermal package without the heritage compromise.
“The original timber on these windows is denser than anything you can buy new. We’ve serviced sashes on a Ponsonby villa where the kauri was still straight after 110 years. Tearing it out for an aluminium frame is a downgrade, not an upgrade.”
— Dorothy Li, Design Manager, Superior Renovations
💡 Quick tip: If your sashes rattle in the wind, that’s not character — that’s worn parting beads and missing draught stops. Both are an easy fix that’ll cut your winter heat loss noticeably.
What we’d never do: Replace the front-facing sashes with modern aluminium joinery. Even ignoring the consent issue, the proportions don’t read right — sash windows are taller than they are wide, modern aluminium tends to the opposite, and the difference shows from the street.
2. Pull the Carpet Back and See What’s Underneath
Most Auckland villas have kauri or rimu tongue-and-groove floors hiding under the carpet. Some of them have been hidden since the 1970s. The strip-back is usually the cheapest dramatic transformation in the whole project.
The process is usually: lift the carpet and underlay, pull the staples and tacks, fill the gaps with matching timber slivers where needed, then sand back and recoat. Costs in Auckland sit between $50 and $90 per square metre to sand, fill and re-coat, depending on the floor’s condition and how many coats of polyurethane you want. For a 90m² villa, that’s a $4,500–$8,000 job that adds more visible value than a $30,000 kitchen.

villa renovation ideas
Sometimes the news isn’t good — borer damage, water staining around old bathrooms, or sections where a previous owner laid a slab over the joists. Borer-eaten boards can usually be patch-replaced with reclaimed kauri sourced from demolition yards. Slab repair is more involved but rarely a deal-breaker.
Finish choice matters more than people realise. A high-gloss polyurethane will look like a bowling alley and yellow over time. A matte or satin water-based finish in a hard-wax oil or modified-resin product reads as period-appropriate and lets the grain show.
💡 Quick tip: Before you commit, lift a corner of carpet in two or three rooms. If the boards underneath are full-width tongue-and-groove with no obvious water damage, you’re in good shape. If you find chipboard or particleboard, the original floor is either gone or buried deeper.
What we’d never do: Sand the boards down to bare timber and stain them dark. The grain on aged kauri is the whole point. Staining covers it up.
3. Open Up the Kitchen — But Only the Back Half of the House
Villa floor plans were built around a central hallway with rooms either side. That makes sense for a house with five servants and a wood-burning stove. It doesn’t work for anyone cooking dinner while watching kids in 2026.
The standard villa renovation move is to open up the rear — usually the back two or three rooms — into a single kitchen-dining-living space. Done well, this is the renovation that genuinely transforms how the house functions. Done badly, it strips out the proportions and ceiling heights that gave the villa its quality.
The principle we apply: leave the front of the house alone. The front bedroom, the formal sitting room with the bay window, the entry hall with the scotia and ceiling rose — keep them. The character of a villa is concentrated in the front 40% of the floor plan. Open up the back 60%.
Cost-wise, a kitchen renovation in this scenario typically falls into our standard Auckland kitchen range: mid-range $28,000–$35,000, custom-cabinetry full kitchen $30,000–$50,000, with structural work to remove a load-bearing wall adding $8,000–$18,000 depending on the span and whether you need a steel beam.
For cabinetry that suits a villa context, we usually steer clients toward shaker-front or recessed-panel doors in Laminex‘s painted-finish range rather than handleless slab fronts. Slab fronts read as too contemporary against a villa’s detail. Shaker fronts pick up the proportions of the original joinery without trying to mimic it.
“The mistake we see most often is people open-planning the entire ground floor and then realising they’ve lost every room that felt like the original house. Two open zones — front formal, back informal — works better than one big space.”
— Dorothy Li, Design Manager, Superior Renovations
What we’d never do: Drop the ceiling height in the new kitchen to install a flat plasterboard ceiling with downlights. Villa stud heights are 3 metres and up. Dropping to 2.4 metres kills the feel of the space in one decision.
4. Add a Rear Extension That Knows Its Place
Most villas eventually need more square metres. The kids, the home office, the second bathroom — the original 100m² footprint runs out. Extensions are how villas keep adapting, and a well-judged rear extension is one of the most value-adding moves you can make.
The rule we’d back: extend at the rear, hide it behind the main roofline, and don’t pretend the new bit is original. A clear architectural transition — a glass link, a step down in floor level, a deliberate change in cladding — does more for the house than a fake-villa extension that tries to copy the original detail and gets it 80% right.
Ground floor rear extensions in Auckland typically start at $80,000 for a basic addition. Per square metre, expect $2,000–$5,500/m² depending on specification — the low end is single-skin weatherboard with simple roof, the high end is butt-jointed glazing, polished concrete floors and timber-lined ceilings. Our house extensions Auckland service page covers the full process from feasibility through to handover.
The consent question is where Special Character Areas Overlay matters most. A rear extension that stays under the existing roofline, doesn’t change the front elevation, and sits within the standard height-in-relation-to-boundary rules can often go through as building consent only — no resource consent required. The moment you raise the ridge, change the front, or break the 3-metre + 45-degree rule on a boundary, you’re into resource consent territory.
For more complex villa extensions — especially second-storey additions that affect the streetscape — we’d usually bring in Sonder Architecture early. SCA resource consent applications need an architectural designer who’s done them before; doing it cold with a builder is a costly way to learn.
What we’d never do: Tack a single-storey extension onto the front of the villa. Even if the rules allowed it (they generally don’t), it destroys the proportional relationship between the house and the street.
5. Bring the Fireplace Back to Life — Don’t Just Cover It
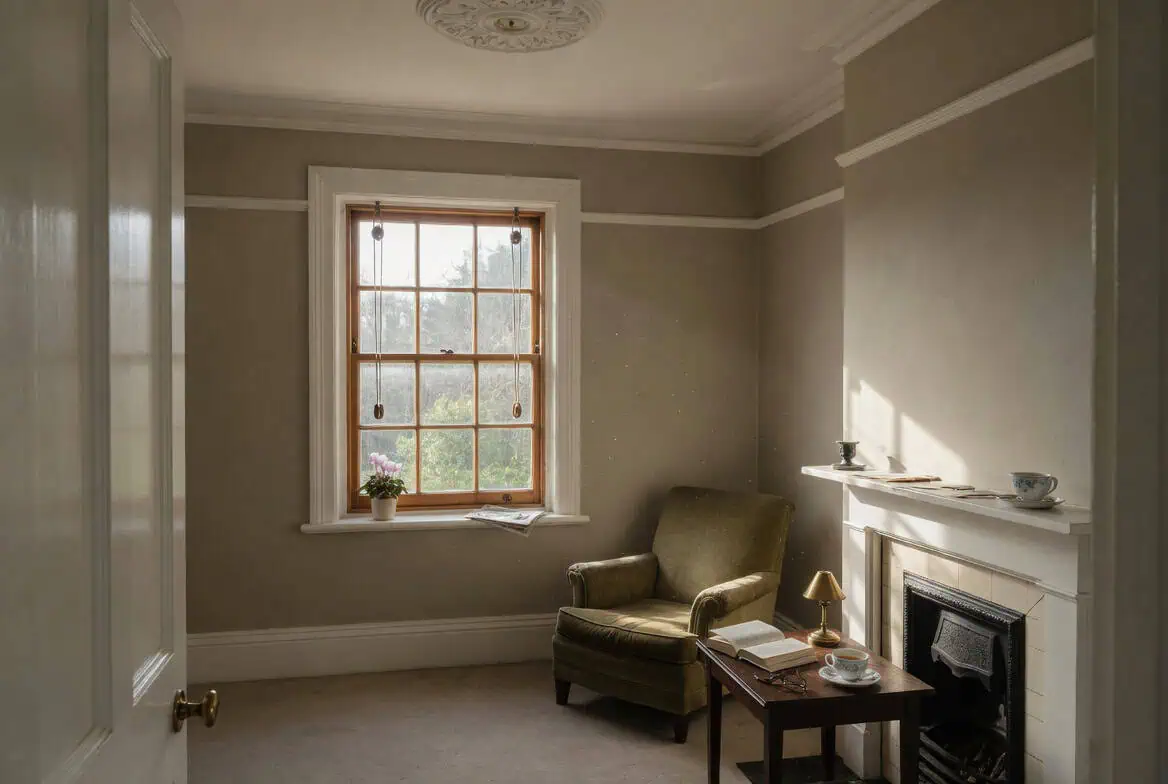
Almost every Auckland villa we work on has at least one fireplace that’s been bricked over, plastered over, or had a heat pump screwed into the wall above it. The original tile surround, the timber mantel, the cast-iron insert — usually still there, just hidden.
Restoring a working fireplace is usually less involved than people expect. The original brickwork is intact in most cases. The chimney needs to be checked and re-lined if you’re going to use it for a wood burner — figure on $3,000–$6,000 for a flue inspection and stainless steel liner. The original tiled surround and timber mantel can almost always be restored or matched.
If using it as a working fireplace isn’t realistic — and in many Auckland zones it isn’t, because of the Air Quality bylaw restrictions on new wood burners in urban Auckland — the next best move is to restore the surround as a feature and leave the firebox empty or set up for a gas effect insert. Either reads dramatically better than a bricked-over wall with a TV bracket.
“A fireplace is the focal point the original architect designed the room around. The seating, the proportions, the symmetry — they all answer to it. Cover it up and the room doesn’t make visual sense anymore.”
— Eunice Qin, Designer, Superior Renovations
What we’d never do: Plaster directly over the original tiles and mantel “to clean it up.” That decision is almost always regretted within two years, and reversing it means destroying the originals.
6. Use a Heritage-Appropriate Palette, Not White Everything
The default villa renovation paint job in Auckland is the same three colours: white on the walls, white on the trim, white on the ceiling. It photographs well. It also flattens every detail the original builder spent weeks getting right.
Villas were designed for tonal contrast. Wall in one tone, scotia and architraves in a complementary tone, ceiling slightly lighter than the wall — that’s the system that makes the scotia and ceiling roses read properly. Paint it all white and the detail disappears at three metres.
Resene’s Heritage range is the obvious starting point — Resene Half Spanish White, Resene Half Sea Fog, Resene Quarter Tea, Resene Half Truffle, and the muted greens like Resene Tuna and Resene Half Lemon Grass. Half-strength tones (the “Half” prefix) tend to suit Auckland villas better than full-strength historical colours, which can read as gloomy in our light.
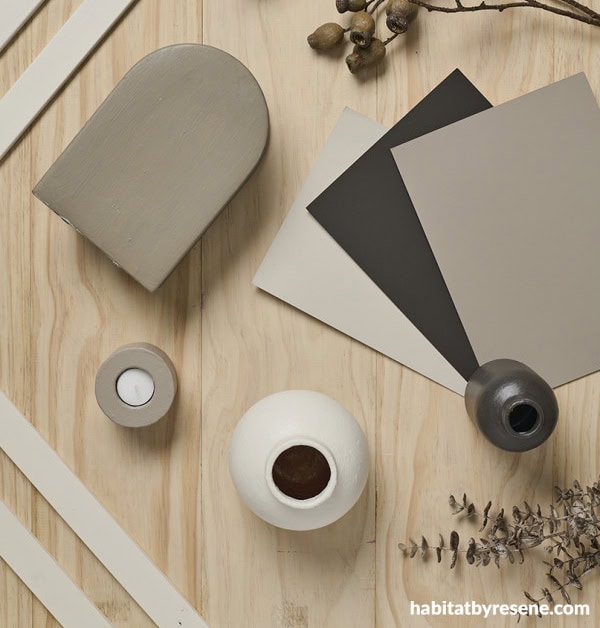
For exteriors, weatherboards in a soft cream or warm white, sashes and joinery in a contrasting heritage green, blue or burgundy, and a front door in a deeper accent reads as period-appropriate without being a costume. A Mt Eden villa we recently completed used Resene Quarter Tea on the weatherboards, Resene Eighth Stack on the sashes and Resene Indian Ink on the front door — restrained, but the detail came back to life.
💡 Quick tip: Paint the scotia and ceiling rose in a half-strength of the ceiling colour, not pure white. The detail pops three times more.
What we’d never do: Paint the original kauri front door white. It’s almost always solid timber underneath, and the grain pattern is worth more than a uniform paint colour.
7. Restore the Scotia, Ceiling Roses and Plaster Detail — Don’t Strip It
Lath-and-plaster ceilings with original scotia, ceiling roses and decorative cornices are the most under-appreciated villa features. They’re also the easiest to wreck during a careless renovation.
The default move from a builder who hasn’t done villa work before is to strip out the lath-and-plaster ceiling and replace it with flat GIB and a new cornice profile from Bunnings. It’s faster, it’s straighter, and it kills the room’s character in an afternoon.
The better path: repair the existing plaster, re-cast missing sections of scotia and ceiling rose to match the original, and live with a ceiling that isn’t dead flat. Specialist plasterers in Auckland charge $80–$120 per linear metre for scotia repair, and $400–$900 to cast and install a replacement ceiling rose. That’s more than a fresh sheet of GIB. It’s also irreplaceable once it’s gone.
If the plaster is genuinely beyond repair — water damage, structural settlement, or previous owners have already pulled half of it out — the next-best move is to install a new GIB ceiling but reinstate the original profiles in plaster cornice, not foam mouldings. The difference between cast plaster and stuck-on foam is obvious at any distance.
💡 Quick tip: Photograph every original profile in the house before any work starts. If a tradesperson breaks it accidentally, the photo is what gets it cast back.
What we’d never do: Use polystyrene foam ceiling roses bought off the shelf. They look like polystyrene foam ceiling roses bought off the shelf.
8. Add a Second Bathroom Where It Won’t Wreck the Architecture
Most Auckland villas were designed with one bathroom, usually added on at the back in the 1920s or 1930s when indoor plumbing reached residential New Zealand. Adding a second bathroom is one of the most common villa renovation requests we get. Where you put it matters more than what’s in it.
The wrong locations: any front bedroom (you’ll lose the bay window and break the streetscape), the front hall (no), under the stairs in a way that compromises ceiling heights, or anywhere that requires you to chop into the lath-and-plaster on a finished room.
The right locations, in priority order:
- The original sleep-out or service wing at the back — usually a single-skin lean-to that can be re-purposed with the addition of insulation, lining and proper plumbing
- A rear extension — designed in from day one, properly insulated, properly waterproofed
- An under-utilised rear bedroom — particularly the smaller fourth or fifth bedroom that’s currently functioning as a study
Cost for a second bathroom in a villa context: $25,000–$35,000 for a standard mid-range fit-out, climbing to $45,000+ for a luxury ensuite with feature tiling, freestanding bath and underfloor heating. The plumbing run from the existing stack is usually the biggest variable — if you’re more than 4–5 metres from the main soil stack, you’ll need a macerator pump or a new stack, which adds $3,000–$6,000.
For fixtures, we usually pair traditional-styled tapware from Reece (the Perrin & Rowe and Brodware ranges work particularly well in villas) with simple white wall and floor tiling and a feature element — encaustic-style floor tiles from The Tile Depot, or vertical tongue-and-groove panelling to dado height.
“The bathrooms that work in villas have a clear period reference but aren’t pretending to be 1910. Black tapware, frameless glass and modern tiling all sit fine in a villa — as long as one element nods to the original era. Encaustic floor tiles do that job particularly well.”
— Cici Zou, Designer, Superior Renovations
What we’d never do: Cut a bathroom into the front bedroom to make a master suite. The bay window is doing more for the value of the house than the ensuite will.
9. Insulate Without Stripping the Lath-and-Plaster You Don’t Have To
Auckland villas were built before insulation was a concept. Single-skin walls, no insulation in the ceiling, raw timber floors over a ventilated subfloor. They breathe well. They also leak heat constantly.
The standard renovation insulation upgrade in Auckland — and the one we’d back for most clients — has three layers:
- Ceiling insulation — R3.6 minimum, R6.0 is the better play in 2026. Costs around $35–$60 per square metre installed. Eligible homeowners can get a subsidised install through EECA’s Warmer Kiwi Homes programme.
- Underfloor insulation — R1.8 polyester or foilboard installed under the joists. Around $25–$45 per square metre.
- Wall insulation — this is where it gets interesting in a villa.
Villa external walls are typically single-skin: weatherboards on the outside, timber framing, lath-and-plaster on the inside. There’s no cavity to blow insulation into. The options are: pull off all the internal plaster and insulate then re-line in GIB (kills the lath-and-plaster), or pull off the external weatherboards and insulate from the outside (preserves the lath-and-plaster, but more involved and may need a building consent).
For most clients in the SCA Overlay, the second path is the one we’d back — insulate from the outside when you reclad or repair weatherboards anyway, leaving the lath-and-plaster intact internally. It’s the path that keeps the character without freezing in July.
BRANZ research consistently shows that ceiling and underfloor insulation deliver around 70% of the available heat-loss savings on a villa. Don’t let perfect get in the way of good — start with ceiling and underfloor, do the walls later when the cladding work comes due anyway.
10. Replace the Kitchen, but Keep the Ceiling Height
Most villa kitchens were added later — a 1950s or 1970s upgrade on what was originally a back porch or scullery. The space is usually fine. The kitchen inside it usually isn’t.
Kitchen replacement in a villa is straightforward in principle. The danger is the temptation to “tidy up” the space by boxing in the ceiling with a dropped bulkhead to hide ducting and lighting. Don’t. The 3-metre ceiling is doing the work — the kitchen needs to live with it, not under it.
Specific moves we’d back for a villa kitchen:
- Tall cabinetry to within 200mm of the ceiling — uses the volume, doesn’t visually drop the height
- A 1.5m+ deep island where the room allows — gives prep space without crowding the perimeter
- Pendant lighting hung at standard heights (1.6–1.8m above the floor) — not raised to “fit” the ceiling
- A scullery if the floor plan allows — keeps the visible kitchen uncluttered without bulkheading the appliance run
Cost-wise, a mid-range villa kitchen replacement falls in the standard Auckland range: $28,000–$35,000 for mid-range, $30,000–$50,000 for a full mid-range fit-out with custom cabinetry and stone benchtops, $90,000+ for a luxury kitchen with premium appliance package and detailed joinery.
💡 Quick tip: Take the cabinetry to the underside of the scotia, not to the ceiling. The 50mm gap above the cabinet reads as intentional and stops the cabinetry from looking like it’s trying to swallow the room.
What we’d never do: Drop a 200mm soffit around the entire kitchen perimeter to “frame” the cabinetry. You’ve just lost 200mm of stud height on the most generous proportions in the house.
11. Restore the Verandah — Don’t Replace It With a Deck
The original front or wrap-around verandah is one of the strongest character signals a villa has. It also tends to be one of the first things damaged or removed by previous renovations — closed in for an extra bedroom in the 1960s, lost to weather damage and replaced with something cheaper, or simply allowed to rot until it had to go.
Restoring or rebuilding the verandah to the original profile is almost always worth doing. The cost varies enormously with size, scope, and how much original detail survives — a basic re-deck and post-replacement might be $8,000–$15,000, a full rebuild including fretwork, balustrade and roof restoration sits closer to $25,000–$60,000.
Verandah work on a front elevation is firmly inside the SCA Overlay’s interest. Resource consent will usually be needed if you’re materially changing the form or adding to it. A like-for-like restoration based on documented evidence of the original — old photos, the neighbouring villa, council records — is usually the cleanest path through the consent process.
For the rear of the house, the equation flips. The back of the villa is where you build the modern deck — properly sized for the way the house lives now, indoor-outdoor flow off the new kitchen-dining space, the wider footprint that makes the rear extension feel like a single project rather than two.
“The verandah is the photo people take when they list the house for sale. It’s also the first thing buyers see when they drive past. Letting it sag, or replacing it with something that doesn’t fit the proportions, costs more in resale value than the restoration does.”
— Eunice Qin, Designer, Superior Renovations
What we’d never do: Replace the original tongue-and-groove ceiling on the verandah with flat plywood. The original is part of what makes the verandah read as a villa verandah and not a deck with a roof.
The Through-Line: Modernise the Back, Respect the Front
Every idea on this list is a version of the same principle. The character of an Auckland villa lives in the front 40% of the floor plan and the street-facing elevation. The modern functionality you need lives best in the back 60% and the rear elevation. The renovations that work pull these two halves into agreement; the ones that fail try to make the whole house one thing or the other.
Our full villa and bungalow renovation guide covers the planning side in more depth — budgeting, consents, structural assessment, and the project sequencing that gets a villa renovation completed without ugly surprises. This list is the design-led companion to that planning guide.
Costs sit in line with what we’d quote on any Auckland renovation. A full villa restoration project typically lands between $180,000 and $500,000 depending on scope — kitchen, bathrooms, insulation, painting, structural work and rear extension being the usual mix. Use our renovation cost calculator hub for an initial estimate by room, or come in to the showroom at 16B Link Drive in Wairau Valley to talk it through with the design team in person.
For the design-led side of any villa project — material selection, heritage palette, layout decisions, the moves that hold the character together — our in-house Design Studio is where those decisions get worked through. Dorothy, Eunice and Cici have worked on enough Auckland villas between them to know where the trade-offs sit on the specific 1905 or 1915 or 1925 house you’re looking at.
➡ Book your free in-home consultation with Superior Renovations
➡ Talk to our Design Studio about your villa project
➡ Request a free feasibility report for your project
Frequently Asked Questions About Auckland Villa Renovations
How much does it cost to renovate a villa in Auckland?
A full villa renovation in Auckland typically costs between $180,000 and $500,000 in 2026 depending on scope. A standard single-level villa with kitchen, bathrooms, painting, flooring and insulation work usually lands in the $180,000–$300,000 range. Add a rear extension and structural work and you're looking at $300,000–$500,000. Heritage-specific work — sash window restoration, scotia repair, verandah rebuild — adds $15,000–$60,000 depending on how much survives and how much needs reinstating.
Do I need resource consent to renovate my villa?
Most Auckland villas in Grey Lynn, Ponsonby, Mt Eden, Devonport, Herne Bay and similar suburbs sit inside the Special Character Areas Overlay under the Auckland Unitary Plan. External changes that affect the streetscape — front-facing windows, verandah alterations, additions visible from the road — generally require resource consent. Internal renovations and rear extensions hidden behind the existing roofline usually need only building consent. Check your specific property on the Auckland Council GIS Viewer before assuming.
Can I replace the original sash windows with modern double glazing?
On front-facing elevations in a Special Character Area, this is generally a no — and even where it's allowed, it's usually a downgrade. The character of a villa is partly carried by the proportions of the original sash joinery. The better move is retrofit double glazing into the existing sash frames, which keeps the streetscape intact and gives you modern thermal performance. Slimline 12mm double-glazed units fit most original villa sashes. Rear-facing windows have more flexibility.
What's the difference between the Special Character Areas Overlay and the Historic Heritage Overlay?
The Special Character Areas Overlay (Chapter D18 of the Auckland Unitary Plan) covers whole streets and neighbourhoods where the collective heritage character matters — Isthmus A covers Grey Lynn, Ponsonby and Freemans Bay; Isthmus B covers Mt Eden, Remuera, Herne Bay and parts of Epsom. The Historic Heritage Overlay applies to individually scheduled buildings of recognised heritage value. The HHO is stricter and affects fewer houses, but most villas in inner Auckland sit inside the SCA rather than the HHO.
How much does it cost to restore a kauri floor in an Auckland villa?
Sanding, filling and recoating an existing kauri tongue-and-groove floor in Auckland sits at $50–$90 per square metre depending on the floor's condition and the finish you choose. For a 90m² villa floor area that's around $4,500–$8,000. Patch-repairing borer-damaged boards with reclaimed kauri adds $80–$150 per board. Replacing entire sections with reclaimed timber sits higher again. The whole job usually takes 5–10 working days and the floor needs to be empty during the process.
Can I add a second storey to my Auckland villa?
Yes, but the consent process is more involved than a single-storey rear extension. Second-storey additions on villas in the Special Character Areas Overlay almost always require resource consent because they materially change the streetscape. Costs typically start from $150,000 and climb significantly from there depending on the size and how the new level integrates with the existing roof. Bringing in an architectural designer with villa experience — we use Sonder Architecture — early in the process is the difference between a smooth consent and a long, expensive one.
How long does an Auckland villa renovation take?
A full villa renovation typically takes 3–6 months on site for the build phase, plus 2–4 months of design and consent processing beforehand. A kitchen-only renovation runs 5–6 weeks. A bathroom takes 3–4 weeks. A rear extension with structural work usually adds 3–4 months to a base renovation timeline. Heritage-specific items — sash window restoration, scotia repair, verandah work — usually run in parallel with the main build rather than extending the schedule, but specialist trades have lead times that need to be booked early.
What's the most cost-effective villa renovation idea?
Pulling the carpet back and restoring the kauri floor underneath is usually the highest-impact, lowest-cost move on a villa renovation. A $4,500–$8,000 floor restoration changes how the whole house feels and adds visible value at resale. The next best ROI moves are heritage-appropriate paint (around $8,000–$15,000 for a full villa interior repaint) and sash window restoration (typically $400–$550 per window for sash cord and operational work).
Should I use the original kauri floor in the extension too?
Matching the new extension floor to the original kauri is usually the wrong call. The contrast between old kauri at the front and a different, deliberately contemporary floor at the rear actually reads better than trying to match. Polished concrete, wide-plank oak, or a darker timber stained to complement the kauri without copying it are common moves. The transition between old and new should feel intentional, not apologetic.
Do I need an architect to renovate a villa in Auckland?
For straightforward internal renovations — kitchen, bathroom, painting, flooring — a renovation company with in-house design capability is usually enough. For anything involving structural changes, rear extensions, second storeys, or resource consent applications inside the Special Character Areas Overlay, you'll want a registered architect or architectural designer involved. We work closely with Sonder Architecture on the more complex villa projects and run the design-to-build process through our Design Studio for the rest.
Where is Superior Renovations based and do you cover all of Auckland?
Our showroom and design studio is at 16B Link Drive in Wairau Valley, North Shore. We cover all of Auckland for villa renovation work — most of our heritage and character home projects are in Grey Lynn, Ponsonby, Mt Eden, Devonport, Herne Bay, Westmere, Freemans Bay, Eden Terrace, Epsom and Remuera, with regular projects further afield in St Heliers, Glendowie, Titirangi and across the North Shore.
Further Resources for your Auckland villa renovation
- 特色项目和客户故事,查看部分项目的规格。
- 来自奥克兰的真实客户故事
- The ultimate guide to renovating villas and bungalows in New Zealand
需要更多信息?
利用我们的免费《房屋翻新完整指南》(48 页),无论您是已经开始翻新还是正在决定翻新,这都不是一个简单的过程,本指南包括一份免费的 100 多点检查清单--将帮助您避免代价高昂的错误。
还有问题没有解答?
Book a no-obligation consultation with the team at Superior Renovations, we’d love to meet you to discuss your renovation ideas!
Or call us on 0800 199 888

您是否一直在拖延装修?
我们与 Q Mastercard ® 合作,为您提供 18 个月免息付款选择,让您现在就可以享受新家,减轻压力。
了解更多 免息付款选择*
*Lending criteria, fees, terms and conditions apply. Mastercard is a registered trademark and the circles design is a trademark of Mastercard International Incorporated.


0 条评论
写评论