
Recladding

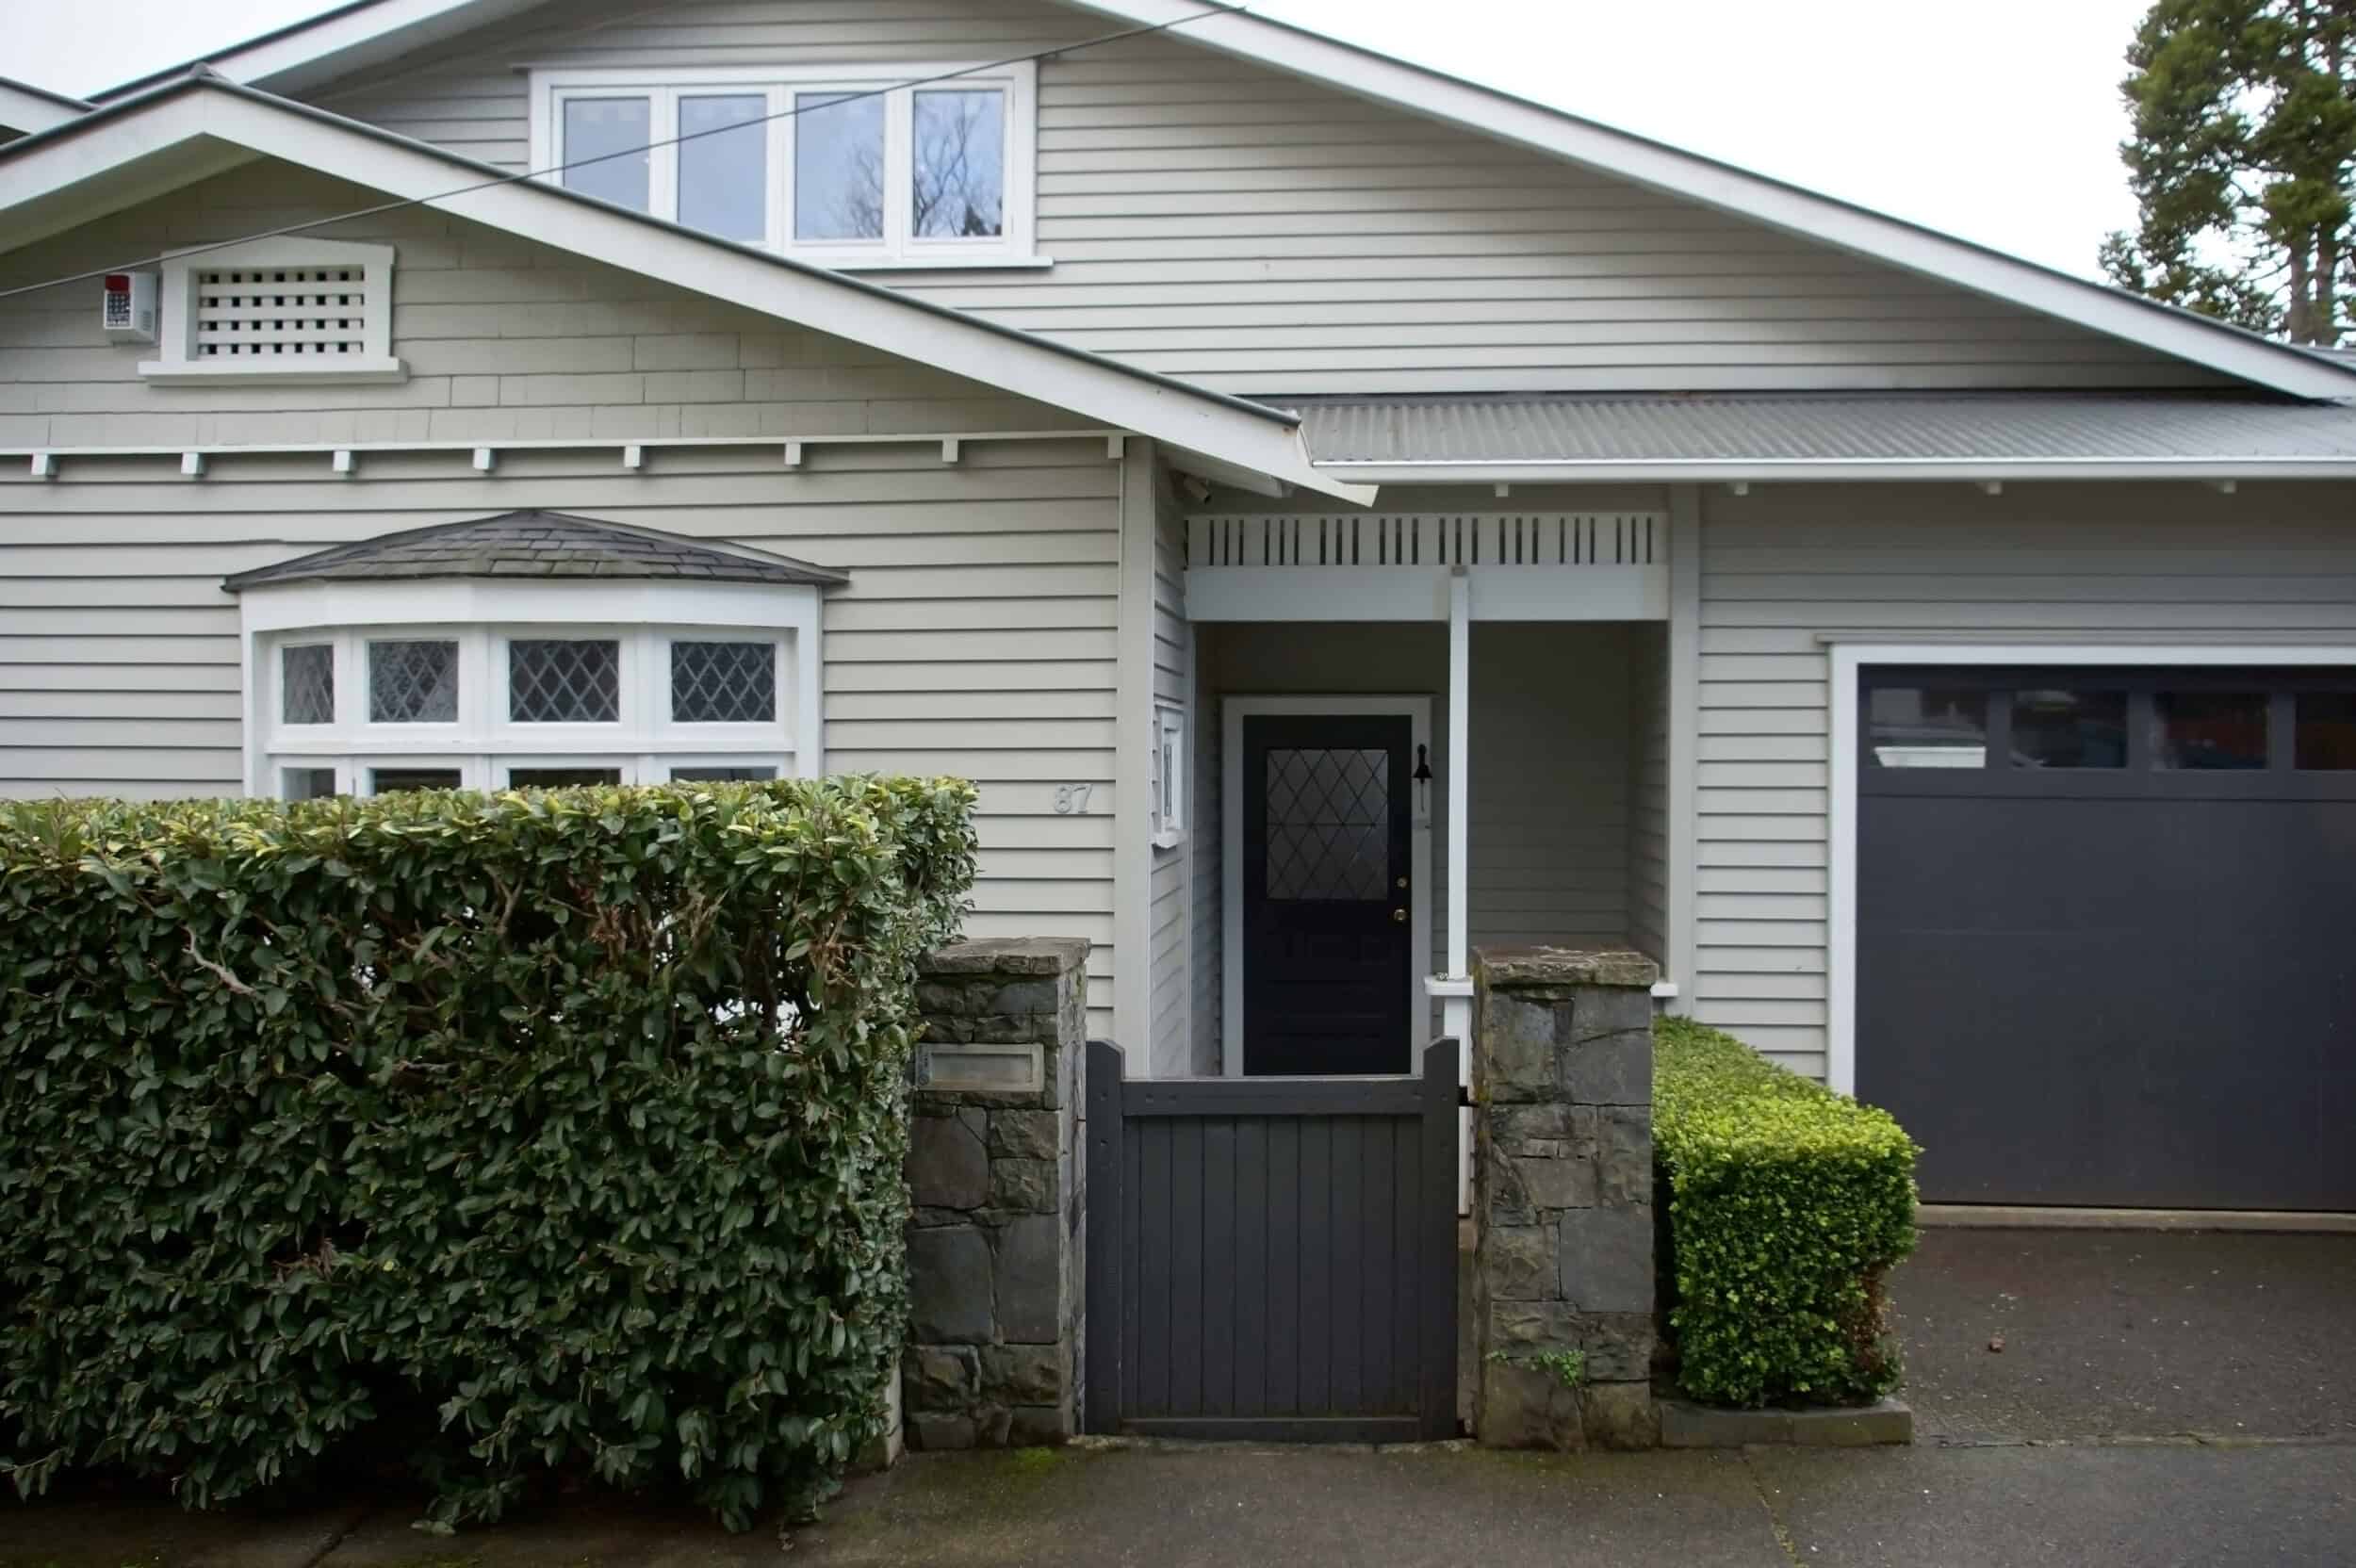
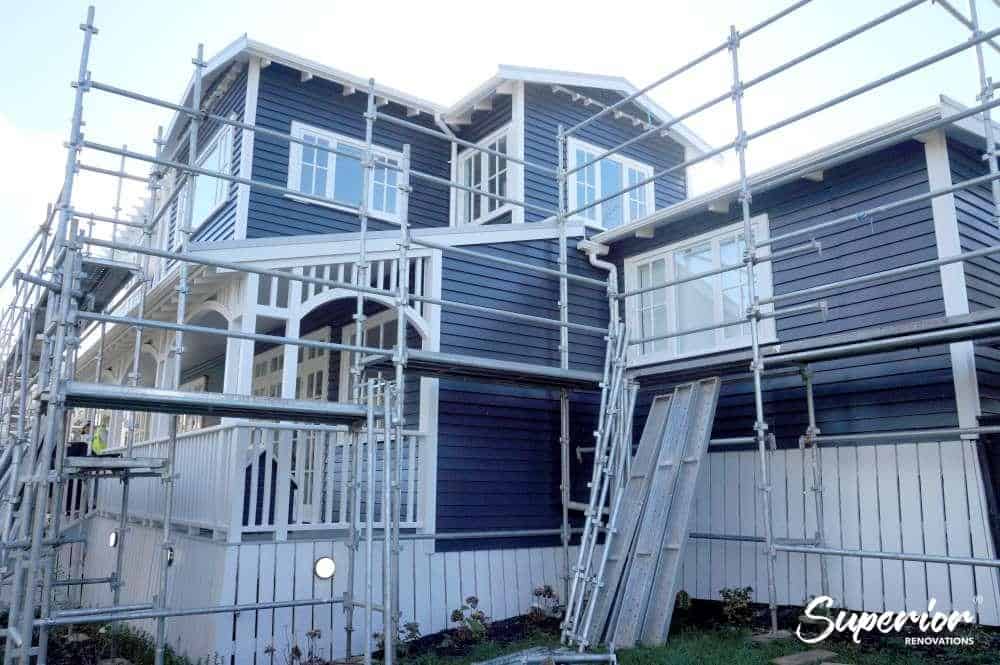
DSC07727 2 - Superior Renovations
Recladding

Cladding Options NZ: Exterior Cladding Ideas & Costs for 2026 Homes

This blog has been updated with added information and republished to reflect the year 2026.

Quick E2 Risk Check for Your Auckland Home (2026)

Before you choose cladding, run your project through the Building Code Clause E2/AS1 risk matrix at building.govt.nz. Add points for wind zone (medium-high across most of Auckland), coastal exposure (very high for Takapuna and Mission Bay), building height, roof-to-wall junctions, and deck attachments. Your score determines cavity requirements, coastal villas in high-risk zones typically need drained and vented cavities plus solid flashings to stay dry long-term.

“Run the E2 risk matrix early, coastal North Shore homes often score high, so we default to fibre cement or metal with proper cavities to keep things dry without surprises.” — Jeff Zhang, LBP & Site Manager, Superior Renovations.

If you’re an Auckland homeowner thinking about a cladding refresh, whether it’s a villa in Mt Eden dealing with humidity or a North Shore place copping the full force of salt wind off the Waitemata, choosing the right material in 2026 matters more than it used to. Options run from vinyl at around $80/m² through to premium stone at $400/m², and the smarter picks lean towards fibre cement and metal: durable, weather-hardy, and a lot less work to keep up.

What’s the Best Cladding Material for Auckland’s Humid Coastal Climate?

James Hardie’s Linea boards are hard to beat for most Auckland situations. They handle salt air well, don’t need the same upkeep as timber, and installed with a proper cavity system they sit in the $120–$220/m² range. For windy North Shore homes, aluminium from Metalcraft or Dimond is worth considering, corrosion-resistant, around $130–$280/m², and built to last. It can dent, but it won’t rot. If you’ve got a traditional bungalow in Remuera or Ponsonby and want to keep that warm Kiwi character, treated timber weatherboards from Hermpac cedar deliver, budget $100–$250/m² and plan to restain every five to ten years.

How Do You Choose Cladding That Won’t Cost a Fortune Long-Term in NZ?

Vinyl like Palliside is the cheapest entry point at $80–$150/m², moisture-proof, low upkeep, and fine for rentals or quick flips in Henderson. Brick or masonry ($150–$300/m²) suits family homes in Ellerslie well: fire-resistant, thermally solid, and built to outlast most things. Stucco gives you a clean, crisp finish at $140–$260/m², but it needs careful installation in earthquake-prone areas or you’ll be chasing cracks. AAC panels and composites ($120–$250/m²) are gaining ground for eco-conscious renos, better insulation, lower environmental footprint. One thing the team flags consistently: factor in the hidden costs. Heavy stone veneer ($200–$400/m²) can require foundation upgrades. And whatever material you choose, a drained cavity is non-negotiable in Auckland’s wet winters.

Which Cladding Trends Are Hot for Kiwi Homes Right Now?

Sustainability is driving a lot of decisions — FSC-certified timber and recycled composites are especially popular for green builds in areas like Titirangi. Metal and fibre cement continue to grow because Auckland homeowners are over spending weekends on maintenance. Mixed materials are having a moment too: cedar weatherboards paired with a contrasting metal section, or stone veneer used as a feature rather than across the whole facade. Energy-efficient options like insulated AAC help with the cold snaps that catch people off guard, and marine-grade aluminium is the default call for anything close to the coast.

Want to talk through your options? Reach out to Superior Renovations for a free consultation, no obligation, just a straight conversation about what’ll work for your place.

Critical Flashings & Junctions per E2/AS1 E2/AS1 requires durable flashings (e.g., aluminium/zincalume) at roof-to-wall, window/door penetrations, and parapets with proper overlaps/upstands (minimum 100mm). Coastal salt accelerates corrosion, specify marine-grade materials for Takapuna or St Heliers homes to ensure long-term weathertightness.

“Flashings are where most leaks start, we always spec marine-grade and double-check junctions in salty Auckland spots to avoid callbacks years later.” — Jeff Zhang, LBP & Site Manager, Superior Renovations.

Why Cladding Matters for Your New Zealand Home in 2026

Cladding is your home’s first line of defence against whatever the weather throws at it, and in New Zealand, that’s a fairly long list. Humidity on the Auckland isthmus, salt wind on the North Shore, UV hammering anything that faces north, driving rain from the west. The right exterior cladding handles all of that while keeping your energy bills reasonable and your home looking the part. Whether you’re building new in a Flat Bush subdivision, adding a house extension that needs to tie in visually with what’s already there, or recladding a 1970s brick-and-tile in Māngere, the material choices available in 2026 are better than they’ve ever been.

The trend across the industry right now is toward sustainability and low maintenance, fibre cement, eco-certified timber, high-performance aluminium. There are more options than ever, which is genuinely useful, but it also means more ways to make the wrong call. This guide cuts through it. We’ve covered the most common cladding options NZ homeowners are using in 2026, costs, pros, cons, and what suits which situation, so you can go into the process with a clear head. Choosing a new cladding system usually goes hand in hand with house recladding in Auckland — our team handles material selection through to install.

At Superior Renovations, we’ve worked on enough Auckland homes to know that the “best” cladding doesn’t exist in the abstract. It depends on your site, your budget, and how much maintenance you’re actually willing to do. This guide covers types of cladding including stucco cladding, brick, metal, fibre cement, and more, with honest cost breakdowns and practical advice rather than marketing speak.


Curious about how much your
Recladding Project would cost?

Try our recladding cost calculator tool


Need ideas? Check out our Kitchen Design Gallery or browse our Bathroom Design Gallery for inspiration!


1. Understanding Cladding and Its Importance in New Zealand

Cladding is the outer layer applied to your home’s walls, the thing standing between your framing and everything New Zealand can throw at it. That’s not a small job. Auckland summers bring humidity and UV exposure. Coastal suburbs like Devonport and Takapuna add salt. Winter means sustained moisture. The right exterior cladding manages all of it while adding insulation value and keeping your home looking the way you want it to. In 2026, with construction costs still elevated and sustainability increasingly a factor in buying decisions, choosing well matters more than ever, and because recladding rarely happens in isolation (it usually rides alongside a wider house renovation involving structural work, insulation upgrades, or window replacement), the material decision has to work with everything else on the build.

What is Cladding?

Put simply, cladding is the external skin of your home’s walls. It protects the structure underneath from moisture, UV, wind, and temperature swings, while doing most of the aesthetic heavy lifting. Wall cladding comes in timber, brick, fibre cement, metal, vinyl, and composite options, each with different performance characteristics depending on where you live and what you’re trying to achieve.

Why Cladding Matters in NZ

New Zealand’s climate varies more than most people give it credit for. Coastal areas deal with salt air that chews through inadequately specified materials fast. Alpine and southern regions need cladding that handles freeze-thaw cycles without cracking. And across the country, the leaky building era left a generation of homeowners wary of anything that traps moisture behind the cladding. That legacy, and the Building Code changes that followed, shapes how cladding is specified today. Products like Hermpac’s responsibly sourced timber and James Hardie’s fibre cement have gained ground partly because they fit the post-leaky-building mindset: durable, well-detailed, and maintainable.

Key Factors to Consider When Choosing Cladding

Before settling on a material, work through these:

  • Durability: Will it hold up to your specific site conditions, rain, wind, UV, salt?
  • Maintenance: How much upkeep are you genuinely prepared to do? Metal cladding from Metalcraft and vinyl from Palliside need very little. Timber needs more.
  • Cost: What’s your full budget, including installation and long-term maintenance? The cheapest exterior cladding upfront isn’t always cheapest over ten years.
  • Aesthetics: Does the material suit your home’s character? Aluminium from Nuwall reads modern; brick from Midland Brick reads permanent and traditional.
  • Sustainability: Is provenance important to you? FSC-certified timber from ITI Timspec and Weathertex’s composite boards are the options to look at here.
  • Installation complexity: Systems like Specialized’s EZpanel or Vulcan’s Ultraclad need professionals. Factor that into your planning from the start.

Get these clear before you start looking at samples or talking to suppliers. It’ll save you a lot of time, and avoid the situation where you fall in love with something that doesn’t suit your site or your budget.

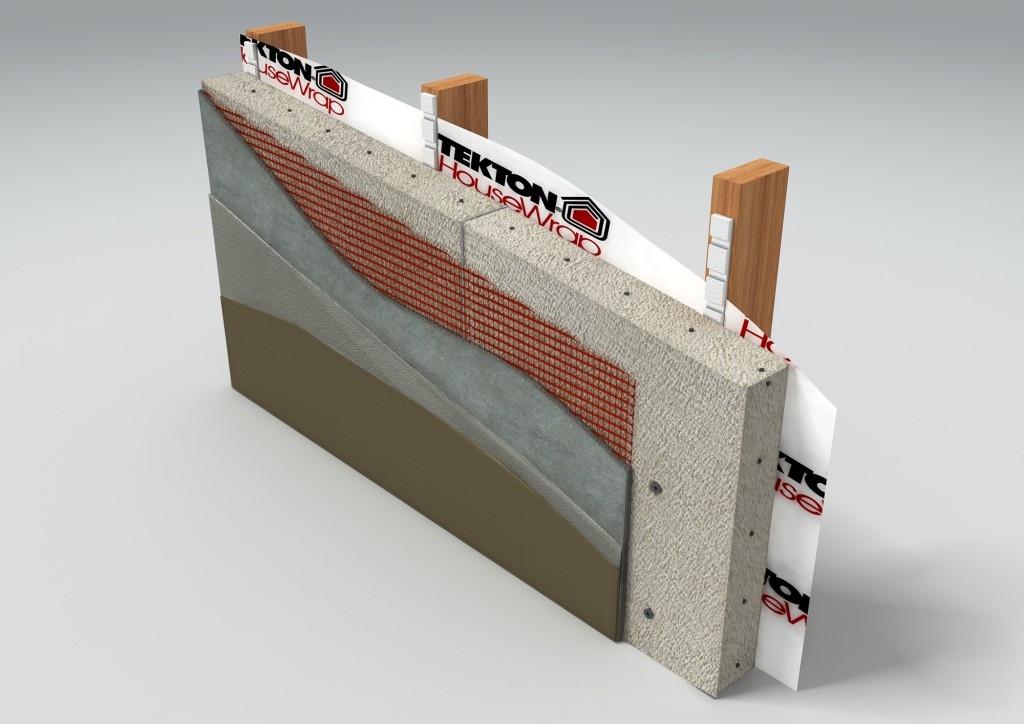
Why Drained Cavities Are Non-Negotiable in 2026 (E2/AS1 Update) From E2/AS1 Fourth Edition (effective 2025, still current): All wall claddings on timber-framed buildings up to 10m must include a drained and vented cavity (minimum 20mm) unless using a proprietary system proven otherwise. This allows moisture to escape, critical in Auckland’s humid winters and salty coastal air, and one of the key lessons from the leaky building era.

“Skipping a proper cavity is the biggest hidden risk we see, adding one during recladding future-proofs your home against leaks, especially in windy or salty suburbs like Devonport.” — Dorothy Li, Design Manager, Superior Renovations

Coastal Auckland Material Quick-Guide (Salt & Wind Focus) High exposure zones demand corrosion-resistant choices (E2 risk factors):

Material Coastal Suitability Key Mitigation Typical $/m²
Metal (aluminium) Excellent Powder-coat + regular rinse $130–$280
Fibre Cement Very Good Cavity + sealed joints $120–$220
Timber Moderate Treated/Accoya + frequent stain $100–$250
Vinyl Good UV-stable colours $80–$150
Brick/Masonry Excellent Mortar checks $150–$300

“For salty Mission Bay or Takapuna properties, aluminium or fibre cement with cavities wins every time, less upkeep and better longevity against the coastal battering.”, Dorothy Li, Design Manager, Superior Renovations.

2. Popular Cladding Options in New Zealand for 2026

There’s no shortage of cladding options NZ homeowners can choose from in 2026, which is genuinely good news, but it also means the decision takes some thought. The right material depends on your site, your home’s style, your budget, and how much maintenance you want to sign up for. Below is an honest look at the most common materials being used across Auckland and the rest of New Zealand right now, what they cost, where they work well, and where they fall short. All costs are approximate (NZD per square metre, installed) and reflect 2026 market conditions.

  1. Timber Weatherboards

Timber weatherboards remain a Kiwi staple for good reason, they suit the character of older homes, they’re easy to paint or stain in whatever colour you want, and when properly specified and maintained, they last well. Brands like Hermpac and ITI Timspec offer sustainably sourced options including Western Red Cedar and Accoya, both treated for NZ’s humidity and coastal conditions.

  • Benefits: Natural aesthetic, eco-friendly (FSC-certified options available), good insulation value, easy to customise with paint or stain.
  • Drawbacks: Needs restaining or repainting every five to ten years. Susceptible to moisture damage if the detailing or maintenance isn’t right.
  • Cost: $100–$250/m², depending on timber species and treatment.
  • Best For: Villas, bungalows, do-ups, and any home where you want a warm, natural look.
weatherboard

https://taurikosawmill.co.nz/timber_profile/horizontal-weatherboard/

  1. Brick and Masonry

Brick is the set-and-forget option. From Midland Brick or Premier Group, it’s heavy, expensive upfront, and once it’s on, it largely looks after itself. That trade-off suits homeowners who want permanence over flexibility.

  • Benefits: Highly durable, fire-resistant, low ongoing maintenance, good thermal mass that helps regulate indoor temperatures.
  • Drawbacks: Higher upfront cost, weight means foundations need to be up to it, limited colour range compared to painted options.
  • Cost: $150–$300/m², including installation.
  • Best For: Permanent family homes, coastal properties, anywhere longevity is the priority.
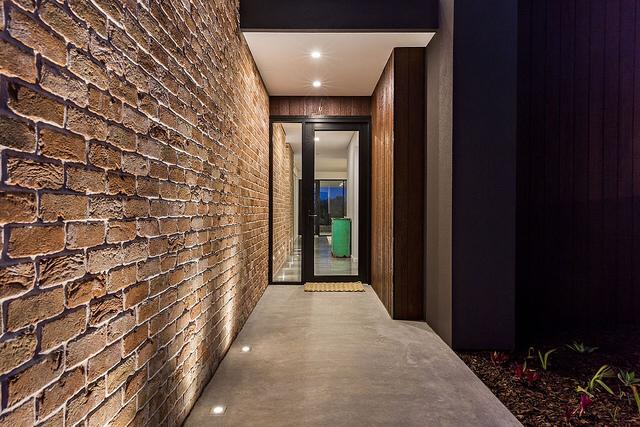
exposed brick veneer cladding along an entryway walkway

https://likestone.ie/interior/

  1. Fibre Cement Cladding

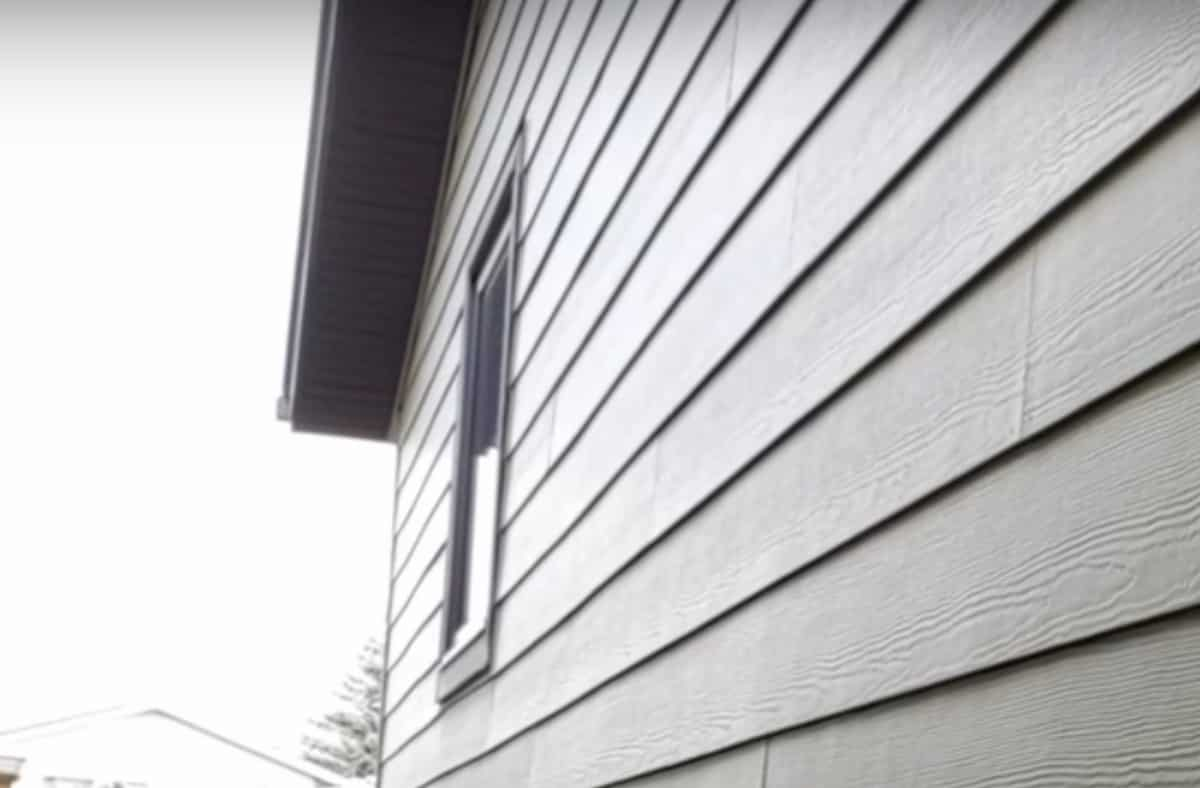
James Hardie’s Linea Weatherboard and Scyon range have become go-to choices across Auckland for a reason. They handle the weather well, they’re fire-resistant, and they don’t demand the same attention as timber. For homeowners who want the look of weatherboards without the maintenance commitment, fibre cement is usually the answer.

  • Benefits: Weather-resistant, low maintenance, fire-resistant, available in a range of profiles and finishes including James Hardie’s Axent Trim for clean, modern lines.
  • Drawbacks: Installation needs to be done properly, it’s not forgiving of shortcuts. Upfront costs sit in the mid-to-high range.
  • Cost: $120–$220/m², depending on product and finish.
  • Best For: Modern homes, coastal sites, anyone who wants low maintenance without sacrificing the look.
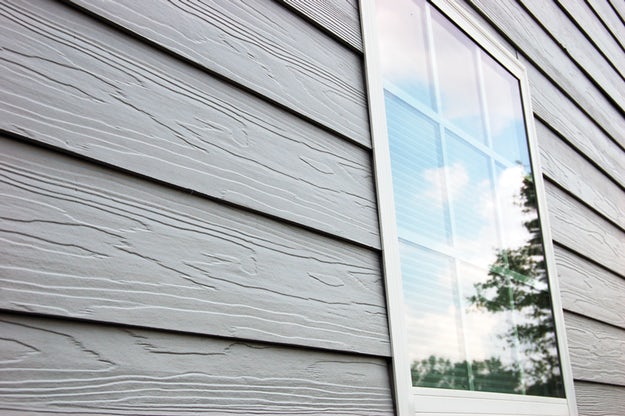
grey fibre cement weatherboard cladding with a woodgrain texture

https://architizer.com/blog/product-guides/product-guide/eaktna-fiber-cement-cladding/


  1. Metal Cladding

Metal cladding has moved well beyond corrugated farm sheds. Metalcraft’s profiles and Dimond’s tray systems give a sharp, contemporary finish that suits the architectural direction a lot of new Auckland builds are taking. Aluminium options from Nuwall and Vulcan’s Ultraclad are particularly well-suited to coastal exposure.

  • Benefits: Long-lasting, low maintenance, recyclable, and, when properly specified, handles coastal salt air better than most alternatives.
  • Drawbacks: Can dent or scratch. Higher initial cost. Doesn’t suit every architectural style.
  • Cost: $130–$280/m², depending on material and finish.
  • Best For: Modern and contemporary builds, coastal properties.
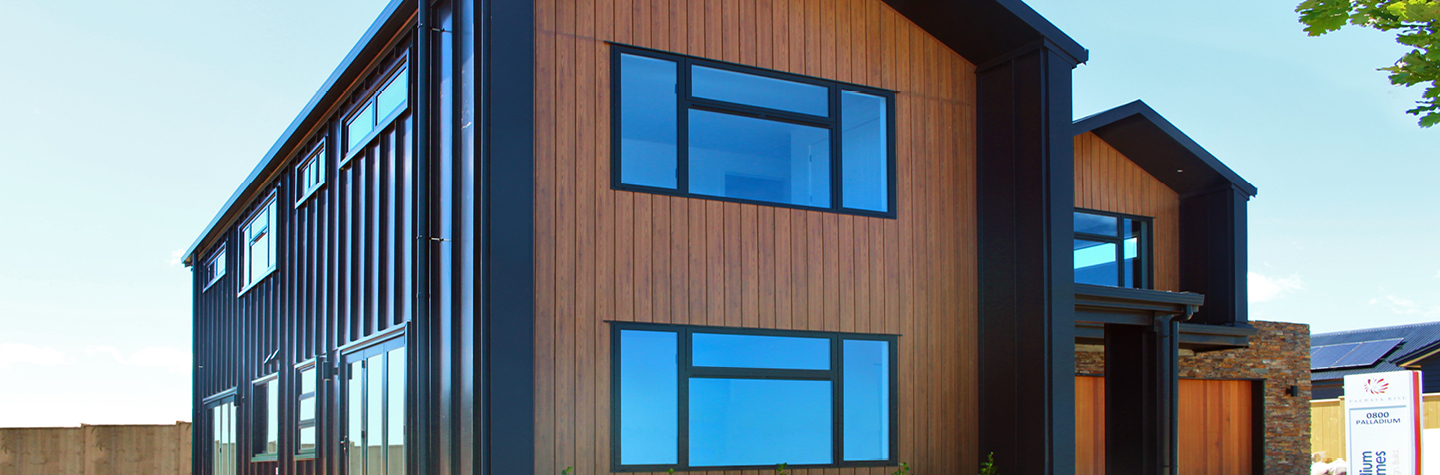
dark vertical steel board and batten cladding on a gable end at dusk

https://proformsteel.co.nz/battenform-metal-cladding/

Fire Safety Compliance for External Claddings (Clause C) Per building.govt.nz fire performance guides: External wall claddings must meet Clause C protection from fire via testing (e.g., BS 8414 for non-loadbearing systems). Fibre cement, brick, AAC, and many metal options achieve high fire ratings naturally; timber requires treatments. Use these pathways for multi-unit or higher-risk Auckland builds.

“Fire-rated fibre cement like James Hardie Linea gives peace of mind in denser suburbs, it’s durable, low-maintenance, and ticks the C clause box without extra effort.”, Alison Yu, Designer, Superior Renovations.

  1. Vinyl Cladding

Palliside’s vinyl weatherboards sit at the budget end of the market, and there’s nothing wrong with that. For rental properties, investment do-ups, or homeowners who need a cost-effective refresh without long-term maintenance, vinyl does the job. It won’t add the same kerb appeal as timber or brick, but it’s practical and genuinely low-upkeep.

  • Benefits: Low cost, low maintenance, moisture and insect resistant, available in a range of colours.
  • Drawbacks: Less durable than brick or metal, can fade over time, won’t suit buyers looking for premium finishes.
  • Cost: $80–$150/m², including installation.
  • Best For: Budget renos, rental properties, situations where practicality beats aesthetics.
Green Vinyl Wall Cladding in Australia

https://www.ecospecifier.com.au/vinyl-wall-cladding/

  1. Stucco Cladding

Stucco cladding gives a clean, crisp finish that suits Mediterranean-style homes and contemporary plaster aesthetics. JSC offer specialised stucco systems for NZ conditions, but the key word here is installation, get it wrong and you’ll be dealing with cracking and moisture problems that are expensive to fix.

  • Benefits: Smooth finish, good insulation, can be textured and finished in various ways.
  • Drawbacks: Prone to cracking if not installed correctly. Needs regular inspection and maintenance to stay weathertight.
  • Cost: $140–$260/m², depending on system and finish.
  • Best For: Homes targeting a European or classic plaster aesthetic.
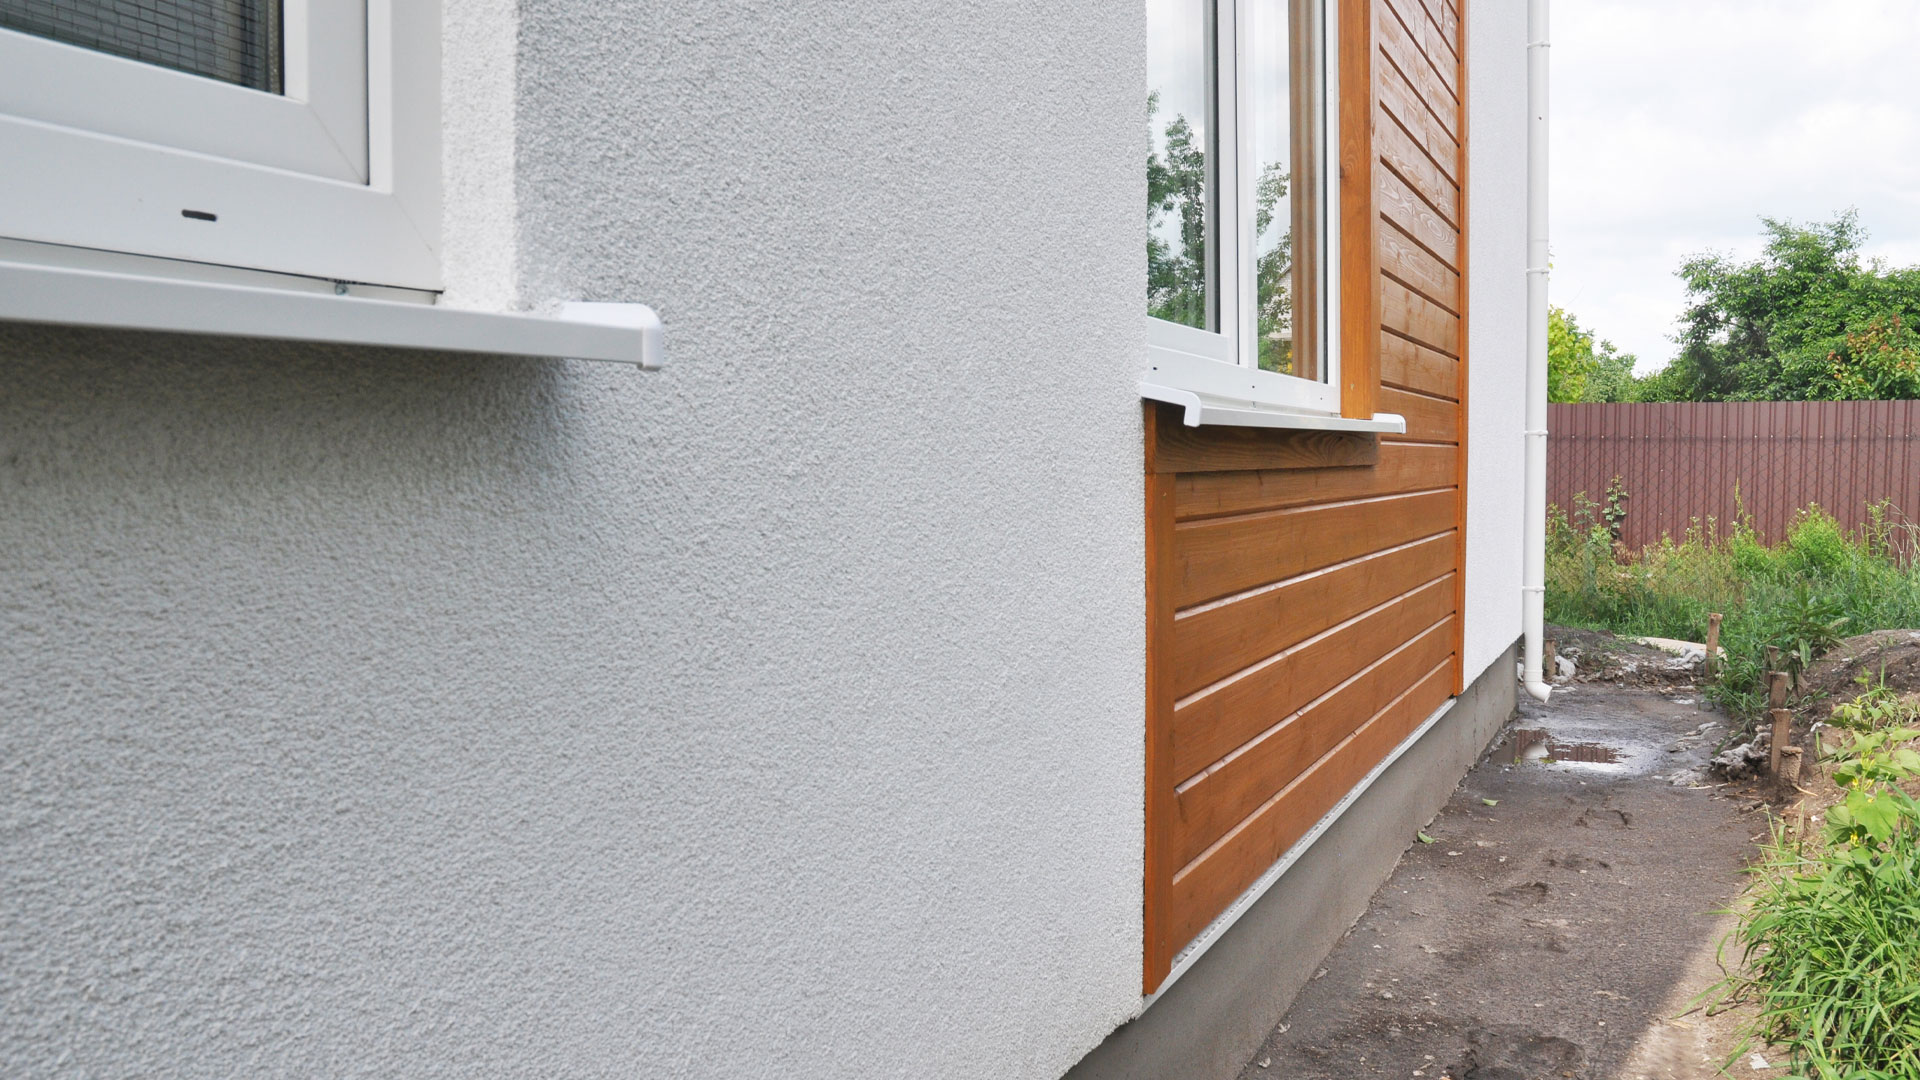
Should I buy a home with roughcast cladding? Reasons to think twice | Trade Me Property

https://www.trademe.co.nz/c/property/article/should-i-buy-a-home-with-roughcast-cladding-reasons-to-think-twice

  1. Stone and Stone Veneer

Craftstone’s natural and manufactured stone options are used mostly as feature elements rather than full-facade cladding, and that’s usually the right call. The cost is significant, installation needs to be done by someone who knows what they’re doing, and heavy stone can require foundation upgrades. Used well, though, it adds a quality that’s hard to replicate.

  • Benefits: Highly durable, very low maintenance once installed, adds real aesthetic value to the right home.
  • Drawbacks: Expensive, heavy, and not a DIY job.
  • Cost: $200–$400/m², depending on natural vs. manufactured stone.
  • Best For: Luxury builds, feature walls, alpine properties.


  1. AAC (Autoclaved Aerated Concrete) Panels

Specialized’s EZpanel and similar AAC systems are gaining ground in Auckland’s new build market. They’re lightweight for a concrete product, go up reasonably quickly, and the thermal and fire performance numbers are strong. Not the most flexible option aesthetically, but for modern homes where energy efficiency is a priority, they make a solid case.

  • Benefits: Good thermal performance, fire-resistant, faster to install than brick.
  • Drawbacks: Higher upfront cost, fewer finish options compared to timber or metal.
  • Cost: $150–$250/m², including installation.
  • Best For: Modern builds where energy efficiency and fire safety are key considerations.
Aerated Concrete Panel | AAC Panel | Specialized - NZ

www.specialized.co.nz

  1. Composite Cladding

Weathertex and Millboard’s Envello range blend natural and synthetic materials to produce cladding that’s durable, low-maintenance, and easier on the conscience than some alternatives. They sit in the mid-range on price and are a natural fit for homeowners who want a modern look with solid environmental credentials.

  • Benefits: Low maintenance, sustainable materials, holds up well to weathering.
  • Drawbacks: Costs more than vinyl, fewer texture and finish options than timber.
  • Cost: $120–$200/m², depending on brand.
  • Best For: Eco-conscious homeowners after a clean, low-maintenance finish.
Pre-Finished Cladding | Composite | PlaceMakers NZ

https://www.placemakers.co.nz/online/projects/cladding/pre-finished

That covers the main materials on the market in New Zealand right now. Each has a place, the trick is matching the right one to your home, your site, and your budget rather than going with whatever looks good in a brochure.

Weatherboard vs Panel Cladding: What Suits Your Home?

One question we field constantly: weatherboards or panels? Weatherboard cladding, the horizontal-board look you see on villas and bungalows right across Auckland, now comes in timber (Hermpac), fibre cement (James Hardie Linea), and vinyl (Palliside), so you can keep the traditional profile while choosing how much maintenance you sign up for. Panel systems, including AAC from Specialized, composite from Weathertex, large-format fibre cement, and metal exterior wall panels, go up faster, give a flatter modern face, and suit contemporary builds in Hobsonville or Albany.

If low upkeep is the priority, the low-maintenance timber cladding options worth a look are Accoya and pre-finished cedar, though fibre cement weatherboards or aluminium panels still ask less of you over a decade. For a straight refresh, a like-for-like weatherboard swap is usually the simplest path. See the crew that handles full reclads across Auckland for how the board-for-board process runs.

3. Comparing Costs and Cheapest Exterior Cladding Options in NZ for 2026

Budget shapes almost every cladding decision, and it should, but the cheapest option upfront isn’t always the cheapest option over ten years. This section breaks down what each material actually costs to install in 2026, flags the genuinely affordable end of the market, and points out the hidden costs that catch people out. All figures are approximate NZD per square metre, installed.

Cost Breakdown of Cladding Options

The full cost of exterior cladding includes materials, labour, and what you’ll spend on maintenance over the years. Here’s how the main options stack up:

Cladding Type Cost Range ($/m²) Key Considerations
Timber Weatherboards $100–$250 Mid-range cost; varies by wood type (e.g., Hermpac’s Western Red Cedar vs. pine). Requires staining every 5-10 years, increasing long-term costs.
Brick and Masonry $150–$300 Higher upfront cost (e.g., Midland Brick) due to materials and labour. Minimal maintenance makes it cost-effective long-term.
Fibre Cement $120–$220 Affordable with low maintenance (e.g., James Hardie’s Linea Weatherboard). Popular for modern homes.
Metal Cladding $130–$280 Cost varies by material (e.g., Metalcraft/Dimond steel vs. aluminium). Aluminium (e.g., Nuwall) is pricier but corrosion-resistant for coastal areas.
Vinyl Cladding $80–$150 Cheapest option (e.g., Palliside). Low material/installation costs but may fade, requiring earlier replacement.
Stucco Cladding $140–$260 Moderately priced (e.g., JSC systems). Requires careful installation to avoid cracking or moisture-related repairs.
Stone and Stone Veneer $200–$400 Premium option (e.g., Craftstone). High cost due to aesthetics and complex installation, but adds significant property value.
AAC Panels $150–$250 Cost-competitive (e.g., Specialized’s EZpanel). Energy-efficient, with long-term savings on heating/cooling.
Composite Cladding $120–$200 Mid-range with low maintenance (e.g., Weathertex, Millboard’s Envello). Cost-effective for eco-conscious homeowners.


Curious about how much your
Recladding Project would cost?

Try our recladding cost calculator tool


Cheapest Exterior Cladding Options

If budget is the primary driver, these three options are where to start:

  1. Vinyl Cladding ($80–$150/m²): Palliside’s vinyl weatherboards are the most affordable option on the market. They’re quick to install, handle moisture well, and need almost no upkeep. Won’t win any architectural awards, but they’re practical and the cost is real.
  2. Timber Weatherboards ($100–$150/m² for pine): Pine from ITI Timspec keeps the initial cost down. You’ll need to budget for regular maintenance, but for homeowners comfortable with that trade-off, timber at the affordable end of the range is a solid option.
  3. Fibre Cement ($120–$160/m² for entry-level options): James Hardie’s more accessible products give you fibre cement’s durability and low-maintenance reputation at a price closer to timber. Worth the slight step up from vinyl if you’re planning to stay in the property long-term.

Tips for Saving on Cladding Costs

  • Get multiple quotes: Prices between suppliers like Premier Group and JSC can vary more than you’d expect, get at least three.
  • Choose local materials: Timber from Hermpac or bricks from Midland Brick avoids freight costs that push prices up on imported products.
  • Think low-maintenance from the start: Vinyl or fibre cement costs less to own over ten years than timber, even if the install price is similar.
  • Know what you can do yourself: Vinyl and some fibre cement systems suit confident DIYers. More complex systems don’t, and the cost of fixing a poor install is always higher than hiring right first time.
  • Look at the long-term picture: Spending a bit more on metal or brick upfront often works out cheaper than repainting or replacing a budget option in year eight.

Hidden Costs to Watch For

A few things that don’t always show up in the initial quote:

  • Installation errors: Poorly installed stucco cladding or timber can mean expensive moisture remediation work later. The tradie you use matters as much as the material you choose.
  • Ongoing maintenance: Timber and stucco both need regular attention. If you’re not factoring that into your budget, you’re underestimating the real cost.
  • Foundation upgrades: Heavier materials like brick and stone sometimes require structural work underneath. Get this checked before you commit to a material.

Vinyl and entry-level fibre cement remain the cheapest exterior cladding options in NZ for 2026. Brick and metal cost more upfront but tend to look after themselves. Know your ten-year budget, not just your installation budget.

4. Cladding Trends and Innovations in New Zealand for 2026

The New Zealand construction industry has shifted noticeably over the past few years, materials are getting better, the focus on sustainability is real rather than just marketing, and Auckland homeowners are increasingly choosing cladding based on what it costs to live with over ten years, not just what it costs to install. Here’s what’s shaping cladding decisions across the country in 2026.

  1. Sustainable and Eco-Friendly Cladding

Environmental credentials have moved from a nice-to-have to a genuine purchase driver. Weathertex and ITI Timspec lead with FSC-certified timber and composite boards made with recycled content, products that hold up to scrutiny, not just marketing claims.

  • Why it’s gaining ground: Hermpac’s Accoya is treated using non-toxic processes and delivers strong durability. Weathertex’s carbon-neutral timber boards appeal to buyers who want the look of timber without the environmental compromise.
  • Examples: Millboard’s Envello composite uses recycled materials; James Hardie’s fibre cement is designed for longevity, which reduces how often it needs replacing.
  • Worth knowing: Look for FSC certification or Environmental Choice NZ when assessing sustainability claims. A lot of products use that language loosely.
  1. Low-Maintenance and Durable Materials

Auckland homeowners are increasingly unwilling to spend their summers on cladding maintenance. Metal from Metalcraft and Dimond, and vinyl from Palliside, are picking up demand because they need very little looking after.

  • Why it’s gaining ground: Maintenance costs have increased. Aluminium from Nuwall resists corrosion in coastal areas; James Hardie’s fibre cement handles NZ’s weather without demanding annual attention.
  • Examples: Vulcan’s Ultraclad aluminium and Specialized’s EZpanel AAC are both built for minimal upkeep and long service lives.
  • Worth knowing: Low-maintenance materials still need to be installed properly to deliver on that promise. Cut corners on installation and you’ll be back sooner than you think.
  1. Modern and Minimalist Aesthetics

Clean lines and bold finishes dominate Auckland’s new build scene right now. Metal tray systems from Dimond and James Hardie’s Scyon Axent Trim are doing a lot of work on contemporary facades.

  • Why it’s gaining ground: The architectural direction in areas like Hobsonville, Albany, and Grey Lynn has shifted decisively toward modern minimalism.
  • Examples: Nuwall’s aluminium panels create flush, contemporary exteriors; Craftstone’s slim stone veneers add texture to feature walls without overwhelming the design.
  • Worth knowing: Mixing smooth cladding with contrasting textures, a timber soffit against a metal facade, for instance, tends to look better than going all-in on one material.
  1. Energy-Efficient Cladding Systems

Tighter building code requirements and sustained energy costs have made thermal performance a real consideration, not just a box to tick.

  • Why it’s gaining ground: Specialized’s EZpanel AAC offers strong thermal resistance; James Hardie’s fibre cement with integrated insulation and Vulcan’s Ultraclad with thermal breaks both improve overall building performance.
  • Examples: AAC panels in particular are appearing more frequently in new builds targeting Homestar or Green Star ratings.
  • Worth knowing: Cladding alone doesn’t determine your home’s thermal performance, it works as part of the whole wall assembly. Design and insulation specification matter equally.
  1. Textured and Mixed-Material Designs

Using one material across an entire facade is becoming less common. Mixing timber with metal, or stone veneer with fibre cement, adds depth and character that a single material rarely achieves on its own.

  • Why it’s gaining ground: It gives homeowners more design flexibility, you can use premium materials where they have impact and pull back on cost elsewhere.
  • Examples: Hermpac cedar weatherboards paired with Craftstone stone veneer on a feature entry wall. Premier Group brick combined with Weathertex composite for a mix of tradition and modernity.
  • Worth knowing: Mixed-material designs need to be detailed carefully at the junctions, otherwise that’s where moisture problems start.
  1. Smart Cladding Technologies

Self-cleaning coatings and solar-integrated cladding are starting to appear, not yet mainstream in New Zealand, but worth being aware of for anyone planning a long-term build.

  • Why it’s gaining ground: Some aluminium systems from Nuwall already feature coatings that resist dirt buildup. Solar-integrated options are still early-stage but align with NZ’s renewable energy direction.
  • Worth knowing: Keep an eye on what comes through suppliers like JSC and industry expos. This part of the market is moving.
  1. Coastal-Adapted Cladding

A significant proportion of Auckland homes are close enough to the coast that salt air is a genuine material consideration, not just an aesthetic one. Aluminium and fibre cement are the default calls for exposed coastal sites.

  • Why it’s gaining ground: Nuwall’s aluminium and James Hardie’s fibre cement are engineered for these conditions. Metalcraft’s Colorsteel is another option worth considering.
  • Worth knowing: Sealing, cavity detailing, and regular rinsing matter as much as material choice. The best cladding still needs proper maintenance in a salt environment.

The direction of travel in 2026 is clear: durability, sustainability, and lower lifetime maintenance costs are driving decisions more than upfront price or trends alone. Materials from James Hardie, Hermpac, and Metalcraft are well-positioned against all three.

5. Choosing the Right Cladding for Your New Zealand Home

Choosing cladding isn’t complicated, but it does require being honest about your site, your budget, and what you’re actually prepared to maintain. Here’s a practical process for working through it.

Step 1: Assess Your Home’s Needs

Start with the basics before you start looking at samples:

  • Architectural style: Is your home a traditional villa, a contemporary new build, or a coastal bach? Hermpac’s timber weatherboards suit the character of older homes; Dimond’s metal tray systems suit modern ones.
  • Purpose: Are you renovating to sell, building a long-term home, or upgrading a rental? That changes the calculus on what to spend.
  • Maintenance commitment: Be honest here. James Hardie’s fibre cement and Metalcraft’s Colorsteel suit people who don’t want to think about cladding maintenance for a decade. Timber suits people who are happy to.
  • Budget: Set your range before you talk to anyone. Vinyl ($80–$150/m²) and basic timber ($100–$150/m²) anchor the affordable end; stone ($200–$400/m²) sits at the other.

Step 2: Consider New Zealand’s Climate

Where you live shapes what will work:

  • Coastal Auckland, Bay of Plenty: Salt air rules out poorly specified timber. Nuwall aluminium, Metalcraft Colorsteel, and James Hardie fibre cement are the safe calls.
  • Wellington: Wind loads are real. Brick from Premier Group or AAC from Specialized handles it well.
  • South Island, Central Plateau: Insulation performance matters more. Vulcan’s Ultraclad and Weathertex composite offer thermal value and moisture resistance.
  • Hawke’s Bay, Nelson: UV exposure is the main issue. Fibre cement and vinyl hold their colour better than untreated timber; stucco from JSC needs UV-protective coatings.

Step 3: Match Cladding to Your Aesthetic Goals

  • Traditional homes: Hermpac cedar or Midland Brick.
  • Modern homes: Dimond or Nuwall metal panels, or James Hardie’s Scyon range for clean plaster-look lines.
  • Luxury builds: Craftstone stone veneer or Millboard’s Envello composite.
  • Mixed aesthetics: Weathertex composite with stone accents, or cedar weatherboards on the upper level with a metal base.

Step 4: Evaluate Installation and Professional Support

Installation quality matters as much as material quality. Poorly installed stucco cladding or timber will fail regardless of the product. Heavy materials like brick need structural assessment first.

  • Use professionals: Brands like Specialized (EZpanel) and JSC (stucco) require certified installers for good reason. Cutting corners here is where expensive callbacks come from.
  • Check building code compliance: Your cladding needs to meet NZBC requirements for weathertightness and fire safety. This isn’t optional and it’s not hard to verify, your installer should be across it.
  • Plan for ventilation: Timber and stucco in particular need proper cavity and ventilation systems. Hermpac provides guidance on this; your installer should too.

Step 5: Plan for Long-Term Performance

  • Lifespan: Brick and metal last decades with minimal input. Vinyl will need replacing sooner.
  • Warranties: James Hardie, Metalcraft, and Palliside all offer warranties between 10 and 50 years. Check what’s actually covered.
  • Resale value: Brick and stone add measurable value. Vinyl is more neutral, buyers at the premium end of the market notice the difference.

Case Study: A Superior Renovations Project

In 2024 we reclad an Auckland coastal home using James Hardie’s Linea Weatherboard. The owners wanted something low-maintenance that could handle the salt air without looking industrial. Fibre cement with a drained cavity system delivered on both counts, clean lines, solid weathertightness, and comfortably within their $150/m² budget. Two years on, no callbacks.

Questions to Ask Your Cladding Supplier

When you’re talking to ITI Timspec, Metalcraft, Premier Group, or anyone else:

  • What warranty does this product carry, and what does it actually cover?
  • Is this material suited to my specific site and climate zone?
  • What installation certifications or expertise does it require?
  • Can you show me examples of similar projects in NZ?
  • Are there eco-friendly options at this price point?

Get clear answers to those questions and you’ll be in a much better position to make a call. The Superior Renovations team is happy to walk through this with you if you want a second opinion before committing.

6. Installation and Maintenance Tips for Cladding in New Zealand

The best cladding material in the world doesn’t perform if it’s installed badly or neglected. This section covers what good installation actually looks like for each material type, what maintenance each one needs, and the mistakes that cost Auckland homeowners money every year.

Cladding Installation Best Practices

Every material has its own requirements. Getting these right at the start is how you avoid expensive remediation work later.

  • Timber Weatherboards (Hermpac, ITI Timspec): A cavity system is non-negotiable in Auckland’s humid conditions, this is what separates a good timber install from one that’ll be rotting in ten years. Use pre-treated timber (Hermpac’s Accoya is a good call) and corrosion-resistant fixings on anything near the coast.
  • Brick and Masonry (Midland Brick, Premier Group): Confirm your foundation can carry the load before you commit. Use experienced masons, alignment and weathertightness depend on it. Weep holes and correct flashing are essential, not optional.
  • Fibre Cement (James Hardie): Follow the manufacturer’s guidelines precisely. Stainless steel fixings in coastal areas, breathable building wrap underneath, and careful sealing at all joints. Shortcuts here show up quickly.
  • Metal Cladding (Metalcraft, Dimond, Nuwall): Panels need to be properly fastened for wind resistance, especially relevant for exposed Auckland sites. Thermal breaks (Vulcan’s Ultraclad) improve the energy performance of the whole wall assembly.
  • Vinyl Cladding (Palliside): DIY-friendly, but tight sealing matters more than people think. Poor alignment and inadequate ventilation are the two things that catch out DIY installs.
  • Stucco Cladding (JSC): Apply over a rigid backing board with a cavity system behind it. This is not a job for anyone without experience, poorly mixed or applied stucco will crack, and that means moisture. Hire certified applicators.
  • Stone and Stone Veneer (Craftstone): Structural support needs to be confirmed first. Joint quality is everything, gaps let water in.
  • AAC Panels (Specialized’s EZpanel): Follow manufacturer specifications for joints and fixing systems. The thermal and fire performance depends on the install being done correctly.
  • Composite Cladding (Weathertex, Millboard): Use the recommended fixing systems and allow for expansion. In wet climates, proper ventilation spacing is important.

Maintenance Tips for Long-Lasting Cladding

  • Timber Weatherboards: Annual check for moisture or pest damage. Restain or repaint every five to ten years. A mild detergent wash keeps mildew from getting a foothold.
  • Brick and Masonry: Low-pressure wash every two to three years. Check mortar for cracking and repair it before water gets in, that’s where brick problems start.
  • Fibre Cement: Annual wash. Joint sealants every five years to maintain weathertightness.
  • Metal Cladding: Rinse coastal installs every three months to clear salt. Touch up scratches with the right paint before they rust through.
  • Vinyl Cladding: Hose down with mild detergent every six to twelve months. Inspect for fading or cracking after about ten years.
  • Stucco Cladding: Annual crack inspection, especially after any seismic activity. Repaint every seven to ten years with UV-resistant paint.
  • Stone and Stone Veneer: Soft brush and water only, don’t use anything abrasive. Sealants every five years.
  • AAC Panels: Annual clean and joint sealant check. That’s about it.
  • Composite Cladding: Wash every six to twelve months, check fixings are still tight.

Common Cladding Installation Mistakes to Avoid

  • Skipping the cavity: Timber and stucco without proper cavity systems trap moisture. In Auckland’s climate, that’s a guarantee of problems.
  • Wrong fixings: Standard steel screws in a coastal environment will corrode. Use stainless steel or specified corrosion-resistant fixings, it costs a fraction more and saves a lot of grief.
  • Ignoring building code: NZBC weathertightness and fire safety requirements exist for good reason. Non-compliance doesn’t just create risk, it creates liability.
  • Poor substrate prep: Stucco and stone cladding need a properly prepared surface. If the substrate isn’t right, adhesion fails.
  • DIY on the wrong systems: Vinyl is manageable for a confident DIYer. Brick, stucco, and AAC panels are not. Know the difference before you start.

Working with Superior Renovations

We’ve worked through more than 1,000 Auckland renovations, and cladding decisions sit inside our Design-to-Build Action Plan, material selection, Building Consent where required (handled in-house), and installation by qualified tradespeople we work with regularly. Clients see options laid out in our Design Studio at Wairau Valley, where we work with James Hardie, Metalcraft, Hermpac and other trusted suppliers, and we build a maintenance schedule in from the start so you know exactly what your cladding needs and when.

Pro Tip: Schedule Regular Inspections

Annual inspections are worth every dollar for high-maintenance materials like stucco and timber. For coastal homes, twice a year makes sense, salt exposure accelerates wear in ways that aren’t always visible until the damage is done.

Get the installation right, stay on top of maintenance, and your cladding, whether it’s the most affordable option or a premium one, will do exactly what it’s supposed to do.

The Right Cladding for Your Auckland Home in 2026

There’s no single best cladding material, but there is a best one for your home, your site, and your budget. The range available in 2026 is genuinely good: from Palliside’s vinyl at the affordable end through to Craftstone stone veneer for premium builds, with strong mid-range options in James Hardie fibre cement and Metalcraft aluminium that suit a wide range of Auckland conditions.

What this guide has tried to do is cut through the marketing and give you an honest picture of what each material costs, what it needs, and where it works well. The short version: if you’re in a coastal suburb, specify for salt. If you don’t want to think about maintenance, go fibre cement or metal. If budget is tight, vinyl or basic timber will do the job. And whatever you choose, get the cavity detailing and flashings right, that’s where most cladding problems actually start.

If you want a straight conversation about what makes sense for your specific property, talk to the team at Superior Renovations. We’ll give you an honest read on your options, no pressure, no jargon.

When Recladding Might Skip Full Consent (Building Act Schedule 1) From building.govt.nz: Like-for-like replacements (same area/openings, no structural changes) of wall cladding are often exempt if carried out by a licensed professional, no consent needed for straightforward refreshes such as vinyl over old weatherboards or fibre cement swaps. New penetrations or heavy additions like stone veneer trigger consent requirements. For the full picture on whether your reclad needs a building consent, read our dedicated guide.

“Many Auckland reclads qualify for exemptions, swapping tired vinyl for low-maintenance composite saves time and fees while refreshing kerb appeal.” — Cici Zuo, Sales Manager & Designer, Superior Renovations.


Curious about how much your
Recladding Project would cost?

Try our recladding cost calculator tool


What are the best cladding options NZ for 2026?

It depends on your site, budget, and how much maintenance you want to do. Fibre cement from James Hardie is a strong all-rounder, low maintenance and weather-resistant. Brick from Midland Brick suits homeowners who want permanence. Timber from Hermpac suits traditional homes where character matters. For coastal sites, aluminium from Nuwall or Metalcraft's Colorsteel is the safer call.

What is the cheapest exterior cladding option in New Zealand?

Vinyl cladding from Palliside is the most affordable at $80–$150/m². Basic pine timber from ITI Timspec and entry-level fibre cement from James Hardie both sit in the $100–$160/m² range and are worth considering if budget is tight.

How much does cladding cost in New Zealand in 2026?

Installed costs vary by material: vinyl ($80–$150/m²), timber ($100–$250/m²), fibre cement ($120–$220/m²), metal ($130–$280/m²), stucco ($140–$260/m²), brick ($150–$300/m²), AAC panels ($150–$250/m²), composite ($120–$200/m²), stone ($200–$400/m²). All figures include installation.

Which cladding is best for New Zealand's coastal climate?

Aluminium from Nuwall, Colorsteel from Metalcraft, and fibre cement from James Hardie are the reliable choices for coastal sites. Vinyl from Palliside is affordable and handles salt air reasonably well, but will fade faster than metal or fibre cement.

How durable is stucco cladding in New Zealand?

Durable when installed correctly with a proper cavity system behind it. The risk with stucco is installation quality, get that wrong and you'll deal with cracking and moisture issues. Plan for repainting every seven to ten years.

What are the most eco-friendly cladding options NZ?

FSC-certified timber from Hermpac or ITI Timspec, carbon-neutral composite from Weathertex, and recycled-content cladding from Millboard's Envello range. James Hardie fibre cement also has a reasonable sustainability story given its longevity.

How often should I maintain my exterior cladding?

Timber needs restaining or repainting every five to ten years. Stucco needs repainting every seven to ten years and annual crack checks. Brick and stone need cleaning every two to three years. Metal, vinyl, fibre cement, and AAC panels need an annual wash and periodic sealant checks.

Can I install cladding myself, or should I hire professionals?

Vinyl and some fibre cement systems are manageable for experienced DIYers. Brick, stucco, and AAC panels need professional installation, the cost of getting it wrong is always higher than hiring right first time. Superior Renovations ensures NZBC compliance and manufacturer guidelines are followed.

Which cladding adds the most value to my home?

Brick, stone, and fibre cement add the most measurable resale value, they signal quality and durability to buyers. Vinyl is less likely to shift the needle at the premium end of the market.

What are the latest cladding trends for 2026 in New Zealand?

Sustainable materials (Weathertex, Hermpac), low-maintenance finishes (Metalcraft, Palliside), minimalist metal facades (Dimond tray systems), mixed-material designs, and energy-efficient systems like AAC panels from Specialized.

How do I choose cladding for a modern home?

Metal panels from Nuwall or Dimond, smooth fibre cement from James Hardie's Scyon range, or composite from Millboard are the go-to options. Adding stone veneer from Craftstone as a feature element lifts the overall look.

Is cladding installation affected by New Zealand's building codes?

Yes, cladding must comply with NZBC requirements for weathertightness, fire safety, and structural performance. Work with professionals like Superior Renovations to make sure everything is compliant, particularly for fire-rated options like fibre cement or AAC panels.

Can you put new cladding over existing cladding?

Sometimes, but it is rarely the best call. Battening new cladding over sound existing cladding can work for a cosmetic refresh, yet it adds weight, builds out thickness at windows and eaves, and hides any moisture problem sitting underneath. On Auckland leaky-era plaster homes we almost always strip back to the framing so the building wrap, drained cavity, and flashings can be detailed properly to E2/AS1. Get a weathertightness check before you decide.

What is the lowest-maintenance cladding for a NZ home?

Aluminium (Nuwall, Vulcan Ultraclad) and fibre cement (James Hardie) top the list, needing little more than an annual wash plus a coastal rinse in salty suburbs. AAC panels and vinyl (Palliside) are also low-upkeep. If you want a timber look with less work, Accoya or pre-finished cedar hold up longer between recoats than untreated pine.


Need more information?

Take advantage of our FREE Complete Home Renovation Guide (48 pages), whether you’re already renovating or in the process of deciding to renovate, it’s not an easy process, this guide, which includes a free 100+ point checklist, will help you avoid costly mistakes.

  • Download Free Renovation Guide (PDF)
  •  

    18 months 0 percent interest long term finance badge

    Have you been putting off getting renovations done?

    We have partnered with Q Mastercard ® to provide you an 18 Month Interest-Free Payment Option, you can enjoy your new home now and stress less.

    Learn More about Interest-Free Payment Options*

    *Lending criteria, fees, terms and conditions apply. Mastercard is a registered trademark and the circles design is a trademark of Mastercard International Incorporated.


    Still have questions unanswered?

    Book a no-obligation consultation with the team at Superior Renovations,
    we’d love to meet you to discuss your renovation ideas!

      Services

      Home RenovationKitchen RenovationBathroom RenovationOutdoor RenovationHouse ExtensionCommercialDesign ServicesOther

      By submitting this form, you agree to receive communications from us via email or text regarding our services, you can unsubscribe at any time.

      This site is protected by reCAPTCHA and the Google

      Privacy Policy and Terms of Service apply.

    monolithic cladding 22 - Superior Renovations
    Recladding

    Monolithic Cladding NZ: Leaky-Home Risk & Your Options

    Monolithic Cladding in New Zealand: What It Is, the Leaky-Home Risk, and Your Options

    Quick answer: Monolithic cladding is a smooth, jointless plaster-look exterior system used heavily on New Zealand homes built between 1994 and 2004 — and it’s the cladding most closely tied to the leaky-home crisis. It isn’t automatically a leaky home, but on homes from that era it carries real risk, so it needs a proper inspection before you buy and, where damage is found, a full reclad to put it right.

    Drive through Albany, Greenhithe, West Harbour or the older parts of Botany and you’ll see them everywhere — smooth, render-finished homes with clean corners, flat or low roofs, and barely an eave in sight. They looked modern when they went up. Twenty-odd years on, a lot of them are the homes Auckland buyers are most nervous about.

    We reclad these houses for a living. We’ve stripped the plaster off enough 1990s and early-2000s homes to know what’s usually waiting behind it, and we’ve sat across the table from plenty of owners and buyers trying to work out whether they’ve got a problem or a bargain. This guide is the builder’s version of that conversation — what monolithic cladding actually is, why it became such a headache, what to check before you buy one, and what the path out looks like if you already own one.

    monolithic plaster-clad house showing cracking and moisture staining on the exterior wall

    Monolithic Cladding in New Zealand


    What Monolithic Cladding Actually Is

    Monolithic cladding is any exterior wall system finished to look like one continuous, jointless surface — usually a textured plaster or render skin with no visible joins. “Monolithic” just means “single stone”: the wall reads as one solid mass rather than a pattern of boards or bricks. That smooth, unbroken look is the whole point, and it’s also the giveaway.

    Underneath the render, though, it’s not one thing. Three main systems sit under the monolithic umbrella, and the differences matter once you start asking whether a particular house is a risk.

    The three systems you’ll come across

    The first is EIFS — a synthetic plaster over polystyrene sheets, sometimes called texture-coat. Light, cheap, easy to shape into those rounded corners and parapets architects loved in the late 90s. The second is fibre-cement sheet with a plaster finish — brands like Harditex were common. The third is solid plaster (stucco) over a backing, the older and generally more forgiving of the three. All three give you the same jointless face, which is why they get lumped together as “plaster homes” or, less kindly, “chilly-bin houses”.

    How to tell if a house has it

    You don’t need a builder to spot it from the kerb. Look for a smooth or lightly textured wall with no weatherboard lines and no brick. Pair that finish with a flat or low-pitched roof, minimal or no eaves, recessed windows, and decorative parapets, and you’re almost certainly looking at monolithic cladding from the high-risk era. Tap it — polystyrene-based systems sound hollow and dull; solid plaster sounds, well, solid. Hairline cracking around windows and at floor-level junctions is worth noting, though plenty of sound homes get cosmetic cracks too.

    💡 Quick tip: The cladding type alone doesn’t tell you whether a home leaks. A solid-plaster home with good eaves and a simple roofline is a very different risk to a polystyrene-clad, flat-roofed, eaveless house from 2001. Build year, design and detailing matter as much as the material.

    According to Settled.govt.nz, the official guidance for buyers, the highest-risk homes are exactly this profile: built from the late 1980s to the mid-2000s, finished in plaster-style monolithic cladding, with an unbroken exterior that often hides problems with no obvious warning signs.


    Why Monolithic Plaster Homes Became a Leaky-Home Risk

    Here’s the part most people get half-right. The cladding itself didn’t fail because plaster is bad. It failed because of how it was built behind the plaster, on a particular kind of house, during a particular window of time.

    Three things lined up at once between roughly 1994 and 2004, and together they created the leaky-building crisis.

    No cavity behind the cladding

    On most homes from this era, the plaster was fixed directly to the timber framing — no gap, no drainage path. When water got in behind the render (and on a sealed, jointless wall it eventually does), it had nowhere to drain and no airflow to dry it out. It just sat against the framing. The Building Performance team at MBIE now requires a drained cavity behind monolithic claddings under E2/AS1, the External Moisture acceptable solution — a 20mm vented gap that lets water escape. That requirement came in with the Building Act 2004 reforms. Homes built before it usually don’t have one.

    Untreated timber framing

    For a stretch from the late 1990s to 2004, it was legal to build with kiln-dried but otherwise untreated framing timber. Dry untreated pine is fine until it gets wet and stays wet — then it rots fast. Put that timber behind a direct-fixed plaster wall with no way to dry, and you’ve built the problem in. Wet trapped framing with no treatment and no cavity is the core of why these homes rot rather than just stain.

    Mediterranean-style design

    The look of the era worked against it. Flat roofs, no eaves to throw rain clear of the walls, internal gutters, parapets, recessed windows and complex junctions — every one of those is a place water can get in, and without eaves the walls cop the full weather. Auckland Council notes that weathertightness problems are generally tied to homes built from the early 1990s, most often with monolithic cladding and these design features.

    💡 Quick tip: Post-2004 monolithic homes built over a proper cavity are a different animal. A cavity-system plaster home is as weathertight as any other modern cladding. The risk band most buyers should treat with real caution is roughly 1994 to 2004 — and the worst of it is the eaveless, flat-roofed, complex-roofline houses from that window.

    So what do we actually find once the cladding comes off? This is where the inspector and the agent and the council guidance all stop, because none of them open these walls up. We do.

    “On the 1994 to 2004 monolithic homes we strip back, around nine in ten have structural framing that needs replacing — not a damp patch you can dry out, actual rotten timber that has to come out and be rebuilt. People hope it’s surface-level. By the time we’re called in, it almost never is. That’s not me being dramatic; it’s just what’s behind the plaster on homes of that age once the render’s been holding water against the frame for twenty years.”
    — Jeff Zhang, LBP, Site Manager, Superior Renovations

    Worth being clear about what that figure means. These are homes already being recladded — owners called us because something was wrong. It’s not a claim that nine in ten plaster homes everywhere are rotten. But it tells you how often “a bit of cracking” turns into structural framing replacement once you actually look. That gap between what you can see and what’s really there is the whole reason this cladding makes people nervous.


    Should You Buy a Monolithic Cladding House in Auckland?

    Short version: you can, and sometimes it’s a genuinely good buy — but only if you go in with your eyes open and the right reports in hand. The mistake isn’t buying a plaster home. The mistake is buying one blind.

    Here’s the due-diligence order we’d tell our own family to follow.

    Get an independent moisture and weathertightness inspection

    Not the vendor’s report. Your own, from an inspector who specialises in weathertightness and isn’t connected to the agent. A standard building inspection often won’t go far enough on a monolithic home — you want invasive moisture testing where it’s allowed, not just a visual once-over. Settled.govt.nz makes the same point: on this cladding type there may be no obvious signs, so you need an expert to look properly before you commit.

    Pull the property file and the LIM

    Order the property file from Auckland Council and read it alongside a LIM. You’re looking for the original consent and Code Compliance Certificate, any record of remedial or recladding work, and — critically — any sign of a weathertightness claim. If there’s history, you want to know before you offer, not after.

    Check what the agent has to tell you

    Real estate agents have disclosure obligations here. The Real Estate Authority requires licensees to disclose known or suspected weathertightness issues, including where a home is monolithic-clad and from the high-risk era. Ask directly whether there have been leaks, repairs, or any claim lodged — and get the answer in writing.

    couple reviewing renovation documents outside a monolithic-clad house

    Monolithic Cladding in New Zealand

    Will the bank lend on it?

    This is where a lot of deals quietly die, and it’s the bit the inspection reports never mention. Banks are wary of pre-2005 monolithic homes, and they show it in different ways: requiring a clear building or weathertightness report before they’ll approve, asking for a larger deposit, or declining outright on the higher-risk properties. Mortgage firm Squirrel notes that some of these homes are simply a no-go for the main banks until remediation is done — and that buyers sometimes use a non-bank or asset lender to bridge the gap, then refinance back to a mainstream bank once the reclad is complete and signed off. Talk to a mortgage adviser before you waste money on due diligence the bank was always going to knock back.

    Can you insure it?

    Standard house insurance is built around sudden, accidental damage — a burst pipe, a storm, a fire. Gradual damage, which is exactly what a slow leak behind plaster cladding is, is usually excluded. As finance commentary from Tella spells out, home insurance generally won’t cover leaky-home damage because it builds up over time rather than happening in one event — and insurers are more cautious about homes with a known weathertightness history. A sound, remediated home with a Code Compliance Certificate is a normal insurance proposition. A known-leaky one in mid-repair is not.

    💡 Quick tip: Run lending and insurance in parallel with your inspection, not after it. Plenty of buyers spend $1,000+ on reports for a home the bank was never going to fund. One call to a mortgage adviser and a quick insurance enquiry can save you that.


    Replacing Monolithic Cladding: The Path Out

    If you own one of these homes, or you’ve found the home you want and the reports have come back with problems, the question stops being “is it risky” and becomes “what do we do about it”. Good news: this is a solved problem. We do it constantly. It’s just a real project, not a weekend job.

    Targeted repair vs full reclad

    Now and then a monolithic home has a contained problem — one leaking junction, damage limited to a single elevation — and a targeted repair makes sense. Far more often, on a 1994–2004 home, the smart money is a full reclad, because once you’ve opened up one wall and found rot, you’ve usually found the same conditions everywhere. Patching one face of a house whose whole envelope was built the same wrong way tends to just move the problem along.

    What a typical reclad involves

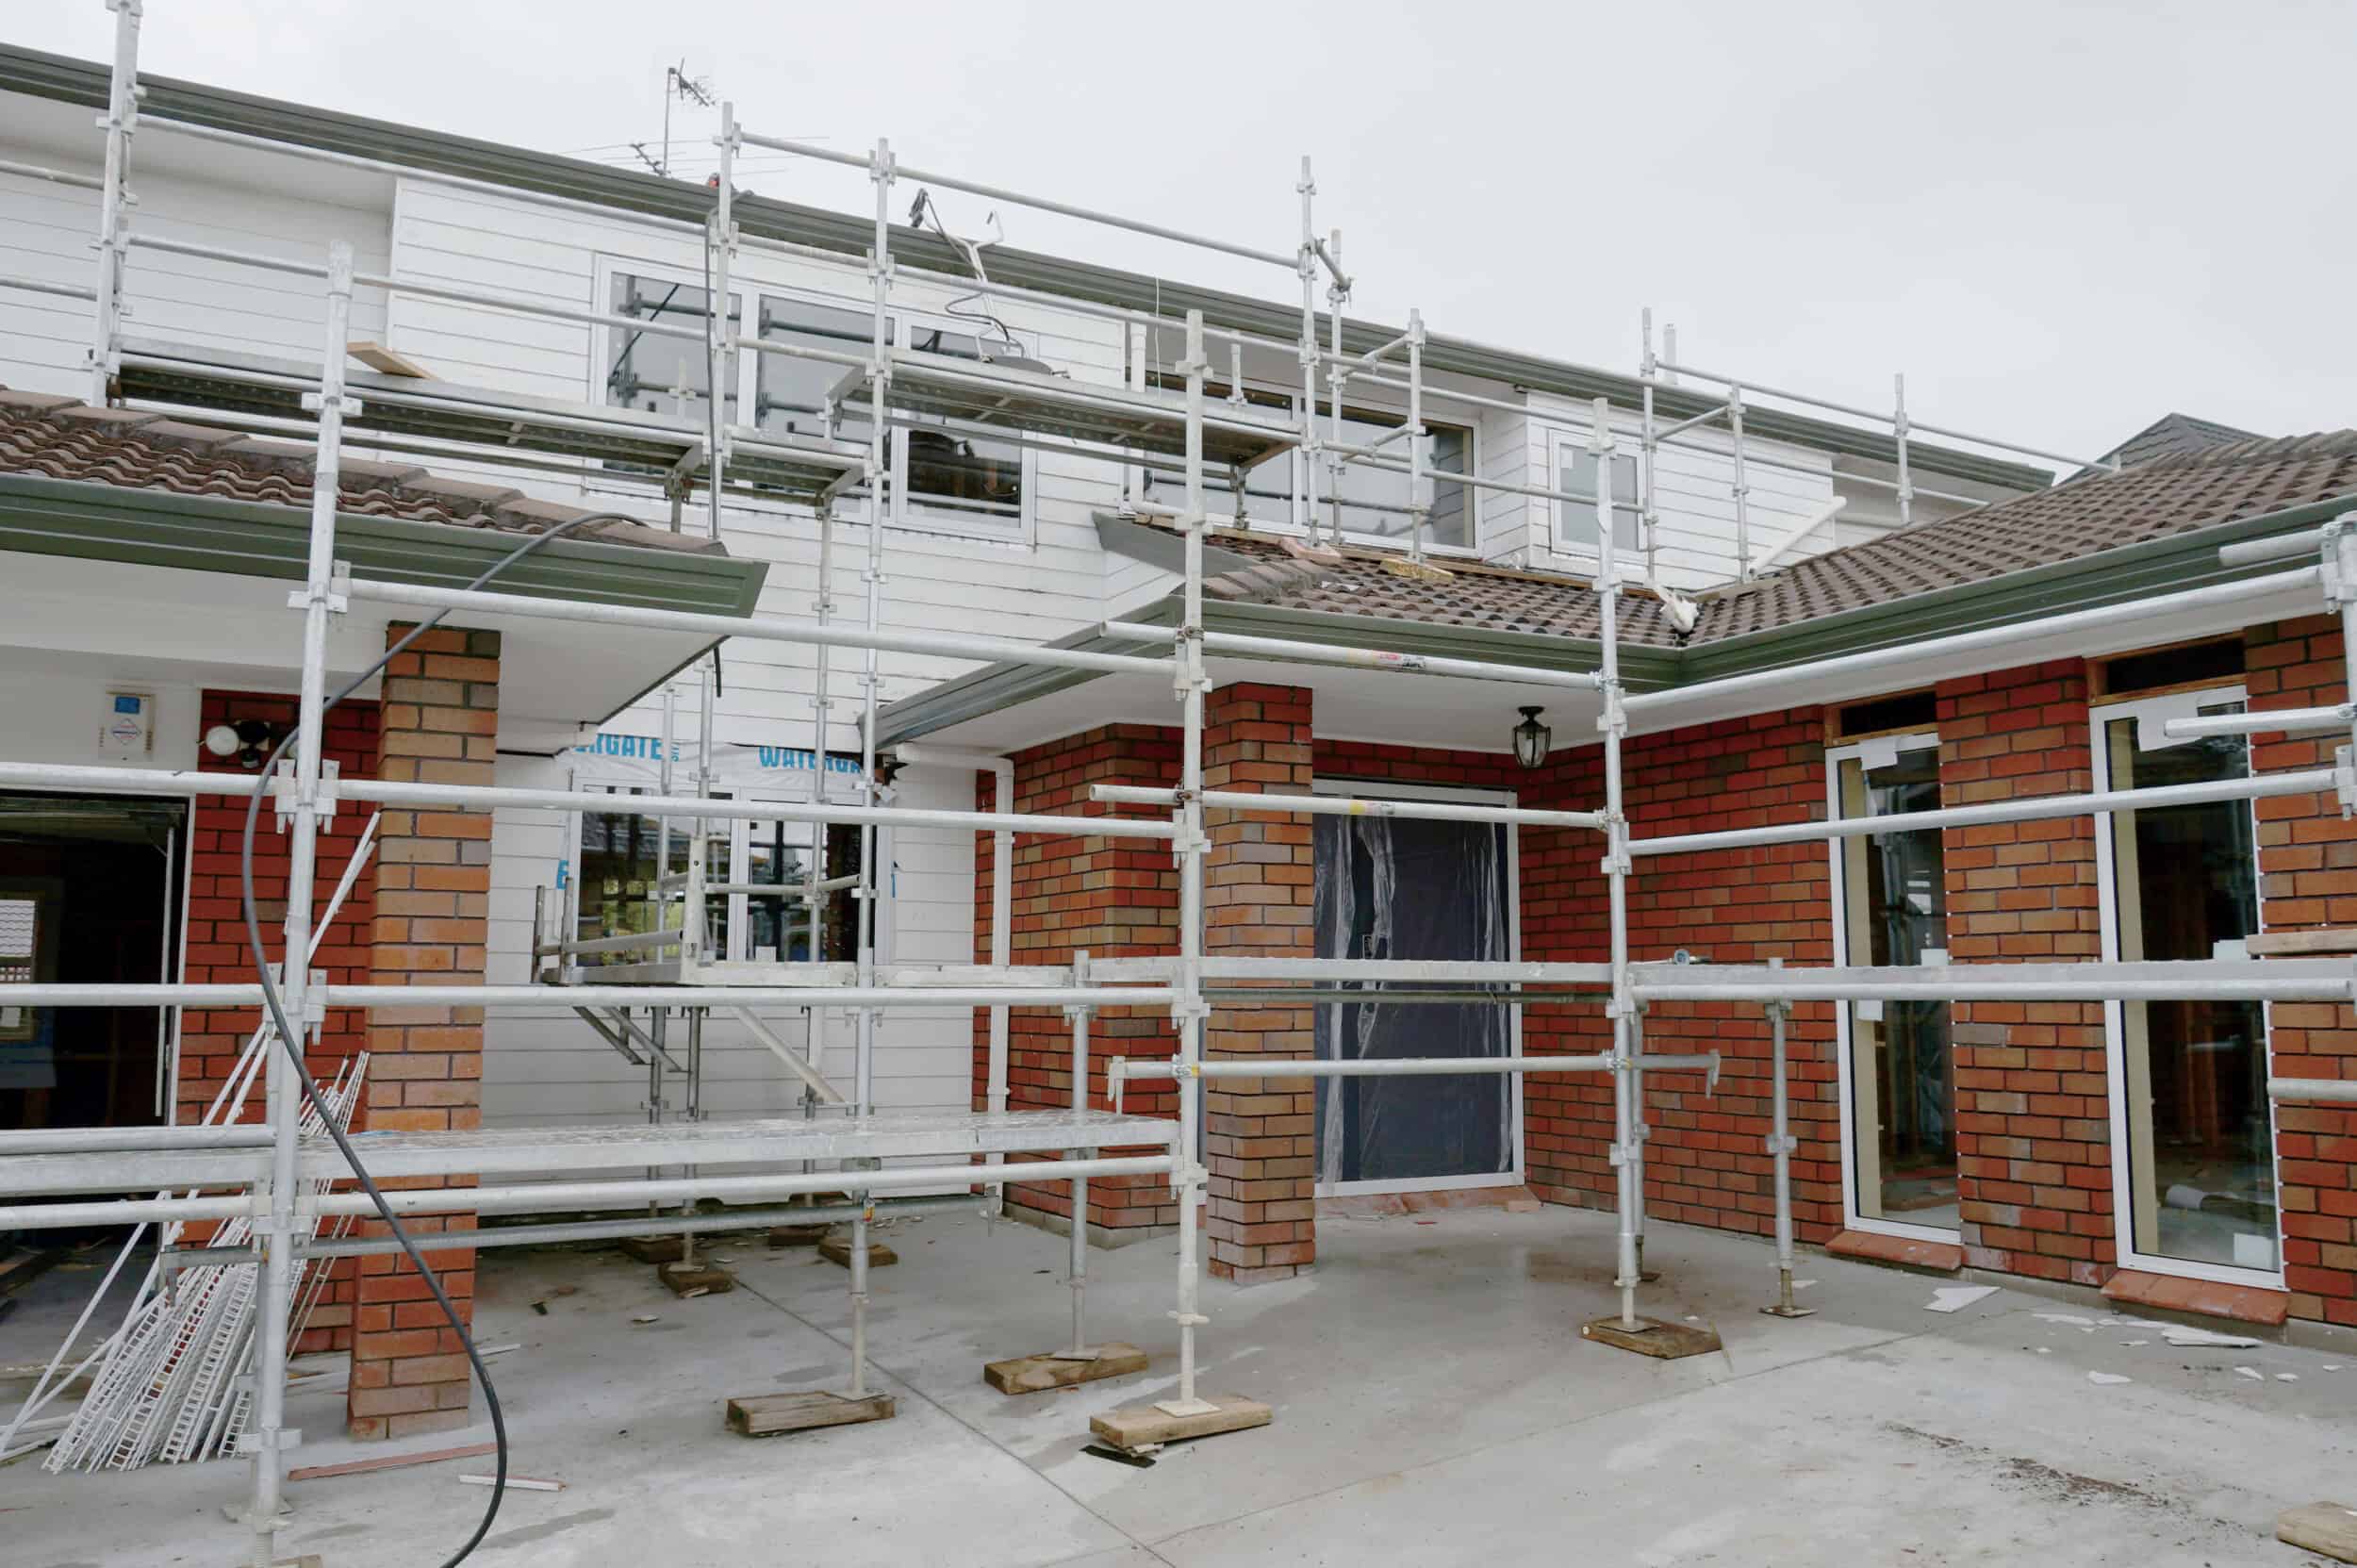
    The shape of the job is consistent. Scaffold goes up. The old cladding comes off and the framing is exposed and assessed. Rotten timber is cut out and replaced, the home is brought up to current weathertightness standards with a proper drained cavity and rigid underlay, and new cladding goes on. Building consent is required, and because cladding work is restricted building work, it’s carried out under a Licensed Building Practitioner. At the end you get a Code Compliance Certificate — the document that turns “former leaky home” into “weathertight home with a new envelope”.

    monolithic cladding removed on scaffolding exposing rotten timber framing and building paper

    Monolithic Cladding in New Zealand

    💡 Quick tip: The real scope only shows once the cladding’s off, so ask how a builder handles framing replacement in the contract. A clear framing allowance and an honest variation process beats a low headline price that quietly balloons mid-build.

    Here’s what a representative reclad looks like for us — a composite of the jobs we run most weeks, rather than one specific house. A two-storey, EIFS-clad home from around 2000 in the North-West, bought by a young family who’d had a clear-ish inspection but cracking at the parapets. Once we stripped it, the framing on the weather-facing elevations was gone and needed full replacement; the sheltered south side was largely sound. Reclad in fibre-cement weatherboard over a cavity, new flashings throughout, consent and CCC handled in-house. The family stayed put through most of the build.

    “The bit people skip is the cavity. You can put beautiful new cladding on a house, but if you’ve direct-fixed it again the way it was built in 2001, you’ve spent six figures rebuilding the original mistake. A reclad done properly means a drained cavity, treated framing, and flashings that actually shed water — so the next twenty years look nothing like the last twenty.”
    — Jeff Zhang, LBP, Site Manager, Superior Renovations

    What it costs — and where to read the detail

    Cost depends almost entirely on how much framing damage is hiding behind the plaster, which is why no one can give you a firm number until the cladding’s off. As a ballpark, a full reclad of a standard two-storey Auckland home, including consent, design and framing repairs, sits around $330,000–$380,000 (excl. GST). Rather than price it out here, we’ve put the full breakdown — what drives the number up, framing allowances, consent and design fees — in a dedicated guide. Read what recladding a monolithic home costs for the detail, or get a quick estimate with our recladding cost calculator.

    What does it do to the home’s value?

    This is the question owners agonise over, and there’s actual Auckland research on it. The University of Auckland Business School analysed real Auckland sales data and found that leaky homes remediated and reclad in a non-monolithic system — weatherboard, for instance — sold for the same prices as homes that had never leaked. The stigma effectively disappeared. By contrast, homes reclad in new monolithic cladding still carried around a 6% discount, and unrepaired monolithic homes about 9%. The takeaway: a proper reclad doesn’t just stop the rot — done right, with the right replacement cladding, it can wipe out the resale stigma entirely.

    Choice of new cladding is part of that decision, and it’s worth getting design input on what suits your home and your street. If you’re weighing up what to switch to, see our rundown of modern cladding options, and if the reclad is a chance to rework the look of the place — new proportions, better window lines, sorting out those parapets — that’s where architectural redesign earns its keep.

    “A reclad is the one time you’ve got the whole exterior off the house, so it’s the moment to make design decisions you can’t easily make later. The cladding you choose changes how the home reads and, going on the Auckland research, what it’s worth when you sell. We treat it as a design opportunity, not just a repair.”
    — Dorothy Li, Design Manager, Superior Renovations

    Worth saying plainly: not every monolithic home needs a reclad tomorrow. But if the reports show framing damage, it’s not a problem that improves with time — repair costs only climb. If that’s where you’ve landed, have a look at how our recladding service handles the whole job, consent and all, under one roof. Design, consent and build all run from our Auckland design studio at 16B Link Drive, Wairau Valley — so you’re not stuck coordinating a designer, a builder and the council yourself.


    Looking After a Monolithic Home You’re Keeping

    Maybe your home checks out, or it’s a post-2004 cavity build, and a reclad isn’t on the cards. The cladding still needs looking after — plaster systems are less forgiving of neglect than weatherboard or brick.

    The maintenance that actually matters

    Keep an eye on the render and deal with cracks early — even hairline cracks let water in, and on a sealed wall that water doesn’t get a second chance to dry. Reseal joints and flashings before they fail, keep paint coatings intact, and clear gutters and internal drains religiously, because blocked drainage on a flat or low roof is a classic leak starter. Watch the high-risk spots: window and door junctions, deck-to-wall connections, parapets and any penetration through the cladding.

    💡 Quick tip: Book a weathertightness check every few years on an older monolithic home, even one with no symptoms. Catching a failing junction early is a few hundred dollars of sealing. Missing it until the framing’s gone is a six-figure reclad. The maths is not subtle.

    Renovating the inside of a monolithic home? It’s a smart moment to have the cladding assessed while you’ve got trades on site — and if you’re touching the exterior at all, you may need to bring that work up to current standards, so it’s worth checking whether the work needs building consent before you start.


    Where to From Here

    Monolithic cladding isn’t a sentence — it’s a thing to understand before you buy and a thing to fix properly if you own one. Get the inspection. Read the property file. Check the bank and the insurer early. And if the news isn’t great, know that a well-built reclad puts the whole problem behind you, often without a lasting hit to the home’s value.

    If you’re staring at a plaster home and wondering whether you’ve got a problem, the fastest way to find out is to have someone who recladds them look at it.

    Book your free in-home consultation with Superior Renovations
    See what a full reclad actually costs
    Request a free feasibility report for your project


    What is monolithic cladding?

    Monolithic cladding is an exterior wall system finished to look like one continuous, unbroken surface — usually a textured plaster or render skin with no visible joins or boards. Common systems include synthetic plaster over polystyrene (EIFS), plaster over fibre-cement sheet, and solid plaster (stucco). It became popular in New Zealand through the 1990s and early 2000s for its smooth, modern look, and is the cladding most associated with the leaky-building era.

    How can I tell if a house has monolithic cladding?

    Look for a smooth or lightly textured wall with no weatherboard lines and no brick. Pair that finish with a flat or low-pitched roof, minimal or no eaves, recessed windows and decorative parapets, and it's almost certainly monolithic cladding from the high-risk era. Polystyrene-based systems sound hollow when tapped; solid plaster sounds dense. A pre-purchase inspection confirms the system and its condition.

    Is monolithic cladding bad?

    The cladding itself isn't inherently bad — modern monolithic systems built over a drained cavity are weathertight. The problem is homes built roughly 1994–2004, where plaster was often fixed directly to untreated timber framing with no cavity, on eaveless Mediterranean-style designs. That combination caused the leaky-building crisis. So it's the era and the build method, not the plaster look, that carry the risk.

    Should I buy a monolithic cladding house in Auckland?

    You can, and some are good value, but never buy one blind. Get your own independent weathertightness inspection (not the vendor's), order the Auckland Council property file and a LIM, ask the agent in writing about any leaks or claims, and confirm early that a bank will lend and an insurer will cover it. If the reports are clean or any issues are priced in, a monolithic home can be a sound buy.

    Will banks lend on a monolithic or plaster home?

    Banks are cautious about pre-2005 monolithic homes. They may require a clear building or weathertightness report before approving, ask for a larger deposit, or decline higher-risk properties outright. Some buyers use a non-bank or asset lender to bridge until remediation is done, then refinance to a mainstream bank once the reclad is complete and a Code Compliance Certificate is issued. Talk to a mortgage adviser before spending on due diligence.

    Can you insure a monolithic home?

    A sound or fully remediated monolithic home with a Code Compliance Certificate is a normal insurance proposition. The catch is that standard house insurance covers sudden, accidental damage — not gradual damage, which is exactly what a slow leak behind plaster is. Insurers are also more cautious about homes with a known weathertightness history, so confirm cover before you commit to a purchase.

    What does it cost to replace monolithic cladding?

    It depends almost entirely on how much framing damage is hidden behind the plaster, which isn't known until the cladding is removed. As a ballpark, a full reclad of a standard two-storey Auckland home — including consent, design and framing repairs — sits around $330,000–$380,000 (excl. GST). For a full cost breakdown, see our dedicated recladding cost guide, or use our recladding cost calculator for a quick estimate.

    Does recladding remove the leaky-home stigma?

    Largely, yes — if it's done right. University of Auckland Business School research using Auckland sales data found that leaky homes remediated and reclad in a non-monolithic system, such as weatherboard, sold for the same prices as homes that never leaked. Homes reclad in new monolithic cladding still carried about a 6% discount, and unrepaired monolithic homes about 9%. The choice of replacement cladding matters for resale value.

    Do post-2004 monolithic homes still leak?

    They're much lower risk. From 2004, the Building Code began requiring monolithic claddings to be installed over a drained cavity under E2/AS1 — a vented gap that lets any water escape and the wall dry out. A cavity-system plaster home is as weathertight as any other modern cladding. The high-risk band is roughly 1994–2004, before the cavity requirement, especially eaveless homes with complex rooflines.

    How do I maintain a monolithic clad home?

    Deal with cracks in the render early, reseal joints and flashings before they fail, keep paint coatings intact, and clear gutters and internal drains regularly — blocked drainage on a flat roof is a common leak starter. Watch window and door junctions, deck-to-wall connections and parapets. On an older monolithic home, book a weathertightness check every few years even with no visible symptoms; catching a failing junction early is far cheaper than a reclad.


    Further Resources for your recladding project

    1. Featured projects and Client stories to see specifications on some of the projects.
    2. Real client stories from Auckland

    Need more information?

    Take advantage of our FREE Complete Home Renovation Guide (48 pages), whether you’re already renovating or in the process of deciding to renovate, it’s not an easy process, this guide which includes a free 100+ point check list – will help you avoid costly mistakes.

    Download Free Renovation Guide (PDF)


    18 months 0 percent interest long term finance badge


    Have you been putting off getting renovations done?

    We have partnered with Q Mastercard ® to provide you an 18 Month Interest-Free Payment Option, you can enjoy your new home now and stress less.

    Learn More about Interest-Free Payment Options*

    *Lending criteria, fees, terms and conditions apply. Mastercard is a registered trademark and the circles design is a trademark of Mastercard International Incorporated.


    Still have questions unanswered?

    Book a no-obligation consultation with the team at Superior Renovations, we’d love to meet you to discuss your renovation ideas!

      Services

      Home RenovationKitchen RenovationBathroom RenovationOutdoor RenovationHouse ExtensionCommercialDesign ServicesOther

      By submitting this form, you agree to receive communications from us via email or text regarding our services, you can unsubscribe at any time.

      This site is protected by reCAPTCHA and the Google

      Privacy Policy and Terms of Service apply.


      References

      1. Settled.govt.nz — Learning about leaky buildings
      2. Building Performance (MBIE) — About Acceptable Solution E2/AS1 (External Moisture)
      3. Auckland Council — Leaky buildings
      4. Real Estate Authority — Weathertightness issues and disclosure
      5. University of Auckland Business School — No price stigma for tactically remediated leaky homes (Rehm et al.)
      6. Squirrel — Buying or selling a leaky home in New Zealand (lending)
      7. Tella — Leaky home finance and insurance
      Exterior painting after 1000 - Superior Renovations
      Recladding

      Can I Reclad My House Without Building Consent? (NZ)

      Can I Reclad My House Without Building Consent? The Complete Auckland Homeowner’s Guide

      Quick answer: In almost every case, yes — you need building consent to reclad your house in Auckland. Recladding affects weathertightness, so it’s rarely exempt. Narrow Schedule 1 exemptions exist for like-for-like repairs on cladding that has met its 15-year durability requirement.

      Recladding a house in Auckland — exterior weatherboard replacement

      Here’s a question we get asked most weeks at Superior Renovations. A homeowner calls, mentions their walls are bubbling or peeling, maybe some dark staining near the window frames — and then asks: “Do I actually need building consent to reclad, or can I just get someone in to do it?”

      It’s a fair question. Recladding sounds, on the surface, like an exterior facelift — strip the old stuff off, put new stuff on, done. But in Auckland there’s a lot more to it than that, and getting it wrong can hurt: financially, legally, and when you come to sell.

      The short version? In almost every case, you do need building consent to reclad your house. There are genuine exemptions, real grey areas, and scenarios where limited repair work can go ahead without the full consent process. This guide breaks it all down.

      We’ve written it specifically for Auckland homeowners, because our city carries a particular mix of factors — a legacy of leaky homes from the 1990s and early 2000s, a coastal climate that’s tough on cladding, and one of the busier property markets in the country. That mix makes understanding your recladding obligations genuinely urgent. Consent is one of the first things we work through when we take on a reclad in Auckland.

      Across the five sections in this guide, we cover:

      • Section 1: What recladding actually is — and when it legally requires building consent
      • Section 2: The genuine exemptions — when you can do like-for-like repairs without consent
      • Section 3: The risks of recladding without consent (bigger than most people think)
      • Section 4: The Auckland consent process, step by step
      • Section 5: Choosing the right cladding material for your Auckland home

      We’ve drawn on guidance from Building Performance (MBIE), Auckland Council, BRANZ, and the Licensed Building Practitioners (LBP) scheme, alongside our own team’s experience recladding homes across Auckland. Let’s get into it.


      1. What Is Recladding — And When Does It Need Building Consent in NZ?

      renovation west auckland

      Superior Renovations

      Let’s start with the basics, because “recladding” gets thrown around loosely. If you’re not sure exactly what it means in the eyes of the law, you can step into consent territory without realising it.

      So What Exactly Is Recladding?

      In plain terms, recladding means replacing part of the exterior envelope of a building — the outer layer that sits between your home’s structure and the weather. That covers weatherboards, fibre cement panels, plaster systems like stucco, and other cladding materials fixed to the external walls.

      Cladding isn’t just about looks — it’s a weathertightness system. And weathertightness is one of the most tightly regulated parts of the New Zealand Building Code.

      Think of it this way. Behind your cladding sits the wall framing — the structural skeleton of your house. Between the two, there’s meant to be insulation, a building wrap, cavity battens, and flashings around windows and doors. When any part of that external skin is replaced, it directly changes whether water can get in and how well it drains away if it does. That’s exactly why consent is required — because getting it wrong leads to the very problems that turned thousands of Kiwi homes into what we now call “leaky homes.”

      When Does Recladding Trigger Consent Under NZ Law?

      Under the Building Act 2004, all building work in New Zealand requires a building consent unless it’s specifically listed as exempt under Schedule 1 of the Act. Full recladding isn’t on the exempt list. So the default position is simple: if you’re recladding your house — replacing the exterior cladding, even with the same material — you almost certainly need consent.

      Three reasons recladding consistently triggers the requirement:

      1. It Affects Weathertightness

      Weathertightness is one of the most critical functions of a building. The Building Code’s Clause E2 (External Moisture) requires buildings to be designed and built to keep water out — water that would otherwise cause damage or affect the health of the people living there. When you reclad, you’re working directly on the system that delivers that protection. Both Auckland Council and MBIE confirm that building consent applies where work affects the external envelope.

      2. It’s Restricted Building Work (RBW)

      Recladding is classified as Restricted Building Work — which means it must be carried out or supervised by a Licensed Building Practitioner (LBP). That’s not a recommendation; it’s a legal requirement. If your reclad involves work on the external envelope of a home, only an LBP holding the relevant licence class (typically Carpentry, sometimes Roofing) can take responsibility for that work and sign a Record of Work. The rule exists to protect homeowners, and it applies whether or not you go through the full consent process.

      3. It Can Expose Hidden Structural Damage

      Here’s the thing about recladding — you often don’t know what you’re dealing with until the old cladding comes off. Many Auckland homes built between the mid-1990s and mid-2000s carry hidden framing damage from years of water getting in. The consent process builds in inspections at key stages precisely so any framing damage found is repaired properly before new cladding goes on. Skip consent, and there’s no mechanism for those inspections. Problems get covered up instead of fixed.

      “The homes where we find the worst hidden damage are almost always the ones where someone did a patch job without consent — they covered the problem up rather than fixing it. Consent inspections aren’t red tape. They’re the thing that catches rot before you seal a new cladding system over the top of it.”
      — Dorothy Li, Design Manager, Superior Renovations

      What Does a “Full Reclad” Actually Involve?

      To give you a concrete picture: a full reclad of a typical Auckland home means removing all the existing cladding, inspecting and repairing the wall framing underneath, replacing the building wrap and cavity battens, installing new flashings around every opening (windows, doors, roof-to-wall junctions), then installing the new cladding system. It’s a major job — and the consent process is there to make sure every one of those steps is done right.

      The consent documentation for a reclad is deliberately thorough. Auckland Council expects detailed drawings and specifications covering ground clearances, deck and balcony details, the cladding system specification, flashing details at every opening, and weathertightness membrane information.

      💡 Quick tip: If you’re not sure whether your project needs consent, use MBIE’s guidance on applying for building consent or call Auckland Council before you start. Asking upfront costs nothing. Discovering you’ve done unconsented work after the fact costs plenty.

      Quick Reference: Does My Project Need Consent?

      Type of work Consent required? Notes
      Full reclad (all external walls) Yes — always Restricted Building Work; LBP required
      Partial reclad (significant sections) Yes — in most cases Check with council if the extent is unclear
      Like-for-like repair (small area, no durability failure) Possibly exempt See Section 2 — Schedule 1, Exemption 1
      Changing cladding type (e.g. plaster to weatherboard) Yes — always Different material = different weathertightness system
      Repainting existing cladding No Maintenance; not building work
      Replacing cladding that failed within 15 years Yes — always Durability failure triggers the consent requirement
      Replacing 30-year-old weatherboards like-for-like Potentially exempt If durability requirement met; confirm with council

      If you’re unsure where your project sits, phone Auckland Council at the pre-application stage. They’re generally helpful, and it’s far better to ask than to discover you’ve done unconsented work later.

      We cover the full consent process in Section 4. And if you want to weigh up new cladding materials, we’ve written a separate guide to exterior cladding options in NZ.


      2. The Real Exemptions — When Can You Reclad or Repair Without Consent?

      villa renovation

      Here’s where it gets interesting — and where homeowners and even some builders get caught out. While full recladding almost always needs consent, there are legitimate exemptions that let certain repair and replacement work go ahead without one. Knowing exactly where those boundaries sit is the whole game.

      The key piece of legislation is Schedule 1 of the Building Act 2004 — specifically Exemption 1. That’s the exemption covering most repair, maintenance, and like-for-like replacement on existing buildings. But it comes with conditions, and those conditions matter enormously for cladding.

      Schedule 1, Exemption 1: What It Actually Says

      According to MBIE’s guidance on Exemption 1, building work is exempt from consent where it involves:

      1. The repair and maintenance of a building product or assembly, provided a comparable product or assembly is used; or
      2. The replacement of a building product or assembly, provided a comparable one is used, in the same position.

      Sounds straightforward. In practice it’s a judgement call — and MBIE is clear that when in doubt, you should either seek a discretionary exemption from the council or simply apply for consent. The cost of getting it wrong is too high to gamble on.

      The Critical Durability Rule: The 15-Year Test

      This is the single most important rule for cladding exemptions. The Building Code’s Clause B2 (Durability) requires that moderately difficult-to-access elements like exterior wall cladding last a minimum of 15 years from installation. That creates a clear rule for cladding repairs:

      If your cladding has failed within its first 15 years — meaning it hasn’t met its durability requirement — you can’t replace it without consent. That holds even for a like-for-like swap. The logic is sound: if the same cladding, installed the same way, failed once, repeating it won’t fix the problem. Consent makes sure the new installation meets Building Code performance standards.

      On the flip side, BRANZ puts the everyday version of the rule plainly. For repair work such as recladding, where the original cladding has met the durability requirements of the Building Code but simply reached the end of its serviceable life, a consent is not required as long as the same cladding is being reinstalled — but if the recladding is being done because the wall failed on weathertightness or durability, consent is required. You can read the full BRANZ position in their article “To consent or not to consent…”.

      The practical read: if your 1980s weatherboards are simply showing their age and you want to replace them with new timber weatherboards in the same position, that’s potentially exempt. But if your 2002 plaster cladding has been leaking for years, you need consent — regardless of what you plan to replace it with.

      What Does “Comparable” Actually Mean?

      This is where the grey area lives. The legislation says “comparable” — not “identical.” Per MBIE, comparability is about the level of performance of a product or element, not its physical likeness. Here’s how that plays out:

      Replacement scenario Consent needed? Reasoning
      30-year-old timber weatherboards replaced with new timber weatherboards (same position) Likely exempt Comparable material, durability requirement met, same position
      12-year-old plaster cladding replaced (failed with leaks) Consent required Failed within the 15-year durability requirement
      Timber weatherboards replaced with fibre cement weatherboards Consent required Change of material = different weathertightness system
      Replacing asbestos cladding with fibre cement sheet Consent required Asbestos can’t be reused; the replacement system changes (plus strict removal rules)
      Repainting exterior walls Not building work Pure maintenance; exempt
      Patching a small damaged section of weatherboard (like-for-like) Likely exempt Minor repair with comparable material

      The Licensed Building Practitioners’ Board is blunt about it: whether your material is comparable, or whether the element you’re replacing has failed its durability requirement, is often a judgement call. Their advice, and ours, is the same — if you’re in any doubt, either seek a discretionary exemption from the council (an “Exemption 2”) or just apply for consent. Don’t risk it.

      “A lot of clients come to us after someone’s told them their repair work is exempt. Sometimes that’s right. But the question I always come back to is whether the original cladding actually met its 15-year durability requirement. If there’s been any sign of water damage, we get consent every time. It’s not extra bureaucracy — it’s the thing that protects you if it goes wrong.”
      — Alison Yu, Designer, Superior Renovations

      💡 Quick tip: The shortcut version — cladding over 15 years old, same type, same position: possibly exempt. Any sign of weathertightness failure at any age: consent. Changing cladding type: consent. Genuinely unsure: ask Auckland Council before you lift a single board.

      The Asbestos Exception

      One scenario deserves special mention: asbestos-containing cladding. Plenty of Auckland homes built before the mid-1980s — particularly those with flat “super six” fibrous cement sheets — may contain asbestos. You cannot simply replace asbestos cladding under the maintenance exemption. Handling, removal, and disposal are governed by strict rules under WorkSafe New Zealand. Any reclad involving possible asbestos should always involve proper testing, a licensed removalist, and a building consent. Start with WorkSafe’s asbestos guidance.

      Resource Consent: A Different Thing Entirely

      One distinction that trips people up: building consent and resource consent are two separate things. Residential recladding almost never needs resource consent — that’s the domain of land use, zoning, and heritage overlays. It does need building consent (unless a Schedule 1 exemption clearly applies). Different teams within the council, different purposes. Don’t confuse them.


      3. The Real Risks of Recladding Your Auckland Home Without Consent

      Auckland home mid-renovation with cladding removed

      Let’s be honest about why people consider skipping consent. It’s rarely about dodging safety. It’s that consent takes time, costs money, and comes with paperwork. We get it. But recladding without consent when one is required isn’t a minor administrative shortcut — the risks are serious enough to earn their own section.

      We’ve watched this play out for Auckland homeowners. The pattern is consistent: the upfront cost of consent looks tiny in the rear-view mirror once something goes wrong.

      Risk 1: Your Insurance May Not Cover You

      This is the big one most homeowners don’t think about until it’s too late. Most home insurance policies in New Zealand limit or exclude cover for loss or damage arising from unconsented building work. If a future leak leads to a claim — related to the reclad or not — and your insurer discovers significant recladding was done without consent, they may decline the claim or cut the payout. You’re not just gambling with the cost of the reclad. You’re potentially gambling with your ability to claim on your whole policy.

      Risk 2: Significant Financial Penalties

      Under the Building Act 2004, carrying out work that requires consent without one is an offence. On conviction, the maximum fine is $200,000, with a further $20,000 for each day the offence continues. The more common enforcement path is an infringement notice — MBIE’s guidance notes an instant fine of $1,000 for certain breaches — along with orders to remove or redo non-compliant work. And that last part is where the real pain lands: being told to strip off newly installed cladding and do it again, this time with consent. The penalty figures are set out in MBIE’s exempt building work guidance.

      Risk 3: You May Struggle to Sell Your Home

      This one catches people off guard, often years later. When you sell in Auckland, both you and your agent have a legal obligation to disclose what you know about the property, and unconsented recladding is the kind of thing a buyer’s solicitor or building inspector turns up when they review the property file and LIM. Buyers may walk, or they’ll knock the price down to cover retrospective consent or redoing the work.

      Unconsented work shows up on the property’s LIM, and it flows straight into the sale. The retrospective fix — a Certificate of Acceptance — is, in Auckland Council’s own words, worth less than a building consent, because the council can only certify what it can physically inspect after the fact. You can read the council’s position on Certificates of Acceptance for unconsented building work here. A fully documented reclad, done with consent and signed off with a CCC, is simply an easier home to sell than one carrying that kind of question mark.

      Risk 4: Hidden Structural Damage Gets Covered Up

      Auckland’s leaky home crisis — concentrated in homes built roughly 1994 to 2004 — came from a combination of poor design, monolithic cladding applied direct-fix without drainage cavities, and untreated timber framing. The consent inspection process for recladding exists specifically to catch framing damage that isn’t visible until the cladding comes off.

      Reclad without consent and there are no mandatory council inspections at the key stages. A builder — even a well-meaning one — can fit brand new cladding over damaged or rotting framing. From the outside it looks fine. Inside the walls, the damage keeps going, often accelerating as new drainage details interact with the compromised structure underneath. You can pay for a full reclad and end up worse off than you started.

      “The one that stuck with me was a home in Pt Chevalier that had been reclad years earlier, apparently without consent. The framing was already compromised when the new cladding went on. By the time it reached us, the damage had spread through the wall cavity and into the floor framing. A job that should have been a reclad had become a much larger remediation. A framing inspection would have caught it before anything was sealed up.”
      — Cici Zuo, Designer, Superior Renovations

      Risk 5: A Possible Second Wave of Weathertightness Issues

      This doesn’t get enough attention. Industry voices across New Zealand have warned we may be seeing the early signs of a second wave of weathertightness problems — this time in homes built during the construction boom of the 2010s, where pressure to build fast, combined with labour shortages, allowed non-compliant work through more often than people realise.

      There’s a further wrinkle. The Weathertight Homes Tribunal — the specialist body set up for historical leaky-home claims — has a hard cut-off: claims had to be lodged within ten years of the building work. For homes from that later boom, many owners won’t have a Tribunal pathway available at all. Early action, proper consent, and quality workmanship are the real protection now.

      Risk 6: Retrospective Consent Is Painful

      If you’ve done — or inherited — recladding without consent, getting a Certificate of Acceptance (the retrospective route) is possible but genuinely difficult. Auckland Council typically requires invasive investigation to verify unconsented work meets the Building Code — cutting into cladding, exposing framing, and other disruptive, expensive work. There’s no guarantee a CoA will be issued, and a CoA gives less assurance than a CCC because the council can only certify what it can actually see.

      MBIE is clear on the underlying point: exemptions are not retrospective. If unconsented work was carried out that wasn’t exempt at the time, you have to apply to the council for a Certificate of Acceptance — and the bar is high.

      The Real Cost of Skipping Consent

      Risk area Potential consequence
      Insurance Declined claims; reduced payouts, even on unrelated events
      Legal Fines up to $200,000 (plus $20,000/day); orders to redo work
      Property value Reduced sale price; harder sale; buyers walking away
      Structural Hidden damage missed; escalating repair costs
      Retrospective remediation Invasive investigation; Certificate of Acceptance costs and uncertainty

      💡 Quick tip: Weigh the cost of doing it properly against the cost of getting it wrong. A consent fee and design documentation are a fraction of a retrospective Certificate of Acceptance, a declined insurance claim, or stripping off cladding to redo it. Consent isn’t the expensive option — skipping it is.

      We walk through the full consent process for recladding in Section 4. And if you want a ballpark on what your Auckland home might cost to reclad properly, use our recladding cost calculator for a project-specific estimate.


      4. The Auckland Building Consent Process for Recladding — Step by Step

      House renovation and recladding project in Auckland

      So you’ve established your reclad needs consent. (As most do.) The next question is what the process actually looks like — how long, what’s involved, and who you need on your team.

      The honest answer: the Auckland consent process for recladding is more involved than a consent for a deck or a bathroom. Auckland Council takes reclad applications seriously — partly because of the leaky homes legacy, partly because weathertightness failures are among the costliest, most complex issues they deal with. That seriousness means more documentation, more inspections, a bit more patience. It also means that when you’re done, you have a properly documented, fully protected home.

      Here’s the shape of it, start to finish.

      Step 1: Get Your Property File

      Before anything else, you — or your architect or designer — obtain your property file from Auckland Council. This isn’t the same as a LIM. Your property file holds all historical consents, as-built drawings, certificates, and correspondence for your specific property. For a reclad, the designer needs it to understand the original consented construction, any prior weathertightness issues on record, and what the current consented cladding system is.

      If your home was built under the 1991 Building Act and never received a Code Compliance Certificate, the council may also require a durability assessment before processing your reclad application — establishing the baseline condition before remediation begins.

      Step 2: Engage an Architect or Remedial Designer

      For a reclad in Auckland, you’ll need a qualified designer — usually a registered architect or an experienced building designer — to prepare your consent documentation. For most reclads this isn’t optional. The documentation has to show clearly how the new cladding system manages water, what the flashings look like at every junction, how ground clearances are handled, and how the system meets Building Code Clause E2 (External Moisture).

      At Superior Renovations, we work with architects and designers who know recladding specifically — and who know how Auckland Council processes these applications. That familiarity with Auckland’s housing stock is worth a lot. We can bring that team in as part of our Auckland recladding service.

      Step 3: Pre-Application Meeting with Auckland Council (Strongly Recommended)

      Auckland Council strongly recommends a pre-application meeting for reclad consents. It’s your chance to sit down with a council consent officer and talk the project through before you lodge. It’s not a rubber stamp — but it flags potential issues early, checks your documentation is likely to be complete, and heads off costly delays once the application is in.

      There’s usually a fee, and it’s usually worth it. Incomplete applications are a common cause of delay, and the council’s processing clock doesn’t start until they consider the application complete. Getting it right first time saves both.

      Step 4: Prepare and Lodge the Consent Application

      Your architect prepares the full application, which for a reclad typically includes:

      • Detailed architectural drawings (site plan, elevations, sections)
      • Weathertightness details — flashing specifications at windows, doors, roof-to-wall junctions, and decks
      • Cladding system specification, including its CodeMark certification or equivalent
      • Ground clearance details
      • Cavity and drainage system details
      • Schedule of materials
      • Producer Statement (PS1) from the designer confirming design compliance

      The application is lodged with Auckland Council along with the consent fee. Auckland Council building consent fees are deposit-based and scale with the value and complexity of the work, so a reclad consent costs more than a minor renovation consent. This is separate from design fees and the building work itself. The council can give you a fee estimate at the pre-application stage.

      Step 5: Council Processing and Approval

      Once lodged, Auckland Council has 20 working days to process a building consent — though that clock pauses if they issue a Request for Information (RFI) for more documentation. A well-prepared application is the best way to avoid an RFI. When it’s approved, you receive the consent and can start.

      Step 6: Council Inspections During Construction

      This is where the process earns its keep. For a reclad, Auckland Council typically requires inspections at several key stages, including:

      • Pre-line / structural inspection — before new work is concealed
      • Framing inspection — after the existing cladding is off and the framing is exposed, before any repair is covered
      • Building wrap / underlay inspection — before cavity battens and cladding go on
      • Cladding and flashing inspection — before joints and junctions are sealed
      • Final inspection — once all work is complete

      It’s common for a weathertightness or design professional to stay involved, providing Producer Statements at key stages to confirm the work matches the consented design. Your LBP coordinates these inspections and provides a Record of Work on completion.

      Step 7: Code Compliance Certificate (CCC)

      Once the final inspection passes and all documentation is in, Auckland Council issues a Code Compliance Certificate (CCC) — the formal confirmation your reclad was completed to the consented plans and meets the Building Code. The CCC is one of the most valuable documents attached to your property. It’s what future buyers, their lawyers, and their lenders will want to see.

      “The consent process sounds daunting, but with the right team around you it’s genuinely manageable. Our job is to run the whole thing — property file through to final CCC. You shouldn’t be chasing council inspectors or worrying about documentation. That’s ours to carry.”
      — Eunice Qin, Designer, Superior Renovations

      We saw the value of this recently on a full-home project in Greenlane, where a new ensuite required council consent. Managing the consent, the documentation, and the council sign-off in-house meant the owners never had to touch the paperwork — the same approach we bring to a reclad.

      How Long Does the Consent Process Take in Auckland?

      Stage Typical timeframe
      Engage architect / obtain property file 2–4 weeks
      Prepare architectural drawings & documentation 4–8 weeks
      Pre-application meeting with council 1–2 weeks to schedule
      Council processing (statutory 20 working days) 4–10 weeks (longer if an RFI is issued)
      Construction + council inspections 8–20 weeks depending on scope
      Code Compliance Certificate issued 2–4 weeks after final inspection

      For a full reclad of a standard two-storey Auckland home, the whole thing — design, consent, construction — usually runs 6 to 12 months. It’s a significant undertaking, which is exactly why an experienced team that knows this process well makes such a difference.

      For the wider picture on consents across other renovation types, see our guide to building consents for Auckland renovations.


      5. Choosing the Right Cladding Material for Your Auckland Home

      New exterior cladding on a renovated Auckland home

      If you’ve read this far, you know recladding almost always needs consent, you understand the exemptions, you know the risks of skipping it, and you know the Auckland process. That leaves the fun question: what should you reclad with?

      A reclad isn’t just maintenance. It’s a chance to change how your home looks, lift its energy performance, and future-proof it against Auckland’s particular climate. And in a city where property values sit where they do, the right cladding choice can move the needle on what your home is worth.

      Auckland’s climate is demanding on exterior cladding. High humidity, regular rain, strong UV, and — in coastal suburbs like Takapuna, Devonport, or Mission Bay — salt-laden air that accelerates corrosion and wear. A material that performs beautifully inland can struggle on a north-facing coastal wall in Parnell.

      Fibre Cement: The Workhorse of Auckland Reclads

      If one material dominates reclad work in Auckland, it’s fibre cement — for good reason. It resists moisture, rot, and fire, and it handles Auckland’s coastal and humid conditions well.

      The market leader in New Zealand is James Hardie, whose range we regularly specify on Auckland reclads:

      James Hardie Axon Panel cladding on an Auckland home

      Axon™ Panel Grooved 133mm

      Image via jameshardie.co.nz.

      • Axon™ Panel: A vertical shiplap panel in several finishes. A favourite for both full reclads and feature walls, it takes paint in any colour — including the darker tones trending across Auckland right now — and suits contemporary and classic homes alike. See the Axon Panel range.
      • Linea™ Weatherboard: A bevel-back fibre cement weatherboard that mimics the classic timber weatherboard look you see everywhere from Grey Lynn villas to North Shore bungalows. Designed for NZ conditions and carrying a long product warranty.
      • Stria™ Cladding: Deep horizontal grooves, installable horizontally or vertically, with interlocking edges that make for efficient install and a distinctive architectural character.
      • Oblique™ Weatherboard: A two-width bevel weatherboard for horizontal or vertical installation — flexibility for more complex facades.

      What these share is engineered resistance to Auckland’s conditions — fire, moisture, UV, and salt air. For sourcing, our trade partner Mitre 10 stocks a wide range of fibre cement products and, as a trusted Superior Renovations partner, can help get the right products to your project.

      Timber Weatherboard: Classic, and Right for Character Homes

      Timber weatherboard is still one of the most beautiful cladding options for Auckland’s pre-war and character homes. Done right — properly primed, painted, and sealed — quality timber weatherboard lasts decades. The catch is maintenance: timber needs more regular attention than fibre cement, and in a coastal or high-humidity spot the painting and sealing schedule has to be taken seriously.

      For villas in Ponsonby, bungalows in Mt Eden, or heritage homes in Remuera, timber often makes the most architectural sense — and can be the more sympathetic choice for character. Worth noting: some Auckland properties fall under heritage overlays or special character areas that can influence what cladding is acceptable. Always check with Auckland Council if your home carries any heritage designation.

      The E2 Risk Matrix: A Tool Worth Knowing

      Before you commit to a material, the Building Code’s E2/AS1 risk matrix should be run for your specific site. It scores your project on factors like wind zone (medium-high across much of coastal Auckland), exposure, building height, roof-to-wall junctions, and deck attachments. The score guides what cavity and cladding systems suit your home.

      High-exposure coastal locations — Devonport, Takapuna, Mission Bay, anywhere on the Waitematā or Manukau harbours — typically score high, which means a properly drained and vented cavity isn’t optional. In our experience, skipping a proper cavity in these spots is the single biggest hidden risk in any reclad.

      “Run the E2 risk matrix early. Coastal North Shore homes often score high, so we default to fibre cement or metal with a proper drained cavity. It’s not about being over-cautious — it’s about knowing the material will still be performing in 25 years. Auckland weather doesn’t forgive shortcuts.”
      — Dorothy Li, Design Manager, Superior Renovations

      Cladding Material Comparison: Auckland Context

      Material Durability Maintenance Best for Auckland considerations
      Fibre cement (James Hardie) Excellent Low Modern & traditional homes Ideal for coastal/humid areas; fire resistant
      Timber weatherboard Good (with maintenance) Medium–high Character / heritage homes Needs regular painting; avoid in very high-exposure zones
      Metal (aluminium / steel) Excellent Low Contemporary / coastal Specify marine-grade near the coast; check wind zone
      Brick veneer Excellent Very low Prestige / traditional Higher cost; weight considerations; not suited to every structure
      Monolithic plaster Fair (with cavity system) Medium Contemporary look Needs a well-drained cavity; carries resale stigma from the leaky-home era

      💡 Quick tip: In Auckland — especially coastal suburbs — fibre cement over a properly drained cavity is the combination that delivers the best long-term performance. The upfront premium over cheaper options is almost always recovered in lower maintenance and better durability.

      Don’t Forget the Coating — Finishing Your Reclad Properly

      One detail that’s easy to overlook: the finishing coat matters enormously for long-term performance. We work with our supplier partner Dulux to specify the right exterior coatings for each project. The coating system has to be compatible with the cladding material and rated for the exposure level at your specific site. A premium exterior system, properly applied to fibre cement, meaningfully extends the life of the cladding — the Dulux Weathershield range, for example, gives colour-fast, weather-resistant protection backed by a name homeowners recognise.

      Finished exterior corner detail on a completed Auckland reclad


      What to Know Before You Start Your Auckland Recladding Project

      The question that kicked this off — “Can I reclad my house without building consent?” — deserves a clear answer.

      In almost every real-world scenario, no. A full or significant partial reclad of a home in Auckland needs building consent. There are legitimate Schedule 1 exemptions — mainly for like-for-like maintenance and replacement of cladding that has met its 15-year durability requirement — but they’re narrow, they take careful interpretation, and applied wrongly they expose you to real financial and legal risk.

      The consent process costs time and money, and it’s genuinely protective. It catches hidden structural damage, makes sure your new cladding is designed for your specific site, and leaves you with a Code Compliance Certificate that protects your home’s value and insurability for decades.

      Five things every Auckland homeowner should take from this guide:

      1. Check before you start. Use MBIE’s guidance or call Auckland Council. Five minutes asking the question can save you years of grief.
      2. The 15-year durability rule is the key threshold. Cladding that failed within 15 years needs consent to replace, full stop. Not sure when yours went on or whether it met its durability requirement? Get a professional assessment.
      3. Work with Licensed Building Practitioners. Recladding is Restricted Building Work. Only LBPs can legally do it or take responsibility for it. Ask to see the licence and the relevant class.
      4. Choose your material for your location. In Auckland, fibre cement over a properly drained cavity is the standard call for most homes, especially coastal ones. The E2 risk matrix is your friend.
      5. Get everything documented. From the application through to the final CCC, keep it all. Future buyers, their lawyers, and their bank will thank you.

      At Superior Renovations, we’ve managed reclad projects across Auckland — from character villas in Remuera and Ponsonby to modern homes on the North Shore. We run the whole process — design, consent, construction, council inspections, final sign-off — under one roof, with a dedicated project manager keeping you in the loop. If you’re thinking about recladding, the first step is a conversation.

      Book your free in-home consultation with Superior Renovations
      Get a project-specific estimate from our recladding cost calculator
      Request a free feasibility report for your project


      Do I always need building consent to reclad my house in New Zealand?

      In almost every case, yes. Full or partial recladding of a home requires building consent because it affects weathertightness and often structural integrity. The only exception is where the work clearly falls under Schedule 1, Exemption 1 of the Building Act 2004 — like-for-like repairs and replacement using comparable materials, where the original cladding has met its 15-year durability requirement. If in doubt, contact Auckland Council or check MBIE's guidance before you start.

      What happens if I reclad my Auckland home without consent?

      The consequences are serious. On conviction, fines under the Building Act 2004 reach $200,000 plus $20,000 for each day the offence continues. You may also struggle to sell — buyers' solicitors check the property file and LIM — and face insurance complications. Fixing it usually means applying for a Certificate of Acceptance, which often requires invasive investigation of the concealed work and gives less assurance than a CCC. It's not worth the risk.

      Can I replace a few damaged weatherboards without consent?

      Possibly. Replacing a small number of damaged weatherboards with comparable material in the same position may be exempt under Schedule 1, Exemption 1 — provided the original cladding met its 15-year durability requirement and the damage isn't the result of a weathertightness failure. If water ingress caused the damage, or if significant sections need replacing, get advice from Auckland Council or a Licensed Building Practitioner before you start.

      How much does a full reclad cost in Auckland?

      It depends heavily on scope. A light-scope reclad — a like-for-like swap on a home with sound framing — runs roughly $40,000–$90,000 for a 150–200m² house. A full-scope reclad with timber remediation, new joinery, insulation, and interior reinstatement runs about $1,750–$2,500 per square metre, typically $250,000–$400,000+ for a 180m² monolithic home with weathertightness issues. Building consent fees and design documentation sit on top and are separate from the build. Our recladding cost calculator gives you a project-specific estimate.

      What is Restricted Building Work, and does recladding qualify?

      Restricted Building Work (RBW) is work that must be carried out or supervised by a Licensed Building Practitioner (LBP). Recladding qualifies, because it involves work on the external envelope of a home. That means your builder must hold an appropriate LBP licence class and provide a Record of Work on completion. Using an unlicensed builder for RBW is against the law, so always ask to see the licence before work starts.

      Does recladding require resource consent as well as building consent?

      Usually not. Residential recladding does not require resource consent — that relates to land use, zoning, and matters under the Resource Management Act, not building work. However, if your property sits in a heritage overlay or special character area, check with Auckland Council whether your chosen cladding material is acceptable before proceeding. Building consent is the one that almost always applies to a reclad.

      What cladding material is best for an Auckland reclad?

      Fibre cement — products like James Hardie's Axon Panel, Linea Weatherboard, and Stria Cladding — is widely considered the best option for most Auckland reclads. It's moisture-resistant, fire-resistant, low-maintenance, and performs well in Auckland's coastal, humid conditions. Timber weatherboard remains excellent for character homes, especially in heritage areas, as long as the maintenance schedule is kept up. The right choice always depends on your site, exposure level, and design goals, which is why we run the E2 risk matrix on every reclad.

      How long does the Auckland recladding consent process take?

      From first engaging an architect through to receiving a Code Compliance Certificate, the full process typically takes 6 to 12 months for a standard Auckland home. Auckland Council's statutory processing time is 20 working days, but that's just one part of a longer journey covering design, documentation, construction, and inspections. Working with a team that knows the Auckland consent process helps keep unnecessary delays to a minimum.

      Is a Certificate of Acceptance the same as a Code Compliance Certificate?

      No. A Code Compliance Certificate (CCC) is issued after consented work passes its final inspection and confirms the work met the Building Code. A Certificate of Acceptance (CoA) is the retrospective option for work already done without consent. Because the council can only certify what it can physically inspect — not concealed framing or membranes — a CoA gives more limited assurance than a CCC, and obtaining one can be difficult and invasive.


      Further Resources for your house renovation

      1. Featured projects and Client stories to see specifications on some of the projects.
      2. Real client stories from Auckland

      Need more information?

      Take advantage of our FREE Complete Home Renovation Guide (48 pages), whether you’re already renovating or in the process of deciding to renovate, it’s not an easy process, this guide which includes a free 100+ point check list – will help you avoid costly mistakes.

      Download Free Renovation Guide (PDF)


      18 months 0 percent interest long term finance badge

      Have you been putting off getting renovations done?

      We have partnered with Q Mastercard ® to provide you an 18 Month Interest-Free Payment Option, you can enjoy your new home now and stress less.

      Learn More about Interest-Free Payment Options*

      *Lending criteria, fees, terms and conditions apply. Mastercard is a registered trademark and the circles design is a trademark of Mastercard International Incorporated.


      Still have questions unanswered?

      Book a no-obligation consultation with the team at Superior Renovations, we’d love to meet you to discuss your renovation ideas!

        Services

        Home RenovationKitchen RenovationBathroom RenovationOutdoor RenovationHouse ExtensionCommercialDesign ServicesOther

        By submitting this form, you agree to receive communications from us via email or text regarding our services, you can unsubscribe at any time.

        This site is protected by reCAPTCHA and the Google

        Privacy Policy and Terms of Service apply.


        References

        1. Building Performance (MBIE) — Building work that doesn’t need a building consent (Schedule 1 exemptions, penalties)
        2. Building Performance (MBIE) — Exemption 1: general repair, maintenance and replacement
        3. BRANZ — To consent or not to consent (recladding and durability)
        4. Auckland Council — Certificate of Acceptance for unconsented building work
        5. Licensed Building Practitioners — Exempt building work (comparable materials, durability judgement)
        6. WorkSafe New Zealand — Asbestos guidance
        7. James Hardie NZ — Cladding product range
        IMG 0712 - Superior Renovations
        Recladding

        Cost Of Recladding A House in Auckland (2026) – Recladding Cost Guide

        Recladding Cost Auckland 2026: Complete Pricing & Process Guide

        Quick answer: A standard Auckland two-storey reclad in 2026 costs $330,000–$380,000 (excl. GST), with single-storey homes from $135,000 and complex leaky homes reaching $500,000+. The biggest variable is framing condition once the cladding comes off.

        This guide has been updated in June 2026 to reflect current Auckland market recladding costs, NZ Building Code requirements, source references, and Superior Renovations’ completed-project data across 1,000+ renovation jobs.

        If you’re staring at cracked plaster on a 1990s Auckland home, or you’ve found mould creeping along a window frame and you’re starting to suspect the worst — this guide is what you need to read before you talk to a builder. Auckland recladding in 2026 typically costs between $135,000 and $500,000+, with a standard two-storey reclad landing in the $330,000–$380,000 range (excl. GST). Where your project sits inside that range depends on three things: the size and complexity of your home, the cladding system you replace with, and how much of the timber framing behind the cladding needs treating or replacing once it’s exposed.

        That last factor is why no reputable builder will give you a guaranteed reclad price sight-unseen. Until the existing cladding comes off, the condition of the framing underneath is a known unknown. Honest pricing builds an allowance for it. Cheap pricing pretends it isn’t there.

        Recladding Cost Calculator NZ — Your Estimate in 60 Seconds

        Quick answer: Get a personalised recladding cost estimate emailed straight to your inbox in under 60 seconds. Use the calculator below — no phone calls, no sales pitches, no waiting on a builder’s diary. Tell us your home’s size, cladding type, and scope, and we’ll send back a project-specific number based on real 2026 Auckland pricing.

        ↓ Jump Straight to the Calculator


        How much does recladding actually cost in Auckland in 2026?

        For a standard Auckland reclad with no surprises, the realistic 2026 ranges sit like this (all figures excl. GST):

        Project type Indicative total range
        150m² single-level plaster home, good eaves, low-risk framing from $135,000
        Split-level plaster top / brick base, straightforward scope from $160,000
        Standard 200m² 3–4 bedroom standalone plaster home, simple scope from $240,000
        Standard Auckland two-storey reclad — typical project $330,000–$380,000
        Two-storey with roof works, eaves extensions, or partial redesign $275,000–$400,000+
        Heritage character home, extensive framing replacement, full redesign for compliance $350,000–$500,000+

        These figures are consistent with what other Auckland reclad specialists are quoting in 2026, and match what we see in our own completed jobs across 1,000+ Auckland renovation projects. Auckland sits roughly 10–20% above the national NZ average for any building work because of higher trade rates, tighter consent processes, and supply chain costs. According to MBIE Building Performance guidance, there is no standardised national pricing for recladding — costs vary significantly by region and project specifics.

        A standard $330k–$380k two-storey reclad typically breaks down like this:

        • Remedial design (if needed): $8,000–$13,000
        • Auckland Council building consent: $5,000–$7,000
        • Independent building consultants and inspections: $2,000–$3,000
        • Building work itself (scaffolding, demolition, framing repair, new cladding system, painting, joinery): $220,000–$400,000+

        💡 Quick tip: Per-square-metre pricing tells you very little for a reclad. Most of the cost isn’t the cladding material — it’s access, scaffolding, framing remediation, consent, and design. A home with awkward access on a steep section can cost more to reclad than a larger home on a flat, easy site.


        What drives the price up — and what brings it down?

        Five factors do most of the work in either direction:

        1. The cladding system you choose

        Fibre cement weatherboard (James Hardie Linea or similar) is the most common reclad finish on Auckland homes — durable in our salt air, low maintenance, sensible price point. Cedar weatherboards run higher and need re-staining every 8–10 years but suit villa and character home aesthetics. Metal longrun and brick veneer sit higher again. According to MBIE’s Building Code clause E2/AS1, direct-fix plaster (the old monolithic system) is no longer recommended — drained, ventilated cavities behind cladding are now the standard for weathertightness compliance.

        2. House size and storeys

        A two-storey home doesn’t just have more wall area to reclad — it needs scaffolding ($10,000–$20,000 for a typical Auckland reclad), more complex access for trades, and longer time on site. A single-storey home of the same floor area can come in $40,000–$70,000 cheaper just on the structural side.

        3. Framing condition

        This is the variable nobody can quote accurately until the cladding comes off. On 1994–2004 plaster homes we budget a 15–25% framing replacement allowance in the fixed-price contract because it’s rarely zero on these builds. On pre-1990 weatherboard homes the allowance drops to 5–15%, usually concentrated at bottom plates and corner studs. If the framing is worse than the allowance, that triggers a variation; if it’s better, you bank the saving.

        4. Window and joinery replacement

        When you take cladding off and put new cladding on, the natural moment to replace single-glazed aluminium windows is now — the flashing, sealing, and detailing all integrate cleanly. Replacing windows during a reclad typically runs $800–$1,500 per window. Doing it later as a separate project costs $1,200–$2,000 per window because you’re paying for re-flashing the cladding twice.

        5. Asbestos and pre-2000 hazards

        According to WorkSafe’s asbestos guidance for homeowners, any home built before 1 January 2000 may contain asbestos materials — in linings, claddings, or soffits. Testing is cheap ($300–$500); removal under WorkSafe rules can add $5,000–$30,000 to a project depending on quantity and location. Budget a contingency.

        Where you can save money: a partial reclad on the worst-affected elevation only (suitable for isolated damage on newer homes), or bundling the reclad with insulation, joinery, or roof works that share scaffolding and access costs.

        “The cost blowouts we see on reclads almost always come from the framing. You can design and scope a budget, but until you see what’s behind the plaster, you’re estimating. We build a 15–25% allowance into two-storey projects for this reason. If the framing is better than we budgeted, the client banks the saving. If it’s worse, we have a documented variation conversation with full transparency before we proceed.”
        — Cici Zou, Head of Sales & Certified Designer, Superior Renovations


        Which cladding system gives the best long-term value for Auckland’s climate?

        Fibre cement weatherboard

        James Hardie Linea, Stria, ColorSteel composites — tough against Auckland’s salt-laden air and humidity, sensible upkeep, around $250–$280/m² for the cladding material itself. The default choice for most Auckland reclads.

        Cedar weatherboards

        The look you want on a Mt Eden bungalow or Ponsonby villa. Needs re-staining every 8–10 years but ages with character. Higher per-metre than fibre cement.

        Metal longrun and corrugated profiles

        Good for modern aesthetics, coastal homes, and any reclad where speed matters. Rust-resistant grades essential within 500m of the coast.

        Brick veneer

        The long-term play. Thermal mass helps with energy bills, lifespan is 60–80 years, repainting every 5–10 years rather than full repaint cycles. Higher upfront cost.

        What we won’t recommend anymore is direct-fix monolithic plaster. Even if the cladding system itself can be made to perform, the resale stigma is real. A buyer’s mortgage broker, lawyer, and building inspector will all flag it. Switching to a cavity-backed weatherboard or fibre cement system in a reclad changes how the property is perceived in the market.


        Curious about the cost of recladding your home?

        Try our cost calculator tool for a quick estimate based on your home’s size, style, and known issues.

        Open the recladding cost calculator


        What is recladding?

        Recladding means replacing the exterior cladding on your home — the weatherboards, plaster, brick, or metal that sits on the outside of your framing — with a new system. Most people don’t reclad for cosmetic reasons. They reclad because the existing cladding is failing, water is getting in, or the property has been flagged as a leaky building risk that needs sorting before resale, insurance renewal, or further damage. For a fixed scope and timeline on your project, see how our recladding service works from weathertightness assessment to completion.

        The reclad isn’t just a new exterior — it’s a chance to fix every weathertightness weakness in the building envelope at once. New cavities for moisture to escape. New flashings at windows and roof junctions. New cladding to current Building Code standards. Often new insulation in the wall framing while the cavity is open.

        It’s a big job. Done properly, it’s the kind of job you only do once per home.


        What is a leaky home, and how do you know if you have one?

        A leaky home isn’t a home that leaks every time it rains. It’s a home where water has been getting trapped inside the wall structure — usually behind a direct-fix monolithic plaster cladding system with no cavity for moisture to escape — and slowly rotting the timber framing from the inside out.

        The leaky building crisis came out of a specific window in NZ construction history. From the early 1990s through to about 2004, a combination of changes hit at the same time: untreated kiln-dried timber became standard, monolithic plaster cladding systems were applied direct-fix to framing without drained cavities, complex roof and wall junction designs created entry points for water, and the building consent process didn’t catch any of it. The result was tens of thousands of homes built to a spec that couldn’t survive New Zealand’s climate. The scale was enormous — MBIE puts the consensus estimate at around 42,000 affected buildings nationally, with repair and replacement costs estimated at $11.3 billion. Three quarters of the dwellings under claim were in greater Auckland.

        Where the 1998–2004 cohort sits today is the interesting question. Many homes built then are now showing symptoms for the first time — moisture damage takes 15–25 years to surface visibly. Owners who assumed “we’d know by now” are finding out they were wrong.

        A rough timeline of risk by build year for Auckland homes:

        • 1990–1997: Emerging risk. Some monolithic direct-fix issues, lower incidence.
        • 1998–2004: Peak risk. Highest incidence of weathertightness failure. This cohort dominates current reclad demand.
        • 2005–2009: Declining risk. Awareness improved, but legacy specifications persisted on many builds.
        • 2010 onwards: Low risk. Mandatory drained cavities under E2/AS1 changed the construction standard.

        Common signs to watch for

        Most leaky home symptoms aren’t dramatic. They creep in. By the time they’re obvious from outside, the damage inside is usually significant. Per MBIE’s Signs of a leaky home guidance:

        • Musty smells, especially in rooms with exterior walls
        • Bulging, soft, or sagging wall and ceiling linings
        • Uneven or springy floor sections
        • Stained or rotting skirting boards and carpet edges
        • Black mould spots near windows or wall junctions
        • Persistent allergy symptoms or unexplained respiratory issues for residents
        • Visible cracking on monolithic plaster, especially around windows and at storey transitions
        • Paint peeling or blistering on exterior walls in patches

        If three or more of these are present in a home built 1990–2009, get an independent weathertightness inspection before doing anything else. A qualified building surveyor uses moisture probes through small holes drilled into wall linings to give you a picture of what’s happening behind the cladding without pulling it off. The cost is usually $1,000–$2,500 for a thorough Auckland-wide inspection.

        “The 1998–2004 plaster homes are still the bulk of the reclads we quote. Most owners think they’re past the danger zone because nothing has gone wrong yet. But the rot timeline on these homes is 15 to 25 years — which means now. We’ve had owners come to us with what looked like a $50k targeted repair turn into a $300k+ full reclad once the cladding came off and we could see what was actually going on behind it.”
        — Kevin Yang, Managing Director, Superior Renovations


        Monolithic plaster homes — the recladding question

        If you own a monolithic plaster home built between 1994 and 2004, you have one of three situations:

        1. The cladding is failing and the framing is damaged. Recladding isn’t optional — it’s the cost of holding onto a habitable, insurable, sellable home. Budget the upper end of the standard Auckland reclad range ($330,000–$500,000+) and plan for framing replacement.

        2. The cladding is showing early symptoms but framing damage is limited. Reclad now and you’ll spend in the $240,000–$330,000 range, depending on the property. Wait five years and you’re likely looking at a higher figure as damage compounds.

        3. The cladding still looks fine and there are no symptoms. You have a strategic decision rather than a forced one. Some owners reclad pre-emptively to remove the leaky home stigma before they sell. Others wait. Either way, the cavity-backed weatherboard or fibre cement system that replaces the direct-fix plaster is what most Auckland buyers now look for — a 2026 reclad permanently removes that asterisk from the property file.

        “Recladding is one of the few renovation decisions where waiting genuinely costs you money. Every year the framing damage progresses, the price goes up. But it’s also the renovation where the property value lift is most predictable — taking a stigmatised plaster home off the leaky list and putting cavity-backed weatherboard on it changes how the home is valued, insured, and sold. We have clients who reclad three years before they list, and the difference at sale more than covers the spend.”
        — Alison Yu, Designer, Superior Renovations

        For projects where the reclad involves significant redesign — second-storey additions, heritage matching on character homes, or restructured window arrangements — we work alongside our sister brand Sonder Architecture for the consent-stage design work (their guide to E2 External Moisture is worth a read if you want the weathertightness rules unpacked properly). Architectural design and reclad delivery under one project umbrella shortens the consent timeline and removes the homeowner’s coordination burden.


        Should you buy a monolithic cladding house in Auckland?

        The short answer: only if the price reflects the reclad you’ll likely need to do within the next 10 years, and only after a full weathertightness inspection has told you what you’re walking into.

        Monolithic plaster homes can be excellent buys when the maths works. They’re often priced below comparable weatherboard or brick homes because the market discounts them — sometimes by $100,000 or more in equivalent Auckland suburbs. If that discount is bigger than your likely reclad cost, you’re getting a deal. If it’s smaller, you’re paying full price for a problem.

        What to do before signing anything:

        • Commission a moisture survey from an independent weathertightness specialist — not the building inspector your real estate agent suggests. A specialist uses moisture probes and thermal imaging. Cost $1,500–$2,500. This is the most important $2,000 you’ll spend in the purchase process.
        • Request the full property file from Auckland Councilanyone can order a property file online, and the file shows all building consent history, any remedial work, and any weathertightness claims. Per MBIE’s Weathertight Services, the scheme closed to new claims on 31 December 2021, so any WHRS history on a property is a documented record of past weathertightness issues.
        • Check insurability before you offer — call IAG, Tower, or your insurer of choice and confirm they will insure the property and at what premium. Some insurers decline monolithic plaster homes or apply moisture-related exclusions.
        • Get a contingent reclad quote — a properly scoped reclad estimate from a builder who can see the home in person. We do these as part of our free in-home consultation.
        • Talk to a lawyer with weathertightness experience — particularly important if the property has a history with the Weathertight Homes Resolution Service or has been the subject of past remediation.

        The risk profile is manageable when you go in with full information. It becomes a financial disaster when you don’t.


        The Superior Renovations reclad process

        Every reclad we do follows the same four-stage process. The detail varies by project; the structure doesn’t.

        Stage 1 — Protect the home

        Before any cladding comes off, the home is wrapped in temporary weatherproof membrane. Internal floor and joinery protection is laid down. Power, water, and access logistics are confirmed. If you’re staying in the home, we agree which zones are off-limits and when.

        Stage 2 — Remove existing cladding

        The existing cladding is removed elevation by elevation, in sequence, and disposed of off-site under WorkSafe rules. If asbestos is present in the existing cladding, removal is handled by a licensed asbestos remediation contractor before main works continue.

        Stage 3 — Inspect timber framing

        Once the cladding is off, an independent building consultant or LBP inspects the exposed framing. The inspection documents the condition of every framing member, identifies decayed timber, and produces a scope of remedial framing work. This stage is where the project’s final cost is locked — every reclad we do builds the framing remediation allowance into the fixed-price contract, so the inspection either confirms the allowance is sufficient or triggers a documented variation if it isn’t.

        Stage 4 — Repair, reclad, and reinstate

        Damaged framing is replaced with H1.2 treated timber to current Building Code standard. New building wrap, cavity battens, flashings, and cladding are installed. Windows and joinery are reflashed or replaced. Soffits, downpipes, gutters, and any decking that interfaces with the cladding line are reinstated. Painting and final finishing complete the build phase. A final inspection from Auckland Council and the issue of the Code Compliance Certificate signs off the project.

        “The framing inspection is the moment of truth on any reclad. Most projects fall within the allowance we’ve budgeted. Some come in under and we credit the saving back. A small number come in over and we work through a variation with the client before we proceed — they see exactly what we found, what it costs to fix, and they sign off before we touch a thing. The clients who get burned on reclads are the ones whose builder didn’t budget a framing allowance at all and then hit them with a surprise variation invoice once the cladding was off.”
        — Jacob Sun, Project Manager, Superior Renovations


        Auckland Council consent realities in 2026

        Recladding requires a building consent from Auckland Council in nearly all cases. The exceptions are vanishingly rare — most are limited to direct like-for-like replacement of small areas of cladding under repair classification, and even then most builders pull a consent to avoid future issues. Recladding is also classified as Restricted Building Work under the Building Act — work on external moisture management systems, including wall cladding, must be carried out or supervised by a Licensed Building Practitioner.

        In 2026 the realistic Auckland Council reclad consent timeline looks like this:

        • Initial application processing: 2–4 weeks for a complete, well-documented application
        • Requests for further information: usually one round, 1–2 weeks to respond
        • Decision: typically 4–8 weeks from initial application to issued consent
        • Inspections during build: framing, pre-cladding, mid-cladding, final — each booked 1–2 weeks in advance
        • Code Compliance Certificate after final inspection: 2–4 weeks

        The most common reason consents get held up isn’t the council — it’s incomplete documentation at submission. A reclad consent application that goes in with a full producer statement set, complete cladding specifications, weathertightness report, and framing plan tends to come back fast. Applications missing any of these get RFI’d (request for information) and the clock effectively resets.

        Consent costs sit in the $5,000–$7,000 range for a standard Auckland reclad. Add architectural drawings ($8,000–$13,000), building consultants ($2,000–$3,000), and any resource consent issues if the property is in a heritage overlay zone (extra $3,000–$15,000 depending on scope).

        💡 Quick tip — Bundle consent applications where you can. If you’re considering a reclad and an extension or a second-storey addition, consenting them together usually saves $2,000–$5,000 versus applying separately. The architectural and engineering work overlaps and the council application fee structure rewards combined scope.


        Maintaining a reclad home — keeping it trouble-free for 25 years

        A properly executed reclad with current Building Code standards behind it should give you a 25–40 year lifespan with low maintenance. The maintenance schedule isn’t onerous:

        • Year 1: Full house wash. Visual check on all flashings, seals, and junctions. Report any settling issues during the defect liability period.
        • Years 2–5: Annual cavity vent inspection. Touch-up paint on any high-exposure areas. Re-stain timber elements (cedar, decks) per material schedule.
        • Years 6–10: Repaint of painted weatherboards (the timing depends on exposure — north and west elevations weather faster than south). Re-seal any silicone joints around windows and penetrations.
        • Years 10–15: Full external inspection. Address any flashing failures. Repaint timeline depends on product and exposure.
        • Ongoing: After major storms, check flashings, gutters, and any decking interfaces for displaced water or debris.

        Caring for the home properly after a reclad doubles the realistic lifespan of the work. Caring for it badly halves it.

        For the long-term performance of any reclad project, the materials matter less than the detailing — the small junctions where cladding meets window heads, roof lines, and ground-level flashings. Those are the failure points historic Auckland weathertightness problems have always returned to. A reclad done well in 2026 is one where every junction has been properly detailed, sealed, and back-checked.


        Do you need to replace your windows during a reclad?

        If your home was built between 1994 and 2004 and still has its original aluminium joinery, the answer is almost always yes. Two reasons:

        1. Detailing. Current weathertight detailing at window head, jamb, and sill flashings doesn’t retrofit cleanly to single-glazed joinery designed for direct-fix cladding. To get a properly weathertight window detail on a new reclad, the windows need to be specified for the new cladding system.

        2. Economics. Cost to replace windows during a reclad: $800–$1,500 per window. Cost to replace later as a separate project: $1,200–$2,000 per window. The flashings have to be redone either way; doing them once is cheaper than doing them twice.

        Auckland Council building consent for a reclad now routinely flags single-glazed joinery as a weathertightness concern. Most reclad consents we lodge include new joinery as part of the scope.

        More on double-glazed joinery costs and options here: double glazing cost calculator.


        Combining a reclad with other work

        The best reclads we do are the ones combined with other planned work. Scaffolding is already up. Trades are already on site. Consent applications are already in front of council. Adding scope is far cheaper at this stage than coming back to do it as a separate project.

        Common combinations:

        • Reclad + insulation upgrade — when the cladding is off, the wall cavity is accessible. Adding R-value beyond current minimums (R2.6 or higher walls) is much cheaper now than retrofitting later. Note that EECA’s Warmer Kiwi Homes grants cover ceiling and underfloor insulation only, for eligible owner-occupiers — wall insulation isn’t grant-funded, which is exactly why the reclad is the cheapest moment you’ll ever have to do it.
        • Reclad + second-storey addition — both involve scaffolding, structural engineering, and the same consent process. Combined cost is typically 15–25% lower than sequential projects.
        • Reclad + interior renovation — particularly relevant when leak damage has extended into the interior, requiring kitchen, bathroom, or living-area replastering and refinishing. See our house renovation services.
        • Reclad + extension — when the recladding work crosses into elevations that are also being extended. Our house extensions service covers this combined scope.
        • Reclad + design consultation — when the reclad changes the home’s visible character significantly (e.g. monolithic plaster to weatherboard), our Design Studio handles material selection, colour palette, and finish coordination.

        Why work with Superior Renovations on a reclad

        Recladding sits at the intersection of structural work, weathertightness expertise, design, and consent management. It isn’t a builder’s job alone — it’s a coordinated project involving designers, engineers, building consultants, asbestos specialists where applicable, council inspectors, and trade subcontractors across framing, cladding, joinery, painting, and roofing.

        Three things matter when choosing who to do your reclad:

        Track record on reclads specifically. Building a new home and recladding a 1998 plaster home are different jobs. We’ve completed 1,000+ Auckland renovations across the Superior Renovations group, with recladding as a specific service stream over the past decade. Every project goes through our Design-to-Build Action Plan process — scope, specifications, framing allowance, variation procedure, fixed-price contract, all documented before site work starts.

        Full in-house consent and design capability. Our in-house design team at the Wairau Valley Design Studio handles the architectural and material design work, and consent applications are managed internally rather than handed off to a third party for the homeowner to chase. For projects requiring architectural redesign, we work with our sister brand Sonder Architecture on the same project umbrella.

        10-year Master Build Guarantee and documented warranties. The reclad work itself, the framing remediation, and the cladding system supplier warranties are all documented. You receive a complete handover pack at project completion that you can hand to any future buyer or insurer.

        If you’ve read this far and you’re getting closer to a decision, the next step is a free in-home consultation. We come out, look at the home, talk through scope, and give you a realistic picture of what your project will involve and what it will cost.

        Book your free in-home consultation with Superior Renovations
        See how we manage a reclad from weathertightness assessment to Code Compliance Certificate
        Request a free feasibility report for your project


        Further Resources for your recladding project

        1. Featured recladding projects and case studies from across Auckland
        2. Real client stories from recently completed reclads

        Need more information?

        Take advantage of our FREE Complete Home Renovation Guide (48 pages), which includes practical steps for planning and budgeting renovation work, including guidance on recladding and weathertightness.

        Download Free Renovation Guide (PDF)

        18 months 0 percent interest long term finance badge

        Have you been putting off getting renovations done?

        We have partnered with Q Mastercard ® to provide you an 18 Month Interest-Free Payment Option, you can enjoy your new home now and stress less.

        Learn More about Interest-Free Payment Options*

        *Lending criteria, fees, terms and conditions apply. Mastercard is a registered trademark and the circles design is a trademark of Mastercard International Incorporated.


        Still have questions unanswered?

        Book a no-obligation consultation with the team at Superior Renovations, we’d love to meet you to discuss your recladding project!

          Services

          Home RenovationKitchen RenovationBathroom RenovationOutdoor RenovationHouse ExtensionCommercialDesign ServicesOther

          By submitting this form, you agree to receive communications from us via email or text regarding our services, you can unsubscribe at any time.

          This site is protected by reCAPTCHA and the Google

          Privacy Policy and Terms of Service apply.


          Frequently Asked Questions

          How much does a full reclad cost in Auckland in 2026?

          A standard Auckland two-storey reclad in 2026 costs $330,000–$380,000 excl. GST. Single-storey homes on simple sites start from $135,000. Heritage character homes with extensive framing replacement can reach $500,000+. The biggest variable is the condition of the framing behind the existing cladding, which can only be confirmed once the cladding is removed.

          How long does a full reclad take in Auckland?

          A standard Auckland two-storey reclad takes 12–18 weeks from site setup to Code Compliance Certificate. The high-disruption phase — cladding removal and framing exposure — lasts 6–10 weeks, after which the home is weathertight again. Most clients move out for the rough phase and return once the new cladding is on.

          Do I need building consent to reclad my house?

          Yes, nearly always. Auckland Council requires building consent for any recladding work that changes the cladding system or affects weathertightness, and recladding is Restricted Building Work that must be carried out or supervised by a Licensed Building Practitioner. Consent costs typically $5,000–$7,000 and processing takes 4–8 weeks from a complete application to issued consent. Reclads in heritage zones may also require resource consent.

          What is the difference between a partial and full reclad?

          A partial reclad replaces cladding on one or two affected elevations only — suitable for isolated damage on newer homes. A full reclad replaces all exterior cladding around the home. Partial reclads save 40–60% upfront but don't suit 1994–2004 plaster homes, where leaks are rarely confined to one elevation.

          Should I move out during a reclad?

          Most clients move out for the 6–10 week rough phase when cladding is off and framing is exposed. The home is wrapped in temporary weatherproof membrane but it's not comfortable to live in. Some clients with single-storey homes and limited damage stay in the home for the full duration with agreed off-limits zones.

          Will I need to replace my windows during a reclad?

          For 1994–2004 plaster homes with original single-glazed aluminium joinery, almost always yes. Auckland Council building consent for a reclad routinely flags single-glazed joinery as a weathertightness concern. Replacing during the reclad costs $800–$1,500 per window versus $1,200–$2,000 as a separate later project.

          What's the best cladding material for Auckland's climate?

          Fibre cement weatherboard (such as James Hardie Linea) is the most common choice — durable against salt air and humidity, sensible upkeep, suitable for most home styles. Cedar weatherboards suit villa and character homes, metal longrun suits modern and coastal homes, brick veneer offers long-term thermal mass. Direct-fix monolithic plaster is no longer recommended.

          Will recladding add value to my Auckland home?

          For ex-plaster homes from the leaky era, yes — often significantly. Taking a 1994–2004 monolithic plaster home and recladding to a cavity-backed weatherboard or fibre cement system removes the resale stigma, restores insurability, and changes how the property is valued. The value lift commonly exceeds the reclad cost on these homes.

          What if I find worse framing damage than budgeted during the reclad?

          This is a known risk on reclads, particularly on 1994–2004 homes. We budget a 15–25% framing replacement allowance in our fixed-price contracts. If damage exceeds the allowance, we document the additional scope, provide a written variation quote, and proceed only with your written sign-off. You never get a surprise bill.


          References

          1. MBIE Building Performance — An introduction to Acceptable Solution E2/AS1
          2. MBIE Building Performance — Signs of a leaky home
          3. MBIE Building Performance — Weathertight Services
          4. MBIE — Weathertight homes: a bold response to regulatory failure
          5. LBP / MBIE — Restricted Building Work
          6. WorkSafe New Zealand — Asbestos in the home
          7. Auckland Council — How to order a property file
          8. EECA — Warmer Kiwi Homes: insulation and heater grants
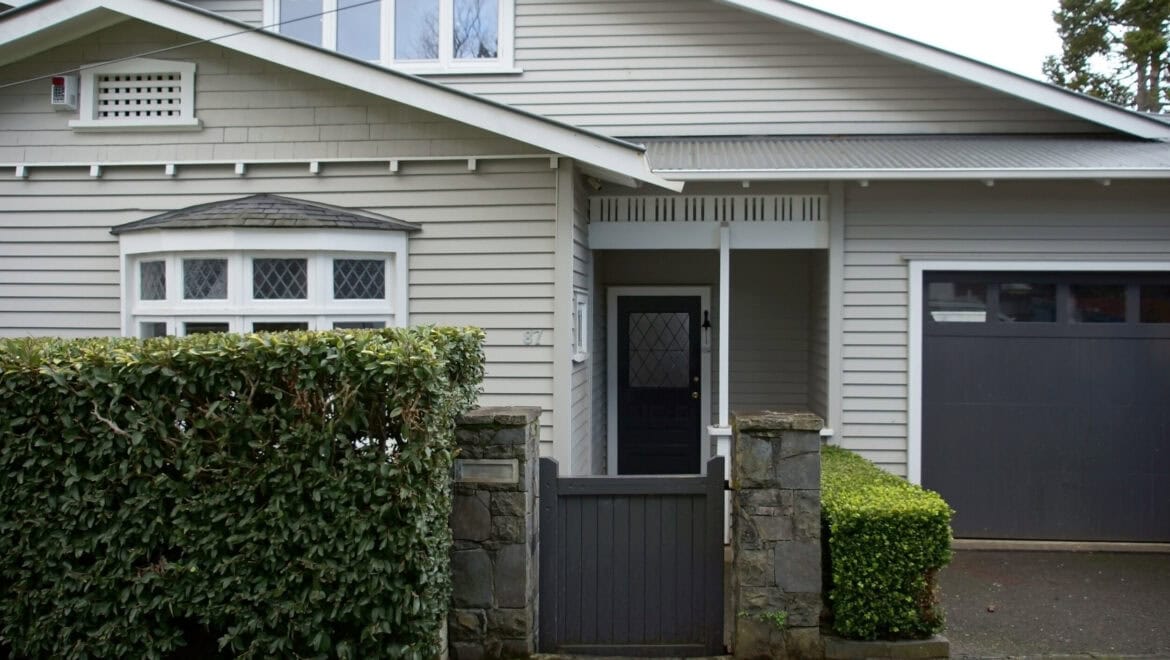
          house recladding cost calculator - Superior Renovations
          Recladding

          House Recladding Cost Calculator Tool (NZ)

          Recladding Cost Calculator NZ — Your Estimate in 60 Seconds

          Quick answer: Get a personalised recladding cost estimate emailed straight to your inbox in under 60 seconds. Use the calculator below — no phone calls, no sales pitches, no waiting on a builder’s diary. Tell us your home’s size, cladding type, and scope, and we’ll send back a project-specific number based on real 2026 Auckland pricing.

          ↓ Jump Straight to the Calculator

          You’re thinking about recladding. Maybe you’ve got a monolithic home and you’re worried about what’s behind the plaster. Maybe the existing weatherboards have done their dash. Maybe you’ve had a builder out who quoted you something that gave you a fright, and you want a second opinion before you commit to a process that takes months and runs into six figures.

          What you need is a number that fits your home. Not a generic Auckland range. Not a competitor’s marketing figure. A starting estimate based on your size, your cladding type, and your scope.

          That’s what the calculator below does. Sixty seconds, results emailed to your inbox. Once you have an estimate, our recladding service in Auckland can turn it into a firm scope and quote.Once you have an estimate, our recladding service in Auckland can turn it into a firm scope and quote.


          Why a Calculator Beats a Generic “Per m²” Number

          Most online recladding cost ranges fall into one of two camps. You’ll either see $150–$450 per square metre (the light-scope number — cladding swap on a sound home) or $1,750–$2,500 per square metre (the full-scope number — cladding plus timber remediation, joinery, insulation, the lot). Both numbers are real. They describe completely different jobs.

          The reason recladding pricing is confusing isn’t that builders are hiding the number. It’s that recladding means different things depending on what your home actually needs.

          A timber-framed Howick home with sound framing getting fibre cement weatherboards swapped in is a $40,000–$90,000 job. A 1990s Auckland monolithic home with hidden moisture damage, decayed framing, and joinery that needs replacing is a $250,000–$400,000+ job. Same word, very different reality.

          The calculator’s job is to figure out which job you have. It asks the questions that move the number — home size, cladding type, scope — and gives you a tailored range instead of a generic one.

          It takes about a minute. Results land in your inbox.


          Get Your Personalised Recladding Estimate

          Sixty seconds, a handful of inputs, and a tailored estimate hits your inbox. Free. No follow-up sales call.

          ↓ Use the Calculator Below


          What Goes Into the Estimate

          The calculator works through the same variables we use when we’re pricing a real reclad. None of it’s guesswork — every input maps to a cost driver we’ve seen on completed Superior Renovations recladding jobs.

          Home size in square metres. The starting point. Be honest about your full floor area, including upper levels if you’re two-storey — the recladding cost scales with the exterior wall area, which is roughly proportional to floor area.

          Current cladding type. Timber weatherboard, monolithic plaster (direct-fix), brick veneer, fibre cement — each comes off differently and reveals different conditions underneath. Monolithic homes from the late 1990s and early 2000s are the most likely to need full remediation, which pushes the budget up materially.

          Target cladding material. Going to fibre cement (James Hardie Linea, for example) at around $150–$250/m² is the most common choice in 2026. Cedar or premium weatherboard sits at $250–$350/m². Metal longrun, brick veneer, or schist can push past $400/m² installed.

          Scope of remediation. This is the big swing factor. A like-for-like swap on a sound home is one thing. A reclad that includes full timber remediation, all new joinery, insulation upgrade to current H1 standards, and interior reinstatement is another job entirely — and usually 4–6× the cost per square metre.

          Access and site conditions. Scaffolding around a two-storey home on a tight section in Grey Lynn costs more than a single-storey on a flat site in Flat Bush. Shrink-wrapping (weather protection during the build) is essential for Auckland weather and adds to the scaffold spend.

          You don’t need to know exact specs going in. The calculator gives you a sensible default for each input — your job is to tell it what you’re roughly planning.

          💡 Quick tip: If you suspect leaky-home issues but haven’t had an assessment yet, run the calculator with the “full remediation” scope. It’ll give you the realistic upper-end number to plan against. A pre-purchase weathertightness report typically runs $900–$1,500 and is the cheapest way to find out which scope you’re actually facing.


          What You Get in Your Inbox

          A couple of minutes after you submit, you’ll receive an email with a project-specific estimate. Here’s what’s in it:

          A low-to-high range based on your inputs. Not a single point estimate — because no honest builder gives you one before site visit and weathertightness assessment. The range shows where your project realistically sits given what you’ve told us.

          A breakdown of the main cost categories — cladding materials, labour, scaffolding and weather protection, professional fees (architectural, engineering, consent), and an allowance for remediation if relevant. Helps you see where the biggest swings are.

          Notes on what the estimate doesn’t include. Typically GST, interior finishes if your scope extends inside, and any unforeseen structural or moisture damage that only becomes visible once the cladding is off. We’d rather flag the limits than pretend they don’t exist.

          It’s not a quote. Recladding quotes need a weathertightness assessment, design drawings, and a detailed schedule of works. The estimate is the layer before that — the number that tells you whether your project sits in a budget you can work with, or whether you need to rescope before going further.

          If the number looks workable, the next step is usually a feasibility assessment, where we walk through your specific property, what you’re trying to achieve, and what’s realistic on your home. That’s a separate conversation — and one you can book after you’ve seen the estimate.


          The Three Variables That Move Your Number the Most

          If you’ve used the calculator and want to understand what drove your result, these three factors do most of the heavy lifting on recladding budgets.

          1. Scope — light reclad vs. full remediation. Single biggest factor by a long way. A like-for-like cladding swap on a sound timber-framed home runs $150–$450/m² and usually lands between $40,000–$90,000 total. A full leaky-home reclad with timber remediation, new joinery, insulation, and interior reinstatement runs $1,750–$2,500/m² and lands between $250,000–$400,000+ for a typical 180m² home. Same home, vastly different jobs. The calculator’s main work is figuring out which one you’re looking at.

          2. Cladding material chosen. Fibre cement is the most common 2026 choice — durable, fits the drained cavity requirement under E2/AS1, comes in at the bottom of the material cost range ($150–$250/m² installed). Premium options like cedar weatherboard ($250–$350/m²), brick veneer ($350–$500/m²), or metal longrun for coastal sites all push the per-m² rate up. Material choice alone can swing a 180m² project by $30,000–$50,000.

          3. Building consent and professional fees. Almost every reclad triggers building consent, and many trigger a fresh weathertightness review under E2/AS1. Architectural and engineering fees typically run $8,000–$15,000 for a standard reclad, $15,000–$25,000 for a complex one. Council fees add $3,000–$8,000. None of this scales with home size in a clean way, so smaller homes get hit harder on a per-m² basis.

          Knowing which of these three is the biggest factor on your project tells you where the budget can flex — and where it can’t.


          See Your Personalised Number

          The calculator’s right below. Sixty seconds in, estimate emailed straight back.

          ↓ Use the Calculator


          A Note on Building Consent

          Almost every recladding project in Auckland needs building consent. The rule isn’t whether you’re swapping a small section — it’s whether the work affects weathertightness, fire safety, or structural integrity. Recladding usually affects all three, which is why Building Performance and Auckland Council treat it as consented work.

          The exception: a true like-for-like replacement (same material, same fixing method, same building envelope) may not need consent. That’s rare in practice — most reclads change the cladding system, add a cavity, or upgrade insulation, all of which trigger consent.

          The calculator includes a typical consent fee range in the estimate, but for accuracy on your specific project, your designer or LBP builder will give you the exact figure after they’ve assessed scope.


          Recladding Cost Calculator NZ

          Estimate generator below. Takes under 60 seconds. Results emailed straight to your inbox. Calculator reflects 2026 Auckland market pricing — averages based on real Superior Renovations project data.

          0
          Just as an indicator on size to provide an estimate based on past projects, although not how we would normally quote
          Level of Complexity
          Recladding will require building consent so will incur architectural fees
          As part of the building consent process
          Average cost only for the purpose of generating an estimate, this is always case by case basis.

          Where to send the results?

          Please fill in your details below and your results will be sent straight to your email inbox. (double check your junk mail folder)
          Total


            By submitting this form, you agree to receive communications from us via email or text regarding our services, you can unsubscribe at any time.


            ssl cert 2 - Superior Renovations

            This site is protected by reCAPTCHA and the Google

            Privacy Policy and Terms of Service apply.


            Frequently Asked Questions

            Is the recladding cost calculator free?

            Yes. No charge, no obligation, no follow-up sales calls. Built by Superior Renovations to give Auckland homeowners a realistic starting estimate without having to chase a builder for one.

            How accurate is the estimate?

            The calculator uses 2026 Auckland market pricing and reflects real Superior Renovations recladding project data. It's accurate enough for budget planning and feasibility — but it isn't a quote. Final pricing depends on a weathertightness assessment, detailed scope, and the specifications you settle on during design.

            How much does it cost to reclad a house in Auckland?

            Light-scope recladding (like-for-like swap on a sound home) runs $150–$450/m², typically $40,000–$90,000 for a 150–200m² home. Full-scope recladding with timber remediation, new joinery, insulation, and interior reinstatement runs $1,750–$2,500/m² — typically $250,000–$400,000+ for a 180m² monolithic home with weathertightness issues. The calculator helps figure out which scope your home needs.

            Does recladding require building consent in Auckland?

            Yes — almost every recladding project requires building consent because it affects weathertightness, fire safety, and often structural integrity. Consent fees typically run $3,000–$8,000. The only exception is a true like-for-like replacement (same material, same fixing method, no cavity change), which is rare in practice.

            Why are recladding costs so variable?

            Because 'recladding' covers vastly different scopes. Swapping weatherboards on a sound timber-framed home is straightforward and runs at the bottom of the cost range. Recladding a 1990s monolithic home with hidden moisture damage often requires full timber remediation, new joinery, insulation upgrades, and interior repair — pushing the total up 4–6× the cladding-only number. The calculator separates these scopes so the estimate is realistic.

            Does the estimate include GST?

            The estimate is GST-exclusive unless otherwise specified. You'll need to add GST when comparing to other builder quotes. Architectural, engineering, and council consent fees are factored in at typical ranges, but final amounts are confirmed during detailed quoting.

            How long does a recladding project take?

            A straightforward reclad on a single-storey home typically runs 6–10 weeks of construction time. A complex full-remediation reclad on a two-storey monolithic home with joinery replacement and interior reinstatement can run 14–20 weeks. Add 4–8 weeks for consent processing on top of construction.

            Can I live in my house during a reclad?

            In most cases, yes — particularly for light-scope reclads where the interior isn't affected. Expect dust, noise, scaffolding around the home, and shrink-wrap weather protection that reduces natural light. For full-remediation reclads with interior work, you may need to relocate during the construction phase. Your builder will flag this during the feasibility assessment.

            What cladding material should I choose?

            Fibre cement (James Hardie Linea is the most specified) is the most common 2026 choice in Auckland — durable, fits the drained cavity requirement under E2/AS1, and sits at the bottom of the material cost range. Cedar weatherboards suit character homes. Metal longrun is the coastal/low-maintenance choice. Brick veneer offers thermal mass and longevity. The calculator factors material choice into the estimate.


            Please note: Every recladding project is unique. The calculator’s accuracy depends on the inputs you provide, and the estimate is a planning tool, not a quote. Recladding scope can shift significantly once existing cladding is removed and underlying conditions become visible. Rates and material costs shift with the market. While information is considered current at the date of publication, Superior Renovations isn’t liable for any decisions made solely on the calculator output. For a tailored quote, a weathertightness assessment and site visit are required.

            SUPERIOR RENOVATIONS
            Renovations on one full bathroom and one small ensuite at my home in Sunnynook, Auckland, were completed on 26th June 2026.
            I am fully satisfied with the work done at my home by all workers and contractors and delighted with the results that I am now enjoying. All work is of a very high standard and attention to care leading to excellent results.
            All staff of Superior Renovations and associated contractors were at all times helpful and happy to explain all aspects of their work and respectful in listening to any of my concerns or questions, with any changes where necessary being quickly and effectively carried out.
            I have no hesitation in recommending Superior Renovations as your choice for any bathroom renovation.

            Valerie Hepburn
            4 Stoneleigh Court, Auckland
            In early June, I hired Superior Renovation company to thoroughly renovate our two bathrooms. The project has now been completed and we are very satisfied. Thank you sincerely, and we highly recommend it.
            Despite some delays, Eunice, Neil and the team at Little Giants have done a really good job on out kitchen renovation. Great finishing and very responsive to fixing up any little thing we weren't happy with.

            Good work team!
            ​From the very first consultation, our experience with this team has been nothing short of stellar.

            ​Working with Eunice, our sales consultant, set a high bar for the rest of the project.
            Eunice is truly exceptional at what she does. When we first began our kitchen project, we went through several versions of our floor plan, and she was with us every step of the way—from the initial planning stages right through to the final concept. Her patience and dedication during the design process were remarkable.
            Throughout the project, Eunice provided:
            * **Invaluable Suggestions:** She has a keen eye for both aesthetics and functionality, pointing out details we never would have considered on our own.
            * **Seamless Adjustments:** No matter how many tweaks we requested, she handled every change with professionalism and a "can-do" attitude.
            * **Expert Guidance:** She transformed our vague ideas into a cohesive, stunning reality.

            ​Once the planning was complete, Neil, our project manager, took the reins and truly blew us away. Neil is a consummate professional who balances technical expertise with fantastic communication.
            ​ He kept us informed at every stage, ensuring we knew exactly what to expect and when.
            Whenever a minor pivot was needed, Neil handled it with grace and efficiency, keeping the timeline on track.
            His standards for the renovation work were incredibly high, ensuring the final result was polished and beautiful.

            ​The transition from Eunice’s initial planning to Neil’s execution was flawless. If you are looking for a team that combines design expertise with top-tier project management, look no further. We are absolutely thrilled with our new kitchen and new flooring !
            Superior Renovations has just finished a complete remodel of my bathroom. I can see, why the company has such a high reputation. At every stage, from sales, design, project management, and execution, the company excelled at every point. I am just so happy with the work that they have done and they have exceeded my expectations at every point.
            Used Superior for a kitchen and bathroom renovation last year. They did an excellent job updating both rooms, communication was excellent ongoing tjrough the project, they coordinated all the tradies, synchronized so there was little downtime, and it all worked exactly as planned and on budget. Was really glad we chose Superior Renovations and plan to use again for our entrance way at some stage.
            As I said to my work colleagues ‘I have just had the most pleasant experience’. When they realised it was with renovations at home they were shocked - ‘unheard of’ I was told.
            Everything went to plan - timing, project management, costs, etc, etc. Neil communicated with me daily and made my whole bathroom renovation a pleasure.
            The best decision I made was choosing Superior Renovations.
            Thank you Kevin for our initial connection and for passing me on to Neil to manage the whole process.
            We just finished a bathroom renovation and couldn’t be happier with the results. The craftsmanship is top-notch, and the attention to detail in the tiling and finishing is impressive. The team was professional, kept the workspace clean, and delivered exactly what we envisioned. Highly recommend them for anyone looking for a high-quality transformation.
            Superior did an excellent job of renovating our ensuite. Project manager Jacob was easy to work with and communications were good.
            This is our second review for Superior Renovations. They have done two projects earlier this year and we were so impressed by the work they have finished. After discussing and very careful consideration, we decided to go with more projects with them. So far, they have now completed stage 1 renovation of our house. We still amazed for their knowledge and services; they really listen to us and discuss anything with us if they feel/think could be better…
            From the first day we work with them, we have no issue with them at all, from communication, discussing, designing to the teams working on the site.
            Especially we are highly recommended to those who are considering doing the house renovation, please contact them and you will know why we are so pleased to have them to do our house renovation.
            We are thanking Cici, Neil and the teams so much….
            We are looking forward to seeing what the outcome will be.

            David and Emily
            We recently had our bathroom renovated by Superior Renovations and couldn’t be happier with the experience. Dorothy and Neil were an absolute pleasure to work with. They guided us through every step of the process, making what can be a stressful experience feel smooth and straightforward.
            The quoting process was transparent and detailed, with no hidden fees or surprises. Neil was incredibly responsive and always available whenever we had questions or requests, which gave us real peace of mind throughout the project. We really love the end result and enjoy our new bathroom!
            We’ll definitely be returning to the Superior Reno team for our next project. Highly recommended!
            Our bathroom reno has just been completed & I am so happy. The whole process was easy & hassle free. Alison designed our bathroom & was very patient with our changes/then changes back again. Jacob our project manager was a delight to deal with. He always kept us informed of the scheduling & any other information we may have needed. All the tradies worked hard & the job was completed & signed off within 3 weeks. That's demo, full tiling, installation of new everything & delivery & pick up of the skip down a very tricky driveway. We absolutely love the new bathroom & would recommend Superior Renovations everyday. Future jobs I will definitely be contacting them again. Thank so much for your excellent work
            Having explored our reno options, it was an easy decision to select Superior Renovations for our work. As first timers at anything like this we had to trust the system with grand old 100year old bungalow. We were so pleased to have Cici, Sonny and Kai working with us the whole way through. Be shout out to all the team, builders, plumbers, electricians, tilers and painters. A superb job delivered on budget and ahead of time. The communication from Cici and Sonny was first class. Would highly recommend working with Superior Renovations in fact, we already have more worked booked in. Thanks Superior you made Millie and Monty's parents very happy. 🐾
            I am very happy with the recent renovation for my new kitchen.
            The team worked really hard to get it done within the time frame.
            The manager, Jacob, was very helpful and communicated well and always sorts out any issue immediately.
            Thank you Irene
            We couldn’t be happier with our new pergola! From start to finish, the team was professional, punctual, and easy to work with. They took the time to listen to what we wanted and offered great suggestions to make the design even better. The quality of the materials and workmanship is outstanding — everything feels solid, well-built, and beautifully finished. Kudos to Sinan Sun as she has been an amazing contact with the company.
            We are very pleased with our bathroom reno by Superior Renovations! Jacob, Cici and the team always kept us up to date, were always friendly to deal with and finished ahead of schedule. Most importantly we are very happy with the quality of the work.
            We have been working with Superior Renovations as a supplier now for over three years. In that time we have found the team to be very professional and well organised. Which is a welcome relief in this industry! Just recently we have become their sole supplier for portaloos, which recognises the collaboration we have forged over these three years.

            In particular, Leanne and Elaine set a very high standard of communication and flexibility. This is of vital importance when scheduling deliveries and pickups with us, however, they understand not everything can be done at once and are willing to work with us for the best (supplier/contractor/client) outcome.

            I would imagine this ethos would flow directly through to all their contracted renovation work. A pleasure to work with!
            A very reliable supplier – we’ve been working with them for three years now, and they have never let us down. Well done to the team.
            We have been working with these guys for the past 4 years and find them an awesome company to work with, very efficient and organised. I highly recommend!
            Finding someone reliable for renovations has always been the most stressful thing for us. In the past, we had several painful renovation experiences—money was spent but the problems were never truly solved, and things often ended up worse than before. We really didn’t know where to find a trustworthy renovation company.

            For more than ten years, our wish had been to renovate our bathroom, laundry, and toilet, so that we could finally enjoy a comfortable and functional living environment. Just when we were about to give up, we came across Superior Renovations online. We quickly made an appointment with Cici, who designed and provided us with a quote.

            Throughout the whole process, I was deeply impressed by the professionalism of Superior Renovations. What stood out most was that they always delivered on their promises—everything agreed upon was completed on time. This built a relationship of trust and reliability. Up until completion, I was completely satisfied with their dedication and the quality of their workmanship.

            During the renovation, we encountered some of the challenges that often come with older houses, but Cici and her team helped us resolve the discomforts we had been living with for years. We are truly grateful to the construction team.

            Some say renovations are easy if you just have money, but I believe the most important thing is finding a trustworthy team that keeps their word, values quality, and cares about the customer’s experience.

            Because of this renovation experience, we can now confidently plan our next project—the kitchen—and Superior Renovations will definitely be our first choice. We strongly recommend them.

            Finally, I want to thank Cici and the team for helping us fulfill our dream.

            Mark & Kate
            Sinan is a very good consultant. She helps a lot during renovation. Very satisfied with their job.
            It was great to have Alison's recommendations and input on how & what would look best for our kitchen and bathroom reno. Jacob, our project manager, has been a star too; ensuring that the project was delivered as planned, AND giving us great ideas & suggestions along the way.

            We will definitely be calling on you guys again for our next home reno. Thanks team!
            Very impressed with Superior Renovations.Building our pergola with blinds for a fair price .First thank you Sinan for quoting the job and your flexabilty and knowledge..Secondly the job was done well within the time frame, thanks to Jeff for supervising the job ( eventhough he wasn't too well) and keeping us up to date throughout the process. Payment was fair and easy as well .
            Thoroughly recommend Superior Renovations for your reno job 👍
            Very efficient team of workers and high quality finish.
            Very happy with our renovated bathroom.
            We will use this company again.
            We’re very happy with the renovation work done by the team. It’s rare for renovation projects to finish on time, but they committed to completing ours before the Easter holiday—and they delivered! Our project manager, Jacob, worked incredibly hard (even physically! 😄) to make it happen.

            I admit I might not have been the easiest client—I was particular about details like colours, tile placement, and exactly where the hand basin bowl should sit on the bench. But they listened, took it all on board, and got it done. Thank you, Jacob!
            I’ll definitely bring you another challenge in the future. 😉