


Kitchen Lighting Ideas NZ: The Role of Lighting in Kitchen Design
Last updated:
Quick answer: Good kitchen lighting is planned in layers: ambient light for the room, task light on every bench, accent light for features and one or two decorative pieces. Pick one warm colour temperature, put each layer on its own switch or dimmer, and lock the wiring in before the cabinets are made.
Most kitchens we’re asked to fix don’t have a lighting problem you’d notice in a showroom. They have one you notice at 6pm in July, when the only light is a ceiling fitting behind you and you’re chopping onions in your own shadow. This guide covers the kitchen lighting ideas our Auckland designers use on real projects, from Grey Lynn villas to 1990s homes in Henderson Valley, plus the numbers worth settling early: colour temperature in Kelvin, colour rendering, under-cabinet LEDs, pendant heights over an island, dimming and switching. It also covers the part people skip, which is who is allowed to do the wiring.
Free cost calculator
How much will your kitchen renovation cost?
Answer a few questions and we’ll email you an Auckland price range.
What’s the Role of Lighting in Kitchen Design?
Lighting does three jobs in a kitchen, and a plan that only does one of them shows. It makes the work safe and easy. It shows off the materials you paid for. And it sets the mood when the cooking is done and the kitchen becomes the place everyone ends up. Get all three and a mid-range kitchen looks considered. Miss them and an expensive one can look flat.
That’s why lighting sits in the design stage at Superior Renovations, not the electrical stage. Our designers plan it alongside the layout and cabinetry in our Wairau Valley design studio, and you can see how that process runs on the design process page or compare the design packages if you want the plan drawn up before you commit to a build.
Enhancing aesthetics
Whether your kitchen is contemporary, traditional or somewhere in between, the lighting either backs up the design or works against it. Pendant lights over an island can be the focal point and a style statement at the same time. Light aimed at a splashback, a benchtop edge or a run of glass-front cabinets pulls the eye to the features you chose and gives the room depth.
In our work: Look at the lighting beneath the upper cabinets in the photo below. Our designer Dorothy Li placed it to wash the herringbone splashback, so the tile reads as a feature wall, and it doubles as the task light for the coffee station. This classic kitchen is on display in our showroom at Wairau Valley, Auckland.
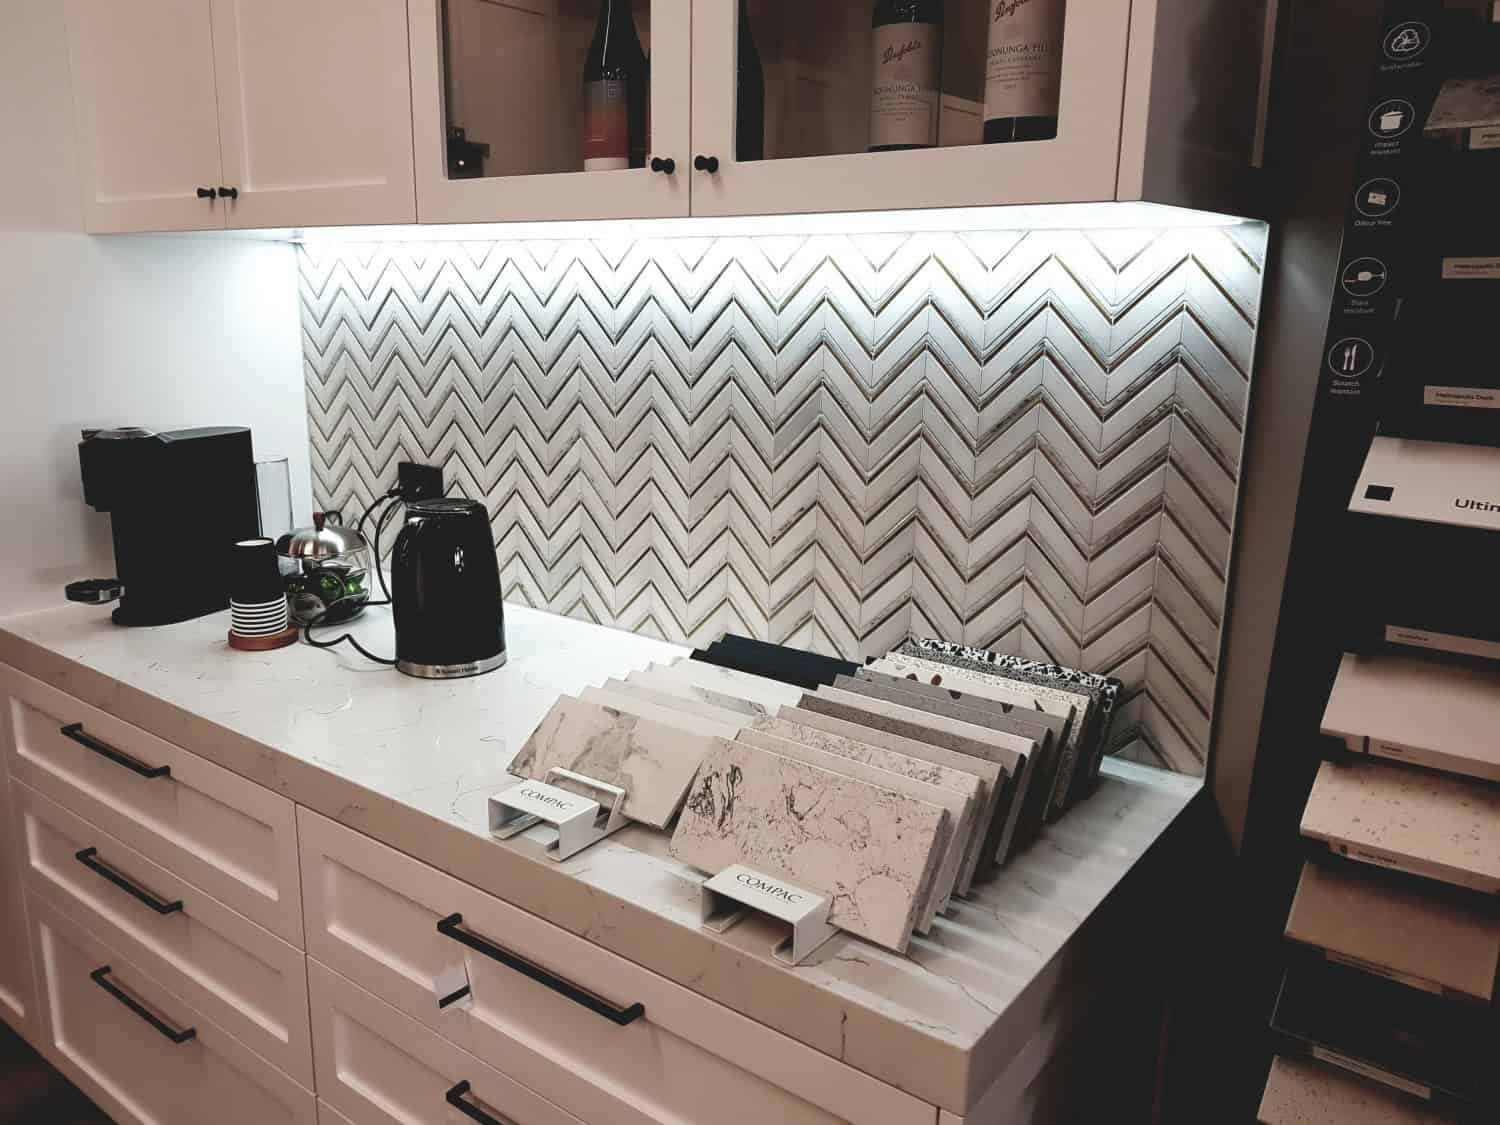
The tile sheets came from Tile Depot: a herringbone mix of engineered stone made to look like marble, with gold metal through it. A strip of LED light grazing across a textured tile like this picks out every joint and change of finish, which is exactly what you want on a feature wall and exactly what you don’t want on a wonky one.
See every display in person: a walk-through of the kitchen displays in our Auckland showroom, or plan a visit to the Superior Renovations showroom.
Improving functionality
A kitchen is a workshop with nicer finishes. You cut, pour, read labels, wipe up and check whether the chicken’s done, and all of it needs light falling on the bench in front of you rather than on the back of your head. Task lighting under the upper cabinets and over the sink, hob and prep zones does that job. Well-placed ceiling lights then fill the rest of the room so there are no dark corners or deep shadows in the walkway.
Creating ambience
The same kitchen has to work at full brightness on a Saturday morning and at low light when friends are over and the dishes can wait. Dimmers and separate switching are what make that possible. With the layers on different controls, you can drop the downlights, leave the under-cabinet strip on and let the pendants carry the room.
The Four Layers of Kitchen Lighting
Kitchen designers build a lighting plan from four layers: ambient, task, accent and decorative. Few kitchens need every fitting type in every layer, but nearly every good kitchen uses at least three of the four.
Ambient lighting
Ambient light is the even, general light that fills the room. It’s what makes the kitchen comfortable for eating and talking as well as cooking. Recessed downlights are the usual choice in Auckland renovations, with track lighting or wall sconces where the ceiling or the style suits them better.
In our work: This rendering from our Design Studio pairs soft ambient light in the ceiling with task lighting above the hob and accent lighting inside the open cabinets. It’s the kind of render our clients receive after working through the design process with our team, so the lighting can be judged before anything is built.
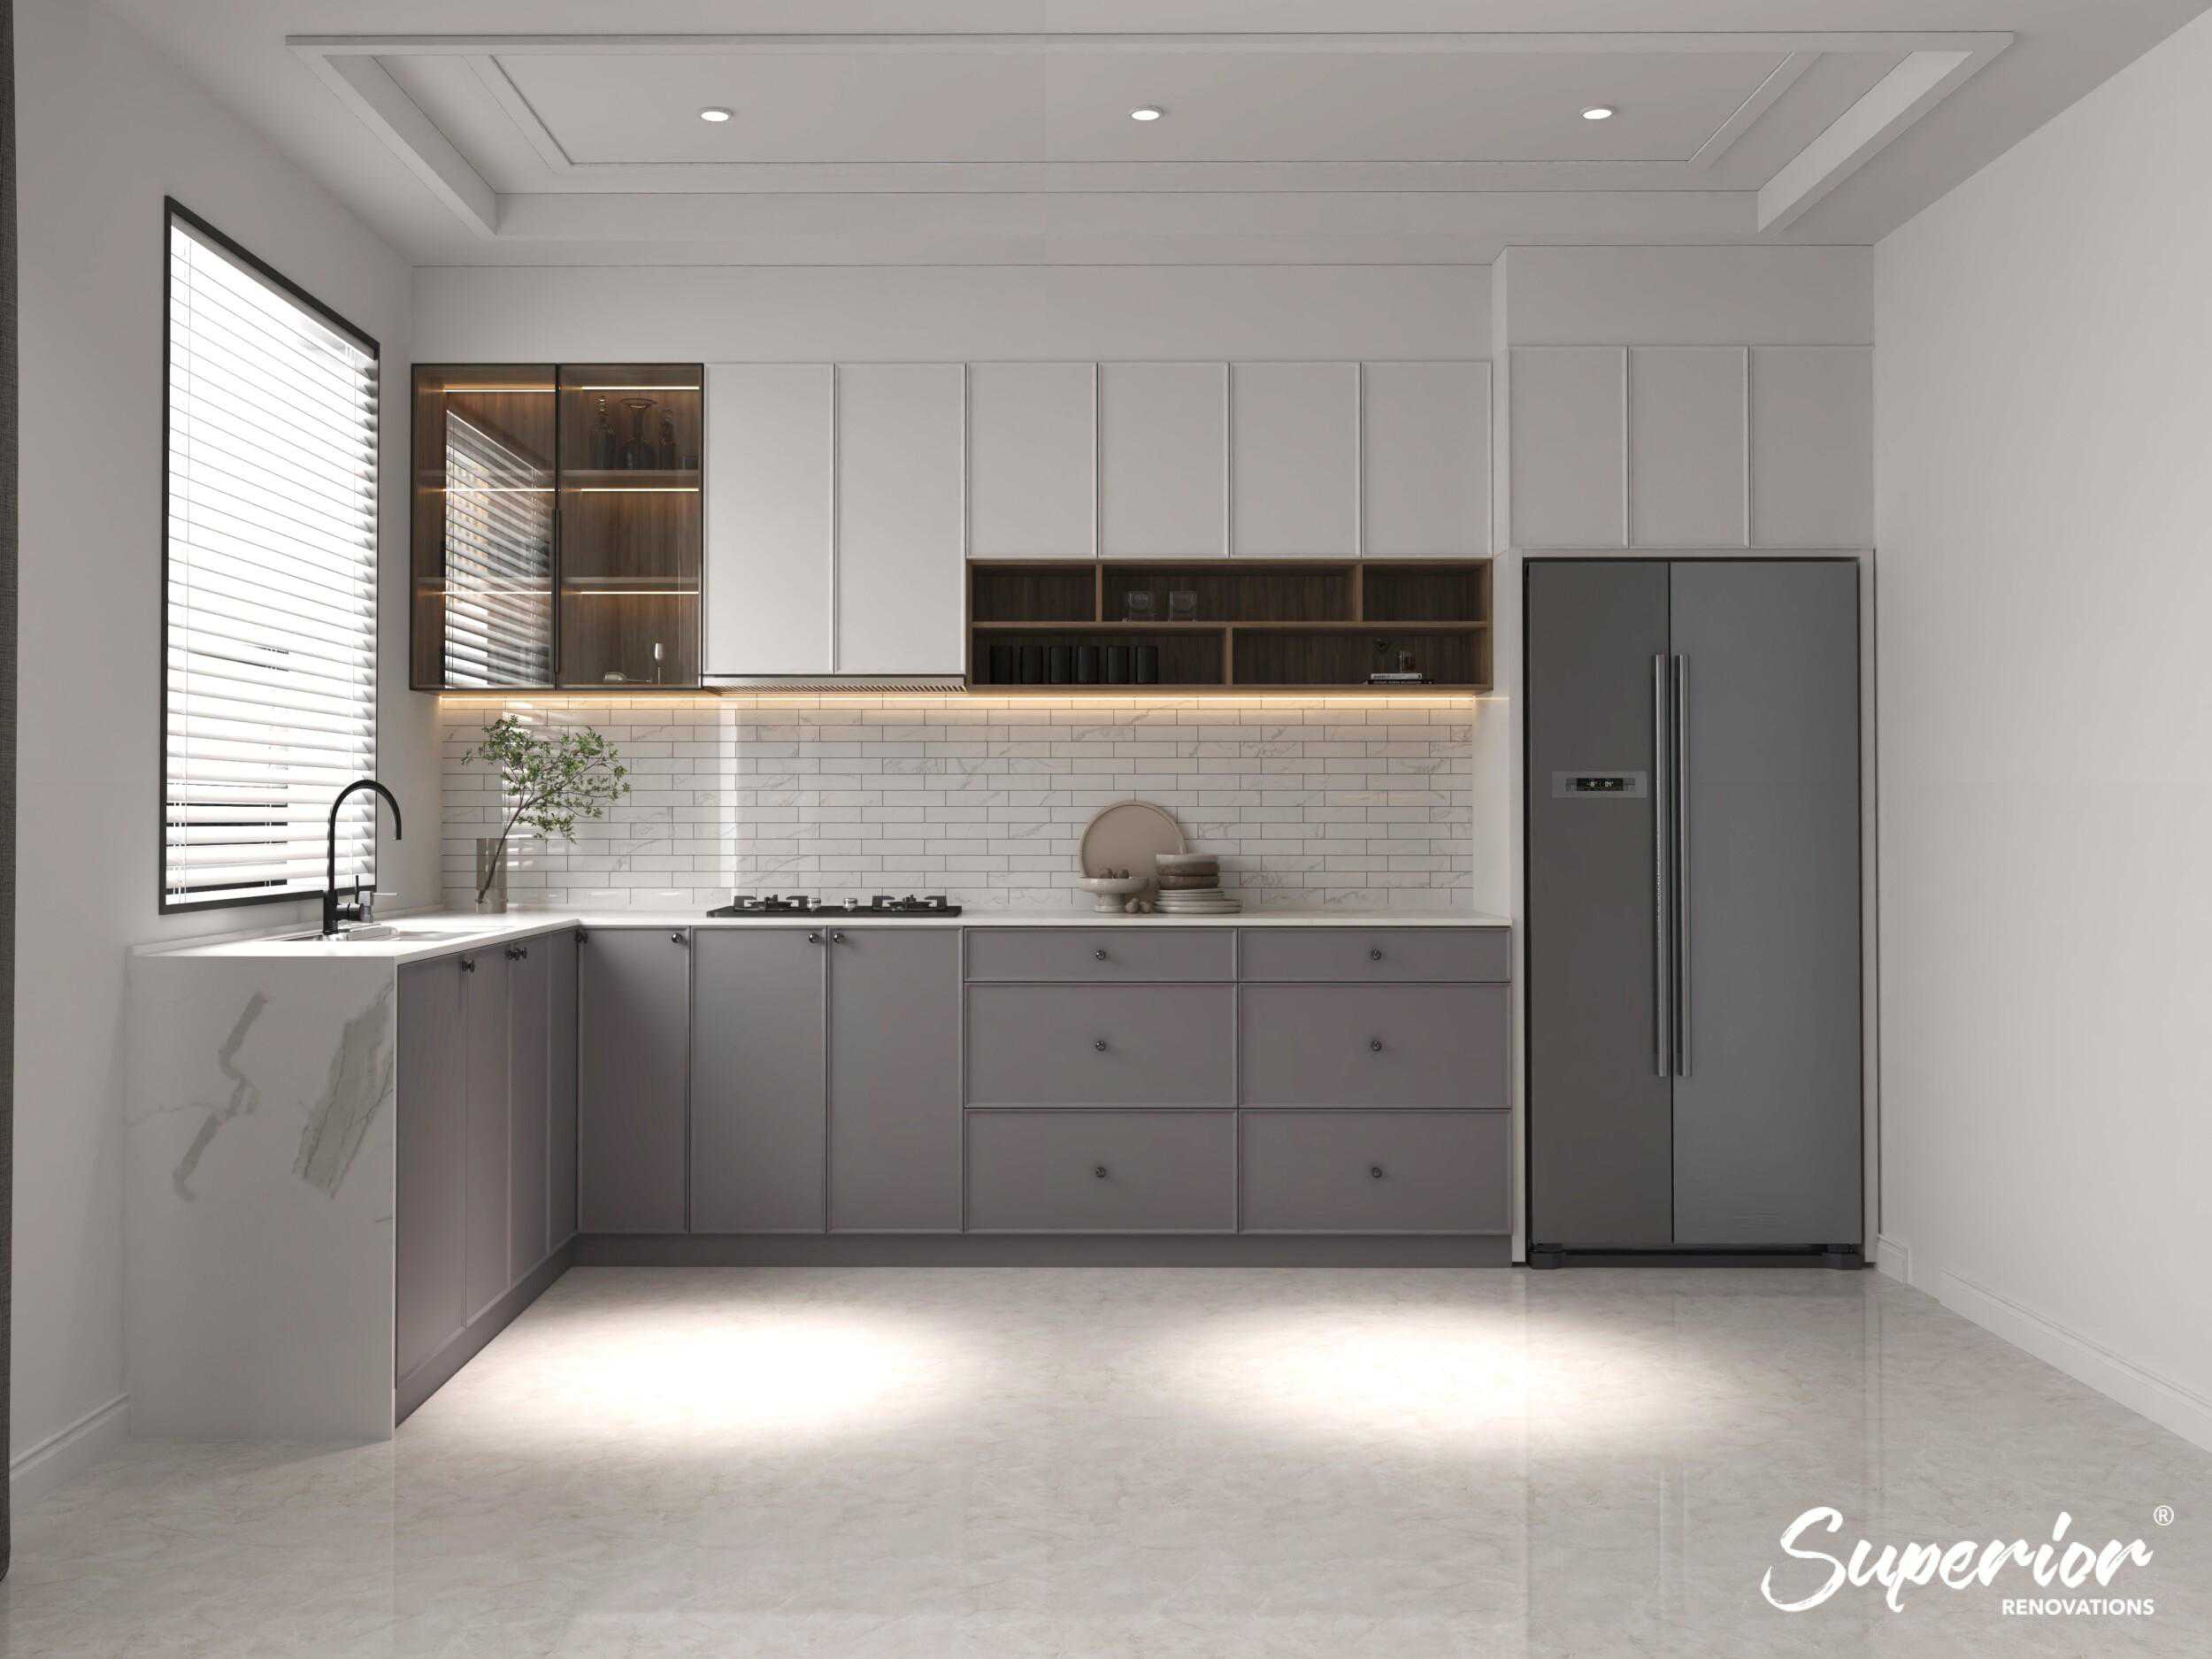
A soft kitchen design that uses three layers of lighting to keep the room warm.
Dimmers make ambient light far more useful. Bright for cooking, low for dinner. Layering in over-cabinet or toe-kick lighting adds another level you can switch on its own, which helps define zones in an open-plan kitchen and dining room.
Task lighting
Task lighting is focused light on the places you work. Whether you’re chopping vegetables, reading a recipe or cleaning up, it lets you see what your hands are doing. The common options are LED strip under the upper cabinets, which removes the shadow your body casts on the bench, and pendants or downlights over an island, sink or hob.
Recessed lights can be placed over the sink, cooktop and dishwasher so every work area is covered, and natural light from a big window or skylight does a lot of the daytime work. The point of planning task lighting is that no bench in the kitchen is left working in the dark.
In our work: In this Henderson Valley kitchen renovation, designed by Dorothy Li, an LED strip under the cabinets washes the chevron splashback and doubles as the task light. Six LED downlights and three pendants over the island complete the layers.
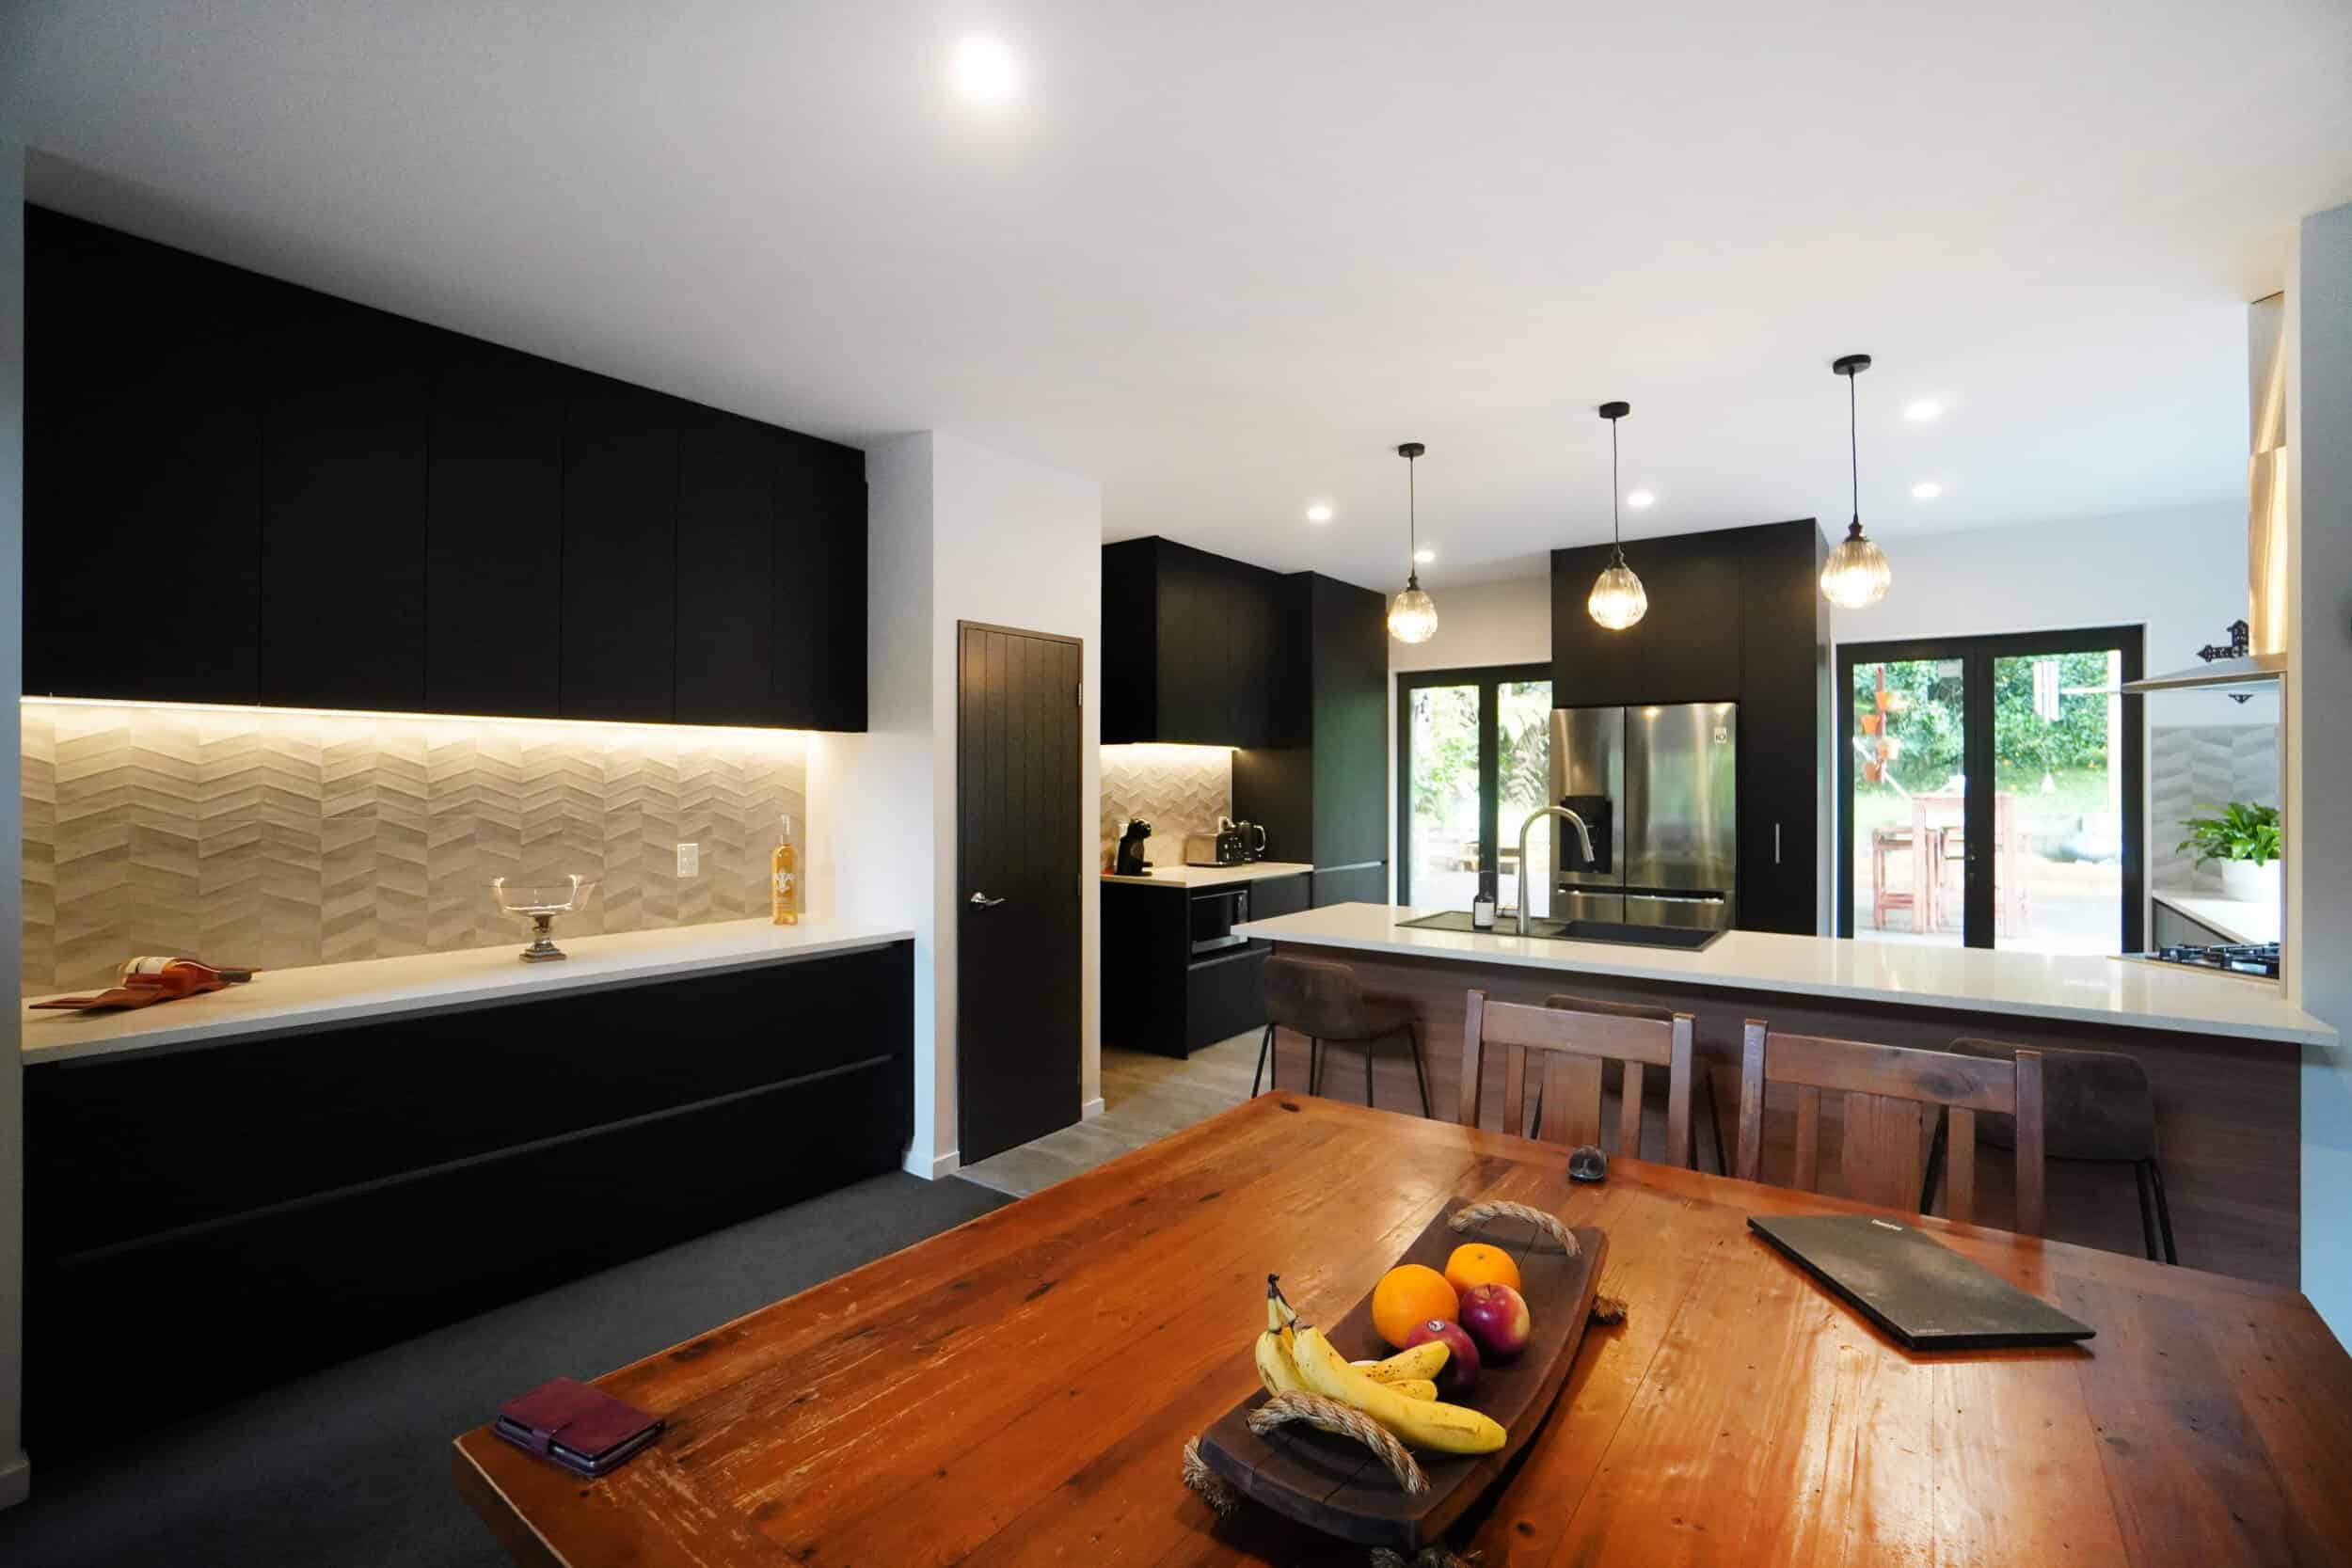
Kitchen renovation designed by our designers in Henderson Valley.
The full specification is on the Henderson Valley case study, with before and after photos. It lists Laminex Prime Acrylic black matte fronts, a Tile Depot Art Stone Painting Grey Chevron splashback with a 3D effect, and a kitchen re-wired by a licensed electrician to AS/NZS 3000.
Accent lighting
Accent lighting picks out the details that make your kitchen yours: a splashback, open shelving, a display niche or a piece of art. Spotlights, uplighters and directional fittings all do it. On a textured tile feature wall, a grazing light shows the relief and colour that flat overhead light would wash out.
In our work: This kitchen renovation in Remuera was designed by Dorothy Li. Matte acrylic cabinet fronts contrast with a glossy benchtop and splashback, and the upper cabinets have glass doors. She took it a step further with accent lighting inside the glass cabinets and task lighting underneath them.
Lighting used to lift the whole design of this kitchen.
Lighting inside glass-front cabinets turns glassware or a collection into a feature. It works best when the shelves are glass too, or when the strip runs down the cabinet sides, so the light carries past the first shelf.
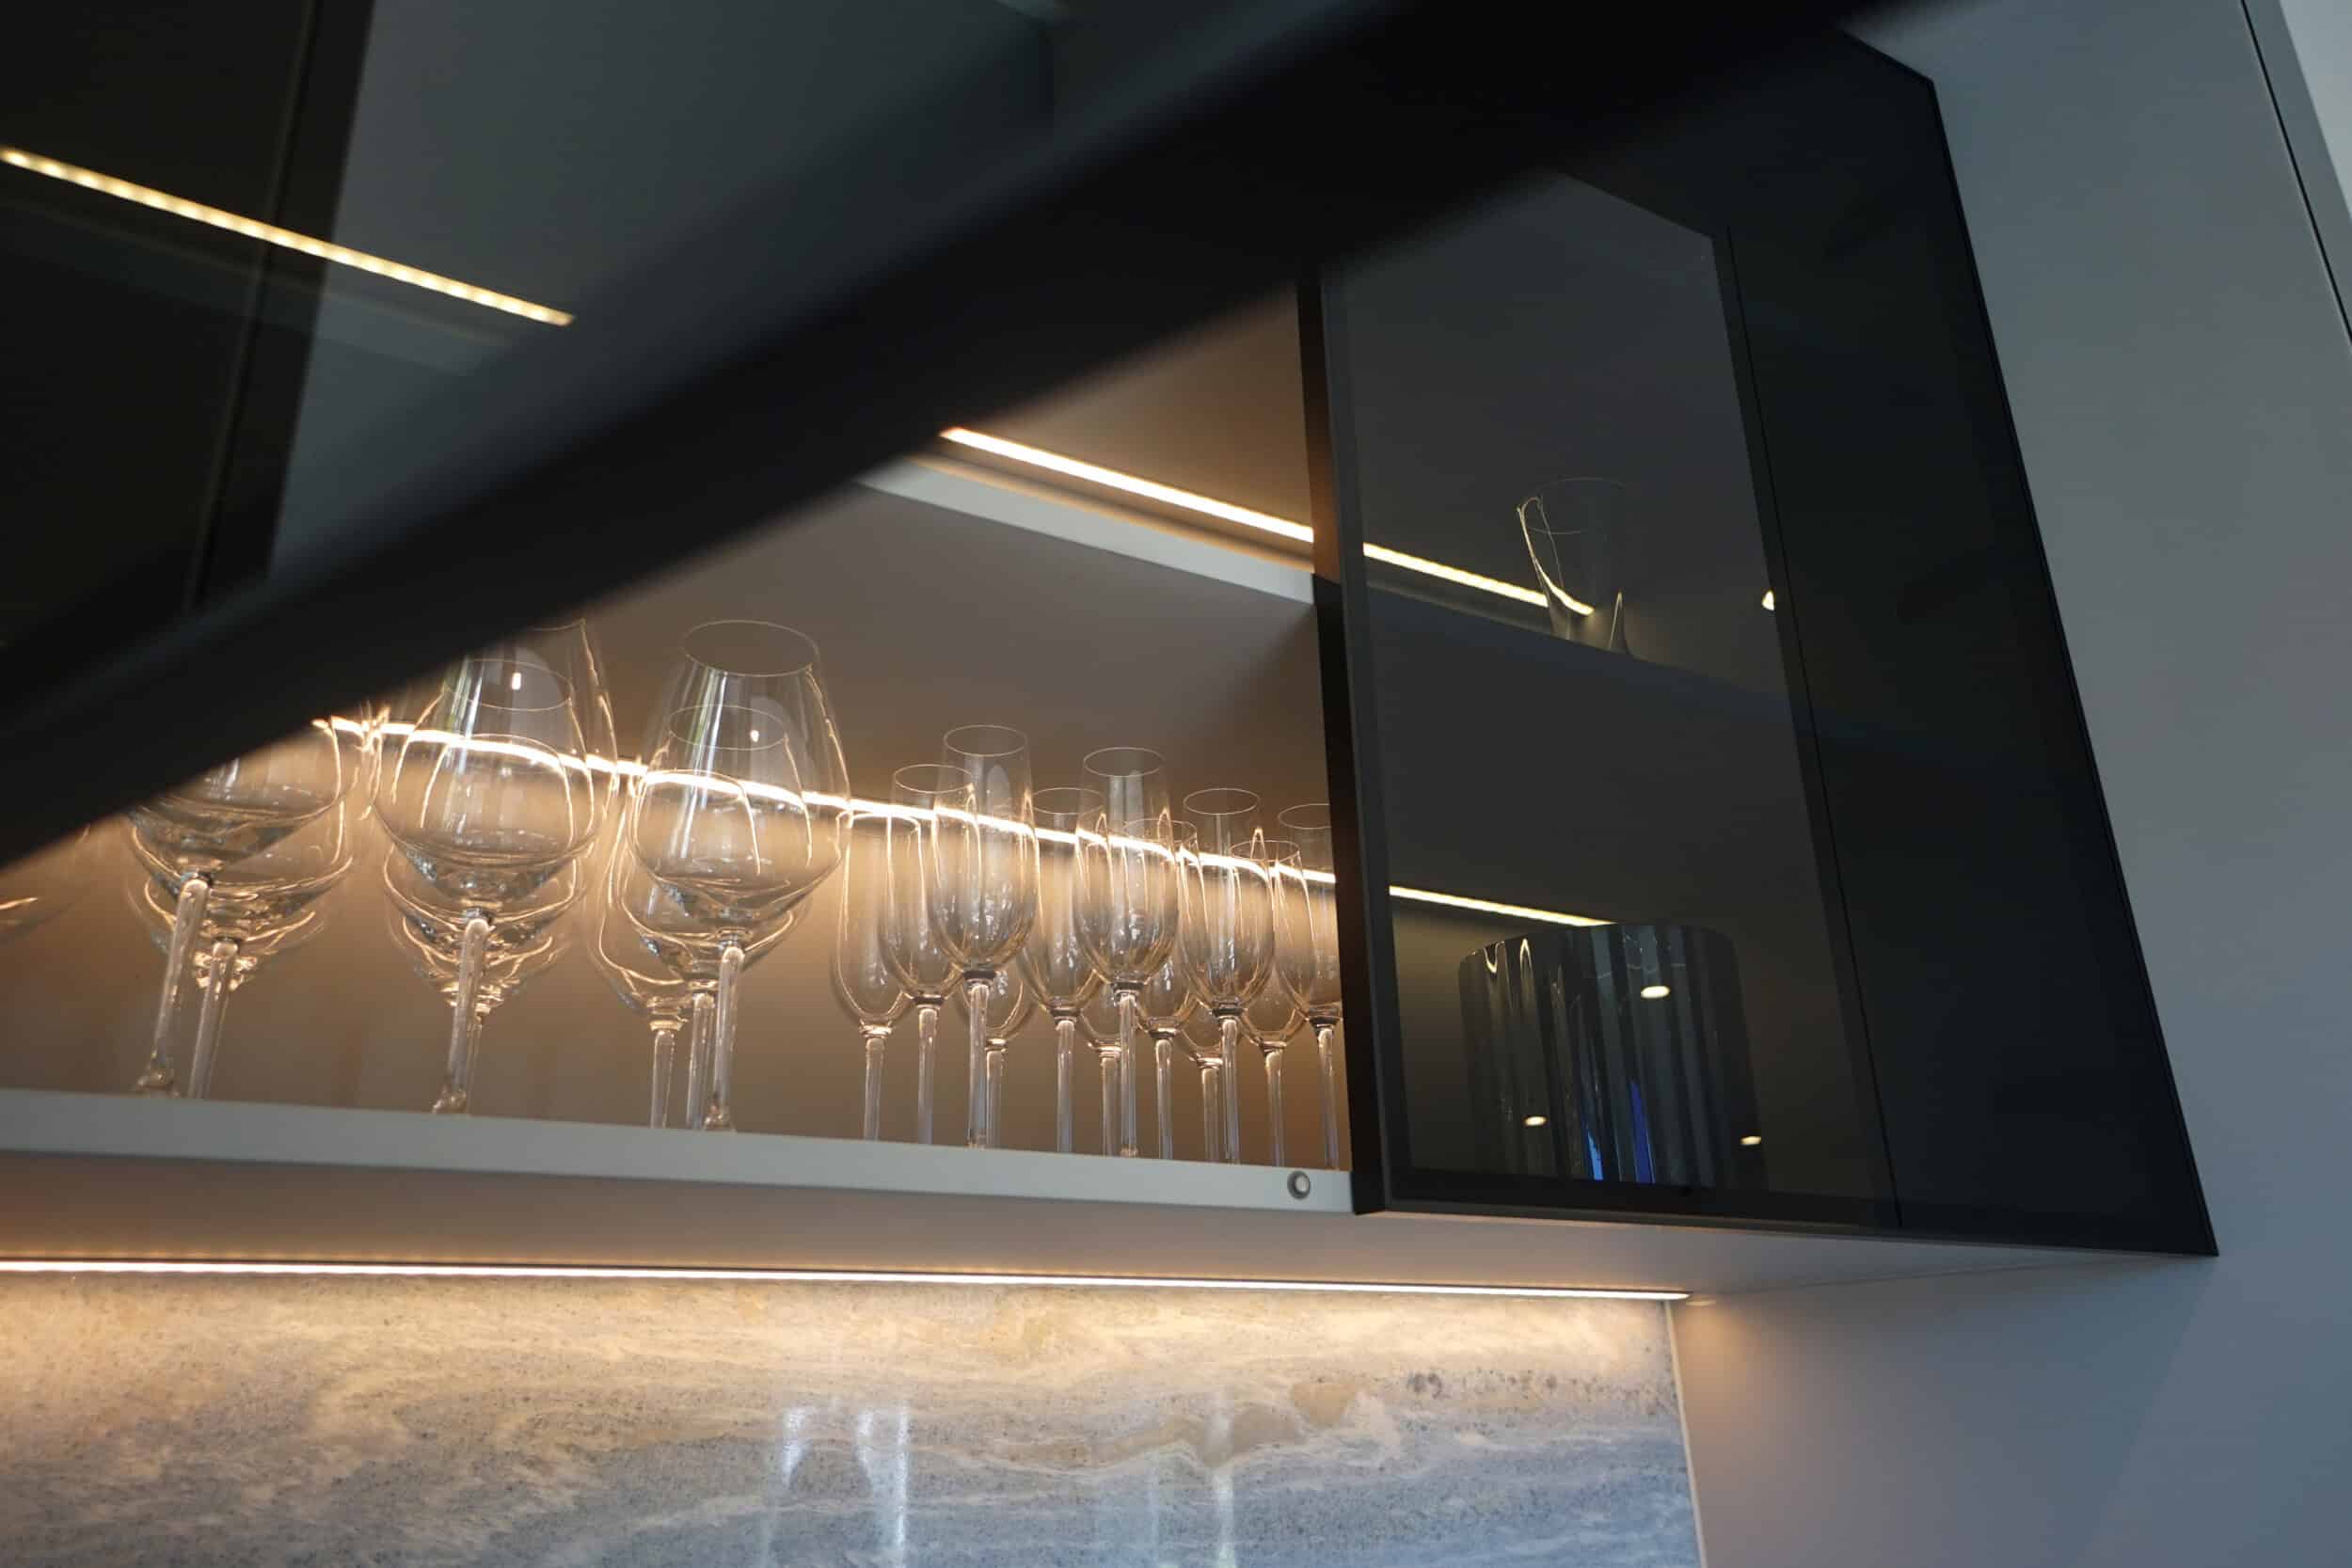
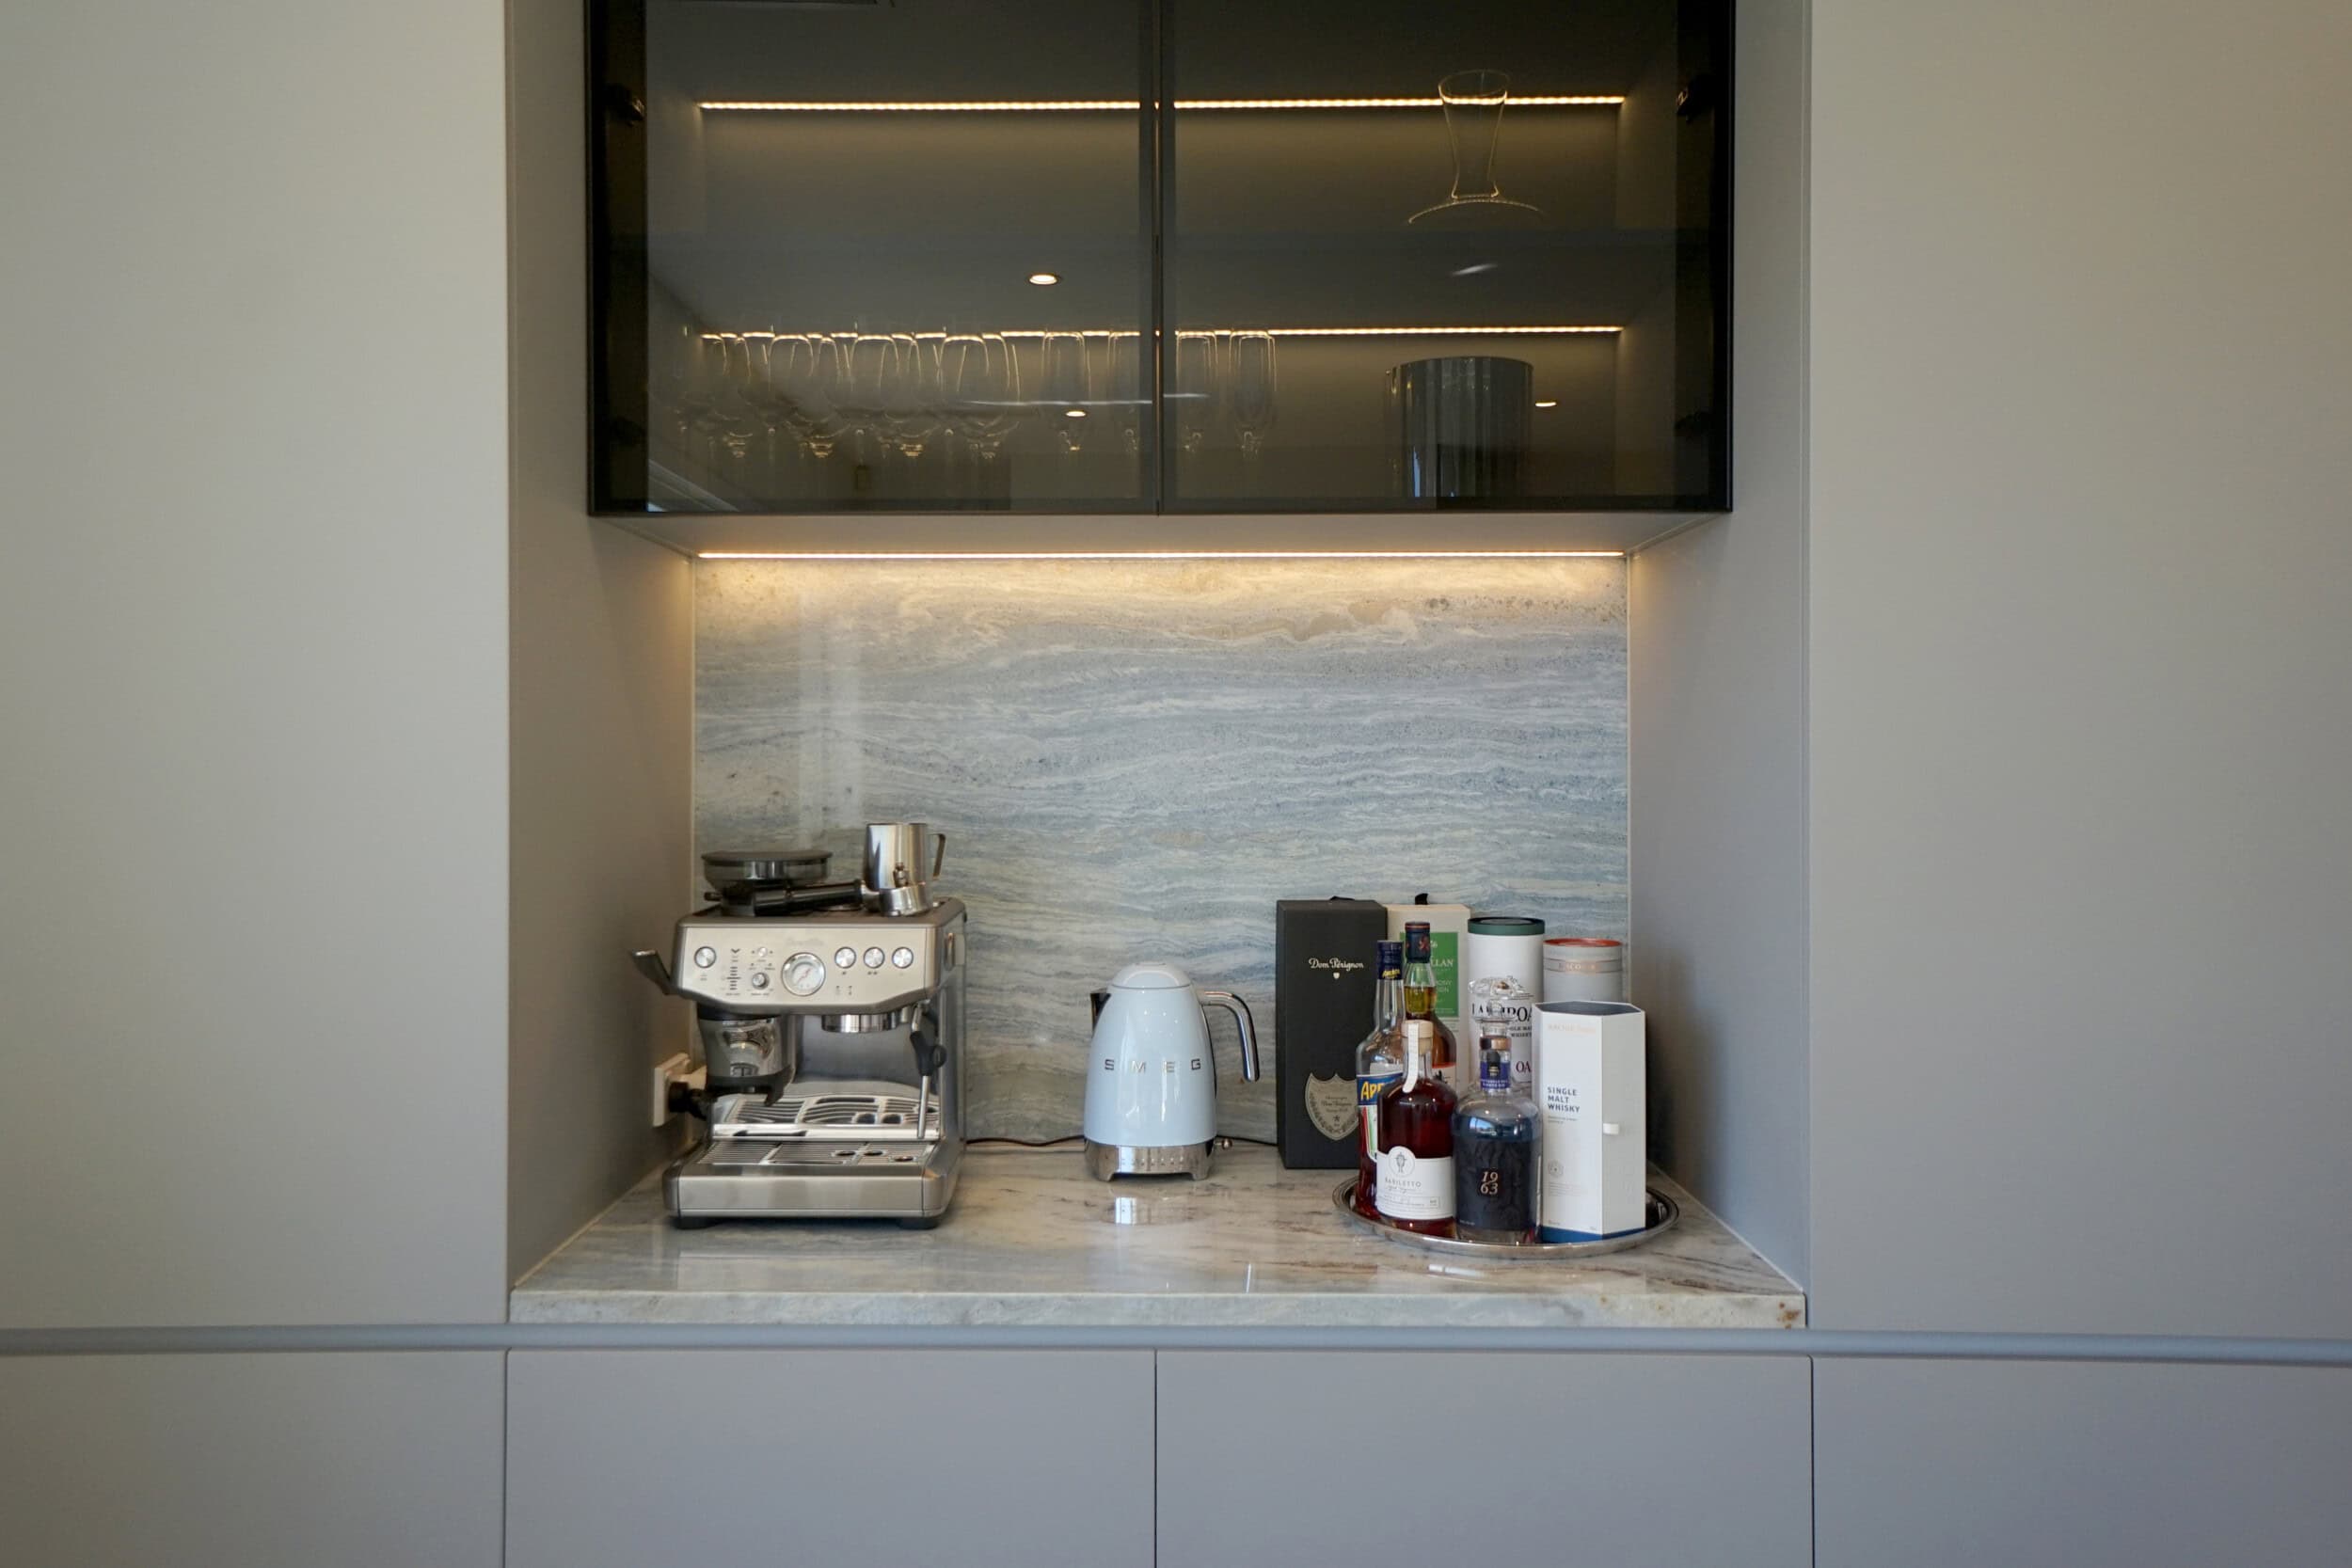
A closer look at the accent lighting and task lighting in the drinks and coffee corner.
In our work: This kitchen display in our Auckland showroom uses every layer. Accent lighting sits in the open veneer cabinets, LED task lighting runs over the sink area, a strip under the base cabinets lights the floor, pendants hang over the benchtop and recessed lights cover the ceiling. All of it dims, so the same kitchen goes from bright and practical to warm and low. Lighting here isn’t an afterthought: it’s part of the design from the first drawing.
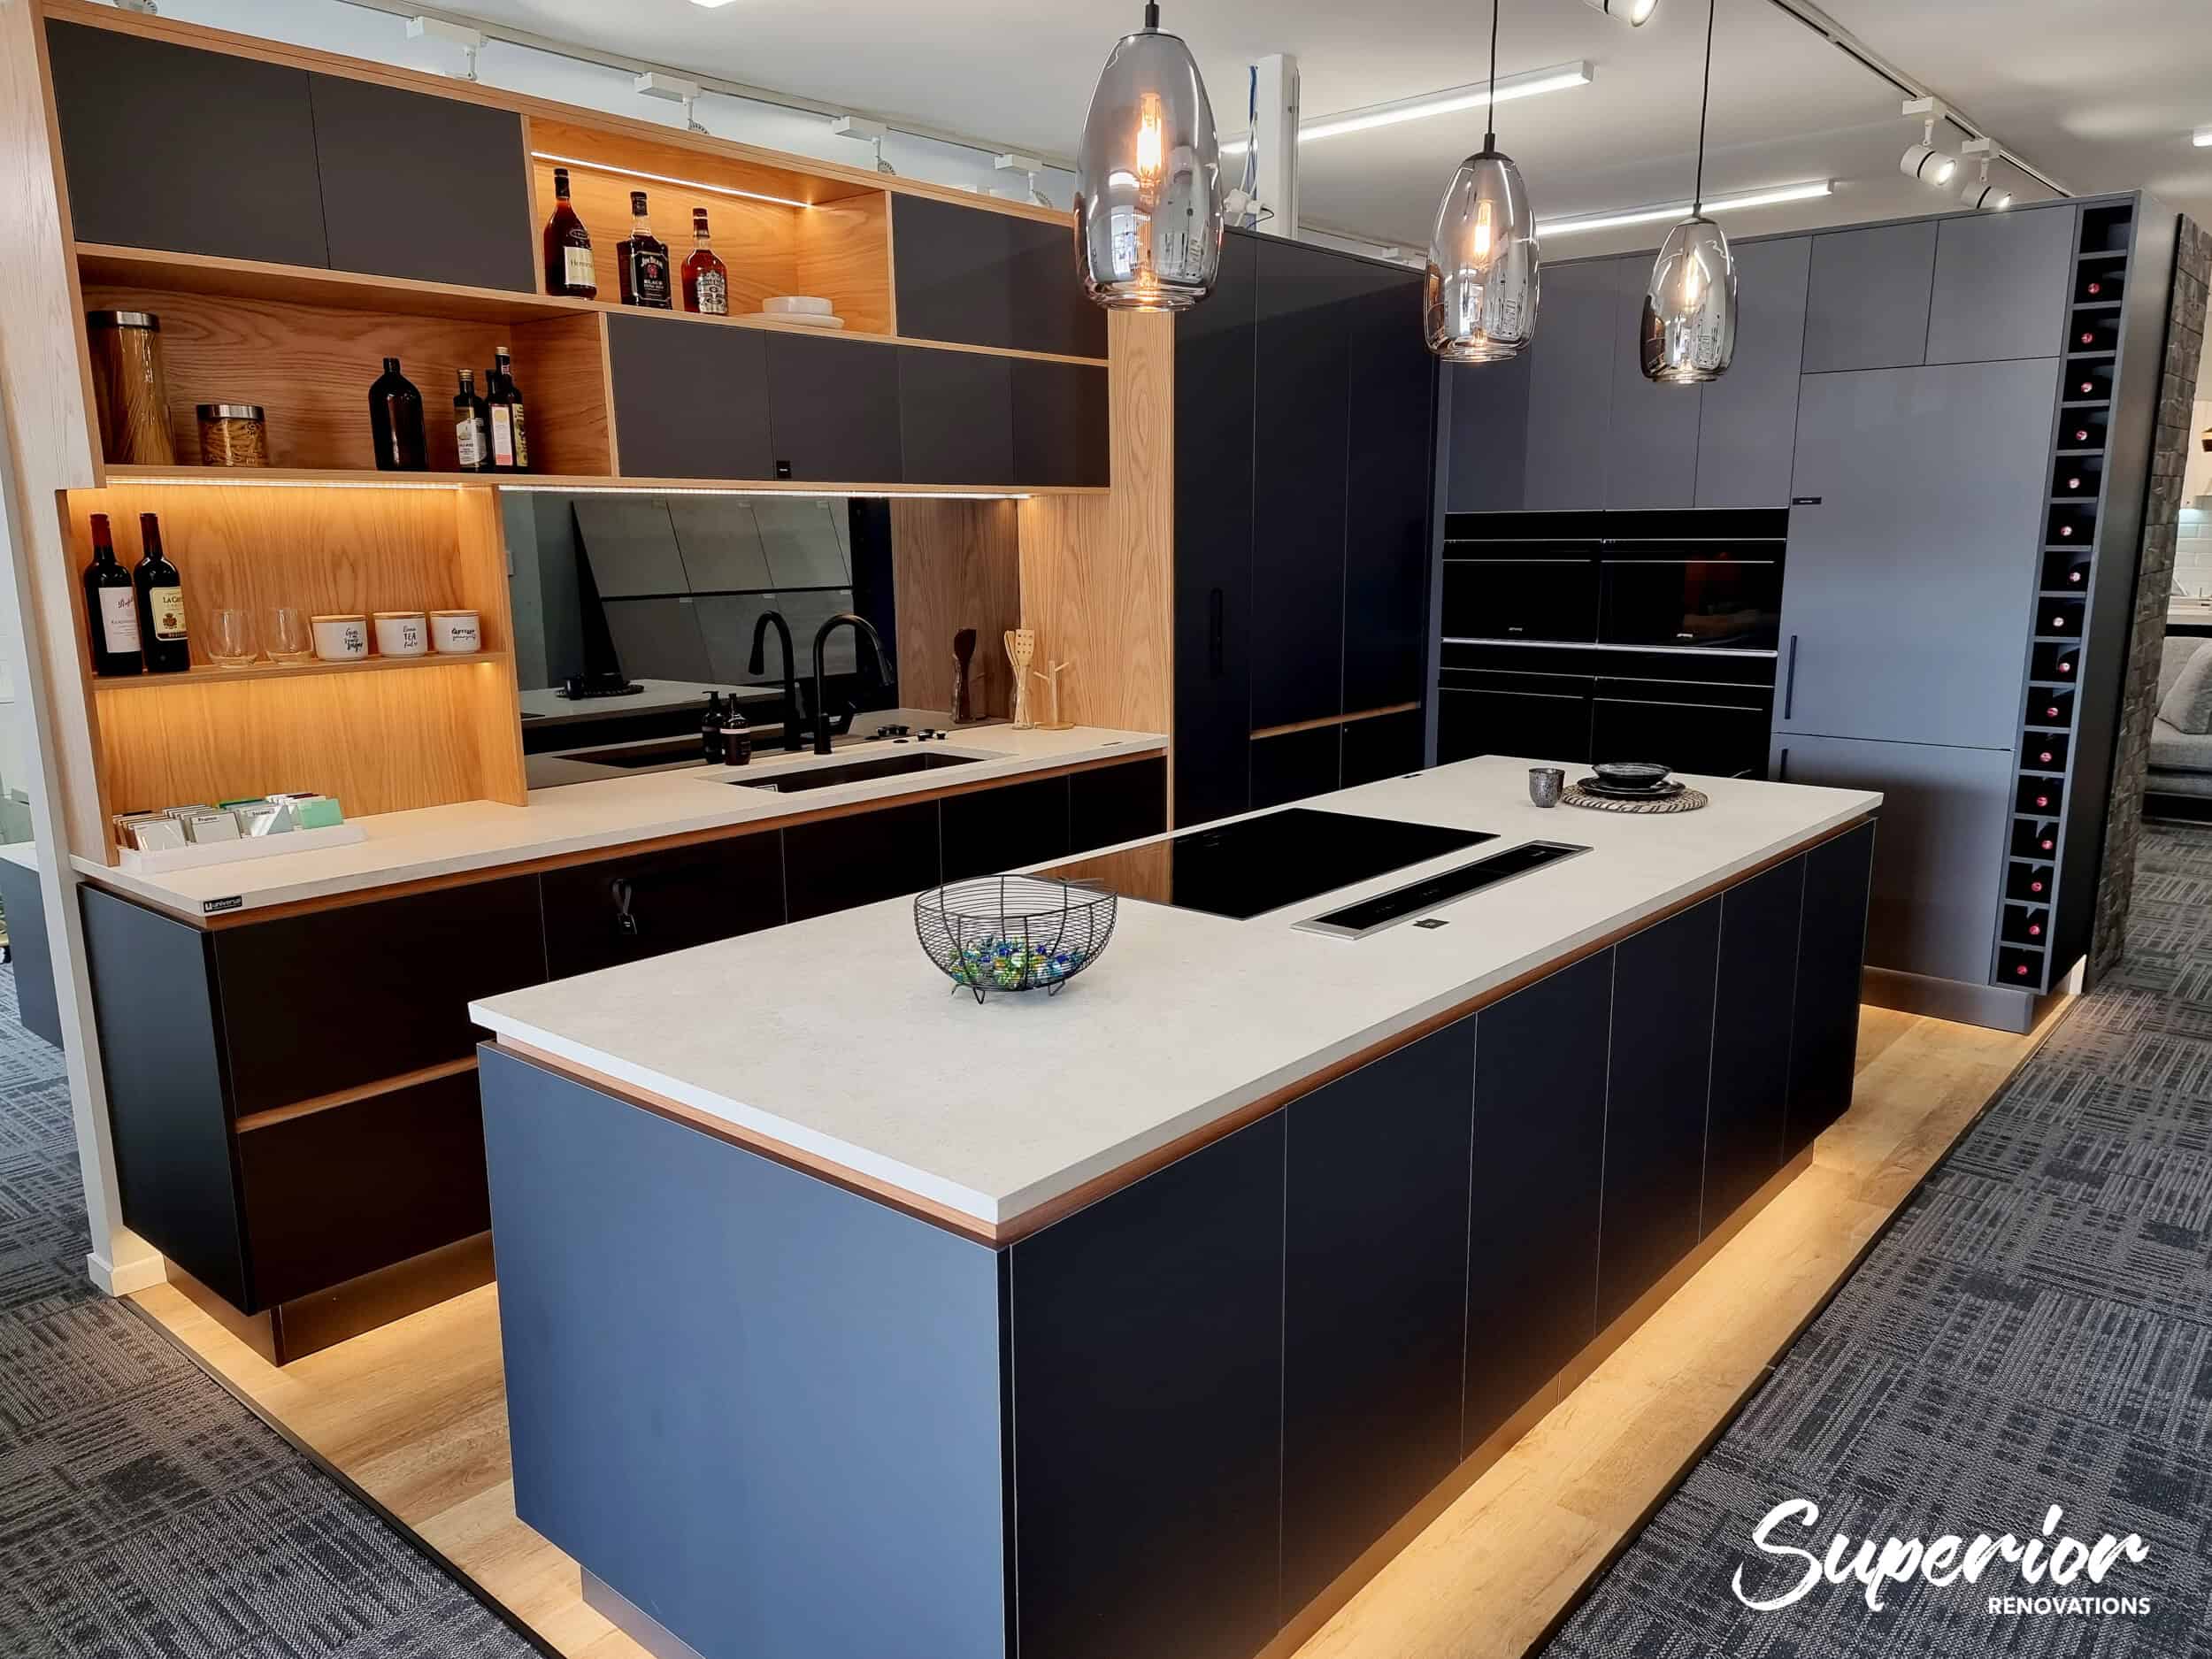
One of the kitchen displays in our Auckland showroom.
Below is a closer look at the bar area of the Henderson Valley kitchen, where the under-cabinet light is doing the accent work on the splashback.
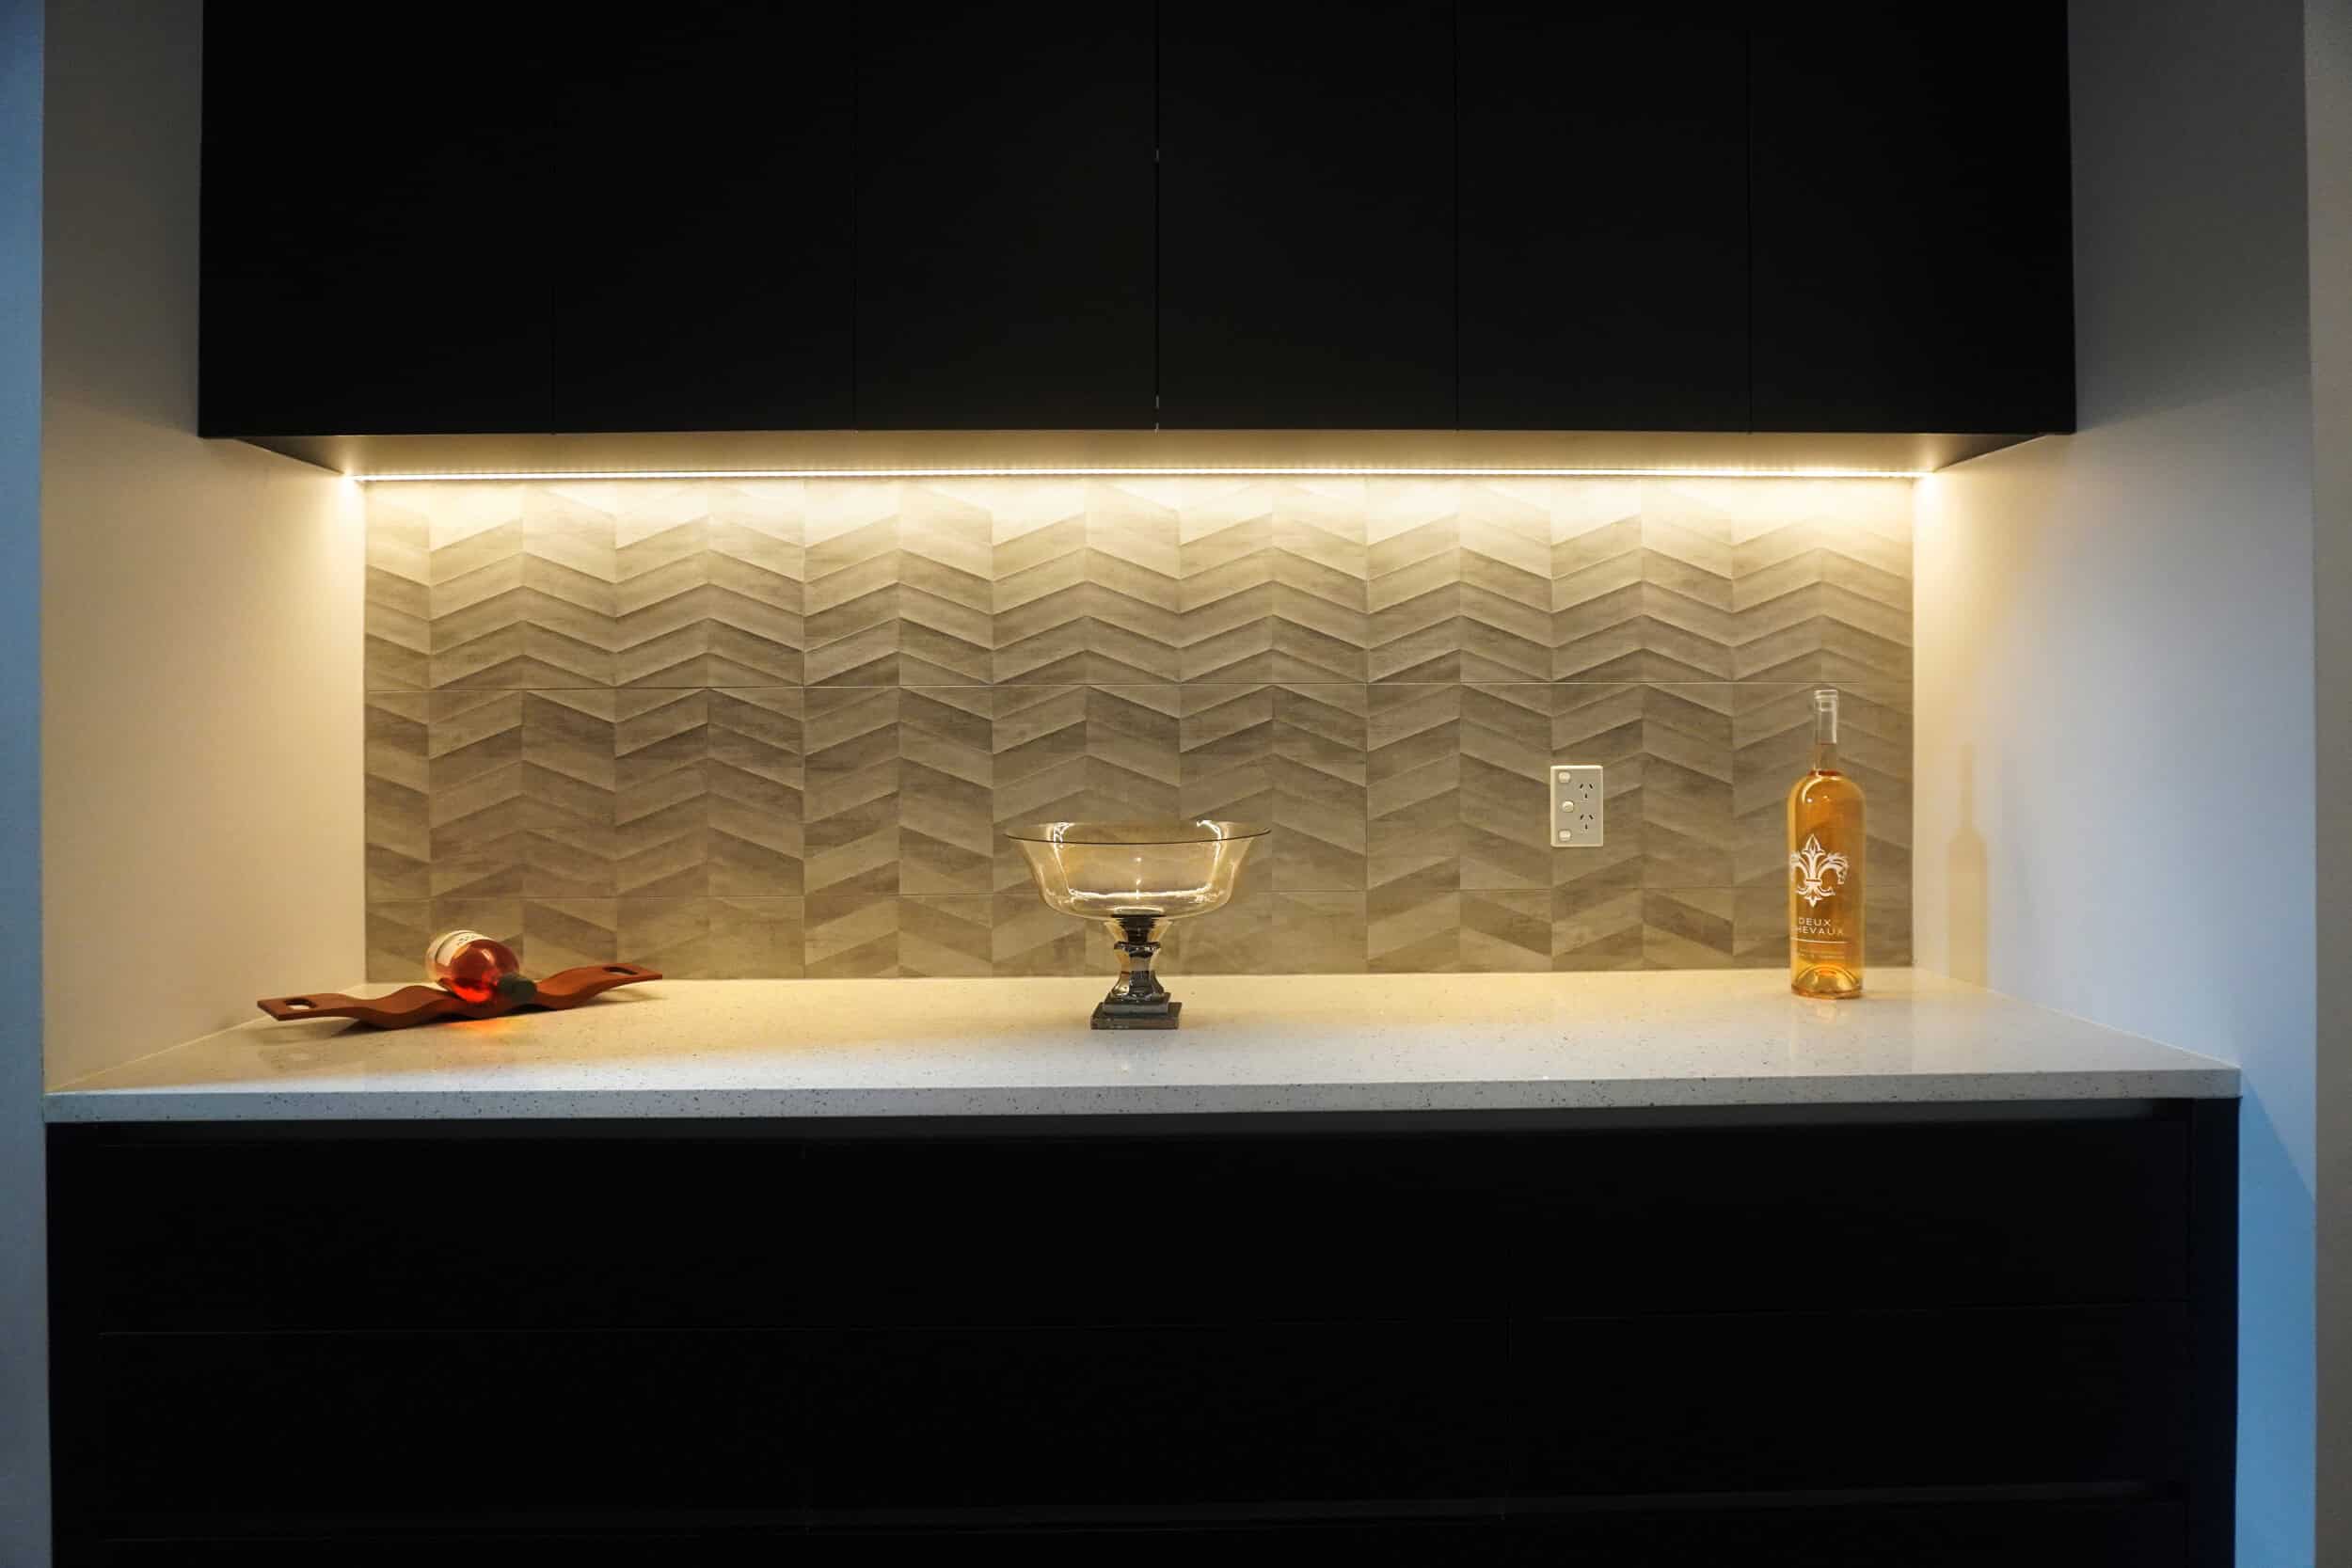
A kitchen renovation in Henderson Valley.
Decorative lighting
Decorative lighting is the fitting you’d buy even if it gave no light: a chandelier, an oversized pendant, a sculptural piece. It still has to light something, but its main job is to set the style, whether that’s modern, rustic or traditional.
In our work: This display in our Auckland renovation showroom uses a decorative chandelier as part of the kitchen design. It shows that a light fitting can be a design element in its own right, not just a source of light.

Different materials, textures, lighting and finishes working together in one kitchen design.
In our work: In this kitchen renovation, pendant lights over the peninsula act as the decorative layer.
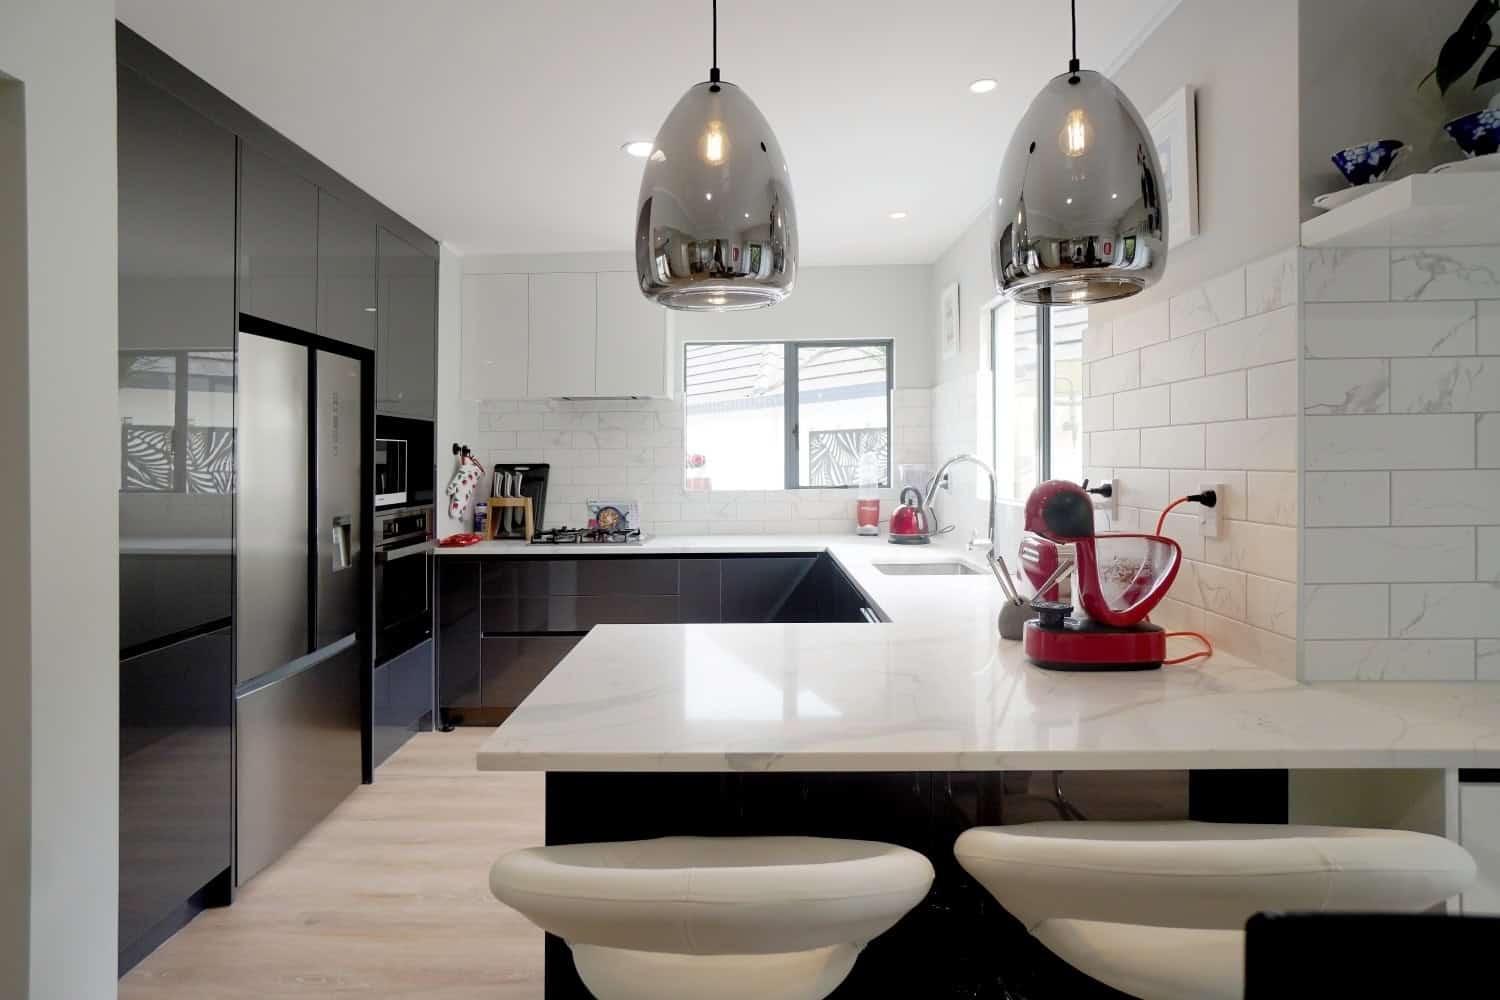
A simple modern kitchen renovation using decorative pendants. See the full video transformation below.
See the full transformation of the kitchen above.
A chandelier over the dining table adds formality. Pendants in natural materials like rattan, timber or linen give a softer, more organic feel. Either way, choose the decorative pieces to suit the rest of the scheme so each fitting earns its place.
Kitchen Lighting Ideas for NZ Homes: The Numbers to Settle Early
Layers tell you what kind of light goes where. These are the decisions that make the layers work, and most of them have to be made before the electrician’s rough-in, not at the lighting shop afterwards.
Colour temperature: pick one Kelvin and stick to it
Colour temperature describes how warm or cool white light looks, measured in Kelvin (K). Lower numbers look yellower and warmer, higher numbers look whiter and bluer. EECA’s LED lighting guidance puts it simply: warm white is more comfortable in homes, while cool white suits places where contrast matters, such as workshops and garages.
The kitchen designers at Little Giant Interiors, our in-house cabinetry company, give the numbers in their guide to getting a high-end look from kitchen lighting and materials: warm white around 3000K flatters timber, brass and warm-toned stone, while a cooler 4000K suits a cool grey or monochrome scheme. The bigger rule is to choose one colour temperature and use it on every layer. Mixing temperatures across pendants, downlights and strip is the most common reason a new kitchen looks slightly off in person and worse in photos.
💡 Quick tip: Buy all the lamps for one layer at the same time, in the same model and from the same supplier. Mixing brands bought months apart is where mismatched whites usually come from, even when the boxes print the same Kelvin number.
Colour rendering (CRI): what lighting makes food look more appealing?
Colour temperature is the colour of the light itself. Colour rendering is how truthfully that light shows the colours of what it lands on: the red of a tomato, the green of herbs, the real tone of your benchtop. It’s rated on the colour rendering index, or CRI. The higher the CRI, the closer colours look to how they appear in daylight, which is why food, timber and stone look richer under a good lamp and grey or washed out under a poor one.
EECA describes minimum performance standards for LED lamps in New Zealand as proposed, not yet in force. EECA’s December 2025 testing of LED bulbs against proposed standards lists what packaging would have to show under the proposed rules, including the rated colour temperature rounded to the nearest 100K, the rated CRI with additional markings if the CRI is below 80, and dimmability. The same testing found 2 of the 20 models tested failed the colour performance requirements in the first round. Until the rules land, ask your supplier for the rated CRI of every fitting near the bench, and treat 80 as the floor, not the target.
Under-cabinet LED: where the strip goes matters
Under-cabinet lighting is the single most useful task light in a kitchen, and the most often fitted wrongly. Little Giant Interiors recommends LED strip in an aluminium channel with a diffuser, set toward the front edge of the upper cabinet. Mounted at the back, it lights the splashback. Mounted forward, it lights the bench you’re actually working on. The diffuser also stops a glossy splashback reflecting a row of bright dots back at you.
Sometimes you want the splashback lit. On the Henderson Valley kitchen above, the strip was placed to wash the 3D-effect chevron tile, and the bench still gets enough spill to work by. Decide which job the strip is doing before the cabinets are drawn, because the channel is built into the cabinet underside.
Pendant heights over an island
Two or three pendants is the usual answer for an island, and the Henderson Valley kitchen uses three. Little Giant Interiors suggests hanging them so the bottom of the shade sits roughly 750mm above the bench. Higher and they stop feeling connected to the island. Lower and they cut across the sightline to the rest of the room, which matters in the open-plan kitchens most Auckland renovations end up with. Treat 750mm as a starting point, then check it against the shade size, the ceiling height and the height of the people who use the island.
Downlights: lumens, placement and the ceiling above
Compare LED downlights by lumens, not watts. EECA notes that LED packaging shows light output in lumens, usually with an incandescent wattage equivalent, and that LEDs will typically appear brighter than the wattage suggests. For placement, Little Giant Interiors puts downlights over the front edge of the bench rather than the middle of the walkway, so you’re not standing in your own shadow while you work.
EECA also recommends replacing the whole fitting, not just the bulb, when you upgrade recessed downlights, because the biggest savings come from reducing heat loss into the ceiling. Its guidance says most LEDs can be installed without gaps between them and the insulation. Check the specific fitting’s rating with your electrician, particularly in an older Auckland villa or bungalow where the ceiling insulation is being topped up at the same time.
Dimming and switching zones
Put each layer on its own switch: under-cabinet, pendants and downlights at a minimum, as Little Giant Interiors recommends. On one switch you get full glare or nothing. Add dimmers to the ambient and decorative layers and the kitchen can run at three or four different moods. Two catches: EECA notes that LEDs come as dimmable or non-dimmable, so check every lamp, and the proposed labelling rules would add dimming compatibility to the pack because not every LED works with every dimmer.
| Decision | Starting point | Where it comes from |
|---|---|---|
| Colour temperature | One temperature throughout: about 3000K for warm schemes, 4000K for cool grey or monochrome | EECA (warm white for homes); Little Giant Interiors (Kelvin values) |
| Colour rendering | Ask for the rated CRI; 80 is the floor | EECA proposed LED labelling rules |
| Under-cabinet strip | Aluminium channel with diffuser, toward the front edge | Little Giant Interiors |
| Island pendants | Two or three, shade bottom roughly 750mm above the bench | Little Giant Interiors |
| Downlights | Compare by lumens; place over the bench front edge; replace whole fittings | EECA; Little Giant Interiors |
| Switching | Each layer on its own switch; check every lamp is dimmable | Little Giant Interiors; EECA |
How Kitchen Designers Plan Lighting in a Renovation
Professional kitchen designers treat lighting as part of the layout, not a finishing touch. In a renovation that matters even more, because lighting is one of the cheapest things to get right at design stage and one of the most expensive to retrofit: under-cabinet channels, pendant drops and new switch positions all have to be wired before the cabinetry and GIB go back on.
Planning the layout
The first step is reading the room. Our designers look at where natural light comes from and when, then map the work zones that need task light: the sink, the hob, the main prep bench and any island. That plan sets where every switch, pendant drop and under-cabinet feed goes, so the electrician’s rough-in matches the cabinetry that arrives weeks later. Our walk-through of each stage of a kitchen renovation shows the order: the electrician wires new circuits and lighting positions to the design plan at rough-in, then connects the under-cabinet and pendant lighting at fit-off, once the benchtop is in. If you’re working out the order of trades, our kitchen renovation checklist puts the lighting decisions in sequence with everything else.
For a small or galley kitchen, the same thinking applies on a tighter footprint. Our design ideas for small kitchens cover the layout side, and light-coloured fronts with good under-cabinet lighting do a lot to make a narrow room feel wider.
In our work: This kitchen render from our design studio shows natural light planned in from the start. Two skylights bring daylight over the island, pendants hang above it, recessed lights sit around the fridge and accent lighting runs near the island.
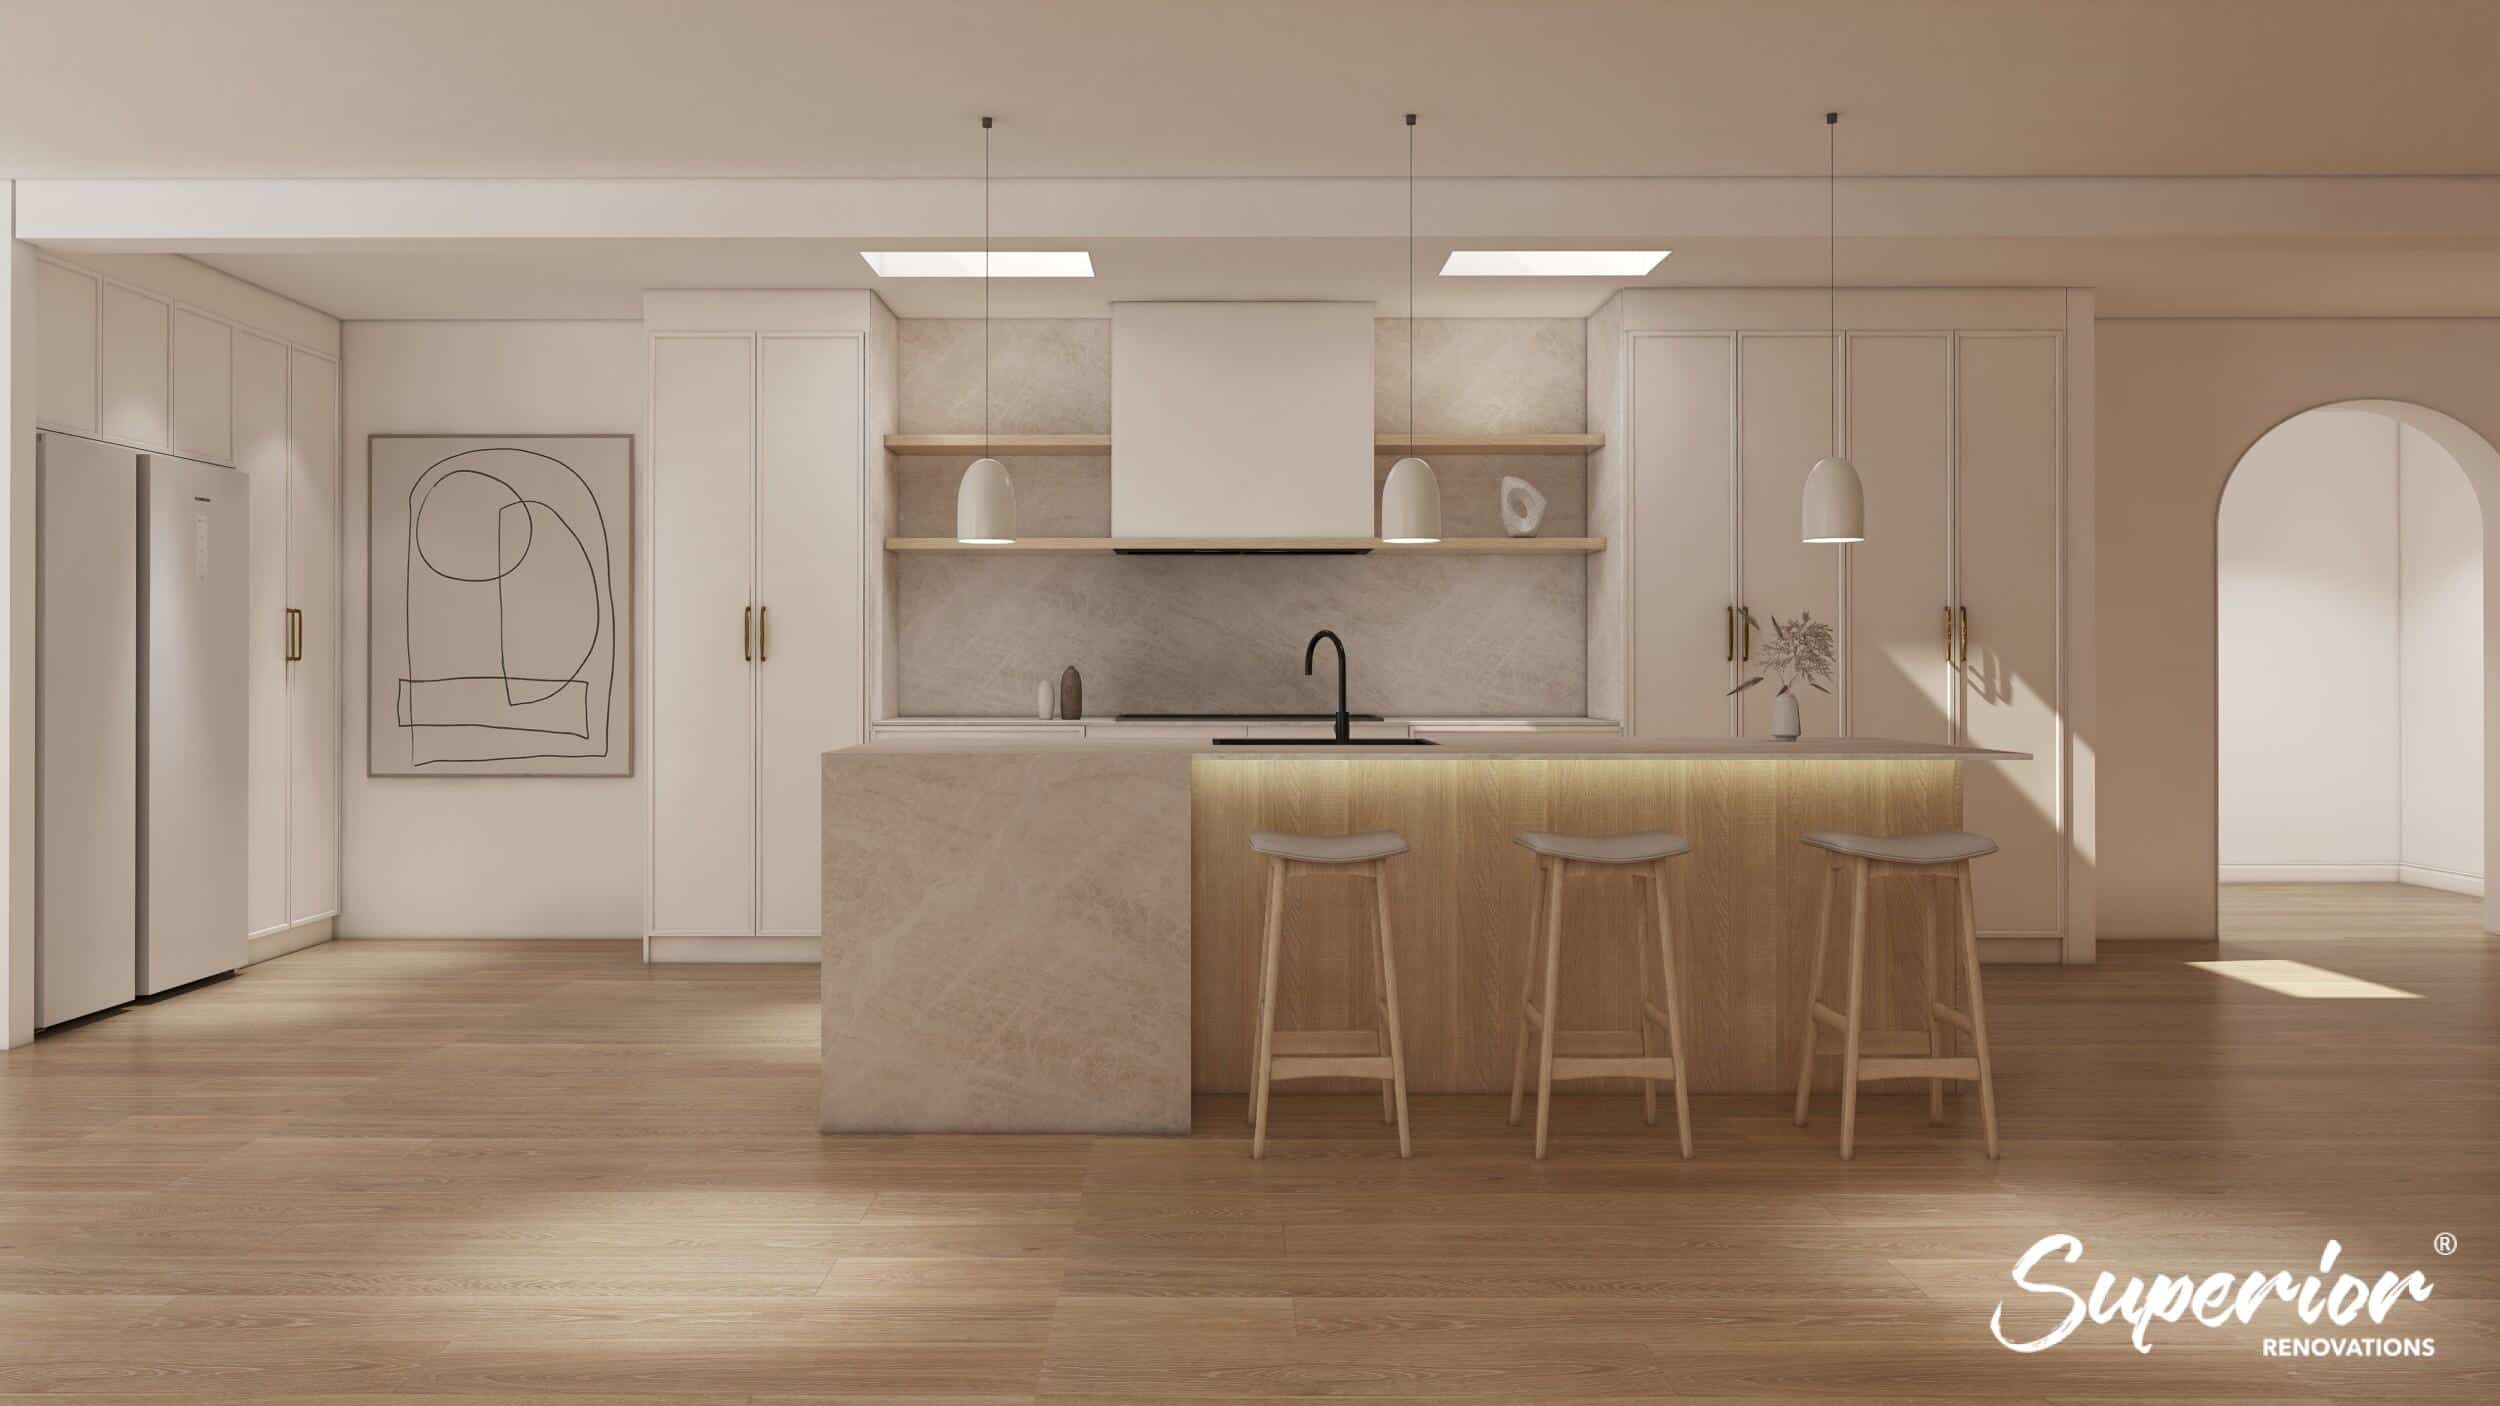
Kitchen render by our Design Studio.
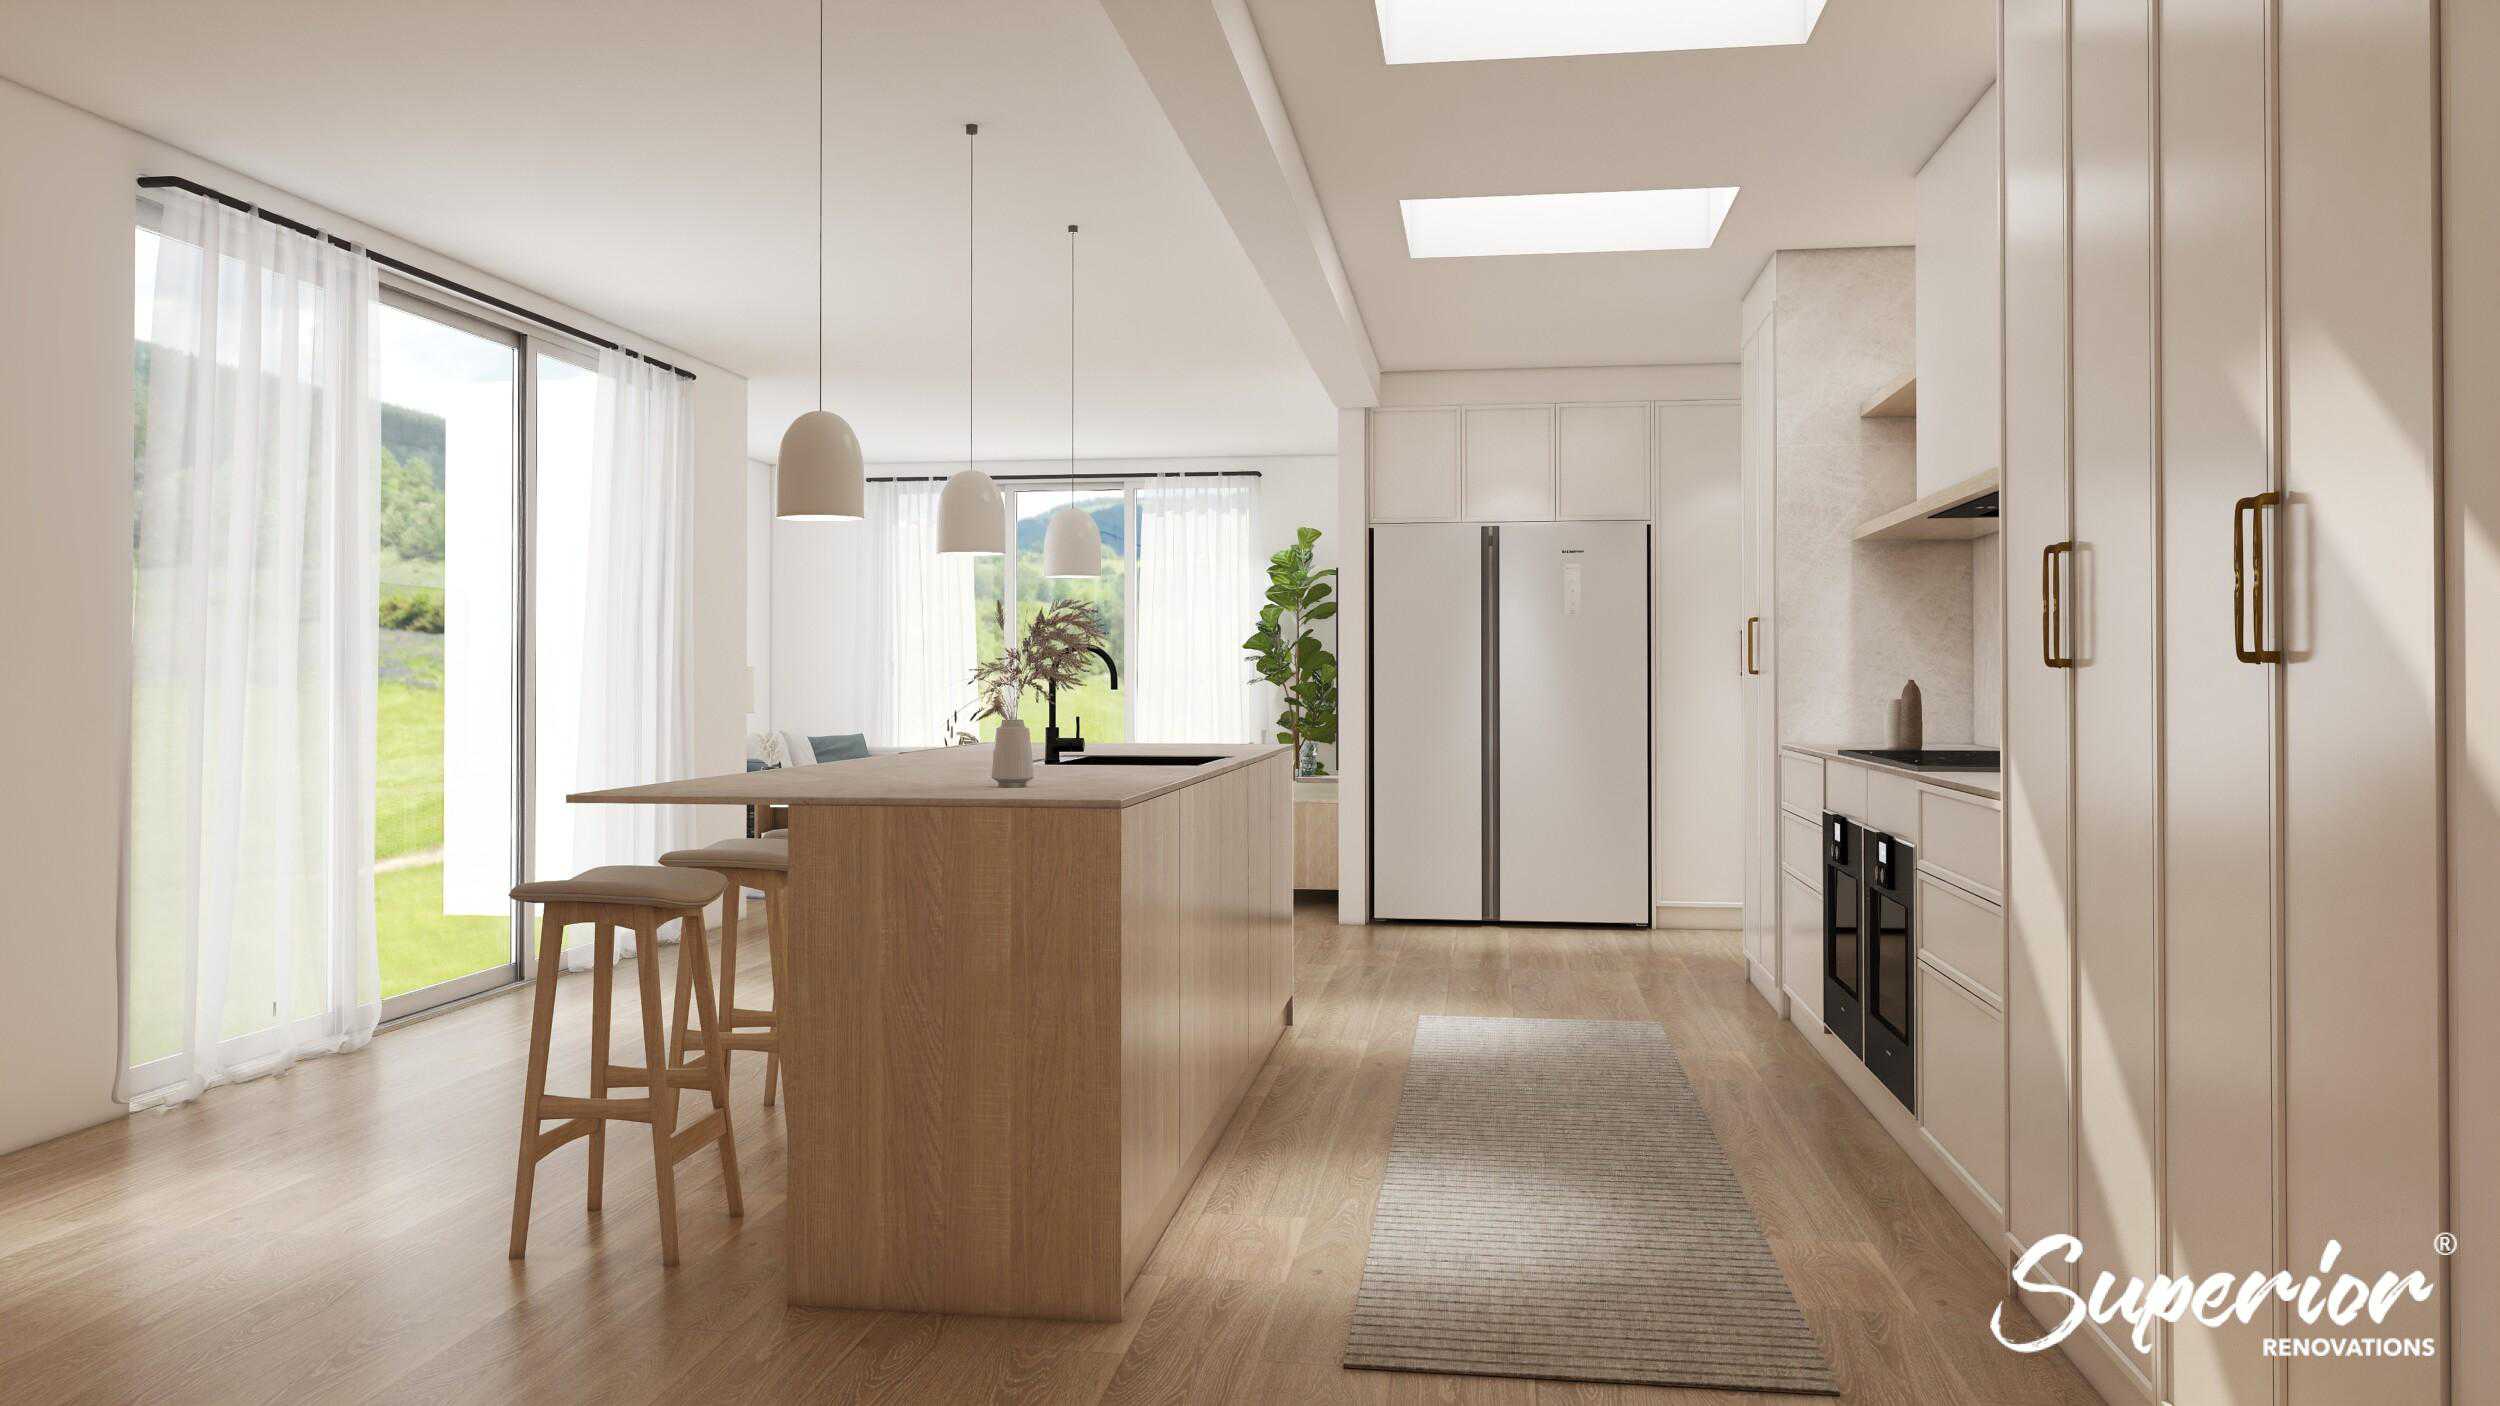
A second view of the same Design Studio render.
In our work: This kitchen we renovated in Herne Bay shows skylights built into the kitchen design.
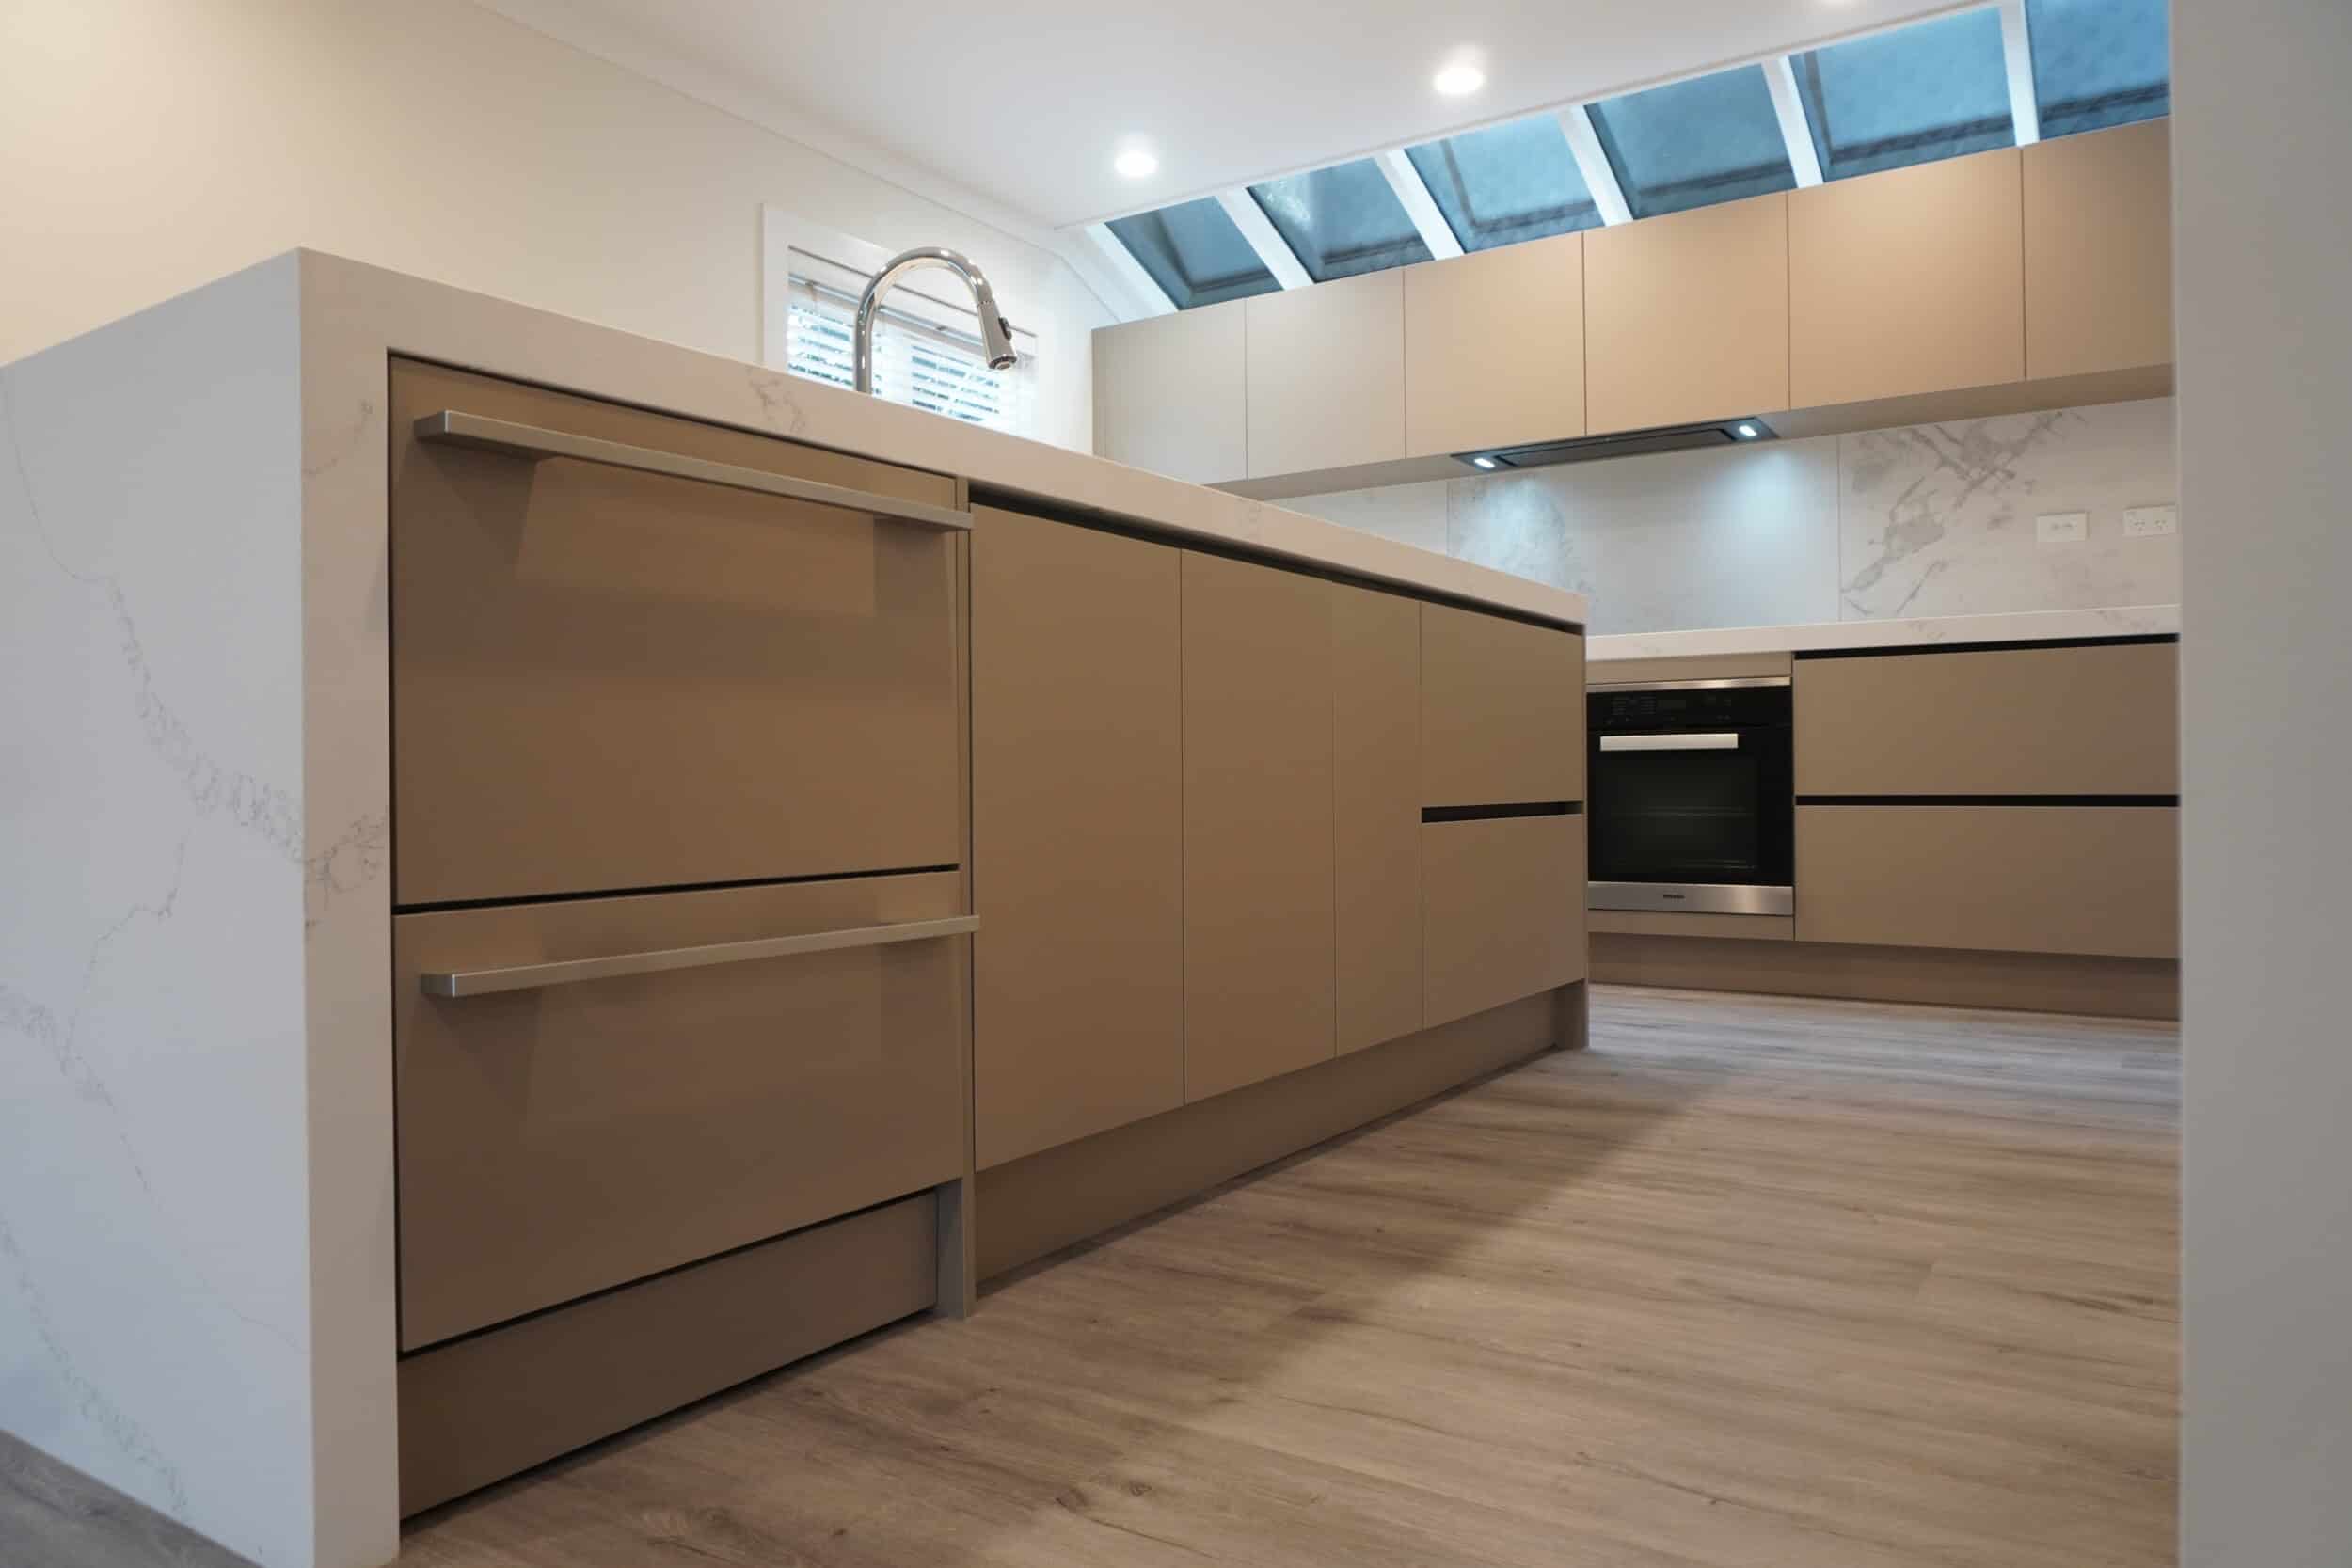
Kitchen renovation in Herne Bay with skylights for added natural light in the kitchen.
See the full design transformation for the project above.
Layering the lighting
A well-designed kitchen combines the four layers so it works for every job. Layering also creates zones in an open-plan space: bright task light over the cooking area, softer ambient light where the dining table sits, and accent light that ties the two together in the evening.
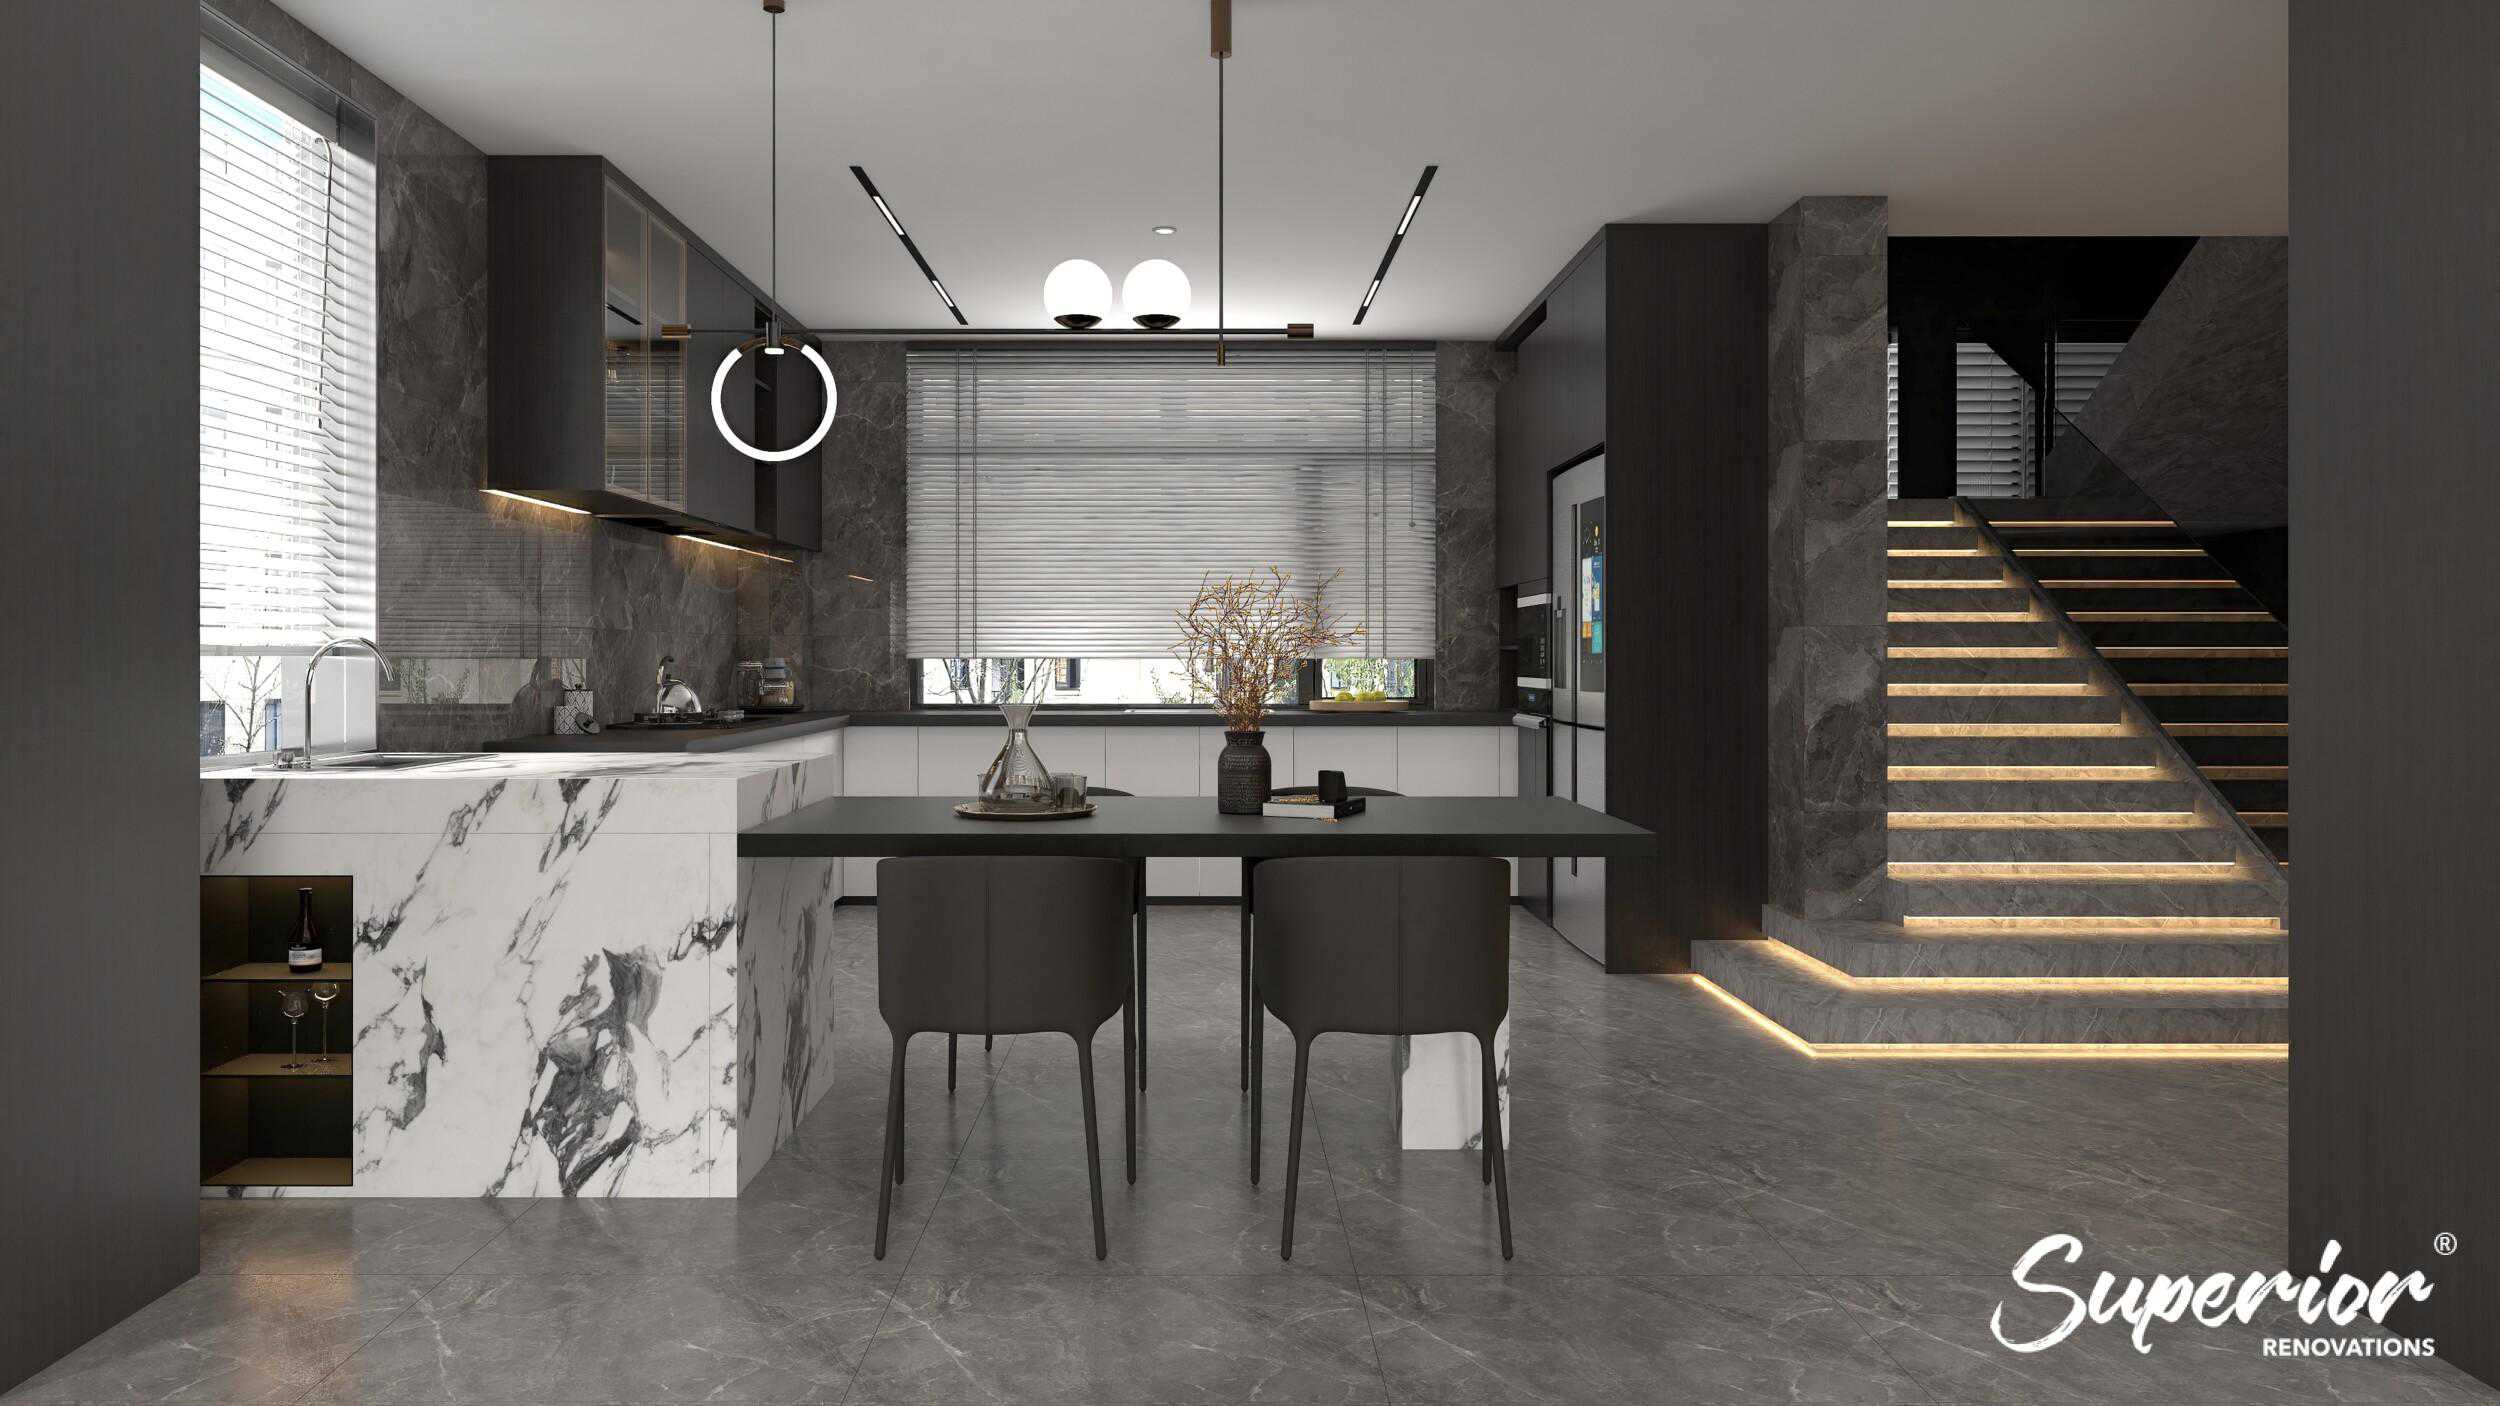
This Design Studio render layers pendant, linear and accent lighting across a mix of textures and materials.
Choosing the right fixtures
The fittings have to suit the style and do the job. Sleek modern kitchens usually suit minimal recessed lights and slim pendants. A villa kitchen in Ponsonby or Grey Lynn can carry a lantern or a more traditional pendant. Beyond looks, LED is the sensible default: EECA puts LED lifetime at 30,000 hours against 2,000 for an incandescent bulb, and says LEDs use up to 85% less electricity. Match the colour temperature to the materials, as above.
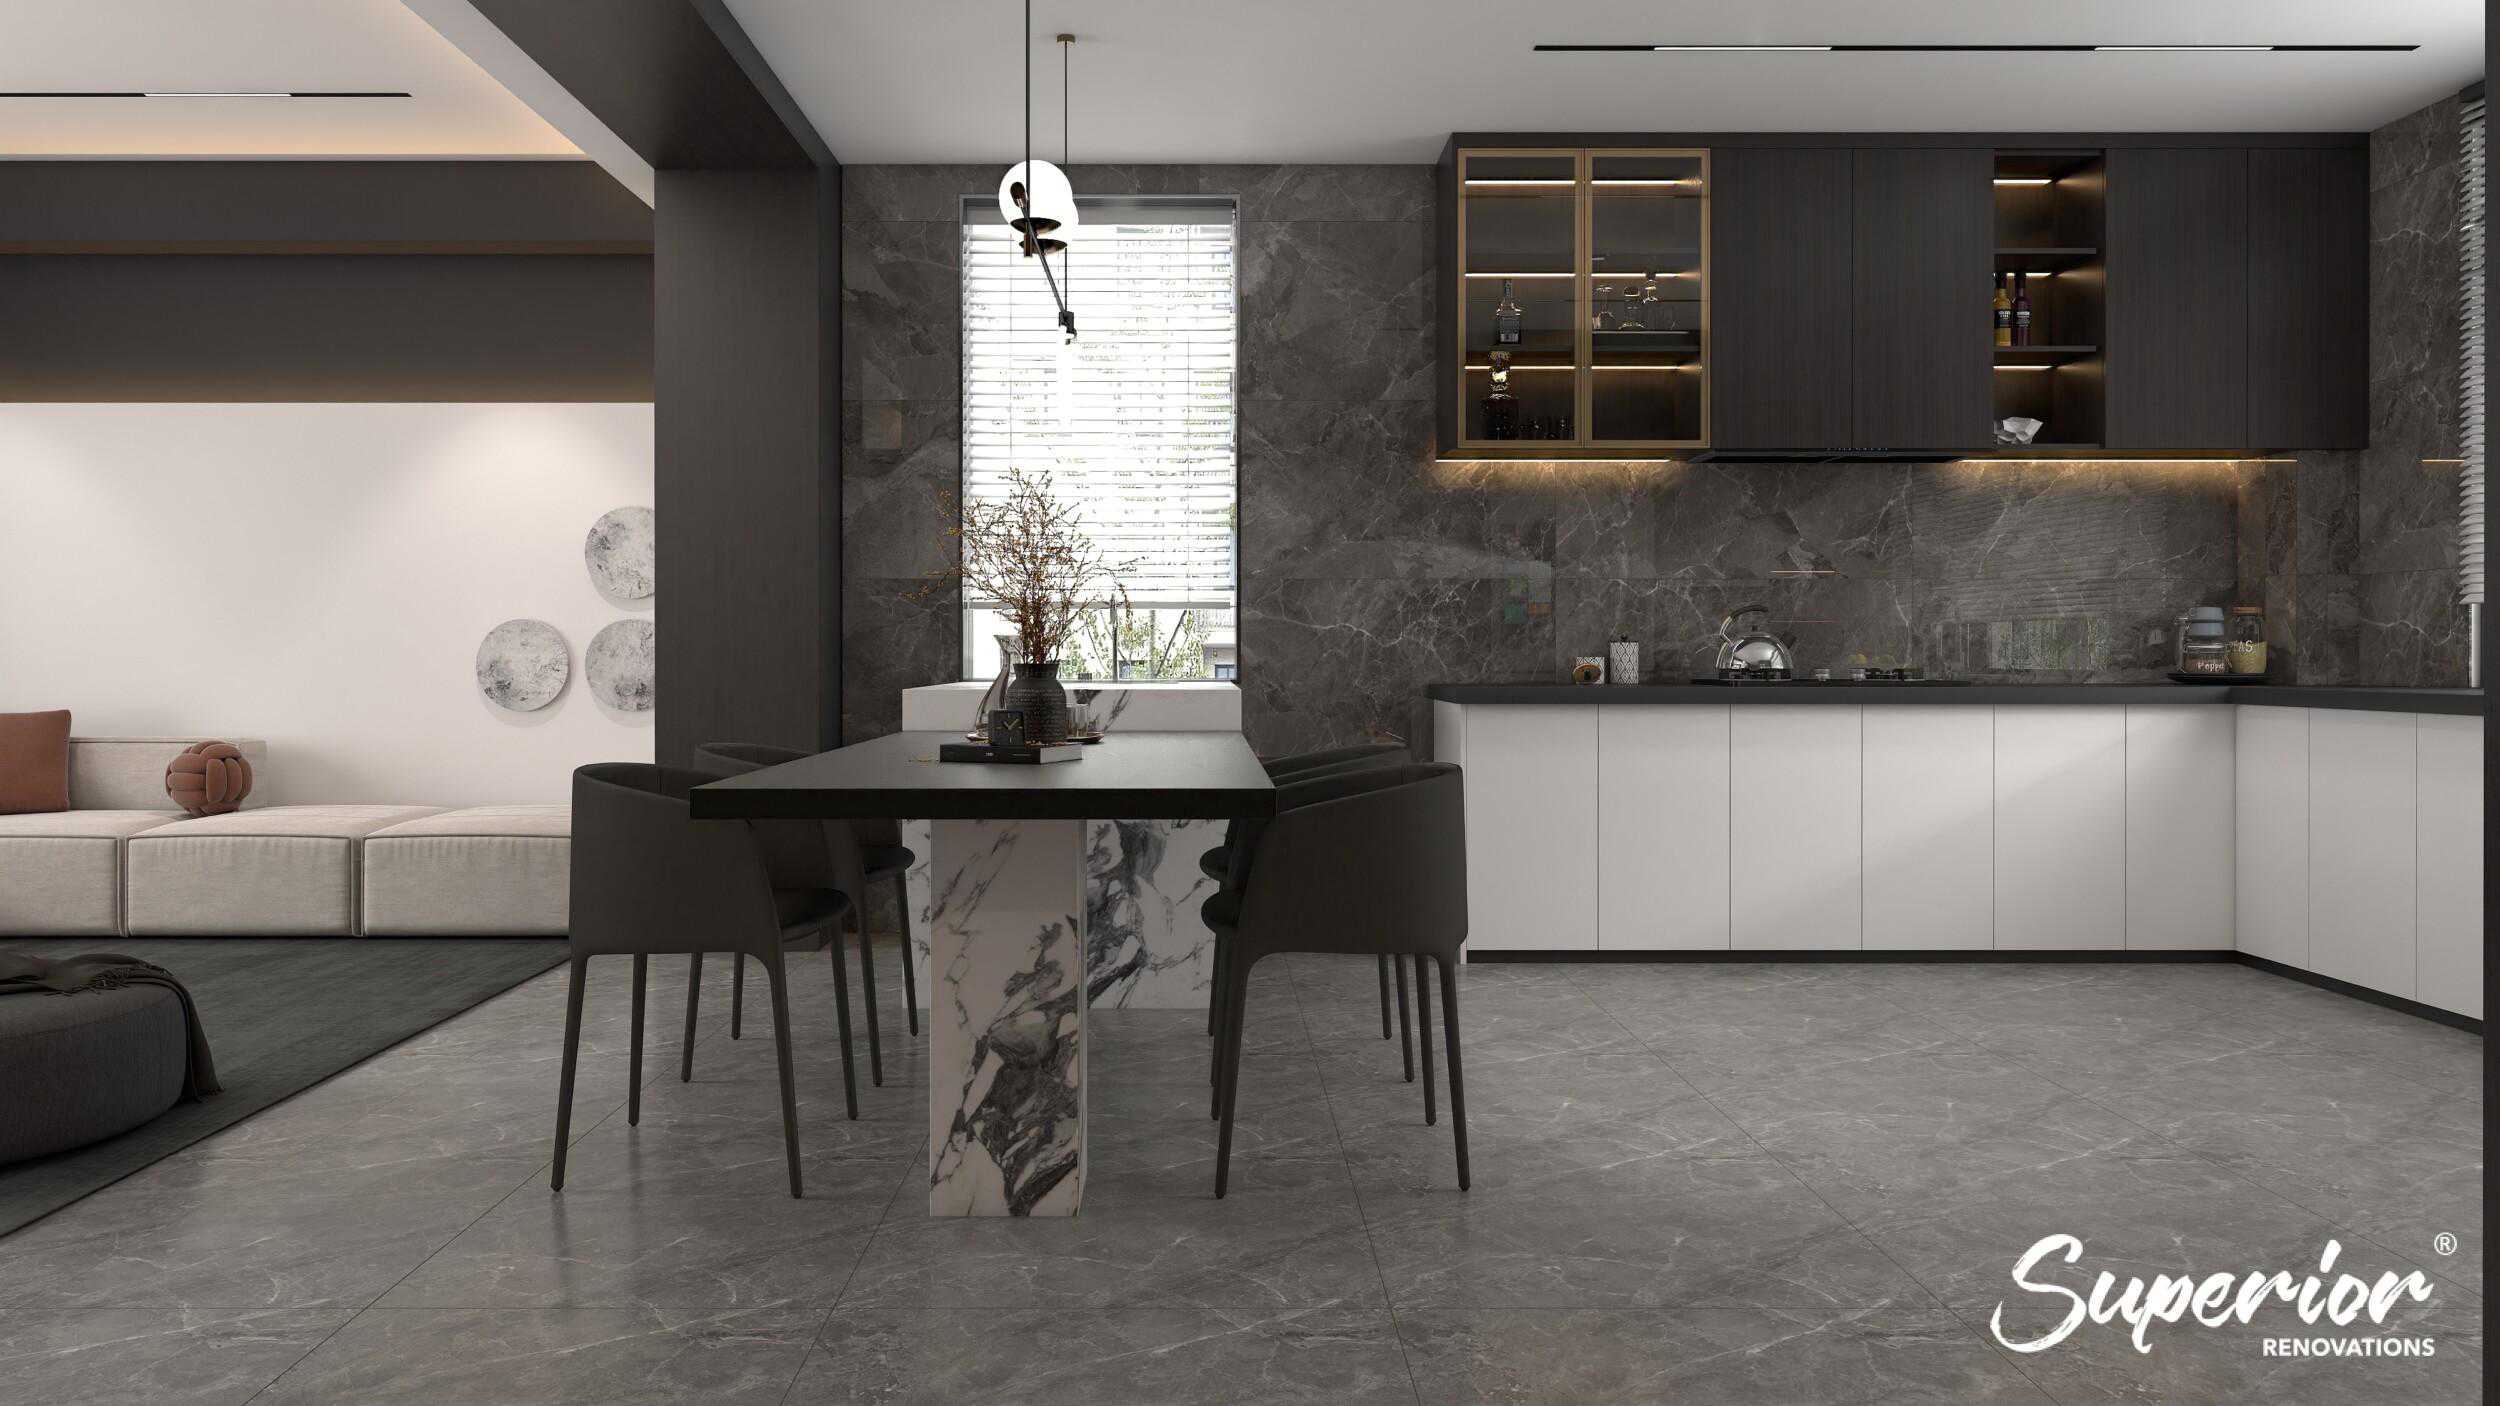
A second view of the same Design Studio render.
Integrating smart lighting
Smart lighting lets you control brightness, colour and timing from an app or by voice, and set scenes for cooking, dining or a late snack. It can also link to motion sensors, so the pantry or scullery light comes on by itself. If you want it, plan it now: smart switches and hubs are far easier to wire in during a renovation than after. Our guide to smart home wiring during an Auckland renovation covers what to put in while the walls are open.
Who Can Wire Your Kitchen Lighting in NZ?
Lighting design is a design job. Lighting installation is electrical work, and New Zealand law is specific about who can do it.
Section 79 of the Electricity Act 1992 lets the owner of a home they live in do some electrical wiring work on it, but only within limits set by regulations, with no part of the work connected to a power supply while it’s being done. Regulation 57 of the Electricity (Safety) Regulations 2010 sets those limits for a domestic installation. They include removing and replacing switches, socket-outlets and light fittings where the work doesn’t involve the switchboard, and relocating existing switches and lighting outlets supplied by tough plastic-sheathed cable. Installing, extending or altering subcircuits is only allowed if the owner never enters an enclosure where live conductors are likely to be present, and the work must be tested and certified to Part 2 of AS/NZS 3000 by a person authorised to inspect mains work before it’s connected. The regulation also requires the work to be done and tested to the electrical code of practice ECP 51.
In a kitchen renovation, new circuits for pendants, under-cabinet lighting and separate dimmer zones go well past swapping a light fitting. Have a licensed electrician do the wiring. On our kitchens the designer sets the electrical and lighting points in the layout and the electrician wires to that plan. Our guide to what you can legally DIY in a kitchen renovation sets out the electrical, plumbing and gas limits in full.
Important note: This section summarises the law as written on legislation.govt.nz when we checked it on 12 Oct 2026. It is general information, not advice for your installation. Talk to a licensed electrician before any wiring work, and to your council or a Licensed Building Practitioner if the renovation includes building work.
Kitchen Lighting Mistakes to Avoid
The right lighting makes a kitchen. The wrong choices can undo a good design. These are the ones we see most often when we’re called in to redo a kitchen.
1. Harsh overhead lighting on its own
A single overhead fitting, especially an old fluorescent batten, gives a flat, cold light and throws your shadow straight onto the bench. Mix in task and ambient light instead. If an overhead fitting has to stay, make it dimmable and warm white.
2. Not enough task lighting
Neglecting task light is the most common mistake in kitchen design. Ambient light alone leaves shadows across the bench, which means eye strain and a higher chance of a slip with the knife. Under-cabinet strips, pendants and recessed spotlights over each work zone fix it.
3. Overly bright or coloured lighting
Colour-changing strips and very bright, very cool LEDs can be fun for a week and tiring after that. Choose light that suits the kitchen’s materials and colours, and add dimmers so it can be turned down.
More on this: 10 mistakes our kitchen designers see most often.
4. Mixing colour temperatures
Warm pendants, cool downlights and a neutral under-cabinet strip in one room will clash, even if every fitting is good on its own. As covered above, pick one colour temperature and buy the lamps for each layer together.
5. Mismatched fixtures
Mixing styles can work, but only on purpose. Make sure the fittings agree on finish, scale and style, or keep to one design theme. If you’re not sure, a kitchen designer can pull it together.
Related reading: a guide to kitchen layouts and ergonomics.
6. No dimmers or separate controls
Without dimmers or separate switching you’re stuck with one level of light for every task and occasion. Bright for cooking, soft for dinner: that only works if the wiring was planned for it. Smart controls add convenience on top.
Our Design Studio Experience
Meet our designers and see how a kitchen is planned in our design studio.
Getting Your Kitchen Lighting Right
Good kitchen lighting comes down to a handful of early decisions: four layers, one colour temperature, task light on every bench, pendants at the right height and each layer on its own switch. Make them at design stage and they cost little. Make them after the cabinets are in and every change means opening up finished work.
➡ Book your free in-home consultation with Superior Renovations
➡ See how we plan a kitchen’s lighting, cabinetry and build as one job
➡ Request a free feasibility report for your project
What is the role of lighting in kitchen design?
Lighting does three jobs in a kitchen: it makes work safe by putting light on the bench, it shows off the materials and features you chose, and it sets the mood once the cooking is done. A good plan uses layers of ambient, task, accent and decorative light, each on its own switch, so the same kitchen works at full brightness for cooking and low light for dinner.
What are the best kitchen lighting ideas for NZ homes?
Start with four layers: downlights for even ambient light, LED strip under the upper cabinets for task light, accent light in glass cabinets or on a feature splashback, and two or three pendants over the island. Use one warm white colour temperature throughout, as EECA says warm white is more comfortable in homes, and put each layer on its own switch or dimmer.
What colour temperature is best for kitchen lighting?
Choose one and use it on every layer. Little Giant Interiors, our in-house cabinetry company, suggests warm white around 3000K for timber, brass and warm stone, and around 4000K for a cool grey or monochrome scheme. EECA's guidance is that warm white is more comfortable in homes and cool white suits places where contrast matters, such as workshops.
What lighting makes food look more appealing?
Light with a high colour rendering index (CRI) shows the true colours of food, timber and stone, so produce looks fresh rather than grey. Under the labelling rules EECA has tested LED bulbs against, packaging would show the rated CRI, with additional markings if it is below 80. Ask your supplier for the rated CRI of every fitting near the bench and treat 80 as the minimum.
What is kitchen task lighting?
Task lighting is focused light on the places you work: the main prep bench, the sink, the hob and the island. The most useful version is LED strip in a diffused aluminium channel toward the front edge of the upper cabinets, so it lights the bench rather than your back. Pendants or downlights over the island and sink cover the rest.
How high should pendant lights hang over a kitchen island?
Little Giant Interiors suggests hanging two or three pendants so the bottom of the shade sits roughly 750mm above the bench. Higher and they stop feeling connected to the island; lower and they block the view across an open-plan room. Treat 750mm as a starting point and adjust for the shade size, the ceiling height and the people who use the island.
Should kitchen lights be on separate switches?
Yes. Put under-cabinet lighting, pendants and downlights on separate switches at a minimum, and add dimmers to the ambient and decorative layers. That lets you run the kitchen bright for cooking and low for dining. Check every LED is dimmable before you buy, because EECA notes LEDs come in dimmable and non-dimmable versions.
Can I install kitchen lighting myself in NZ?
Only within narrow limits. Under section 79 of the Electricity Act 1992 and regulation 57 of the Electricity (Safety) Regulations 2010, a homeowner can do some work such as replacing light fittings that do not involve the switchboard, but new subcircuits must be tested and certified by a person authorised to inspect mains work before connection. For a kitchen renovation, have a licensed electrician do the wiring.
When should I plan the lighting in a kitchen renovation?
At design stage, before the cabinetry is made. Under-cabinet channels, pendant positions and new switch locations all have to be wired before the cabinets and GIB go on, so changing them later means opening finished work. Our designers draw the lighting plan with the layout so the electrician's rough-in matches the cabinetry.
Are LED downlights safe next to ceiling insulation?
EECA's guidance says most LEDs can be installed without gaps between them and the insulation, which reduces fire risk compared with older downlights and lets the ceiling be insulated properly. It also recommends replacing the whole recessed fitting rather than just the bulb. Check the rating of the specific fitting with your electrician before insulation goes back in.
Further Resources for your kitchen renovation
- Featured projects and client stories to see specifications on some of the projects.
- Real client stories from Auckland
- Kitchen and bathroom inspiration: our kitchen design gallery and bathroom design gallery
- Meet the people behind the designs: our in-house design department
Want a specific cost estimate? Try our renovation cost calculators
- Bathroom Renovation Cost Calculator
- Kitchen Renovation Cost Calculator
- Reroofing Cost Calculator
- Double Glazing Cost Calculator
- House Extension Cost Calculator
- Custom Kitchen Cabinetry Cost Calculator
Need more information?
Take advantage of our FREE Complete Home Renovation Guide (48 pages), whether you’re already renovating or in the process of deciding to renovate, it’s not an easy process, this guide which includes a free 100+ point check list – will help you avoid costly mistakes.
Download Free Renovation Guide (PDF)

Have you been putting off getting renovations done?
We have partnered with Q Mastercard ® to provide you an 18 Month Interest-Free Payment Option, you can enjoy your new home now and stress less.
Learn More about Interest-Free Payment Options*
*Lending criteria, fees, terms and conditions apply. Mastercard is a registered trademark and the circles design is a trademark of Mastercard International Incorporated.
Still have questions unanswered?
Book a no-obligation consultation with the team at Superior Renovations,
we’d love to meet you to discuss your renovation ideas!