
Landscaping & Outdoor

d675d752 64e5 44ab 9af8 65752d94b8e1 - Superior Renovations
Landscaping & Outdoor

Louvre Roof NZ: Cost, Consent and Choosing a System That Lasts (Auckland 2026)

Quick answer: A louvre roof in Auckland typically runs $15,000–$35,000 for a motorised aluminium system, and here’s the catch most people miss — a pergola is consent-exempt at any size only while it stays unroofed, so the moment you add a louvre roof, the council treats it as a roofed structure with its own consent rules.

Every summer we get the same call. Someone’s deck bakes from about 11am, the outdoor table hasn’t been used since Waitangi weekend, and they’ve seen a neighbour in Howick or Torbay put in one of those adjustable-blade roofs that tilts open for sun and shuts for a southerly. They want one. What they don’t want is a $28,000 aluminium structure that either rusts near the coast or turns into a consent headache after it’s already bolted to the house.

This is the guide we wish more of them read first. Real Auckland cost bands, the consent rules that trip people up, and how to choose a system that’s still working in ten years.


What a Louvre Roof Actually Is (and How It Differs From a Pergola)

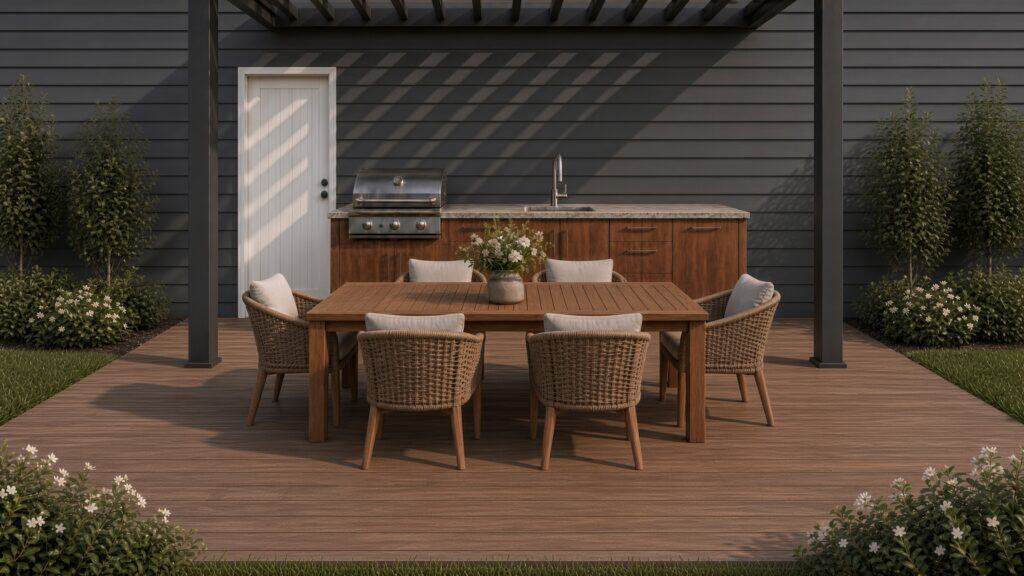
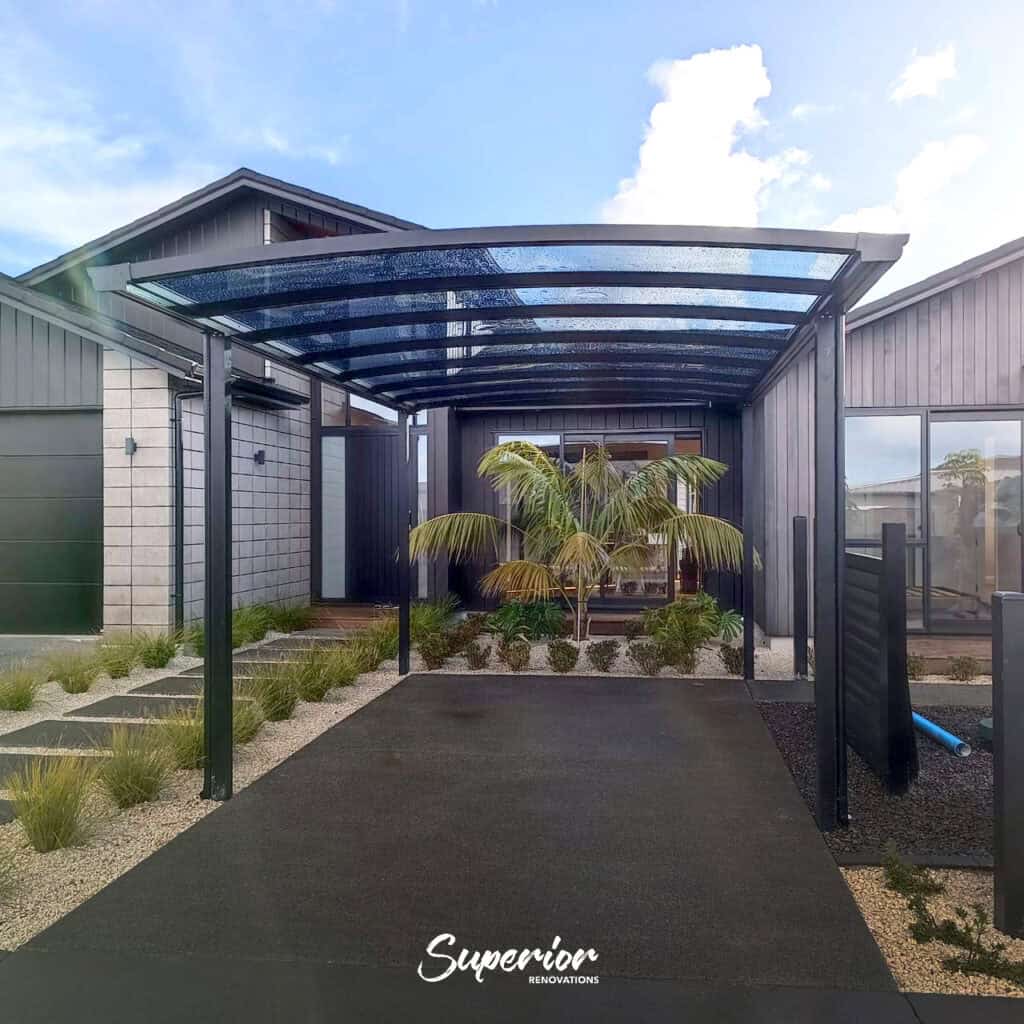
A louvre roof is a pergola with a roof that moves. Instead of open beams or fixed slats, it has aluminium blades, called louvres, that pivot on a track. Open them flat and you get full sun. Angle them and you get filtered light and airflow. Close them and, on a decent system, you stay dry through light rain because the blades seal against each other and drain the water out through the frame’s gutters.

That single moving part is what separates a louvre roof from the two things people often confuse it with.

Louvre roof vs pergola vs solid patio roof

A traditional timber or aluminium pergola is a frame — it breaks up harsh sun and looks the part, but it won’t keep rain off. A solid patio roof (polycarbonate or long-run steel) keeps everything off but also blocks the light on the days you actually want it. A louvre roof sits in the middle: you decide, blade by blade, how much sky comes through.

Structure Keeps rain off? Adjustable light? Typical use
Pergola (open) No No Shade, structure, planting
Louvre roof Yes, when closed Yes Year-round outdoor living
Solid patio roof Yes, always No Full cover, storage, shelter

Manual or motorised?

Smaller louvre roofs can be hand-cranked. Most people go motorised — a remote or a phone app, and often a rain sensor that closes the blades automatically when the first drops land. The motorised versions cost more and bring an electrical connection into the job, which matters for both budget and consent. We’ll come back to the wiring in a moment, because it’s not a DIY afternoon.

💡 Quick tip: If you’re leaning motorised, ask whether the rain sensor is standard or an add-on, and where the manual override is. Power cuts happen, and you don’t want the blades stuck open in a downpour.


What a Louvre Roof Costs in Auckland

From our own Auckland outdoor builds, a motorised aluminium louvre roof typically lands between $15,000 and $35,000 (GST inclusive), depending on the span, the blade quality, and whether it’s freestanding or fixed to the house. That’s the structure itself. The number on your final invoice usually depends on what sits under and around it.

Covered outdoor living — indicative Auckland pricing

Installed ranges (GST inclusive) from our completed outdoor projects, 2026

Motorised louvre roof$15,000–$35,000
Timber pergola$5,000–$12,000
Screening blinds$3,000–$8,000

Source: Superior Renovations — indicative installed pricing from completed Auckland outdoor projects. Ranges, not fixed quotes.

The costs a product-only quote leaves out

A louvre roof has to land on something solid. If your deck can’t carry the point loads, or you’re building over lawn, you’re adding a deck or a footings-and-slab base underneath. Then there’s the electrical run for a motorised system, and building consent fees if your structure needs one. A quote that shows only the aluminium kit is telling you half the story.

As a rough all-up guide, a designed and built covered outdoor area (base, structure, screens and finishing) is a $30,000-plus project once everything’s in, not a $15,000 one. Where it lands depends entirely on scope.

💡 Quick tip: Run your own numbers before you ring anyone. Our pergola and covered-outdoor cost calculator gives you a ballpark in about a minute so you walk into quotes knowing roughly where you sit.

“The louvre kit is the easy bit. What decides whether the job runs smoothly is the structure under it and the wiring — get the footings and the consent path sorted first, and the roof itself goes up in a day or two.”
— Jeff Zhang, LBP & Site Manager, Superior Renovations


Do You Need Building Consent for a Louvre Roof?

This is where the internet gets it wrong, so read this bit carefully. A lot of installer websites say “louvred pergolas are usually exempt from consent.” That’s not quite how the rules read.

Under Schedule 1 of the Building Act 2004, a pergola is exempt from building consent with no size limit — but only while it stays unroofed. A louvre roof, by definition, is a roof. So the moment you add closing blades, your structure is no longer an exempt pergola. It gets assessed like a porch or verandah instead.

What Schedule 1 actually says

Per Building Performance (MBIE), a roofed porch or verandah is generally exempt from consent up to 20m² when it’s attached at ground or first-storey level. Between 20m² and 30m², it can still be exempt — but only when the design or construction is carried out by a Licensed Building Practitioner. Above that, or where it doesn’t meet the conditions, you’re into a full building consent.

Two things people forget: the structure still has to meet the Building Code even when it’s exempt, and Auckland Council’s site coverage and boundary (yard) rules under the Unitary Plan apply regardless of the consent exemption. A structure that’s fine under the Building Act can still breach a yard setback. Check both.

Important note: Consent thresholds and exemptions are specific to your site and change over time. Treat this as a starting point, not advice for your build — confirm your project with Auckland Council or a Licensed Building Practitioner before you commit. Our sister brand covers the detail in what you can build without consent in NZ.

The 20–30m² LBP pathway is genuinely useful, and it’s one reason we handle these as a build rather than a product drop-off. A licensed builder on the job can be the difference between an exempt project and a full consent, on the exact same structure.


Choosing a System That Survives an Auckland Winter

Auckland is hard on outdoor structures. Salt-laden air off both harbours, humidity, and the odd hard-out southerly that finds anything loose. A louvre roof that looks great in a Sydney showroom photo can pit and stain within a few years in Devonport or Mission Bay if the wrong grade of aluminium and coating go in.

Aluminium grade and powder-coating

Marine-grade aluminium with a quality powder-coat finish is the baseline near the coast. Ask what warranty covers the coating specifically, not just the motor. Come and see blade finishes in person at our Wairau Valley showroom (16B Link Drive) before you settle on a colour. Stainless fixings matter too — cheaper fasteners are usually where the first rust streaks appear, long before the frame itself gives up.

Wind rating and the motor

Exposed Auckland sites, anywhere with a clear run to the water, need a system rated for the wind zone. A good motorised unit will have a wind sensor that opens the blades to let a gust pass through rather than fighting it. That’s a feature worth paying for on a headland section, not a gimmick.

Because a motorised roof needs power, the wiring is prescribed electrical work and has to be done by a registered electrician under New Zealand’s electrical safety rules — not the landscaper, not you. We build the electrical into the plan from the start so there’s a tidy, compliant supply to the motor and any integrated lighting.

“The clients who get the most out of these are the ones who think of it as another room, not a garden gadget. Get the lighting, the heating and the floor right and you’ll use it in July, not just January.”
— Eunice Qin, Designer, Superior Renovations


A Louvre Roof Works Best as Part of One Outdoor-Living Build

The best outdoor rooms we’ve built weren’t a louvre roof bolted onto whatever was already there. They were designed as one job — the deck, the roof, the screening, the lighting and the power, all planned together so the proportions work and the trades don’t trip over each other.

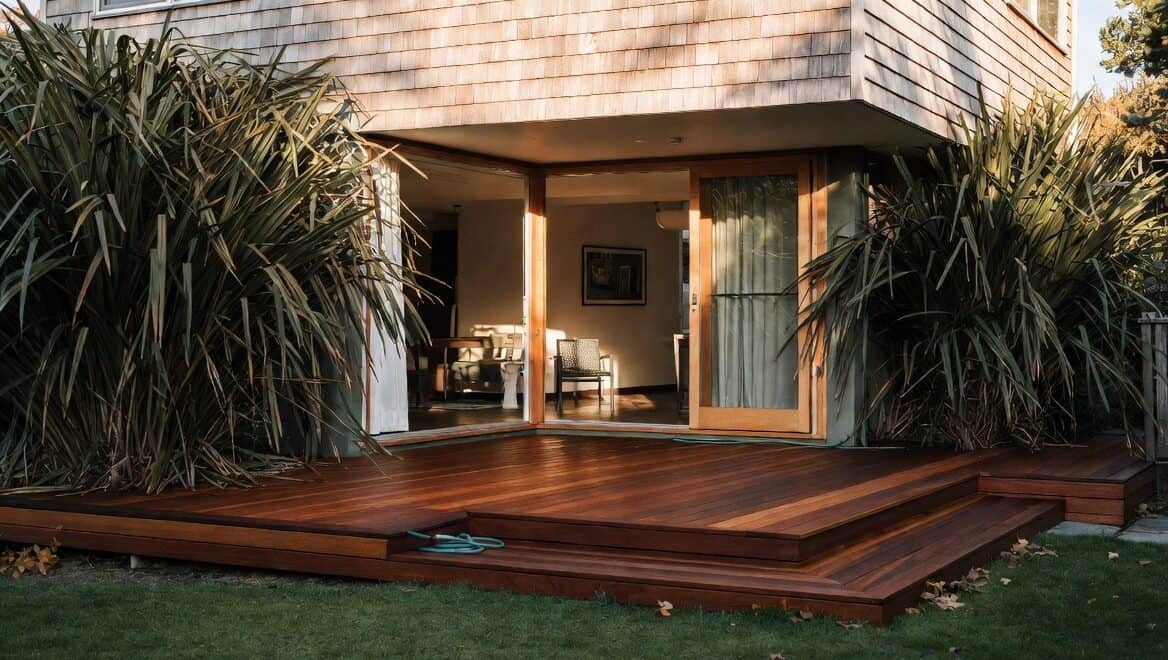
On a Mellons Bay full-home renovation, the Kwila deck was built to make the most of the sea views, with the covered-living zone planned around how the family actually used the space. In Cockle Bay, we ran a full Kwila deck rebuild and extension alongside interior work as one managed project. That’s the difference between an add-on and a room you’ll live in.

How long it takes

A full outdoor-living build (design, any consent, base, structure and finishing) typically runs 6 to 12 weeks of on-site work, with design and consent adding lead time before the tools come out. The louvre roof itself is quick once the structure’s ready; it’s the base and the approvals that set the timeline.

If you’d rather have one team carry the whole thing, from design and consent through to deck and roof, that’s exactly how our team plans and builds an outdoor living area from deck to roof across Auckland.

💡 Quick tip: If a full renovation’s already on the cards, price the outdoor room in at the same time. Sharing scaffolding, project management and trades across one build usually beats bolting it on as a separate job a year later.


The Bottom Line on Louvre Roofs

A louvre roof is one of the best-value ways to actually use your outdoor space year-round in Auckland — if you get the structure, the durability and the consent path right. Budget realistically, choose for the coast not the showroom, and treat the roof as part of a proper build rather than a product on its own.

Book your free in-home consultation with Superior Renovations
Explore our outdoor living and deck build service in Auckland
Request a free feasibility report for your project


Do I need building consent for a louvre roof in NZ?

Often, yes. Under Schedule 1 of the Building Act 2004, an unroofed pergola is exempt at any size, but a louvre roof counts as a roof — so it is assessed like a porch or verandah. That is generally exempt up to 20m² when attached at ground or first-storey level, and between 20m² and 30m² only when a Licensed Building Practitioner does the design or build. Auckland Council site coverage and yard rules also apply. Confirm your site with the council or an LBP before you start.

How much does a louvre roof cost in NZ?

A motorised aluminium louvre roof typically runs $15,000–$35,000 for the structure in Auckland, depending on span, blade quality and whether it is freestanding or attached. Once you add the base or deck it sits on, the electrical run for the motor, and any consent fees, a designed and built covered outdoor area is usually a $30,000-plus project. A hand-operated system on an existing deck sits at the lower end.

What is the difference between a pergola and a louvre roof?

A pergola is an open frame that breaks up sun but does not keep rain off. A louvre roof has pivoting aluminium blades you can open for sun, angle for filtered light, or close to stay dry in light rain. The practical upshot is that a louvre roof lets you use the space year-round, while a pergola is more of a fair-weather structure. It also changes the consent position, since a louvre roof is treated as a roofed structure.

Are motorised louvre roofs worth it?

For most people, yes. A motorised system opens and closes from a remote or phone app, and better units include a rain sensor that shuts the blades automatically. The trade-off is cost and an electrical connection that must be installed by a registered electrician. If your budget is tight and the roof is small, a manual system still does the core job of opening and closing the blades.

Do louvre roofs keep the rain out?

A quality louvre roof keeps you dry in light to moderate rain when the blades are closed, because the blades seal against each other and channel water into the frame's built-in gutters. In heavy, wind-driven Auckland rain some spray can still get in around open sides, which is where screening blinds help. Ask the supplier how the system drains and whether the gutters connect to your stormwater.

What is the best louvre roof material for Auckland's coastal weather?

Marine-grade aluminium with a quality powder-coat finish and stainless fixings is the baseline near the coast. Salt air off Auckland's harbours pits cheaper aluminium and rusts low-grade fasteners within a few years. Ask specifically what warranty covers the coating, not just the motor, and confirm the fixings are stainless. On exposed sites, also check the system is rated for your wind zone.

Can I attach a louvre roof to my house or does it have to be freestanding?

Both are common. Attaching it to the house gives a sheltered flow from indoors out and is popular off a kitchen or living room. Freestanding suits a spot further down the section or where the roofline does not work. Attaching to the dwelling can affect the consent assessment and needs proper flashing so you do not create a leak, so it is worth planning with a builder rather than improvising.

How long does it take to install a louvre roof?

The roof itself goes up in a day or two once the structure is ready. The timeline is driven by everything else — a full outdoor-living build with design, any consent, a new base or deck and finishing typically runs 6 to 12 weeks on site, plus lead time for design and consent beforehand. Installing onto an existing, suitable deck is much quicker.

Does a louvre roof add value to my Auckland home?

Usable outdoor living is a genuine selling point in Auckland, where indoor-outdoor flow is high on most buyers' lists. A well-built, consented louvre roof that extends the living space tends to help presentation and appeal. Unconsented or poorly built structures can do the opposite, since a buyer's lawyer or building inspector may flag them, so keep your paperwork in order.

Do I need an electrician for a motorised louvre roof?

Yes. Wiring a motorised louvre roof is prescribed electrical work under New Zealand's electrical safety rules and must be done by a registered electrician — not a landscaper and not the homeowner. This covers the supply to the motor and any integrated lighting or heaters. Building the electrical into the plan from the start keeps it tidy and compliant rather than an awkward add-on later.


Further Resources for your outdoor renovation

  1. Featured projects and Client stories to see specifications on some of the projects.
  2. Real client stories from Auckland

Need more information?

Take advantage of our FREE Complete Home Renovation Guide (48 pages), whether you’re already renovating or in the process of deciding to renovate, it’s not an easy process, this guide which includes a free 100+ point check list – will help you avoid costly mistakes.

Download Free Renovation Guide (PDF)

finance - Superior Renovations

Have you been putting off getting renovations done?

We have partnered with Q Mastercard ® to provide you an 18 Month Interest-Free Payment Option, you can enjoy your new home now and stress less.

Learn More about Interest-Free Payment Options*

*Lending criteria, fees, terms and conditions apply. Mastercard is a registered trademark and the circles design is a trademark of Mastercard International Incorporated.


Still have questions unanswered?

Book a no-obligation consultation with the team at Superior Renovations, we’d love to meet you to discuss your renovation ideas!

    Services

    Home RenovationKitchen RenovationBathroom RenovationOutdoor RenovationHouse ExtensionCommercialDesign ServicesOther

    By submitting this form, you agree to receive communications from us via email or text regarding our services, you can unsubscribe at any time.

    This site is protected by reCAPTCHA and the Google

    Privacy Policy and Terms of Service apply.


    References

    1. Building Performance (MBIE) — Exempt building work: 6.5 Pergolas
    2. Building Performance (MBIE) — Porches and verandas up to 20 square metres
    3. Building Performance (MBIE) — Porches and verandas between 20 and 30m² (Licensed Building Practitioner)
    4. Building Act 2004, Schedule 1 — Building work for which building consent not required
    pergola auckland
    Landscaping & Outdoor

    Pergola NZ Guide: Best Designs, Costs & Builders for 2026

    Updated July 2026 with the latest consent rules, Auckland wind zone guidance, and real project cost ranges.

    Quick Answer: What You Need to Know About Pergolas in NZ

    An unroofed pergola of any size is exempt from building consent in New Zealand under Schedule 1 of the Building Act 2004. The moment you add a solid roof, it becomes a veranda, and that has a 30m² ground-floor exemption. A pergola in Auckland typically costs $1,500–$3,500 for a DIY kitset and $8,000–$35,000 for a custom build, with louvre and retractable roof systems sitting at the top of that range. Materials matter: aluminium handles coastal salt, timber suits character homes, and steel earns its keep in high-wind zones like Piha or Westmere.


    Looking for a quick cost estimate for your custom pergola?

    Try our calculator below (results in 2 minutes):

    Pergola Cost Calculator Tool


    Most Auckland homeowners we speak to assume they need a consent for a pergola. Most don’t. Most also assume a pergola and a veranda are the same thing legally, they’re not, and the difference is the single biggest cause of unnecessary consent applications and surprise costs we see.

    This guide covers what a pergola actually is under NZ law, which materials handle our weather, what realistic Auckland prices look like in 2026, and how to decide between a $2,500 kitset from Mitre 10 and a $20,000 custom build. We’ve designed and built pergolas across the North Shore, Eastern Bays, Central Auckland and West Auckland, the cost ranges and project notes here come from real jobs, not industry averages.


    Pergola or Veranda? The Difference That Decides Whether You Need Consent

    This is the part most NZ pergola guides get wrong, and it’s the part that costs homeowners the most money.

    Under Schedule 1 of the Building Act 2004, a pergola is defined as a simple-framed, unroofed structure. It’s exempt from building consent with no size limit, as long as it doesn’t have a solid roof. The moment you add a fixed roof (polycarbonate, steel sheeting, even a permanent louvre system in some interpretations), it stops being a pergola in the eyes of the Act. It becomes a veranda or carport, and a different exemption applies.

    The veranda exemption allows up to 30m² on the ground floor without consent, provided the structure is built using lightweight materials and follows accepted construction standards. Anything bigger, or attached in a way that affects the host building’s weathertightness or structure, will need a consent.

    For full official guidance see the MBIE Schedule 1 exempt building work guidance.

    What About Auckland Unitary Plan Rules?

    Being exempt from a building consent doesn’t mean you can ignore Auckland Council district plan rules. The Auckland Unitary Plan still controls:

    • Yard setbacks, typically 1.5–3m from boundaries, depending on your zone
    • Height in relation to boundary, daylight planes in residential zones
    • Maximum height, usually 8m in residential zones, but local overlays can be stricter
    • Heritage and special character overlays — Ponsonby, Grey Lynn, Devonport and parts of Parnell have additional restrictions even on exempt structures

    “Boundary rules catch a lot of owners out. We measure twice before posts go in the ground, a 25m² pergola that’s compliant under the Building Act but breaches a setback in the District Plan is still going to cost you a resource consent or a removal order.” — Dorothy Li, Design Manager, Superior Renovations

    If you’re planning anything within 1m of a boundary, in a heritage zone, or attached to your house, the safe move is a quick call to Auckland Council’s duty planner before you commit. It’s free, it takes ten minutes, and it stops you finding out the hard way.

    💡 Quick tip: Call 0800 BEFORE YOU DIG before any post goes in. Pergola posts go 600–900mm deep, that’s right into the zone where underground power, gas, fibre and water services sit. A free service-locate call now beats a $4,000 repair bill later.


    Best Pergola Materials for Auckland Conditions

    Auckland’s not a single climate. The North Shore has salt-laden sea breeze. Central suburbs get humid summers and damp winters. West Auckland and exposed bays cop genuine wind. The right material depends less on aesthetics and more on what your site throws at it.

    Aluminium — The Default for Coastal Auckland

    Powder-coated aluminium is the most popular pergola material we install, and for good reason. It doesn’t rust, it doesn’t rot, and a matte black or off-white finish holds its colour for 15–20 years before a recoat is even worth thinking about.

    Best for: Coastal suburbs like Takapuna, Devonport, Mission Bay, Browns Bay, Piha, and any property within 1km of the coast where salt corrosion is a real factor.

    Watch out for: Cheap imported aluminium with thin powder-coat. Marine-grade or architectural-grade (minimum 80-micron coating) is the spec to look for if you’re near the water.

    Cost range: $12,000–$30,000 fully installed for a typical 4m × 4m custom design.

    Timber — Character Homes, Inland Suburbs

    A timber pergola in Western Red Cedar, macrocarpa or treated pine still has a place, especially on character villas and bungalows in Mt Eden, Grey Lynn, Remuera, Epsom and Sandringham where aluminium can look out of place against the original architecture.

    Best for: Inland suburbs, character homes, owners who want to stain or paint to match an existing colour scheme.

    Watch out for: Untreated or H3.1-treated timber close to the ground. For posts in or near soil, H4 or H5 treatment is the minimum, anything less will rot inside 8–10 years in Auckland’s wet winters. Resene Woodsman or a similar UV-stable oil-based stain needs reapplying every 2–3 years.

    Cost range: $8,000–$22,000 fully installed for a 4m × 4m custom build.

    Timber pergola with slatted roof over an outdoor entertaining area in Auckland

    Steel — High-Wind Sites, Larger Spans

    Steel is the right call when wind exposure or span length is the controlling factor. A steel pergola can clear-span 6m+ without intermediate posts, which timber and aluminium struggle to do affordably.

    Best for: Exposed properties in Westmere, Herne Bay, Bucklands Beach, lifestyle blocks west of Auckland, anywhere classified high or very high wind zone under NZS 3604.

    Watch out for: Hot-dip galvanised or marine-grade powder coat is essential. Painted steel will rust at every fixing point within 5 years on a coastal site.

    Cost range: $14,000–$35,000 fully installed.

    What’s a “Wind Zone” and Why Does It Matter?

    Most Auckland suburbs fall in the medium wind zone under NZS 3604, but coastal Takapuna, Piha, Karekare, Westmere and the exposed Eastern Bays can hit high or very high. The wind zone dictates post size, footing depth, and bracing requirements.

    For a medium wind zone, 100×100mm timber or 75×75mm steel posts with 600mm footings is typical. For high/very high, that goes up to 150×150mm timber or 100×100mm steel with 900mm footings and diagonal bracing. A pergola spec’d for the wrong wind zone is the single most common failure mode we see in DIY builds across Auckland.


    Pergola Designs That Work in NZ, and What They Cost

    The pergola category has changed in the last five years. Five years ago “pergola” meant timber posts and rafters. Today it covers everything from a $1,500 freestanding kitset to a $40,000 louvre roof system with motorised LED lighting and rain sensors. Here’s what the actual options look like in 2026, with honest cost ranges from real Auckland jobs.

    1. Open-Slat Pergola (Traditional)

    A classic frame with timber or aluminium slats overhead. Provides dappled shade and visual structure without blocking light. Best paired with climbing plants, jasmine, clematis, or NZ natives like clematis paniculata or muehlenbeckia for a softer look.

    Cost: $1,500–$3,500 kitset / $8,000–$15,000 custom

    Best for: Character homes, gardens, BBQ areas where rain shelter isn’t critical

    2. Polycarbonate or Tinted Glass Roof

    A pergola frame with a fixed transparent or tinted roof. Gives you actual rain shelter and UV reduction while keeping the open feel. Polycarbonate is the more common choice; tinted laminated glass is the architectural upgrade.

    Cost: $12,000–$22,000 fully installed

    Best for: Decks and outdoor dining areas you want to use year-round

    Note: This is technically a veranda under the Building Act, exempt up to 30m² on ground floor with the right construction.

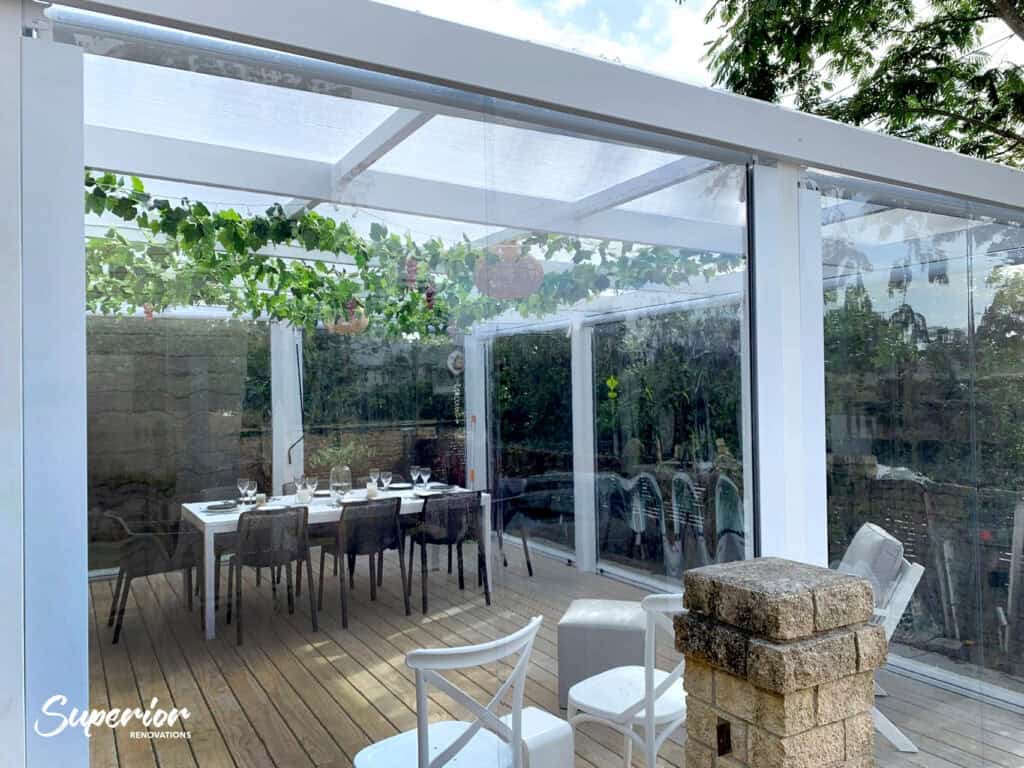
    Polycarbonate roof pergola over an Auckland deck with outdoor dining area

    3. Retractable Canopy / Fabric Roof

    An aluminium frame with a motorised or manual retractable fabric canopy. Open for sun, closed for rain or harsh midday sun. UV-stable PVC-coated polyester is the standard fabric; expect 10–15 years before replacement.

    Cost: $15,000–$28,000 fully installed

    Best for: Auckland’s variable weather, full sun in winter, shade in summer

    Watch out for: Wind ratings. A canopy without a wind sensor can shred in a southerly. Auto-retract sensors are worth the $400 add-on.

    4. Louvre Roof (Opening Roof) System

    Adjustable aluminium blades that rotate from fully open to fully closed. Motorised, often with rain and wind sensors. This is the premium end of the market and what most “modern pergola” Instagram photos actually show.

    Cost: $20,000–$40,000+ fully installed

    Best for: Owners wanting a true four-season outdoor room, north-facing decks where sun control is the main driver

    White custom louvre roof pergola over an Auckland deck with adjustable roof panels

    5. Attached vs Freestanding

    Attached pergolas connect to the house at the fascia, eaves or a structural wall. They’re more economical (one less wall of posts) and visually integrate the outdoor and indoor spaces. Freestanding sits independently, which is easier from a consent and weathertightness perspective.

    The trade-off: Attached structures can compromise weathertightness if the flashings aren’t done properly. We’ve inspected post-DIY attached pergolas where water has been tracking back into the wall cavity for years. If you’re attaching to the house, this is the part that absolutely needs a qualified builder, not a weekend project.

    Cost difference: Attached is typically 10–15% cheaper to build but adds the flashing work the saving disappears into.

    Cost Comparison Summary (2026 Auckland)

    Pergola Type DIY Kitset Custom Build (Installed) Best Use Case
    Open-slat (timber) $1,500–$3,500 $8,000–$15,000 Gardens, shade, character homes
    Open-slat (aluminium) $2,500–$5,500 $10,000–$18,000 Coastal, low maintenance
    Polycarbonate roof $3,500–$7,000 $12,000–$22,000 Year-round dining, deck cover
    Retractable canopy $6,000–$10,000 $15,000–$28,000 Auckland variable weather
    Louvre roof system n/a (specialist install) $20,000–$40,000+ Premium, four-season use

    Kitset vs Custom Build — Which Is Right for You?

    This is the single most common question we get on enquiry calls, and the honest answer depends on three things: your site, your finish standard, and whether you actually want to spend a weekend (or three) building it yourself.

    When a Kitset Makes Sense

    Kitsets from Mitre 10, Bunnings or Placemakers work well when:

    • Your site is flat, well-drained, and in a medium wind zone
    • You want a standard rectangular footprint under about 4m × 4m
    • You’re genuinely handy, you’ve built a deck, hung doors, dug post holes
    • You’re prepared to spend 20–40 hours across 2–3 weekends
    • The pergola is going in an area where minor imperfections won’t bother you (rear garden, not the main entertaining deck)

    When Custom Is Worth the Extra Spend

    A custom build earns its premium when:

    • You’re in a high or very high wind zone, overspec’d posts and bracing matter
    • You’re on a coastal site needing marine-grade fixings throughout
    • The pergola is attached to the house, flashings are not a DIY job
    • You want non-standard dimensions, integrated lighting, or a louvre/retractable system
    • You’re building it to support a renovation, getting it wrong now creates a problem when you eventually sell

    Longevity Comparison

    Build Type Expected Lifespan (Auckland) Main Failure Mode
    Budget timber kitset (untreated/H3) 8–12 years Rot at post bases, joint failure
    Quality timber kitset (H4/H5, sealed) 15–20 years UV degradation of finish, fixing rust
    Standard aluminium kitset 15–20 years Powder-coat chipping, cheap fixings
    Custom engineered build 25–30+ years Component replacement (canopy, motor) rather than structural

    The longevity gap is the part that doesn’t show up in the kitset price tag. A $2,500 kitset replaced at year 10 plus a second replacement at year 20 costs more across 30 years than a $15,000 custom build done once.

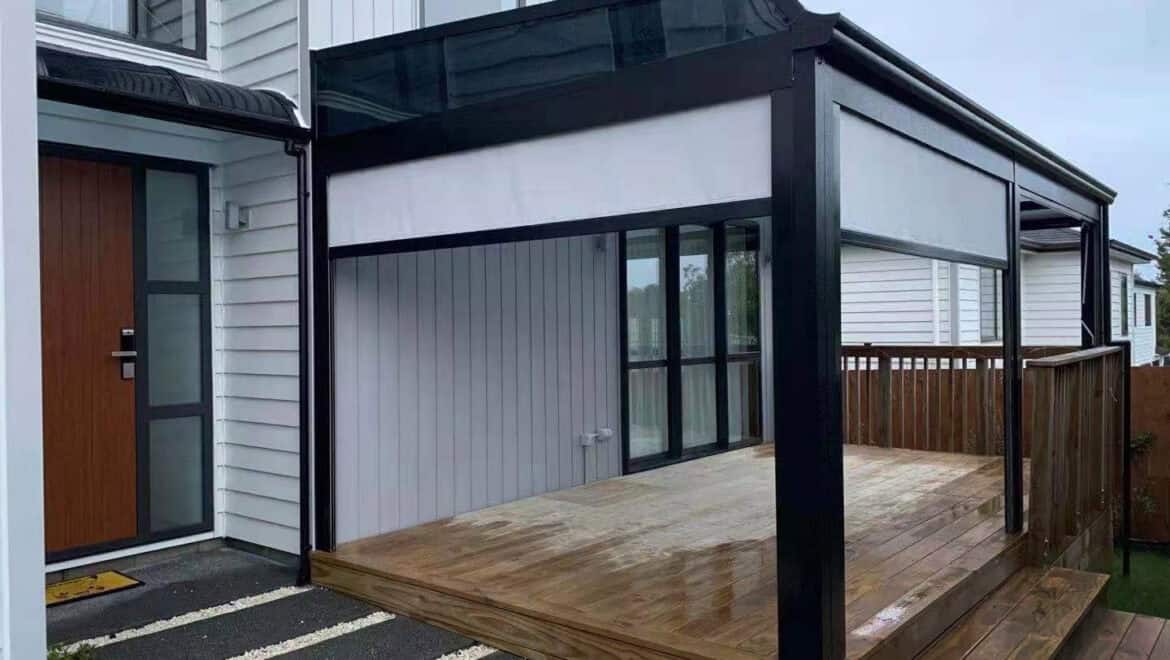
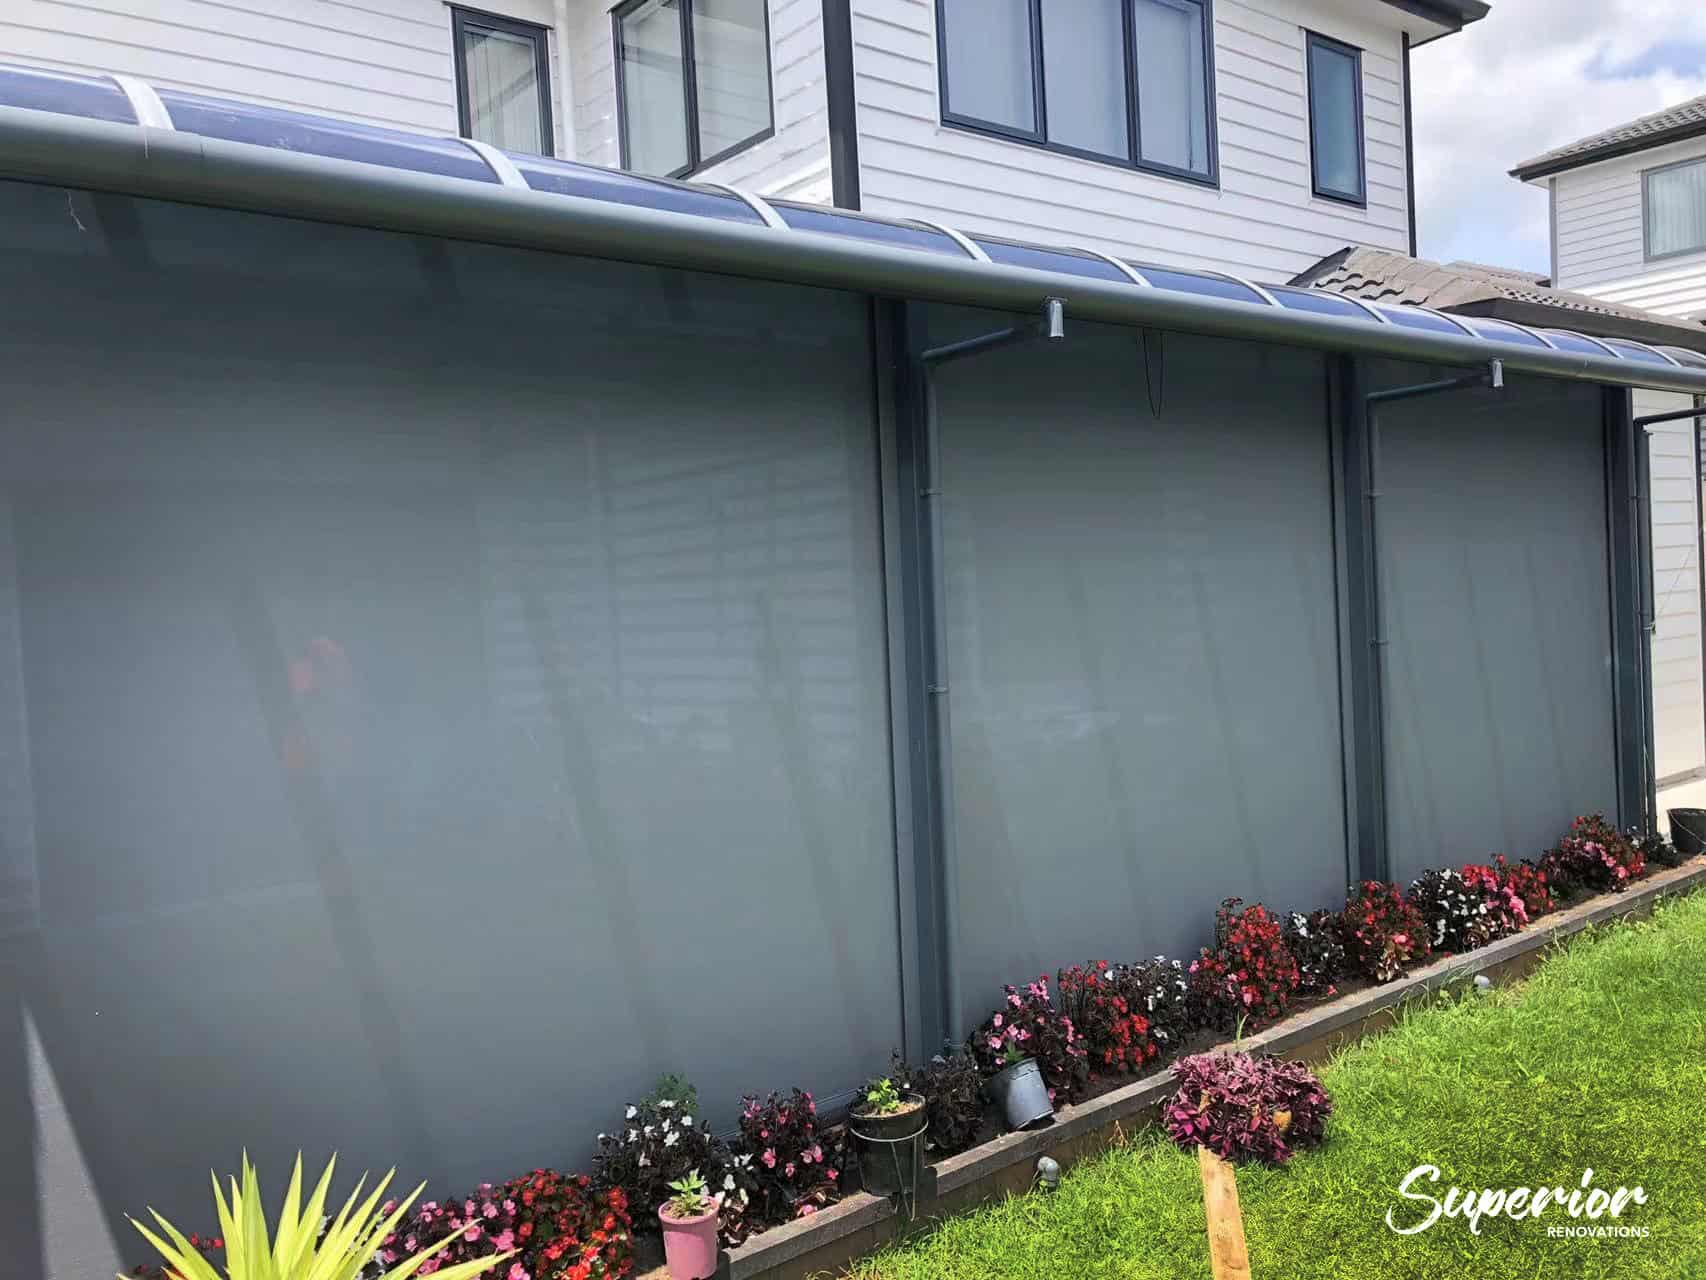
    Custom aluminium pergola with motorised roller blinds installed over an Auckland deck

    “On coastal sites in Takapuna or Mission Bay, we overspec posts and use marine-grade fixings throughout. It adds maybe 8% to the build cost and triples the structural lifespan, that’s the trade-off we wish every kitset buyer understood before they ordered.”, Jeff Zhang, LBP & Site Manager, Superior Renovations


    Maintenance and Longevity — What to Expect From Each Material

    A pergola in Auckland is a 15-to-30-year asset depending on the material and how well it’s looked after. The maintenance load is genuinely low if you know what to do, and the wrong “maintenance” (pressure washing timber, painting over rust) actually shortens the lifespan.

    Timber Pergolas

    • Wash: Soft brush and mild soapy water every 6–12 months. Skip the pressure washer, it raises the grain and breaks down the surface seal
    • Re-stain: UV-protective oil-based stain every 2–3 years. Resene Woodsman or Cabot’s Aquadeck are the standard NZ specs
    • Inspect: Post bases annually for any movement, soft spots, or insect activity (borer in older treated timber)
    • Coastal note: Salt rinse every 3–4 months if you’re within 500m of the water

    Aluminium and Steel Pergolas

    • Wash: Hose down every 6 months. Mild detergent for sap or bird droppings
    • Inspect: Fixings yearly, particularly any stainless or galvanised bolts that may show surface rust. A spray of CRC Soft Seal at fixing points prevents 90% of the failure modes we see
    • Touch up: Powder-coat chips happen. Matching touch-up paint from the original supplier seals the metal before rust starts. Don’t ignore them on coastal sites, once rust gets under powder coat, it spreads fast

    Canopies, Blinds and Add-Ons

    • Retractable canopies: Retract during storms. Spot-clean with mild soap. Replacement fabric every 10–15 years
    • Outdoor blinds and curtains: Annual machine wash if removable, otherwise hose-clean. Check tracks and rollers for corrosion
    • Climbing plants: Prune in spring. Watch the weight, mature jasmine and kiwifruit vines are heavier than the pergola was rated for, especially after rain

    Slat-roof timber pergola showing maintenance-friendly construction in Auckland


    Three Real Auckland Pergola Projects We’ve Completed

    The cost ranges and design choices above come from actual jobs. Here are three recent builds with the brief, the decisions we made, and the final outcome.

    Project 1: Coastal Aluminium Pergola, North Shore

    A family in a North Shore coastal suburb wanted to extend their entertaining season and add weather cover to an existing 24m² deck. The site sat 200m from the water with full salt exposure.

    Our spec: 4m × 4m powder-coated aluminium frame in matte black, marine-grade 80-micron coating, retractable PVC-coated polyester canopy with wind sensor, integrated LED downlights.

    Final cost: $22,400 installed

    Timeline: 4 days on site after a 3-week lead time on the canopy system

    Why it worked: The wind sensor justified itself in the first southerly. The motorised canopy turned the deck into a year-round dining space without the visual heaviness of a fixed polycarbonate roof.

    Coastal aluminium pergola with retractable canopy and roller blinds on a North Shore Auckland deck

    Project 2: Heritage-Sensitive Timber Pergola, Mt Eden

    A character bungalow in Mt Eden where the brief was a pergola that looked like it had always been there. The owners had previously rejected an aluminium quote because the modern lines fought the 1920s architecture.

    Our spec: 4.5m × 3.5m Western Red Cedar frame, traditional rafter detailing, stained in a warm walnut Resene Woodsman finish, climbing jasmine trained along stainless wires.

    Final cost: $14,800 installed

    Timeline: 6 days on site (cedar machining took longer than expected)

    Why it worked: The cedar weathers in sympathy with the bungalow’s existing eaves. The jasmine will provide full dappled shade within two summers without any added cover.

    Project 3: Louvre Roof Outdoor Room, Howick

    An east-facing deck where the brief was a true outdoor room, usable in any weather, from harsh summer midday sun to winter rain. The owners ran a home-based business and wanted the space to function as an informal meeting area.

    Our spec: 5m × 4m aluminium frame with motorised opening louvre roof, rain and wind sensors, integrated LED strip lighting on a smart-home dimmer, drop-down outdoor blinds on two sides.

    Final cost: $34,600 installed

    Timeline: 8 days on site, 6-week lead time on the louvre system

    Why it worked: The rain sensor auto-closes the roof in under 30 seconds. The blinds handle low morning sun. Three years on, the space has paid back in saved meeting room hire alone.

    Louvre roof pergola installed as an outdoor entertaining room in Howick Auckland


    Frequently Asked Questions About Pergolas in NZ

    Do I need a building consent for a pergola in NZ?

    No, if the pergola is unroofed. Under Schedule 1 of the Building Act 2004, an unroofed pergola is exempt from building consent regardless of size. The moment you add a solid roof, it becomes a veranda, and the veranda exemption (up to 30m² on ground floor) applies. Auckland Unitary Plan rules around setbacks, boundary heights and heritage overlays still apply even when no building consent is required.

    What are the rules for building a pergola in NZ?

    The structure must comply with the Building Code even if exempt from consent. Posts must be founded to handle local wind loads (NZS 3604), boundary setbacks must respect the district plan, and attached pergolas must not compromise the host building's weathertightness. Auckland Council can require a resource consent if you're in a special character zone or breaching setback rules.

    How much does a pergola cost in Auckland?

    DIY kitsets run $1,500–$3,500 for a basic 3m × 3m timber pergola from Mitre 10, Bunnings or Placemakers. Custom builds range $8,000 to $35,000 depending on material and roof type. A polycarbonate-covered aluminium pergola installed runs $12,000–$22,000. A motorised louvre roof system is $20,000–$40,000+. Coastal sites add 8–10% for marine-grade fixings.

    Is it cheaper to build a pergola or buy a kitset?

    A kitset is cheaper upfront, typically $1,500–$3,500 versus $8,000+ for a custom build. But kitsets last 8–15 years versus 25–30+ for custom, and the longevity gap closes the cost gap over time. For coastal sites, high wind zones, or pergolas attached to the house, the custom build pays for itself in not needing replacement.

    How much does a timber pergola cost in NZ?

    A treated pine kitset starts around $1,500. A quality cedar or macrocarpa kitset is $2,500–$4,000. Custom-built timber pergolas in Auckland range $8,000–$22,000 fully installed depending on size, timber grade and finish. Western Red Cedar adds about 25–30% to the material cost over treated pine but lasts substantially longer without staining.

    Can I attach a pergola to my house in NZ?

    Yes. An attached unroofed pergola is still exempt from building consent under Schedule 1. The critical issue is weathertightness, the flashing at the attachment point must prevent water tracking into the wall cavity. This is not a safe DIY job for attached structures; we recommend a qualified builder handle the connection detail regardless of who builds the rest.

    What's better than a pergola for Auckland weather?

    If full weather cover is the goal, a roofed veranda or a louvre roof system outperforms a traditional pergola. A motorised louvre opens for sun in winter and closes against rain in summer, effectively a four-season outdoor room. Retractable canopy systems give similar flexibility at a lower cost. A traditional open-slat pergola is still the right call when you want shade without enclosure and don't need rain shelter.

    What's the best pergola material for coastal Auckland?

    Powder-coated aluminium with a marine-grade 80-micron coating is the standard for coastal Auckland. It doesn't rust, doesn't need staining, and holds its finish for 15–20 years even within 500m of the water. Steel is acceptable if hot-dip galvanised and powder-coated, but standard painted steel will rust at every fixing point inside 5 years on a coastal site.

    How long does a pergola last in Auckland?

    Budget timber kitsets last 8–12 years before post-base rot becomes critical. Quality H4/H5 treated or naturally durable timbers like cedar or macrocarpa, properly sealed, last 15–20 years. Standard aluminium kitsets run 15–20 years. Custom engineered pergolas with marine-grade fixings and proper detailing last 25–30+ years, with only the canopy or motor needing replacement during that span.

    Do I need an architect or designer for a pergola?

    Not for a standard freestanding pergola. For an attached pergola, a custom design integrated with existing architecture, or anything above $20,000 in build cost, professional design pays for itself in avoiding costly site mistakes. Most reputable renovation companies include 3D design as part of the quote process, we offer this free for pergola projects we're invited to quote on.

    What roofing options can you add to a pergola in NZ?

    Four main options. Open slats or battens give dappled shade with no rain cover. A fixed polycarbonate or tinted-glass roof turns the space into a year-round veranda, exempt to 30 square metres on the ground floor. A retractable fabric canopy opens for sun and closes for rain. At the premium end, a motorised louvre roof with rotating aluminium blades and rain sensors gives full four-season control. Costs run from around $8,000 for a slatted build to $40,000 or more for a motorised louvre system, installed.


    Planning a Pergola? Talk to Us First

    A pergola sits in the awkward zone where it’s small enough to feel like a DIY job but big enough that getting it wrong is expensive. The cost-to-replace on a failed coastal pergola, a wrongly-flashed attached structure, or a kitset that doesn’t survive its first southerly is significantly higher than what good upfront advice costs.

    We’ve designed and built pergolas across Auckland for over a decade. As the crew that builds decks, pergolas and outdoor rooms right across Auckland, we know what your site needs. A free in-home consultation gets you the right material recommendation for your site, an honest cost range, a 3D design visualisation, and confirmation of where you sit on consent rules, before you commit a cent.

    Book a free in-home consultation or call 0800 199 888.

    Or run the numbers yourself with our pergola cost calculator, results in 2 minutes.


    Want to See More Outdoor Renovation Inspiration?

    Outdoor renovations and landscaping services

    Full cost guide to outdoor renovations in NZ

    Kwila decking: costs, care and why it suits Auckland decks

    Free 48-page Complete Home Renovation Guide


    18 months 0 percent interest long term finance badge

    Have you been putting off getting renovations done?

    We have partnered with Q Mastercard ® to provide you an 18 Month Interest-Free Payment Option, you can enjoy your new home now and stress less.

    Learn More about Interest-Free Payment Options*

    *Lending criteria, fees, terms and conditions apply. Mastercard is a registered trademark and the circles design is a trademark of Mastercard International Incorporated.


    Still have questions unanswered?

    Book a no-obligation consultation with the team at Superior Renovations,
    we’d love to meet you to discuss your renovation ideas!

      Services

      Home RenovationKitchen RenovationBathroom RenovationOutdoor RenovationHouse ExtensionCommercialDesign ServicesOther

      By submitting this form, you agree to receive communications from us via email or text regarding our services, you can unsubscribe at any time.

      This site is protected by reCAPTCHA and the Google

      Privacy Policy and Terms of Service apply.

      IMG 0743 - Superior Renovations
      Landscaping & Outdoor

      Fence Ideas NZ: Best Fencing Options for Auckland Homes

      If you’re thinking about a new fence in Auckland, whether that’s managing the wind in Titirangi, getting proper privacy in Mt Roskill, or framing views from Mission Bay, the material choice matters more than most people realise. Our climate is hard on fences: salt air, humid summers, UV, and the occasional battering from westerly fronts. This guide covers the main options honestly, timber, aluminium, composite, glass, steel, vinyl, concrete, stone, wire, and green walls, with real cost ranges and what actually holds up in our conditions.

      What’s the Top Fence Material for Auckland’s Conditions?

      Aluminium is the standout for coastal properties. It doesn’t rust, needs minimal maintenance, and handles the salt air in places like Takapuna or Mission Bay without deteriorating the way timber or steel can. Go slatted or louvred if you want airflow on windy days. Timber is still the right call for heritage villas in Remuera or Ponsonby, paling or picket at $100–$400 per metre, but it needs regular staining to handle UV and rain. Composite is gaining ground fast for Grey Lynn renovations: it looks like timber, resists humidity, and runs about $200–$450 per metre. For rural sections in Dairy Flat or Warkworth, chain link or net wire at $40–$150 does the job without fuss or wasted budget.

      How Do You Pick a Fence That Suits Privacy, Security, and NZ Rules?

      Start with what the fence actually needs to do. Full privacy in a busy urban street? Solid composite or concrete panels block sightlines and absorb noise, relevant for Onehunga properties near the motorway. Views and pool safety? Frameless glass suits beachfront homes in St Heliers, but budget $300–$600 per metre and be across the pool fencing regulations, which are stricter than standard fence rules. Security priority? Steel tubular or wrought iron gives that solid edge for Parnell properties. Most fences under 2.5m don’t need consent, check Building.govt.nz and confirm with Auckland Council, particularly in heritage zones where extra rules apply. Green walls with climbing vines are worth considering for eco-minded Mt Eden gardens: living privacy that cools the property in summer, but they need consistent watering and pruning to stay effective.

      Which Budget-Friendly Options Hold Up in Auckland Conditions?

      Vinyl pickets ($100–$300) or treated pine are the practical choice for family homes in Howick, easy to clean and durable through wet winters. Stone or schist walls deliver a premium result for Remuera properties ($400–$800 per metre), but the installation is complex and the cost reflects it. Worth getting multiple quotes from suppliers like Bunnings or Mitre 10 before committing. For coastal and urban sites, powder-coated aluminium usually wins the ten-year cost comparison when you factor in how little maintenance it needs.

      Thinking about sorting the boundary properly? Get in touch with Superior Renovations for a free conversation about what would work for your property.

      Finding the Right Fence for Your Auckland Home

      A fence does more than mark a boundary. For Auckland homeowners, it manages privacy in tightly packed suburbs, deals with coastal salt and wind, complements the architecture, and, if chosen well, holds its value over time. The options span a wide range: timber, glass, aluminium, composite, steel, concrete, stone, wire, green walls. Each has a place. Each has trade-offs. This guide works through the main fence ideas NZ homeowners are considering in 2026, with honest cost ranges, practical pros and cons, and enough Auckland-specific context to make the decision straightforward. Whether you’re working on a front fence in Titirangi or a pool boundary in Mission Bay, the right choice starts with understanding what each material actually delivers.

      Auckland’s conditions matter for every material decision here. Humid summers, coastal salt air, UV intensity, and westerly winds all affect how a fence performs. We’ve drawn on insights from our designer Dorothy Li and local regulations at Building.govt.nz, and referenced products from Bunnings, Mitre 10, and PlaceMakers. The goal is a straightforward guide to fence design NZ that helps you make an informed call without wading through marketing copy.


      If you’re looking for specific cost estimates, try our Renovation Cost Calculator Tools


      Timber Fencing: What Auckland Homeowners Need to Know

      Timber is still the most common fencing material across Auckland, and for good reason. It suits the character of older homes, it’s flexible in terms of style and finish, and for the right property it’s hard to beat on aesthetics. Whether you’re in Ponsonby or Papakura, timber can work. But it’s not a low-effort choice, and in Auckland’s conditions specifically, the maintenance commitment is real.

      The appeal of timber is straightforward. It brings warmth and a natural look that complements Auckland’s gardens, from coastal Mission Bay properties to Henderson backyards. Dorothy Li puts it plainly: “A timber fence can be stained or painted in virtually any colour, making it a versatile choice that integrates your home with its surroundings.” It’s also genuinely DIY-friendly for homeowners who want to be hands-on.

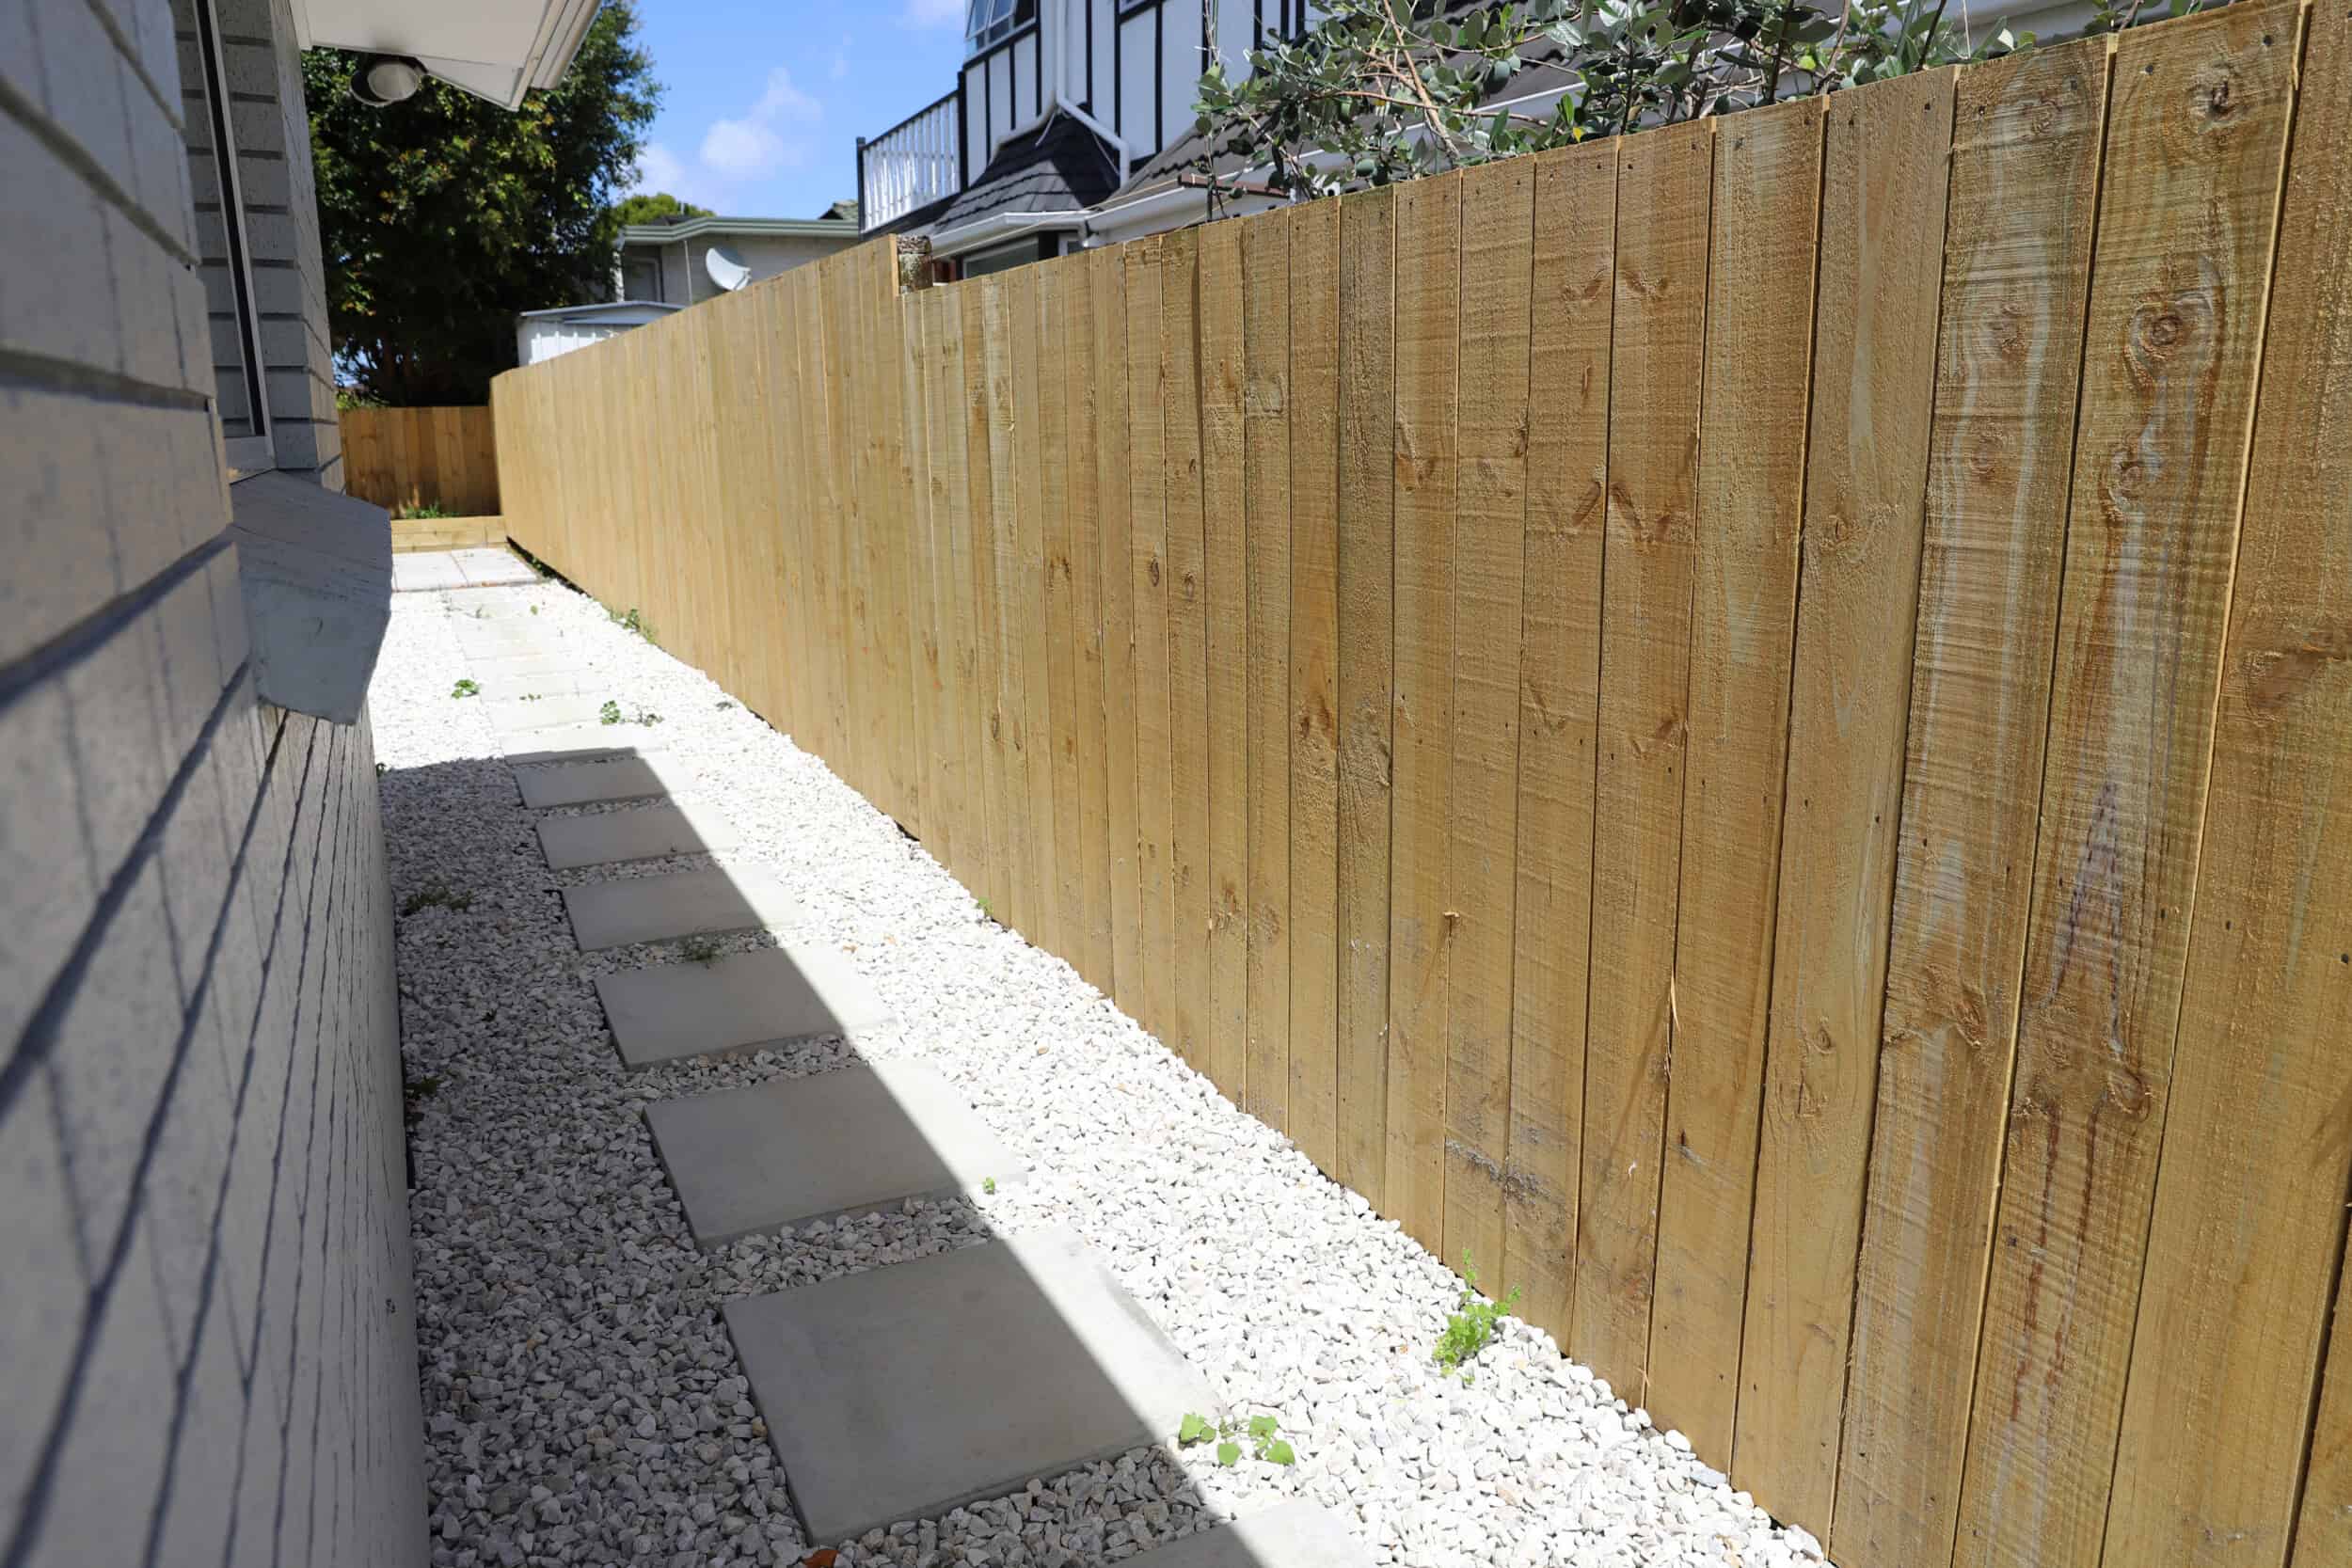
      timber paling fence along a side path with white stone garden bed

      Timber Fencing by Superior Renovations

      Pros of Timber Fencing

      • Aesthetic flexibility: Can be stained, painted, or left natural to match any home style, from modern villas to classic bungalows.
      • Privacy: Tall paling fences from suppliers like PlaceMakers block sightlines effectively, well-suited to Auckland’s tightly packed suburbs.
      • Affordability: At $100–$300 per lineal metre depending on wood type, timber is cheaper upfront than most alternatives.
      • Sustainability options: Reclaimed wood from suppliers like Woodmart suits eco-conscious homeowners and gives a genuinely distinctive result.

      Cons of Timber Fencing

      • Ongoing maintenance: As Dorothy Li notes, timber needs painting, staining, or sealing every few years to hold up against Auckland’s humid, coastal climate.
      • Weather sensitivity: Untreated or neglected timber warps, rots, and attracts pests, particularly through Auckland’s wet winters.
      • Long-term cost: Treated pine or hardwood lasts well when maintained. Without it, replacement costs add up.

      Cost Breakdown

      Timber fencing costs vary by material and style. Here’s a realistic guide for Auckland:

      Fence Type Cost per Lineal Metre Supplier
      Treated Pine Paling $100–$200 Bunnings
      Hardwood Paling $200–$400 Mitre 10
      Reclaimed Wood $150–$350 Woodmart
      Picket Fence $120–$250 PlaceMakers


      Timber Fence Styles for Auckland

      Auckland’s mix of architectural styles calls for different approaches. Common timber options that work well here:

      • Paling fences: Treated pine or hardwood, the practical choice for privacy. Bunnings carries affordable options across most grades.
      • Picket fences: Front yard classic for Remuera or Epsom, adds character without closing off the street frontage. Available at PlaceMakers.
      • Trellis-topped fences: Privacy with an open, airy feel, suits Mt Eden gardens well. Mitre 10 has a solid range.
      • Board and batten: Alternating paling widths give a rustic result. Available through Trade Tested.

      On consents: Under New Zealand’s Building Code, fences under 2.5 metres typically don’t need a building consent — Building.govt.nz covers the detail. Always confirm with Auckland Council for your specific site, particularly in heritage zones where additional rules apply.

      Timber is a genuinely good fencing choice for Auckland when you go in with clear expectations. The aesthetics and flexibility are hard to beat. The maintenance is real and non-negotiable if you want it to last. Weigh those factors honestly for your property and lifestyle, and timber will either be an obvious fit or an obvious pass.

      Composite Fencing: Low Maintenance, Modern Looks

      Composite fencing, wood fibres and recycled plastic combined, has gained real traction in Auckland over the last few years. It suits the renovation direction a lot of Grey Lynn and Parnell properties are taking: clean, modern, and not asking for much attention. For homeowners who want something that looks like timber but performs like a hard material, composite is worth serious consideration.

      The practical case for composite is strong in Auckland’s climate. Dorothy Li on the material: “It’s designed to withstand harsh weather while requiring minimal upkeep.” Unlike timber, composite doesn’t need regular staining. It resists moisture, UV, and the salt air that degrades other materials in coastal suburbs. The eco credentials, made with recycled content, appeal to homeowners who want that to factor into the decision.

      Pros of Composite Fencing

      • Low maintenance: No painting or sealing required. A wash with soapy water keeps it in good shape.
      • Durable in Auckland conditions: Resists moisture, UV, and pests, all relevant for our climate.
      • Sustainable: Recycled materials content aligns with eco-conscious renovation goals.
      • Modern finish: Clean profiles and contemporary colour options suit newer Auckland homes and renovations in suburbs like Grey Lynn and Newmarket.

      Cons of Composite Fencing

      • Higher upfront cost: $200–$450 per lineal metre, depending on design and supplier, noticeably more than timber or vinyl.
      • Limited colour and style range: Pre-set options rather than the full flexibility of painted timber. May not suit heritage homes in Devonport.
      • Installation complexity: Sloped sections, common across Auckland, benefit from professional installation, which adds to overall cost.

      Cost Breakdown

      Composite fencing costs reflect its durability. Realistic Auckland pricing:

      Fence Type Cost per Lineal Metre
      Standard Composite Panel $200–$350
      Textured Composite $250–$400
      Premium Composite with Aluminium Frame $300–$450


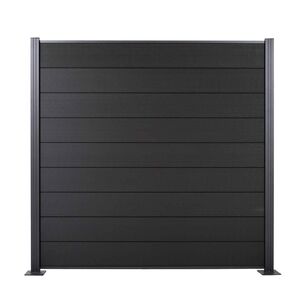
      black composite slat fence panel with aluminium posts

      https://www.placemakers.co.nz/online/outdoor-landscaping/fencing-netting-non-timber/fence-panels/powdercoated-steel-fence-panels/composite-fence-panel-kit-1800-x-1875mm-black/p/4511603

      Composite Fence Styles for Auckland

      Common composite options that suit Auckland’s range of properties:

      • Solid panels: Full privacy for densely packed areas like Mt Roskill.
      • Slatted designs: A modern, open feel for front yards in St Heliers.
      • Wood-grain finish: The aesthetic of timber without the upkeep, natural fit for eco-minded Titirangi properties.
      • Coloured panels: Charcoal, sandstone, and similar tones that suit minimalist design directions in Newmarket.

      On consents: Composite fences under 2.5 metres generally don’t need building consent under NZ’s Building Code — Building.govt.nz. Confirm with Auckland Council for coastal or heritage zone specifics.

      For Auckland homeowners who want the look of timber without committing to its maintenance cycle, composite is often the answer. The upfront cost is higher than timber, but the ten-year running cost is lower. If that trade-off works for your budget, it’s worth pricing properly before ruling it out.

      Aluminium Fencing: Rust-Proof, Low Maintenance, Built for Coastal Auckland

      Aluminium’s key advantage for Auckland is simple: it doesn’t rust. In coastal suburbs like Takapuna, Devonport, or Mission Bay where salt air is a constant, that single characteristic makes aluminium significantly more practical than steel, and less demanding than timber. Its contemporary look suits the direction most modern Auckland renovations are heading, clean lines, powder-coated finishes, and minimal ongoing work.

      Dorothy Li on aluminium: “It’s a fantastic option for homeowners wanting a sleek, long-lasting fence that doesn’t sacrifice style.” Whether you’re enclosing a pool in Ellerslie or defining a boundary in New Lynn, aluminium holds up without much input from you after installation.

      black slat fence panel installed at an angle on a sloping site

      https://www.placemakers.co.nz/online/outdoor-landscaping/fencing-netting-non-timber/fencing-accessories/aluminium-fencing/valla-series-slat-fence-pack-12m-x-65mm-grey/p/2250943


      Pros of Aluminium Fencing

      • Doesn’t rust: The defining advantage for coastal Auckland sites. Mission Bay, Devonport, Takapuna, aluminium handles salt air without deteriorating.
      • Low maintenance: A hose-down is all it needs. No painting, no sealing.
      • Manageable weight: Easier to install on Auckland’s sloped sections than steel or concrete, while still handling strong winds.
      • Finish options: Powder-coated in a range of colours from Bunnings, straightforward to match your home’s palette.

      Cons of Aluminium Fencing

      • Privacy limitations: Dorothy Li’s observation is accurate, aluminium’s typical open designs don’t provide full privacy. Slatted or louvred options help but cost more.
      • Price: $150–$400 per lineal metre puts it above basic timber, though well below glass or wrought iron.
      • Not suited to heritage properties: The contemporary aesthetic doesn’t read naturally against older homes in Ponsonby or Remuera where timber or wrought iron fits better.

      Cost Breakdown

      Aluminium pricing in Auckland by design and finish:

      Fence Type Cost per Lineal Metre Supplier
      Standard Aluminium Slats $150–$250 Mitre 10
      Powder-Coated Aluminium $200–$350 Bunnings
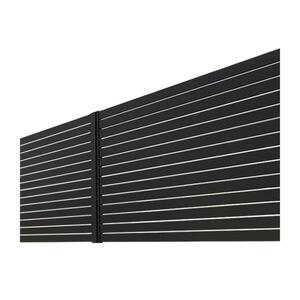
      Louvred Aluminium Panels $250–$400 Building Easy


      Aluminium Fence Styles for Auckland

      • Slatted fences: Pool areas or front boundaries in St Heliers, balance of openness and partial privacy.
      • Vertical bar fences: Minimalist and clean for modern Grey Lynn homes.
      • Louvred panels: Adjustable slats for both privacy and airflow, well-suited to windy Titirangi sites.
      • Decorative toppers: Add visual interest to a standard design for front yards in Mt Eden.

      On consents: Aluminium fences under 2.5 metres don’t typically require building consent — Building.govt.nz. Pool fencing is a different matter, strict safety requirements apply, so always confirm with Auckland Council before installation.

      For coastal or urban Auckland properties where low maintenance and corrosion resistance are priorities, aluminium is a strong contender. It’s not the cheapest option and it won’t suit every architectural style. But for the right site, it’s one of the most practical materials available in our market.

      Steel Fencing: Strength and Security for Auckland Properties

      Steel is the choice when security is the primary brief. It’s heavier, tougher, and more expensive than aluminium, but for properties in Waitakere’s rugged terrain or urban Mt Wellington where the fence needs to mean business, steel delivers. Modern powder-coated steel has moved well beyond industrial aesthetics and suits contemporary Auckland homes convincingly.

      Dorothy Li on steel: “It’s one of the toughest materials you can choose, offering security without compromising on style.” The range of finishes available, particularly powder-coated panels in darker tones, has made steel a more common choice for residential Auckland properties than it was a decade ago.

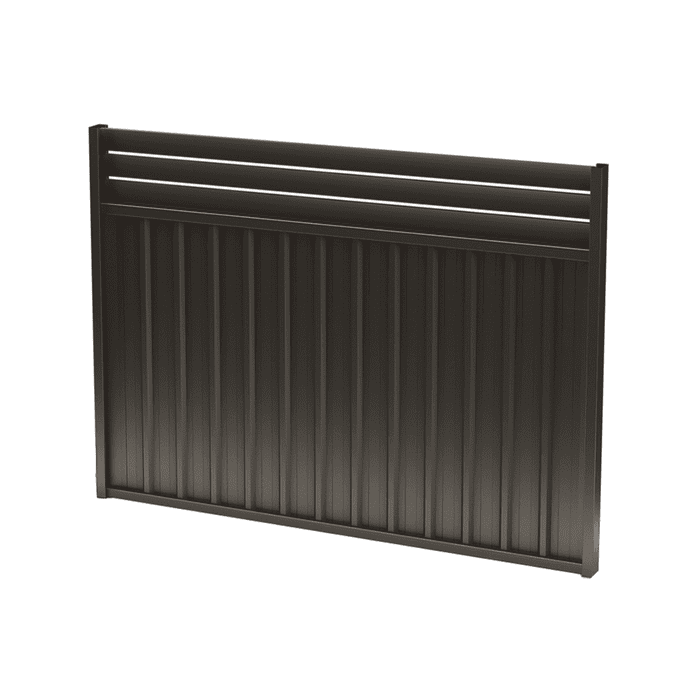
      ebony slat fencing panel with horizontal top rail

      https://www.bunnings.co.nz/sector-panel-fencing-1-5-0-3m-ebony-borderline-panel_p0421817


      Pros of Steel Fencing

      • Genuine strength: Handles impacts and Auckland’s coastal wind and rain load better than lighter materials.
      • Security: The right call for properties in Penrose or commercial-adjacent zones that need a solid barrier.
      • Low maintenance when powder-coated: Rust-resistant finish, just an occasional clean.
      • Contemporary aesthetic: Available finishes suit modern homes in Albany or Botany Downs well.

      Cons of Steel Fencing

      • Cost: $200–$500 per lineal metre, higher than timber or vinyl.
      • Weight: More complex to install, particularly on Auckland’s sloped sections.
      • Privacy: Tubular or slatted designs are open by nature. Adding infills for privacy increases cost.

      Cost Breakdown

      Steel fencing costs in Auckland by type:

      Fence Type Cost per Lineal Metre Supplier
      Tubular Steel Fence $200–$350 Bunnings
      Powder-Coated Steel Panels $250–$450 Mitre 10
      Custom Steel with Infills $300–$500 PlaceMakers

      Steel Fence Styles for Auckland

      • Tubular steel: Pool fencing or front boundaries in Takapuna, security with maintained visibility.
      • Slatted steel panels: Modern and clean for urban Newmarket properties.
      • Powder-coated designs: Bold colour options for contemporary Henderson homes.
      • Decorative steel: Custom patterns for standout Remuera frontages.

      On consents: Fences under 2.5 metres generally don’t need consent — Building.govt.nz. Pool fencing has stricter requirements, always check with Auckland Council before proceeding.

      black corrugated steel fence panel along a driveway with mountain backdrop

      https://www.placemakers.co.nz/online/projects/landscaping/fencing/metal-fencing

      Steel earns its place when security is genuinely the priority. It’s heavier and more expensive than aluminium, and it won’t suit every home’s style. But for properties that need a fence with genuine presence, it’s the right call.

      Vinyl Fencing: Budget-Friendly and Easy to Live With

      Vinyl doesn’t get much attention in design conversations, but for the right Auckland property it makes real sense. Family homes in Howick or Papakura that need a clean, durable fence without a significant maintenance commitment, vinyl is a practical answer. It’s made from PVC, which handles Auckland’s humidity and salt air without rotting or rusting, and it costs less to own over ten years than timber despite similar upfront pricing.

      Dorothy Li’s take on vinyl is accurate: “It’s designed to look great and last long with minimal effort.” The limitation is customisation, vinyl comes in pre-set colours, mostly white and neutral tones, and doesn’t suit heritage aesthetics or bold design directions. But for what it does, it does it reliably.

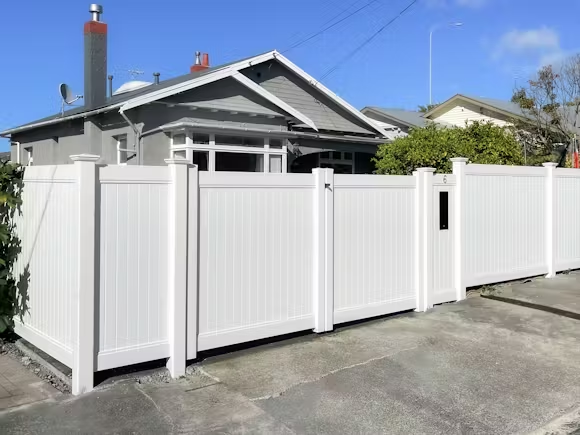
      979414 pvc privacy fence panel kit 1.8m x 2.4m 2c - Superior Renovations

      https://www.tradetested.co.nz/p/gardening/fencing/privacy-fence-system/pvc-privacy-fence-panel-kit-1-8m-x-2-4m

      Pros of Vinyl Fencing

      • Low maintenance: No staining or painting, just a wash. That’s the whole maintenance regime.
      • Durable in Auckland conditions: Resists rot, pests, and UV fade through wet winters and sunny summers.
      • Affordable: $100–$300 per lineal metre, cheaper than aluminium or composite at equivalent quality levels.
      • Style range: Picket, privacy panels, ranch-style, enough variety to suit most family home situations.

      Cons of Vinyl Fencing

      • Colour and style limitations: Pre-set options, mostly whites and neutrals. Doesn’t suit Remuera heritage homes or bold contemporary design directions.
      • Impact vulnerability: Vinyl can crack under heavy impact, a consideration for windy Titirangi sections where debris is a real factor.
      • Environmental footprint: PVC is less sustainable than composite or reclaimed timber, worth considering if that’s a priority for your build.

      Cost Breakdown

      Vinyl fencing is cost-effective for Auckland homeowners. Typical pricing:

      Fence Type Cost per Lineal Metre
      Vinyl Picket Fence $100–$200
      Vinyl Privacy Panels $150–$250
      Textured Vinyl Panels $200–$300

      Vinyl Fence Styles for Auckland

      • Picket fences: Front yards in Epsom or Papakura, adds character without closing off the view.
      • Privacy panels: Full coverage for secluded Mt Roskill backyards.
      • Ranch-style: Low, open design for larger Albany sections.
      • Textured panels: Wood-grain look for modern Newmarket properties that want the aesthetic without the upkeep.

      On consents: Vinyl fences under 2.5 metres don’t typically require consent — Building.govt.nz. Pool fencing has different requirements, confirm with Auckland Council.

      961890 pvc picket fence panel kit 1.2m x 2.4m 1c - Superior Renovations

      https://www.tradetested.co.nz/p/gardening/fencing/picket-fence-system/pvc-picket-fence-panel-kit-1-2m-x-2-4m


      Vinyl won’t win a design competition, but it’s a dependable, low-cost option for Auckland family homes that need a functional fence without the maintenance overhead. If your priorities are budget and practicality, it deserves a proper look.

      Glass Fencing: Views, Pool Compliance, and Contemporary Aesthetics

      Glass fencing has a specific and well-defined role: preserving views while maintaining a safety boundary. For coastal properties in Mission Bay or modern homes in Wynyard Quarter with established outlooks, it’s the only material that genuinely delivers on both. It’s also the standard choice for pool fencing where maintaining sightlines across the yard matters. But it comes at a price, in both upfront cost and cleaning commitment.

      Dorothy Li from Superior Renovations on glass: “It’s ideal for showcasing your property’s views while maintaining safety and security.” For Herne Bay properties or beachfront sections anywhere on Auckland’s coast, that’s a genuine and practical benefit that other materials can’t replicate.

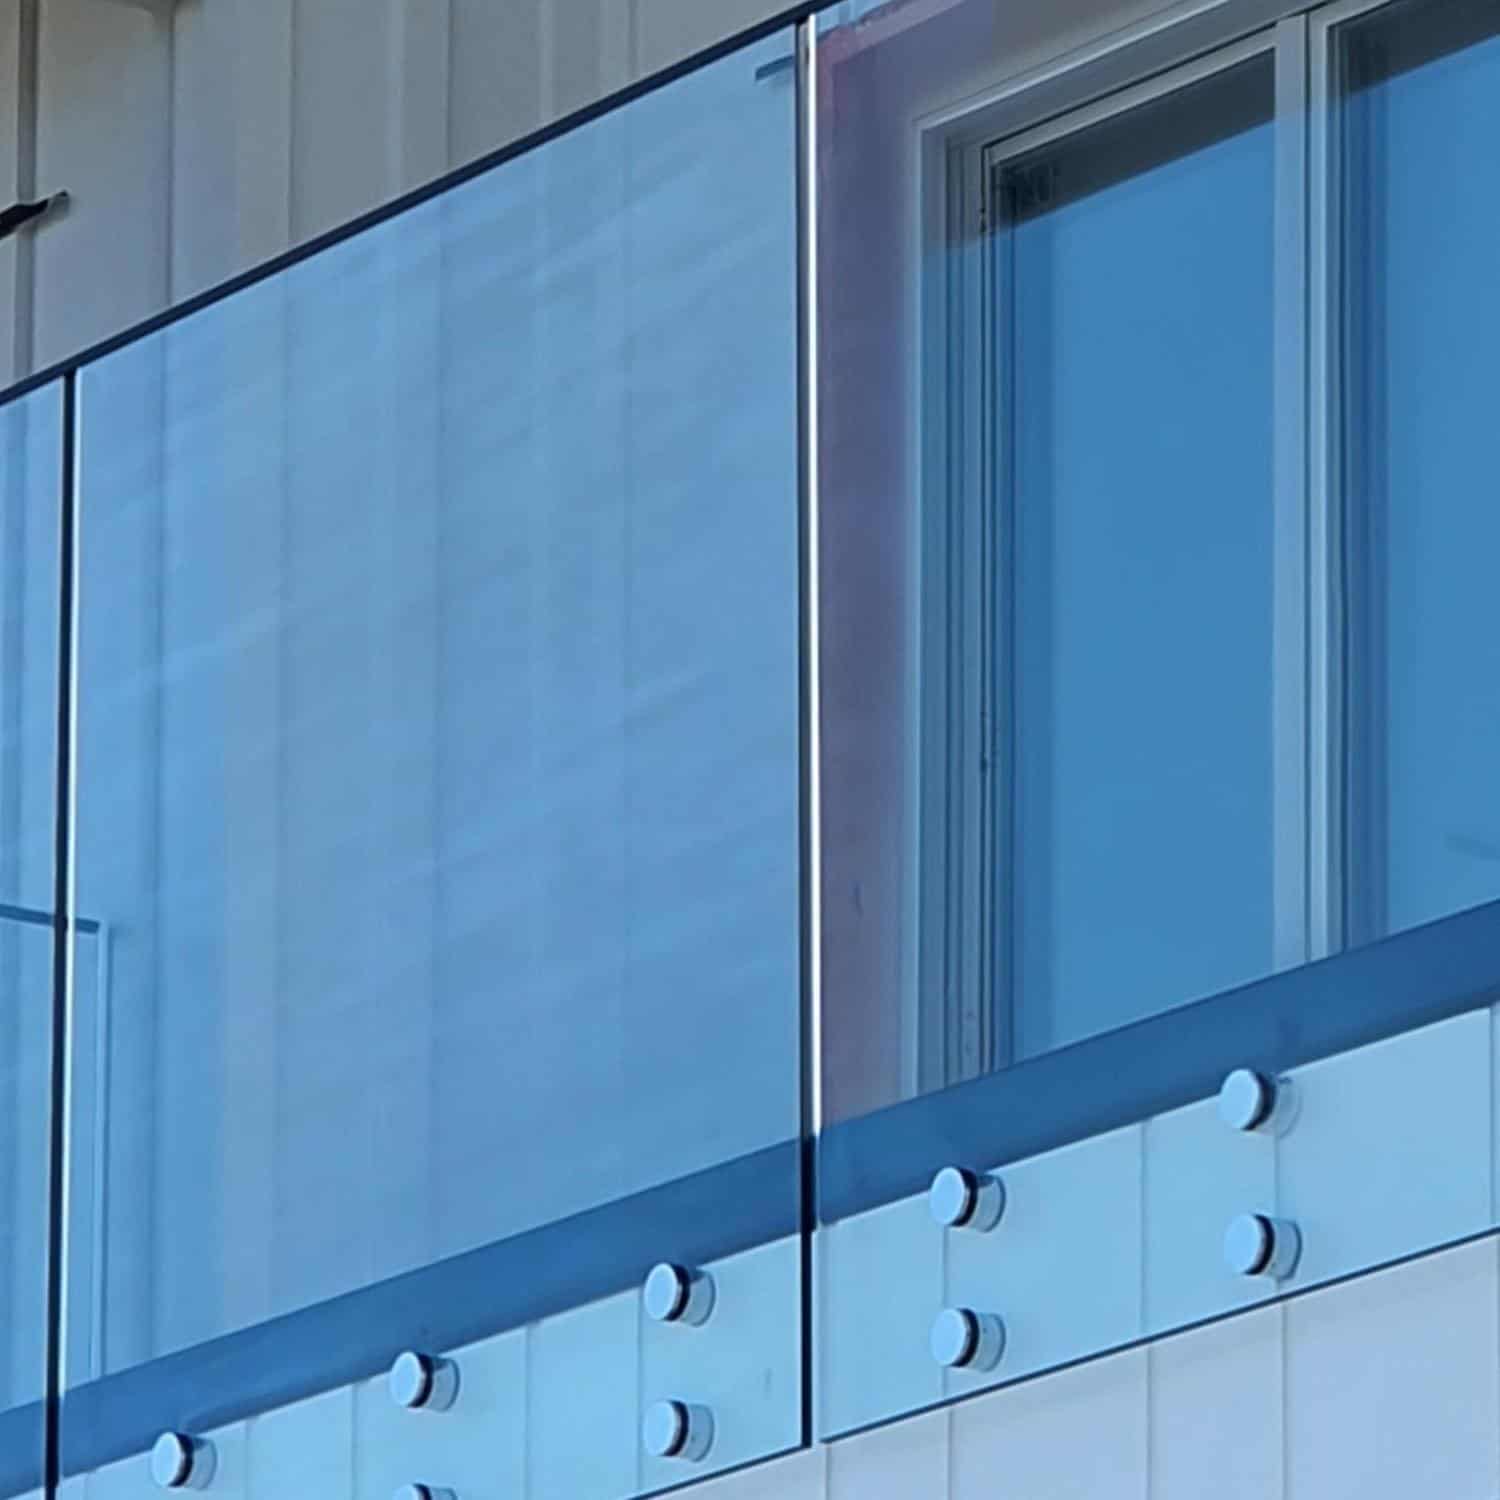
      glass balustrade panel fixed with stainless standoffs beside a window

      https://www.mitre10.co.nz/shop/guardian-balustrade-face-fixed-glass-panel-h-1280mm-w-1500mm-d-12mm/p/326333

      Pros of Glass Fencing

      • Unobstructed views: The only material that gives you a proper view of Auckland’s coastal vistas or established garden from behind the boundary.
      • Pool safety compliance: Toughened glass meets NZ’s strict pool fencing standards, a practical choice for family homes in St Heliers.
      • Low maintenance: A wipe with glass cleaner keeps it clear, quick and simple.
      • Contemporary look: Transparent and minimal, suits modern Auckland architecture cleanly.

      Cons of Glass Fencing

      • Cost: $300–$600 per lineal metre depending on thickness and framing, one of the pricier options on this list.
      • Cleaning frequency: Glass shows fingerprints, water spots, and salt residue, in Auckland’s coastal climate that means regular attention.
      • No privacy: Transparent by design. Frosted options provide partial privacy but cost more and change the aesthetic significantly.

      Cost Breakdown

      Glass fencing is a premium investment. Auckland pricing by style:

      Fence Type Cost per Lineal Metre
      Frameless Glass Panels $400–$600
      Semi-Framed Glass $350–$500
      Frosted Glass Panels $450–$600

      Glass Fence Styles for Auckland

      • Frameless glass: The cleanest, highest-end result for pool areas or balconies in Devonport.
      • Semi-framed glass: Aluminium or steel frames add stability, relevant for exposed Titirangi sites where wind loads are real.
      • Frosted glass: Partial privacy without losing the light, suits urban Newmarket properties.
      • Tinted glass: Contemporary edge for coastal Milford properties.

      On consents: Pool fencing almost always requires consent and must meet NZ’s safety standards, this is not optional. Most other glass fences under 2.5 metres don’t require consent, but confirm with Auckland Council, Building.govt.nz has the detail.

      Glass fencing is the right choice for a specific brief: maintain the view, comply with pool safety, create a contemporary boundary. Outside of that brief, the cost and cleaning commitment are hard to justify. Know what you need the fence to do, and glass either fits that clearly or it doesn’t.

      Wrought Iron Fencing: Character, Security, and Long-Term Durability

      Wrought iron has been the go-to material for heritage Auckland suburbs like Remuera and Devonport for generations, and for good reason. The fine detailing suits Victorian and Edwardian architecture in a way no modern material replicates convincingly. It’s also genuinely strong. But it comes with a maintenance obligation: without proper treatment, Auckland’s humidity will find the iron and rust will follow.

      Dorothy Li on wrought iron: “It adds a sense of grandeur while providing excellent security.” For front boundaries in Ponsonby or garden enclosures in Epsom where the architectural character of the fence needs to match the property, wrought iron delivers in a way aluminium or composite simply doesn’t.

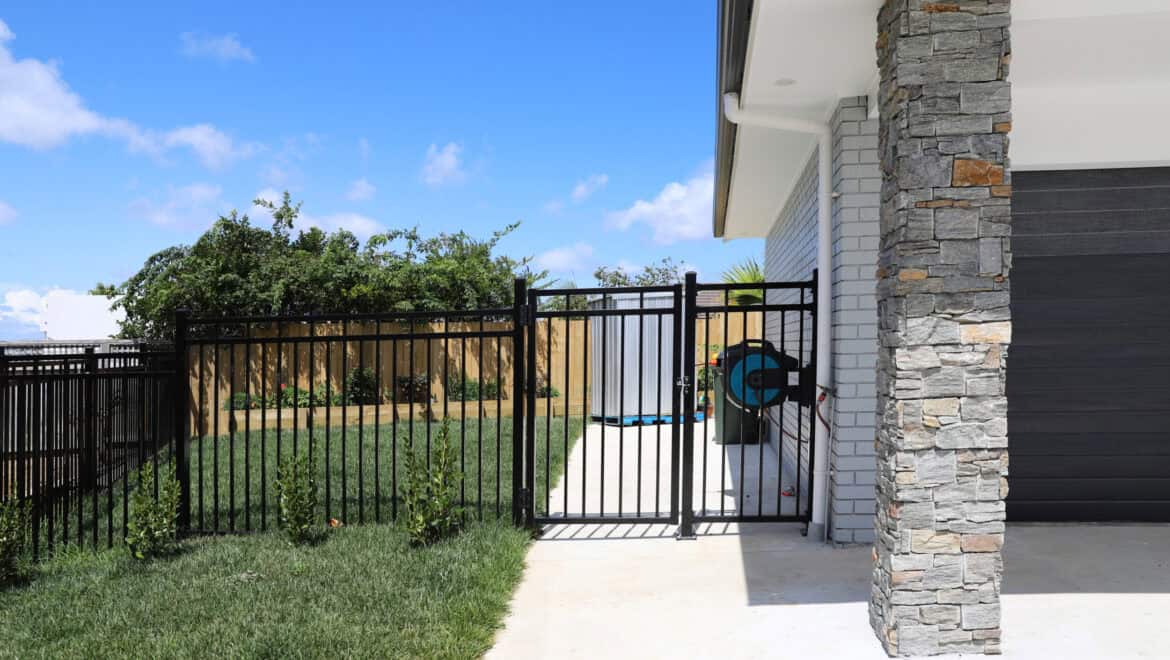
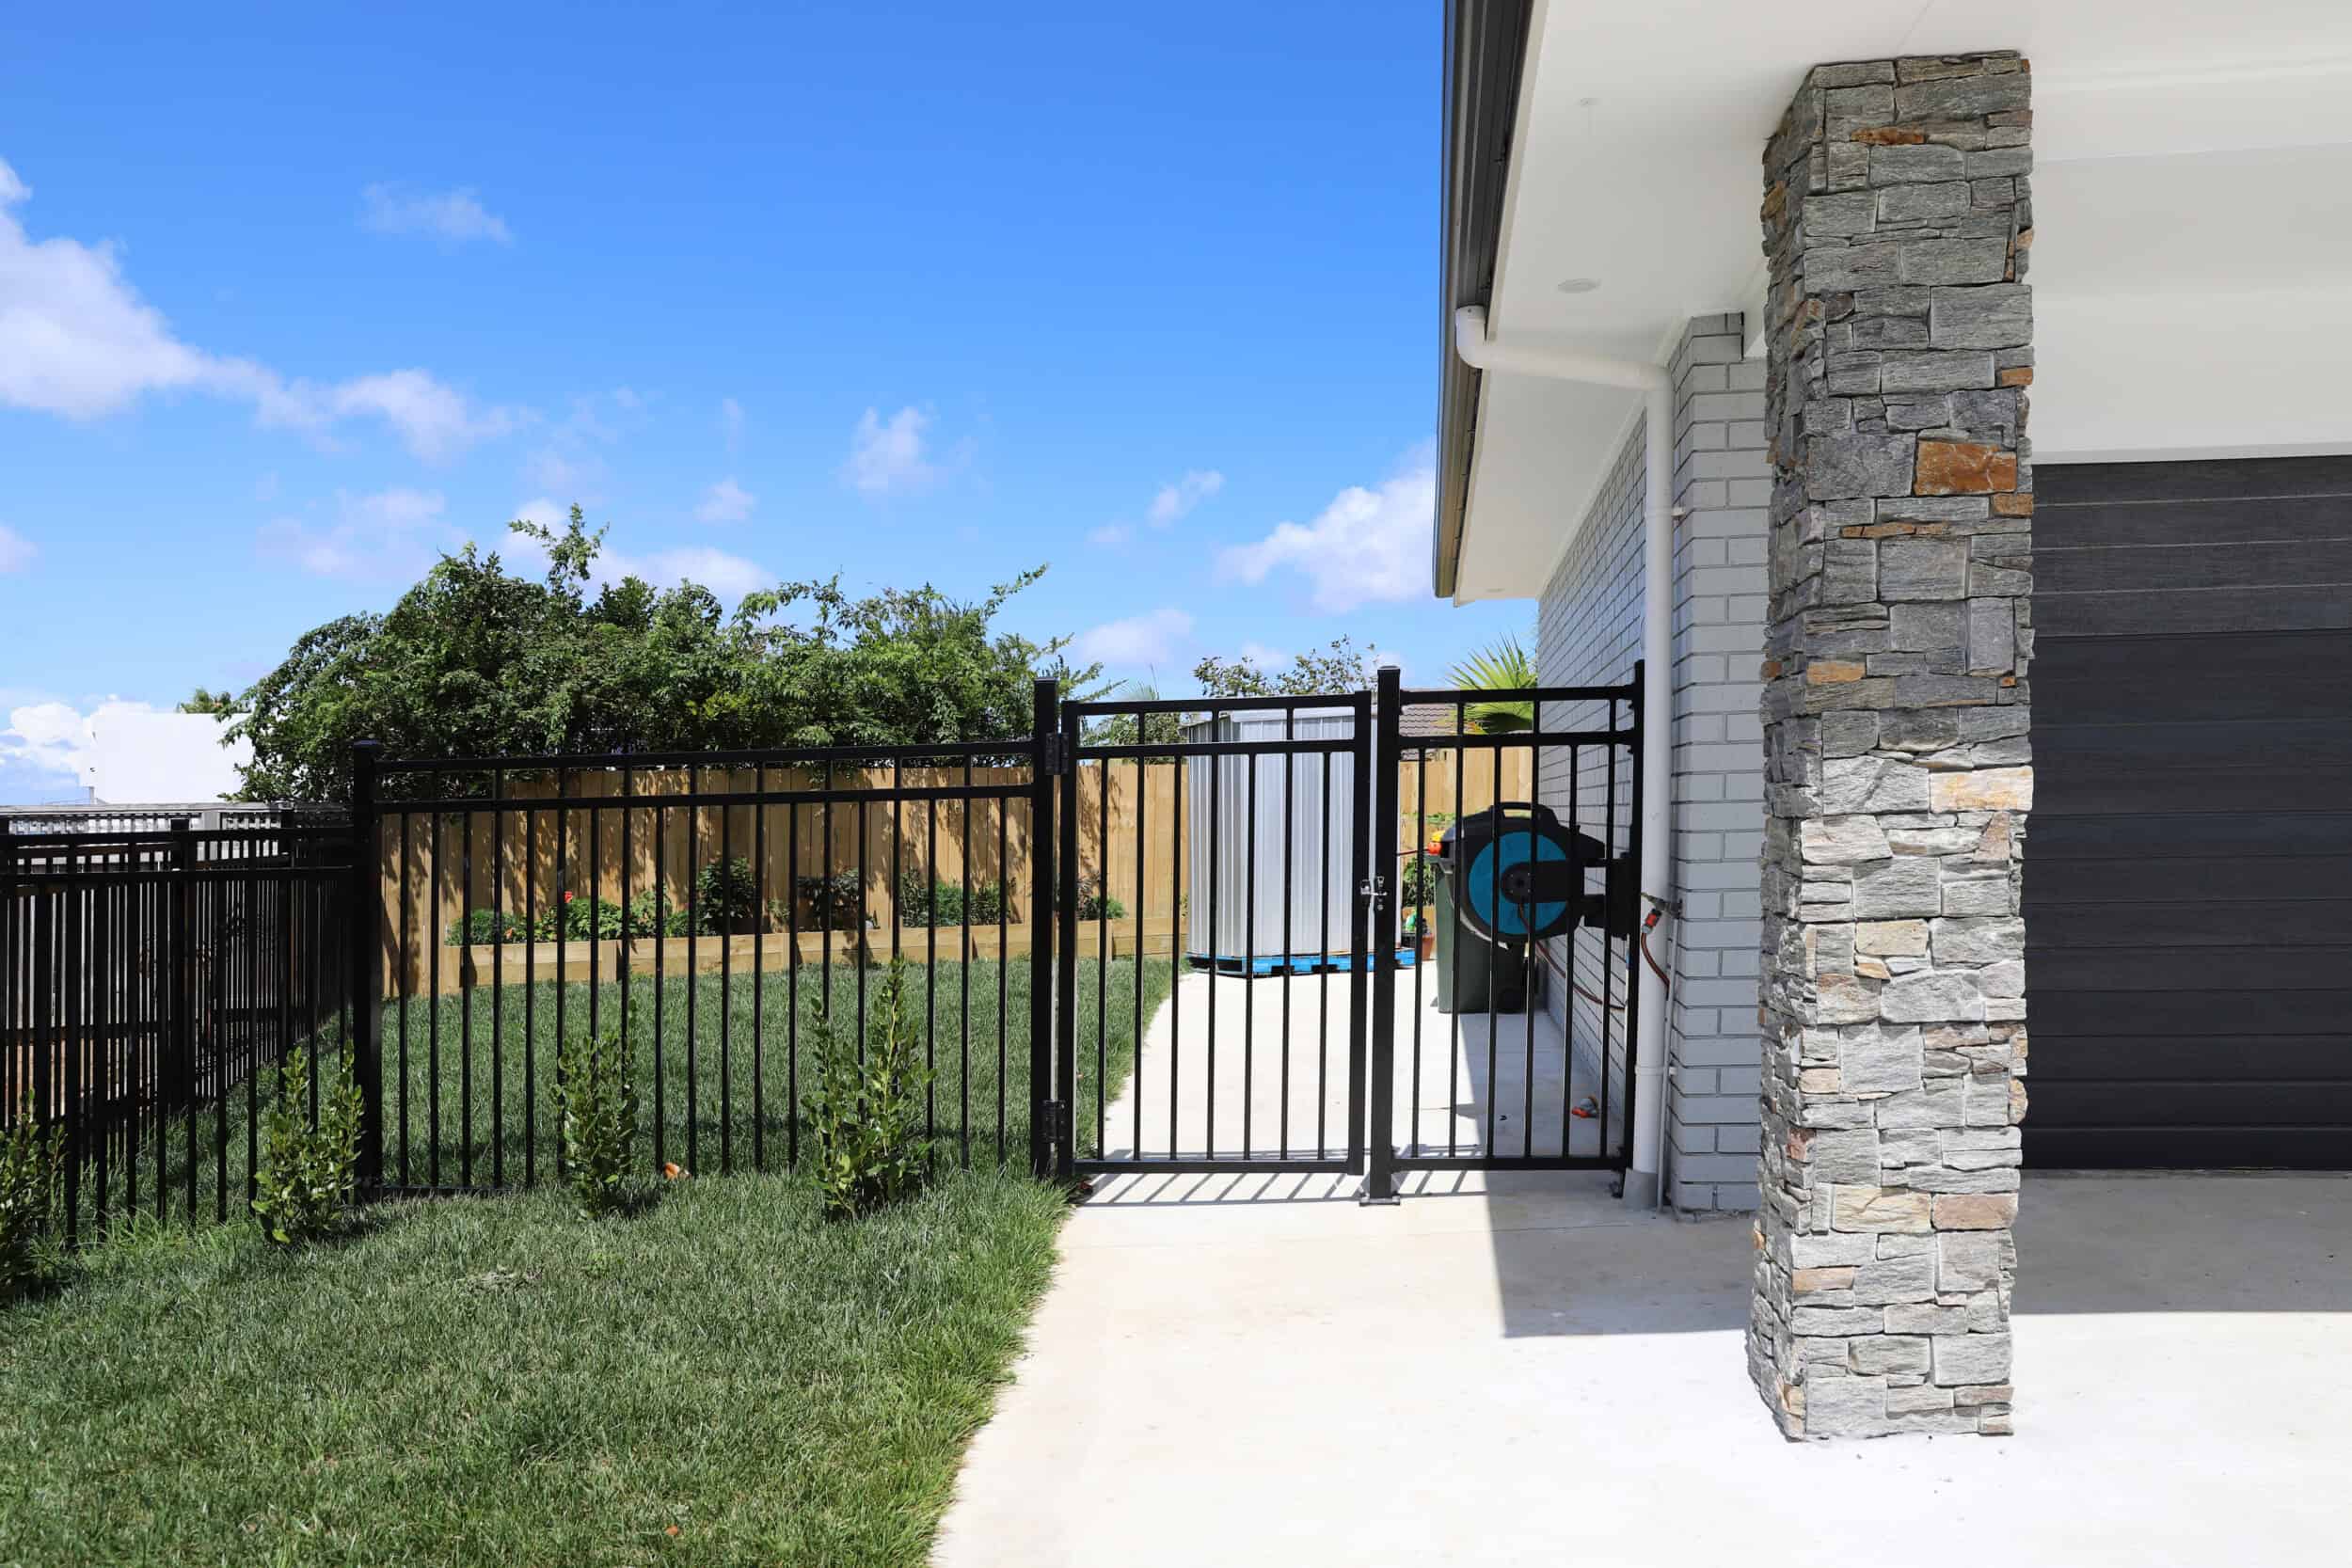
      black aluminium pool fence and gate beside a stone-clad house entry

      Pros of Wrought Iron Fencing

      • Durability: With proper treatment, wrought iron withstands Auckland’s coastal winds and rain for decades.
      • Security: The height and density of a well-specified wrought iron fence is a genuine deterrent, relevant for Parnell properties.
      • Customisable design: Ornate scrollwork or clean vertical bars, the range of styles is broad.
      • Suits heritage properties: Complements older Auckland homes and adds genuine character to Mt Eden frontages.

      Cons of Wrought Iron Fencing

      • Cost: $300–$600 per lineal metre, at the premium end of the market.
      • Rust risk without maintenance: Auckland’s humidity is the enemy of untreated or powder-coat-failed iron. Regular inspection and repainting is non-negotiable.
      • Limited privacy: Open designs by nature. Adding infills increases cost and changes the look.

      Cost Breakdown

      Wrought iron fencing costs in Auckland:

      Fence Type Cost per Lineal Metre
      Standard Wrought Iron Bars $300–$450
      Ornate Wrought Iron $400–$600
      Powder-Coated Wrought Iron $350–$500

      Wrought Iron Fence Styles for Auckland

      • Ornate designs: Heritage homes in Remuera or Devonport, this is where wrought iron earns its reputation.
      • Vertical bars: Clean and minimal for Newmarket properties where security matters but so does modern aesthetics.
      • Powder-coated panels: Rust-resistant and available in multiple colours, the practical approach for coastal Takapuna properties.
      • Custom gates: Matching gate and fence combination for a cohesive Herne Bay frontage.

      On consents: Fences under 2.5 metres typically don’t require consent — Building.govt.nz. Heritage and coastal zones may have additional rules, confirm with Auckland Council.

      Wrought iron is the right material for a specific kind of Auckland property, one where the architecture demands it and the budget supports it. For everything else, aluminium delivers much of the visual result without the maintenance obligation or price.

      Concrete Fencing: Maximum Privacy and Noise Control

      Concrete does one thing better than any other fencing material: blocks everything. Sound, sightlines, wind. For Auckland homes near busy roads, Onehunga near the motorway corridor, Mt Albert on a main arterial, concrete is the serious answer to noise and privacy. It’s also essentially indestructible and asks very little from you once it’s up.

      Dorothy Li’s description is direct: “It’s a fantastic option for those who want a fence that’s virtually indestructible and blocks out noise.” The trade-off is cost, installation complexity, and an aesthetic that can feel heavy if the design isn’t handled well. Textured and painted options have addressed that significantly in recent years.

      Pros of Concrete Fencing

      • Durability: Handles Auckland’s coastal winds, UV, and rain without cracking or fading over time.
      • Privacy and noise reduction: Unmatched among fencing materials, the right call for Newmarket or Onehunga properties facing traffic noise.
      • Minimal maintenance: No paint, no sealant, an occasional wash is all it needs.
      • Finish options: Textured, painted, or patterned finishes from PlaceMakers can soften the aesthetic considerably.

      Cons of Concrete Fencing

      • Cost: $250–$500 per lineal metre, a significant investment.
      • Installation complexity: Heavy material, requires solid foundations and professional installation, particularly relevant on Auckland’s sloped sections.
      • Aesthetic limitations: Can read as industrial. Doesn’t suit the character of heritage Remuera or Devonport properties.

      Cost Breakdown

      Concrete fencing costs in Auckland by type:

      Fence Type Cost per Lineal Metre
      Precast Concrete Panels $250–$400
      Textured Concrete $300–$450
      Custom-Patterned Concrete $350–$500

      Concrete Fence Styles for Auckland

      • Precast panels: Fast to install and effective for full privacy in urban Mt Roskill.
      • Textured panels: Stone or brick-effect finishes for modern Botany Downs properties that want the privacy without the industrial look.
      • Painted concrete: Colour adds warmth to Henderson frontages.
      • Patterned concrete: Decorative detail for upscale St Heliers properties.

      On consents: Concrete fences under 2.5 metres generally don’t need consent, but their weight may require engineering assessment for stability, particularly on sloped or unstable ground common across Auckland, Building.govt.nz. Confirm with Auckland Council before proceeding.

      Concrete is the high-performance privacy option. It’s not for every property or every street frontage, but for the brief it suits, nothing else comes close.

      Stone Wall Fencing: Permanence, Natural Beauty, and Premium Value

      Stone walls occupy the premium end of the fencing market, and they look it. For upscale Herne Bay properties or rural Dairy Flat sections where permanence and natural character are the brief, a properly built stone wall adds something that no manufactured material can replicate. It also adds to the property’s value in a way most other fencing materials don’t.

      Dorothy Li on stone: “They add a natural, timeless charm that enhances any property’s value.” That’s accurate, but the cost and installation complexity are equally real. This is not a DIY project, and the price reflects skilled masonry work.

      Pros of Stone Wall Fencing

      • Durability: Stone handles Auckland’s coastal exposure, salty air, heavy rain, without deteriorating. Properly built stone walls last generations.
      • Privacy and security: Solid, tall, and essentially immovable, excellent for Parnell or Remuera properties where seclusion and security are both priorities.
      • No maintenance: Once built, stone needs nothing, no paint, no sealant, no annual inspection regime.
      • Natural material: Local volcanic stone or schist reads authentically in Auckland’s landscape in a way that manufactured materials don’t.

      Cons of Stone Wall Fencing

      • Cost: $400–$800 per lineal metre, the most expensive fencing option in this guide by a significant margin.
      • Installation complexity: Requires skilled masons and solid foundations. Auckland’s sloped and variable soils add to that complexity.
      • Fixed and permanent: Once it’s built, changing it is a demolition project. Make sure you’re confident in the design before committing.

      Cost Breakdown

      Stone wall fencing costs in Auckland:

      Fence Type Cost per Lineal Metre
      Volcanic Stone Wall $400–$600
      Schist Stone Wall $500–$700
      Custom Stacked Stone $600–$800

      Stone Wall Styles for Auckland

      • Volcanic stone: Locally sourced and genuinely Auckland, natural fit for coastal Mission Bay properties.
      • Schist stone: Cleaner and more modern-reading, suits upscale Epsom homes.
      • Dry-stacked stone: Rustic, mortar-free construction for rural Albany sections.
      • Polished stone panels: Contemporary finish for Newmarket urban properties.

      On consents: Stone walls under 2.5 metres generally don’t require consent, but engineering assessment for structural stability may be needed, particularly on sloped or unstable sites, Building.govt.nz. Confirm with Auckland Council for boundary and heritage zone specifics.

      Stone walls are expensive and the right brief for them is specific: premium properties where permanence, natural material, and long-term value addition are the priorities. Outside of that brief, the cost is hard to justify against other options.

      Net and Wire Fencing: Practical and Affordable for Rural Auckland

      Net and wire fencing doesn’t try to do anything it can’t. It marks a boundary, keeps animals in or out, and does both cheaply and reliably. For rural and semi-rural Auckland properties, Pukekohe, Warkworth, Clevedon, it’s the standard solution for a reason. Don’t use it for privacy in a suburban street. Do use it when the brief is practical containment over large areas.

      Dorothy Li’s description of net and wire is straightforward: “It’s a reliable, low-cost option for those needing a functional fence without the frills.” That’s exactly what it is, and in rural Auckland, that’s often exactly what’s needed.

      black wire mesh fence around a lawn and garden in front of a modern house

      https://www.bunnings.co.nz/peak-1500mm-x-1200mm-black-steel-fence-panel-for-no-dig-mesh-fencing_p0443770


      Pros of Net and Wire Fencing

      • Cost: $50–$150 per lineal metre, the affordable end of the fencing market.
      • Easy installation: Lightweight and flexible, manageable on uneven Waitakere terrain and suitable for DIY.
      • Open sightlines: Doesn’t block views, relevant for rural Dairy Flat sections where the outlook is part of the value.
      • Versatile: Livestock, garden, temporary boundary — Bunnings carries a broad range for different applications.

      Cons of Net and Wire Fencing

      • No privacy: Zero seclusion. Not appropriate for urban Mt Roskill or any densely populated suburb.
      • Basic look: Utilitarian by design, not suitable for upscale Remuera or Herne Bay properties.
      • Rust risk without galvanising: Auckland’s humidity is hard on ungalvanised wire. Specify galvanised for longevity.

      Cost Breakdown

      Net and wire fencing cost range in Auckland:

      Fence Type Cost per Lineal Metre
      Standard Wire Netting $50–$100
      Galvanised Wire Mesh $80–$120
      Heavy-Duty Stock Fencing $100–$150

      Net and Wire Styles for Auckland

      • Wire netting: Garden enclosures and small livestock in Papakura.
      • Galvanised mesh: Rust-resistant, the right specification for Piha coastal properties.
      • Stock fencing: Heavy-duty for larger animals on Clevedon rural sections.
      • Post and wire: Minimal boundary marker for large Albany sections.

      On consents: Net and wire fences under 2.5 metres don’t typically need consent — Building.govt.nz. Confirm with Auckland Council for rural or coastal zone specifics.

      Net and wire is an honest, functional material for the brief it suits. That brief is rural or semi-rural Auckland. Elsewhere, look elsewhere.

      Chain Link Fencing: The Budget-First Option

      Chain link is the cheapest fencing option available in Auckland, and it makes no apology for that. It’s practical for large sections in Manurewa or temporary fencing during renovations in Mt Roskill. It won’t add aesthetic value to a property and it provides no privacy, but it does mark a boundary cheaply, reliably, and with minimal installation effort.

      Dorothy Li puts it plainly: “It’s a low-cost, durable option that gets the job done without fuss.” That’s the whole case for chain link. Nothing more, nothing less.

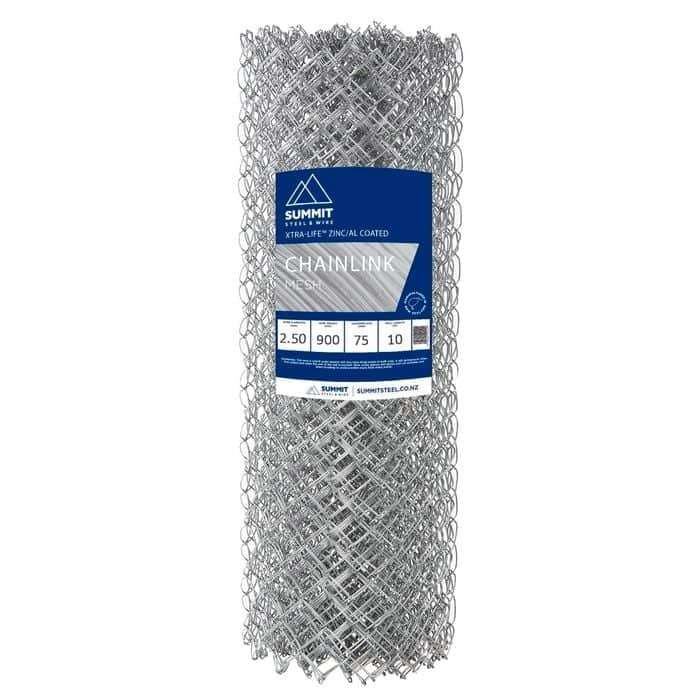
      roll of galvanised chainlink mesh fencing with Summit Steel and Wire branding

      https://www.bunnings.co.nz/summit-steel-wire-0-9-x-10m-chainlink-netting_p0167970

      Pros of Chain Link Fencing

      • Lowest cost: $40–$120 per lineal metre, the cheapest fencing option in this guide.
      • Durable in Auckland conditions: Galvanised or vinyl-coated chain link handles humidity and coastal air without rusting prematurely.
      • Easy installation: DIY-manageable on flat or sloped sections in Henderson.
      • Low maintenance: Galvanised chain link from Bunnings needs almost nothing from you once it’s up.

      Cons of Chain Link Fencing

      • No privacy: Zero, unsuitable for any urban property where that matters.
      • Industrial appearance: Won’t suit Remuera or Devonport, or any property where the fence needs to contribute to kerb appeal.
      • Security limitations: Easier to climb or cut than solid alternatives, not the right choice for high-security applications.

      Cost Breakdown

      Chain link fencing, the most affordable option in Auckland:

      Fence Type Cost per Lineal Metre
      Standard Chain Link $40–$80
      Galvanised Chain Link $60–$100
      Vinyl-Coated Chain Link $80–$120

      Chain Link Styles for Auckland

      • Standard chain link: Temporary or boundary fencing in Papakura.
      • Galvanised chain link: Coastal Piha or Milford, rust-resistant and sensibly specified.
      • Vinyl-coated chain link: Adds colour and a bit more durability for Mt Wellington backyards.
      • Chain link with slats: Partial privacy for suburban Albany properties.

      On consents: Chain link fences under 2.5 metres don’t typically need consent — Building.govt.nz. Pool fencing and heritage zones have different requirements, confirm with Auckland Council.

      Chain link is the right material for a specific brief: lowest possible cost, large sections, functional boundary only. Outside of that brief, the other options in this guide deliver meaningfully better results for the investment.

      Green Wall Fencing: Living Privacy for Eco-Conscious Auckland Properties

      Green walls bring something none of the other materials on this list can: a boundary that’s alive. For eco-conscious properties in Titirangi or urban gardens in Grey Lynn where the design brief includes sustainability and natural character, a well-specified green wall delivers on privacy, aesthetics, and environmental value simultaneously. The trade-off is maintenance, plants need consistent attention, particularly through Auckland’s dry summers.

      Dorothy Li’s take is genuine: “It’s a fantastic way to blend sustainability with aesthetics, creating a fence that’s alive and evolving.” For Mt Eden gardens where the outdoor space is a considered part of the property’s character, that describes exactly what a green wall achieves.

      Pros of Green Wall Fencing

      • Environmental value: Improves air quality, reduces noise, and creates habitat in urban areas like Ponsonby.
      • Privacy and aesthetics: Dense foliage provides genuine seclusion and looks distinctive, no manufactured material replicates it.
      • Natural temperature regulation: Plants reduce heat load in summer, practical for Henderson properties facing full western sun.
      • Design flexibility: Vertical gardens to trellis-supported vines, components available at Bunnings to suit different approaches and budgets.

      Cons of Green Wall Fencing

      • Maintenance commitment: Dorothy Li is direct about this, regular watering, pruning, and care are non-negotiable. Auckland’s dry summers test the most established green walls.
      • Cost: $300–$700 per lineal metre including irrigation infrastructure, not a cheap option.
      • Installation complexity: Professional setup is recommended, particularly for automated systems on upscale Remuera properties.

      Cost Breakdown

      Green wall fencing costs in Auckland by approach:

      Fence Type Cost per Lineal Metre
      Basic Trellis with Vines $300–$450
      Vertical Garden Panels $400–$600
      Automated Green Wall with Irrigation $500–$700

      Green Wall Styles for Auckland

      • Trellis with climbing vines: Accessible entry point for suburban Papakura gardens, jasmine and similar species establish quickly.
      • Vertical garden panels: Pre-planted modules for immediate visual impact in modern Newmarket homes.
      • Hedge-style green walls: Dense griselinia for coastal St Heliers properties where salt tolerance matters.
      • Automated green walls: With irrigation for reduced manual maintenance, appropriate for upscale Remuera properties where the investment is justified.

      On consents: Green walls under 2.5 metres generally don’t need consent, though structural supports may require engineering assessment — Building.govt.nz. Confirm with Auckland Council for urban and coastal zone specifics.

      Green walls suit a specific homeowner: one who is genuinely committed to the maintenance, values natural materials and environmental contribution, and has a brief that rewards something distinctive over something conventional. Get those conditions right and a green wall delivers a result nothing else on this list can match.

      Comparing All Fence Options for Auckland Homes

      With twelve fencing materials covered, here’s the full comparison in one place. Use this to narrow your shortlist, then go back to the relevant section for the detail on any material that looks like the right fit for your property.

      The right fence depends on your specific brief. Budget, privacy requirement, maintenance commitment, location, and architectural character all influence the decision. This table gives you the overview; the sections above give you what you need to make the final call.

      Fence Type Cost (NZD) Pros Cons Best For
      Timber $100–$400/m Versatile, affordable, natural Requires regular maintenance Heritage and suburban homes (e.g., Remuera)
      Composite $200–$450/m Low maintenance, durable, eco-friendly Higher upfront cost, limited colours Modern homes and renovations (e.g., Grey Lynn)
      Aluminium $150–$400/m Rust-resistant, low maintenance Limited privacy, not suited to heritage styles Coastal and pool areas (e.g., Takapuna)
      Steel $200–$500/m Strong, secure, modern Heavy to install, limited privacy Security-focused urban properties (e.g., Penrose)
      Vinyl $100–$300/m Affordable, low maintenance Limited colours, can crack under impact Family homes on a practical budget (e.g., Howick)
      Glass $300–$600/m Preserves views, pool-compliant, modern Expensive, needs regular cleaning Pool areas and coastal view properties (e.g., Mission Bay)
      Wrought Iron $300–$600/m Durable, secure, heritage character Expensive, rust risk without maintenance Heritage and premium properties (e.g., Parnell)
      Concrete $250–$500/m Maximum privacy, noise reduction, very durable Expensive, heavy, can feel industrial Busy urban streets and noise-sensitive sites (e.g., Onehunga)
      Stone Wall $400–$800/m Exceptional durability, natural beauty, adds value Highest cost, complex installation Premium and rural properties (e.g., Dairy Flat)
      Net and Wire $50–$150/m Very affordable, easy to install No privacy, basic appearance Rural and farm properties
      Chain Link $40–$120/m Cheapest option, durable No privacy, industrial look Temporary boundaries and rural sections (e.g., Waimauku)
      Green Wall $300–$700/m Sustainable, distinctive, provides privacy High maintenance, complex setup Eco-conscious and design-focused properties (e.g., Mt Eden)


      Most fences under 2.5 metres don’t require building consent — Building.govt.nz covers the technical requirements. Pool fencing and heritage zones are the main exceptions, always confirm with Auckland Council before starting work.

      Making the Final Call on Your Fence

      Twelve materials, a wide range of costs, and a set of trade-offs that are genuinely different for each one. The right answer for your property comes down to a clear-eyed look at what the fence actually needs to do: privacy, security, views, boundary definition, noise control, or some combination of those. Auckland’s coastal climate, your suburb’s character, and your maintenance appetite all narrow the field from there.

      Use the comparison table to shortlist, then look at the detail. Check Building.govt.nz and confirm your specific requirements with Auckland Council, particularly for pool fencing and heritage zones where the rules are stricter. Source quotes from Bunnings, Mitre 10, Trade Tested, or PlaceMakers depending on the material. The right fence, properly installed, will add to your property’s value and function for years without demanding much in return.

      Getting a fence built as part of your Auckland renovation

      For most homeowners a new fence is one line item in a larger outdoor project rather than a standalone job. Residential fencing in Auckland runs most smoothly when it is scoped alongside the deck, retaining, paving or landscaping it sits next to, so levels, drainage and materials all line up. That is the way we handle outdoor work across Auckland: one crew, one plan, one point of accountability, rather than a separate fencing contractor working around everyone else. If a deck is part of the same project, our guide to kwila decking walks through the timber choice and cost that most often pairs with a timber or aluminium boundary fence. And if the fence is really about privacy for an outdoor living area, a louvre or slat screen on a pergola sometimes does the job better than a taller boundary fence that trips the 2.5-metre consent threshold.

      What's the most affordable fence for Auckland homes?

      Chain link and net and wire are the cheapest options, starting at $40–$120 per lineal metre. Both are well-suited to rural or temporary boundary applications in areas like Waimauku — Bunnings carries a solid range. For urban properties where appearance matters, the next step up is vinyl or treated pine at $100–$200.

      Which fence is best for privacy in urban Auckland?

      Concrete, stone walls, and solid composite panels all provide strong privacy. Concrete is the best performer on noise reduction, precast panels from PlaceMakers work well for busy sites like Onehunga, at $250–$500 per metre.

      What's the most durable fence for Auckland's coastal climate?

      Aluminium is the standout for coastal properties, it doesn't rust and handles salt air without deteriorating. Glass is also strong in this regard. Both are well-suited to Mission Bay, Takapuna, and similar coastal suburbs. Find aluminium at Mitre 10 in the $150–$400 per metre range.

      Do I need a building consent for my fence in Auckland?

      Most fences under 2.5 metres don't require consent — Building.govt.nz has the full technical requirements. Pool fencing is the main exception: it must meet NZ safety standards and often requires consent. Heritage zones can also have specific rules. Confirm with Auckland Council before starting any work.

      Which fence is best for eco-conscious Auckland homeowners?

      Green walls and composite fencing are the strongest options here. Green walls use living plants for genuine environmental benefit, but require ongoing maintenance and cost $300–$700 per metre. Composite uses recycled materials and is low-maintenance, a more practical choice for most eco-conscious homeowners.

      What's the most stylish fence for modern Auckland homes?

      Glass and powder-coated aluminium both deliver a clean, contemporary result. Glass suits view properties and pool areas at $300–$600 per metre — Mitre 10 carries a range of options. Aluminium slatted or louvred panels suit most modern Auckland builds at a lower price point.


      Need more information?

      Take advantage of our FREE Complete Home Renovation Guide (48 pages), whether you’re already renovating or in the process of deciding to renovate, it’s not an easy process, this guide, which includes a free 100+ point checklist, will help you avoid costly mistakes.

      • Download Free Renovation Guide (PDF)
      • Or try our free House Extension Cost Calculator 

        18 months 0 percent interest long term finance badge

        Have you been putting off getting renovations done?

        We have partnered with Q Mastercard ® to provide you an 18 Month Interest-Free Payment Option, you can enjoy your new home now and stress less.

        Learn More about Interest-Free Payment Options*

        *Lending criteria, fees, terms and conditions apply. Mastercard is a registered trademark and the circles design is a trademark of Mastercard International Incorporated.


        Still have questions unanswered?

        Book a no-obligation consultation with the team at Superior Renovations,
        we’d love to meet you to discuss your renovation ideas!

          Services

          Home RenovationKitchen RenovationBathroom RenovationOutdoor RenovationHouse ExtensionCommercialDesign ServicesOther

          By submitting this form, you agree to receive communications from us via email or text regarding our services, you can unsubscribe at any time.

          This site is protected by reCAPTCHA and the Google

          Privacy Policy and Terms of Service apply.

        kwila decking in back yard
        Landscaping & Outdoor

        Kwila Decking Auckland: Costs, Suppliers & Care 2026 – Superior Renovations

        Kwila Decking Auckland: Costs, Suppliers & Maintenance Guide

        Quick answer: Kwila decking costs roughly $90–$130 per m² for materials and $550–$900 per m² fully installed in Auckland — about $11,000–$18,000 for a standard 20m² deck. With proper installation and a clean-and-oil every 12–18 months, kwila lasts 15–25+ years in our coastal, humid conditions.

        If you’re an Auckland homeowner weighing up a kwila deck — a spot for summer barbies in Botany Downs, or somewhere to sit and watch the bush in Titirangi — this guide covers the decisions that actually matter. Kwila (also called Merbau) is the go-to decking hardwood in Auckland for good reason. It’s dense and naturally oily, so it shrugs off our humidity, coastal salt air, and UV without much fuss. Rich reddish-brown tones, a 15–25+ year lifespan with proper care, and a hardness that takes high-traffic family use in its stride.

        This is the kwila material guide. It draws on the outdoor building projects across Auckland we’ve delivered over the past decade — costs, durability, maintenance, finishes, alternatives, and what to watch out for. Auckland’s conditions are specific: intense UV, salty air in the coastal suburbs, and clay soils that complicate substructures. The advice below is built around those, not generic timber-yard copy. For the wider cost picture across every decking material and size, our full Auckland deck cost guide is the place to start.

        Last updated: June 2026

        Kwila decking on an Auckland home showing warm reddish-brown timber tones


        How Much Does Kwila Decking Cost in Auckland?

        Budget $90–$130 per m² for kwila materials and $550–$900 per m² fully installed — roughly $11,000–$18,000 for a standard 20m² deck. Kwila is a premium hardwood and the price reflects that. But “premium” isn’t the same as overpriced once you factor in 20 years of ownership. Across more than 1,000 Auckland renovation projects, outdoor work is the category where shortcuts in spec show up fastest — the climate punishes anything done on the cheap.

        One thing to be upfront about: timber and labour pricing has moved sharply in recent years and still fluctuates with supply and demand. Treat the figures below as ranges to budget within, not fixed quotes. For the all-materials comparison (pine through to aluminium), see our Auckland deck cost guide.

        Materials, labour, and the bits people forget

        The cost of a kwila deck isn’t just the timber. There’s installation labour, site preparation, substructure, fixings, and ongoing maintenance to account for. Kwila boards run $90–$130 per m² to supply; the jump to $550–$900 per m² installed is mostly labour and substructure, because hardwood is slow to lay. Every screw is pre-drilled and countersunk, which is why a kwila install costs more in labour than a softwood one.

        Supplier (Auckland) Board size Supply price (per m², incl GST)
        South Pacific Timber 140×19mm ~$89–$95
        PlaceMakers (FSC Griptread) 140×19mm finished ~$90–$100
        BBS Timbers / JSC Timber 140×19mm ~$90–$115
        Typical supply band FSC / select grade $90–$130

        💡 Quick tip: Order 5–10% more board than your measured area to cover cuts, waste, and the odd defect. Running short mid-build means a second delivery charge and a colour-match gamble if the next batch is from a different lot.

        What pushes the installed price up

        That $550–$900 per m² installed band is wide because Auckland sites vary so much. Here’s what moves the number:

        • Deck height and subframe. A ground-level deck on a flat section needs minimal substructure. An elevated deck on a Titirangi hillside needs engineered posts, bracing, and concrete footings — the subframe alone can cost as much as the boards.
        • Site prep and access. Old deck removal, drainage work, or getting materials up a steep Mt Eden driveway all add labour time, and that time lands in the quote.
        • Design complexity. A single-level rectangle in Flat Bush costs less than a multi-level deck with integrated seating in Herne Bay. If you want help weighing complexity against budget, our Design Studio in Wairau Valley exists for exactly that.
        • Fixings and pre-coating. T316 stainless screws for coastal sites and pre-oiling boards on all four faces before they go down add a little upfront — both are worth every cent.
        • Council consent. Where consent is triggered, add $500–$2,000 and allow processing time (more on this below).

        “The job we see go wrong most often isn’t the timber — it’s boards that went down without being oiled on all four faces first. On a coastal site that one step decides whether you’re re-sanding in year three or year ten. It’s the cheapest insurance on the whole build.”
        — Alison Yu, Designer, Superior Renovations

        Do you need council consent for a deck?

        A deck is exempt from building consent only if it’s not possible to fall more than 1.5 metres from it — even if the deck collapsed. That’s Exemption 24 of Schedule 1 of the Building Act 2004, per Building Performance (MBIE). Above that fall height, you need consent from Auckland Council. Either way, a safety barrier is required under Building Code clause F4 wherever there’s a fall of one metre or more.

        Ignore the “25m²” figure that gets repeated online — it doesn’t apply to decks at all. That threshold relates to detached sheds and similar standalone structures, not decks. Where consent is required, the structural work is restricted building work and must be carried out or supervised by a Licensed Building Practitioner (LBP). We handle all consent paperwork in-house on the projects we deliver, so it’s one less coordination headache for the homeowner.

        Important note: Exempt work still has to meet the Building Code, and a resource consent can apply separately — for site coverage, yard setbacks, or daylight planes. On tight Auckland sections it pays to check the planning rules before you commit to a footprint.

        Is kwila worth it?

        Pine is cheaper upfront and composite is lower maintenance, but kwila sits in a practical middle ground. A well-maintained kwila deck realistically lasts 15–25+ years in Auckland, and its look is hard to fake with a synthetic board. For homeowners planning to stay put and actually use the outdoor space, the numbers hold up — especially in suburbs like Parnell or Devonport, where a good deck shows up in a valuation.


        Pros and Cons of Kwila Decking for Your Auckland Home

        Kwila has a strong reputation in the Auckland market — mostly well earned. But it isn’t the right answer for everyone. Here’s the honest version of what you’re getting and what you’re signing up for.

        Why Auckland homeowners choose kwila

        It handles our conditions

        Kwila’s high oil content gives it natural resistance to moisture, insects, and decay — the three things that shorten a deck’s life here. Whether you’re in Takapuna copping salt spray off the harbour or in Mt Eden dealing with heavy winter rain, it’s built for it. The catch is that the timber’s natural resistance only pays off if the install is done right — drainage, ventilation, and fixings all matter.

        Kwila deck boards laid on an Auckland home showing grain and colour

        The look is hard to argue with

        Kwila’s warm reddish-brown tones — shifting toward gold as the timber ages — add character a composite board rarely matches convincingly. It works on a modern build in Grey Lynn and on a classic bungalow in Henderson alike. Left untreated, it weathers to a clean silver-grey, which suits beachside places like Devonport or Waiheke without any colour upkeep at all.

        “A deck earns its keep when it reads as another room, not an add-on. We set the deck level to sit flush with the interior floor so the indoor-outdoor line disappears — open the doors and the living space just keeps going. That’s the detail clients actually feel, every summer.”
        — Dorothy Li, Design Manager, Superior Renovations

        Less maintenance than pine

        This is a relative claim, but a real one. A clean and an oil every 12–18 months is the commitment with kwila; pine needs attention every six to twelve months to stay decent. Products like Dryden OilStain or Resene Kwila Timber Stain are straightforward to apply and easy to get from Mitre 10 or Bunnings.

        FSC-certified options exist

        Kwila’s sustainability record has historically been patchy — some supply chains raise legitimate concerns about logging in the source regions. FSC-certified kwila addresses that directly, so if environmental provenance matters to you, ask for the certification and verify it rather than taking the supplier’s word.

        Built for heavy use

        Kwila’s Janka hardness of around 1,800 lbf means it takes heavy furniture and constant foot traffic without denting or marking. For a deck that’s going to be used hard — regular entertaining in Botany Downs, kids in Albany — it’s a more practical pick than softer timbers.

        The downsides worth knowing

        Tannin bleeding

        Kwila bleeds tannins — a reddish-brown run-off that washes out after rain and can stain concrete, pavers, or the neighbour’s fence. In a tight Remuera backyard, plan for it. The bleed is worst in the first few months and settles down, but it’s an unpleasant surprise if you’re not across it beforehand.

        💡 Quick tip: Lay drop cloths during the build, hose the deck down every couple of weeks for the first three to six months, and pre-coat the boards before they go in. Those three steps deal with most of the tannin problem.

        Higher upfront cost than pine

        At $90–$130/m² materials and $550–$900/m² installed, kwila sits above pine ($350–$550/m² installed) but in a similar band to composite ($550–$850/m² installed). For a budget-conscious deck in Manurewa where function matters more than finish, pine is worth a look. For anyone staying in the home and using the space properly, kwila usually wins the ten-year comparison.

        It still needs maintenance

        Low maintenance isn’t no maintenance. Skip the annual oil and kwila fades to silver-grey — fine if that’s the look you want, but unprotected timber also dries out and can crack in Auckland’s UV-heavy summers. Set a reminder and stick to it. The job takes an afternoon, not a weekend.

        It’s not a DIY install

        Kwila’s density makes it harder to work than pine. It needs correct board spacing (4–6mm), the right fixings, and experienced hands to avoid splitting or cupping — both more common in Auckland’s humidity if the install is sloppy. Use a tradie with hardwood decking experience specifically, not just general carpentry, and ask to see photos of past kwila jobs.

        Pros and cons at a glance

        Advantages Disadvantages
        Handles Auckland’s coastal, humid weather Tannin bleed can stain nearby surfaces early on
        Rich reddish-brown look that ages well Higher upfront cost than pine
        Lower maintenance than softwoods Still needs oiling to hold its colour
        FSC-certified options available Sourcing ethics vary without certification
        High density suits heavy family use Needs experienced installers to avoid cupping

        Alternatives to Kwila Decking

        Kwila isn’t the only answer. Depending on your budget, maintenance appetite, and what the deck needs to do, one of these might suit you better. Here’s the honest comparison.

        Treated pine

        Pine is the most common decking timber in New Zealand for one reason: it’s the cheapest, at $50–$80/m² materials and $350–$550/m² installed. H3.2-treated pine is pressure-treated for outdoor use and widely stocked at Bunnings and Mitre 10. The trade-offs: a shorter 10–15 year life, staining every six to twelve months, and a softer surface that dents under heavy use. Good for a bigger deck in Papakura on a tight budget — just be honest about the upkeep.

        Composite

        Composite — wood fibre and recycled plastic — has grown fast in Auckland because it barely needs maintaining: no oiling, no staining, just a hose-down. Expect $100–$200/m² materials and $550–$850/m² installed. It handles fade, rot, and moisture well, which suits coastal spots like Devonport. Two things to check before you commit: darker boards get genuinely hot underfoot in summer, and some homeowners still find the not-quite-timber look unconvincing. For a poolside or wet area, pick a textured surface — smooth composite gets slippery.

        Vitex

        Vitex is a tropical hardwood that gets less attention than kwila but deserves a look. At $80–$110/m² materials and $500–$850/m² installed, it offers durability close to kwila with a lighter, golden-brown tone that suits coastal properties in Mission Bay or Waiake where kwila’s deeper red can feel heavy. It bleeds tannins like kwila and still needs oiling, and fewer Auckland suppliers carry it — so sourcing can be the limiting factor.

        Bamboo

        Bamboo is gaining traction as a sustainable option. High-density, thermally treated bamboo costs $90–$150/m² materials and $500–$800/m² installed, and resists moisture and pests reasonably well when it’s a quality product. The risk is quality variance — cheaper bamboo warps and cracks in Auckland’s humidity, so this is one to spec carefully and not buy on price.

        💡 Quick tip: Work out the ten-year cost, not just the install price. Kwila and vitex often win that number even when pine looks cheaper on day one — the maintenance and replacement maths catches up.

        How the options compare

        Material Materials /m² Installed /m² Lifespan Maintenance Best for
        Kwila $90–$130 $550–$900 15–25+ yrs Low (oil 12–18 mo) Coastal, high-traffic decks
        Treated pine $50–$80 $350–$550 10–15 yrs High (stain 6–12 mo) Budget-conscious builds
        Composite $100–$200 $550–$850 20–30 yrs Very low (clean only) Low-maintenance priority
        Vitex $80–$110 $500–$850 15–20 yrs Low (oil 12–18 mo) Coastal, lighter look
        Bamboo $90–$150 $500–$800 10–20 yrs Moderate (seal 12 mo) Eco-conscious builds

        Figures are indicative 2026 Auckland ranges, fully installed (materials, labour, subframe, standard site prep), and shift with timber and labour costs. They exclude balustrades, stairs, and complex foundations.


        How Long Does Kwila Decking Last in Auckland?

        The headline number is 15–25+ years. That’s the realistic lifespan of a well-installed, properly maintained kwila deck in Auckland — but the gap between 15 and 25+ years comes down to a handful of factors worth getting right from the start.

        What determines the lifespan

        • Timber grade. FSC-certified, select-grade kwila is denser and more consistent than cheap stock. Knots and imperfections are where moisture gets in and trouble starts.
        • Installation quality. Board spacing of 4–6mm, stainless fixings, and proper substructure ventilation are the three things that most separate a 25-year deck from a 12-year one.
        • Maintenance. A clean every six months and an oil every 12–18 months protects against UV and moisture. Neglect it and you’ll see cracking and fading within a few seasons in high-UV spots like Parnell.
        • Coastal exposure. In Mission Bay, Waiake, or St Heliers, salt air attacks the fixings before it touches the timber — which is why T316 stainless matters.
        • Usage. A high-traffic entertainer’s deck in Howick lives a harder life than a quiet sitting area in Titirangi. Kwila’s built for it, but it’s worth being honest about the wear.

        💡 Quick tip: On Auckland’s clay-heavy soils, keep a minimum 450mm clearance under the deck for airflow. Clay drains slowly, so moisture sits longer underneath than it would on sandy ground — and trapped damp is what rots a substructure.

        What Auckland’s climate throws at it

        Rain, UV, and salt air make Auckland demanding — but kwila was built for tropical conditions, so it’s not out of its depth. Three things to manage: moisture (pre-coat all four board faces before installing), UV (oil regularly or accept the silver-grey patina, knowing the surface still degrades unprotected), and salt air (the real risk is corroded fixings, not the timber — spec T316 stainless near the coast). See the kind of outdoor work we deliver in the projects we’ve completed across the city.

        How kwila compares on lifespan

        Material Life expectancy Key factors for longevity
        Kwila 15–25+ years Regular oiling, quality install, FSC-certified timber
        Treated pine 10–15 years Frequent staining, H3.2 treatment, ventilation
        Composite 20–30 years Minimal upkeep, UV-resistant brands, proper install
        Vitex 15–20 years Oiling, quality fixings, ventilation
        Bamboo 10–20 years High-density treatment, sealing, quality sourcing

        Kwila sits in a strong spot — better than pine and bamboo, comparable to vitex, and while composite edges it on raw lifespan, composite costs more and lacks kwila’s natural character. For most Auckland homeowners, that’s the right trade.


        Maintaining Your Kwila Deck: A Practical Auckland Guide

        Kwila is low-maintenance next to pine. It is not no-maintenance. Auckland’s humidity, UV, and salt air work on any deck regardless of timber species — the question is whether you stay ahead of it or fix the damage after the fact. Staying ahead is cheaper and less work. Here’s the routine.

        The three core tasks

        1. Cleaning

        Clean every six months — spring and autumn. In shady suburbs like Titirangi, mildew establishes fast and is harder to shift once it’s in the grain. A mild deck cleaner like Wet & Forget and a stiff brush handles most of it. For coastal homes, the post-winter clean matters most — salt and moisture together create the surface deterioration that’s easy to prevent and annoying to fix.

        2. Managing tannin leaching

        Kwila bleeds tannins for the first three to six months. Hose or low-pressure wash every two to three weeks early on to flush the run-off before it sets on surrounding pavers or concrete. Pre-coating all four board faces before installation cuts the bleed from the outset, and drop cloths during the build protect tight Ponsonby or Grey Lynn courtyards where pavers sit close to the deck edge.

        💡 Quick tip: If tannin reaches concrete or light pavers, a diluted oxalic acid cleaner (available at Bunnings) lifts the stain without damaging the deck surface.

        3. Oiling or staining

        Oil or stain every 12–18 months to protect against UV and moisture. Skip it and the deck fades to silver-grey — a legitimate look, but the UV still degrades unprotected timber even if the patina suits you. Dryden OilStain and Resene Kwila Timber Stain both penetrate the boards and hold up to NZ conditions rather than sitting on top where they peel. Clean and dry the deck first, sand lightly if the surface is rough, then apply with the grain. Allow 24–48 hours to dry — and check the forecast, because applying before rain is a wasted afternoon.

        Maintenance schedule for Auckland conditions

        Task Frequency Best time Notes
        Tannin wash-down Every 2–3 weeks, first 3–6 months After installation Low-pressure; protect nearby surfaces
        General cleaning Every 6 months Spring and autumn Mild cleaner; focus on shaded areas
        Oiling / staining Every 12–18 months Spring or early summer UV-resistant product; apply in the cooler part of the day
        Inspection Every 6 months After winter and after summer Check fixings, cracks, mildew — coastal sites especially

        Mistakes worth avoiding

        • Not pre-coating before installation. Unsealed undersides and board ends invite moisture from below — one of the more avoidable causes of early deck failure here.
        • Cheap oils. They don’t penetrate and won’t survive Auckland’s UV. You’re applying it to an expensive deck — pay for a quality product.
        • High-pressure washing. It damages the surface grain and drives moisture into the boards. Low pressure or a stiff brush is all you need.
        • Skipping inspections. A loose screw caught early is a ten-second fix. Found after a winter of movement, it can mean replacing a board.

        If you’re planning a pergola or louvre roof over your deck, factor the shading into your maintenance plan — covered sections stay damp longer and need a closer eye on mildew. You can ballpark the structure with our pergola cost calculator before you commit.

        Maintained kwila deck on an Auckland property holding its reddish-brown colour


        Painting, Staining, or Letting Kwila Weather Naturally

        How you finish a kwila deck shapes how it looks and how much work it takes over its life. Three options — stain to keep the natural colour, paint for a different look, or let it weather. Each is legitimate; they just come with different commitments.

        Staining

        Staining is the default for kwila in Auckland because it works with the timber rather than hiding it. Oil-based products like Resene Kwila Timber Stain or Dryden OilStain penetrate the boards and protect from within — they don’t peel or bubble the way a surface coating can in our humidity. You get a range of tones from clear to deep brown, easy reapplication every 12–18 months, and protection that suits coastal and north-facing decks. The only real limit: if you want a colour that doesn’t read as timber, stain won’t get you there.

        Painting

        Paint gives an opaque finish and bold colour — but the grain disappears, which is why most kwila owners don’t do it. It works for specific looks: a charcoal deck in Ponsonby, a clean white against a coastal-style Herne Bay home. Expect more prep (sanding and priming), a higher maintenance burden (chips and peels in humidity, touch-ups every two to three years), and the loss of the natural character you probably bought kwila for. If you go this way, use a quality exterior paint with UV and mildew resistance.

        Natural weathering

        Left untreated, kwila weathers to a silver-grey patina — a genuine aesthetic, not a failure mode, and popular in coastal suburbs like Waiheke where it suits the setting. The trade-off is that unprotected timber degrades faster under UV and the patina can be patchy in shaded areas. If this is the look you want, apply a clear sealant initially — it slows the silvering slightly but protects the structure underneath while the patina develops.

        💡 Quick tip: Test any stain or paint on an offcut first. Kwila’s natural oils and grain affect how colour takes, and what looks right in the tin isn’t always what ends up on the deck.

        What finishing costs

        Materials run $10–$20/m²; professional application adds $30–$50/m² — worth it on a large or complex deck where even coverage matters, and especially for painting where prep quality decides how long the finish holds. For a standard rectangular 20–30m² deck, DIY staining is well within reach for most handy homeowners. A 4L tin covers roughly 20–40m² and costs $50–$100.

        Detail of a freshly oiled kwila deck showing rich reddish-brown colour


        Best Suppliers for Kwila Decking in Auckland

        Kwila quality varies between suppliers — grade, sourcing, and the advice you get alongside the timber all affect how the deck performs. Here’s an honest rundown of the main Auckland options.

        💡 Quick tip: Always ask for FSC certification documentation in writing. A supplier who can’t produce it is telling you something about the supply chain.

        The main Auckland kwila suppliers

        Supplier Supply price /m² FSC option Best for
        PlaceMakers $90–$120 Yes Reliable supply for larger projects
        Mitre 10 $85–$115 Sometimes Materials + maintenance products in one stop
        Bunnings $80–$110 Sometimes DIY builds, convenience
        South Pacific Timber $95–$130 Yes Sustainable, high-grade kwila
        BBS Timbers $90–$120 Yes Hardwood expertise, coastal spec advice
        JSC Timber $90–$115 Yes Broad range, custom milling

        For budget and convenience, Bunnings or Mitre 10. For sustainability, South Pacific Timber. For hardwood expertise and coastal-specific advice, BBS Timbers or JSC Timber. For broad coverage and reliable supply on a bigger job, PlaceMakers. Any of these, specified correctly and installed well, will give you a deck that performs for 15–25+ years.

        What to check before you buy

        • Timber grade. Ask for select or standard grade as a minimum — fewer knots, more consistent density.
        • FSC certification. Get it in writing.
        • Fixings. Confirm they stock T316 stainless, or can point you to a source. Not all carry it as standard.
        • Delivery. Check lead times and freight, especially for Waiheke or harder-access North Shore sites.
        • Order extra. Add 5–10% over your measured area for cuts, waste, and defects.

        Your Kwila Decking Project: The Short Version

        Kwila is a well-suited decking timber for Auckland — it handles the salt, UV, and humid winters, and looks good doing it. With proper installation and consistent maintenance, 20+ years is a realistic expectation.

        Budget summary for a 20m² kwila deck

        Item Cost range Notes
        Kwila materials (supply) $1,800–$2,600 $90–$130/m²
        Installation, subframe, fixings, site prep $9,200–$15,400 The bulk — hardwood is labour-intensive
        Council consent (if fall >1.5m) $500–$2,000 Schedule 1, Building Act 2004
        Annual maintenance $200–$400 Clean and oil
        Fully installed total $11,000–$18,000 Standard ground-level 20m² build, excl. consent

        Build in a 5–10% contingency for site surprises — clay soils in Remuera or Howick sometimes need more substructure work than the initial quote anticipates. Elevated decks, balustrades, and stairs sit above this range.

        Get the foundations right

        The things that separate a 25-year deck from a 12-year one aren’t complicated: good timber, a proper install, T316 fixings near the coast, 450mm of under-deck ventilation on clay soils, pre-coating on all four faces, and a maintenance routine you actually stick to. Poor installation and neglected maintenance are what shorten kwila’s life — neither is hard to avoid.

        Book your free in-home consultation with Superior Renovations
        Explore our Auckland deck and outdoor renovation service
        Request a free feasibility report for your project


        How much does a kwila deck cost in Auckland?

        For a standard 20m² ground-level kwila deck, budget $11,000–$18,000 fully installed. Materials run $90–$130 per m² to supply; the fully installed cost sits around $550–$900 per m² once labour, subframe, fixings, and site prep are included. Add $500–$2,000 if council consent is triggered. Timber and labour pricing has risen and fluctuates, so treat these as ranges, not fixed quotes. Elevated decks, balustrades, and stairs push the cost higher. Compare at least two suppliers and quotes before committing.

        Do I need council consent to build a deck in Auckland?

        A deck is exempt from building consent only if it's not possible to fall more than 1.5 metres from it, even if the deck collapsed — Exemption 24 of Schedule 1 of the Building Act 2004 (Building Performance/MBIE). Any deck above that fall height needs consent from Auckland Council. A safety barrier is also required under Building Code clause F4 wherever there's a fall of one metre or more. The '25m²' figure repeated online doesn't apply to decks — it relates to detached sheds. Superior Renovations handles all consent paperwork in-house on our projects.

        How long does kwila decking last?

        A well-installed, properly maintained kwila deck lasts 15–25+ years in Auckland conditions. The difference between the bottom and top of that range comes down to timber grade, installation quality (4–6mm board spacing, T316 stainless fixings, 450mm under-deck ventilation), maintenance, and coastal exposure. Kwila is a dense tropical hardwood with natural oils that resist moisture, insects, and decay — but it only delivers on that if the install and upkeep are done right.

        How often should I maintain my kwila deck?

        Clean every six months (spring and autumn) and oil or stain every 12–18 months using a product like Resene Kwila Timber Stain or Dryden OilStain. In the first three to six months after installation, hose the deck down every two to three weeks to manage tannin run-off before it stains nearby pavers or concrete. The total commitment is a few hours twice a year plus an annual oiling session — far less than pine.

        Should I stain, paint, or let my kwila deck weather naturally?

        Staining is the most practical choice for most Auckland homeowners — it protects the timber, keeps the natural colour, and needs reapplying every 12–18 months. Painting offers bolder colour but peels more readily in our humidity and needs attention every two to three years. Natural weathering produces a silver-grey patina that suits coastal properties in Waiheke or Devonport; apply a clear sealant initially to protect the structure while it silvers. Test any finish on an offcut first — kwila takes colour differently than pine.

        How do I deal with tannin bleeding on kwila?

        Kwila bleeds reddish-brown tannins after rain, worst in the first three to six months. Hose or low-pressure wash the deck every two to three weeks early on, pre-coat all four faces of each board before installation to cut the bleed at the source, and lay drop cloths during the build to protect pavers and concrete in tight Auckland backyards. If tannin reaches a hard surface, a diluted oxalic acid cleaner lifts the stain without damaging the deck.

        What kwila spec does an Auckland coastal site need?

        Specify T316 stainless steel fixings — standard steel corrodes in salt air and fails long before the timber does. Keep a minimum 450mm clearance under the deck for ventilation, which matters more on Auckland's clay soils where drainage is slow. Pre-coat boards on all four faces before installation, and oil annually rather than every 18 months in high-UV or exposed coastal spots like Mission Bay, Takapuna, and St Heliers. These steps separate a deck that lasts from one that needs remediation in year eight.

        Where can I buy quality kwila decking in Auckland?

        Main options: Bunnings ($80–$110/m²) for affordable DIY supply; Mitre 10 ($85–$115/m²) for materials plus maintenance products; PlaceMakers ($90–$120/m²) for reliable grade and Auckland-wide coverage; South Pacific Timber ($95–$130/m²) for FSC-certified sustainable kwila; and BBS Timbers or JSC Timber ($90–$120/m²) for hardwood expertise and coastal-specific advice. Always ask for FSC documentation and confirm they stock T316 stainless fixings. Visit in person and check a grade sample before ordering volume.


        Further Resources for your outdoor renovation

        1. Featured projects and client stories to see specifications on some of the projects.
        2. Real client stories from Auckland

        Need more information?

        Take advantage of our FREE Complete Home Renovation Guide (48 pages), whether you’re already renovating or in the process of deciding to renovate, it’s not an easy process, this guide which includes a free 100+ point check list – will help you avoid costly mistakes.

        Download Free Renovation Guide (PDF)


        18 months 0 percent interest long term finance badge

        Have you been putting off getting renovations done?

        We have partnered with Q Mastercard ® to provide you an 18 Month Interest-Free Payment Option, you can enjoy your new home now and stress less.

        Learn More about Interest-Free Payment Options*

        *Lending criteria, fees, terms and conditions apply. Mastercard is a registered trademark and the circles design is a trademark of Mastercard International Incorporated.


        Still have questions unanswered?

        Book a no-obligation consultation with the team at Superior Renovations, we’d love to meet you to discuss your renovation ideas!

          Services

          Home RenovationKitchen RenovationBathroom RenovationOutdoor RenovationHouse ExtensionCommercialDesign ServicesOther

          By submitting this form, you agree to receive communications from us via email or text regarding our services, you can unsubscribe at any time.

          This site is protected by reCAPTCHA and the Google

          Privacy Policy and Terms of Service apply.


          References

          1. Building Performance (MBIE) — Exemption 24: Decks, platforms, bridges, boardwalks
          2. Forte — How much does decking cost in New Zealand? (kwila supply pricing)
          Retaining wall
          Landscaping & Outdoor

          Retaining Wall Cost NZ 2026: Materials, Height & Consent

          Retaining Wall Cost Auckland 2026: When You Need Consent and What It Actually Costs

          Quick answer: A retaining wall in Auckland typically costs $300–$1,000+ per lineal metre installed in 2026 — timber sits at $300–$500/m, concrete block at $400–$800/m, gabion at $400–$700/m, and natural stone from $1,000/m up. Any wall over 1.5m, or one with a driveway, building, fence or sloping ground behind it, needs building consent and a Chartered Professional Engineer (CPEng).

          Auckland is a city built on slopes. Volcanic cones in the central isthmus. Clay-heavy ridges in Titirangi and the Waitākere foothills. Steep cuttings through the North Shore from Devonport to Beach Haven. If you own a freestanding home anywhere outside the flat new subdivisions, the odds are good that somewhere on your section — at the back of the garden, beside the driveway, or holding up a neighbour’s lawn — there’s a retaining wall doing serious work.

          And it’s a wall most homeowners don’t think about until it starts leaning, leaking, or needs replacing.

          After more than 1000 Auckland renovation projects, the pattern we see is the same: people get a verbal “around $400 a metre” quote, sign off, and then discover the real number when the engineer, geotech, drainage and consent fees roll in. The wall itself is rarely the expensive part. The compliance, ground conditions and engineering behind it almost always are.

          Here’s what a retaining wall actually costs in Auckland in 2026 — by material, by height, and with the consent and engineering layers built in so the final number doesn’t catch you out.


          What Does a Retaining Wall Cost in Auckland in 2026?

          The short answer: it depends on what it’s made of, how tall it is, and what the ground is like. The longer answer is below, but here’s the at-a-glance picture for a standard residential wall, professionally built, including basic drainage but excluding consent, engineering and unusual site access.

          Material Cost per lineal metre (installed) Typical lifespan
          Timber (H4/H5 treated) $300–$500/m 15–25 years
          Concrete block (Firth Compac, Allan Block) $400–$800/m 50+ years
          Poured concrete (reinforced) $500–$1,000+/m 75+ years
          Gabion (wire cage filled with rock) $400–$700/m 30–60 years
          Natural stone $1,000–$1,950+/m A lifetime

          Ranges assume a wall up to roughly 1.5m on a reasonably accessible Auckland site. Add 30–50% for walls above 1.5m, and significantly more for difficult access, poor ground or premium finishes. Figures synthesised from current NZ market pricing in 2026.

          Timber Retaining Walls — Cheapest Up Front, But Watch the Clock

          Timber is the most popular retaining wall material in Auckland for one reason: it’s the cheapest to build. H4-treated pine posts, set into concrete with 75mm or 100mm timber sleepers, will cost $300–$500 per lineal metre fully installed for a wall under 1.2m. It’s quick to put up, easy to repair, and on a flat site with no surcharge a competent builder can knock it out in a couple of days.

          The catch is lifespan. Even H4-treated pine in Auckland’s wet clay will start showing wear by year 12 to 15. H5 timber, rated for in-ground freshwater contact, buys you another five to ten years. Either way, you’re looking at replacing the wall once during a typical homeowner’s tenure on the property. Concrete block doesn’t have that problem.

          One thing we’d flag from project experience: cheap timber walls are often built with no drainage coil behind them. The result is hydrostatic pressure building up against the back of the timber, accelerating rot and pushing the wall outwards. We’ve replaced more than one “10-year-old” wall that lasted six, because the drainage was skipped to save $300.

          Concrete Block — The Auckland Default for Anything Over a Metre

          Modular concrete block systems like Firth Compac IV or Allan Block dominate residential retaining work in Auckland for walls between 1m and 3m. Expect to pay $400–$800 per lineal metre installed for a standard concrete block wall up to 1.5m, with engineered systems above that height pushing toward $900–$1,200/m once consent and structural reinforcement are factored in. The blocks themselves cost more than timber sleepers, but the system lasts decades longer with effectively zero maintenance.

          Concrete block also stacks up well for the taller, surcharge-loaded walls that are common on sloping Mt Eden, Remuera and Hillsborough sections. With reinforcing steel and proper backfill, a properly engineered block wall can comfortably retain 2m+ of soil with a driveway sitting on top.
          Firth Compac concrete block retaining wall on an Auckland section

          Poured Concrete — When You Need Real Structure

          Reinforced poured concrete is what you build when the wall is genuinely structural — holding up a section that supports a house, a driveway with frequent vehicle loads, or a slope that’s already shown movement. Costs start around $500/m for straightforward walls and climb to $1,000+/m once you factor in engineered foundations, steel reinforcing, formwork, and the inevitable specialist labour.

          It’s not the prettiest option from the front unless you clad it in stone or render. But for serious structural work on a hillside section, it’s often the only material that makes sense. Sonder Architecture, our architectural partner, designs more poured concrete retaining walls than any other type on extension and full-rebuild projects — usually because the section demands it.

          Gabion Walls — A Drainage-Friendly Middle Ground

          Gabion walls — galvanised steel cages filled with hand-stacked rock — sit in an interesting middle space. At $400–$700 per lineal metre, they’re roughly cost-competitive with concrete block, but the construction is faster on hard or rocky sites where driving timber posts is impossible. They drain themselves naturally — water just passes through the rock — which is why Auckland Council’s retaining wall practice note treats gabion structures as porous and not subject to hydrostatic pressure design.

          The aesthetic is divisive. Some homeowners love the modern, rugged look. Others can’t stand it. They’re a great fit for steep Titirangi or Waiatarua sections where bringing in concrete trucks is logistically painful, but they need careful design to look intentional rather than industrial.

          Natural Stone — The Premium Tier

          Real-stone retaining walls — dry-stacked schist or hand-mortared limestone — start at around $1,000 per lineal metre and run to $1,950/m and beyond for premium quarried stone with skilled installation. They’re rarely the right choice for purely functional walls, but for the front elevation of a Remuera, Herne Bay or St Heliers property where the wall is also a landscape feature, the premium can be worth it.

          The alternative — and one we’ve used on several Auckland projects — is stone-cladding a concrete or block wall after construction. It gives you the look at roughly half the cost.

          “Most homeowners come to us thinking material is the big decision. Nine times out of ten, the bigger driver of cost is what’s behind the wall — the ground, the drainage and whether it’s holding up a driveway. We’ve had projects where the timber-versus-block decision changed the budget by $3,000, and the engineering decision changed it by $25,000.”
          — Dorothy Li, Design Manager, Superior Renovations

          💡 Quick tip: Get any retaining wall quote in writing as a per-lineal-metre rate, broken down by material, drainage and excavation separately. Verbal “around $X per metre” rates almost always exclude the things that actually cost money.

          gabion retaining wall built from stone-filled wire cages along a sloped driveway

          Retaining walls


          Cost by Height: Why a 1.6m Wall Can Cost More Than Twice a 1.4m Wall

          Wall height is the single biggest cost driver after material. It’s not a straight line either. Above 1.5m, the all-in cost roughly doubles per lineal metre — not because the wall itself is bigger, but because consent, engineering, geotechnical reports and stricter construction methods all kick in at that threshold.

          Under 1.5m: The Cheapest Tier (When the Site Cooperates)

          A retaining wall under 1.5m, on flat ground, with nothing significant behind it, is the simplest project on the menu. For an Auckland homeowner, this typically means $300–$650 per lineal metre depending on material, with no building consent required and no engineer involvement. A 10m timber sleeper wall in a flat back garden in Glendowie or Howick might come in at $4,000–$6,000 all in.

          The big caveat — and we’ll cover this properly in the next section — is that “nothing behind it” almost never describes a real Auckland section.

          1.5m–3m: Consented Territory

          Walls between 1.5m and 3m always need building consent in Auckland. That triggers a Chartered Professional Engineer (CPEng) design, producer statements, council consent fees, and inspections through construction — adding $3,000–$8,000+ to the project before you’ve laid a block. The wall itself typically runs $600–$1,200 per lineal metre at this height bracket once engineering and consent are factored in.

          For a 15m, 2m-high concrete block wall on a sloping Mt Eden section — a fairly common Auckland scenario — total project cost lands between $20,000 and $35,000, including engineering, consent, drainage, backfill and finished surface.

          Over 3m: Serious Engineering Territory

          Anything taller than 3m is no longer a landscaping job. Walls of this height are full structural projects — geotechnical investigation, deep foundations or piles, specifically engineered design (SED) with PS1 and PS4 producer statements, and detailed council inspections. Costs scale to $1,500–$3,000+ per lineal metre easily, before any consent and engineering overhead.

          These walls are common on steep North Shore cliff sections, Titirangi bush blocks and the older Waitākere subdivisions where original retaining work from the 1970s is failing and needs full replacement. Budget for a project in the $80,000–$200,000+ range for any significant cliff or boundary work at this scale.

          Wall height Consent required? Engineer required? Indicative cost per metre (all-in)
          Under 1.5m, no surcharge No Optional $300–$650/m
          Under 1.5m, with surcharge Yes Usually $500–$1,000/m
          1.5m–3m Yes Yes (CPEng) $600–$1,500/m
          Over 3m Yes Yes (CPEng + Geotech) $1,500–$3,000+/m
          Add for consent + engineering $3,000–$10,000+ on project total

          💡 Quick tip: If your wall is going to be close to 1.5m, talk to a designer about whether you can genuinely keep it under 1.5m with a small fence-style extension above, or whether consent is unavoidable and the design should be engineered from day one. The worst outcome is a 1.6m wall built without consent that council later requires to be re-engineered retrospectively.

          For more on Auckland’s consent process and how it fits into the bigger renovation picture, our renovation consent process guide walks through the full sequence of applications, inspections and producer statements.


          close-up of a concrete block retaining wall against a house foundation

          Retaining walls

          The Consent Rule Almost Every Auckland Homeowner Gets Wrong

          Here’s the consent rule everybody half-remembers: “you don’t need consent if it’s under 1.5 metres.” It’s true. It’s also wildly incomplete. The Building Act 2004 Schedule 1 exemption requires the wall to retain less than 1.5m of ground AND to support no “surcharge.” The surcharge clause is the part nobody knows about — and it’s the part that catches the majority of Auckland projects.

          Schedule 1 Exemption 20 — The Real Rule

          According to Building Performance (MBIE), under Schedule 1, Exemption 20 of the Building Act 2004, a retaining wall is exempt from building consent if both of these are true:

          1. The wall retains not more than 1.5 metres of ground (measured vertically)
          2. The wall does not support any surcharge or any additional load beyond the ground itself

          Both conditions, not either. If your wall is 1.4m high but it’s holding up a driveway, a building, a fence, a swimming pool, another retaining wall, or sloping ground above, the exemption doesn’t apply. You’ll need a building consent.

          What “Surcharge” Actually Means

          Surcharge is engineering shorthand for “any extra load on the ground behind the wall, beyond the soil itself.” Auckland Council’s retaining walls practice note AC2231 (v.5, March 2019) defines it as any vertical pressure applied to the ground surface near the wall, which then pushes additional horizontal load against it. Per the Building Performance Schedule 1 guidance, the loads that count as surcharge — and therefore break the exemption — include:

          • Driveways or parking areas above the wall
          • Buildings or sheds within the “zone of influence” behind the wall
          • Swimming pools
          • Other retaining walls higher up the slope
          • Fences or heavy landscaping
          • Sloping ground above the top of the wall

          That last one is the killer. On a sloping Titirangi, Mt Eden, Remuera or North Shore section, the ground above your retaining wall almost always continues to slope upward — which counts as surcharge, which disqualifies the Schedule 1 exemption. The flat-garden scenario where the exemption cleanly applies is much rarer in Auckland than the consent rule’s wording suggests.

          “I get the surcharge question on probably half of our retaining wall enquiries. People assume that because their wall is 1.3m high, they’re sorted — and then we look at the section and there’s a clear slope rising from the top of the wall. That’s a surcharge in council’s eyes. The exemption is gone. It’s not what people want to hear, but it’s better to find out before construction than after.”
          — Eunice Qin, Designer, Superior Renovations

          Resource Consent — The Second Layer Most People Forget

          Even if your wall is genuinely exempt from building consent, it may still trigger a resource consent under the Auckland Unitary Plan. The Unitary Plan sets separate rules for:

          • Height-in-relation-to-boundary controls (your wall affects this)
          • Side yard and front yard setbacks
          • Zoning rules in heritage areas like Ponsonby, Devonport and parts of Mt Eden
          • Earthworks volume thresholds (cumulative cut and fill on your section)

          The full consent picture in Auckland involves both a building consent (for the wall itself) and potentially a resource consent (for the land-use rules). Our sister brand Sonder Architecture has a detailed breakdown of what you can and can’t build without consent — read Sonder’s 2026 consent rules guide for the full picture across renovations and outbuildings. You can also check our own renovation FAQ for the short-form consent rules across other parts of a project.

          Important note: Even when a retaining wall is exempt from building consent, it must still comply with the New Zealand Building Code. If it fails — collapsing, leaning, undermining a neighbour’s section — you, as the property owner, carry liability. “I didn’t need consent” is not a defence against a Building Code claim.


          eroded slope beside a house showing exposed soil above a low concrete block retaining wall

          Retaining walls


          Engineer or Builder? Who Does What on a Retaining Wall

          For any wall that needs building consent, you’ll need both — a Chartered Professional Engineer (CPEng) to design and certify the wall, and a Licensed Building Practitioner (LBP) to construct it. The CPEng signs off the structural side. The LBP signs off the build. Council accepts both and issues the Code Compliance Certificate (CCC).

          When You Need a CPEng

          You need a Chartered Professional Engineer involved if any of these apply:

          • Wall is over 1.5m high (always)
          • Wall has any surcharge — driveway, building, slope above, fence on top
          • Ground conditions are poor — soft clay, fill material, high water table
          • The wall is close to a property boundary or an existing building
          • You want belt-and-braces certainty even on a sub-1.5m wall

          A CPEng design for a typical Auckland residential retaining wall costs $600–$1,500+ GST, with more complex sites pushing higher. That covers the structural calculations, drawings, and a PS1 (Producer Statement — Design) document that council needs for consent approval.

          PS1, PS3 and PS4 — The Producer Statement Workflow

          For a consented retaining wall in Auckland, the producer statement sequence usually runs like this:

          1. PS1 — Producer Statement: Design. The CPEng confirms the wall has been designed to meet the Building Code. Issued at the start, attached to the consent application.
          2. PS3 — Producer Statement: Construction Review. Sometimes issued by the builder confirming construction has followed the engineered design.
          3. PS4 — Producer Statement: Construction Observation. The CPEng inspects key stages of construction — footing pours, reinforcing placement, backfill — and certifies the build matches the design. Per AC2231, engineer observation and a PS4 are generally required for specifically engineered retaining walls in Auckland.

          Add roughly $800–$2,000 to the project for engineer observation visits during construction, on top of the design fee.

          When Your Builder Can Handle It Solo

          For a genuinely exempt wall — under 1.5m, no surcharge, on stable ground — a competent landscape builder or LBP can handle the entire project without engineer involvement. That’s where the $300–$500/m timber and $400–$650/m concrete block ranges actually apply. The wall still has to comply with the Building Code, and good builders know how to design it to do so — but no formal CPEng input is required.

          Be sceptical of any builder who tells you that a 2m wall on a sloping section doesn’t need an engineer. They might be cutting corners, or they might be planning to step the wall into two 1m tiers — which can work, but only if there’s enough horizontal separation between tiers to genuinely remove the surcharge load on the lower wall.

          💡 Quick tip: Ask any builder up front whether they’ll be issuing a PS3, whether your wall design will have a PS1 from a CPEng, and whether council will require a PS4. If they can’t answer cleanly, they probably haven’t built many consented retaining walls.


          The Auckland-Specific Cost Drivers Nobody Mentions in Their Quote

          Two retaining walls of identical material, identical height and identical length can cost wildly different amounts depending on where they are in Auckland. The variables that drive that difference — clay soils, slope, access, drainage — almost never appear on a verbal quote. They appear in the final invoice.

          Auckland Clay Soils and the Drainage Premium

          Most of central, west and south Auckland sits on clay or clay-loam soils. Heavy reactive clay holds water, swells when wet, and shrinks when dry. For a retaining wall, that means hydrostatic pressure pushing on the back of the wall every winter, and active soil movement at the base. Auckland Council’s AC2231 practice note is explicit that suitable drainage behind a retaining wall is essential, with stormwater discharging to an approved point via a silt trap — which is why drainage failure is one of the most common causes of retaining wall problems in Auckland.

          Practically, that adds two cost items to almost every Auckland wall:

          • Drainage coil + filter cloth + gravel backfill: $30–$80 per lineal metre on top of the base wall cost
          • Subsoil drains tied into stormwater: a further $1,500–$4,000 on bigger projects

          Skip this and the wall fails inside 10 years. Spend it and the wall outlasts the next homeowner.

          Hilly Suburbs — Titirangi, Mt Eden, Devonport, Beach Haven

          Sloped sections complicate everything. On hill suburbs like Titirangi, the Waitākere foothills, parts of Mt Eden and Devonport, the steepness alone often pushes a project from a one-day timber job to a three-week engineered concrete build with a small digger and a concrete pump. Slope also means surcharge, which means consent, which means the engineer, which means the producer statements, which means the additional $5,000–$10,000 in soft costs.

          It’s not unfair. It’s just what it costs to build something safely on a hillside in clay. Auckland’s geography is what it is.

          Site Access — The Hidden Multiplier

          If a 3.5-tonne digger, a concrete truck and a one-tonne ute can all reach the wall site directly, you’re paying base rates. If the only access is through a side gate, down a narrow drive, or — worst case — by hand-barrowing materials across a back lawn, you’re easily doubling labour hours on the project. We’ve quoted Auckland sites where the access constraint alone added $8,000–$15,000 to an otherwise simple wall.

          Walk the access route honestly before signing a quote. If a builder isn’t asking about it, they haven’t priced it.

          Geotechnical Reports — When You Actually Need One

          For walls over 3m, walls on suspect ground (fill, soft clay, anywhere within the leaky-building-era subdivision footprint where original drainage may be compromised), or walls on a slope with a known history of movement, the engineer will require a geotechnical investigation before designing the wall. A residential geotech report in Auckland runs $500–$2,500 depending on the number of bore holes and lab tests required. It’s another upfront cost — but it’s the difference between a wall that holds and a wall that costs $40,000 to rebuild in five years.

          Retaining work is one of the most common sources of cost overruns in an Auckland renovation, alongside structural changes and consent-related work. We’ve written about this in detail in our guide to the most expensive parts of a renovation — worth reading if you’re scoping a bigger project that includes retaining work.

          “On any property where we’re doing structural renovation work — extensions, recladding, a significant rear deck — the retaining wall question gets asked first. If the existing wall is failing or the new build adds surcharge to an old wall, we’d rather rebuild it properly now than deal with it as a $30,000 surprise during the build. Cheaper to plan for, cheaper to consent, cheaper to fix.”
          — Alison Yu, Designer, Superior Renovations

          💡 Quick tip: If your renovation project is going to add any new load behind an existing retaining wall — a deck, a paved patio, a vehicle pad — get the existing wall assessed by a CPEng before signing off on the renovation design. Retrofitting an existing wall to handle new surcharge is significantly more expensive than building from scratch.

          Sloping Auckland section requiring an engineered retaining wall and drainage


          Pulling It Together: What Your Auckland Retaining Wall Will Really Cost

          For most Auckland homeowners, the real cost of a retaining wall in 2026 lands somewhere between $5,000 and $40,000, depending on length, height, material and whether consent and engineering are in play. A simple sub-1.5m timber wall in a flat back garden in Howick will sit at the lower end. A 2m engineered concrete block wall holding up a driveway in Mt Eden will sit near the top. Walls over 3m on Titirangi or North Shore hillsides regularly run past $80,000 once geotech and engineering are included.

          The single biggest reason quotes vary is whether the consent and engineering layer has been priced in honestly. If a quote looks too good, it almost certainly excludes the surcharge case, the CPEng design, the producer statements, the drainage system, or the access constraint. Get those in writing before you sign anything.

          If you’re planning a renovation that involves retaining work — or any structural change that might load an existing wall — talk to us before the design is locked in. We’ve built 1000+ Auckland projects, including hundreds with retaining work, and the planning conversation is the cheapest part of the whole job. Our showroom and design studio sits at 16B Link Drive, Wairau Valley, and we run free in-home consultations across Auckland.

          Book your free in-home consultation with Superior Renovations
          Explore our outdoor renovations and landscaping service
          Request a free feasibility report for your project


          How much does a retaining wall cost in Auckland in 2026?

          A residential retaining wall in Auckland typically costs $300–$1,000+ per lineal metre installed in 2026. Timber sits at $300–$500/m, concrete block at $400–$800/m, gabion at $400–$700/m, and natural stone from $1,000/m up. Walls over 1.5m or with surcharge cost roughly double once consent and engineering are included. Add $3,000–$10,000 on top for consent, CPEng design and producer statements on engineered walls.

          Do I need building consent for a retaining wall in NZ?

          Under Schedule 1 Exemption 20 of the Building Act 2004, a retaining wall is exempt from consent only if it retains less than 1.5m of ground AND supports no surcharge (no driveway, building, fence, pool or sloping ground above). On most Auckland sloping sections, the no-surcharge rule is broken by the slope itself, which means consent is required even for walls under 1.5m. The wall must also comply with the Building Code regardless of consent status.

          What is surcharge on a retaining wall?

          Surcharge is any additional load on the ground behind a retaining wall beyond the soil itself. It includes driveways, parking areas, buildings, swimming pools, fences, other retaining walls higher up the slope, and sloping ground above the top of the wall. Auckland Council practice note AC2231 defines surcharge as any vertical pressure applied to the ground surface near the wall, which the designing engineer must determine for each site — and the slope above a wall on a hillside section commonly counts.

          What is the cheapest type of retaining wall in Auckland?

          H4 or H5 treated timber is the cheapest material, at $300–$500 per lineal metre installed for a sub-1.5m wall on a flat site. It lasts 15–25 years in Auckland's wet clay before needing replacement. Concrete block at $400–$800/m costs more up front but lasts 50+ years, often working out cheaper over the lifetime of the wall. Skip the drainage to save money and you'll halve the lifespan of either option.

          How long does a retaining wall last in New Zealand?

          Timber walls in Auckland clay last 15–25 years depending on treatment level and drainage. Concrete block walls last 50+ years with minimal maintenance. Poured concrete walls last 75+ years. Gabion walls last 30–60 years depending on basket galvanising and stone quality. Natural stone walls effectively last a lifetime if built correctly. Drainage failure is the single biggest factor that shortens a wall's lifespan in Auckland — particularly on clay sites.

          Do I need a Chartered Professional Engineer for my retaining wall?

          A CPEng is required for any wall over 1.5m, any wall with surcharge, any wall close to a boundary or building, and any wall on poor ground (soft clay, fill, high water table). The engineer designs the wall, issues a PS1 producer statement for consent, and usually issues a PS4 after observing key construction stages. Even on exempt walls, engineering input on walls over 1m is strongly recommended in Auckland's clay-heavy soils.

          How much does drainage add to a retaining wall cost in Auckland?

          Basic drainage — a perforated drainage coil wrapped in filter cloth, set in gravel behind the wall and tied to a stormwater outlet — adds $30–$80 per lineal metre to the base wall cost. Larger subsoil drainage systems with multiple outlets and gravel backfill add $1,500–$4,000 to bigger projects. Auckland Council's AC2231 practice note treats drainage behind a retaining wall as essential, and it is the most common item omitted on cheap quotes.

          Can I build a retaining wall in my back garden myself?

          You can build a retaining wall under 1.5m yourself in Auckland if the wall meets the Schedule 1 surcharge exemption AND complies with the Building Code. Drainage, footings, backfill and timber treatment all need to be done correctly. For any wall that requires consent, the construction work is classed as restricted building work and must be done by or under the supervision of a Licensed Building Practitioner. DIY on a consented wall is not an option.

          How much does a CPEng cost for a residential retaining wall design?

          A Chartered Professional Engineer design and PS1 producer statement for a standard residential retaining wall in Auckland costs $600–$1,500+ GST. More complex designs — taller walls, surcharge cases, poor ground conditions — push higher. Construction observation visits and a PS4 producer statement add a further $800–$2,000 to the engineer's fee. A geotechnical report, if required, adds $500–$2,500 on top of engineering fees.

          Does a retaining wall add value to my Auckland property?

          A well-built retaining wall that creates usable garden space, prevents soil movement, or improves the street frontage adds tangible property value. A failing or non-compliant wall reduces value — buyers and their building inspectors flag retaining wall issues as a significant red flag, particularly in hilly suburbs like Titirangi, Mt Eden and the North Shore. Engineered walls with consent paperwork and a Code Compliance Certificate are easier to sell against than informal builds.


          Further Resources for Your Outdoor Renovation

          1. Featured projects and Client stories to see specifications on some of the projects.
          2. Real client stories from Auckland

          Need more information?

          Take advantage of our FREE Complete Home Renovation Guide (48 pages), whether you’re already renovating or in the process of deciding to renovate, it’s not an easy process, this guide which includes a free 100+ point check list – will help you avoid costly mistakes.

          Download Free Renovation Guide (PDF)


          18 months 0 percent interest long term finance badge

          Have you been putting off getting renovations done?

          We have partnered with Q Mastercard ® to provide you an 18 Month Interest-Free Payment Option, you can enjoy your new home now and stress less.

          Learn More about Interest-Free Payment Options*

          *Lending criteria, fees, terms and conditions apply. Mastercard is a registered trademark and the circles design is a trademark of Mastercard International Incorporated.


          Still have questions unanswered?

          Book a no-obligation consultation with the team at Superior Renovations,
          we’d love to meet you to discuss your renovation ideas!

            Services

            Home RenovationKitchen RenovationBathroom RenovationOutdoor RenovationHouse ExtensionCommercialDesign ServicesOther

            By submitting this form, you agree to receive communications from us via email or text regarding our services, you can unsubscribe at any time.

            This site is protected by reCAPTCHA and the Google

            Privacy Policy and Terms of Service apply.


            References

            1. Building Performance (MBIE) — 13.2 Retaining walls up to 1.5 metres depth of ground (Schedule 1, Exemption 20)
            2. Auckland Council — Practice Note AC2231 (v.5, March 2019): Retaining walls
            DSC05975 1000 - Superior Renovations
            Landscaping & Outdoor

            Cost of Building a Deck in Auckland 2026 | Superior Renovations

            Cost of Building a Deck in Auckland: A 2026 Guide

            Quick answer: A professionally built deck in Auckland costs $250–$650 per square metre installed in 2026. Most projects come in between $7,000 (small pine, flat site) and $50,000+ (large hardwood or composite with pergola). Material choice, deck height, and site conditions drive the spread. GST-inclusive figures throughout.

            Walk into any Auckland backyard mid-summer and the deck is doing the work — Sunday lunches that turn into dinner, kids tracking water from the pool, the boss’s barbecue you said yes to before you remembered the lawn was patchy. It’s the room that pulls the rest of the house outdoors.

            The question we get asked first, every single time: what does it actually cost?

            The honest answer is wider than most online calculators suggest. A small treated-pine deck on a flat section starts around $5,000. A 40m² hardwood deck with a louvered pergola, screening blinds, and integrated lighting can push past $50,000. The variables that drive that spread — material, height, foundations, finishing, the suburb you’re in — are what the rest of this guide unpacks.

            After 1,000+ completed renovation projects across Auckland, we’ve built decks on coastal sites where salt air dictates the timber, on Titirangi hillsides where foundation work outweighs the deck itself, and on the back of Mt Eden villas where character architecture rules the design. The figures below reflect that work — not generic industry averages or AUD prices someone forgot to convert.

            Custom Kwila deck on a renovated Auckland home, designed and built by Superior Renovations


            2026 Auckland Deck Costs: The Quick Reference

            For a professionally built deck in Auckland, expect to invest:

            • Small pine deck (10–20m², flat site): $5,000–$15,000
            • Medium kwila or vitex deck (20–40m²): $15,000–$35,000
            • Large hardwood or composite deck (40–80m²): $30,000–$70,000+
            • Add a pergola, screens, lighting, or in-built seating: $10,000–$30,000 on top

            All figures GST-inclusive, fully built (materials, labour, foundations, balustrades where required, finishing). They exclude consent fees ($2,000–$5,000 if your build requires consent) and major earthworks on difficult sites.

            DIY pine decks are technically possible. The cost saving is usually smaller than people expect once you factor in consent, engineering, hire costs, and the warranty you don’t get from doing it yourself. The real saving comes from getting material and structural choices right at design stage — not from skipping a professional install. More on that throughout the guide, including a section on how the choices play out across different Auckland suburbs.

            💡 Quick tip: Auckland’s typical deck build runs 1–4 weeks on site after consent is sorted. Add 4–8 weeks for consent applications if your deck triggers building consent (most decks above 1.5m do). Budget the timeline, not just the dollars.

            What Actually Drives the Cost

            Skip the spreadsheet detail for a moment. The cost variance on Auckland decks comes from a handful of decisions you’ll make in the first design meeting. Get them right and the rest is execution.

            Material choice — the single biggest variable

            The timber or composite you specify can shift the per-square-metre cost by a factor of three. Treated pine professionally installed sits around $250–$400/m² (GST-incl). A premium composite or aluminium deck can hit $700–$900/m². Same footprint, very different invoice. Full material breakdown in the next section.

            Deck height and foundation engineering

            Ground-level decks on flat sections are the simplest builds. Push above 1.5 metres or onto a sloping site and the engineering cost climbs fast. Sloping sites in Titirangi, Glendowie, parts of Mt Eden, and the eastern bays often need concrete piles, structural posts, and engineered bracing. The foundation cost on a hillside deck can match or exceed the deck timber. If your section drops away from the house, get a geotech assessment built into the quote.

            Balustrades, stairs, and screening

            Flat ground-level decks don’t need a railing. Under New Zealand Building Code clause F4 (Safety from Falling), a barrier is required wherever you could fall 1 metre or more — including off the edge of a deck. Glass balustrades run $400–$700 per linear metre installed. Powder-coated aluminium balustrades run $250–$450 per linear metre. Stairs add $1,500–$4,000 per flight depending on width and material.

            Pergolas, screens, and add-ons

            Most decks we build at Superior Renovations include some form of cover. A timber pergola sits at $5,000–$12,000. A motorised louvered roof — weather-responsive, opens and closes from your phone — runs $15,000–$35,000. Screening blinds for wind and privacy add $3,000–$8,000. Detailed numbers on this side sit in our pergola cost calculator.

            Site access and ground conditions

            A back deck reached by a wide concrete drive is one job. A back deck behind a 1930s Grey Lynn villa with a 60cm side passage is a different one entirely. Subsoil and material have to come in and out by wheelbarrow, and labour absorbs that cost. Ground conditions matter too — Auckland’s clay and volcanic soil mix means geotech expectations vary suburb by suburb. Pre-purchase site assessments are worth their weight in saved variations.


            Material Comparison: What Actually Works in Auckland’s Climate

            Auckland’s humidity, UV intensity, salt air on the coastal fringe, and rainfall mean material choice matters more here than in drier parts of New Zealand. A deck specified for Christchurch will underperform in Mission Bay. The realistic options:

            Treated Pine (H3.2 or H4)

            The budget option, and for many homeowners the right call. Pressure-treated pine costs $250–$400/m² installed. Built and maintained properly — stained or oiled every 12–18 months — a pine deck will last 15–20 years before significant boards need replacing.

            Pine’s weaknesses: it’s soft, dents under heavy outdoor furniture, and the treatment colour shifts as it ages. Without regular maintenance it greys and roughens quickly. Pine also can’t carry the same load over the same span as hardwood, so structural framing requirements are slightly heavier — a quiet cost you don’t always see in the headline timber price. Radiata pine for exterior decking must be treated to at least H3.2, one of the species options set out in NZS 3602:2003 for decking timber.

            Kwila (Merbau)

            Auckland’s traditional hardwood favourite. Kwila is dense, naturally oily, naturally insect-resistant, and rated for 25+ year decks with light annual oiling. Installed cost: $450–$650/m² (GST-incl). The rich red-brown colour fades to a soft silver-grey if left unoiled.

            Two catches. Kwila is a tropical hardwood, almost entirely imported — sourcing from FSC-certified suppliers matters if sustainability is part of your brief. And it leaches red tannin in its first year, which can stain concrete, paving, painted weatherboards, or anything underneath. Worth knowing before specifying it next to a freshly painted exterior.

            Vitex

            The quiet contender, and the option more Auckland homeowners choose once they’ve actually seen both kwila and vitex side by side. Vitex is a dense Pacific hardwood — typically sourced from the Solomon Islands or Vanuatu — that combines long deck life with a paler honey tone that ages to silver-grey without the tannin issue kwila has. Installed cost sits around $450–$650/m², similar to kwila.

            What makes vitex genuinely suited to Auckland decks:

            • No tannin leaching. Safe to install next to light-coloured paving, painted weatherboard, and tiled outdoor areas. The number one practical reason designers specify it over kwila on character home renovations.
            • Strong dimensional stability. Vitex moves comparatively little in Auckland’s seasonal humidity swings, meaning fewer cupped or twisted boards by year three or four.
            • Lighter, more contemporary aesthetic. The honey-blond tone suits modern architectural homes, painted villas, and contemporary extensions. Where kwila reads traditional, vitex reads current.
            • Naturally durable without chemical treatment. Vitex carries a Class 2 natural durability rating (durable above ground), giving a 25+ year deck life with normal maintenance. It is one of the decking species recognised in NZS 3602.
            • Sustainability profile. Commonly supplied from community-based operations in the Solomon Islands under forestry oversight.

            The kwila-vs-vitex call usually comes down to colour preference and what’s underneath the deck. If white concrete, light paving, or painted weatherboard is in the picture, vitex is the safer specification. If the deck floats over soil or dark paving and you want the classic Kiwi hardwood look, kwila still works. Kwila carries a Class 1 (very durable) rating to vitex’s Class 2 — but both will outlast a pine deck by years with normal maintenance, and the tannin difference matters more to most Auckland sites than the durability gap does.

            Garapa

            A South American hardwood — paler than kwila, denser than pine. Installed cost $400–$600/m². Garapa carries a Class 2 natural durability rating, similar to vitex, with a deck life around 20–25 years. Good option when vitex isn’t readily available and the brief calls for a paler timber.

            Iroko

            A premium West African hardwood at $500–$700/m² installed. Less common in Auckland than kwila or vitex; often specified by designers for high-end character home extensions where matching original timber tones matters. Highly durable, with a 30+ year life.

            Composite Decking (Trex, Outdure, Millboard)

            The fastest-growing category in Auckland’s premium deck market. Composite boards combine recycled timber fibre with polymer — no oiling, no splintering, minimal fading, no warping. Installed cost: $500–$900/m² depending on brand and grade.

            The trade-off: composite reads as a product more than as timber. Some clients love that — barefoot-safe, no maintenance, kids and dogs proof. Others prefer the patina of real wood. Composite is also harder to repair locally if a board is damaged — replacement boards come from the original supplier, which can mean lead times.

            Aluminium Decking

            The newest category, gaining traction on coastal Auckland sites. Aluminium boards are non-combustible (helpful near boundaries), don’t rust, don’t fade, don’t warp. Installed cost: $600–$900/m². Best fit: coastal homes in Mission Bay, Takapuna, St Heliers, Devonport, where salt air degrades traditional timber finishes within years.

            The drawbacks: aluminium runs hot in summer sun (uncomfortable barefoot), dents under impact, and visually reads more commercial than residential. Most Auckland homes still specify timber.

            Hardwood deck installation on an Auckland home with stairs and balustrade detailing


            Consent, LBP, and the Rules That Actually Apply

            Deck consent rules in New Zealand sit under Schedule 1 of the Building Act 2004. The thresholds for residential decks:

            Building consent is NOT required if:

            • It is not possible to fall more than 1.5 metres from the deck, even if the structure collapses
            • The deck doesn’t structurally affect the existing house’s load-bearing structure

            Building consent IS required if:

            • Any point of the deck allows a fall of more than 1.5 metres
            • The deck attaches structurally to the house in a way that affects load-bearing walls
            • A pergola, roof, or covered structure triggers separate building work rules

            This is Exemption 24 of Schedule 1, as set out by Building Performance (MBIE). On a sloping section the fall height has to be measured at the worst-case point — over a slope or retaining wall, the drop may be greater than at the front edge.

            Resource consent is a separate question. Even a low ground-level deck can trigger resource consent if it breaches site coverage limits, encroaches on yard setbacks under the Auckland Unitary Plan, or affects a heritage overlay (relevant for Ponsonby, Grey Lynn, Mt Eden, Devonport, and other character areas).

            Consent advice is site-specific. The thresholds above are general guidance — always confirm your own project with Auckland Council or a Licensed Building Practitioner before you start.

            The LBP requirement that catches people out

            Decks that require building consent almost always involve Restricted Building Work — structural work, weathertightness work, or design that affects the building envelope. RBW must be carried out or supervised by a Licensed Building Practitioner (LBP), and the LBP must provide a Record of Work for council.

            If you’re hiring a builder direct, ask for their LBP number and the licence class before you sign anything. If the build is consent-required and your builder isn’t LBP-licensed for that class of work, the consent application will stall — and you’ll be the one paying for the variation. At Superior Renovations, LBP coverage is built into our team across every consent-required project.

            The handrail rule

            Separate from consent: any deck where you could fall 1 metre or more must have a barrier or handrail, under New Zealand Building Code clause F4. This applies whether or not the deck needed consent to build. Barrier height and the spacing between balustrades are specified in F4 and its Acceptable Solutions — worth confirming at design stage rather than fixing at compliance inspection.

            For official source detail, see the Auckland Council deck consent guidance and the Building Performance (MBIE) guidance on Exemption 24 for decks.

            💡 Quick tip: If you’re already planning a renovation alongside the deck — kitchen, indoor-outdoor flow, full extension — bundle the consent application. One consent for the whole package costs less and runs faster than two separate applications. See our outdoor renovations and landscaping service for how outdoor and indoor work combine on a single Action Plan.

            The Real Question: What Does a Cheap Deck Actually Cost?

            Three quotes, three numbers, lowest one wins. We’ve watched this go wrong enough times to know how it usually ends.

            The cheapest quote isn’t always lying. Sometimes the spec is genuinely lighter — undersized framing, missing balustrade detail, pine where the brief said kwila, no provision for the slope, no consent budget. The price is real. So is the deck. It just isn’t the deck you thought you were buying.

            The hidden costs of the cheap quote typically land in year two or three:

            • Variations during the build. The original quote excluded foundation engineering. Once piles are in the ground and quoted separately, the cheap deck isn’t cheap.
            • Re-work on consent. The cheap quote assumed no consent was needed. Council inspector says otherwise. You pay to retrofit the structure to comply.
            • Premature failure. Pine specified without H4 treatment rots underneath at the bearer level. Hardwood without proper fixings cups within two years.
            • No LBP, no Record of Work, no resale paper trail. The cheap deck is on your house but not on your file. The buyer’s lawyer finds it during due diligence.

            A properly built deck at the right material specification with a written Action Plan, fixed price, and consent management built in costs more upfront. It costs less over ten years. Most of our deck clients have either lived through a cheap-quote regret on a previous job, or watched a neighbour live through it. They know the real maths.

            If you’re at the quote-comparison stage right now, book a free in-home consultation and we’ll walk through where the variations risk sits in your specific brief — even if you end up going with a competitor.


            How We Build Decks: The Action Plan Process

            What sets a Superior Renovations deck apart from a quote-and-build contractor isn’t only the workmanship. It’s the written Action Plan behind the quote. Every deck project follows the same six-stage process:

            1. Free in-home consultation. A senior designer visits your home, sees the site, takes measurements, and listens to how you actually want to use the space. No template forms. No checkbox briefs.

            2. Design Studio collaboration. You visit our Wairau Valley Design Studio, where material samples, balustrade options, lighting, and pergola configurations can be seen, touched, and selected before any commitment is signed.

            3. Detailed Action Plan document. Before any work begins, you receive a written Action Plan covering scope, specifications, materials by brand, timeline, variations process, and fixed price. No vague “we’ll work it out as we go” estimates.

            4. Consent management. If your deck requires building or resource consent, our team handles the application, engineer’s drawings, LBP documentation, and council liaison. You don’t deal with Auckland Council directly.

            5. Project management on site. A dedicated project manager runs the build, coordinates trades, and provides regular progress updates. The person you spoke to at the start of the project is the same person there at handover.

            6. Warranty and post-build support. All work is covered under our standard renovation warranty, plus material-specific manufacturer warranties for composite, aluminium, and hardware components.

            This is the same Design-to-Build process behind 1,000+ completed Auckland renovation projects and our 170+ Google reviews.

            Custom kwila deck completed by Superior Renovations on an Auckland residential property


            Auckland Suburb Considerations

            A few suburb-specific patterns shape what works and what doesn’t:

            Coastal suburbs — Mission Bay, St Heliers, Takapuna, Devonport, Browns Bay

            Salt air shortens the life of pine and softens hardwood finishes faster than further inland. Vitex, composite, or aluminium are the practical specifications on coastal properties. Annual oiling on a kwila deck becomes maintenance you genuinely have to do rather than skip. Stainless steel fixings are non-negotiable — galvanised will rust within years on a salt-exposed site. Use 316-grade stainless decking screws for coastal builds.

            Hillside suburbs — Titirangi, Glendowie, Mt Eden, Mt Albert, Onehunga

            Foundation engineering is the biggest cost variable here. A deck cantilevered off a sloping section needs piles, structural posts, and engineered bracing — sometimes adding $8,000–$25,000 to the build before any timber goes on. Geotech assessment at design stage is genuinely worth the spend. Building Code requirements for fall protection on elevated decks also bite hard on hillside sites — any deck with a 1m-plus fall needs barriers, which adds another $3,000–$8,000 to the spec.

            Character and heritage suburbs — Ponsonby, Grey Lynn, Herne Bay, Devonport

            Heritage and character overlay rules in the Auckland Unitary Plan affect what’s permitted — particularly for visible decks at the front or sides of a property. Allow extra time for resource consent review and design adjustments. Recent villa renovations we’ve worked on have needed deck designs that step down from the original floor level rather than extending out, to keep character compliance intact.

            Modern build suburbs — Hobsonville Point, Long Bay, Millwater, Karaka

            Covenants and design controls in master-planned subdivisions often dictate material and colour choices. Check your covenant document before specifying material — some restrict composite or aluminium for visual consistency, others mandate specific timber tones or balustrade styles. The covenant is enforceable; “but the council said it was fine” doesn’t help if your neighbour escalates.

            Auckland deck extension with handrail and integrated stair access, designed and built by Superior Renovations


            Frequently Asked Questions

            Do I need consent to build a deck in Auckland?

            Building consent is not required where it is not possible to fall more than 1.5 metres from the deck, even if the structure collapses — this is Exemption 24 of Schedule 1 of the Building Act 2004. Any deck with a potential fall of more than 1.5 metres, or any deck attached to the house in a way that affects load-bearing structure, requires building consent. Resource consent is a separate question — even low decks can trigger it if site coverage, yard setbacks, or heritage overlay rules apply under the Auckland Unitary Plan. Always confirm your specific site with Auckland Council.

            How much does it cost to build a deck in Auckland in 2026?

            Most Auckland decks fall in the $250 to $650 per square metre range fully built (GST-inclusive). Small treated-pine decks start around $5,000. Larger hardwood decks with pergolas and lighting reach $50,000 to $70,000 or more. The biggest variables are material choice, deck height, and site conditions. Sloping sites and coastal locations cost more than flat inland builds.

            Vitex or kwila — which is better for an Auckland deck?

            Both are durable Pacific hardwoods suited to 25-plus year decks. The practical difference is tannin. Kwila leaches red tannin in its first year, which can stain light paving and painted exteriors. Vitex doesn't. Kwila carries a higher natural durability class (Class 1 to vitex's Class 2 under NZS 3602), but for most Auckland sites the tannin difference matters more than the durability gap. Vitex also reads more contemporary in colour. Cost is similar — around $450 to $650 per square metre installed for either. If your deck sits next to white concrete or painted weatherboard, vitex is the safer specification.

            How long does it take to build a deck in Auckland?

            A typical deck build takes 1 to 4 weeks on site after consent is sorted. Add 4 to 8 weeks for building consent applications if your deck triggers consent — most decks with a fall of more than 1.5 metres do. Sloping sites with engineered foundations can add another 1 to 2 weeks for piles to set. Plan the timeline around consent, not just the build.

            Can I extend my existing deck without consent?

            If the extension keeps the potential fall under 1.5 metres and doesn't structurally attach to the house in a load-bearing way, no building consent is needed. If the extension takes the fall above 1.5 metres, attaches structurally to the dwelling, or breaches site coverage rules under the Auckland Unitary Plan, consent will be required. Penalties for unconsented work can be significant — get a qualified designer or your council to check first.

            What is the cheapest decking material in NZ?

            Treated pine is the cheapest professionally installed deck material in New Zealand, at around $250 to $400 per square metre fully built. For exterior decking it must be treated to at least H3.2. It needs staining or oiling every 12 to 18 months and lasts 15 to 20 years before significant boards need replacing. The trade-off is that pine dents under furniture, greys quickly without maintenance, and isn't as load-bearing as hardwood.

            Do I need an LBP for a deck in Auckland?

            If your deck requires building consent, it almost always involves Restricted Building Work (RBW). RBW must be carried out or supervised by a Licensed Building Practitioner (LBP), and the LBP must provide a Record of Work for Auckland Council. If you're hiring a builder direct, ask for their LBP number and the licence class before you sign anything.

            How long does a hardwood deck last in Auckland?

            A well-built kwila or vitex deck lasts 25-plus years in Auckland conditions with light annual oiling. Coastal sites in Mission Bay, Takapuna, St Heliers or Devonport may see shorter life on hardwoods due to salt air. Composite and aluminium decks are warrantied for 25 to 30 years and don't require oiling. Whatever the material, ventilation under the deck and stainless fixings make a real difference to how long it lasts.

            Do I need a handrail on my deck?

            Any deck where you could fall 1 metre or more must have a barrier or handrail, under New Zealand Building Code clause F4 (Safety from Falling). This applies whether or not the deck needed building consent. Glass balustrades run $400 to $700 per linear metre installed. Powder-coated aluminium balustrades run $250 to $450 per linear metre. Barrier height and balustrade spacing are specified in F4 and its Acceptable Solutions.

            Is composite decking worth it in Auckland?

            Composite is worth it if low maintenance matters more than the look of real timber. The upfront cost ($500 to $900 per square metre) is higher than pine and similar to or above kwila and vitex. The trade-off is no oiling, no splintering, minimal fading, no warping, and 25 to 30 year warranties. Coastal Auckland sites in particular favour composite or aluminium because salt air shortens timber life.


            Get a Real Quote for Your Auckland Deck

            The figures in this guide are accurate for typical Auckland projects in 2026. Every site is different. The only way to get a true cost for your specific home is a free in-home consultation with our design team. We’ll assess the site, walk through material options, and produce a written Action Plan with a fixed price.

            Book your free in-home consultation with Superior Renovations
            Estimate your pergola or deck cover cost
            Request a free feasibility report for your project

            Please note: Whilst all information is considered to be true and correct at the date of publication, changes in circumstances after the time of publication may impact on the accuracy of the information. The information may change without notice and Superior Renovations is not in any way liable for the accuracy of any information printed and stored or in any way interpreted and used by a user.


            Further Resources for your deck and outdoor renovation

            1. Featured projects and Client stories to see specifications on some of the projects.
            2. Real client stories from Auckland

            Need more information?

            Take advantage of our FREE Complete Home Renovation Guide (48 pages), whether you’re already renovating or in the process of deciding to renovate, it’s not an easy process, this guide which includes a free 100+ point check list – will help you avoid costly mistakes.

            Download Free Renovation Guide (PDF)
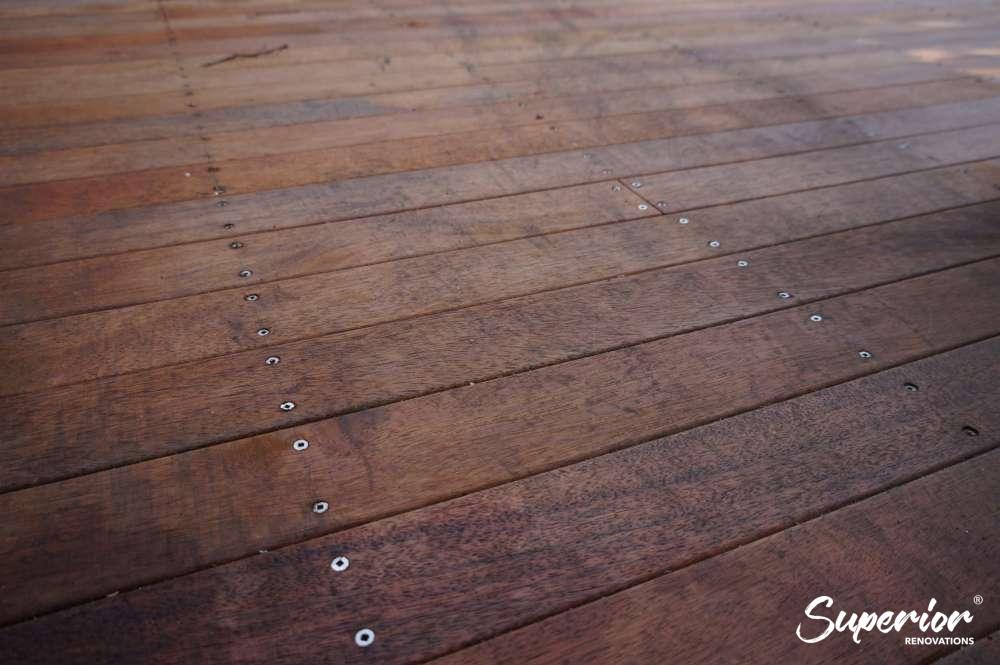

            18 months 0 percent interest long term finance badge

            Have you been putting off getting renovations done?

            We have partnered with Q Mastercard ® to provide you an 18 Month Interest-Free Payment Option, you can enjoy your new home now and stress less.

            Learn More about Interest-Free Payment Options*

            *Lending criteria, fees, terms and conditions apply. Mastercard is a registered trademark and the circles design is a trademark of Mastercard International Incorporated.


            Still have questions unanswered?

            Book a no-obligation consultation with the team at Superior Renovations, we’d love to meet you to discuss your renovation ideas!

              Services

              Home RenovationKitchen RenovationBathroom RenovationOutdoor RenovationHouse ExtensionCommercialDesign ServicesOther

              By submitting this form, you agree to receive communications from us via email or text regarding our services, you can unsubscribe at any time.

              This site is protected by reCAPTCHA and the Google

              Privacy Policy and Terms of Service apply.


              References

              1. Auckland Council — Build a deck: check if you need consent
              2. Building Performance (MBIE) — Exemption 24: decks, platforms, bridges, boardwalks
              3. Standards New Zealand — NZS 3602:2003 Timber and wood-based products for use in building
              outdoor renovation auckland - Superior Renovations
              Landscaping & Outdoor

              Outdoor Renovations NZ: Auckland Costs & Consent Guide

              Outdoor Renovations NZ: Costs, Consent and Planning for Auckland Homes

              Quick answer: Most outdoor renovations in Auckland fall between $15,000 for a modest deck or landscaping refresh and $80,000+ for a full outdoor living build with deck, pergola, kitchen and planting. Low decks (under 1.5m fall height) and fences under 2.5m usually don’t need building consent — but the work still has to meet the Building Code.

              You’ve finished the inside. New kitchen, sorted bathrooms, the lot. Then you open the back door and there it is — a tired patch of lawn, a deck that’s seen better summers, a fence leaning into the neighbour’s hydrangeas. The inside of the house has moved on and the outside hasn’t caught up.

              That gap is where most of our outdoor work starts. We’ve spent more than a decade renovating Auckland homes from our design studio and showroom at 16B Link Drive, Wairau Valley, and the outdoor renovation is almost always the part people underestimate — on cost, on consent, and on how much it changes the way they actually live in the house. Get it right and a 22m² deck off the living room does more for day-to-day life than another bedroom ever would.

              This is the pillar guide. It covers what outdoor renovations cost in Auckland, what trips the consent line, the order things should happen in, and where each part of the job — decks, pergolas, fences, driveways, outdoor kitchens — fits. Where a topic has its own detailed guide, we point you to it rather than repeating it here. If you’d rather skip straight to talking it through, our outdoor renovations and landscaping team works across Auckland.

              Outdoor renovation in Greenlane Auckland with a deck extending the living space


              Why Outdoor Renovations Earn Their Keep in Auckland

              Auckland’s climate does something most of the country can’t claim: it lets you use the outdoors for a decent chunk of the year. Warm, humid summers from December through February, mild and wet winters. Done properly, an outdoor renovation turns a few square metres of dead section into living space you’ll use eight or nine months a year — at a fraction of what enclosed floor area costs to build.

              The Indoor-Outdoor Flow Auckland Buyers Expect

              Ask any agent in Remuera or Herne Bay what sells a renovated home and “flow” comes up fast. A living room that opens onto a deck at the same level, with a sightline straight through to a planted garden, reads as bigger and lighter than the floor plan says it is. We did exactly this on a full home renovation in Greenlane — a deck leading straight off the interior living space — and the room felt like it had doubled without a single wall moving.

              It’s not just resale. It’s Tuesday-night dinner outside in February. It’s the kids on the lawn while you cook. The renovation pays you back in use long before it pays back at sale.

              💡 Quick tip: If indoor-outdoor flow is the goal, sort the threshold before anything else. A deck that sits 100mm below the interior floor, with a flush or low-profile door track, is the difference between a space that flows and one that just sits next to the house.

              Extending Living Space Without Extending the House

              A single-storey house extension in Auckland runs roughly $2,000–$5,500 per m² once you’re adding enclosed, consented floor area. A deck and pergola covering the same footprint is a fraction of that, because you’re not building walls, insulation, or a weathertight roof to Building Code H1 standards. For a lot of families, the smarter move is outdoor living space first — then revisit the extension later if you still need it.

              That said, outdoor work and structural work often belong in the same project. If you’re already thinking about a house extension in Auckland, folding the outdoor living design into that plan from the start saves you paying twice for site setup, scaffolding and council fees.


              Do You Need Consent? The Rules That Actually Catch People

              This is where most outdoor projects go sideways, so we’ll be specific. The big distinction is between a building consent (is the structure safe and Code-compliant?) and a resource consent (does it comply with the Auckland Unitary Plan — height, boundaries, coverage?). A job can need one, both, or neither.

              Decks, Fences and Pergolas — the Building Consent Lines

              Under Schedule 1 of the Building Act 2004, a fair amount of outdoor work is exempt from building consent. The current thresholds, per MBIE’s Building Performance guidance:

              • Decks: exempt where it’s not possible to fall more than 1.5 metres from the surface. On a flat Glendowie site that’s easy. On a sloping Titirangi section, the worst-case fall height can quietly push you over the line — measure carefully.
              • Fences: exempt under 2.5 metres high. Pool fences are never exempt — they always need consent.
              • Pergolas: an unroofed pergola is exempt at any size. Add a solid roof and you’ve changed the game — that can tip it into consent territory.

              A barrier is still required under the Building Code wherever there’s a potential fall of a metre or more, consent or not. And exempt doesn’t mean unregulated — every exempt job still has to meet the Building Code, which is exactly why getting a deck framed and fixed properly matters even when no inspector is coming.

              Important note: A fence can be exempt from building consent under 2.5m yet still need a resource consent above 2.0m under the Auckland Unitary Plan, and boundary fences engage the Fencing Act 1978 (your neighbour and cost-sharing). Two different rule sets, one fence.

              When Resource Consent Comes Into It

              Resource consent is about your section’s planning rules, not the structure’s safety. Height in relation to boundary, site coverage, impervious-surface limits (think large driveways and paving), and yard setbacks can all trigger it. A big new concrete driveway, for instance, can push a site over its impervious-surface limit and require sign-off you didn’t see coming. Auckland Council’s building and resource consents pages are the place to check your specific zone.

              We handle consents in-house, so on our projects this gets sorted before anything’s built. If you’d rather understand the framework yourself first, our group architecture firm Sonder has a plain-English breakdown of what you can build without consent in NZ.

              💡 Quick tip: Before you fall in love with a 2.4m lapped-and-capped fence for privacy, check your front yard rules. Auckland front-boundary fences often face tighter height limits than side or rear — and “I didn’t know” isn’t a defence the council accepts.

              What Outdoor Renovations Cost in Auckland

              Costs swing hard depending on materials, site access and how much earthworks the section needs. A flat lawn in Flat Bush is a different job from a steep, retaining-wall-dependent slope in Titirangi. As a working range, a modest outdoor refresh starts around $15,000, a proper deck-and-pergola outdoor room lands in the $30,000–$50,000 band, and a full outdoor living build with kitchen, planting and lighting runs $80,000 and up. All figures NZD and, as a rule in our quotes, GST-inclusive.

              Element Typical Auckland Cost Notes
              Pine deck $200–$400 / m² Budget option; needs regular maintenance
              Kwila (hardwood) deck $500–$800 / m² Durable, premium look; needs oiling
              Composite deck $300–$700 / m² Low maintenance, no oiling
              Louvred / covered pergola $3,000–$6,000 / m² Adjustable shade; powder-coated aluminium
              Timber paling fence (1.8m) $75–$120 / m Classic, cost-effective
              Concrete driveway $75–$150 / m² Durable; watch impervious-surface limits
              Full outdoor living build $80,000+ Deck, pergola, kitchen, planting, lighting

              Those per-m² figures come from our own completed Auckland projects across more than a decade on the tools. The single biggest cost variable people miss is the ground itself — retaining, drainage and access on a sloping section can add more than the visible structure. Worth modelling before you commit.

              For a pergola specifically, you can get a quick ballpark with our pergola cost calculator before you talk to anyone.

              Where the Money Actually Goes

              On a typical outdoor renovation, the spend splits roughly between site prep and structure. Earthworks, drainage and retaining come first and they’re rarely glamorous. Then the build — deck, pergola, paving. Then the finishing layer most people care about: planting, lighting, the outdoor kitchen. Skimp on the first and the last never lasts.

              “People come to us with a Pinterest board full of planting and lighting, and we end up spending the first conversation on drainage. It’s not the fun part, but on an Auckland clay section it’s the part that decides whether your deck is still flat in five years.”
              — Dorothy Li, Design Manager, Superior Renovations


              Decks, Pergolas and the Outdoor Structures

              This is the heart of most outdoor renovations. Here’s how the main structures stack up — kept short, because each of these has its own detailed guide.

              Decks: Pick the Timber for the Site

              Pine is the budget default — cheap, workable, but it wants regular maintenance or it greys and splits. Kwila is the premium hardwood: rich reddish-brown, dense, long-lasting, and worth the upkeep of annual oiling. Composite sits in between on cost and asks almost nothing of you afterwards. We built a Kwila deck off the master suite on a deck and bathroom renovation in Cockle Bay that’s aged beautifully precisely because the owners committed to oiling it.

              If you’ve settled on Kwila, our guide to Kwila decking covers staining, oiling and what to expect as it weathers. For budgeting, our breakdown of the cost of building a deck in Auckland sets out per-m² ranges by material.

              Pine timber deck built on the second level off the master bedroom in Cockle Bay Auckland

              Pergolas: Shelter That Earns Its Spot Year-Round

              A pergola is what turns a deck from a fair-weather platform into a space you’ll use in light rain and harsh sun alike. Louvred aluminium ones are the current favourite because the blades adjust — open for sun, closed for a southerly. On one project we deliberately roofed a pergola in glass rather than slats, because the brief was to enjoy the weather in all its moods, not just hide from it.

              Material, span and roofing choice drive the cost more than footprint does. Our custom pergola guide for NZ homes walks through styles, materials and roofing options in detail.

              Custom pergola extending outdoor living space in an Auckland renovation

              Fences and Privacy

              Timber paling is the affordable classic. Aluminium and Colorbond steel give you a sleeker, low-maintenance line — we used aluminium fencing to edge a clifftop section in Mellons Bay, keeping the view while making it safe. Glass balustrades are the move when the view is the whole point and you don’t want to block it. For ideas across budgets, see our fence ideas for NZ homes.

              💡 Quick tip: Match the fence to the job, not the catalogue. Glass for views, aluminium for low-maintenance boundaries, timber for warmth and budget. Mixing two materials across one section usually looks more expensive than it costs.

              Driveways, Outdoor Kitchens and the Finishing Layer

              Once the deck and structures are in, the finishing elements decide how the space actually feels to live in.

              Driveways and Paving

              Concrete is the Auckland workhorse — durable, low-fuss, handles the family SUV without complaint at roughly $75–$150 per m². Pavers cost more but let you match the home’s character. The catch we flagged earlier: a large new hard surface can push your section over its impervious-surface limit and trigger a resource consent, so factor drainage and permeability in early. We laid a substantial concrete driveway as part of an extensive West Harbour renovation, and the stormwater design was sorted before the first pour.

              Outdoor Kitchens

              An outdoor kitchen is the difference between cooking inside and carrying plates out, versus actually living out there. A basic setup — grill, bench, sink — sits around $5,000–$10,000. A full build with high-end appliances, storage and a pizza oven can pass $20,000. On a Redvale project we zoned the outdoor area into three: cooking, dining and lounging, with lawn as the backdrop. That zoning is what made a large space feel considered rather than empty.

              If your outdoor kitchen ties into the main kitchen renovation, our design studio team can plan both as one project so the materials and sightlines carry through.

              Lawns, Planting and Lighting

              Lawn options run from seed (cheapest, slowest to establish) through ready lawn or sod (instant, dearer) to artificial turf (no mowing, high upfront cost — handy for busy family sections). Native planting earns its place in Auckland because it copes with our wind and rain: flax, cabbage trees, native grasses. Then lighting — the layer that decides whether the space exists after dark. Path lights for safety, accent lights on a specimen tree, LEDs on a timer. Layered, low-voltage outdoor lighting is the cheapest element with the biggest payback on how often you actually use the space.

              “The mistake I see most is treating planting and lighting as an afterthought once the budget’s tight. Get them into the design from day one. A $2,000 lighting layer changes how a family uses a deck more than another five square metres of timber ever would.”
              — Eunice Qin, Designer, Superior Renovations

              Outdoor renovation and landscaping in Epsom Auckland with custom-built benches for entertaining


              The Right Order to Tackle an Outdoor Renovation

              Sequence matters more outdoors than people expect, because half the work hides underground. Get it out of order and you’re lifting a new deck to fix drainage you should have done first.

              Design and Consent First

              Start with how you want to use the space — entertaining, kids, a quiet corner — then design to that, not to a product you saw online. This is also when consent gets checked, before anyone orders timber. On our projects the design and consent work happens together, which is the whole point of a design-to-build process: you’re not handing a builder a plan that can’t actually be consented.

              Groundwork, Then Structure, Then Finish

              Earthworks, drainage and any retaining come first. Then the structural build — deck framing, pergola posts, paving base. Then the finishing layer of planting, lighting and the outdoor kitchen fit-out. Each stage depends on the one before it being right, which is why a managed sequence beats hiring trades piecemeal and hoping they coordinate. If you’re rolling outdoor work into a larger project, we manage the whole design-and-build outdoor renovation end to end.

              💡 Quick tip: Run services — power for lighting, water for the kitchen, gas for the grill — before the deck goes down, not after. Chasing a power cable under a finished Kwila deck is a job nobody enjoys or wants to pay for twice.

              Bringing It Together

              The best outdoor renovations aren’t a deck, a fence and some plants bought separately. They’re one space, designed as a whole, that makes the house live larger than its floor plan. Sort the consent, respect the sequence, spend where it lasts.

              If you’re weighing up where to start, the cheapest hour you’ll spend is the planning one. That’s what a consultation is for.

              Book your free in-home consultation with Superior Renovations
              Get a quick estimate with our pergola cost calculator
              Request a free feasibility report for your project


              Do I need building consent for a deck in NZ?

              Not if it's not possible to fall more than 1.5 metres from the deck surface — that work is exempt under Schedule 1 of the Building Act 2004. On a flat Auckland section this is straightforward; on a sloping site the worst-case fall height can push you over the line, so measure carefully. A safety barrier is still required wherever there's a potential fall of a metre or more, and the deck must still meet the Building Code even when no consent is needed.

              How much does an outdoor renovation cost in Auckland?

              A modest refresh starts around $15,000. A deck-and-pergola outdoor room typically lands between $30,000 and $50,000. A full outdoor living build with deck, pergola, outdoor kitchen, planting and lighting runs $80,000 and up. The biggest cost variable is the ground — earthworks, drainage and retaining on a sloping section can add more than the visible structure. Figures are NZD and GST-inclusive in our quotes.

              How high can a fence be without consent in NZ?

              A fence up to 2.5 metres high is exempt from building consent under Schedule 1. But a resource consent may still be needed above 2.0 metres under the Auckland Unitary Plan, and boundary fences engage the Fencing Act 1978 for cost-sharing with your neighbour. Pool fences are never exempt — they always require consent. Front-boundary fences often face tighter height limits than side or rear fences.

              What's the most affordable decking material in NZ?

              Pine is the cheapest decking timber, at roughly $200 to $400 per square metre installed in Auckland. It's workable and readily available, but it needs regular staining or oiling to stop it greying and splitting. Macrocarpa is another budget-friendly NZ-grown option. If you'd rather avoid maintenance, composite decking costs more upfront ($300 to $700 per m²) but asks almost nothing of you afterwards.

              Do pergolas need building consent in New Zealand?

              An unroofed pergola is exempt from building consent at any size under Schedule 1 of the Building Act. Once you add a solid roof, it can tip into consent territory because it changes how the structure performs. Louvred pergolas with adjustable aluminium blades generally stay on the exempt side. As with all exempt work, it still has to meet the Building Code, and a roofed structure may also raise resource-consent questions around height and boundaries.

              How long does an outdoor renovation take in Auckland?

              A standalone deck might take one to two weeks. A full outdoor living build — design, consent if needed, earthworks, structure and finishing — typically runs 6 to 12 weeks of on-site work, with design and any consent adding lead time before that. Weather is a genuine factor in Auckland: wet winters can stall groundwork and concrete pours, which is why many homeowners plan outdoor builds for spring and early summer.

              What's the difference between building consent and resource consent for outdoor work?

              Building consent is about whether the structure is safe and meets the Building Code. Resource consent is about whether the work complies with the Auckland Unitary Plan — height in relation to boundary, site coverage, impervious-surface limits and yard setbacks. An outdoor project can need one, both or neither. A low deck might need neither; a large concrete driveway might need resource consent for stormwater even though it needs no building consent.

              Can a new driveway require resource consent?

              It can. A large area of new concrete or paving adds impervious surface, and if your section exceeds its impervious-surface limit under the Auckland Unitary Plan, you may need resource consent — even though a driveway needs no building consent. This catches people out. Permeable paving and proper stormwater design can keep you under the limit, so it's worth checking your zone's coverage rules before committing to a large hard surface.

              Which outdoor renovation adds the most value to an Auckland home?

              Indoor-outdoor flow consistently does the most work — a deck at the same level as the interior living space, opening through to a planted garden, makes a home feel larger and lighter to buyers. It's also the element owners use most day to day. Outdoor kitchens and quality lighting add appeal, but the deck-and-flow connection between inside and out is the foundation everything else builds on.

              Should I do outdoor renovations at the same time as interior work?

              Often yes. If you're already renovating or extending, folding the outdoor design into the same project shares site setup, scaffolding and council fees, and keeps materials and sightlines consistent inside and out. It also means one team manages the sequence rather than you coordinating separate trades. The main reason to split them is budget staging — and even then, designing both together up front prevents expensive rework later.


              Further Resources for your outdoor renovation

              1. Featured projects and Client stories to see specifications on some of the projects.
              2. Real client stories from Auckland

              Need more information?

              Take advantage of our FREE Complete Home Renovation Guide (48 pages), whether you’re already renovating or in the process of deciding to renovate, it’s not an easy process, this guide which includes a free 100+ point check list – will help you avoid costly mistakes.

              Download Free Renovation Guide (PDF)


              18 months 0 percent interest long term finance badge

              Have you been putting off getting renovations done?

              We have partnered with Q Mastercard ® to provide you an 18 Month Interest-Free Payment Option, you can enjoy your new home now and stress less.

              Learn More about Interest-Free Payment Options*

              *Lending criteria, fees, terms and conditions apply. Mastercard is a registered trademark and the circles design is a trademark of Mastercard International Incorporated.


              Still have questions unanswered?

              Book a no-obligation consultation with the team at Superior Renovations, we’d love to meet you to discuss your renovation ideas!

                Services

                Home RenovationKitchen RenovationBathroom RenovationOutdoor RenovationHouse ExtensionCommercialDesign ServicesOther

                By submitting this form, you agree to receive communications from us via email or text regarding our services, you can unsubscribe at any time.

                This site is protected by reCAPTCHA and the Google

                Privacy Policy and Terms of Service apply.


                References

                1. MBIE Building Performance — Technical requirements for exempt building work (Schedule 1)
                2. Building Act 2004 — Schedule 1: Building work for which building consent not required
                3. Auckland Council — Building and resource consents

                new pergola cost
                Landscaping & Outdoor

                Pergola Cost Calculator NZ: 2026 Auckland Pergola Costs

                Pergola Cost Calculator NZ: What a Custom Auckland Pergola Costs in 2026

                Quick answer: A professionally built pergola in Auckland costs between $10,000 and $45,000 in 2026, depending on size, material, and whether you go fixed-roof or motorised louvred. Use our free pergola cost calculator below to get a tailored estimate in under 60 seconds.

                The straight answer first: a professionally built pergola in Auckland in 2026 sits between $10,000 and $45,000 for most builds. The wider real range stretches from around $4,000 for a basic timber kit-set DIY at the bottom to $70,000+ for a premium louvred outdoor room with lighting, heating, and screening at the top.

                What the headline number doesn’t tell you is what your money actually buys. A $12,000 timber pergola and a $32,000 aluminium louvred pergola are two completely different products that happen to share a name. Knowing which one fits your section, your sun, and your budget is the difference between getting it right first time and replacing it in five years.

                This page breaks down what each tier gets you in Auckland in 2026, what drives costs up or down, and how to read your pergola quotes without missing the gaps. Our free pergola cost calculator gives you a tailored estimate based on your specific size, material, and finish — it takes under 60 seconds.

                Custom aluminium pergola Auckland 2026 — pergola cost calculator NZ


                How our pergola cost calculator works

                We built the calculator for the question we get asked most: “what’s this going to cost me before I get builders out?” It returns a realistic estimate for a custom aluminium-framed pergola in Auckland based on the five inputs that move the price the most — size, finish colour, roof type, site complexity, and whether it’s freestanding or attached to your home.

                You fill it in, your estimate lands in your inbox in under 60 seconds, and you’ll have a starting figure to work with before any quotes come in. We’ll follow up to walk through your number and answer questions — no pressure to book anything.

                Open the Pergola Cost Calculator
                Get your Auckland pergola estimate in your inbox in under 60 seconds.

                What the calculator covers

                • Custom aluminium-framed pergola (3mm thick — NZ standard spec for residential)
                • Powder-coated finish (black or white as standard)
                • Clear PVC or polycarbonate roof panel
                • Supply and installation in Auckland
                • Standard footings on a typical residential section

                What it doesn’t cover (these get costed separately)

                • Electrical works — LED lighting, motorised louvres, automation ($800–$2,000)
                • Adjustable louvre roof systems (different rate — typically $1,200–$2,500/m²)
                • Scaffolding if your site needs it
                • Deck construction or ground levelling
                • Screening blinds (Ziptrak-style) — $3,000–$8,000 per blind, manual or motorised
                • Outdoor heating units — $600–$1,200 per heater plus install

                💡 Quick tip: Run the calculator twice — once for your wishlist size, once for a slightly smaller version. The second number is often the one that gets the project moving without compromising the look you want.


                What does a pergola cost in NZ in 2026?

                Pergola pricing in 2026 lands on a per-square-metre rate of roughly $900–$2,200 fully installed. The bottom of that range covers a simple open timber structure on a flat, accessible site. The top covers a motorised louvred system with the bells. Here’s the proper breakdown by build type, all figures GST-inclusive for supply and professional installation.

                Pergola type 2026 cost range (Auckland) Best fit for
                Basic timber DIY kit-set (small) $4,000–$10,000 Confident DIYer, small section, simple shade
                Standard professional timber (entertaining size) $10,000–$22,000 Family homes, rustic look, mid-budget
                Powder-coated aluminium pergola $14,000–$30,000 Coastal sites, low-maintenance, modern
                Mid-range motorised louvred system $20,000–$35,000 Year-round use, adjustable shade and rain cover
                Larger premium louvred install $45,000+ Premium renovations, engineered structural
                Premium outdoor room (lights, heat, screens) $60,000–$70,000+ Full-spec four-season living space

                A few notes on the figures above:

                • Auckland labour sits at the higher end of the national scale — typically $85–$130 per hour for carpentry and structural work. Outside Auckland you can usually take 10–20% off.
                • A standard 20m² pergola takes two installers 2–4 days, depending on footing requirements and site access.
                • Aluminium has overtaken timber as the modern default for Auckland — it’s rust-proof in salty Takapuna or Piha air, doesn’t warp under our humidity, and skips the yearly reseal that timber needs.

                “Pricing a pergola isn’t like pricing a kitchen — there’s no fixed kitchen-shaped product to compare. A $12k pergola and a $32k pergola might both be 25m² in the same suburb. What changes is the material grade, the post and beam spec, the roof system, and what’s hidden in the footings. We walk every client through that breakdown before they sign anything.”
                — Dorothy Li, Design Manager, Superior Renovations

                Run your pergola through the cost calculator
                Get a tailored 2026 Auckland estimate based on your actual size and finish.


                What your pergola budget actually buys in Auckland (2026 tier breakdown)

                Cost ranges are useful for shock-proofing your expectations. What you actually need to know is what each tier gets you on the ground. Here’s what we see across our 1000+ completed Auckland projects when we slot builds into budget tiers.

                $10,000 — entry custom pergola

                What you get at this tier:

                • Treated timber pergola, freestanding, 12–15m²
                • Open beam roof or basic polycarbonate panels
                • Standard footings on a flat, accessible section
                • One coat of exterior stain or paint

                Suits: Smaller backyards in Henderson, Manurewa, or Hobsonville new builds where the section layout is straightforward. Schedule 1 exempt in most cases.

                What you don’t get: aluminium framing, oversized spans, electrical, screens, louvres.

                $20,000 — standard professional build

                What you get at this tier:

                • 18–25m² timber or basic powder-coated aluminium pergola
                • Better roof options: tinted polycarbonate or clear PVC
                • Footings rated for medium wind zone (most central Auckland suburbs)
                • Possible deck integration as an extra
                • LBP sign-off on structural work

                Suits: Typical 1970s brick-and-tile homes in Manurewa or Pakuranga, family villa rear extensions in Mt Eden where access is reasonable. Most builds in this tier stay Schedule 1 exempt if freestanding.

                $30,000 — proper aluminium custom

                What you get at this tier:

                • 20–30m² powder-coated aluminium pergola, black or white
                • Higher-spec roof: clear PVC or polycarbonate with proper drainage detail
                • LED lighting integration possible (separate electrical run)
                • Often paired with deck work or paving
                • LBP structural sign-off included

                Suits: Remuera or Glendowie character homes wanting indoor-outdoor flow off a kitchen-dining renovation. Coastal North Shore builds where rust-proof spec matters. Approaching the 30m² consent threshold — Sonder Architecture handles consent in-house if needed.

                Custom aluminium pergola Auckland with deck integration — pergola cost NZ

                $45,000+ — louvred outdoor room

                What you get at this tier:

                • 25–40m² motorised louvred pergola
                • Adjustable louvre system — open in winter sun, close before a shower hits
                • Integrated LED lighting and often outdoor heating
                • Engineered structural design for high or very-high wind zones
                • Often paired with screening blinds (Ziptrak) and complete new deck
                • Building consent included where required

                Suits: Premium renovations in Herne Bay, Westmere, Takapuna; clients wanting genuine four-season outdoor use. The premium isn’t the aluminium — it’s the louvre mechanism, the engineering, and the integration.

                💡 Quick tip: Adding a single Ziptrak screen ($3,000–$8,000) often makes a fixed-roof pergola feel as functional as a louvred one — for half the spend. Worth modelling both before you commit.

                “The mistake we see most often is clients pricing a louvred pergola without thinking about whether they’ll actually use the louvres. If the pergola faces north and you only use it in summer, a fixed-roof with a Ziptrak screen on the western side does the same job for $15k less. We always ask about orientation before we recommend a system.”
                — Alison Yu, Designer, Superior Renovations

                Get your tier estimate via the calculator
                Plug in your size and material — see where your build lands.


                What drives pergola costs up or down

                Six things move the number the most. Get a handle on these and you’ll read any builder quote far more confidently.

                1. Material

                Material is the single biggest cost lever. Roughly, supply rates per m² for NZ in 2026:

                • Treated pine: $200–$450/m² — most affordable, needs sealing every 1–2 years
                • Macrocarpa (NZ native): $400–$700/m² — natural durability, less chemical treatment
                • Cedar: $600–$900/m² — premium softwood, rich colour, resists warping
                • Fixed-frame aluminium (powder-coated): $500–$1,200/m² installed
                • Motorised louvred aluminium: $1,200–$2,500/m² installed

                Steel turns up occasionally for industrial-style builds. It’s heavy, needs galvanising or powder-coating to resist rust, and you’ll usually need a crane to install it. For most Auckland sections it’s not worth the complication.

                2. Size

                Bigger means more footings, more posts, more roof material, more labour hours, and at a certain point engineering sign-off. A 12m² and a 30m² pergola use similar materials per m², but the larger one needs structural calculations and may push you over the 30m² consent threshold (see consent section below).

                3. Roof type

                • Open beam: cheapest, no rain protection — fine for shade alone
                • Polycarbonate or PVC fixed: adds $100–$300/m² over open beam
                • Adjustable louvred (motorised): adds $700–$1,500/m² over a fixed roof, plus electrical install

                4. Footings and site work

                A flat, accessible site with stable ground gets standard footings, usually included in the quote. Steep section, clay soil, or restricted access (think a Grey Lynn villa with a 60cm side passage) costs extra. Expect $500–$1,500 added for concrete cutting and new footings on existing patios or decks.

                5. Electrical, lighting, and heating

                Running cabling from your switchboard for motorised systems, LED strips, or heaters: $800–$2,000 depending on distance and concealment. Infrared radiant heaters cost $600–$1,200 per unit plus install. For lighting and motorised louvre control, we usually spec products from PDL by Schneider Electric — purpose-built for NZ wiring standards.

                6. Finish and detail

                Powder-coat in standard Resene colours (black, white, Grey Friars, Ironsand) is included. Anything custom adds $400–$1,000. Timber finishes need a stain and seal every 1–2 years to keep the wood from greying out under Auckland UV — Resene’s exterior range from Mitre 10 handles this well.

                Estimate your build with these factors locked in
                The calculator accounts for size, material, finish, and site.


                Do you need consent for a pergola in Auckland? (And what it costs if you do)

                The good news for most homeowners: a pergola doesn’t need a building consent. Under Schedule 1 of the Building Act 2004, freestanding pergolas under 30m² are generally exempt building work, provided they meet a few conditions.

                Important note: Consent is generally required if your pergola is (1) attached to your house and over 20m², (2) freestanding and over 30m², (3) has a solid waterproof roof structure, or (4) breaches your boundary setback or daylight plane. Auckland heritage zones often add further restrictions — Ponsonby fringe, Parnell, Mt Eden character zones in particular.

                When consent applies, expect:

                • Building consent fee (Auckland Council): $1,500–$3,000, processing 10–20 working days. Confirm current fees with Auckland Council.
                • Resource consent (if you breach setbacks, daylight planes, or site coverage): $2,500–$5,000+
                • LBP-certified structural sign-off: required for attached pergolas 20–30m² — usually included if you’re using a Licensed Building Practitioner

                The Auckland Unitary Plan generally requires pergolas to respect yard setbacks (1.5–3m from boundaries depending on zone) and height limits (typically 3–4m). Overhanging public areas or a neighbour’s land needs written approval.

                “Boundary rules catch a lot of homeowners out — they assume their section is theirs to do what they like with, then find out they’re 80cm too close to the fence and the council wants the posts moved. We measure setbacks twice before anyone digs.”
                — Cici Zou, Designer (NZ Dip. Interior Design, Certified Designer), Superior Renovations

                💡 Quick tip: We handle the consent application in-house when it’s needed — same process we use on our renovation consents — so you don’t have to deal with Auckland Council yourself.


                How to compare pergola quotes without getting caught

                A $5,000–$10,000 gap between two pergola quotes for the “same” build is normal. What’s not normal is accepting the gap without knowing what’s actually different.

                Here’s where the differences usually hide:

                1. Beam span and post spacing

                Cheaper quotes often use thinner beams spanning further, supported by fewer posts. Looks fine on paper. Sags or flexes in five years. Ask what beam dimensions are specified and at what spacing — a 240x90mm beam spanning 3m is a different product than a 200x50mm beam spanning 4m, even if both quotes call it a “pergola”.

                2. Footing depth and spec

                The NZ Building Code requires footings rated for your wind zone. Cheaper quotes may spec shallow footings sufficient for low wind but inadequate for Takapuna, Piha, exposed Westmere, or any coastal site. Ask: what depth, what diameter, what concrete spec? On a high wind zone site you should see 600–900mm deep footings minimum.

                3. Fixing grade

                Marine-grade stainless or hot-dip galvanised fixings cost more than basic zinc-plated. On a coastal pergola the difference is whether you’re replacing brackets in seven years or never having to touch them.

                4. Consent and engineering inclusion

                Some quotes exclude consent costs and engineering sign-off, expecting you to handle them. Get explicit confirmation either way — these are $1,500–$3,000 line items you do not want to discover after the fact.

                5. Standard inclusions on the extras

                Concrete footing preparation, removal of existing structures, anchoring to existing decks, gutter and downpipe integration — these are commonly excluded on cheap quotes. Ask line by line what’s in and what’s out.

                💡 Quick tip: Ask each quoting builder for their Licensed Building Practitioner (LBP) number and check it on the LBP register at lbp.govt.nz. If they can’t give you one for structural work, walk.


                Why two pergolas of the same size cost different across Auckland

                Two clients ask for a 24m² aluminium pergola. One quote comes back at $26,000, the other at $34,000. Same product, different number. Here’s what causes the gap.

                Site access

                A Hobsonville new build with flat lawn and driveway access takes a different approach than a 1930s villa rear courtyard in Grey Lynn with a 60cm side passage. On the second, materials and waste move in and out by wheelbarrow, scaffolding goes up by hand, and labour hours stack up. That’s an extra $2,000–$4,000 in many cases — not a builder being greedy, just the reality of the site.

                Ground conditions

                Auckland’s geology shifts suburb by suburb. Clay slopes in Titirangi or West Harbour need deeper footings than the flat sand in Albany. Volcanic-fringe sites near Mt Eden or One Tree Hill can mean rock breaking on the way down. We’ve seen footing costs vary by $1,500–$2,500 between two builds based on ground alone.

                Wind zone

                Most central Auckland suburbs sit in medium wind zone per the building.govt.nz wind maps. Coastal Takapuna, Piha, exposed Westmere, or hilltop Titirangi can hit high or very high. Higher zones require thicker posts (150x150mm timber or 100x100mm steel minimum), deeper footings, and diagonal bracing per the NZS 3604 framing standard. That spec adds real cost — and skipping it on the wrong site is how pergolas come down in southerlies.

                Sun, shade, and orientation

                The cheapest pergola is the one you actually use. A north-facing pergola in Remuera that gets baked from 11am needs a different shade strategy than a south-facing courtyard in Hillsborough that’s already shaded for half the day. Material and roof type both shift based on orientation — a $2,000 louvre upgrade on the wrong-facing site is wasted money; on the right-facing site, it’s the difference between using the space in February and not.

                Aluminium pergola Auckland north-facing — pergola cost factors

                “We always walk the site before we quote. Two sections that look the same on Google Maps can have totally different cost profiles once you stand on them — the wind, the access, the sun angle, the ground. A 30-minute site visit saves clients from variations later.”
                — Eunice Qin, Designer, Superior Renovations


                Pergola renovation cost: replacing or upgrading an existing structure

                Not every pergola job starts with bare lawn. A big share of the outdoor work we do in Auckland is a pergola renovation — you’ve already got a structure, it’s just past its best. The old treated pine has greyed off and started to rot at the post bases. The polycarbonate roof has gone brittle and yellow. Or the bones are sound but the thing was never much chop to begin with, and now the kitchen-dining reno behind it has raised the bar for the whole outdoor space.

                Pergola renovation cost runs differently to a new build, and the reason is simple: what you pay depends on how much of the old structure you can actually keep.

                What a pergola renovation actually costs in Auckland

                Three broad scenarios cover most of what lands on our desk. The gap between them is the difference between saving the old structure and starting again.

                Renovation scope 2026 cost range (Auckland) What’s involved
                Refresh existing pergola $3,000–$9,000 Reseal or repaint timber, replace roof panels, new fixings, minor repairs
                Upgrade and extend $10,000–$25,000 Keep footings and posts, add louvred or fixed roof, screens, lighting
                Tear down and rebuild $14,000–$45,000+ Remove old structure, new footings, new aluminium or timber build

                Here’s the trap: people assume keeping the old structure automatically saves money. Sometimes it does. Often it doesn’t. If the existing footings were never rated for your wind zone — and plenty of older DIY pergolas weren’t — building a heavier louvred roof onto them is a false economy that fails an engineer’s check. We’d rather tell you that before you spend $12,000 upgrading a base that has to come out anyway.

                When a refresh makes sense — and when it doesn’t

                A refresh is the right call when the structure is fundamentally sound: posts solid at the base, beams straight, footings adequate. At that point you’re spending on the parts that wear — the roof, the finish, the fixings — and getting most of a new pergola’s look for a third of the cost.

                A rebuild is the right call when the posts have rot at ground level, the footings are shallow, or you’re changing the roof type in a way the old frame can’t carry. Retrofitting a motorised louvre system onto a timber frame built for open beams is the classic example. The frame usually isn’t rated for the extra load, and you end up rebuilding anyway.

                💡 Quick tip: Before you spend anything on a pergola renovation, get the post bases checked. Push a screwdriver into the timber at ground level — if it sinks in, the rot is already there and a refresh is money down the drain. That five-minute check decides refresh versus rebuild.

                A pergola renovation rarely happens on its own. More often it’s one piece of a wider outdoor renovation — new deck, paving, planting, and the structure all done together so the finished space flows. Done in stages, you pay twice for site setup and the finished areas rarely line up. Planned as one job, they do. That’s where the tidiest budgets and the best results tend to come from.

                “People come to us wanting to save the old pergola, and sometimes we can — but the first thing we check is the footings and the post bases, not the timber up top. A tidy-looking pergola can be sitting on footings that won’t pass a wind-zone check. If that’s the case, spending on a refresh is throwing good money after bad. We’ll always tell you which side of that line you’re on before you commit.”
                — Dorothy Li, Design Manager, Superior Renovations

                If your pergola renovation is part of a larger outdoor project, it’s worth scoping the whole thing through our guide to outdoor renovations in Auckland — deck, structure, and planting planned together rather than in stages.


                Pergola finance — 18-month interest-free

                If you’d rather not deplete savings on outdoor work right now, we partner with Q Mastercard for 18-month interest-free finance on renovation projects from $1,000 up. Standard lending criteria apply — see our finance options page for the detail.

                For most clients, finance turns a $25,000 louvred pergola from a “next year” project into a “this summer” one. The interest-free term covers a full year of using the pergola before the standard rate kicks in.


                Ready to get your pergola costed?

                The fastest way to get a realistic 2026 figure for your specific build is the calculator — it’ll have an estimate in your inbox in under a minute. If you’d rather walk through the build face-to-face with one of our designers, our free in-home consultations cover all of Auckland. We’ll measure the site, talk through orientation and material, and bring sample finishes.

                If you’re earlier in the process and want a written feasibility brief before you commit to anything, request one of our free feasibility reports.

                Book your free in-home consultation with Superior Renovations
                Get your free pergola cost estimate in 60 seconds
                Request a free feasibility report for your project


                Pergola cost NZ — frequently asked questions

                How much does a pergola cost in Auckland in 2026?

                A professionally built pergola in Auckland costs between $10,000 and $45,000 in 2026 for most builds. The wider range stretches from $4,000 for a basic timber DIY kit-set up to $70,000+ for a premium louvred outdoor room with lighting, heating, and screening. The biggest cost levers are material (timber vs aluminium), size, and roof type (open beam vs fixed vs motorised louvred). Auckland labour rates ($85–$130 per hour) sit at the higher end of NZ — outside Auckland figures typically come down 10–20%.

                How much does an aluminium pergola cost in NZ?

                A custom powder-coated aluminium pergola in Auckland costs $14,000–$30,000 in 2026 for a fixed-roof build. Stepping up to a motorised louvred aluminium system pushes the price to $20,000–$35,000 mid-range, or $45,000+ for premium larger installs. Aluminium is the modern default for Auckland because it's rust-proof in salty coastal air, doesn't warp in our humidity, and skips the yearly reseal that timber needs. Powder-coat in standard black or white is included; custom colours add $400–$1,000.

                Do I need a building consent for a pergola in Auckland?

                In most cases, no. Under Schedule 1 of the Building Act 2004, freestanding pergolas under 30m² are exempt from building consent. Consent is generally required if your pergola is attached to your house and over 20m², freestanding and over 30m², has a solid waterproof roof, or breaches your boundary setback or daylight plane. Auckland heritage zones (parts of Ponsonby, Parnell, Mt Eden) often add further restrictions. When consent is required, expect $1,500–$3,000 in council fees and 10–20 working days processing time.

                How much does a louvred pergola cost in NZ?

                A motorised louvred pergola in NZ costs $20,000–$35,000 for a mid-range build and $45,000+ for premium larger installs. The premium isn't just the aluminium — it's the louvre mechanism (adjustable blades that open and close to control sun and rain), the motorisation, and the electrical run from your switchboard. Per square metre rates run $1,200–$2,500/m² fully installed. A useful comparison: a fixed-roof aluminium pergola with a single Ziptrak screen often delivers similar all-weather function for $15,000 less.

                What is the cost per square metre for a pergola in NZ in 2026?

                Pergola cost per square metre in NZ sits between $900 and $2,200 fully installed in 2026. The bottom of that range covers simple open timber structures on flat accessible sites. The top covers motorised louvred aluminium systems with electrical. By material: treated pine $200–$450/m² supply, macrocarpa $400–$700/m², cedar $600–$900/m², fixed-frame aluminium $500–$1,200/m² installed, motorised louvred aluminium $1,200–$2,500/m² installed. Add labour, footings, and site work to get the total.

                Is it cheaper to build a pergola myself or hire a builder?

                A timber DIY kit-set from Mitre 10 or Bunnings can save $2,000–$5,000 in labour on a small pergola, with materials starting around $1,500–$3,000. The catch: you take on the structural compliance, the wind-zone footing spec, the boundary setback check, the LBP requirement (if attached over 20m²), and you don't get a warranty. Skipping a step risks Auckland Council asking you to remove or remediate the structure later. For pergolas $15,000+ or anything attached to the house, professional install is almost always the right call.

                How long does it take to install a pergola in Auckland?

                A standard 20m² aluminium pergola in Auckland takes two installers 2–4 days on site, depending on footing requirements and site access. Add 10–20 working days for council processing if consent is required, plus 4–8 weeks for custom aluminium fabrication lead time. Larger louvred builds or sites with restricted access (think a Grey Lynn villa rear with a narrow side passage) can stretch installation to a full week. Weather plays a role — we don't pour footings in heavy rain.

                Do I need an LBP for my pergola?

                Yes for any pergola attached to your house with restricted building work — that means anything affecting the building's structure, weathertightness, or fire safety. For freestanding pergolas, an LBP isn't legally required if the build is Schedule 1 exempt. In practice, any pergola 20m² or larger benefits from LBP-certified structural sign-off — it confirms the build meets the NZ Building Code and gives you cover if you sell the property later. Ask your builder for their LBP number and check it on the register at lbp.govt.nz.

                What is the best material for an Auckland pergola?

                For most Auckland sites, aluminium is the best modern default — rust-proof in salty coastal air, low-maintenance, and available in standard powder-coat colours like Resene Grey Friars or Ironsand. Timber (cedar or macrocarpa) suits rustic or character home settings, especially villas and bungalows in Grey Lynn, Mt Eden, or Devonport — but expect yearly UV reseal. Steel is rare for residential pergolas — heavy, needs galvanising, usually overkill. The right material also depends on wind zone — coastal Takapuna, Piha, or exposed Westmere builds need spec rated for high winds.

                Does a pergola add value to my Auckland home?

                A well-built pergola adds real value to an Auckland home, particularly in entertaining-focused suburbs like Remuera, Herne Bay, Glendowie, and Takapuna. Outdoor living space functions as an additional room — buyers in the Auckland market consistently respond to that. The value-add is highest when the pergola integrates with existing deck and indoor-outdoor flow, rather than sitting as a standalone structure. As with any renovation, build quality matters: a $30,000 aluminium louvred pergola with engineering sign-off adds more value than a $30,000 timber pergola that's already showing UV damage.

                Can I finance a pergola through Superior Renovations?

                Yes — we partner with Q Mastercard to offer 18-month interest-free finance on renovation projects from $1,000 up, which covers most pergola builds. Standard lending criteria apply, including a credit check. For a $25,000 louvred pergola, that's effectively a year of using the pergola before the standard rate kicks in. Finance is a useful lever for clients who don't want to deplete savings on outdoor work right now, especially when the build is timed for summer. Our finance options page covers the full terms.

                What is included in the Superior Renovations pergola cost calculator estimate?

                Our pergola cost calculator estimates the cost of a custom aluminium-framed pergola (3mm aluminium, NZ standard) in either black or white powder-coat, with a clear PVC or polycarbonate roof, supplied and installed in Auckland on a standard residential site. It excludes electrical works (LED, motorised louvres, automation), scaffolding if your site needs it, adjustable louvre roof systems, deck construction, screening blinds (Ziptrak), and outdoor heaters. Those get costed separately during consultation. The estimate lands in your inbox in under 60 seconds.

                How much does a pergola renovation cost in Auckland?

                A pergola renovation in Auckland costs $3,000–$9,000 for a refresh (reseal or repaint, new roof panels, new fixings), $10,000–$25,000 to upgrade and extend an existing structure with a new roof or screens, or $14,000–$45,000+ to tear down and rebuild. The deciding factor is how much of the existing structure is sound — particularly the footings and post bases. Keeping an old frame only saves money if it's rated for your wind zone; retrofitting a heavier louvred roof onto footings that aren't rated usually forces a rebuild anyway.

                Is it cheaper to renovate a pergola or build a new one?

                Renovating an existing pergola is cheaper only when the structure is fundamentally sound — solid posts, straight beams, and footings adequate for your wind zone. A refresh of a sound pergola runs $3,000–$9,000 versus $14,000+ for a new build. But if the post bases have rot at ground level or the footings are shallow, a rebuild is the honest call. The five-minute test: push a screwdriver into the timber at ground level. If it sinks in, budget for a rebuild rather than a refresh.


                Further Resources for your pergola project

                1. Featured projects and client stories to see specifications on some of our completed Auckland pergola projects.
                2. Full pergola design, materials, and builder guide for NZ — the design and materials companion to this cost article.
                3. Our landscaping and outdoor renovations service — full scope of outdoor work Superior Renovations covers in Auckland.
                4. Real client stories from completed Auckland renovation projects.

                Need more information?

                Take advantage of our FREE Complete Home Renovation Guide (48 pages), whether you’re already renovating or in the process of deciding to renovate, it’s not an easy process, this guide which includes a free 100+ point check list – will help you avoid costly mistakes.

                Download Free Renovation Guide (PDF)


                Still have questions unanswered?

                Book a no-obligation consultation with the team at Superior Renovations, we’d love to meet you to discuss your renovation ideas!

                  Services

                  Home RenovationKitchen RenovationBathroom RenovationOutdoor RenovationHouse ExtensionCommercialDesign ServicesOther

                  By submitting this form, you agree to receive communications from us via email or text regarding our services, you can unsubscribe at any time.

                  This site is protected by reCAPTCHA and the Google

                  Privacy Policy and Terms of Service apply.


                  WRITTEN BY SUPERIOR RENOVATIONS

                  Superior Renovations is quickly becoming one of the most recommended renovation company in Auckland and it all comes down to our friendly approach, straightforward pricing, and transparency. When your Auckland home needs renovation/ remodeling services, Superior Renovation is the team you can count on for high-quality workmanship, efficient progress, and cost-effective solutions.

                  Get started now by booking a free in-home consultation.

                  Request Your In-home Consultation

                  Or call us on 0800 199 888

                  www.superiorrenovations.co.nz


                  18 months 0 percent interest long term finance badge

                  Have you been putting off getting renovations done?

                  We have partnered with Q Mastercard ® to provide you an 18 Month Interest-Free Payment Option, you can enjoy your new home now and stress less.

                  Learn More about Interest-Free Payment Options*

                  *Lending criteria, fees, terms and conditions apply. Mastercard is a registered trademark and the circles design is a trademark of Mastercard International Incorporated.

                  SUPERIOR RENOVATIONS
                  Renovations on one full bathroom and one small ensuite at my home in Sunnynook, Auckland, were completed on 26th June 2026.
                  I am fully satisfied with the work done at my home by all workers and contractors and delighted with the results that I am now enjoying. All work is of a very high standard and attention to care leading to excellent results.
                  All staff of Superior Renovations and associated contractors were at all times helpful and happy to explain all aspects of their work and respectful in listening to any of my concerns or questions, with any changes where necessary being quickly and effectively carried out.
                  I have no hesitation in recommending Superior Renovations as your choice for any bathroom renovation.

                  Valerie Hepburn
                  4 Stoneleigh Court, Auckland
                  In early June, I hired Superior Renovation company to thoroughly renovate our two bathrooms. The project has now been completed and we are very satisfied. Thank you sincerely, and we highly recommend it.
                  Despite some delays, Eunice, Neil and the team at Little Giants have done a really good job on out kitchen renovation. Great finishing and very responsive to fixing up any little thing we weren't happy with.

                  Good work team!
                  ​From the very first consultation, our experience with this team has been nothing short of stellar.

                  ​Working with Eunice, our sales consultant, set a high bar for the rest of the project.
                  Eunice is truly exceptional at what she does. When we first began our kitchen project, we went through several versions of our floor plan, and she was with us every step of the way—from the initial planning stages right through to the final concept. Her patience and dedication during the design process were remarkable.
                  Throughout the project, Eunice provided:
                  * **Invaluable Suggestions:** She has a keen eye for both aesthetics and functionality, pointing out details we never would have considered on our own.
                  * **Seamless Adjustments:** No matter how many tweaks we requested, she handled every change with professionalism and a "can-do" attitude.
                  * **Expert Guidance:** She transformed our vague ideas into a cohesive, stunning reality.

                  ​Once the planning was complete, Neil, our project manager, took the reins and truly blew us away. Neil is a consummate professional who balances technical expertise with fantastic communication.
                  ​ He kept us informed at every stage, ensuring we knew exactly what to expect and when.
                  Whenever a minor pivot was needed, Neil handled it with grace and efficiency, keeping the timeline on track.
                  His standards for the renovation work were incredibly high, ensuring the final result was polished and beautiful.

                  ​The transition from Eunice’s initial planning to Neil’s execution was flawless. If you are looking for a team that combines design expertise with top-tier project management, look no further. We are absolutely thrilled with our new kitchen and new flooring !
                  Superior Renovations has just finished a complete remodel of my bathroom. I can see, why the company has such a high reputation. At every stage, from sales, design, project management, and execution, the company excelled at every point. I am just so happy with the work that they have done and they have exceeded my expectations at every point.
                  Used Superior for a kitchen and bathroom renovation last year. They did an excellent job updating both rooms, communication was excellent ongoing tjrough the project, they coordinated all the tradies, synchronized so there was little downtime, and it all worked exactly as planned and on budget. Was really glad we chose Superior Renovations and plan to use again for our entrance way at some stage.
                  As I said to my work colleagues ‘I have just had the most pleasant experience’. When they realised it was with renovations at home they were shocked - ‘unheard of’ I was told.
                  Everything went to plan - timing, project management, costs, etc, etc. Neil communicated with me daily and made my whole bathroom renovation a pleasure.
                  The best decision I made was choosing Superior Renovations.
                  Thank you Kevin for our initial connection and for passing me on to Neil to manage the whole process.
                  We just finished a bathroom renovation and couldn’t be happier with the results. The craftsmanship is top-notch, and the attention to detail in the tiling and finishing is impressive. The team was professional, kept the workspace clean, and delivered exactly what we envisioned. Highly recommend them for anyone looking for a high-quality transformation.
                  Superior did an excellent job of renovating our ensuite. Project manager Jacob was easy to work with and communications were good.
                  This is our second review for Superior Renovations. They have done two projects earlier this year and we were so impressed by the work they have finished. After discussing and very careful consideration, we decided to go with more projects with them. So far, they have now completed stage 1 renovation of our house. We still amazed for their knowledge and services; they really listen to us and discuss anything with us if they feel/think could be better…
                  From the first day we work with them, we have no issue with them at all, from communication, discussing, designing to the teams working on the site.
                  Especially we are highly recommended to those who are considering doing the house renovation, please contact them and you will know why we are so pleased to have them to do our house renovation.
                  We are thanking Cici, Neil and the teams so much….
                  We are looking forward to seeing what the outcome will be.

                  David and Emily
                  We recently had our bathroom renovated by Superior Renovations and couldn’t be happier with the experience. Dorothy and Neil were an absolute pleasure to work with. They guided us through every step of the process, making what can be a stressful experience feel smooth and straightforward.
                  The quoting process was transparent and detailed, with no hidden fees or surprises. Neil was incredibly responsive and always available whenever we had questions or requests, which gave us real peace of mind throughout the project. We really love the end result and enjoy our new bathroom!
                  We’ll definitely be returning to the Superior Reno team for our next project. Highly recommended!
                  Our bathroom reno has just been completed & I am so happy. The whole process was easy & hassle free. Alison designed our bathroom & was very patient with our changes/then changes back again. Jacob our project manager was a delight to deal with. He always kept us informed of the scheduling & any other information we may have needed. All the tradies worked hard & the job was completed & signed off within 3 weeks. That's demo, full tiling, installation of new everything & delivery & pick up of the skip down a very tricky driveway. We absolutely love the new bathroom & would recommend Superior Renovations everyday. Future jobs I will definitely be contacting them again. Thank so much for your excellent work
                  Having explored our reno options, it was an easy decision to select Superior Renovations for our work. As first timers at anything like this we had to trust the system with grand old 100year old bungalow. We were so pleased to have Cici, Sonny and Kai working with us the whole way through. Be shout out to all the team, builders, plumbers, electricians, tilers and painters. A superb job delivered on budget and ahead of time. The communication from Cici and Sonny was first class. Would highly recommend working with Superior Renovations in fact, we already have more worked booked in. Thanks Superior you made Millie and Monty's parents very happy. 🐾
                  I am very happy with the recent renovation for my new kitchen.
                  The team worked really hard to get it done within the time frame.
                  The manager, Jacob, was very helpful and communicated well and always sorts out any issue immediately.
                  Thank you Irene
                  We couldn’t be happier with our new pergola! From start to finish, the team was professional, punctual, and easy to work with. They took the time to listen to what we wanted and offered great suggestions to make the design even better. The quality of the materials and workmanship is outstanding — everything feels solid, well-built, and beautifully finished. Kudos to Sinan Sun as she has been an amazing contact with the company.
                  We are very pleased with our bathroom reno by Superior Renovations! Jacob, Cici and the team always kept us up to date, were always friendly to deal with and finished ahead of schedule. Most importantly we are very happy with the quality of the work.
                  We have been working with Superior Renovations as a supplier now for over three years. In that time we have found the team to be very professional and well organised. Which is a welcome relief in this industry! Just recently we have become their sole supplier for portaloos, which recognises the collaboration we have forged over these three years.

                  In particular, Leanne and Elaine set a very high standard of communication and flexibility. This is of vital importance when scheduling deliveries and pickups with us, however, they understand not everything can be done at once and are willing to work with us for the best (supplier/contractor/client) outcome.

                  I would imagine this ethos would flow directly through to all their contracted renovation work. A pleasure to work with!
                  A very reliable supplier – we’ve been working with them for three years now, and they have never let us down. Well done to the team.
                  We have been working with these guys for the past 4 years and find them an awesome company to work with, very efficient and organised. I highly recommend!
                  Finding someone reliable for renovations has always been the most stressful thing for us. In the past, we had several painful renovation experiences—money was spent but the problems were never truly solved, and things often ended up worse than before. We really didn’t know where to find a trustworthy renovation company.

                  For more than ten years, our wish had been to renovate our bathroom, laundry, and toilet, so that we could finally enjoy a comfortable and functional living environment. Just when we were about to give up, we came across Superior Renovations online. We quickly made an appointment with Cici, who designed and provided us with a quote.

                  Throughout the whole process, I was deeply impressed by the professionalism of Superior Renovations. What stood out most was that they always delivered on their promises—everything agreed upon was completed on time. This built a relationship of trust and reliability. Up until completion, I was completely satisfied with their dedication and the quality of their workmanship.

                  During the renovation, we encountered some of the challenges that often come with older houses, but Cici and her team helped us resolve the discomforts we had been living with for years. We are truly grateful to the construction team.

                  Some say renovations are easy if you just have money, but I believe the most important thing is finding a trustworthy team that keeps their word, values quality, and cares about the customer’s experience.

                  Because of this renovation experience, we can now confidently plan our next project—the kitchen—and Superior Renovations will definitely be our first choice. We strongly recommend them.

                  Finally, I want to thank Cici and the team for helping us fulfill our dream.

                  Mark & Kate
                  Sinan is a very good consultant. She helps a lot during renovation. Very satisfied with their job.
                  It was great to have Alison's recommendations and input on how & what would look best for our kitchen and bathroom reno. Jacob, our project manager, has been a star too; ensuring that the project was delivered as planned, AND giving us great ideas & suggestions along the way.

                  We will definitely be calling on you guys again for our next home reno. Thanks team!
                  Very impressed with Superior Renovations.Building our pergola with blinds for a fair price .First thank you Sinan for quoting the job and your flexabilty and knowledge..Secondly the job was done well within the time frame, thanks to Jeff for supervising the job ( eventhough he wasn't too well) and keeping us up to date throughout the process. Payment was fair and easy as well .
                  Thoroughly recommend Superior Renovations for your reno job 👍
                  Very efficient team of workers and high quality finish.
                  Very happy with our renovated bathroom.
                  We will use this company again.
                  We’re very happy with the renovation work done by the team. It’s rare for renovation projects to finish on time, but they committed to completing ours before the Easter holiday—and they delivered! Our project manager, Jacob, worked incredibly hard (even physically! 😄) to make it happen.

                  I admit I might not have been the easiest client—I was particular about details like colours, tile placement, and exactly where the hand basin bowl should sit on the bench. But they listened, took it all on board, and got it done. Thank you, Jacob!
                  I’ll definitely bring you another challenge in the future. 😉