
House Extensions

DSC062692 - Superior Renovations
House Extensions

Cost of Adding a Second Storey Extension NZ (2026)

Quick answer: A second storey extension in Auckland costs from $150,000 for a modest addition, with most family-scale projects landing between $250,000 and $550,000. Per-square-metre rates run $4,500–$8,000 in 2026, which is roughly 50% more than the equivalent ground-floor extension because of structural reinforcement, scaffolding, and weatherproofing.

You’ve stared at the section, paced the boundary, and realised there’s no room to push out. The neighbour’s fence is right there. The driveway eats the rest. So the question becomes whether to go up — and what that actually costs.

This guide is the version of that conversation we have with Auckland homeowners every week. Real 2026 figures, real consent rules, real disruption maths. Not the glossy stuff. The numbers that decide whether a second storey is the right move or whether you should be thinking about a single-level extension instead.

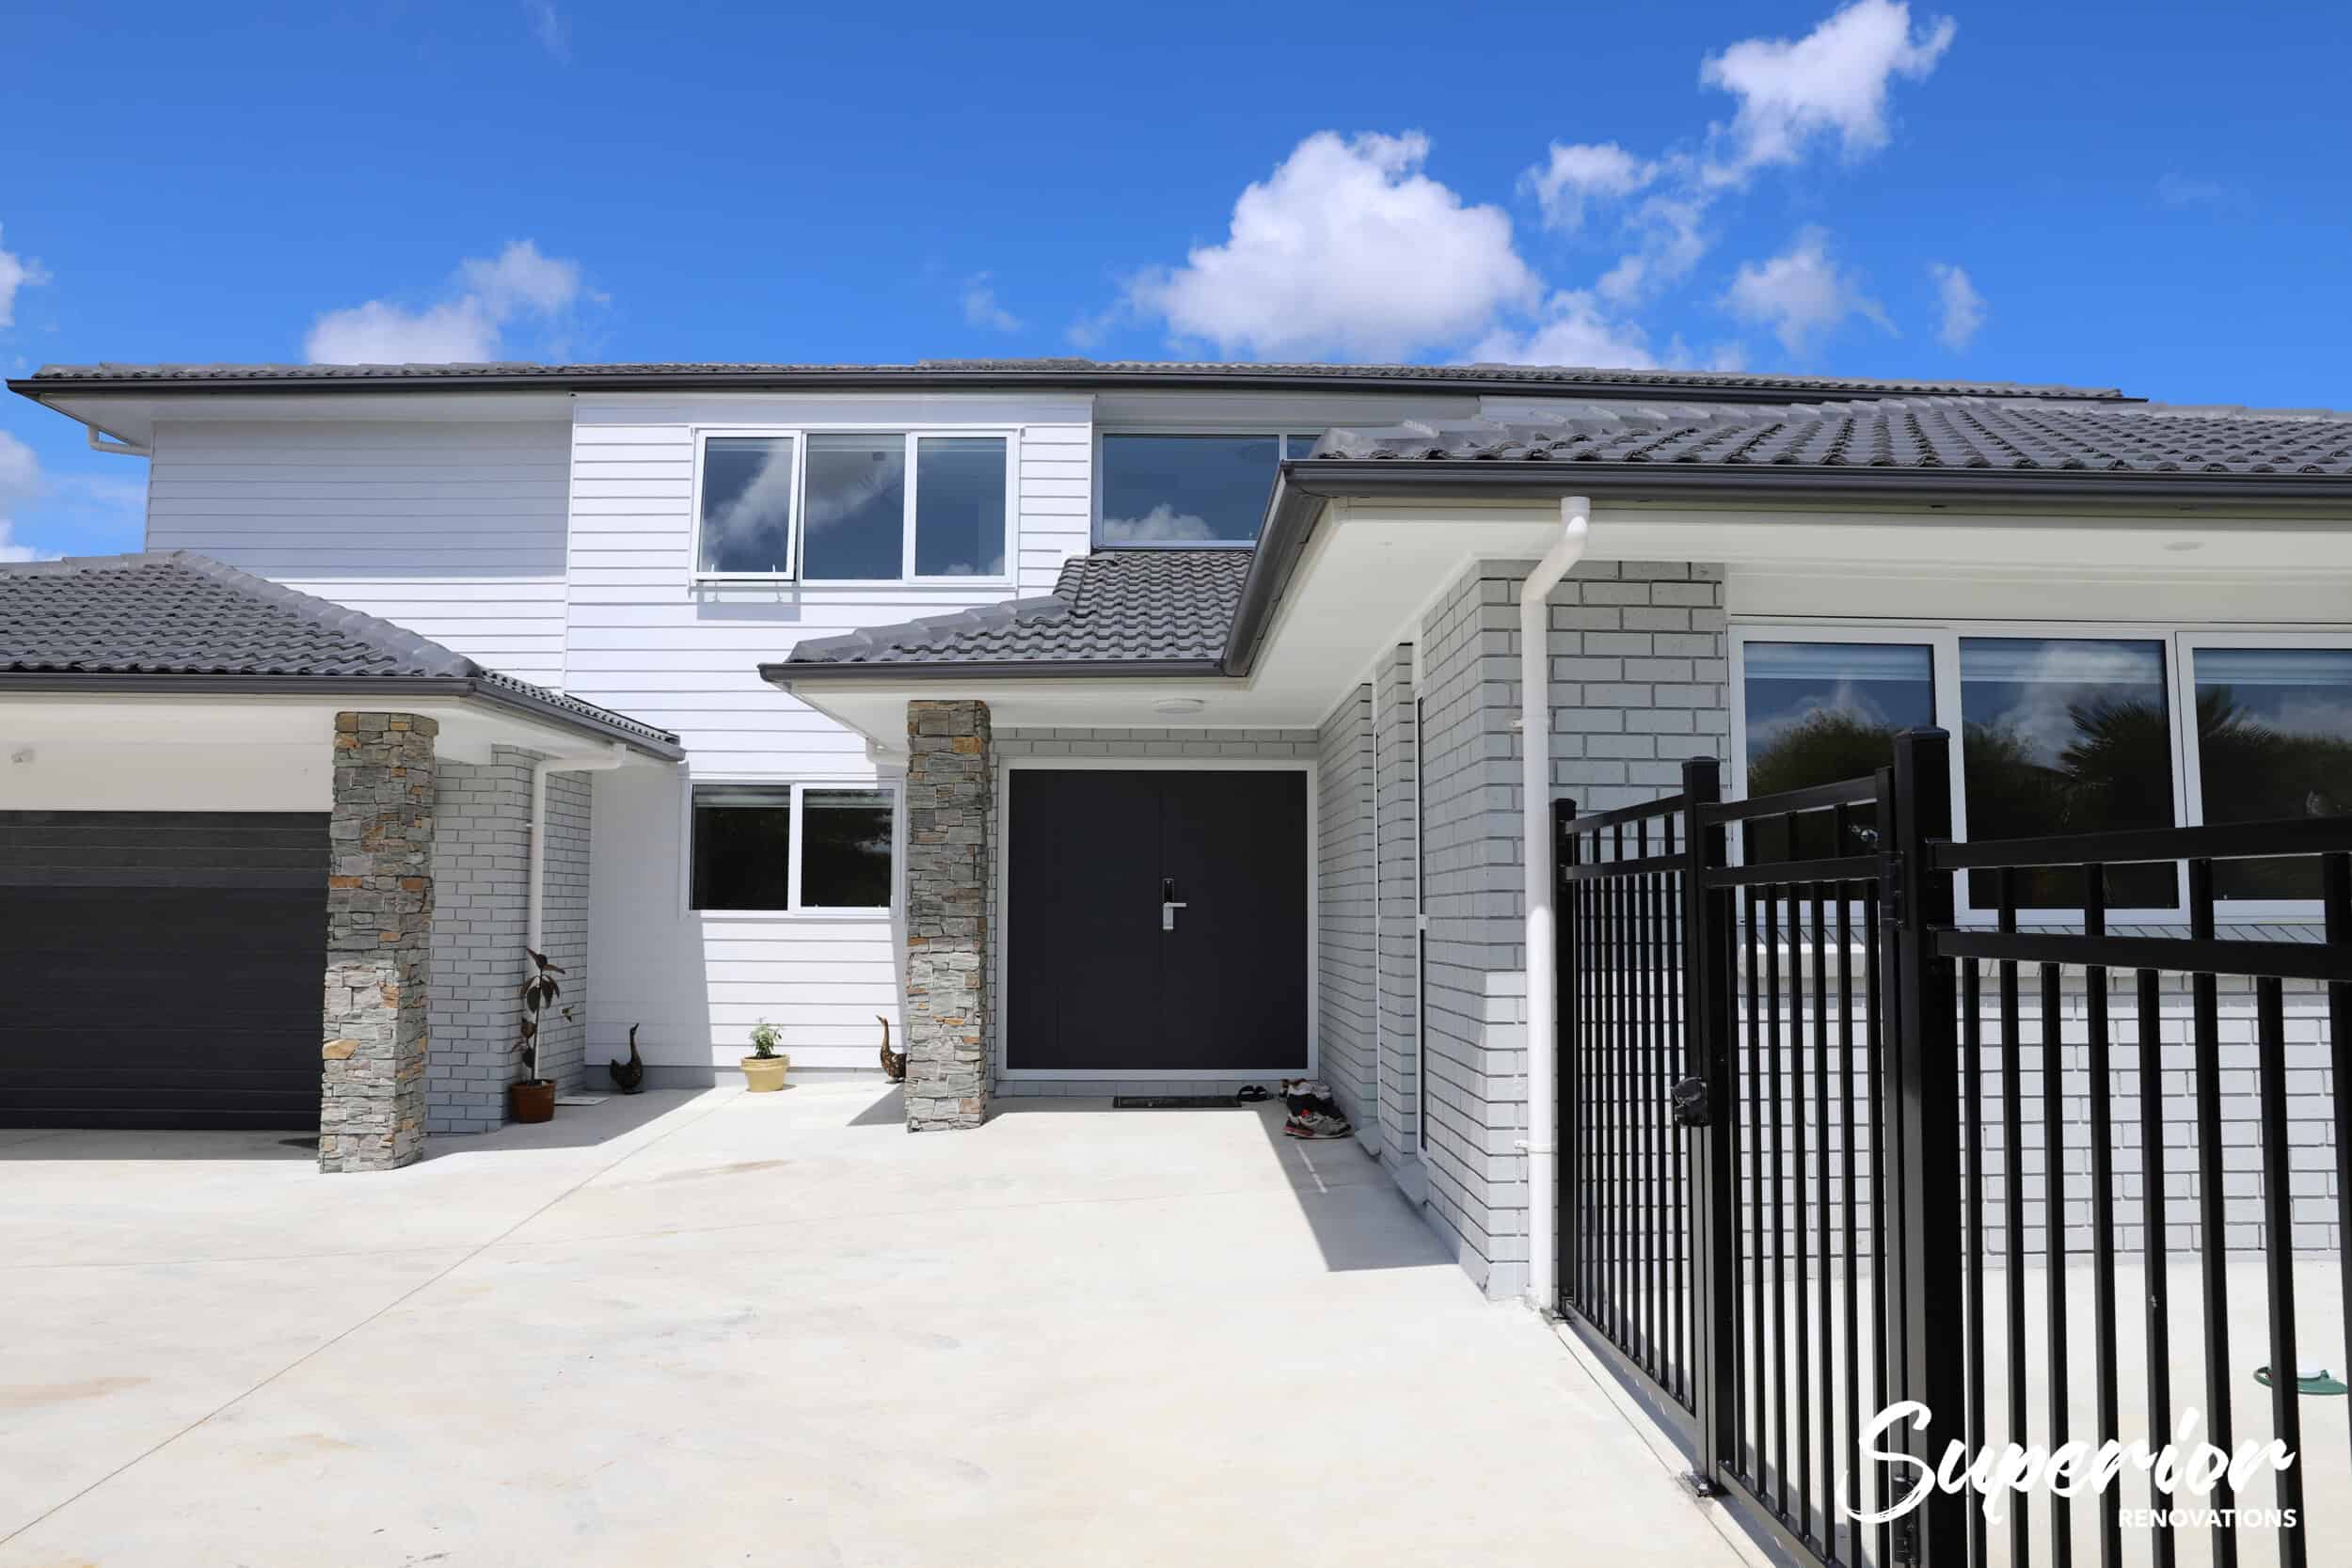
Second storey extension Auckland — Superior Renovations completed project

Auckland second storey extension — Superior Renovations


What Does a Second Storey Extension Actually Cost in Auckland in 2026?

Auckland second storey extensions in 2026 sit in a wide band. A small master suite addition starts around $150,000. Most family-scale jobs — two or three bedrooms, a bathroom, maybe a small lounge — land between $250,000 and $400,000. Larger or higher-spec builds push past $550,000, and a premium architectural second storey on a sloping site in Remuera or Herne Bay can clear $700,000 once consent fees, design, and ground works are in.

Per square metre, the working range for 2026 is $4,500 to $8,000/m². The lower end covers a straightforward bedroom-and-bathroom addition over a flat villa or 1970s home with sound foundations. The higher end covers second storeys with full kitchens, complex roof tie-ins, premium cladding to match a character home, or sites that need serious structural work.

💡 Quick tip: A useful rule of thumb across the industry — and one we use ourselves at our house extension cost calculator — is that a second storey runs around 50% more per square metre than the same area built at ground level. The premium covers structural reinforcement, full scaffold, weatherproofing, and the extra labour of working at height.

2026 Second Storey Extension Cost by Size and Tier (Auckland)

Size of Addition Standard ($4,500/m²) Mid-Range ($6,000/m²) High-End ($8,000/m²)
30 m² (master suite) $135,000 $180,000 $240,000
50 m² (two bedrooms + bathroom) $225,000 $300,000 $400,000
80 m² (full upper floor) $360,000 $480,000 $640,000
Add: design + consent $13,000–$25,000 $18,000–$33,000 $25,000–$45,000

Figures are 2026 Auckland market rates for the build only, before design fees, consents, ground works, and site-specific costs. All figures inclusive of GST. Source: Superior Renovations 1,000+ project dataset, plus 2026 cross-checks against published Auckland builder benchmarks.

So why the range from $4,500 to $8,000? It comes down to four things: the existing structure, the spec of the build, the site, and how much of the upper floor is wet area (kitchen and bathrooms are roughly twice the cost per m² of a bedroom).

“The single biggest mistake we see is homeowners falling in love with a second storey design before anyone’s checked whether the existing house can actually carry it. We start every second-storey project with a structural assessment before we draw a single line — because the foundations and framing dictate what’s even possible. It saves clients from spending $15,000 on plans that have to be reworked.”
— Dorothy Li, Design Manager, Superior Renovations


Why Building Up Costs 40–60% More Per Square Metre Than Building Out

This is the part most cost guides skip past. Building up is more expensive than building out, even for the same floor area. Here’s where the extra money goes.

Structural Reinforcement

Older Auckland homes — villas, bungalows, post-war timber-framed houses, even 1970s brick-and-tiles in the south and west — weren’t designed to carry a full second floor. Foundations often need underpinning. Floor joists may need to be doubled or replaced. Internal walls may need to be reframed to load-bearing spec. Steel beams or LVL portal frames go in where the existing structure won’t take the new load path.

Budget $25,000–$70,000 for structural reinforcement on a typical Auckland project. A villa with original piles and timber bearers will usually need more than a 1990s home built to higher engineered standards. The structural engineer’s report tells you which camp you’re in before the contract is signed.

Full Scaffold and Weatherproofing

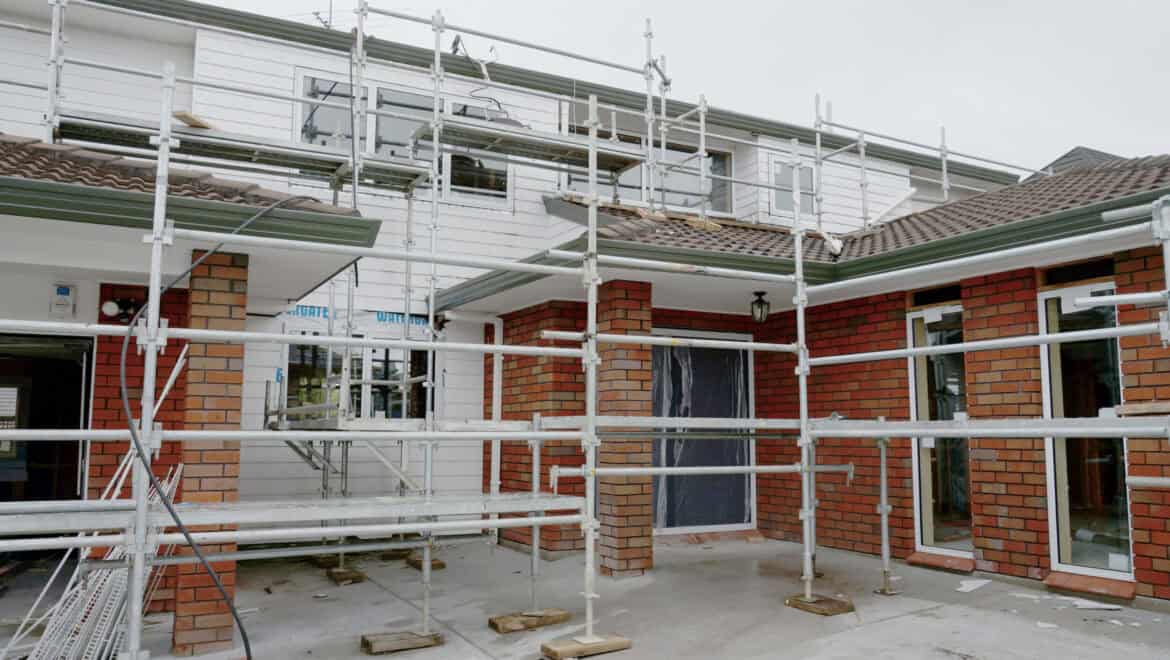
To put a second storey on, the existing roof comes off. To stop the house from being soaked through six months of Auckland weather, the whole structure needs a full perimeter scaffold and a shrink-wrapped temporary roof. This isn’t optional — it’s how the build stays watertight and the framing dries to the right moisture content before the new structure goes on.

A full scaffold-and-shrink-wrap setup for a typical job runs $15,000–$28,000. Bigger or more complex sites with safety overhang requirements over neighbouring properties push higher.

Working at Height

Every trade — framers, roofers, electricians, plumbers, plasterers — works slower when they’re three metres in the air. Material handling needs cranes or mechanical lifts on most jobs. Site safety requirements under WorkSafe NZ rules add to programme hours. Add roughly 10–15% labour premium across the build for working at height.

Disruption and Temporary Accommodation

Here’s the cost almost nobody quotes for properly. Most second storey builds need the household out for the disruptive phase — roof off, framing in, weather-tight stage complete. That’s typically 8–14 weeks of the 30–40 week programme.

Renting a comparable Auckland family home runs $700–$1,400 per week in 2026. Multiply that by 10–14 weeks and you’re looking at $7,000–$20,000 in temporary accommodation alone. Some families stay through the build to save the rent — that works if you have a separate downstairs bathroom and kitchen, but it’s a hard couple of months. Plan for both options before you commit.

💡 Quick tip: If you can phase the build so the upstairs is weather-tight and roofed before the new bathroom and kitchen go in, you can sometimes stay in the home through 60–70% of the programme. We sequence this on site whenever the structure allows it.


What Moves the Number Up or Down on Your Job

The cost ranges above are the market band. Your specific number sits inside that band based on a handful of decisions and site realities. These are the levers that actually move the budget.

The Existing House — Age, Construction, and Condition

A 1990s timber-framed home with intact bearers and original consent records is the cheapest base to build on. A 1920s villa with rotten subfloor framing, original piles, and a council file full of unconsented modifications is the most expensive. Most Auckland inner-suburb houses sit between those two points.

For character villas and bungalows in Mt Eden, Grey Lynn, Ponsonby, and Epsom, expect to add 10–25% to the base build figure for matched-detail work — replica weatherboards, matching window joinery, profile tiles to blend the existing roof to the new. Auckland Council’s heritage overlay rules require this matching in scheduled areas, and the quality of the match is what protects the value of the home.

Site Conditions and Ground Works

Sloping sections in Titirangi, Waitakere foothills, Mt Eden’s volcanic flank, and the cliff suburbs (Herne Bay, St Heliers, Mission Bay) often need pile reinforcement before any upper floor goes on. A geotechnical report — generally $2,500–$5,500 from a registered engineering geologist — is the first step.

If the report flags soft soils, slope instability, or volcanic basalt at depth, foundation reinforcement can add $15,000–$75,000. Auckland’s geology varies street by street, so this isn’t predictable from postcode alone — you need the soil test before you know.

Spec and Finish Choices

Standard double-glazed aluminium joinery, mid-range carpet and tile, painted plasterboard ceilings, and stock-profile interior doors sit at the lower end of the range. Custom timber joinery, premium engineered stone in upstairs ensuites, hardwood flooring, specialist glazing for views, and integrated joinery push the per-m² rate to the top of the band.

For a second storey, glazing decisions are bigger than people expect. North-facing window walls to capture Hauraki Gulf or Waitakere views typically cost $15,000–$45,000 more than equivalent standard windows, but they’re often the reason the project exists.

Whether You Add Wet Areas Upstairs

Bedrooms cost the least per m² to build. Bathrooms and kitchens cost the most. Adding an ensuite upstairs adds $25,000–$45,000 to the budget on top of the per-m² build rate. A second full kitchen upstairs (for multi-generational living or future granny flat conversion) is $45,000–$75,000 for a mid-range fitout.

Matching the Existing Roof and Cladding

The cladding choice doesn’t just affect the bill — it affects what the finished house looks like from the kerb. Matching the existing weatherboard profile or roof tile colour is a non-negotiable on character homes and a smart choice on most others, because mismatched cladding is the single biggest visual giveaway that a house has been added to.

Suppliers we work with regularly for cladding match work include James Hardie for Linea weatherboard, and Mitre 10 (mitre10.co.nz) and Bunnings (bunnings.co.nz) for stock profiles. For windows and joinery to match heritage character homes, custom timber fabricators are usually required — not stock aluminium suites.


Three Real Auckland Second Storey Projects — What They Cost

The numbers feel more grounded when you can see them against a real project. Here are three Auckland second storey jobs that bracket the typical range. Identifying details are anonymised, but the scopes, suburb context, and figures are real.


Project One — Mt Eden Villa, 30 m² Master Suite Over the Existing Lounge

  • The brief: A 1910s villa on a 600m² section with no room to extend sideways. The owners wanted a master bedroom, walk-in wardrobe, and ensuite upstairs, accessed via a new internal staircase, while keeping the original villa front rooms intact downstairs.
  • Construction challenges: Original timber piles needed underpinning. Existing ceiling joists were 100×50 timber — well below modern load spec — so a full new floor structure went in. Replica weatherboards to match the original profile, custom timber sash windows to match the period.
  • Cost breakdown:
    • Build (30m² mid-range): $185,000
    • Structural reinforcement: $32,000
    • Scaffold + weatherproofing: $18,000
    • Ensuite fitout: $28,000
    • Heritage detail matching: $22,000
    • Design + consent fees: $19,000
    • Total: $304,000
  • Programme: 32 weeks from contract to handover. Family rented a Mt Eden townhouse for 11 weeks during the disruptive phase ($1,200/week = $13,200).

Project Two — Titirangi 60 m² Two-Bedroom Addition on a Sloped Section

  • The brief: A 1970s timber-framed house on a steep west-facing section in Titirangi. The owners had two teenagers needing their own rooms plus a study, and the section dropped sharply behind the house — no ground-floor extension possible. Designed in partnership with Sonder Architecture to manage the consent complexity and structural design.
  • Construction challenges: The geotechnical report flagged clay soils and required new piles to bedrock. The existing roof was an asphalt shingle — replaced rather than matched. North-facing window wall designed to capture the Manukau Harbour view.
  • Cost breakdown:
    • Build (60m² mid-range): $360,000
    • Structural reinforcement + new piles: $58,000
    • Geotechnical report + ground works: $22,000
    • Scaffold + weatherproofing: $24,000
    • Upstairs bathroom: $36,000
    • North-facing glazing upgrade: $28,000
    • Design + consent fees: $34,000
    • Total: $562,000
  • Programme: 38 weeks. Family stayed in the home for the first 18 weeks, then moved out for 14 weeks during the disruptive phase.

Project Three — Remuera 80 m² Full Upper Floor, High-End Spec

  • The brief: A 1990s home in Remuera, originally single-storey, with the owners wanting a full upper floor — three bedrooms, master suite with ensuite, second bathroom, and a small lounge with harbour views. High-end specification throughout.
  • Construction challenges: The existing house had good foundations but the roof structure needed full removal. Custom cedar cladding to match a contemporary redesign of the ground floor. Triple-glazed window suites for thermal performance and acoustic management on a busy ridge road.
  • Cost breakdown:
    • Build (80m² high-end): $620,000
    • Structural reinforcement: $38,000
    • Scaffold + weatherproofing: $26,000
    • Master ensuite + second bathroom: $74,000
    • Cedar cladding upgrade: $35,000
    • Triple-glazed joinery: $42,000
    • Design + consent fees: $42,000
    • Total: $877,000
  • Programme: 44 weeks. Family relocated for 18 weeks during the build.

The pattern across all three: structural and scaffold costs barely shift with size, so smaller second storeys carry a higher per-m² rate. Bigger jobs spread the fixed costs across more floor area.

“Most clients underestimate the disruption window on a second storey. The Titirangi job we did recently — the family moved into a rental for 14 weeks, which added about $19,000 to the project on top of the build cost. We talk about that number upfront now, because it’s the line item that catches people off guard mid-project.”
— Cici Zou, Certified Designer (NZ Dip. Interior Design), Superior Renovations


Auckland Council Consents — What’s Actually Required and What It Costs

A second storey extension always requires building consent under the Building Act 2004. There’s no consent exemption pathway that applies — not Schedule 1 minor works, not the Building and Construction (Small Stand-alone Dwellings) Amendment Act 2025 70m² exemption (that’s for detached secondary dwellings, not additions to existing homes).

The question isn’t whether you need consent — you do. The question is whether you also need resource consent, and that depends on the Auckland Unitary Plan zoning of your section.

Building Consent vs Resource Consent

Building consent covers the structural, weathertightness, fire, and Building Code compliance of what you’re building. Auckland Council’s processing fee for a typical residential second-storey building consent runs $3,500–$8,500 in 2026, and processing takes 4–8 weeks once a complete application is lodged.

Resource consent is triggered when the planned build doesn’t fit within the permitted activity rules of your zone. For most Auckland second storeys, the rules that get tested are:

  • Height-to-boundary controls — your new upper floor can’t shade or dominate neighbouring properties beyond the angles set in the AUP for your zone. In Single House Zone, recession planes are tighter. In Mixed Housing Suburban and Mixed Housing Urban, there’s more permitted bulk. In the Terrace Housing and Apartment Buildings Zone, more again.
  • Maximum building height — typically 8m for Single House Zone, 9m for Mixed Housing Suburban, 11m for Mixed Housing Urban.
  • Site coverage — already at the limit on a tight inner-Auckland section, even building up can trigger this if the upper floor extends beyond the existing footprint.
  • Heritage overlays — if your home is in a scheduled character area (parts of Mt Eden, Ponsonby, Grey Lynn, Devonport, Parnell), resource consent for design and visual effects is almost always required.

Resource consent costs run $8,000–$25,000 on top of building consent fees, and adds 3–6 months to the programme. The number isn’t the killer — the time delay is.

The H1 Insulation Requirement Most Homeowners Don’t Know About

Under the updated NZ Building Code H1 insulation requirements (in force from May 2023 with updated R-value targets), any new construction — including second storey additions — must meet minimum insulation values for ceilings, walls, floors, and windows. For Auckland’s climate zone, that’s R-6.6 ceilings, R-2.0 walls, R-2.5 floors, and double-glazing with insulating frames as the practical minimum.

This adds $8,000–$18,000 to a second storey build compared to pre-2023 standards. It also means existing single-skin walls on the ground floor often need upgrading to bring the connecting fabric up to code — which is sometimes optional, sometimes mandated by council depending on scope. Worth confirming early.

Important note: Engaging a Licensed Building Practitioner (LBP) is mandatory for restricted building work, which includes the structural work involved in any second storey. The LBP must be named on the consent application. Our project managers and contracted builders all hold current LBP certification.

The Consent Timeline in Practice

From the day you sign a design contract to the day the first hammer hits framing, expect 14–22 weeks on a straightforward second storey, longer if resource consent is needed. The breakdown:

  • Concept design + structural assessment: 3–5 weeks
  • Developed design + engineering: 4–6 weeks
  • Building consent application + processing: 4–8 weeks
  • Resource consent (if required): add 12–24 weeks
  • Pre-construction coordination: 2 weeks

We handle the whole consent process in-house for our clients, working with Sonder Architecture on the design and structural side where consent complexity warrants it. That partnership means one quote, one timeline, one point of contact through the design-to-build process.


Does a Second Storey Extension Actually Pay Off in Auckland?

The short answer: usually yes, but with caveats. The longer answer needs to look at three different value calculations.

Direct Property Value Lift

Adding bedrooms and floor area to an Auckland home in 2026 typically adds $4,500–$8,000 per m² to the property’s resale value, in line with construction cost per m². In inner suburbs with strong demand for family-sized homes — Mt Eden, Grey Lynn, Epsom, Remuera, Ponsonby — the lift is at the top of that range. In further-out suburbs, closer to the bottom.

For a 50m² second storey costing $300,000, expect property value to lift $280,000–$400,000, depending on the suburb and the quality of the build. That’s a return of 90–130% on the spend — close to neutral on a pure resale-value calculation, with the lifestyle benefit on top.

The Move-vs-Improve Comparison

This is where the maths often tips firmly in favour of going up. Selling and buying up a notch in the Auckland market in 2026 carries:

  • Real estate agent commission: 2.5–4% of sale price ($35,000–$70,000 on a $1.5M home)
  • Legal, marketing, and staging: $8,000–$15,000
  • Buying costs on the new property: legal, due diligence, inspection ($5,000–$10,000)
  • The price gap between your existing home and the better-sized one you actually want: typically $400,000–$800,000 in inner suburbs
  • Moving costs, time off work, stress, and disruption

Total transaction cost of moving up: $450,000–$900,000 before you’ve improved your living situation. Against a $300,000–$500,000 second storey extension that keeps you in the suburb you like, the suburb your kids go to school in, on the section you’ve already paid for. The maths usually favours building.

Lifestyle Value (The Reason Most People Actually Build)

The bedroom your teenager isn’t sharing anymore. The master suite separated from the rest of the house. The Hauraki Gulf view from the new lounge that didn’t exist before. The garden you didn’t have to give up. These aren’t on the valuation spreadsheet, but they’re why most second storey projects happen.


How to Keep Costs Down Without Compromising the Build

Big projects don’t have to mean blown budgets. These are the levers that actually work — and the ones that don’t.

  • Keep the footprint simple. A rectangular upper floor sitting cleanly over the load-bearing walls of the ground floor is the cheapest build. Cantilevers, jogs, dormers, and complex roof shapes add cost fast.
  • Lock the design before construction starts. Mid-build design changes are the single biggest source of variation cost. The discipline that costs nothing — and saves the most money — is finalising every spec, fixture, and finish before the building consent is lodged.
  • Match the existing house where you can. Custom-profile cladding, made-to-measure joinery, and one-off roof tiles cost real money. Standard profiles that align visually with what’s there cost less and look just as good.
  • Build a 15–20% contingency into the budget. Not because the builder will overrun — a fixed-price contract protects you from that — but because owner-driven variations and homeowner-supplied items always cost more than the original brief assumed.
  • Get the structural and geotechnical reports done before the design is finalised. Discovering the foundations need work after the consent is lodged is the most expensive way to find that out.
  • Avoid moving plumbing and electrical risers. Stacking the new upstairs bathroom above the existing downstairs bathroom or kitchen saves $8,000–$15,000 in plumbing reroute work.

What doesn’t save money: cheaping out on glazing or insulation. The H1 Code requirements set the floor on these. Buying a marginally cheaper aluminium joinery suite saves $2,000–$5,000 up front and costs you in heat loss, condensation, and resale every year you live there.


When a Second Storey Isn’t the Right Answer

Sometimes the honest advice is don’t build up. The cases where another path is better:

  • The section actually does have room to extend sideways. A ground-floor extension on the same floor area is typically 30–40% cheaper and 30% faster. If lateral space exists, that’s the easier path.
  • The existing structure is too compromised to carry the load. Some 1920s villas with severely degraded subfloor framing need full lift-and-relevel work just to be safe to add to. At that point, the maths sometimes favours a knockdown-and-rebuild rather than an extension.
  • You’re more than 18 months from selling. Construction value depreciates fastest in the first 18 months while the build is being absorbed into the area’s comparable sales. Selling within that window often returns less than the project cost.
  • The site triggers full resource consent under heritage rules. If you’re in a Schedule 14.1 heritage area and the design effects are significant, the consent path can take 12–18 months and consent costs alone can hit $40,000+. Worth knowing before you fall in love with the upstairs plan.

We’ll tell you any of these things at the first consultation if they apply. The free in-home feasibility chat exists exactly so the maths gets checked before a design contract gets signed.

Second Storey vs Single-Storey (Ground-Floor) Extension — How to Choose

The up-or-out decision usually comes down to your section, not your preference. A single storey extension that pushes out at ground level is the cheaper and faster option where the land allows it: no roof removal, no full scaffold, no working-at-height premium, and rarely any household displacement. A ground floor extension of the same floor area typically lands 30-40% below the second-storey figure, which is why we always check for lateral room first. The catch is that building out eats section, sunlight and outdoor living space, and on Auckland’s tighter inner-suburb sites there is often simply nowhere left to go but up. A second storey keeps the footprint and the garden, captures views and light on the new upper floor, and adds the most bedrooms per dollar on a small section. A middle path some homeowners miss is an over-garage extension – adding a room or two above an existing attached garage, which already has foundations and walls doing some of the structural work. If you are genuinely undecided between adding to the house and starting over, our guide on whether to renovate or rebuild works through the numbers, and the way our Auckland extensions team scopes a build is the same whether you end up going up or out.

💡 Quick tip: before you commit to going up, get a surveyor or your designer to confirm your recession planes and site coverage under the Unitary Plan. A ground-floor extension that stays inside site coverage limits can be a permitted activity, while the same floor area added upstairs sometimes trips a height-to-boundary rule and pulls you into resource consent.


The Superior Renovations Approach to Second Storey Extensions

We’ve completed 1,000+ Auckland renovation projects out of our Wairau Valley showroom at 16B Link Drive. Our Design-to-Build Action Plan process handles second storey jobs from the first structural assessment through to the Code Compliance Certificate. For design and structural consent complexity, we work with Sonder Architecture as our cross-brand partner — same group, same accountability, one quote.

Every project comes with a fixed-price contract, a dedicated project manager, a 147-point QA process, and a 12-month maintenance and workmanship warranty on top of the standard trade warranties. We hold $5M public liability insurance and $1M professional indemnity. The team’s averaging 4.7 stars across 170+ Google reviews.

If finance is part of the picture, we partner with Q Mastercard for an 18-month interest-free payment option on renovation work — same terms as we offer on bathroom and kitchen renovations. Details on our finance options page.

The starting point for any second storey conversation is a free in-home consultation. We look at the existing structure, talk through what’s possible against the Auckland Unitary Plan rules for your zone, and give you an honest read on whether a second storey is the right move for your home.

Book your free in-home consultation with Superior Renovations
Use our house extension cost calculator for a quick ballpark
Request a free feasibility report for your project


How much does it cost to add a second storey to a house in Auckland in 2026?

In 2026, second storey extensions in Auckland start from around $150,000 for a modest 30m² master suite addition. Most family-scale projects (50–60m², two or three bedrooms plus a bathroom) cost between $250,000 and $400,000. Larger or higher-spec builds run $450,000–$700,000+, and a premium architectural second storey on a sloping site can clear $800,000. Per-m² rates sit at $4,500–$8,000 depending on spec, condition of the existing structure, site, and how much wet area is involved. These figures are inclusive of GST and based on our 1,000+ Auckland project dataset cross-checked against current Auckland builder benchmarks.

Why does a second storey extension cost more per m² than a ground-floor extension?

The premium is roughly 40–60% per m² and covers four things competitors often skip: structural reinforcement of the existing house to carry the new load ($25,000–$70,000), full perimeter scaffold and shrink-wrap weatherproofing ($15,000–$28,000), the labour premium for working at height (10–15% across all trades), and the cost of temporary accommodation during the disruptive phase ($7,000–$20,000). The same floor area built at ground level avoids all four of those.

Do I need building consent and resource consent for a second storey extension in Auckland?

Building consent is always required under the Building Act 2004 — there's no exemption pathway for second storeys. Auckland Council building consent fees run $3,500–$8,500 in 2026 with 4–8 week processing. Resource consent is needed when your build doesn't fit your zone's permitted activity rules — most commonly when height-to-boundary recession planes, maximum building height, or heritage overlay rules are triggered. Resource consent adds $8,000–$25,000 and 3–6 months. We assess both at the free consultation and handle the full process in-house.

How long does it take to build a second storey extension in Auckland?

Total programme from contract signing to handover runs 30–44 weeks. The breakdown: 7–11 weeks for design and structural engineering, 4–8 weeks for building consent processing (longer with resource consent), 2 weeks pre-construction, and 18–25 weeks for the build itself. Most jobs require the household out for 8–14 weeks during the disruptive phase when the roof is off and the new structure is being installed. Smaller and simpler projects sit at the lower end; sloped sites with structural reinforcement at the upper end.

How much will I need to budget for temporary accommodation during a second storey build?

Most second storey builds need the household out for 8–14 weeks while the roof is off and the new structure is going up. Renting a comparable family home in Auckland in 2026 runs $700–$1,400 per week depending on suburb and house size. Budget $7,000–$20,000 in temporary accommodation. If your home has a separate downstairs bathroom and kitchen, you can sometimes stay through more of the build — we sequence the programme that way wherever the structure allows it.

What does the Auckland Unitary Plan say about adding a second storey?

The Auckland Unitary Plan controls maximum building height, recession planes (height-to-boundary angles), and site coverage by zone. In Single House Zone, maximum height is typically 8m with tighter recession planes. Mixed Housing Suburban allows 9m, Mixed Housing Urban 11m, and Terrace Housing and Apartment Buildings Zone more again. Heritage overlay areas (parts of Mt Eden, Ponsonby, Grey Lynn, Devonport, Parnell) trigger additional design and visual effects rules. Whether your second storey is a permitted activity or needs resource consent depends entirely on your zone and overlay — we check this against the Auckland Council planning maps for every project at the consultation stage.

Does adding a second storey actually add value to my Auckland home?

In most Auckland inner suburbs, second storey extensions add $4,500–$8,000 per m² to property value, broadly in line with construction cost per m². A 50m² second storey costing $300,000 typically lifts property value by $280,000–$400,000 in suburbs like Mt Eden, Grey Lynn, Epsom, and Remuera. That's close to a break-even on a pure resale calculation, with the lifestyle benefit and avoided cost of moving on top. Selling up and buying a bigger home in the same suburb usually carries $450,000–$900,000 in transaction and price-gap costs — which is why building up often wins the maths.

Does my existing house need structural reinforcement to take a second storey?

Almost always yes, to some degree. Older Auckland homes — villas, bungalows, post-war timber framing, and 1970s brick-and-tile — weren't designed to carry a full second floor. Foundations may need underpinning, floor joists may need doubling, and internal walls often need reframing to load-bearing spec. Budget $25,000–$70,000 for structural reinforcement on a typical project. The structural engineer's assessment, done before any design work, tells us exactly what's required on your specific house.

Do I need to comply with the new H1 insulation requirements for a second storey extension?

Yes. The updated NZ Building Code H1 requirements that came into force in May 2023 apply to any new construction, including second storey additions. For Auckland's climate zone, that means minimum R-6.6 ceilings, R-2.0 walls, R-2.5 floors, and double-glazed window suites with insulating frames as the practical minimum. Meeting H1 adds $8,000–$18,000 to a second storey build compared to pre-2023 standards but delivers significant heating cost savings and improved comfort year-round.

Can I live in my house during a second storey extension build?

Partly. The pre-construction stages (design, consent, demolition prep) don't require you to leave. Once the roof comes off and structural work begins, most households need to be out for 8–14 weeks for safety and weather protection. If your home has a separate downstairs bathroom, kitchen, and bedroom that aren't directly affected, we can sometimes sequence the build to let you stay through 60–70% of the programme. Your project manager will plan this with you before construction starts so the temporary accommodation budget is clear.

Should I use an architect for my second storey extension?

For straightforward second storeys with no resource consent complexity, our in-house design team handles the design and consent process end-to-end. For complex sites — heritage overlays, significant resource consent applications, sloping sections with geotechnical challenges, or distinctive architectural intent — we partner with Sonder Architecture, our group cross-brand architectural practice. That gives you one quote, one timeline, and one point of contact across design and build rather than the two-contract handoff that creates most renovation friction.

What's included in a fixed-price second storey extension quote from Superior Renovations?

A complete fixed-price quote covers structural design and engineering, Auckland Council consent applications and fees, demolition, scaffold and weatherproofing, structural reinforcement, new framing, roofing, cladding, insulation to H1 spec, plasterboard, internal joinery, electrical and plumbing, painting, flooring, and all trade coordination. It also covers the 147-point QA process and the 12-month maintenance and workmanship warranty. Excludes only homeowner-supplied items, post-contract design changes (handled as priced variations), and any latent conditions discovered after demolition. The full scope of works is documented before contract signing — no surprise invoices.


Further Resources for your second storey extension

  1. Featured projects and Client stories to see specifications on some of the projects.
  2. Real client stories from Auckland
  3. Use our House Extension Cost Calculator for a quick ballpark figure
  4. Read our Ultimate Guide to Planning a House Extension for the wider context
  5. Browse our full House Extensions Auckland service page

Need more information?

Take advantage of our FREE Complete Home Renovation Guide (48 pages), whether you’re already renovating or in the process of deciding to renovate, it’s not an easy process, this guide which includes a free 100+ point check list – will help you avoid costly mistakes.

Download Free Renovation Guide (PDF)


18 months 0 percent interest long term finance badge

Have you been putting off getting renovations done?

We have partnered with Q Mastercard ® to provide you an 18 Month Interest-Free Payment Option, you can enjoy your new home now and stress less.

Learn More about Interest-Free Payment Options*

*Lending criteria, fees, terms and conditions apply. Mastercard is a registered trademark and the circles design is a trademark of Mastercard International Incorporated.


Still have questions unanswered?

Book a no-obligation consultation with the team at Superior Renovations,
we’d love to meet you to discuss your renovation ideas!

    Services

    Home RenovationKitchen RenovationBathroom RenovationOutdoor RenovationHouse ExtensionCommercialDesign ServicesOther

    By submitting this form, you agree to receive communications from us via email or text regarding our services, you can unsubscribe at any time.

    This site is protected by reCAPTCHA and the Google

    Privacy Policy and Terms of Service apply.

    IMG 0723 - Superior Renovations
    House Extensions

    Planning a House Extension in Auckland (2026 Guide)

    Planning a House Extension in Auckland (2026): Process, Consent and Costs

    Quick answer: A house extension in Auckland runs through five stages — feasibility, design, consent, build, and Code Compliance Certificate. Single-storey work typically costs $2,000–$5,500 per m² in 2026 plus a 10–15% contingency, with council consent processing taking 4–8 weeks for a clean application.

    Running out of room in your Grey Lynn bungalow? Outgrowing your Mt Eden villa? Before you go house-hunting in the outer suburbs, it’s worth asking whether extending is the smarter move. For a lot of Auckland families, it is — and the rules just got friendlier. Since 15 January 2026, a new building consent exemption lets certain standalone dwellings up to 70m² be built without a Building Consent, which changes the calculus on whether to extend the main house or add a separate dwelling on the section. This guide walks the full planning process: feasibility, design, when you actually need an architect, consents (including the new 70m² rule), 2026 costs, and how to make the new work feel like it was always part of the house.


    Is a House Extension Feasible on Your Auckland Section?

    Start by pulling your property file from Auckland Council. It shows your boundaries, easements, and what the Unitary Plan zone allows on your section. Single House and Mixed Housing Suburban zones generally permit around 35–40% site coverage; Mixed Housing Urban allows a bit more — but heritage and special character overlays in suburbs like Ponsonby, Mt Eden, Grey Lynn, and Devonport limit height, form, and external materials. According to Auckland Council, the property file and a LIM are where most buyers and renovators start, because they flag development restrictions and hazards before you commit.

    What to check before you spend a cent on design

    Measure your setbacks (typically 1m sides, 1m–3m rear depending on zone), check the slope — hilly Titirangi or West Harbour sections need engineered foundations — and think about builder access and stormwater. Sun orientation matters too. A north-facing living extension is the goal in most Auckland homes. We run free on-site feasibility visits that catch the things people miss — protected trees, flood-prone overlays in low-lying parts of Howick, geotech requirements on clay soils. Better to know before you’ve paid an architect.

    💡 Quick tip: Find your zone before anything else. Search your address in the Auckland Unitary Plan viewer — five minutes tells you whether the extension in your head is permitted, or whether you’re heading for a Resource Consent.

    Extend, or move? The honest version

    Moving costs more than people expect once you add agent fees, legals, and the price gap to a bigger home in the same suburb. Extending keeps you in the school zone and the neighbourhood you bought into. The catch: an extension is a real build, with consent, disruption, and the chance the house hides a surprise behind the GIB. The right answer depends on your section, your budget, and how long you plan to stay. If you want a second opinion on whether your section can take what you’re imagining, request a free feasibility report and we’ll come and walk it with you.


    The House Extension Process in Auckland: Five Stages, Step by Step

    Most Auckland extensions run the same path, whatever the size. Feasibility, design, consent, build, then your Code Compliance Certificate — five stages, and skipping any of them is how projects go sideways. Here’s how each one runs in practice.

    Stage 1 — Define your needs and your budget

    Before architects and drawings, get clear on two things: what rooms you actually need, and what you can genuinely spend. They aren’t the same conversation. Set the budget first, then design to it — designing first and trying to value-engineer back into budget is how projects unravel in week four. Be honest about the contingency, not optimistic.

    Stage 2 — Concept design and feasibility

    A good designer or architect translates your brief into a buildable shape, then checks it against the property file, the zone, and any overlays. For consent-related extensions, Superior Renovations works with Sonder Architecture, whose design office sits inside our Wairau Valley showroom at 16B Link Drive — so the architect, the renovation consultant, and the material samples are all under one roof. Here’s how a typical consent-related enquiry runs:

    • Your enquiry comes in to Superior Renovations.
    • We connect you directly with Sonder’s head architect — copied in from the start.
    • The architect runs a feasibility study and requests your property file from Auckland Council.
    • Once the file’s in, the architect arranges a site visit to walk your options in person.
    • If it’s a go, you get concept drawings plus a fixed quote for the full architectural drawings needed for council submission.
    • If you accept, Sonder produces the drawings; our renovation consultant then reviews the plans, confirms scope on site, and produces a fixed-price construction proposal.

    Stage 3 — Lodge consents with Auckland Council

    Full plans get produced — materials, finishes, layouts, structural specs, energy compliance — and the consent applications get prepared. Most attached extensions in Auckland need a Building Consent; a Resource Consent gets triggered when the design pushes site coverage, height-to-boundary, or setback rules — though the 2026 reforms are stripping that resource consent layer back (more on that below). The statutory clock on a Building Consent is 20 working days, but it pauses every time the council issues a Request for Information, so a clean application with no RFIs runs 4–8 weeks total.

    Stage 4 — Build

    Once consent’s granted and the contract’s signed, the build begins. Your renovation company manages the site, sequences subcontractors, and runs quality control. A single-storey extension usually runs in this order:

    1. Site set-up and demolition — week 1
    2. Foundations and slab — weeks 2–3
    3. Framing, roof, and exterior cladding — weeks 3–6
    4. Window installation and weathertight close-in — weeks 5–6
    5. Plumbing, electrical, insulation, GIB — weeks 6–9
    6. Internal lining, painting, flooring, fit-out — weeks 9–11
    7. Final fit, clean, snag list, council sign-off — week 12

    Council inspectors visit at set points — typically foundations pre-pour, framing, pre-line, drainage, and final. Fail one and it’s remediated and re-inspected before the next stage proceeds.

    Stage 5 — Code Compliance Certificate

    The CCC from Auckland Council is the official sign-off that the work meets the consent and the Building Code. It’s not optional — and it’s the document your conveyancer and any future buyer will ask for. The application gets lodged once all inspections pass; council has 20 working days to issue.

    Important note: This sequence is typical, not guaranteed. Timelines and inspection requirements vary by project size, complexity, and Auckland Council’s current workload. Your project manager will give you a project-specific schedule before work starts.


    Do You Need an Architect for a House Extension?

    Short answer: not always — but for most attached extensions in Auckland, you need someone doing architectural design, and on anything structural that person needs the right qualifications behind them. The question isn’t really “architect yes or no” — it’s whether your project needs a registered architect, an architectural designer, or a design-and-build team that brings the design in-house.

    What an architect actually does on an extension

    A good architect or architectural designer turns your brief into a workable design, sorts the consent documentation, and makes sure the new work sits right with the existing house rather than bolting onto it. On an extension specifically, the value is in the joins — matching the roofline, getting window proportions right, and detailing the weathertight junction where old meets new. That junction is where leaky-building problems start when it’s done badly.

    Architect, architectural designer, or design-and-build?

    There are three routes Auckland homeowners take. Engage a registered architect independently and tender the build separately — the right call for highly custom or heritage-sensitive work. Use a licensed architectural designer for straightforward extensions where you don’t need a full architectural service. Or use a design-and-build company where design, consent, and construction sit under one contract — usually faster, with no coordination gap between the person who drew it and the team who builds it. For consent and structural work we run this through Sonder Architecture, so the design and the build never lose each other in translation.

    “People ask whether they need an architect like it’s a yes-or-no. What they actually need is the right level of design for the job. A simple bedroom-and-bathroom extension on a standard section doesn’t need a full architectural service — it needs a designer who knows the consent rules cold. A second-storey addition on a character villa in Mt Eden does need an architect, because the heritage detailing and the structural design are where it lives or dies. The mistake is paying for the wrong level — either way.”
    — Dorothy Li, Design Manager, Superior Renovations

    💡 Quick tip: Ask whoever designs your extension to show you the weathertight detailing at the junction between the existing house and the new work — in the drawings, not just in words. The teams who can’t show it on paper are the ones whose extensions leak in five years.


    House Extension Rules in NZ: Consent, Zones and the 2026 Changes

    This is the part most homeowners get wrong, and it’s the part that costs the most when you do. Most attached house extensions in Auckland require a Building Consent, and getting it wrong — assuming an exemption applies when it doesn’t — costs more than getting it right.

    What needs consent, and what triggers Resource Consent

    A Building Consent is non-negotiable for almost any attached extension that touches the structure, the roofline, or an exterior wall. On top of that, a Resource Consent gets triggered when the design pushes the Unitary Plan rules — site coverage, height-to-boundary, or setbacks — or where a heritage or special character overlay applies. Per MBIE’s Building Performance guidance, building without a required consent carries fines of up to $200,000 under the Building Act 2004, plus daily penalties — and it surfaces on the LIM at resale.

    The 2026 reforms: Resource Consent is becoming the exception

    For years Auckland extensions sat in an awkward middle — Building Consent required, Resource Consent often required on top. Under the 2026 reform package, many extensions that previously triggered Resource Consent no longer will, provided they comply with the new standardised national zone rules. Stripping out that layer can remove months and a meaningful chunk of planning cost for homeowners on standard sections. Two other shifts matter: nationally standardised zones make the base rules more predictable across the country (Auckland’s overlays and special character protections still apply), and councils can no longer decline a project on amenity grounds alone — a neighbour disliking the look doesn’t count, only material impacts like shading, noise, or flood risk.

    Building Consent still applies to most attached work

    The reforms don’t remove Building Consent for attached extensions — that part stays. What changes is a simpler application process, with low-risk pathways for straightforward extensions and a tighter focus on what councils can and can’t decline. For a deeper read on these changes, see our ArchiPro editorial on the 2026 consent reforms, co-authored with our team and Sonder Architecture.

    💡 Quick tip: Don’t assume a Schedule 1 exemption applies to your extension. The exemptions are narrow, and the 70m² standalone exemption below is for detached dwellings only — not for adding to your existing house.


    The 15 January 2026 Rule Change: The 70m² Detached Dwelling Exemption

    This is the regulatory shift most Auckland homeowners considering an extension haven’t fully absorbed — and it changes whether you extend the main house or build a separate dwelling on the same section.

    Since 15 January 2026, new provisions under the Building and Construction (Small Stand-alone Dwellings) Amendment Act 2025 let a self-contained detached dwelling of up to 70m² be built without a Building Consent. In most cases it skips Resource Consent too, under the National Environmental Standards for Detached Minor Residential Units (NES-DMRU) that came into force the same day.

    What qualifies under the exemption

    Per MBIE / Building Performance and Schedule 1A of the Building Act 2004, the dwelling must meet specific conditions:

    • Net floor area: 70m² or less, including any integrated garage
    • Single storey: no mezzanine, no loft — even a small open mezzanine disqualifies it
    • Maximum height: 4 metres, with floor level no more than 1m above ground
    • Setback: generally at least 2m from boundaries and other structures (a council district plan can be more lenient, never stricter)
    • Construction: light timber or steel frame, simple design fully meeting the Building Code
    • Who builds it: designed and supervised by Licensed Building Practitioners — it’s restricted building work
    • Council notification: a Project Information Memorandum (PIM) before you start, and notification again on completion

    What this means for your extension decision

    The question shifts. It used to be: do we extend the back of the house, or build a granny flat with full consent? Now it’s: do we extend the main house, or build a 70m² standalone dwelling that skips the consent process? The quality rules haven’t changed — these dwellings still meet the Building Code and are built by qualified trades. What’s changed is the consent overhead. Central government estimates the exemption saves around $5,650 in direct consent costs and roughly 14 weeks off a typical timeline for qualifying builds.

    “The exemption is a real shift for clients with decent section size to play with. If you’re in Albany or Flat Bush with room out the back, a 70m² detached dwelling can do what a $250,000 attached extension used to — and you skip the consent queue. The clients it doesn’t suit are the ones on tight inner-suburb sections in Grey Lynn or Mt Eden where you can’t physically fit it within the 2m setback, or where the local overlay still controls form.”
    — Eunice Qin, Designer, Superior Renovations

    What it doesn’t change

    The exemption doesn’t remove Development Contributions — the council’s charge for infrastructure load — which still apply on most Auckland sections for an additional dwelling, and are flagged at PIM stage. It also doesn’t apply where your section already carries restrictions via covenants, body corporate rules, or specific overlays. And it’s strictly for detached, single-storey, self-contained dwellings — not for adding to your existing house.


    What a House Extension Costs in Auckland (2026)

    Costs vary with finish level, site complexity, and whether the extension involves wet areas. These ranges reflect 2026 Auckland regional pricing, aligned with our live cost guidance. For a personalised figure, use the calculator; for the full breakdown of what drives the number, we’ve got a dedicated guide.

    Extension Size Cost per m² (Single-Storey) Indicative Total Second-Storey Uplift Contingency
    30m² (small) $2,500–$4,500 $75,000–$135,000 +20–30% 10–15%
    50m² (medium) $2,500–$5,000 $125,000–$250,000 +15–25% 10–15%
    80m² (large) $2,500–$5,500 $200,000–$440,000 +10–20% 10–15%
    100m²+ (very large) $2,500–$5,500 $250,000–$550,000+ +10–20% 10–15%

    On top of the build, factor in architectural fees ($8,000–$30,000 through to consent documentation), Auckland Council consent fees ($3,000–$8,000 for a residential extension, plus $1,000–$5,000+ if Resource Consent applies), structural engineering where needed ($2,000–$8,000), and Development Contributions, which vary by suburb. Second-storey additions run higher per m² — roughly $4,500–$6,000+/m² — because of structural reinforcement, stairs, and usually re-roofing the whole house. For the full cost picture, see our Auckland house extension cost breakdown for 2026, or get a personalised figure from the house extension cost calculator.

    💡 Quick tip: Run the calculator before you book an architect. It tells you whether the brief in your head is within budget, or whether you need to trim the scope before you spend on design fees.

    These are estimated ranges. Your actual figures depend on your scope, site conditions, finish choices, and builder. Always get a fixed-price quote against a fully documented scope before committing.


    Adding an Extension to Your House: Design Ideas That Work

    The best extensions don’t shout. Match the existing house — similar cladding, matching roof pitch, similar window proportions — and you stop noticing where the old work ends and the new begins. This matters most in character suburbs like Epsom, Parnell, and Devonport, where the streetscape has a clear personality and the council looks closely at exterior changes.

    Make the new work feel original

    Weatherboards on a villa, brick on a 1970s home, a roofline that carries through rather than clashing. For flow, bi-fold or sliding doors onto a new deck give you the indoor-outdoor connection Auckland summers are made for. Natural light is the thing people underestimate — skylights, clerestory windows, or oversized glazing on the north face change how a new room actually feels to live in.

    “The extensions that still feel right ten years later are the ones where the new work doesn’t announce itself. Match the cladding, match the roofline, get the window proportions sitting with the existing house, and the join disappears. The brief I push back on is the one that wants the addition to look completely different from the original — it dates fast, and it kills the resale story.”
    — Alison Yu, Designer, Superior Renovations

    Out, or up?

    If extending sideways isn’t an option on a tight Mt Eden or Grey Lynn section, going up costs more upfront but makes long-term sense. A second-storey master suite — bedroom, ensuite, walk-in wardrobe — adds space without sacrificing garden, though it usually means re-roofing and moving out for the disruptive phase. For the numbers on the vertical option, see our guide on the cost of adding a second storey in NZ.


    Common Auckland Extension Mistakes to Avoid

    Skipping the feasibility study

    Paying for full architectural drawings before you know whether your site can take the brief is the most common way money gets wasted. A feasibility study costs a few hundred dollars and tells you what the council will and won’t permit, what geotech will require, and the rough cost envelope. Skipping it can cost tens of thousands.

    Underestimating the consent timeline

    Building Consent processing is statutorily 20 working days, but the clock pauses on any RFI, so 4–8 weeks total is realistic for a clean application. Resource Consent, where it applies, adds more. Build that into your schedule from the start and you avoid the “we wanted to be in for Christmas” problem.

    Rushing into a contract you haven’t read

    Read every contract before you sign — scope, payment schedule, the variations clause, dispute resolution, and the practical completion definition. A clearly written fixed-price contract protects both parties. A vague one is how disputes start.

    Skipping the efficiency upgrades while the walls are open

    An extension is the right moment to look at insulation and double glazing. New work has to meet the current H1 insulation standards, but retrofitting the existing house at the same time — while the tradies are already on site — costs less than coming back later. EECA publishes good guidance on what’s worth doing.

    💡 Quick tip: If your home was built before 2008 and the insulation hasn’t been touched, ask your builder to quote upgrading the existing-house insulation as a separate line item during the extension build. You’ll pay less labour while they’re already there.


    Typical Auckland Extension Scenarios

    The shape of an extension depends on the suburb, the section, and the existing house as much as the budget. Three patterns we see regularly.

    The character-home rear extension (Mt Eden / Grey Lynn / Ponsonby)

    A villa or bungalow with a tiny original kitchen at the back and a garden the house barely connects to. The extension opens the rear — combined kitchen-dining-living, bi-fold doors onto a deck, the original front rooms kept as bedrooms and a formal lounge. Typical scope: a 35–55m² addition, matched weatherboard, pitched roof to match, new kitchen and laundry, one or two non-loadbearing walls removed. Indicative range: $135,000–$220,000 all-in, 12–18 months from first conversation to CCC once heritage overlays are in play.

    The detached studio or home office (Hobsonville / Albany / Flat Bush)

    A growing family on a newer section needs a workspace, teenager retreat, or family accommodation slightly separate from the main house. Pre-2026 this meant a full consent process. Now a 70m² detached dwelling can qualify for the exemption — single storey, 4m max height, 2m setbacks, LBP-built — which is genuinely faster and cheaper. Indicative range: $150,000–$280,000 for a 50–70m² self-contained dwelling, depending on finish and whether on-site services need extending.

    The second-storey master suite (Glendowie / Meadowbank / Takapuna)

    A solid 1970s or 1980s home on a sloping section where extending sideways isn’t practical. Going up adds a master suite without losing garden. Typical scope: a 40–60m² upper floor, structural reinforcement of the existing ground floor, a new internal staircase, roof modifications, often a re-roof of the whole house. Indicative range: $250,000–$450,000+. The catch is living through the roof-off phase — most clients move out for 4–6 weeks of the critical period.

    These aren’t unusual situations — they’re typical. The projects that go well are the ones where the owners ran a feasibility check before paying for design, set the budget honestly, and stayed flexible when the unexpected turned up. That’s the whole job of our Auckland design-and-build extensions team — to keep those three things on track from the first site visit to the CCC.


    The Bottom Line on Planning an Auckland Extension in 2026

    A house extension is a significant project — in money, time, and disruption — and it rewards the homeowners who do the work upfront. Pull the property file. Run the feasibility check. Set the budget honestly. Get the right level of design for the job. Sign a fixed-price contract you’ve actually read.

    The 2026 regulatory environment is the friendliest it’s been for Auckland homeowners wanting more space. The 70m² standalone exemption opens a door that wasn’t there in 2023. The broader consent reforms strip months and real money off many attached extensions. If you’ve been putting it off, the conditions for moving on it have rarely been better.

    Book your free in-home consultation with Superior Renovations
    Try our Auckland house extension cost calculator
    Request a free feasibility report for your project


    Frequently Asked Questions: Planning a House Extension in Auckland

    What's the process for a house extension in Auckland?

    An Auckland house extension runs through five stages: feasibility (property file, zone check, site visit), design (concept drawings and full architectural plans), consent (Building Consent lodged with Auckland Council, Resource Consent if the design triggers it), build (foundations through to fit-out, with council inspections at set points), and finally the Code Compliance Certificate. Most projects take 6–12 months start to finish. The first step is always pulling your property file and confirming what your Unitary Plan zone allows before you spend a cent on design.

    Do I need an architect for a house extension?

    Not always. A straightforward single-storey extension on a standard section often needs a licensed architectural designer rather than a full registered architect — someone who knows the consent rules and can detail the weathertight junction between old and new. A second-storey addition or a heritage-overlay villa does need an architect, because the structural and heritage detailing is where the project lives or dies. A design-and-build team brings the design in-house so consent, drawings, and construction stay coordinated. The key is matching the level of design to the complexity of the job.

    Do I need a building consent for a house extension in Auckland?

    Yes — almost all attached house extensions in Auckland require a Building Consent from Auckland Council, and many also need a Resource Consent depending on height-to-boundary, site coverage, and Unitary Plan zone rules. Consent fees typically run $3,000–$8,000 for a residential extension, with processing of 4–8 weeks for a clean application. The 2026 reforms are removing the resource consent layer for many standard extensions, but Building Consent itself stays. Building without a required consent carries fines up to $200,000 under the Building Act 2004 and surfaces on the LIM at resale.

    How much does a house extension cost in Auckland in 2026?

    Single-storey extensions in Auckland cost $2,000–$5,500 per m² in 2026, depending on size, finish, and site complexity — so a 50m² addition typically lands between $125,000 and $250,000 all-in, plus architectural fees ($8,000–$30,000), consent fees ($3,000–$8,000), and a 10–15% contingency. Second-storey additions run higher per m², roughly $4,500–$6,000+, because of structural work and re-roofing. Wet areas like a new kitchen or bathroom push you toward the upper end. Get a personalised figure from our house extension cost calculator before committing.

    How long does a house extension take from start to finish?

    A typical Auckland extension runs 6–12 months from first conversation to Code Compliance Certificate. Roughly: feasibility and design 2–4 months, consent processing 4–8 weeks, construction 3–6 months depending on size, then the CCC. Heritage suburbs and complex sites push the design and consent phases longer. Second-storey additions and projects with significant structural change take longer again. Your renovation company gives you a project-specific timeline before work starts, with milestone dates for inspections, payments, and handover.

    Can I build a granny flat or sleepout without consent in 2026?

    Since 15 January 2026, a self-contained detached dwelling up to 70m² can be built without a Building Consent under the Building and Construction (Small Stand-alone Dwellings) Amendment Act 2025. Conditions apply: single storey, maximum 4m height, generally a 2m setback from boundaries and other structures, light-frame construction, and built or supervised by Licensed Building Practitioners, with a Project Information Memorandum (PIM) from council before you start. Development Contributions still apply. This is a separate pathway from a traditional attached extension — it's for detached secondary dwellings only, not for adding to your existing house.

    What's the difference between extending outwards and adding a second storey?

    Second-storey additions cost 10–30% more per m² than single-storey ground extensions because of structural reinforcement, stairs, and roof modifications — and they usually require re-roofing the whole house. Single-storey extensions are cheaper and faster but use up section. The right choice depends on your section size, the existing house structure, suburb rules, and how you want to use the space. On a tight inner-suburb section in Grey Lynn or Mt Eden, going up is often the only option. On a larger section in Albany or Howick, going out is usually cheaper.

    What's a feasibility study and do I really need one?

    A feasibility study is a pre-design check that confirms whether your extension idea is buildable, consentable, and within budget — before you commit to full architectural drawings. It involves pulling your Auckland Council property file, checking Unitary Plan zone rules and overlays, walking the site, flagging geotech or services issues, and producing a rough cost envelope. It costs a few hundred dollars and routinely saves clients tens of thousands by catching problems before design fees get spent. We include this in our extension consultation at no charge.

    Can I live in my house during an extension build?

    For most attached extensions to the rear of the house, yes — though you'll be living through dust, noise, and reduced access during certain phases. For second-storey additions, most clients move out for 4–6 weeks during the roof-off period and structural work. For full ground-floor extensions affecting the kitchen or main bathroom, some clients move out for the duration while others install a temporary kitchen. Your project manager walks through what's realistic for your specific project and family situation before work starts.

    What happens if my section has a heritage or special character overlay?

    Heritage and special character overlays in suburbs like Mt Eden, Grey Lynn, Ponsonby, and Devonport add design constraints — exterior materials, roof form, window proportions, sometimes scale and setback rules. They don't prevent extensions, but they shape what's permitted, and the work needs to be in keeping with the original house and the streetscape. Resource Consent is more often triggered, and design fees tend to be higher because of the matching detail required. Working with an architect experienced in your specific overlay is essential — Sonder Architecture handles heritage work for our extension clients.


    Further Resources for your Auckland house extension

    1. Featured projects and Client stories to see specifications on some of the projects.
    2. Real client stories from Auckland

    Need more information?

    Take advantage of our FREE Complete Home Renovation Guide (48 pages), whether you’re already renovating or in the process of deciding to renovate, it’s not an easy process, this guide which includes a free 100+ point check list – will help you avoid costly mistakes.

    Download Free Renovation Guide (PDF)


    18 months 0 percent interest long term finance badge

    Have you been putting off getting renovations done?

    We have partnered with Q Mastercard ® to provide you an 18 Month Interest-Free Payment Option, you can enjoy your new home now and stress less.

    Learn More about Interest-Free Payment Options*

    *Lending criteria, fees, terms and conditions apply. Mastercard is a registered trademark and the circles design is a trademark of Mastercard International Incorporated.


    Still have questions unanswered?

    Book a no-obligation consultation with the team at Superior Renovations, we’d love to meet you to discuss your renovation ideas!

      Services

      Home RenovationKitchen RenovationBathroom RenovationOutdoor RenovationHouse ExtensionCommercialDesign ServicesOther

      By submitting this form, you agree to receive communications from us via email or text regarding our services, you can unsubscribe at any time.

      This site is protected by reCAPTCHA and the Google

      Privacy Policy and Terms of Service apply.


      References

      1. Auckland Council — Property reports and zoning (property file and LIM)
      2. Auckland Council — Auckland Unitary Plan (Operative in part)
      3. MBIE Building Performance — Check if you need consents
      4. MBIE Building Performance — Granny flats exemption: guidance and resources
      5. EECA — Energy efficiency, insulation and heating guidance
      house extension cost
      House Extensions

      House Extension Cost Calculator NZ — Estimate in 60 Seconds | Superior Renovations

      House Extension Cost Calculator NZ — Your Estimate in 60 Seconds

      Quick answer: Get a personalised house extension cost estimate emailed straight to your inbox in under 60 seconds. No phone calls, no sales pitches, no waiting on a builder’s diary. Tell us your project basics, and we’ll send back a project-specific number based on real 2026 Auckland pricing.

      You’re thinking about extending. You’ve done the basics — pulled up online ranges, looked at a few builder websites, probably had a mate at a barbecue throw out a figure that may or may not be from this decade. What you actually need is a number that fits your project. Your house. Your section. Your space.

      That’s what this calculator gives you.


      Get Your Personalised Estimate

      Sixty seconds, ten quick questions, and a tailored estimate hits your inbox. Free. No follow-up sales call.

      Open House Extension Cost Calculator →


      Why a Calculator Beats a Generic “Per m²” Estimate

      Most online sources will tell you a house extension in Auckland costs $2,000–$5,500 per square metre. That’s accurate. It’s also useless for budget planning.

      The range exists because extensions vary wildly. A 30m² bedroom addition on a flat section in Flat Bush sits at the bottom end. A 50m² addition with a new kitchen and bathroom on a sloping site in Titirangi sits near the top. Both are “house extensions in Auckland.” Both are technically inside that $2,000–$5,500 spread. Both cost vastly different amounts.

      The per-m² range alone doesn’t tell you which one you are.

      That’s where the calculator earns its keep. Instead of giving you a number that covers everyone, it asks the specific questions that move your number — size, type of rooms, whether you’re going up or out, site complexity — and gives you a tailored estimate based on what those choices actually cost in Auckland right now.

      It takes about a minute. Results land in your inbox.


      What Goes Into the Estimate

      The calculator works through the same variables we use when we’re pricing a real project. None of it’s guesswork — every input maps to a cost driver we’ve seen on completed Superior Renovations jobs.

      Built from data across hundreds of Auckland renovations completed since 2018 — including ground-floor extensions, second-storey additions, and garage conversions.

      Size of the extension. Square metres is the starting point — but it’s not linear. A 30m² extension often costs more per square metre than a 60m² one because fixed costs (consents, design, engineering) don’t scale down. The calculator factors that in instead of just multiplying area by a flat rate.

      Type of space. A dry room — bedroom, living area, study — costs significantly less than a kitchen or bathroom. Wet areas need plumbing, waterproofing, ventilation, and higher-spec fixtures. Adding a bathroom to an extension typically adds $25,000–$45,000 on top of the dry-room build cost.

      Single or double storey. Going up is more expensive than going out — usually 40–60% more per square metre once you factor in structural reinforcement, scaffolding, and the work needed to make the existing house carry a new floor.

      Site conditions. Flat section or sloped? Easy access for trucks and trades, or a tight build? Volcanic clay, reactive soil, or a straightforward concrete slab job? Foundations alone can swing the budget by $30,000+.

      Finish level. Standard weatherboard and vinyl plank, or cedar cladding and engineered timber? The choice between budget and premium materials makes a five-figure difference on most extensions.

      You don’t need to know exact specs going in. The calculator gives you a sensible default for each input — your job is to tell it what you’re roughly planning, and the estimate adjusts to suit.

      💡 Quick tip: If you’re not sure about an input, pick the option closest to what you’re imagining. You can always run it again with different inputs to see how the number shifts — it takes a minute.


      See Your Personalised Number

      Inputs take a minute. The estimate hits your inbox right after.

      Open House Extension Cost Calculator →


      What You Get in Your Inbox

      A couple of minutes after you submit, you’ll receive an email with a project-specific estimate. Here’s what’s in it:

      A low-to-high range based on the inputs you provided. Not a single point estimate — because no honest builder gives you one before a site visit. The range shows you where your project realistically sits.

      A breakdown of the main cost categories — construction, finishes, professional fees, consents — so you can see where the money goes and where the biggest swings are.

      Notes on what the estimate doesn’t include. Typically GST, resource consent (if triggered), and any unforeseen ground or structural issues that only become visible once construction starts. We’d rather flag the limits than pretend they don’t exist.

      It’s not a quote. Quotes need site visits, drawings, and detailed scope. The estimate is the layer before that — the number that tells you whether your project sits in a budget you can work with, or whether you need to rescope before going further.

      If the number looks workable, the next step is usually a feasibility consultation, where we walk through your specific property, what you’re trying to achieve, and what’s realistic on your section. That’s a separate conversation — and one you can book after you’ve seen the estimate, not before.


      The Three Variables That Move Your Number the Most

      If you’ve used the calculator and want to understand what drove your result, these three factors do most of the heavy lifting.

      1. Foundations and structural work — 20–40% of the total. The single biggest swing factor on most Auckland extensions. A flat-section ground-floor extension on basic slab foundations is dramatically cheaper than a second-storey addition needing steel beams, reinforced foundations, and scaffolding. If you’re on a steep site in Titirangi, Mt Eden, or Remuera, expect this category to push higher because of piling and retaining work.

      2. Wet areas — kitchen and bathroom additions. Adding either to your extension materially increases the per-m² rate. Bathrooms add $25,000–$45,000. Kitchens add $28,000–$50,000. If your goal is purely more living space, a bedroom or open-plan living extension is going to come in considerably lower than the same square metres with a kitchen or bathroom inside it.

      3. Labour and trade coordination — 40–50% of the total. Auckland trade rates currently sit at $90–$120/hour depending on the trade. A 50m² extension typically needs 800–1,200 trade hours. The reason fixed-price builders quote higher than charge-up builders isn’t margin — it’s the risk premium for guaranteeing the number. The flip side: charge-up budgets often blow by 15–20% once schedule slip and coordination losses kick in.

      Knowing which of these three is the biggest factor on your project tells you where to focus when you’re trying to bring the number down — or where to brace yourself if it has to stay where it is.


      Get Your Free Estimate Now

      Sixty seconds. Tailored to your project. Sent to your inbox. No sales call.

      Open House Extension Cost Calculator →


      Frequently Asked Questions

      Is the house extension cost calculator free?

      Yes. No charge, no obligation, no follow-up sales calls. Built by Superior Renovations to give Auckland homeowners a realistic starting estimate without having to chase a builder for one.

      How accurate is the estimate?

      The calculator uses 2026 Auckland market pricing and reflects real Superior Renovations project data. It's accurate enough for budget planning and feasibility — but it isn't a quote. Final pricing depends on detailed scope, site visit, and the specifications you settle on during design.

      What's the average cost to extend a house per square metre in Auckland?

      Single-storey ground-floor extensions in Auckland sit at $2,000–$5,500 per square metre. Basic dry-room additions are at the lower end. Wet-area extensions and complex sites push toward the top. Second-storey additions add another 40–60% on top of the ground-floor rate.

      Does a house extension require building consent in Auckland?

      Yes — almost every house extension triggers building consent because it changes the building footprint and usually involves structural work. Auckland Council consent fees typically run $3,000–$8,000 for residential extensions, with resource consent adding more if you breach boundary or height-to-boundary rules.

      How much more does a second-storey extension cost than a single-storey?

      Roughly 40–60% more per square metre. Second-storey additions need structural reinforcement of the existing house, steel beams, scaffolding, and temporary roof removal — none of which apply to a ground-floor extension.

      Does the estimate include GST?

      The estimate is GST-exclusive unless otherwise specified. You'll need to add GST when comparing the estimate to other builder quotes. Architect fees, structural engineering, and council consent fees are also typically excluded from the initial estimate — they get factored in during the detailed quoting stage.

      How long does it take to get the estimate?

      Under 60 seconds to complete the form. The estimate lands in your inbox within a couple of minutes.

      Can I get a fixed quote without using the calculator first?

      You can — but the calculator's the cheapest way to gauge whether your project fits your budget before committing time to a full design and quoting process. Fixed quotes need scope, drawings, and a site visit, which adds weeks before you see a number. The calculator gives you a starting figure today.

      Can I use the calculator estimate for my mortgage or finance application?

      The calculator gives you a realistic project range based on real Auckland pricing, which is useful for early budget conversations with your bank or broker. But banks usually require a signed fixed-price contract or a registered valuer's report before they'll release renovation finance against a property. Treat the estimate as the figure that tells you whether the conversation is worth having — then book a feasibility consultation if you need a quotable number.

      What happens after I submit — will someone call me?

      No sales call. The estimate lands in your inbox within a couple of minutes and that's it. If you want to take the next step, you book a feasibility consultation through the site — we don't chase you with phone calls or follow-up emails. Plenty of Auckland homeowners use the calculator to sense-check budget without ever speaking to us, and that's the point.


      Please note: Cost factors vary project to project, and the calculator’s accuracy depends on the inputs you provide. The estimate is a planning tool, not a quote. Rates and material costs shift with the market, and final project pricing requires a site visit and detailed scope. While information is considered current at the date of publication, Superior Renovations isn’t liable for any decisions made solely on the calculator output.

      DSC03694 - Superior Renovations
      House Extensions

      House Extension Cost NZ – Auckland Prices Per m² (2026)

      House Extension Cost in NZ: What Auckland Homeowners Actually Pay

      Quick answer: A single-storey house extension in Auckland costs between $2,000 and $5,500 per square metre — so a typical 50m² ground-floor addition runs $100,000 to $275,000 depending on materials, site conditions, and whether you’re adding wet areas like kitchens or bathrooms.

      Auckland’s property market doesn’t leave much room for half-measures. If you’re in a three-bedroom bungalow in Grey Lynn that’s bursting at the seams, or a 1970s brick-and-tile in Mt Roskill where the kids are sharing rooms, the question isn’t whether you need more space — it’s whether extending makes more sense than moving.

      Try the free house extension cost calculator

      For most Auckland homeowners, it does. A ground-floor extension starts from around $80,000, while a second-storey addition begins at roughly $150,000, according to our own project data at Superior Renovations. Those figures shift depending on what you’re building, where you’re building it, and what the ground looks like when your builder starts digging. (For a full overview of what we do and how the process works, see how our Auckland house extensions service works.)

      This guide breaks down exactly where the money goes. We’ll cover per-square-metre rates, the five biggest cost drivers, how extending compares financially to buying a bigger home in Auckland, and the specific choices that separate a $2,000/m² extension from a $5,500/m² one. Every figure is grounded in Auckland pricing and NZ regulatory requirements — not generic internet estimates.

      We’ve been doing this since 2017 from our showroom at 16B Link Drive, Wairau Valley. We work with Sonder Architecture on the design and consent side, and our design team — led by Design Manager Dorothy Li — handles the interior vision for every extension project. The numbers you’ll read here come from the projects we’ve actually built.

      House extension project in Auckland by Superior Renovations showing open-plan living area


      What Does a House Extension Cost Per Square Metre in Auckland?

      The per-m² rate is where every extension budget starts. But the range is wide — and the reasons for that range matter more than the numbers themselves.

      For a standard single-storey extension in Auckland, expect $2,000 to $5,500 per square metre. A basic bedroom or living area addition without plumbing sits at the lower end ($2,000–$3,500/m²). Add a kitchen or bathroom and you’ll push into the $3,500–$5,000/m² range because of pipework, waterproofing, and higher-specification fixtures. Go up instead of out — a second-storey addition — and you’re looking at $4,500 to $6,000+ per m² once structural reinforcement is factored in.

      💡 Quick tip: Our house extension cost calculator gives you a personalised estimate in under 60 seconds. It’s free, and results go straight to your inbox.

      Per-m² Costs by Extension Type

      Extension Type Cost Per m² (NZD) What’s Included
      Basic ground-floor (bedroom/living) $2,000–$3,500 Standard framing, weatherboard, insulation, GIB, basic electrical
      Mid-range ground-floor (kitchen/bathroom) $3,500–$5,000 Plumbing, waterproofing, mid-range fixtures, cabinetry, tiling
      Second-storey addition $4,500–$6,000+ Structural engineering, steel beams, reinforced foundations, scaffolding
      Deck/carport enclosure $1,500–$2,500 Existing foundations reused, walls and roof added, basic fitout

      Why Smaller Extensions Often Cost More Per Square Metre

      Here’s the bit that catches people off guard. A 30m² extension often costs more per square metre than a 60m² one. The reason is fixed costs. Auckland Council consent fees, architect drawings, structural engineering, and site establishment — none of those scale down just because your extension is smaller. Those overheads get spread across fewer square metres, pushing the per-m² rate up.

      We had a client in Epsom who added a 25m² bedroom. The build itself was straightforward, but consent fees, engineering, and professional fees still totalled around $18,000. Spread across 25m², that’s $720/m² before a single nail gets driven. On a 60m² extension, the same fixed costs work out to roughly $300/m².

      “The biggest misconception with extensions is that halving the size halves the cost. It doesn’t. The consent, engineering, and design work is almost the same whether you’re adding 20m² or 50m² — so if you’re already going through the process, make sure the extra space is genuinely worth the investment.”
      — Dorothy Li, Design Manager, Superior Renovations


      Five Cost Drivers That Shape Your Auckland Extension Budget

      The per-m² range is wide because no two Auckland sections are the same, no two homes are the same age, and no two homeowners want the same thing. These five factors explain where your project falls within that $2,000–$5,500 spread.

      1. Site Conditions and Foundations

      This is the one that blindsides people. Site preparation and foundation work can add $10,000 to $75,000 to your extension budget, depending on what’s under the ground and how steep your section is.

      A flat section in Flat Bush or Papakura might need basic concrete slab foundations at around $200/m². But a sloped site in Titirangi or the volcanic clay of Mt Eden? That could require piling at $1,000/m² or more, plus retaining walls that run $5,000–$25,000 depending on height and length.

      We’ve seen it plenty of times — a client in Remuera budgets $150,000 for a 40m² extension, then the geotechnical report comes back showing reactive clay that needs deep-driven piles. Suddenly $20,000 of that budget goes into the ground before framing even starts.

      💡 Quick tip: Get a geotechnical report ($1,000–$2,000) before you commit to any design. It’s the cheapest insurance against a $30,000 surprise mid-build. Your architect needs it anyway for consent drawings.

      2. Materials and Finish Level

      The gap between budget and premium materials is substantial. Weatherboard cladding runs around $150/m²; cedar can hit $300/m² or more. Standard double-glazing sits at $400–$600/m², while thermally broken aluminium joinery pushes past $800/m². Inside, vinyl plank flooring at $50/m² looks remarkably close to engineered timber at $150/m² — but the cost difference on a 40m² extension is $4,000.

      Quality insulation isn’t the place to cut. According to EECA, a well-insulated home saves around $340 a year off the power bill. In Auckland’s damp winters, proper insulation and double-glazing aren’t luxury items — they’re baseline, and the energy-efficiency requirements under clause H1 of the NZ Building Code set the minimum thermal performance any new building work has to meet.

      3. Council Consents and Compliance

      Almost all house extensions require a building consent from Auckland Council. Fees typically run $3,000–$8,000 for a residential extension, with resource consent adding another $5,000–$15,000 if you’re pushing height-to-boundary rules or building in a heritage overlay zone like Parnell or Devonport.

      The consent process itself takes 4–8 weeks for processing, and inspections during construction add $500–$1,500. What most homeowners underestimate is the time cost — consent delays can stall your project by months, and every month of delay is money spent on temporary accommodation or living through a half-finished build.

      Our partners at Sonder Architecture prepare consent-ready drawings that meet Auckland Council requirements from the start, which cuts the risk of rejection and resubmission. For more detail on what requires consent and what doesn’t, read our building consent guide for Auckland renovations.

      💡 Quick tip: Check your property’s zoning under Auckland’s Unitary Plan before sketching anything. Some zones have recession plane and height-to-boundary rules that can kill a second-storey design before it starts.

      4. Professional Fees: Architect and Structural Engineer

      Architect fees for a straightforward extension typically run $5,000–$15,000, depending on scope and complexity. Structural engineering — required for any second-storey addition or project involving load-bearing changes — adds another $1,000–$5,000.

      That might feel like a lot upfront. But we’ve watched poor design decisions cost homeowners far more during construction — a load-bearing wall that wasn’t identified, a roofline that doesn’t integrate with the existing structure, or a layout that creates dead space nobody uses. Good design is the difference between an extension that adds $200,000 in value and one that adds $80,000.

      5. Labour: The 40–50% Factor

      Labour accounts for 40–50% of total extension costs in Auckland. A typical project requires carpenters, electricians, plumbers, GIB fixers, painters, and sometimes specialist trades like tilers or waterproofing applicators. Trade rates in Auckland currently run $90–$120/hour depending on the trade, and a 50m² extension might need 800–1,200 trade hours.

      The real cost of labour isn’t just the hourly rate — it’s coordination. When trades aren’t sequenced properly, your electrician shows up before the framing is ready, and you’re paying for idle time. At Superior Renovations, we project-manage all trades in-house, which keeps the schedule tight and avoids the kind of delays that quietly inflate budgets by $5,000–$10,000.


      Extend or Move? How the Numbers Stack Up in Auckland

      This is the question that stops most Auckland homeowners in their tracks. You love your neighbourhood. The kids are settled in school. The commute works. But the house is too small. So: do you extend, or do you sell up and buy bigger?

      In most Auckland scenarios, extending costs significantly less than buying a larger home in the same area. And the gap isn’t close.

      The Real Cost of Moving Up in Auckland

      Auckland’s median sale price sat at $1,020,000 in April 2026, according to REINZ — and it varies enormously by suburb, which matters once you start comparing a do-up to a bigger buy (we break the suburb numbers down in our guide to the most expensive suburbs in Auckland). If you’re in a $1 million three-bedroom home in Sandringham and want a four-bedroom place in the same suburb, you’re probably looking at $1.3–$1.5 million for the purchase — plus transaction costs that add up fast.

      Moving Cost Item Estimated Range (NZD)
      Real estate agent commission (2.5–4% + GST) $30,000–$50,000
      Legal fees and conveyancing (both transactions) $3,000–$6,000
      Building report + LIM report (purchase) $800–$2,000
      Moving costs $1,500–$5,000
      Total transaction costs (selling + buying) $35,000–$63,000

      So you’re spending $35,000–$63,000 just to make the switch — before the price difference between your current home and the bigger one. That’s money you could put directly into an extension that adds the same square metres, custom-designed to exactly what your family needs.

      And buyers routinely underestimate the spend on a “bigger” home, because a new purchase rarely has everything the way you want it. In our experience most families pour another $20,000–$50,000 into making a new house feel like theirs.

      When Extending Wins (and When It Doesn’t)

      Extending makes clear financial sense when you love your location and your home’s bones are solid. A $150,000–$250,000 extension on a well-built villa in Ponsonby or Mt Eden adds living space in a suburb where the same square metres via purchase would cost $500,000+ more.

      Where extending gets harder to justify: if the existing house has major structural issues (rotten framing, failed cladding, non-compliant electrical), or if you’re already at the suburb’s price ceiling. Spending $300,000 on an extension in a suburb where the median is $900,000 risks overcapitalising. In those cases, a full-home renovation that reworks your existing layout — rather than adding to it — might deliver better value.

      “The first thing I ask any extension client is: what’s your home currently worth, and what are comparable four- or five-bedroom homes selling for in your street? If the gap is $300,000 or more, extending almost always makes financial sense. If it’s under $100,000, we need to think carefully about scope.”
      — Alison Yu, Designer, Superior Renovations

      💡 Quick tip: Before committing to either option, request a free feasibility report from Superior Renovations. We’ll assess your home’s extension potential and give you realistic numbers specific to your property.


      Where the Money Goes: The Most Expensive Parts of an Extension

      Not every dollar in your extension budget is created equal. Some line items are fixed regardless of project size, and others can swing by tens of thousands depending on a single design decision. Here’s where the biggest costs hide — and where you have the most control.

      Structural Work and Foundations: The Big One

      Foundations and structural reinforcement are the single most expensive component of most Auckland extensions, accounting for 20–40% of total cost. For a second-storey addition, the existing structure needs to carry the weight of an entire new floor — which usually means steel beams, reinforced concrete, and sometimes underpinning the existing foundations. (We go deeper on the trade-offs in our guide to the cost of adding a second-storey extension.)

      One of our projects in Titirangi — a 60m² second-storey extension on a sloped site — required $55,000 in foundation upgrades alone. The volcanic clay soil needed deep-driven piles, and the slope meant retaining walls on two sides. Working with Sonder Architecture, we optimised the design to minimise piling runs, which saved around $12,000 — but it was still the single biggest line item on the project.

      Ground-floor extensions on flat sections are dramatically cheaper. If you’re on a level site in Hobsonville or Flat Bush, a standard concrete slab foundation might only add $200/m² to the build cost. That’s a $30,000+ difference compared to a complex hillside site.

      Wet Areas: Kitchens and Bathrooms

      Adding a kitchen or bathroom to your extension pushes the per-m² cost significantly higher than a dry room like a bedroom or living area. A bathroom within an extension typically adds $25,000–$45,000 to the total cost, covering plumbing rough-in, waterproofing (a PS3 producer statement is standard practice for the waterproofing), tiling, fixtures, and ventilation.

      A kitchen addition hits the budget just as hard — cabinetry, plumbing, electrical for appliances, rangehood ducting, and benchtops can add $28,000–$50,000 depending on specification level.

      💡 Quick tip: If you’re adding a bathroom to your extension, keep it as close to existing plumbing as possible. Every metre of new pipework adds cost — and running waste lines under a concrete slab is significantly more expensive than connecting to nearby existing drains.

      The Full Budget Breakdown

      Cost Component Typical Range (NZD) % of Total Budget
      Foundations and structural work $10,000–$75,000 20–40%
      Materials and cladding $30,000–$100,000 25–35%
      Labour (all trades) $40,000–$120,000 40–50%
      Council consents and inspections $3,000–$23,000 5–12%
      Architect and engineering fees $6,000–$20,000 5–10%
      Electrical and plumbing (if wet areas included) $8,000–$35,000 5–15%

      Note: Labour percentages overlap with other categories as trade costs are embedded across all line items. Percentages show relative weight, not additive totals.


      How to Maximise Value and Keep Your Extension Budget on Track

      An extension isn’t just about adding square metres — it’s about adding the right square metres. The difference between an extension that adds $200,000 in value and one that barely recovers its cost comes down to a handful of decisions made before construction starts.

      What Actually Adds Value in Auckland’s Market

      A well-planned extension can lift a home’s value well above what it cost to build — but not every addition pulls its weight. In Auckland, the features that consistently deliver the strongest return are extra bedrooms (turning a three-bed into a four-bed is a real buyer magnet), second bathrooms, and open-plan kitchen-living spaces with indoor-outdoor flow.

      We worked on a project in Ellerslie — a 40m² extension that added a second bedroom and ensuite bathroom for $140,000. The home’s estimated value increased by roughly $200,000. The owners stayed in the suburb they loved, the kids didn’t change schools, and they ended up with a home that exactly matched what their family needed. That’s the outcome you’re aiming for.

      Energy-efficient features pull their weight at resale too. Warm, dry, low-running-cost homes are exactly what Auckland buyers look for now — good insulation, double-glazing and efficient heating read as signals the home’s been looked after, not just savings on the power bill.

      Avoiding Overcapitalisation: The 20% Rule

      Here’s where homeowners need to be honest with themselves. A rule of thumb most Auckland valuers and agents will give you: keep your extension spend under roughly 20% of the home’s current value if resale matters to you.

      For a $1 million home, that means capping your extension spend at around $200,000. Go over that in a suburb like Māngere or Ōtara — where the price ceiling might be $1.1 million regardless of what you build — and you’re unlikely to recover the full cost when you sell.

      In premium suburbs like Remuera, Herne Bay, or Epsom, the ceiling is much higher, so a $250,000–$300,000 extension on a $1.5 million home still has room to add value. Know your suburb’s ceiling before you design your extension — a free estimate from homes.co.nz is a quick way to gauge where your property sits.

      Seven Ways to Cut Costs Without Cutting Corners

      Every dollar saved on construction is a dollar that goes straight into your return on investment. These are the strategies that actually work — not the wishful-thinking tips you see on generic renovation blogs.

      1. Enclose existing outdoor space. Converting a deck or carport into a living area can cost as little as $1,500–$2,500/m² because the foundations are already there. One of our Henderson clients enclosed a 25m² patio for $50,000 — roughly half the cost of building the same space from scratch.

      2. Simplify the roofline. Every hip, valley, or change in roof direction adds framing time, flashings, and material. A simple gable or skillion roof can save $5,000–$15,000 compared to a complex roofline on the same footprint.

      3. Build out, not up. Ground-floor extensions are typically 30–50% cheaper than second-storey additions because they skip the structural reinforcement. If your section allows it, going out is almost always the better budget move.

      4. Choose materials strategically. Weatherboard at $150/m² instead of cedar at $300/m². Vinyl plank at $50/m² instead of engineered timber at $150/m². On a 40m² extension, those choices save $10,000+ without a visible quality drop.

      5. Lock in a fixed-price contract. At Superior Renovations, we offer fixed-price contracts so you know the final number before work starts. Charge-up contracts can blow out by 15–20% — that’s $30,000–$40,000 on a $200,000 project.

      6. Time your build for the shoulder season. Autumn and early winter are quieter periods for Auckland builders. You may get better availability and avoid the summer rush that stretches timelines and inflates subcontractor rates.

      7. Use prefab where it makes sense. Prefabricated wall panels and roof trusses can shave 10–20% off construction time and reduce material waste. Not suitable for every project, but worth discussing with your builder for simpler extensions.

      “The clients who get the best value from their extensions are the ones who invest time in the design phase — not the ones who spend the most money. A smart 40m² layout that connects well to the existing house will outperform a clumsy 60m² addition every time, both for liveability and for resale.”
      — Cici Zou, Designer (NZ Dip. Interior Design, Certified Designer), Superior Renovations


      Planning Your Auckland House Extension: The Process From Start to Finish

      Knowing the costs is one thing. Knowing the process is what separates a smooth project from a stressful one. Here’s what the timeline actually looks like for a typical Auckland house extension.

      Phase 1: Feasibility and Design (4–8 Weeks)

      Every extension project at Superior Renovations starts with a free in-home consultation. We assess the existing structure, check the section for consent constraints, and discuss what you’re trying to achieve. From there, Sonder Architecture develops concept drawings that balance your wish list against your budget and the site. Our in-house design studio then works on the interior layout, material selection, and finish specifications.

      This phase is where the most important decisions get made. The layout, the connection between old and new, the roof form, the window placement — these all get locked in during design. Changing your mind during construction is expensive. Changing it during design is free.

      Phase 2: Consent (4–8 Weeks)

      Once drawings are finalised, they’re submitted to Auckland Council for building consent. Processing times vary, but 4–8 weeks is typical for a standard residential extension. If resource consent is also required (boundary infringements, site coverage exceedances, heritage overlays), add another 4–12 weeks.

      💡 Quick tip: Don’t wait for consent to order long-lead items. Custom joinery, imported tiles, and specific appliances can take 6–12 weeks to arrive in NZ. Ordering early keeps your build timeline tight once consent is granted.

      Phase 3: Construction (8–20 Weeks)

      Build time depends on complexity. A straightforward 30–40m² ground-floor extension typically takes 8–12 weeks of construction. A second-storey addition with structural work can run 16–20 weeks. In our experience across Auckland extensions, a realistic total project timeline — from first consultation to Code Compliance Certificate — is 6–12 months once you account for design, consent, and build.

      During construction, your project manager at Superior Renovations coordinates all trades, manages inspections, and keeps you updated with weekly progress reports. We use fixed-price contracts, so your quoted figure is the figure you pay — no surprises at the end.

      Phase 4: Handover and Code Compliance

      Once construction is complete, Auckland Council inspects the work and issues a Code Compliance Certificate (CCC). This document confirms your extension meets the NZ Building Code — it’s essential for insurance, sale, and peace of mind. We don’t consider a project finished until the CCC is in your hands.


      Ready to Extend? Your Next Steps

      A house extension is one of the biggest financial decisions you’ll make as an Auckland homeowner. The right project — the right size, the right location on your section, the right design — adds space your family uses every day and value that shows up when you sell. The wrong one burns budget on square metres that don’t earn their keep.

      That’s why we start every project with a feasibility assessment. No obligation, no pressure. Just an honest conversation about what’s possible on your property, what it’ll cost, and whether it makes sense for your situation.

      Book your free in-home consultation with Superior Renovations
      Try the free house extension cost calculator
      Request a free feasibility report for your project


      How much does a house extension cost in NZ?

      A single-storey house extension in Auckland costs $2,000–$5,500 per square metre. A 50m² ground-floor addition typically runs $100,000–$275,000, while a second-storey addition starts from around $150,000. The final cost depends on materials, site conditions, consent requirements, and whether wet areas like kitchens or bathrooms are included.

      How much does it cost to extend a house per square metre in Auckland?

      Basic ground-floor extensions (bedrooms, living areas) cost $2,000–$3,500/m². Mid-range extensions with kitchens or bathrooms run $3,500–$5,000/m². Second-storey additions cost $4,500–$6,000+ per m² due to structural reinforcement. Enclosing an existing deck or carport is the cheapest option at $1,500–$2,500/m².

      Do I need building consent for a house extension in Auckland?

      Yes. Almost all house extensions require a building consent from Auckland Council, including ground-floor extensions, second-storey additions, garage conversions, and new sleepouts. Consent fees typically run $3,000–$8,000 for residential extensions, and processing takes 4–8 weeks. Resource consent may also be required if you're pushing boundary setback or height rules.

      Is it cheaper to extend my house or buy a bigger home in Auckland?

      Extending is usually cheaper. A 50m² extension costs $100,000–$275,000, while buying a bigger home in the same suburb means paying $300,000–$500,000 more plus $35,000–$63,000 in transaction costs (agent fees, legal fees, reports, moving). You also avoid disrupting your family, changing schools, and leaving a neighbourhood you love.

      What is the most expensive part of a house extension?

      Foundations and structural work are typically the most expensive component, accounting for 20–40% of the total budget. Second-storey additions require steel beams and reinforced foundations, which can add $20,000–$50,000. Sloped sites in suburbs like Titirangi or Remuera often need piling and retaining walls that cost $10,000–$75,000.

      How long does a house extension take to build in Auckland?

      A standard 30–40m² ground-floor extension takes 8–12 weeks of construction time. Second-storey additions run 16–20 weeks. Add 4–8 weeks for consent processing and 4–8 weeks for design, and the total project timeline from first consultation to Code Compliance Certificate is typically 6–12 months.

      Do house extensions add value to your home?

      Yes — a well-designed extension can add strong value to an Auckland home. Extra bedrooms, second bathrooms, and open-plan living areas deliver the best returns. To protect your return, a common rule of thumb among Auckland valuers and agents is to keep extension costs under roughly 20% of your home's current market value to avoid overcapitalising.

      What is the cheapest way to extend a house in NZ?

      The most cost-effective approach is enclosing an existing deck or carport ($1,500–$2,500/m²), since foundations are already in place. Other budget strategies include building out instead of up, simplifying the roofline, using weatherboard instead of cedar, choosing vinyl plank flooring over timber, and locking in a fixed-price contract to avoid budget blowouts.

      Can I live in my house during an extension?

      In most cases, yes — especially for ground-floor extensions that are built alongside the existing house. Your builder will stage the work to minimise disruption. Second-storey additions may require temporary relocation during structural work when the existing roof is removed. Superior Renovations discusses this during the feasibility assessment so you can plan ahead.

      How much does a second-storey extension cost in Auckland?

      Second-storey additions in Auckland cost $4,500–$6,000+ per square metre — roughly 40–60% more than a ground-floor extension. The extra cost covers structural engineering, steel beams, foundation reinforcement, scaffolding, and temporary roof removal. A typical second-storey addition starts from around $150,000.

      What should I look for when choosing an extension builder in Auckland?

      Look for a Licensed Building Practitioner (LBP) with a track record of completed extensions in Auckland. Ask for a fixed-price contract rather than charge-up, check their Google reviews, confirm they hold current insurance, and ask to see completed projects. Superior Renovations offers fixed-price contracts and has 170+ Google reviews from Auckland homeowners.


      Further Resources for your house extension

      1. Featured projects and Client stories to see specifications on some of the projects.
      2. Real client stories from Auckland

      Need more information?

      Take advantage of our FREE Complete Home Renovation Guide (48 pages), whether you’re already renovating or in the process of deciding to renovate, it’s not an easy process, this guide which includes a free 100+ point check list – will help you avoid costly mistakes.

      Download Free Renovation Guide (PDF)


      18 months 0 percent interest long term finance badge


      Have you been putting off getting renovations done?

      We have partnered with Q Mastercard ® to provide you an 18 Month Interest-Free Payment Option, you can enjoy your new home now and stress less.

      Learn More about Interest-Free Payment Options*

      *Lending criteria, fees, terms and conditions apply. Mastercard is a registered trademark and the circles design is a trademark of Mastercard International Incorporated.


      Still have questions unanswered?

      Book a no-obligation consultation with the team at Superior Renovations,
      we’d love to meet you to discuss your renovation ideas!

        Services

        Home RenovationKitchen RenovationBathroom RenovationOutdoor RenovationHouse ExtensionCommercialDesign ServicesOther

        By submitting this form, you agree to receive communications from us via email or text regarding our services, you can unsubscribe at any time.

        This site is protected by reCAPTCHA and the Google

        Privacy Policy and Terms of Service apply.


        References

        1. EECA — Insulate your home (energy efficiency and heating-cost savings)
        2. Building Performance (MBIE) — H1 Energy Efficiency, NZ Building Code
        3. Auckland Council — Building consents and Code Compliance Certificates
        4. REINZ — Residential property statistics (Auckland median sale price)
        5. homes.co.nz — Free property value estimates

        v

        IMG 0769 1200x800 1 - Superior Renovations
        House Extensions

        Is $50,000 Enough for a House Extension in NZ? | Superior Renovations

        Is $50,000 Enough for a House Extension in New Zealand? (Honest 2025/2026 Auckland Guide)

        Quick answer: Yes — but only for specific project types, on the right site, with a tight scope. A $50,000 extension budget in Auckland in 2025 can realistically cover a small bedroom addition (15–18m²) on a flat section, or an enclosed deck or carport conversion up to about 25m². It is not enough for a kitchen extension, a bathroom addition, a second-storey build, or anything on a sloped Auckland section without a top-up.

        Read on for the full picture — every cost, every hidden trap, and exactly how to make your extension budget go as far as possible in New Zealand.

        open-plan house extension with a new staircase glass balustrade and skylight above the entry

        Here’s the thing about $50,000 as an extension budget: it makes a lot of Auckland homeowners either very hopeful or very stressed — sometimes both in the same afternoon. You’ve been staring at your West Auckland brick-and-tile or your Grey Lynn villa thinking, “There must be a way to squeeze another room out of this place without selling a kidney.” And honestly? There might be. But the answer depends enormously on what you’re trying to build, where your house sits, and whether you’ve accounted for the costs that nobody puts on the glossy brochures.

        This series is the guide we wish every Auckland homeowner had before they started. We’ve broken it into five focused sections — each around 1,000 words — covering exactly what $50k buys you in today’s market, the hidden costs that blow budgets, Auckland Council’s consent process, smart strategies to stretch your dollars, and how to choose the right team so your investment doesn’t become a horror story.

        We’ve designed every section to give skimmers a clear takeaway and give deep-divers the full picture. Whether you spend five minutes or fifty on this guide, you’ll leave knowing more than you did — and more than most of what you’ll find on ArchiPro.


        Section 1: What Does a $50,000 Extension Budget Actually Get You in New Zealand?

        The honest answer to “Is $50,000 enough for a house extension in NZ?” is: it depends — but here’s what the numbers actually say.


        glass balustrade staircase extension with a chandelier and high void ceiling

        Let’s cut straight to it: $50,000 is a tight but workable extension budget in Auckland in 2025 — provided your scope is small and your site is cooperative. It’s not enough for the extension most people imagine when they type “$50k extension NZ” into Google. But in the right circumstances, it is genuinely enough to add a usable, consented, value-adding space to your home.

        Here’s what the industry data actually shows.

        The Real Cost Per Square Metre for Extensions in New Zealand

        According to New Zealand Certified Builders (NZCB) and Superior Renovations’ own project data, a standard single-storey extension in Auckland currently costs between $2,000 and $5,500 per square metre — and that’s for the build alone, before consents and professional fees. The most basic end of that range ($2,000–$2,500/m²) applies to no-frills rooms: no plumbing, flat section, standard weatherboard cladding, minimal electrical. Complex builds, sloped sections, premium finishes, or any wet room pushes that number higher — sometimes significantly.

        Here’s a practical breakdown of what different extension types cost, and how a $50,000 extension budget NZ stacks up:

        Extension Type Typical Size Cost Range (Build Only) $50k Covers It?
        Small bedroom addition (no wet room) 15–18m² $30,000–$55,000 ✅ Possible on a flat site with tight scope
        Enclosed deck or carport conversion 20–25m² $25,000–$60,000 ✅ Best value scenario for $50k
        Home office or studio addition 12–20m² $28,000–$55,000 ✅ Achievable with standard finishes
        Bedroom + ensuite addition 20–30m² $80,000–$150,000+ ❌ Plumbing makes this 2–3× over budget
        Open-plan kitchen/dining extension 30–50m² $100,000–$250,000+ ❌ Not a realistic $50k project
        Second-storey addition 50m²+ $200,000–$450,000+ ❌ Different category entirely

        💡 Quick tip for skimmers: The most achievable $50,000 extension in NZ is an enclosed existing deck or carport conversion. You leverage structure that’s already there — and that changes everything cost-wise.

        Important note on the figures above: Our FAQ page shows that a typical ground floor extension starts from $80,000. The lower end of the table ($25,000–$55,000) reflects the absolute minimum scope only — enclosing existing covered structure, no wet room, flat site, standard finishes. These figures are not representative of a full new-build extension. If you are starting from scratch on a bare section, $80,000 is a more realistic starting point.

        What a $50k Extension Budget Actually Looks Like in Real Life

        Let’s talk about three real-world scenarios that actually work at or near the $50k mark in Auckland.

        Scenario 1 — The Henderson Patio Conversion: One of our clients enclosed a 25m² covered outdoor patio in Henderson, turning it into a multi-use living room with proper insulation, weatherboard cladding, double-glazed windows and joinery, and a new exterior door. Total cost: around $50,000 — including consents. The existing roof and concrete slab were the key — no new foundations, no new roofline. This is the sweet spot for an extension budget NZ at the $50k level.

        Scenario 2 — The Mt Roskill Bedroom: A young family needed a fourth bedroom and had a flat section with room to expand. A simple 16m² bedroom-only addition — weatherboard cladding, standard GIB lining, basic carpet and a single window — came in just under $50,000. No wet room, no complex electrical, no plumbing. Flat ground, straightforward access. Everything aligned to make the budget work.

        Scenario 3 — The Prefab Studio: A Remuera homeowner needed a home office and ordered a prefabricated studio module. Installed and consented, the 15m² space cost around $48,000 — and because the build happened off-site, the on-site timeline was dramatically shorter. Prefab is worth investigating for $50k extension budget NZ scenarios where speed and cost predictability matter.

        What a $50k Extension Budget Doesn’t Cover (Be Honest With Yourself)

        The $50k ceiling means you can’t add plumbing, you can’t tackle a sloped section without a top-up, and you probably can’t do anything more complex than a single, simple room. The moment you add a wet room, a kitchen bench, or a complex structural connection to an existing multi-level home, you’re in a different financial territory.

        That’s not us trying to upsell you. That’s just Auckland construction costs in 2025. Labour alone accounts for 40–50% of any build — at $50–$100 per hour for skilled trades in Auckland, a complex eight-week project can burn through $50k in labour before you’ve touched materials.

        “The happiest clients we have are the ones who come in with clear priorities. ‘I need a bedroom. Nothing fancy. Just a proper, consented bedroom that my teenager can sleep in.’ That’s a project we can build a great outcome around at $50k. The ones who struggle are those who start with $50k but expect $150k worth of scope.”
        — Dorothy Li, Designer, Superior Renovations

        Why Auckland’s Property Market Makes Even a Small Extension Worth It

        Here’s the good news. Even a modest extension — a single bedroom addition — can add 10–20% to your Auckland home’s value, according to property data from homes.co.nz and industry insights from NZCB. With Auckland’s median house price estimated at $949,000–$1.1M depending on the data source and period (REINZ, January 2025; homes.co.nz), that’s a potential value bump of $95,000–$220,000 from a well-executed bedroom addition. A $50k investment with a $95k+ return is a genuinely compelling case.

        And when you consider that buying up to a larger home means real estate agent commissions (typically 3–4%), legal fees, moving costs, and the disruption of leaving a neighbourhood you love — staying put and extending often wins on pure economics. Consumer NZ notes that moving costs including legal fees and inspections alone can exceed $20,000. That’s nearly half your extension budget, gone just to move house.

        Have you already run the numbers on your specific project? Our free House Extension Cost Calculator is built specifically for Auckland homes and gives you a realistic ballpark in under a minute.


        Section 2: The Hidden Costs of a House Extension in NZ That Will Blow Your Extension Budget

        The biggest reason extension budgets in NZ blow out isn’t the build — it’s what nobody told you was coming before the build even started.

        Bathroom design by our designer dorothy


        Every year, Auckland homeowners come to us mid-panic. They got a quote that seemed reasonable, said yes, and then watched the costs climb as one unexpected line item after another appeared. The structure wasn’t what they expected. The council wanted more information. The electrical switchboard needed upgrading. The section wasn’t as flat as it looked on Google Maps.

        None of these things are anyone’s fault. But they are predictable — and preventable — if you plan for them upfront.

        This section is about making sure your $50,000 extension budget NZ is a real number, not an optimistic one.

        Hidden Cost #1: Site and Foundation Conditions

        Auckland’s terrain is famously “characterful.” Sloped sections in suburbs like Titirangi, Remuera, Epsom, or anywhere on the North Shore with clay soil can add anywhere from $10,000 to $75,000 to your build cost — purely in foundation work, earthworks, and retaining structures. This cost doesn’t appear in a simple per-metre estimate. It only shows up when an engineer actually looks at your site.

        Before you get attached to any design or budget, spend $2,000–$4,000 on a geotechnical report. It tells you exactly what’s beneath your section. If the news is good, you’ve confirmed your budget is solid. If the news is bad, you’ve saved yourself from a $30,000 surprise mid-build.

        💡 Quick tip: Clay soil is extremely common in Auckland’s older inner suburbs. If your home was built before 1980 on a sloped section, assume you’ll need geotechnical advice before finalising your extension budget.

        Hidden Cost #2: Professional and Consent Fees

        This is the most consistently underestimated cost in any extension budget NZ conversation. Here’s what professional and consent fees realistically look like for a small-to-medium residential extension in Auckland:

        Fee Category Typical Range (Auckland) Notes
        Architectural drawings $5,000–$15,000 Required for consent application
        Structural engineering sign-off $2,000–$5,000 All structural work requires this
        Building consent fees (Auckland Council) $2,000–$10,000 Varies by project value; includes MBIE levy of $1.75 per $1,000. Resource consent, if also required, adds a further $5,000–$15,000+
        Resource consent (if required) $5,000–$15,000+ Adds 3–6 months to timeline; not always needed
        Geotechnical report $2,000–$4,000 Recommended on any non-flat or older section
        Code of Compliance Certificate (CCC) fees Included in consent fees Applied for at completion
        Total professional + consent fees $13,000–$40,000+ Must be inside your total budget, not in addition to it

        Read that last row carefully. On a $50,000 project, professional and consent fees can easily consume 25–40% of your entire budget. This is not optional spending — it’s the legal, safety-critical framework your extension sits within. If you’re building to Auckland Council’s standards (and you must), these fees are non-negotiable.

        The good news? Auckland Council confirms that development contributions are not charged on house extensions — only on new standalone dwellings. That’s one significant fee off the list.

        Hidden Cost #3: Connecting to Existing Services

        Every new room needs power. It might need data cabling, heating, and ventilation. And the way that connects back to your existing home’s systems isn’t always straightforward — especially in Auckland’s older housing stock where switchboards are often undersized for modern loads.

        For a basic dry room extension (bedroom or office), electrical connection costs typically run $3,000–$8,000. That’s before any HVAC — and in Auckland winters, you’ll want proper heating. Heat pump installation from suppliers like those available through Harvey Norman (one of our supplier partners) typically adds $2,000–$4,000 for a standard wall unit, including installation. See our full supplier partners list for the brands we work with.

        Hidden Cost #4: Insulation — An Investment You’ll Never Regret

        New Zealand’s building code requires minimum insulation standards in all new building work — and frankly, the minimums aren’t that impressive. If you’re building a new room, build it properly. The Energy Efficiency and Conservation Authority (EECA) estimates that quality insulation — costing $40–$160/m² — saves Auckland homeowners up to $600 per year in heating costs. On a 20m² room, good insulation costs $800–$3,200. That’s paid back in two to five years in energy savings — and the room is infinitely more liveable.

        For ceiling insulation, aim for R3.2 or higher. For walls, R2.2 minimum. For new builds in Auckland’s variable climate, these aren’t luxury specs — they’re just sensible. Our suppliers at Mitre 10 and Bunnings stock a solid range; your builder can advise on the right product for your specific build method.

        Hidden Cost #5: The “While We’re At It” Trap

        This is human nature, and it derails more extension budgets than any structural surprise. Once the walls are open and the trades are on site, it becomes deeply tempting to say: “Can we just move this doorway while they’re here?” or “While we’re at it, let’s upgrade the flooring in the adjacent room.”

        Every one of those decisions is a contract variation — and variations cost money. At Superior Renovations, all variations are costed and presented to you in writing before any work starts. You’re never surprised by an invoice. But we still encourage every client to make a “nice to have” list before the project starts — so those ideas don’t creep in as assumptions during the build.

        “I call it the compound effect of good ideas. Every single ‘while we’re at it’ costs money — not because builders are charging for nothing, but because changes mid-build require re-planning, re-ordering, and re-doing. The best extension projects are the ones where the scope is locked in tight before a single board is cut.”
        — Cici Zou, NZ Dip. Interior Design, Certified Designer, Superior Renovations

        Hidden Cost #6: The 15–20% Contingency — Non-Negotiable

        On a $50,000 project, you should have $7,500–$10,000 sitting in a contingency reserve before work begins. Not as a wish, not as “we’ll see” — as a genuine, ringfenced fund. Rotting timber behind cladding. A water pipe in an unexpected location. A rainy week that delays concrete pours. These things happen in almost every Auckland extension project, and the homeowners who handle them calmly are the ones who planned for them.

        Practically speaking: if your build budget is $50,000, your actual cash position needs to be $57,500–$60,000 before you sign anything. If it’s not, scale the scope down until you have that buffer.

        The Total “Real Cost” of a $50,000 Extension Budget in NZ

        Budget Component Amount
        Construction (build cost) $30,000–$40,000
        Professional fees (architect, engineer) $7,000–$15,000
        Building consent (Auckland Council) $4,000–$10,000
        Electrical / services connection $3,000–$6,000
        Insulation (proper spec) $1,000–$3,000
        Contingency (15–20%) $7,500–$10,000
        Total cash position needed $52,500–$84,000

        See the issue? If your only available cash is $50,000, the all-in costs of a “small” extension may already push you over. This doesn’t mean you can’t do it — it means you need to know these numbers going in, not after you’ve signed a build contract.

        Our free feasibility report service is designed specifically for this moment — before you commit to anything. We’ll assess your property, your goals, and your realistic budget, and give you a straight picture of what’s achievable.


        Section 3: Auckland Council Consent for House Extensions — The Complete Process for Homeowners on a Budget

        Almost every house extension in Auckland requires building consent — and skipping it has serious financial and legal consequences that will follow your home forever.


        West Harbour Auckland house renovation showing stone-clad columns and a new black entry door

        Superior Renovations


        Here’s something that shocks a lot of Auckland homeowners who are managing an extension budget NZ of $50,000: the consent process isn’t just a box-ticking exercise. It’s a legal requirement under the Building Act 2004, and it protects your investment, your family’s safety, and your home’s resale value. Getting it right — or having the right team handle it — is one of the most important things you can do for your project.

        Do You Actually Need Building Consent for Your Extension?

        Almost certainly yes. Auckland Council confirms that all new building work requires consent unless it’s specifically exempt under Schedule 1 of the Building Act 2004. Schedule 1 exemptions cover minor structures like small sheds, basic garden walls, and certain decks — not habitable rooms. If you’re adding a room to your house, you need consent. Full stop.

        You may also need resource consent if your planned extension pushes against the Auckland Unitary Plan’s zoning rules — specifically around height-to-boundary ratios, site coverage maximums, or impervious surface limits. This is more common than people realise, particularly in older inner-city suburbs with tighter sections.

        💡 Quick tip: Use Auckland Council’s online “Do I need a consent?” tool before calling anyone. It takes five minutes and can save you weeks of going down the wrong track.

        The Building Consent Process: Step by Step

        Understanding the consent process helps you plan your timeline — and your extension budget NZ — realistically. Here’s how it works in Auckland:

        1. Pre-application check: Confirm your zoning and check for heritage overlays (common in Ponsonby, Grey Lynn, Herne Bay). Our architectural partner Sonder Architects carries out feasibility studies at this stage for Superior Renovations projects.
        2. Design development: Architect prepares concept plans and detailed working drawings to building code standards.
        3. Engineering sign-off: Structural engineer reviews and stamps the structural design.
        4. Consent application preparation: Full documentation package assembled for Auckland Council submission.
        5. Lodgement: Application submitted via Auckland Council’s online portal (recommended for faster processing) or in person.
        6. Processing: Auckland Council has 20 working days to approve or decline — but can issue an RFI (Request for Further Information) which pauses the clock until the information is provided.
        7. Consent granted: Fees paid, consent formally issued. Work must commence within 12 months.
        8. Construction: Build phase begins, with mandatory inspections at key stages (foundations, pre-slab, framing, pre-line, final inspection).
        9. Code of Compliance Certificate (CCC): Applied for upon completion. Auckland Council has 20 working days to issue once satisfied all work meets the building code.

        How Long Does Building Consent Actually Take in Auckland?

        Realistically, allow 2–4 months for building consent under normal conditions. If resource consent is also required, add another 3–6 months on top of that. This is not your build time — this is the approval process that has to happen before a single spade goes in the ground.

        If your application isn’t watertight — incomplete documents, unclear plans, missing engineer’s statements — Auckland Council will issue RFIs that stop the clock and delay your project further. Working with experienced professionals who understand Auckland’s consent requirements from the start is the most effective way to keep this timeline moving.

        Auckland’s Zoning Rules and What They Mean for Your Extension

        Auckland’s Unitary Plan determines what you can build, and it varies suburb to suburb. The key rules that affect most residential extensions are:

        • Site coverage: Maximum percentage of your section that can be built on (typically 35–50% depending on zone)
        • Height-to-boundary: Rules about how close to and how tall you can build near property boundaries
        • Setbacks: Minimum distances from boundaries (typically 1–2m)
        • Impervious surface limits: Total hard surface allowed on site — affects stormwater management

        If your extension pushes any of these limits, resource consent is required — which adds cost and time but isn’t always a dealbreaker. A skilled architect can often redesign around constraints while preserving the core purpose of the project.

        What Happens If You Build Without Consent? (Don’t.)

        Unpermitted work in Auckland follows your home like a bad credit rating. It can void your home insurance, prevent mortgage lenders from financing against the property, and must be declared in any sale and purchase agreement. Retrospective (“as-built”) consent is possible in some cases, but it’s expensive, not guaranteed, and sometimes requires partial demolition of non-compliant work. The cost of fixing it after the fact almost always exceeds the cost of getting it right from the start.

        “The consent process is where a lot of people working to a tight budget try to cut corners. But consent isn’t optional — it’s the document that makes your extension a legal, insured, sellable part of your home. I always frame it this way: consent fees are not an extra cost on top of your extension. They’re the cost of making sure your extension actually counts.”
        — Eunice Qin, Designer, Superior Renovations

        Want to understand exactly how Superior Renovations manages the consent process for your project? Our House Extensions Auckland page details the full five-stage client process from initial enquiry to CCC. We also offer a free feasibility report that includes a preliminary assessment of consent requirements for your specific property.


        Section 4: 8 Smart Ways to Stretch Your Extension Budget in NZ Further Than You Think

        A $50,000 extension budget NZ can go a lot further with the right decisions — not by cutting corners, but by being genuinely strategic about where every dollar lands.


        kitchens north shore

        This section is where the practical wins live. We’ve watched hundreds of Auckland homeowners navigate tight extension budgets over the years, and the ones who finished smiling weren’t the ones with the most money — they were the ones who made the smartest decisions early in the process. Here are the eight that make the biggest difference.

        1. Work With Existing Structure Wherever Possible

        This is the single biggest cost-saving lever available on a tight extension budget NZ. Enclosing an existing covered deck, converting a double carport, or transforming a basement or garage into habitable space means the foundations, roofline, and framing are already there. You’re paying for walls, insulation, windows, joinery, and finishing — not the bones of a whole new structure.

        Our 2025 Auckland extension cost guide documents a Henderson example where a covered 25m² patio was converted into a fully consented living room for around $50,000 — because the existing structure made the project dramatically more affordable. Without that existing roof and slab, the same space would have cost $90,000–$120,000.

        2. Keep the Shape Simple

        Architects talk about “complexity” — and in construction, complexity translates directly to cost. A rectangular footprint is cheaper than an L-shape. A flat or skillion roof is cheaper than a gabled roof that needs to match your existing home’s pitch precisely. Fewer corners, fewer junctions, fewer structural complications.

        Ask your architect or designer to show you a “value-engineered” option alongside the premium design. Sometimes a modest change — a flat roof instead of a hip, a rectangular room instead of an irregular one — saves $8,000–$20,000 with almost no impact on how the finished space feels or functions.

        3. Take Plumbing Off the Table (For Now)

        Wet rooms are the single biggest cost multiplier in any extension. A single mid-range bathroom addition adds $30,000–$50,000 above the base build cost. If you’re working to a $50,000 extension budget NZ, removing plumbing from your scope entirely is the most powerful cost reduction available to you.

        That doesn’t mean you can never have the bathroom — it means you build the extension now without it, but design it so adding a bathroom in a future stage is straightforward. A little forethought about where pipes could run, and where a wet area could logically sit, costs almost nothing at design stage and avoids major rework later.

        4. Choose Materials That Look Premium but Aren’t

        Cladding and interior surfaces are where a lot of extension budgets quietly inflate. Standard weatherboard from our supplier partners at Mitre 10 performs beautifully in Auckland’s climate and is significantly cheaper than cedar or brick. For interior surfaces, the Laminex range — one of our trusted supplier partners — delivers a genuinely premium look at a fraction of solid timber or stone pricing. Our designers use Laminex regularly to create spaces that feel custom and high-end without the associated cost.

        logo grid of Superior Renovations supplier and brand partners including Mitre 10 Bunnings GIB and James Hardie

        5. Investigate Prefab or Modular Options

        Prefabricated and modular extensions are having a genuine moment in New Zealand. With construction happening off-site in controlled conditions, labour costs reduce, on-site time shortens, and build quality is often more consistent. For a straightforward bedroom or home office addition on a flat section, prefab can realistically save $10,000–$15,000 versus traditional construction — potentially putting a 20m² room within reach of a $50,000 extension budget NZ.

        Prefab isn’t right for every situation. Complex sites, heritage homes, and intricate integrations with existing structure often still need traditional methods. But for a simple addition on a compliant section, it’s worth getting a prefab quote alongside your traditional options.

        6. Stage Your Build — Don’t Do Everything at Once

        One of the smartest moves available to homeowners with a tight extension budget NZ: do the structural work and shell now, and fit out the interior progressively over 12–18 months as budget allows. This means the consented structure is complete and weathertight, the room is there — but the finishing choices (flooring, joinery, lighting, feature wall) happen over time without the pressure of a build deadline.

        A caveat: staging works best when it’s planned from the start, not improvised mid-build. Your builder and designer need to know that the plan is a staged delivery — so the shell is built to accommodate the future fit-out without costly rework.

        7. Use a Fixed-Price Contract to Protect Every Dollar

        A fixed-price contract isn’t just a nice-to-have when you’re managing a tight budget — it’s essential. Without one, cost overruns have nowhere to go except your pocket. At Superior Renovations, all projects operate on fixed-price contracts, with any variations formally costed and presented for written approval before work proceeds. You know what you’re paying before the first foundation is poured.

        Not every builder offers fixed pricing — some operate on cost-plus or time-and-materials, which shifts all cost risk to you. Ask explicitly before signing anything. Our Our Promise page explains exactly how we protect your budget through every stage of the project.

        8. Access Interest-Free Finance to Top Up a Tight Budget

        If your scope genuinely needs $65,000–$70,000 but you have $50,000 in cash, finance can bridge that gap without derailing the project. Superior Renovations has partnered with Q Mastercard to offer an 18-month interest-free option, and works with Loan Market for longer-term renovation lending at competitive rates.

        open-plan kitchen extension with a large marble-look island bench and blue bar stools

        The principle: only finance what you can comfortably service, and only use it to close a real gap — not to inflate scope beyond what you actually need. Extensions that add genuine functionality and a bedroom add real value to an Auckland home. That value should justify the finance cost several times over.


        Section 5: How to Choose the Right Builder for Your Auckland Extension — And Protect Your Budget from Start to Finish

        The single most important budget decision you’ll make for your extension in NZ isn’t a material choice or a design decision — it’s which company you hand the project to.

        A lot of content about extension budgets NZ stops at “here’s what things cost.” This section is about the more uncomfortable truth: who you choose to build your extension has more impact on whether you finish on budget, on time, and with a result you actually love than any other single decision. Wrong choice here and all the budget planning in the world doesn’t save you.

        Auckland has seen its share of extension horror stories. Builders who disappeared mid-project. Work that failed council inspections. Costs that tripled between quote and invoice. These are real, and they happen to real homeowners every year. Here’s how to make sure you’re not one of them.

        What “Licensed” Actually Means in New Zealand

        New Zealand law requires that any “restricted building work” — structural elements, weathertightness, foundations, fire safety systems — be carried out or directly supervised by a Licensed Building Practitioner (LBP). This is mandatory under the Building Act 2004, not optional.

        You can verify any builder’s LBP licence status through the Ministry of Business, Innovation and Employment (MBIE) building performance website. It takes two minutes. Do it for every builder you seriously consider — and if they’re evasive about LBP status, that’s a hard no.

        The New Zealand Certified Builders (NZCB) association is also a useful resource for finding vetted, qualified builders in your area — members are required to hold current LBP licences and meet ongoing professional development standards.

        Full-Service vs. Owner-Managed: The Real Cost Comparison

        There’s a persistent belief that managing your own extension project saves money. Sometimes it does — on paper. In practice, the hidden costs of owner-managed projects are significant:

        Factor Full-Service Company Owner-Managed
        Consent management Handled by company Your time and responsibility
        Trade coordination Single project manager You chase each trade separately
        Budget control Fixed-price contract (if offered) Cost-plus risk falls on you
        Timeline control PM ensures trades arrive on schedule Trade no-shows common; delays costly
        Quality assurance 147-point QA process (Superior Renovations) You assess everything yourself
        Design expertise In-house designers + 3D renders You source separately

        On a $50,000 extension budget NZ where every dollar and every week matters, the full-service model often costs less in total — because delays, mistakes, and re-work in owner-managed projects frequently exceed any savings on management fees.

        The Questions You Must Ask Every Builder

        Before signing anything with any builder — no matter how good their Google reviews look — ask these questions and write down the answers:

        • Are you a Licensed Building Practitioner? What is your licence number? (Then verify it at building.govt.nz)
        • Do you carry full contractor all-risk insurance and public liability insurance? Can I see the certificates?
        • Do you offer fixed-price contracts? How are variations handled?
        • Can you provide three to five references from extension projects specifically — not renovations, extensions?
        • Who will be my single point of contact throughout the project?
        • Have you worked on similar projects in my suburb or area?
        • What does your consent process look like — who manages it?
        • What is your realistic timeline from signing to Code of Compliance Certificate?

        Red Flags That Should End the Conversation

        Walk away from any builder who: won’t confirm their LBP status, can’t provide insurance certificates, requests more than 10–15% upfront, has no verifiable reviews or references, dismisses consent as something to “sort out later,” or quotes dramatically lower than every other builder you’ve spoken to. In New Zealand construction, a suspiciously low quote is not a bargain — it’s a warning.

        What Superior Renovations Brings to Your Extension Project

        We know this is our blog, so let’s keep this specific rather than self-congratulatory. Here’s what our full-service model actually delivers for extension clients:

        • In-house design team: Dorothy Li, Alison Yu, Cici Zou (NZ Dip. Interior Design), and Eunice Qin are certified designers who create full 3D renders before anything gets built. You know exactly what your space will look like.
        • Architectural partnership: We work with Sonder Architects as our preferred partner for consent-related projects — they know Auckland Council’s requirements deeply and keep consent timelines moving.
        • 147-point quality assurance process: Three-stage sign-off (Team Member, Team Leader, Project Manager) before handover. Not just a checklist — an actual structured process.
        • Fixed-price contracts: No surprise invoices. Any variation is costed and approved in writing before work begins.
        • Auckland-wide coverage: We work across all Auckland suburbs — from Remuera and Ponsonby to Henderson, Manukau, Albany, and everywhere in between.


        designer and client reviewing renovation plans and material samples during an initial consultation

        Read our client stories on our client stories page, or check what Auckland homeowners say about their experience on our reviews page. The proof, as they say, is in the projects.

        For a deeper dive into how the extension process actually unfolds — from first consultation to CCC — our guide to house extension costs in NZ for 2025 covers every stage in detail.


        So — Is $50,000 Enough for a House Extension in NZ? Here’s the Final Answer

        Yes. With conditions.

        A $50,000 extension budget NZ can absolutely deliver a real, consented, value-adding space — if you’re building a dry room (no plumbing), on a flat section, with a tight and disciplined scope, and you’ve accounted for the full picture of costs from day one.

        Here’s the summary you can rely on:

        Scenario Realistic on $50k?
        Enclosed existing deck / carport (20–25m²) ✅ Yes — best case for this budget
        Small bedroom addition (15–18m², no wet room, flat section) ✅ Yes — with tight scope and standard materials
        Home office or sunroom addition (12–20m²) ✅ Yes — prefab option makes this very achievable
        Bedroom + ensuite (20–30m²) ⚠️ No — plumbing alone blows the budget
        Any extension on sloped Auckland section ⚠️ Unlikely — foundation costs may double the build price
        Kitchen / open-plan extension (30m²+) ❌ No — not a realistic $50k project in Auckland

        The homeowners who get the best outcomes from a $50,000 extension budget NZ are the ones who are honest about this from the start — with themselves, and with their builder. They know what they’re getting. They plan for the hidden costs. They build in contingency. They choose a team with fixed-price contracts and a track record they can verify.

        If you’re not sure where your project sits, the most valuable thing you can do right now is have a no-obligation conversation with a team that will give you a straight answer.

        Book your free in-home consultation with Superior Renovations
        Try our free house extension cost calculator for Auckland
        Request a free feasibility report for your extension project

        Have you been through an extension project at a similar budget? We’d love to hear what worked — drop a comment below. And if this guide answered a question you’ve been wrestling with, share it with someone else who’s standing in front of their house doing the same maths.


        Is $50,000 enough for a house extension in New Zealand?

        Yes — for specific project types. A $50,000 extension budget NZ is enough for a small bedroom addition (15–18m²) on a flat section with no wet rooms, or an enclosed existing deck or carport conversion up to about 25m². It is not enough for extensions involving plumbing, sloped sections, or any build over approximately 20–25m² with standard finishes. Professional fees and building consent costs must be included within the $50k total — not added on top. Total cash position needed (including contingency) is typically $57,500–$60,000 for a genuinely $50k build.

        What can $50,000 buy for a house extension in Auckland?

        At $50,000, the most realistic options in Auckland are: enclosing an existing covered deck or carport (20–25m²), a simple bedroom addition (15–18m²) with standard finishes on a flat section, or a prefabricated home office or studio module (12–20m²). These scenarios work because they either leverage existing structure (reducing foundation and framing costs) or keep the build scope very tight. Anything requiring new plumbing, second-storey structural work, or complex foundations requires a larger budget.

        What is the cost per square metre for a house extension in NZ in 2025?

        A standard single-storey extension in Auckland costs $2,000–$5,500 per m² in 2025, according to New Zealand Certified Builders (NZCB) industry data and Superior Renovations' project history. Basic dry rooms (no plumbing, standard cladding, flat site) sit at $2,000–$2,500/m². Extensions involving wet rooms, premium finishes, or complex foundations push toward $3,500–$5,500/m² or beyond. These figures are for construction only — professional fees and consent costs are separate line items.

        What hidden costs should I budget for in an extension in NZ?

        The main hidden costs in an extension budget NZ are: Site and foundation conditions: $0–$75,000+ on sloped or clay-soil Auckland sections Architectural drawings: $5,000–$15,000 Building consent fees (Auckland Council): $2,000–$10,000 (resource consent, if also required, adds a further $5,000–$15,000+) Structural engineering sign-off: $2,000–$5,000 Electrical and services connections: $3,000–$8,000+ Proper insulation: $1,000–$3,200 (EECA recommends R3.2 ceiling, R2.2 walls minimum) Contingency reserve (15–20%): $7,500–$10,000 on a $50k project — non-negotiable Total cash position needed including all costs: typically $52,500–$84,000 for a project with a $50,000 construction budget.

        Do I need building consent for a house extension in Auckland?

        How long does building consent take for a house extension in Auckland?

        Allow 2–4 months for building consent under normal conditions in Auckland. Auckland Council has 20 working days to process, but Requests for Information (RFIs) pause the clock and are common on incomplete applications. If resource consent is also required, add a further 3–6 months. This is approval time only — construction cannot begin until consent is formally granted and fees are paid.

        Does Auckland Council charge development contributions for house extensions?

        No. Auckland Council confirms that development contributions are not charged for house extensions — only for new standalone dwellings. This is one significant fee category that does not apply when extending an existing home.

        What is the cheapest way to extend a house in NZ?

        The cheapest approach to a house extension in NZ is to leverage existing structure. In order of cost-effectiveness: Enclose an existing covered deck, carport, or garage (foundations and roofline already in place) Use a prefabricated or modular addition for a bedroom or studio (off-site build reduces labour costs by $10,000–$15,000) Keep the footprint rectangular and the roof flat or skillion — fewer corners and junctions = lower build cost Exclude plumbing entirely — a dry room costs roughly half what a wet room costs per m² Choose standard weatherboard cladding and Laminex-range interior finishes over premium materials

        What return on investment can I expect from a $50,000 house extension in Auckland?

        Adding a bedroom in Auckland typically increases property value by 10–20%, according to property data from homes.co.nz and NZCB industry insights. With Auckland's median house price estimated at $949,000–$1.1M depending on the data source and period (REINZ, January 2025; homes.co.nz), a well-executed single bedroom addition could add $95,000–$220,000 in value — a strong return on a $50,000 build investment. Return varies by suburb, execution quality, and market conditions at time of sale. Consumer NZ also notes that moving costs (legal fees, inspections) can exceed $20,000 — making extending often more cost-effective than upsizing.

        Should I use a full-service renovation company or manage my extension myself in NZ?

        For a tight $50,000 extension budget NZ, a full-service company with a fixed-price contract is often more cost-effective than owner-managing, because delays and cost overruns in self-managed projects frequently exceed savings on management fees. Look for: a Licensed Building Practitioner (LBP) on the job, fixed-price contracts with a formal variation approval process, a single project manager point of contact, and verifiable references from extension projects specifically in Auckland. Check any builder's LBP licence at building.govt.nz.

        How much contingency should I allow on a $50,000 extension in NZ?

        Allow 15–20% contingency on any extension budget NZ — that's $7,500–$10,000 ringfenced before work starts on a $50k project. This covers unforeseen site conditions (rotting timber, unexpected pipe locations, weather delays), scope clarifications, and minor variations. If this contingency isn't in your available cash before signing a contract, scale the scope down until it is. Do not start a build without it.

        Can I add a bathroom to a $50,000 house extension in NZ?

        No — not within a $50,000 total budget in Auckland. A mid-range bathroom or ensuite addition costs $30,000–$50,000 on top of the base build cost due to waterproofing, drainage, plumbing fixtures, ventilation, and additional consent conditions. If a bathroom is your goal, plan for a minimum total budget of $80,000–$130,000 for a bedroom-plus-ensuite addition, or consider staging the project — building the dry shell now and adding the wet room as a second stage when budget allows.


        Further Resources for your house renovation

        1. Featured projects and Client stories to see specifications on some of the projects.
        2. Real client stories from Auckland

        Need more information?

        Take advantage of our FREE Complete Home Renovation Guide (48 pages), whether you’re already renovating or in the process of deciding to renovate, it’s not an easy process, this guide which includes a free 100+ point check list – will help you avoid costly mistakes.

        Download Free Renovation Guide (PDF)


        18 months 0 percent interest long term finance badge

        Have you been putting off getting renovations done?

        We have partnered with Q Mastercard ® to provide you an 18 Month Interest-Free Payment Option, you can enjoy your new home now and stress less.

        Learn More about Interest-Free Payment Options*

        *Lending criteria, fees, terms and conditions apply. Mastercard is a registered trademark and the circles design is a trademark of Mastercard International Incorporated.


        Still have questions unanswered?

        Book a no-obligation consultation with the team at Superior Renovations,
        we’d love to meet you to discuss your renovation ideas!

          Services

          Home RenovationKitchen RenovationBathroom RenovationOutdoor RenovationHouse ExtensionCommercialDesign ServicesOther

          By submitting this form, you agree to receive communications from us via email or text regarding our services, you can unsubscribe at any time.

          This site is protected by reCAPTCHA and the Google

          Privacy Policy and Terms of Service apply.

          SUPERIOR RENOVATIONS
          Renovations on one full bathroom and one small ensuite at my home in Sunnynook, Auckland, were completed on 26th June 2026.
          I am fully satisfied with the work done at my home by all workers and contractors and delighted with the results that I am now enjoying. All work is of a very high standard and attention to care leading to excellent results.
          All staff of Superior Renovations and associated contractors were at all times helpful and happy to explain all aspects of their work and respectful in listening to any of my concerns or questions, with any changes where necessary being quickly and effectively carried out.
          I have no hesitation in recommending Superior Renovations as your choice for any bathroom renovation.

          Valerie Hepburn
          4 Stoneleigh Court, Auckland
          In early June, I hired Superior Renovation company to thoroughly renovate our two bathrooms. The project has now been completed and we are very satisfied. Thank you sincerely, and we highly recommend it.
          Despite some delays, Eunice, Neil and the team at Little Giants have done a really good job on out kitchen renovation. Great finishing and very responsive to fixing up any little thing we weren't happy with.

          Good work team!
          ​From the very first consultation, our experience with this team has been nothing short of stellar.

          ​Working with Eunice, our sales consultant, set a high bar for the rest of the project.
          Eunice is truly exceptional at what she does. When we first began our kitchen project, we went through several versions of our floor plan, and she was with us every step of the way—from the initial planning stages right through to the final concept. Her patience and dedication during the design process were remarkable.
          Throughout the project, Eunice provided:
          * **Invaluable Suggestions:** She has a keen eye for both aesthetics and functionality, pointing out details we never would have considered on our own.
          * **Seamless Adjustments:** No matter how many tweaks we requested, she handled every change with professionalism and a "can-do" attitude.
          * **Expert Guidance:** She transformed our vague ideas into a cohesive, stunning reality.

          ​Once the planning was complete, Neil, our project manager, took the reins and truly blew us away. Neil is a consummate professional who balances technical expertise with fantastic communication.
          ​ He kept us informed at every stage, ensuring we knew exactly what to expect and when.
          Whenever a minor pivot was needed, Neil handled it with grace and efficiency, keeping the timeline on track.
          His standards for the renovation work were incredibly high, ensuring the final result was polished and beautiful.

          ​The transition from Eunice’s initial planning to Neil’s execution was flawless. If you are looking for a team that combines design expertise with top-tier project management, look no further. We are absolutely thrilled with our new kitchen and new flooring !
          Superior Renovations has just finished a complete remodel of my bathroom. I can see, why the company has such a high reputation. At every stage, from sales, design, project management, and execution, the company excelled at every point. I am just so happy with the work that they have done and they have exceeded my expectations at every point.
          Used Superior for a kitchen and bathroom renovation last year. They did an excellent job updating both rooms, communication was excellent ongoing tjrough the project, they coordinated all the tradies, synchronized so there was little downtime, and it all worked exactly as planned and on budget. Was really glad we chose Superior Renovations and plan to use again for our entrance way at some stage.
          As I said to my work colleagues ‘I have just had the most pleasant experience’. When they realised it was with renovations at home they were shocked - ‘unheard of’ I was told.
          Everything went to plan - timing, project management, costs, etc, etc. Neil communicated with me daily and made my whole bathroom renovation a pleasure.
          The best decision I made was choosing Superior Renovations.
          Thank you Kevin for our initial connection and for passing me on to Neil to manage the whole process.
          We just finished a bathroom renovation and couldn’t be happier with the results. The craftsmanship is top-notch, and the attention to detail in the tiling and finishing is impressive. The team was professional, kept the workspace clean, and delivered exactly what we envisioned. Highly recommend them for anyone looking for a high-quality transformation.
          Superior did an excellent job of renovating our ensuite. Project manager Jacob was easy to work with and communications were good.
          This is our second review for Superior Renovations. They have done two projects earlier this year and we were so impressed by the work they have finished. After discussing and very careful consideration, we decided to go with more projects with them. So far, they have now completed stage 1 renovation of our house. We still amazed for their knowledge and services; they really listen to us and discuss anything with us if they feel/think could be better…
          From the first day we work with them, we have no issue with them at all, from communication, discussing, designing to the teams working on the site.
          Especially we are highly recommended to those who are considering doing the house renovation, please contact them and you will know why we are so pleased to have them to do our house renovation.
          We are thanking Cici, Neil and the teams so much….
          We are looking forward to seeing what the outcome will be.

          David and Emily
          We recently had our bathroom renovated by Superior Renovations and couldn’t be happier with the experience. Dorothy and Neil were an absolute pleasure to work with. They guided us through every step of the process, making what can be a stressful experience feel smooth and straightforward.
          The quoting process was transparent and detailed, with no hidden fees or surprises. Neil was incredibly responsive and always available whenever we had questions or requests, which gave us real peace of mind throughout the project. We really love the end result and enjoy our new bathroom!
          We’ll definitely be returning to the Superior Reno team for our next project. Highly recommended!
          Our bathroom reno has just been completed & I am so happy. The whole process was easy & hassle free. Alison designed our bathroom & was very patient with our changes/then changes back again. Jacob our project manager was a delight to deal with. He always kept us informed of the scheduling & any other information we may have needed. All the tradies worked hard & the job was completed & signed off within 3 weeks. That's demo, full tiling, installation of new everything & delivery & pick up of the skip down a very tricky driveway. We absolutely love the new bathroom & would recommend Superior Renovations everyday. Future jobs I will definitely be contacting them again. Thank so much for your excellent work
          Having explored our reno options, it was an easy decision to select Superior Renovations for our work. As first timers at anything like this we had to trust the system with grand old 100year old bungalow. We were so pleased to have Cici, Sonny and Kai working with us the whole way through. Be shout out to all the team, builders, plumbers, electricians, tilers and painters. A superb job delivered on budget and ahead of time. The communication from Cici and Sonny was first class. Would highly recommend working with Superior Renovations in fact, we already have more worked booked in. Thanks Superior you made Millie and Monty's parents very happy. 🐾
          I am very happy with the recent renovation for my new kitchen.
          The team worked really hard to get it done within the time frame.
          The manager, Jacob, was very helpful and communicated well and always sorts out any issue immediately.
          Thank you Irene
          We couldn’t be happier with our new pergola! From start to finish, the team was professional, punctual, and easy to work with. They took the time to listen to what we wanted and offered great suggestions to make the design even better. The quality of the materials and workmanship is outstanding — everything feels solid, well-built, and beautifully finished. Kudos to Sinan Sun as she has been an amazing contact with the company.
          We are very pleased with our bathroom reno by Superior Renovations! Jacob, Cici and the team always kept us up to date, were always friendly to deal with and finished ahead of schedule. Most importantly we are very happy with the quality of the work.
          We have been working with Superior Renovations as a supplier now for over three years. In that time we have found the team to be very professional and well organised. Which is a welcome relief in this industry! Just recently we have become their sole supplier for portaloos, which recognises the collaboration we have forged over these three years.

          In particular, Leanne and Elaine set a very high standard of communication and flexibility. This is of vital importance when scheduling deliveries and pickups with us, however, they understand not everything can be done at once and are willing to work with us for the best (supplier/contractor/client) outcome.

          I would imagine this ethos would flow directly through to all their contracted renovation work. A pleasure to work with!
          A very reliable supplier – we’ve been working with them for three years now, and they have never let us down. Well done to the team.
          We have been working with these guys for the past 4 years and find them an awesome company to work with, very efficient and organised. I highly recommend!
          Finding someone reliable for renovations has always been the most stressful thing for us. In the past, we had several painful renovation experiences—money was spent but the problems were never truly solved, and things often ended up worse than before. We really didn’t know where to find a trustworthy renovation company.

          For more than ten years, our wish had been to renovate our bathroom, laundry, and toilet, so that we could finally enjoy a comfortable and functional living environment. Just when we were about to give up, we came across Superior Renovations online. We quickly made an appointment with Cici, who designed and provided us with a quote.

          Throughout the whole process, I was deeply impressed by the professionalism of Superior Renovations. What stood out most was that they always delivered on their promises—everything agreed upon was completed on time. This built a relationship of trust and reliability. Up until completion, I was completely satisfied with their dedication and the quality of their workmanship.

          During the renovation, we encountered some of the challenges that often come with older houses, but Cici and her team helped us resolve the discomforts we had been living with for years. We are truly grateful to the construction team.

          Some say renovations are easy if you just have money, but I believe the most important thing is finding a trustworthy team that keeps their word, values quality, and cares about the customer’s experience.

          Because of this renovation experience, we can now confidently plan our next project—the kitchen—and Superior Renovations will definitely be our first choice. We strongly recommend them.

          Finally, I want to thank Cici and the team for helping us fulfill our dream.

          Mark & Kate
          Sinan is a very good consultant. She helps a lot during renovation. Very satisfied with their job.
          It was great to have Alison's recommendations and input on how & what would look best for our kitchen and bathroom reno. Jacob, our project manager, has been a star too; ensuring that the project was delivered as planned, AND giving us great ideas & suggestions along the way.

          We will definitely be calling on you guys again for our next home reno. Thanks team!
          Very impressed with Superior Renovations.Building our pergola with blinds for a fair price .First thank you Sinan for quoting the job and your flexabilty and knowledge..Secondly the job was done well within the time frame, thanks to Jeff for supervising the job ( eventhough he wasn't too well) and keeping us up to date throughout the process. Payment was fair and easy as well .
          Thoroughly recommend Superior Renovations for your reno job 👍
          Very efficient team of workers and high quality finish.
          Very happy with our renovated bathroom.
          We will use this company again.
          We’re very happy with the renovation work done by the team. It’s rare for renovation projects to finish on time, but they committed to completing ours before the Easter holiday—and they delivered! Our project manager, Jacob, worked incredibly hard (even physically! 😄) to make it happen.

          I admit I might not have been the easiest client—I was particular about details like colours, tile placement, and exactly where the hand basin bowl should sit on the bench. But they listened, took it all on board, and got it done. Thank you, Jacob!
          I’ll definitely bring you another challenge in the future. 😉