1")
Complete Guide to Bathroom Design & Bathroom Trends (2026)
Complete Guide to Bathroom Design & Bathroom Trends NZ (2026)
Quick answer: Good bathroom design in 2026 starts with the layout, not the tapware — get the plumbing and traffic flow right, then layer in terrazzo, large-format porcelain, backlit mirrors, and a wet-room shower zone. In Auckland, a mid-range bathroom renovation runs $25,000–$35,000, takes 3–4 weeks on site, and adds genuine resale value when done well.
This guide was republished in May 2026 with updated trends, current Auckland costs, NZ Building Code references, and fresh designer commentary from the Superior Renovations team.
2026 Bathroom Design Trends for NZ Homes — At a Glance
Earthy tones and terrazzo are still leading the way, but 2026 has added more universal-access features, layered smart lighting, and a clear move toward wet-room layouts. The winners we’re installing across Auckland right now:
- Terrazzo and large-format porcelain for durable, low-grout wet areas
- Backlit mirrors paired with under-cabinet LEDs for shadow-free grooming
- Wet rooms with anti-slip matte finishes and a single glass panel
- Sliding cavity doors and wall-hung vanities to open up small footprints
- Statement freestanding baths paired with a separate walk-in shower
- Brushed nickel tapware (the new neutral — softer than matte black)
- Bathroom niches in the shower and above the basin for grout-free storage
- Level-access showers and wider doorways for future-proof use
“Layered lighting is what separates a nice bathroom from one that feels like a hotel. Task LEDs down each side of the mirror, recessed warm-white spots overhead, and a single dimmable pendant for the bath — that’s three scenes from one room, controlled by one keypad.”
— Cici Zou, Designer (NZ Dip. Interior Design, Certified Designer), Superior Renovations
Where to Start: How We Approach Bathroom Design
Most renovation guides skip the part that matters most. They jump straight to tile boards and tapware without admitting that the bathroom you end up with is decided in the first design conversation, not the final material selection.
After more than 1,000 Auckland bathroom projects, we’ve learned the order matters: layout first, then function for who lives there, then materials, then trends. Try to start with trends and you’ll end up with a Pinterest board that doesn’t fit your section, your plumbing, or how your family actually uses the space at 7am.
The four questions we ask in every first consultation
- Who uses this bathroom, and at the same time? A family bathroom for two teenagers needs double basins and a separate toilet. An ensuite for two adults needs a generous shower and storage. A guest bathroom needs none of that.
- Where are the existing soil pipes? Moving the toilet is the single most expensive change you can make. We map this before drawing a layout.
- What’s the home worth, and what’s the renovation for? A $40,000 bathroom in a $900,000 Henderson home is sensible. The same bathroom in a $2.6m Remuera home is undercooking the asset. We tier the spec to the property, not the catalogue.
- What’s the wider plan? If a second bathroom is on the cards in three years, we plan the plumbing now and save you doing it twice.
“The fastest way to overspend on a bathroom is to design it twice. We use a Design-to-Build Action Plan that locks the scope, layout, and product selections before a single tile is ordered — that’s what keeps the quote a quote, not a guess.”
— Dorothy Li, Design Manager, Superior Renovations
💡 Quick tip: Before any design meeting, take a photo of your current bathroom from each corner and one straight down. Plumbers can identify pipe runs from those four photos faster than from any verbal description.
Why we recommend starting with a designer, not a builder
Plenty of builders can install a bathroom. Far fewer can design one that suits the way you live. We run a full in-house design team out of our Wairau Valley showroom for exactly that reason — every bathroom we build is drawn, specified, and 3D-rendered before a tradie sets foot on site.
If you want to see what that process looks like in practice, browse the Bathroom Design Gallery or the Design Studio pages. Both give you a clearer picture of how we work than any list of bullet points can.
Bathroom Layouts That Actually Work in Auckland Homes
Every bathroom in New Zealand is some version of four layouts. Knowing which one you’re working with — and which one you should be working with — is the foundation of every good bathroom design.
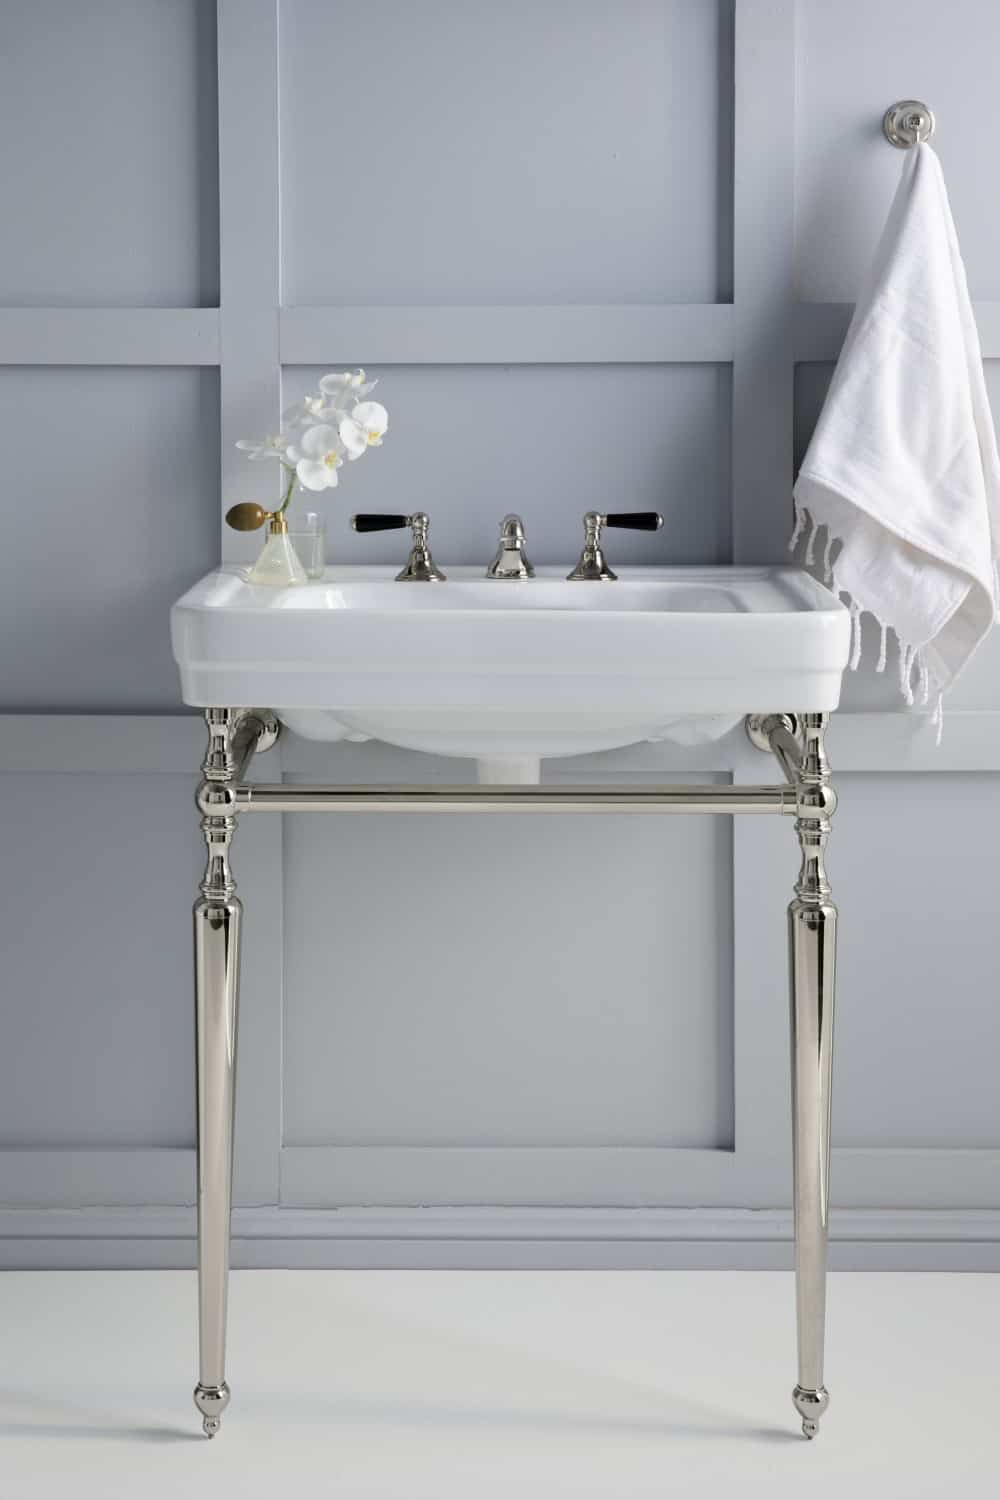
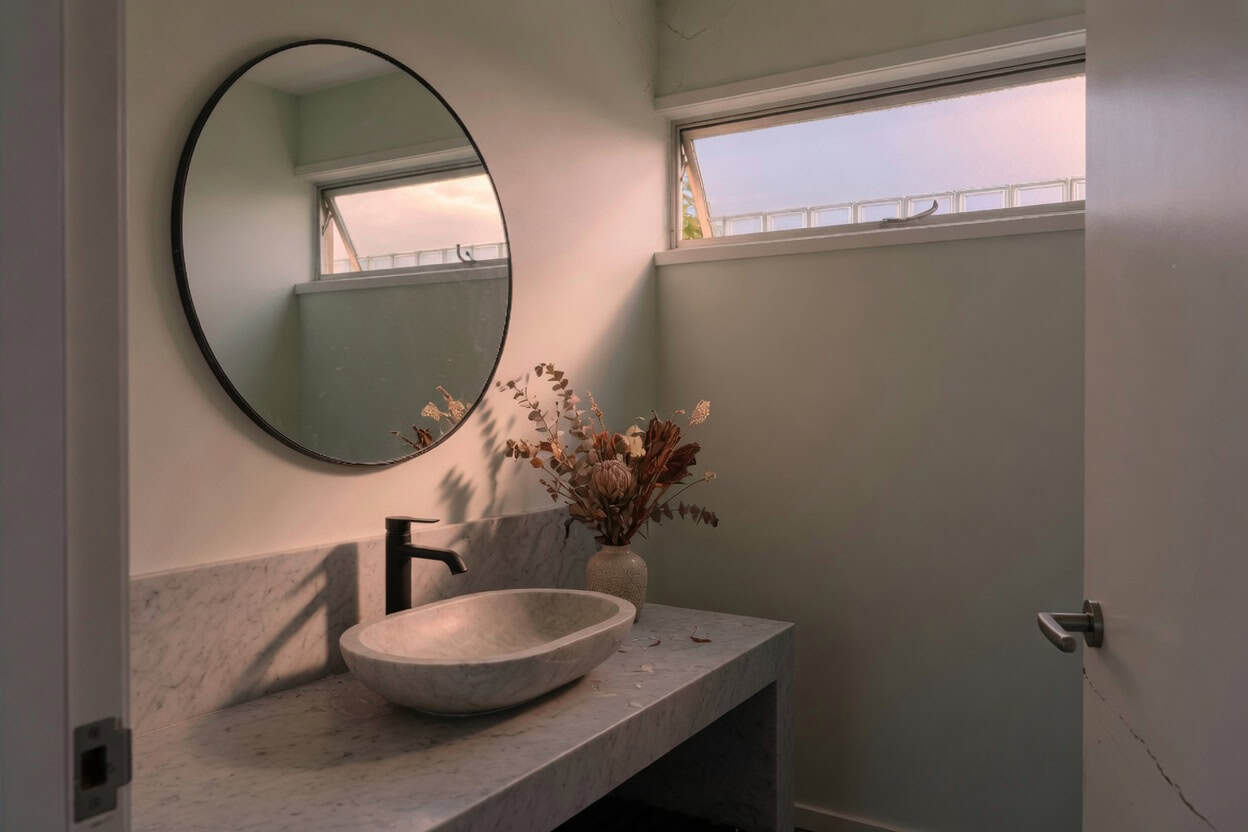
1. The Statement Bath Layout
A freestanding bath set against a window, a feature wall, or in the centre of the room. This works in larger bathrooms — usually masters in villas, character bungalows, or larger St Heliers and Remuera homes where the bathroom footprint is over 7m². The bath is the hero, the rest of the layout supports it.
Where it works: Villas with deep bathrooms, master ensuites over 8m², any bathroom with a window worth looking out of.
Where it doesn’t: Compact apartments, family bathrooms with high traffic, small ensuites under 5m².
See the St Heliers villa renovation where we used this layout →
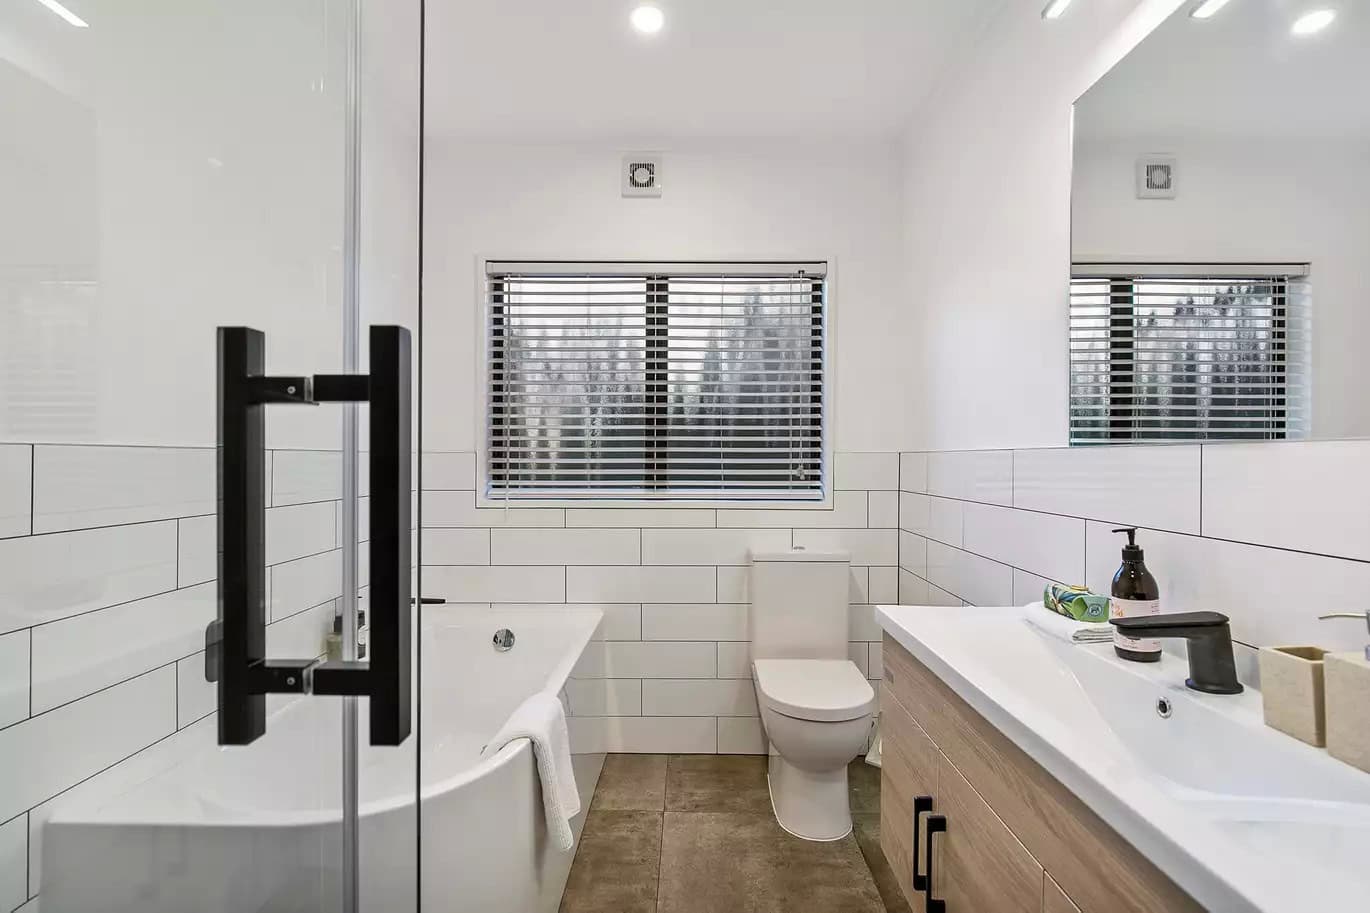
2. The Over-Bath Shower Layout
The classic Kiwi family bathroom. A bath with a shower over it, glass screen or rail-mounted curtain, hand-held mixer for bathing kids. It’s the most space-efficient layout and still the right answer for many three-bedroom homes in West and South Auckland.
Where it works: Family bathrooms in homes under 130m², the main bathroom when an ensuite already has a separate shower, any layout under 5m².
The mistake to avoid: Don’t install an off-the-shelf acrylic shower box over the bath. It looks dated immediately and traps grime in the joins. A frameless glass panel costs marginally more and lifts the entire room.
💡 Quick tip: For an over-bath shower, spec a thermostatic mixer rather than a basic tap-style mixer. Kids can scald themselves on the latter — the thermostatic version caps the temperature at a safe maximum.
3. The Bath and Separate Shower Layout

The full-house layout. A bath, a separate walk-in shower, and ideally double basins. This is what most Auckland homeowners aim for when they renovate a main bathroom or build a master ensuite. It needs at least 8–10m² to work without feeling cramped.
Where it works: Family bathrooms in homes over 150m², master ensuites in renovated villas, full-home renovations where you’re combining a bathroom and laundry into one larger room.
The detail most people get wrong: The shower and bath share a wet wall. Plan the plumbing chase carefully — if you don’t, the shower mixer ends up in a position where you have to step under cold water to turn it on. We always run a one-metre line ahead of the showerhead position.
See a bath + shower renovation in Albany → · Milford North Shore version →
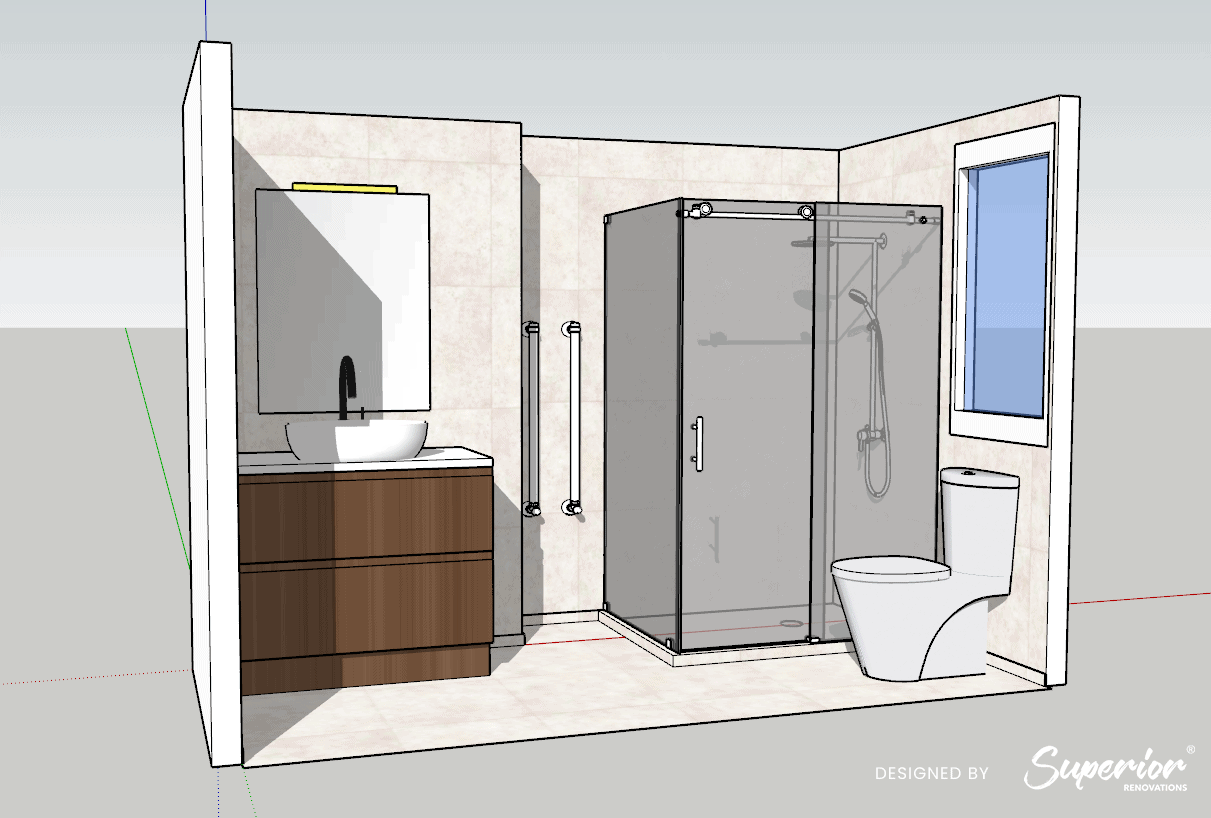
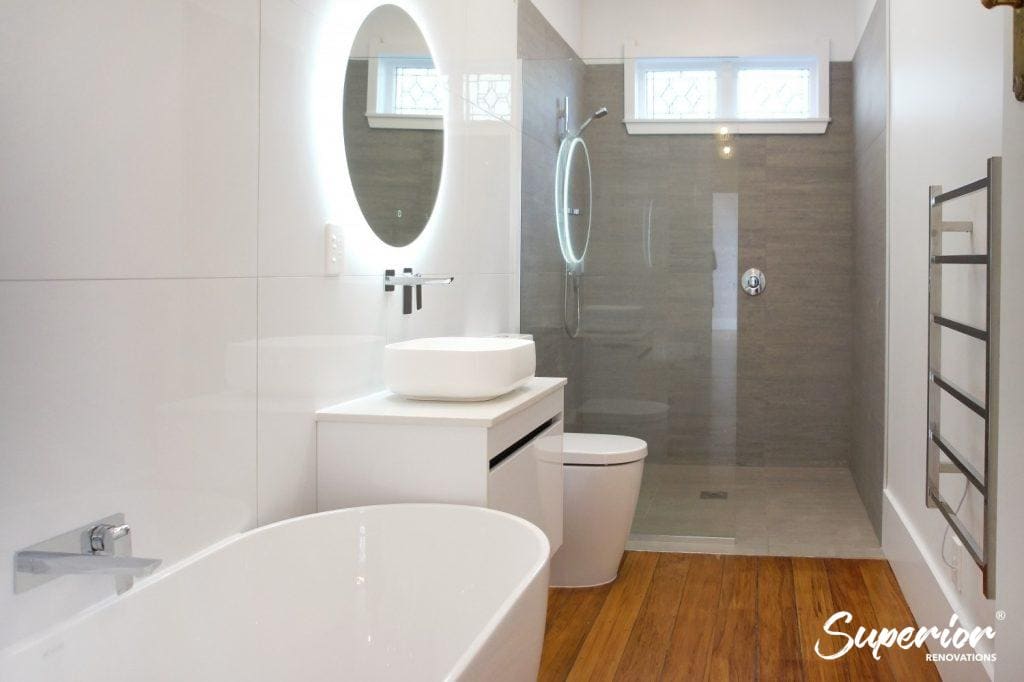
4. The Wet Room (Shower Room) Layout

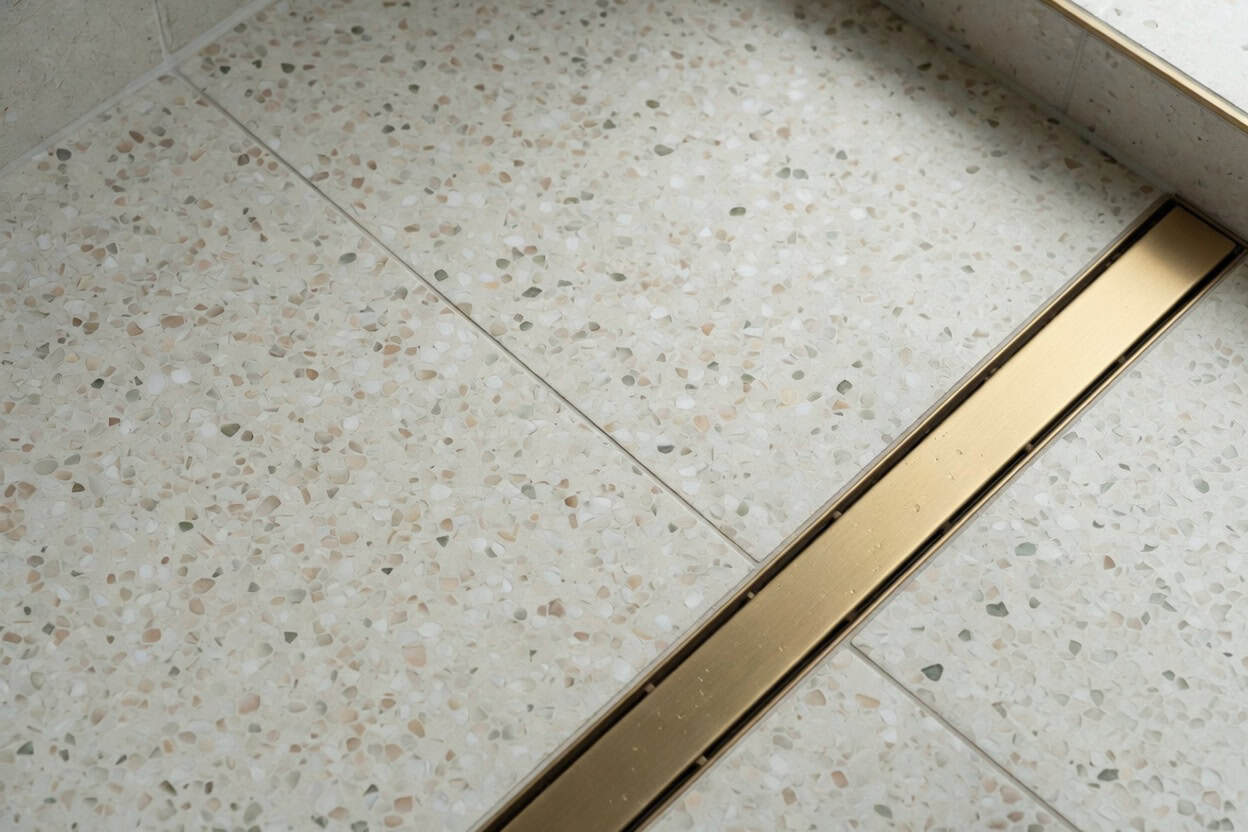
The fastest-growing layout in 2026, and the one we’d argue makes the most of a small space. A fully waterproofed room with anti-slip matte tile floor, a linear drain, a single glass panel, and no shower tray. The shower zone, toilet, and vanity all share the same waterproof envelope.
Where it works: Compact ensuites in apartments and townhouses, second bathrooms in renovated villas where the footprint is tight, accessible bathrooms for older homeowners (a level-access shower removes the trip hazard of a shower tray lip).
The thing to get right: Fall and drainage. A wet room needs at least a 1:80 fall toward the linear drain, and the waterproof membrane has to extend up the walls 1.8m in the shower zone (NZ Building Code Clause E3 Internal Moisture). This is not a job for a handyman.
For a deeper breakdown of small-bathroom layouts specifically, see our companion guide on small bathroom design ideas, or read our take on the bathtub vs walk-in shower question.
What about pipework — can I change the layout completely?
Yes, but you need to know what you’re signing up for. Moving the basin, bath, or shower a metre or two is straightforward — most floor cavities can accept new branches off the existing waste pipe. Moving the toilet is the expensive change, because the soil pipe has a much larger diameter and needs proper fall.
If you’re considering moving the toilet to a new position, expect to involve an architect or a designer to produce drainage drawings, and budget for Auckland Council consent. Council processing can take anywhere from 4 to 8 weeks per the Auckland Council standard timeframe, before any physical work starts.
Important note: Replacing fixtures in the same positions is a Schedule 1 exemption under the Building Act — no consent required. Moving plumbing, removing walls, or adding electrical circuits beyond standard replacements typically requires consent. We assess this at the first consultation and handle all council applications in-house.
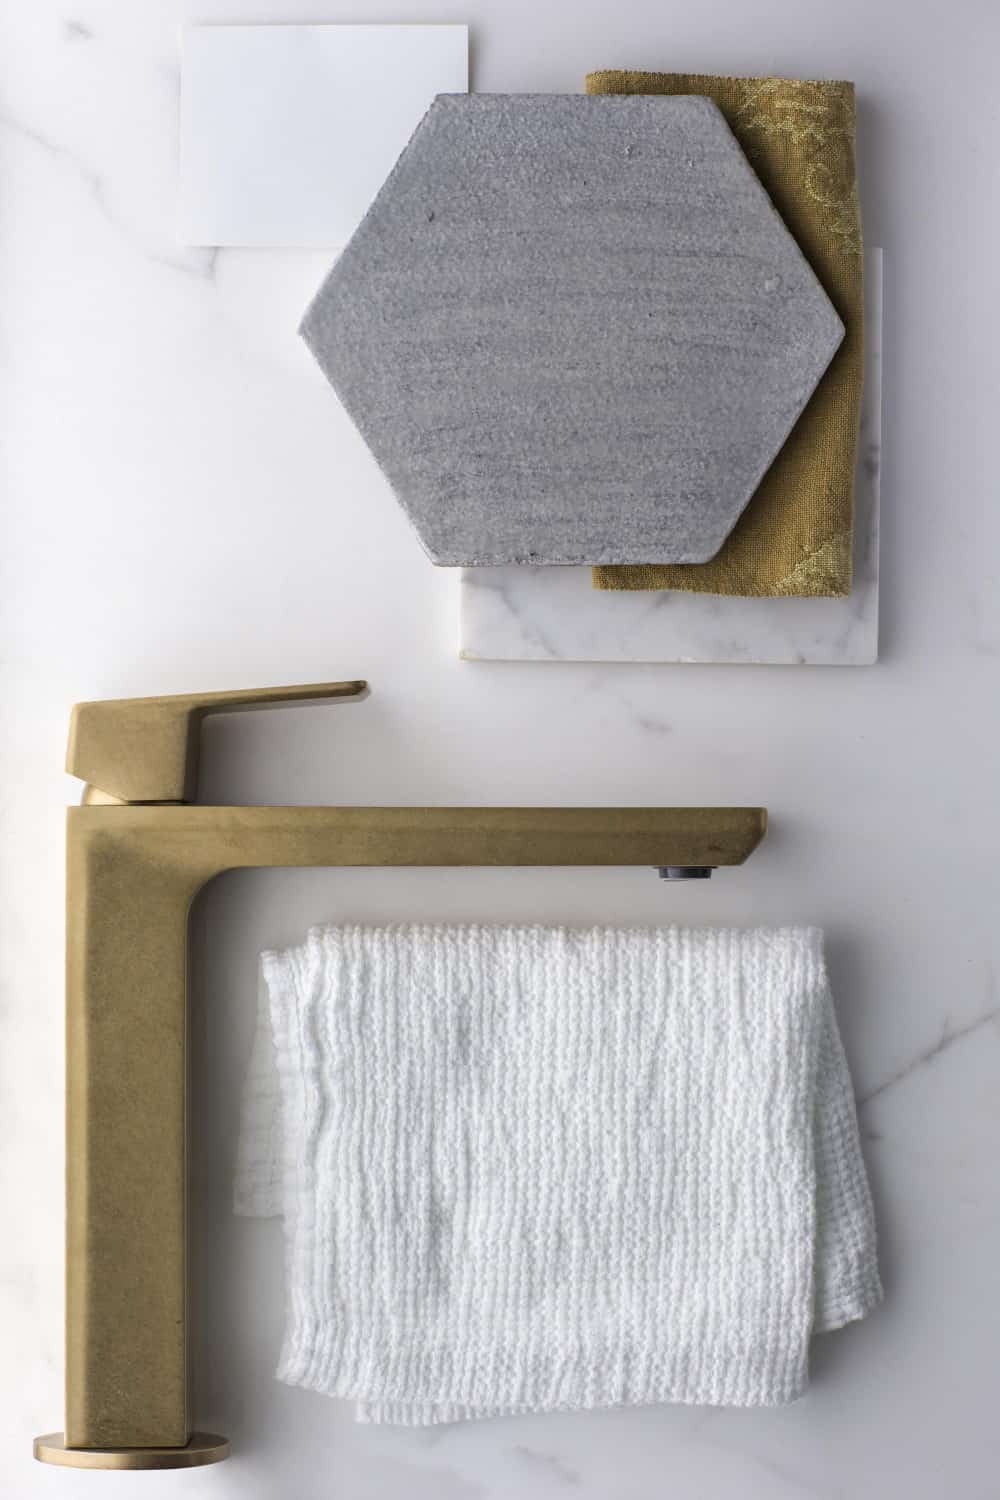
Bathroom Design Trends 2026 — What Auckland Homeowners Are Actually Installing
Most trend lists are wishful thinking written by someone selling tile. This is what’s actually being specified and installed across our active 2026 projects, ranked by how often we’re seeing them.
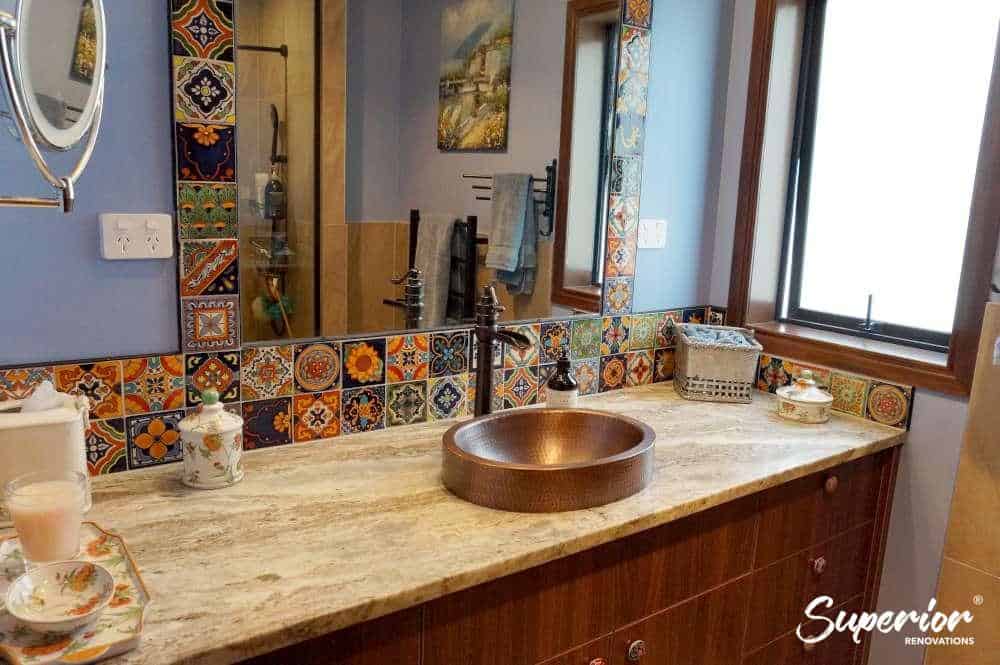
1. Terrazzo (the real comeback, finally)
Bathroom Designs
Terrazzo had a false start in 2023 — a lot of homeowners liked the look but balked at the cost. In 2026 it’s back properly, driven by recycled-content composite terrazzo tiles that cost a fraction of the poured version. We’re using it on floors, in shower zones, and on vanity tops in roughly one in three projects.
Why it works in Auckland: Terrazzo handles damp winters without the grout-line mould issues you get with small-format tile. Large-format terrazzo (600x600mm or bigger) has fewer joints, less cleaning, and a 25-year-plus life on a bathroom floor.
“Our clients in St Heliers and Milford are choosing terrazzo because it solves three problems at once — it looks current, it lasts, and the recycled content ticks the sustainability box that more buyers now ask about. We’re sourcing most of ours through The Tile Depot and a couple of specialty importers.”
— Eunice Qin, Designer, Superior Renovations
2. Large-format porcelain (still the workhorse)

If terrazzo isn’t to your taste, the next-best option is large-format porcelain. 600x1200mm tiles are now standard, and 1200x2400mm slabs are being used in shower zones to give a near-seamless wall — almost no grout, easier to clean, and visually it stretches the room.
We spec porcelain over ceramic for any wet area because it absorbs less than 0.5% water by weight and won’t craze under the temperature swings you get in an unheated Auckland bathroom in winter.
3. Backlit and integrated mirrors
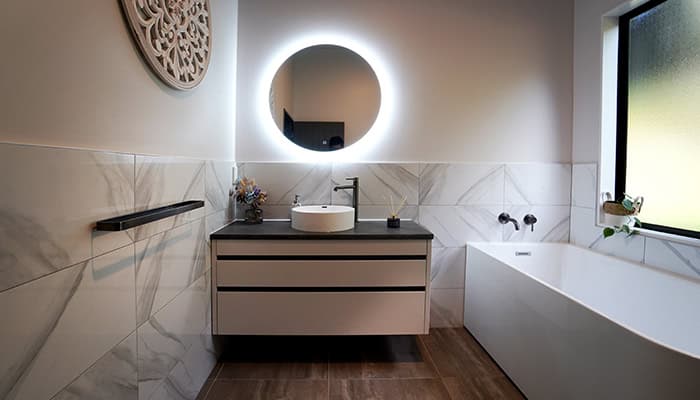
Backlit mirrors have moved from a luxury feature to a near-standard inclusion. They throw light forward onto your face (no shadows from an overhead downlight) and most have anti-fog heating that clears the mirror after a hot shower. Energy use is negligible compared with overhead lighting.
The variation we’re seeing more of in 2026 is the vanity-mounted mirror — set forward of the wall on slim brass or chrome stems. It works particularly well over a stone vanity in larger ensuites.
See backlit mirrors in our Parnell luxury renovation → · Redvale luxury renovation →
4. Earthy and warm-neutral colour palettes
The hard greys and stark whites of 2020 have aged badly. 2026 palettes are warmer — bone, oat, clay, soft terracotta, sage — paired with timber-look vanities and brushed brass or nickel tapware. It reads calmer, photographs better, and ages slower.
The exception is the bold dark bathroom: matte black or deep charcoal walls, paired with one or two warm metal accents. This works in a windowless guest powder room but rarely in a main bathroom — natural light matters more than drama.
Bathroom Designs
5. Geometric and patterned feature walls
Geometric tile creates a focal wall without overcomplicating the rest of the room. We’re using it most often behind a freestanding bath, on a single shower wall, or as a splashback strip behind a vanity. The trick is to commit to one geometric feature per room — two competing patterns flatten each other.
Bathroom Designs
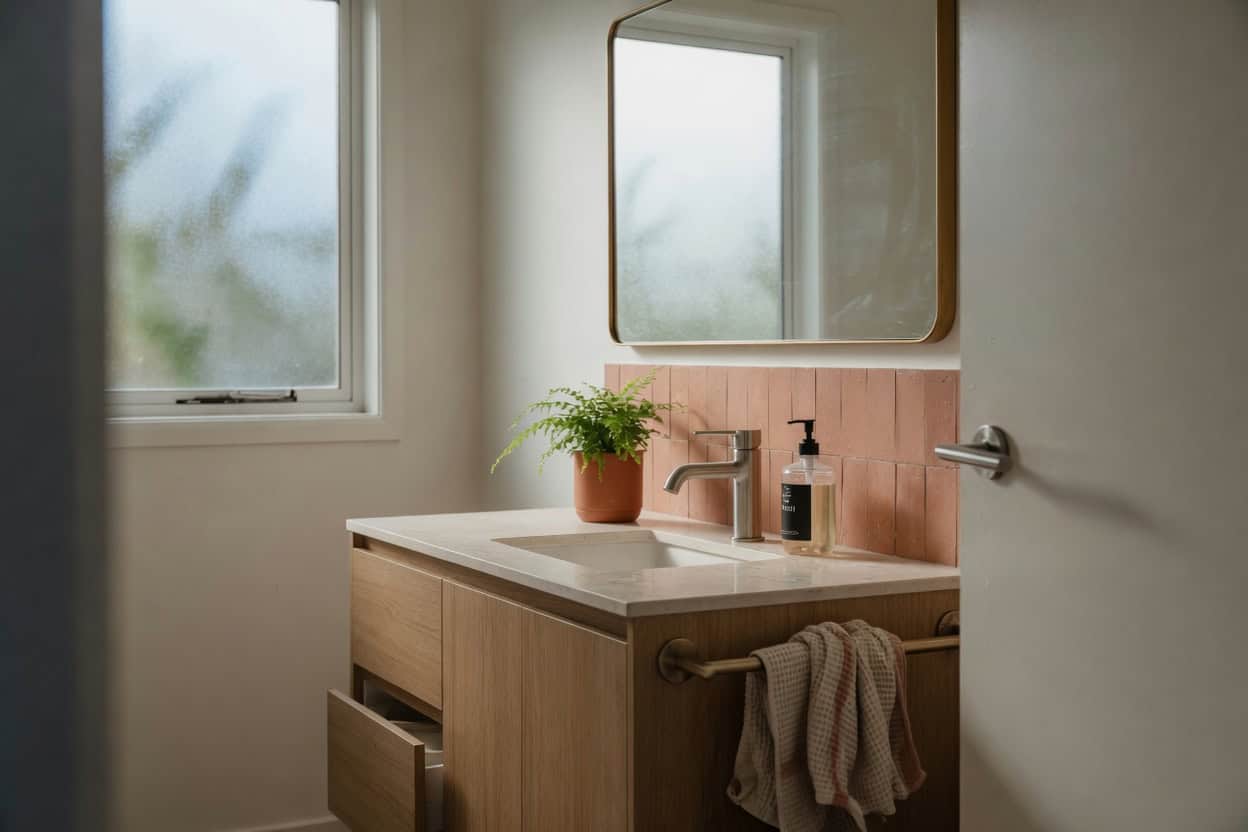
6. Wall-hung vanities and floating storage

Wall-hung (floating) vanities are now the default for any bathroom under 7m². They show more floor, which makes small rooms read larger, and they make cleaning the floor underneath possible. Pair with an under-cabinet LED strip for a soft ambient wash that doubles as a night light.
For larger ensuites and family bathrooms, we still spec floor-mounted joinery — usually NZ-made cabinetry with melamine or laminate fronts from Laminex, finished with stone or composite tops.
See the Titirangi floating vanity project →
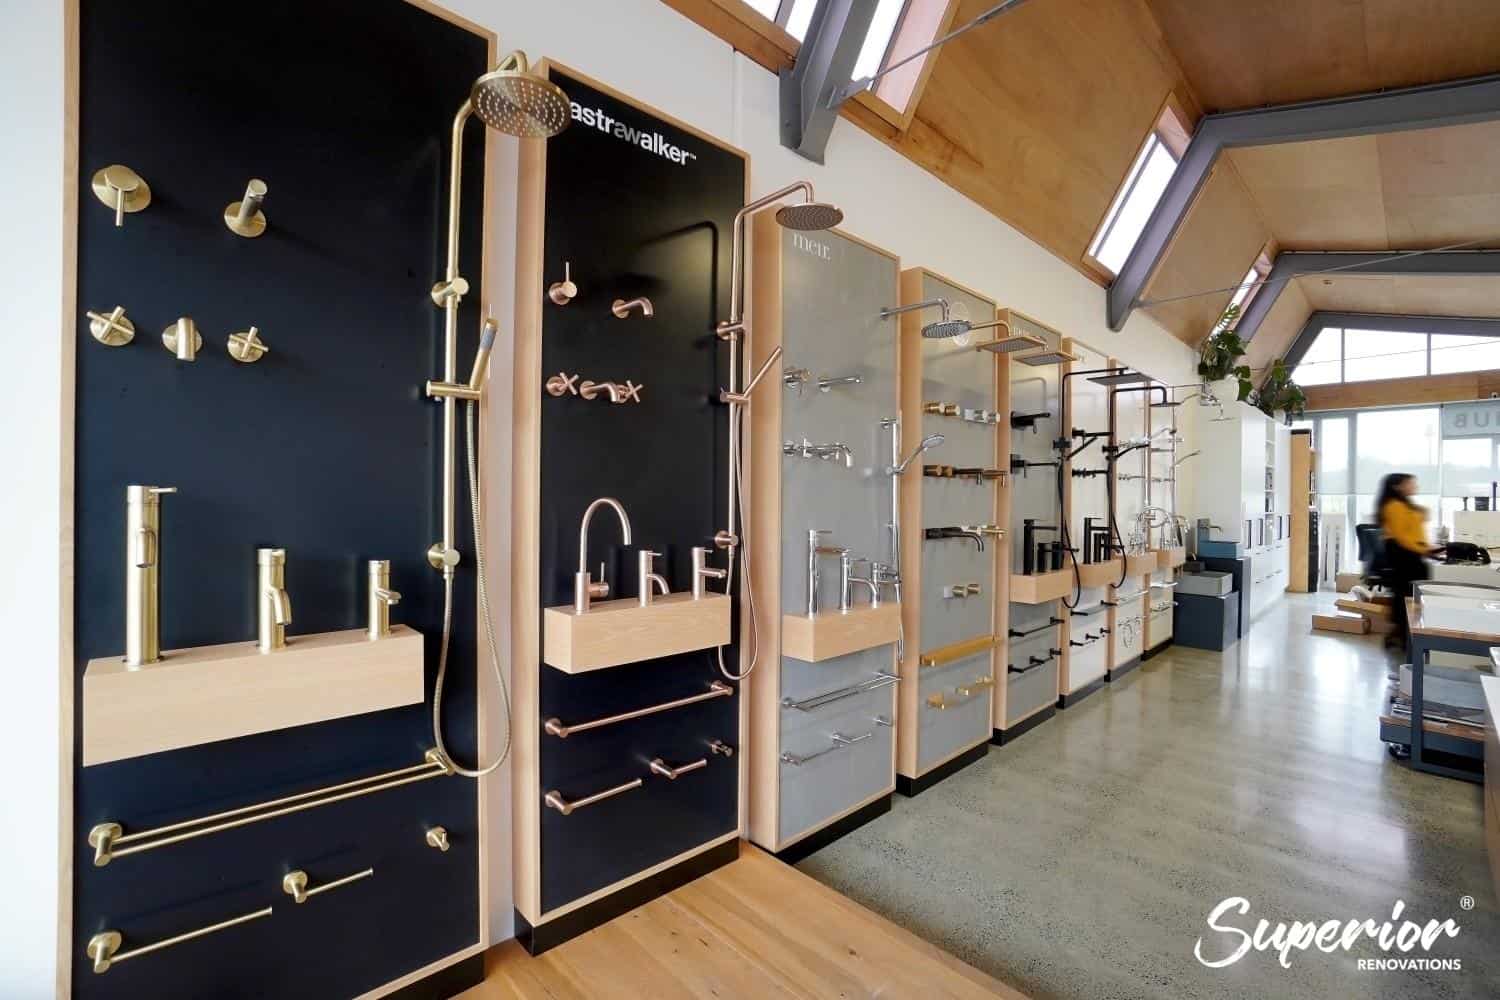
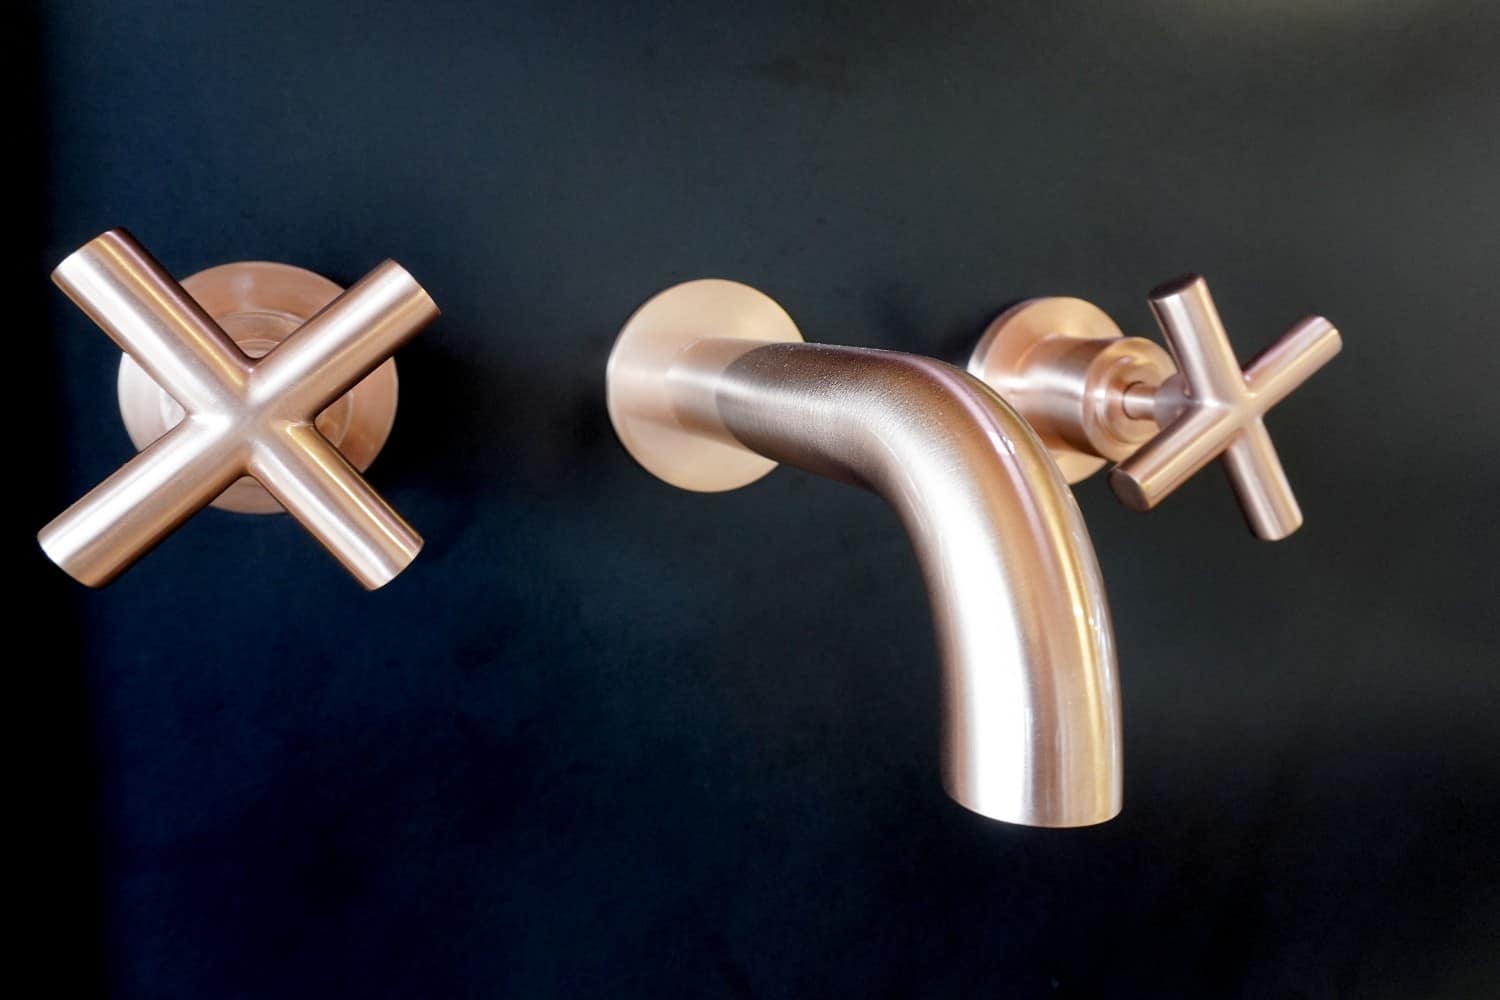
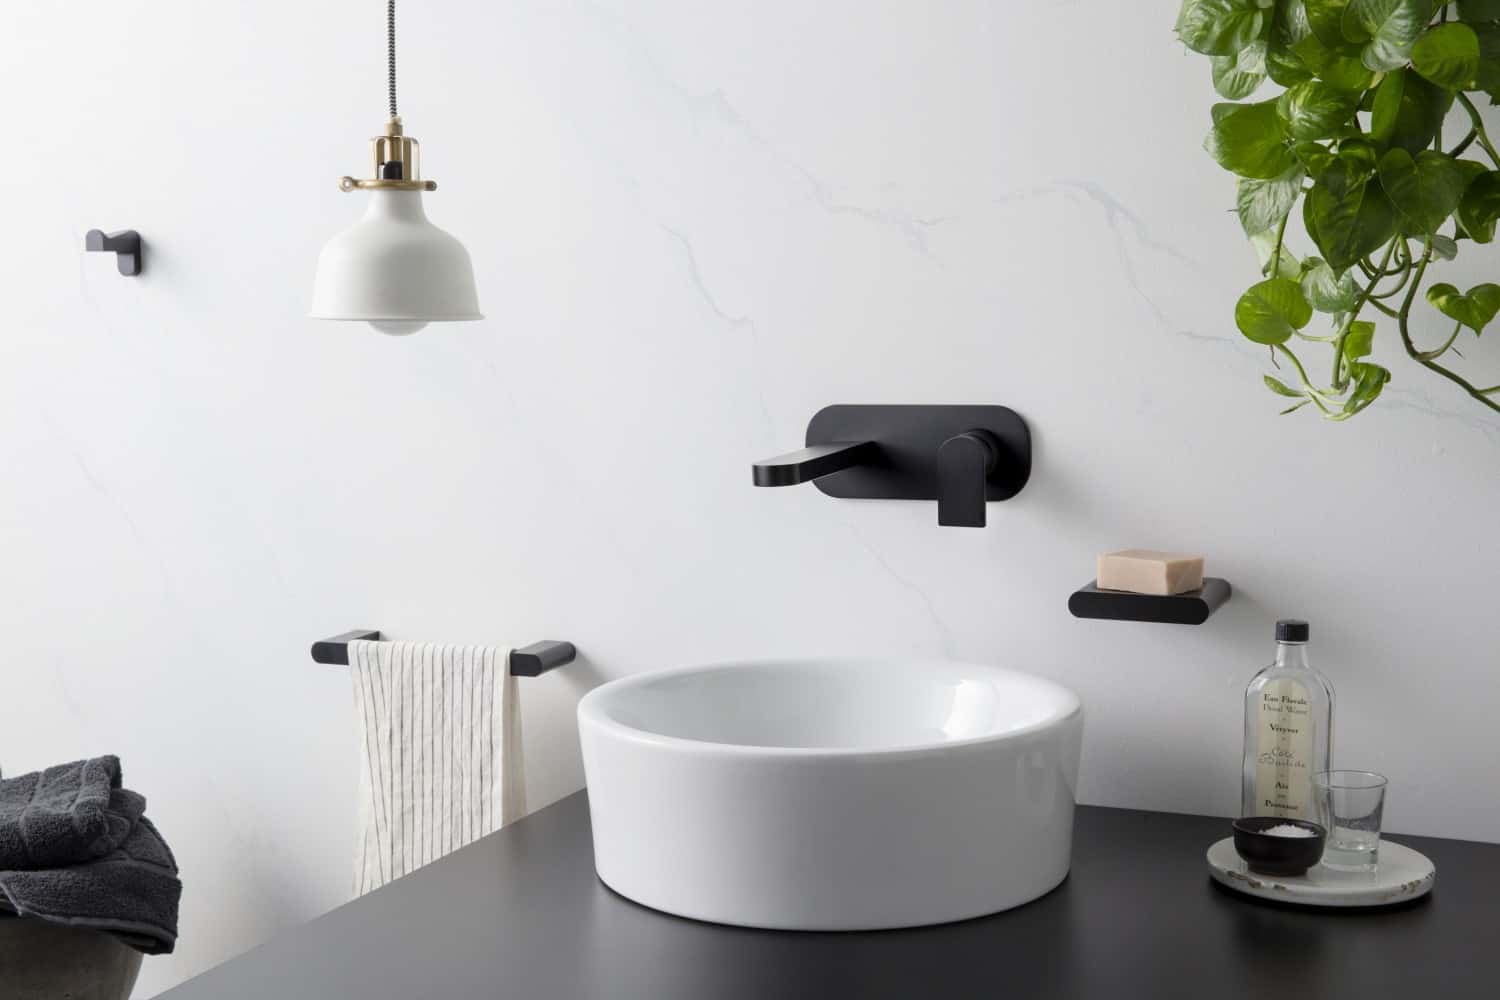
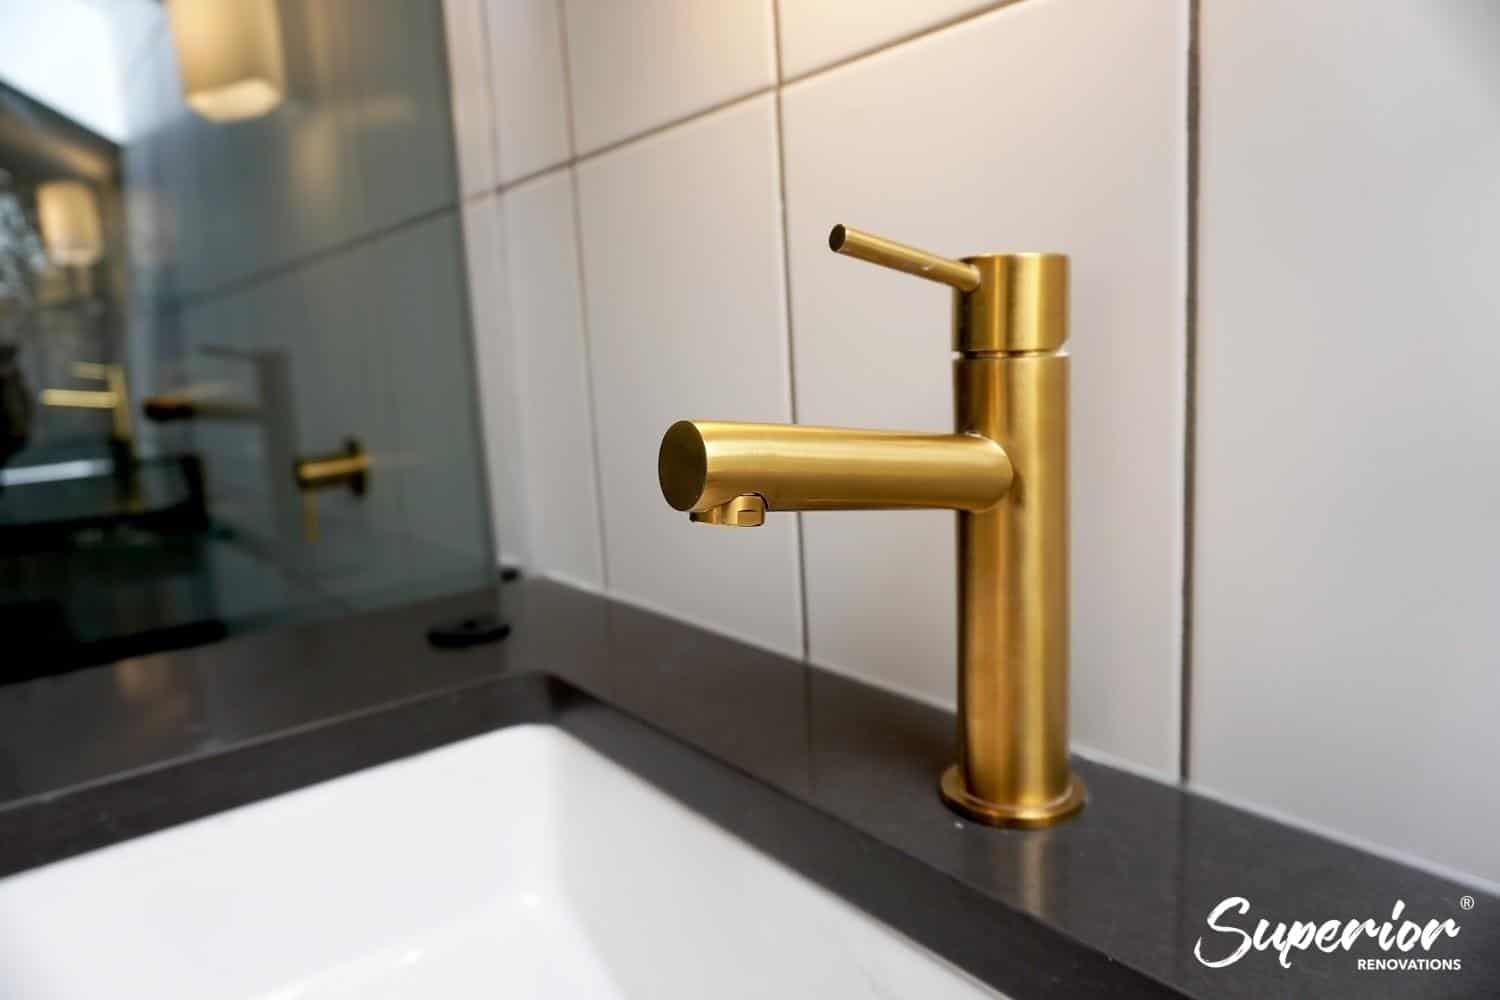
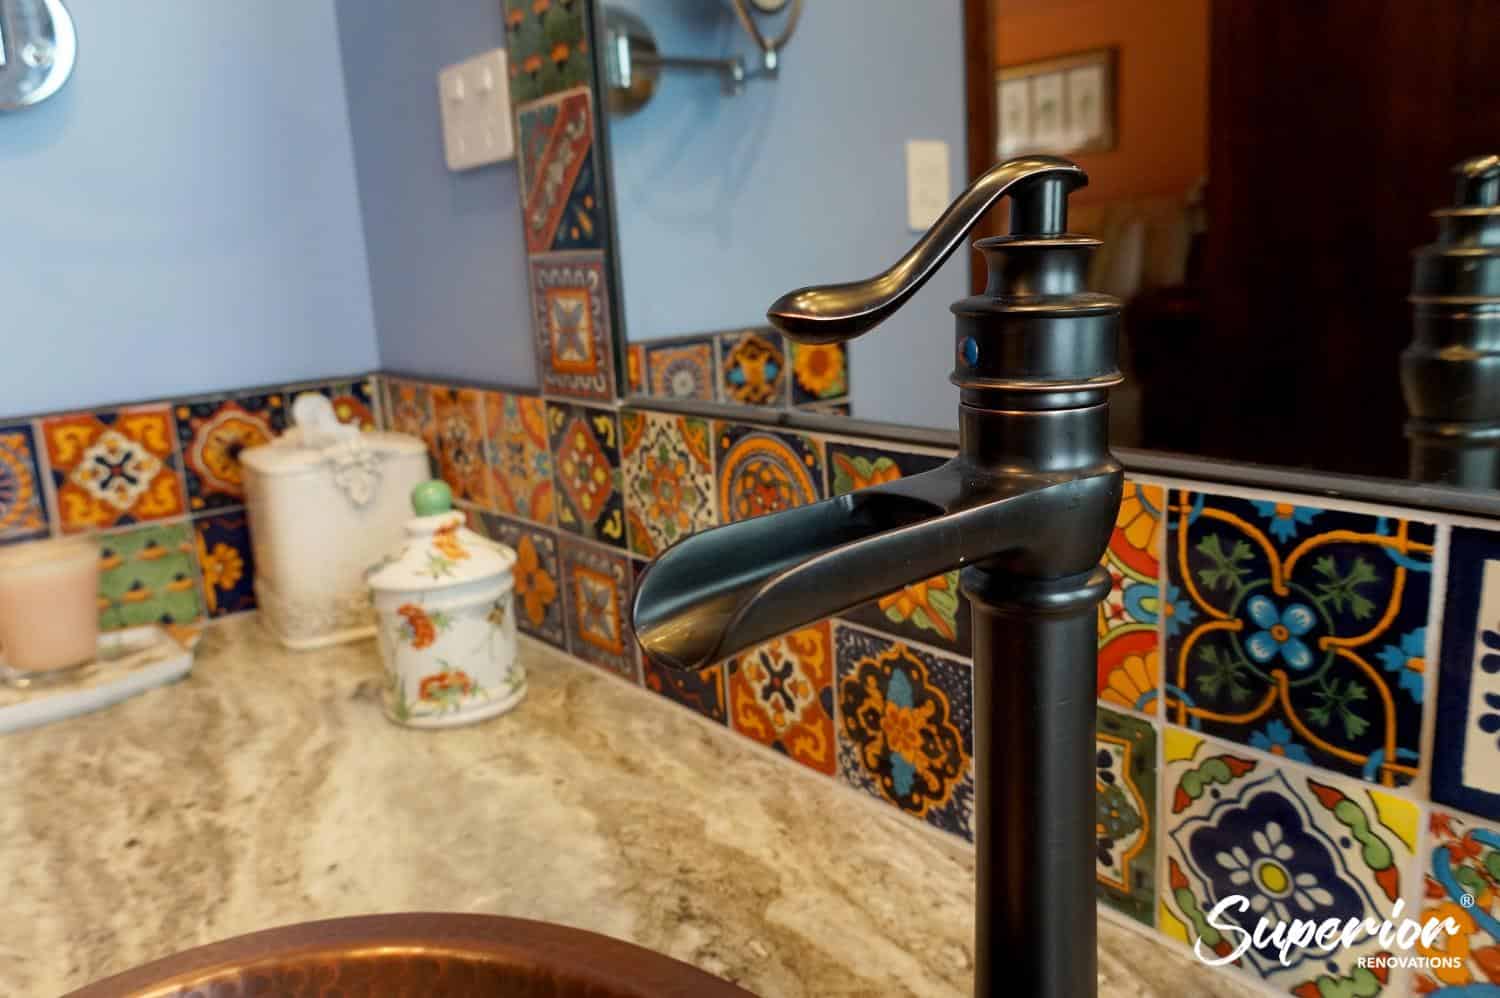
7. Brushed nickel tapware (the new neutral)
Matte black was the dominant tapware finish from 2019 to 2024. In 2026 it’s tipped over — brushed nickel and warm brushed brass are now the more common spec, particularly in warm-neutral colour schemes. Both are softer, both age more gracefully, and both don’t show water spots the way matte black does in Auckland’s hard-ish water.
Source most of our tapware through Reece, with a few specialty brands when a client wants something specific. PVD-coated finishes are now standard at the mid-range and up — they hold their colour for years longer than the older powder-coated versions.
8. Bathroom niches over add-on shelving
The recessed niche — built into the shower wall or above the basin — has replaced the add-on shower caddy and the floating glass shelf. It’s grout-free, it doesn’t trap soap scum, and it disappears visually when not in use. Plan one shoulder-height niche per shower minimum, ideally tiled in a contrast strip to anchor it as a deliberate feature.
9. Sliding cavity doors
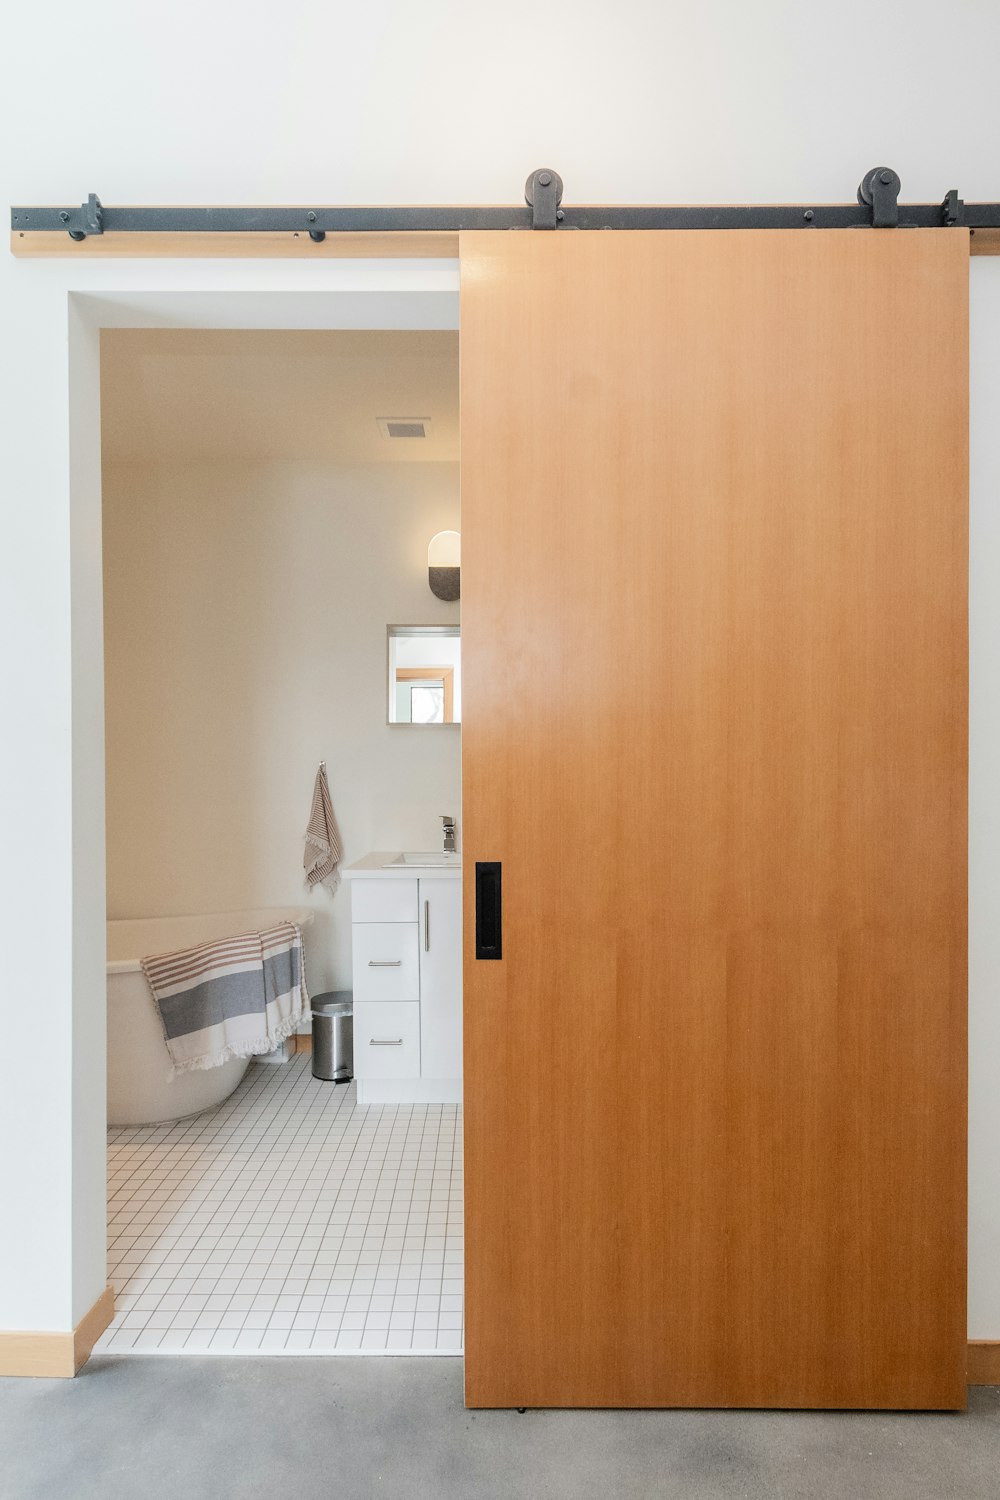
A standard hinged door swings 800mm into the room. A sliding cavity door takes zero. In small bathrooms under 5m², swapping a hinged door for a cavity slider frees up enough space for a slightly larger vanity or a wider shower. We use cavity sliders on roughly half our small-bathroom and ensuite projects now.
10. Smart and layered lighting controls
Wall-keypad scene controls — a single keypad with pre-programmed “morning”, “evening”, and “night” scenes — are filtering down from luxury projects into mid-range bathrooms. We spec these through PDL by Schneider Electric on most projects over $35,000.
The full lighting principle is covered properly further down — this is just a flag that the hardware is now affordable.
11. Universal-access and future-proof features
This is the trend most renovation guides ignore, and it’s the one that matters most for Auckland’s ageing housing stock. NZ Building Code Clause G1 Personal Hygiene specifies that sanitary facilities must be accessible (per building.govt.nz). The practical 2026 inclusions:
- A level-access shower (no tray, no step) with minimum 900x900mm clear zone
- Vertical grab rails near the toilet and in the shower (specced now, installed later if you’d rather)
- A wider doorway (at least 810mm clear) — Auckland villas often have 760mm doors that won’t fit a walking frame
- A vanity height of 850–870mm — slightly higher than the old standard, easier on knees and backs
“We design every family ensuite with future use in mind now. A wider doorway and a level-access shower don’t add cost at the planning stage, but adding them later is a $15,000 retrofit. It’s the most overlooked decision in bathroom design and the one clients thank us for ten years later.”
— Dorothy Li, Design Manager, Superior Renovations
Designing for Who Actually Lives There
A bathroom built for a young family is a different room from a bathroom built for empty nesters or a guest ensuite. We tier every project to who uses it, when, and at what age. Below is how each type breaks down.
Family Bathroom Design — Built for Volume

The family bathroom is usually the busiest, hardest-worked room in the house. Two adults, two kids, a six-day-a-week routine. The design priorities are different to a guest bathroom or an ensuite — durability, simultaneous use, and storage come before aesthetics.
What we always spec for a family bathroom:
- Double basins. Two people brushing teeth at the same time is not a luxury — it’s a normal 7am.
- Porcelain floor and walls. Soap, shampoo, sunscreen, kids dropping things. Porcelain shrugs it all off and cleans with a wet cloth.
- A separate toilet zone where space allows. A toilet behind its own door (a “three-way bathroom” layout) means one kid can be on the toilet while another is in the shower without crisis.
- Closed storage. Toiletries, spare toilet rolls, towels. Open shelving looks great in a magazine and a mess in a real family bathroom.
- An over-bath shower or a separate bath and shower — bathing small kids in a walk-in shower is exhausting.
💡 Quick tip: If you have teenagers or are planning to, install a heated towel rail on its own timer. Wet towels on the floor are a renovation killer for the bathroom you just spent $35,000 on.
Master Ensuite Design — A Room for Two Adults

The master ensuite is where the budget gets stretched, and rightly so. It’s a daily-use room for the people who paid for the renovation. We use ensuites to spec the products we wouldn’t put in a family bathroom — stone tops, large-format slabs, a freestanding bath, a generous walk-in shower with a fixed rain head and a separate handset.
What sets a good ensuite apart:
- A walk-in shower over an over-bath shower. Adults take showers, not baths. Build the shower zone properly.
- A separation between the bath zone and the rest of the room. If the bath is in the same room as the toilet, it’s not a retreat — it’s a bathroom with a bath in it.
- Privacy from the bedroom. A direct sightline from the bed to the toilet ruins both rooms. We always add a short passage, a half-wall, or a pocket door.
- Considered lighting. Two scenes minimum — bright for grooming, low for unwinding.
“A well-positioned ensuite adds genuine luxury without needing extra floor area. The first thing we check on every plan is the sightline — what do you see when you walk through the bedroom door, and what do you see from the bed. If either of those is the toilet, the plan changes.”
— Cici Zou, Designer (NZ Dip. Interior Design, Certified Designer), Superior Renovations
Guest Bathroom and Powder Room Design
The guest bathroom is the underrated room. It gets used less, so it’s the place to take a small design risk — a dark feature wall, an unusual basin, a statement light fitting. Most guest powder rooms are small (under 3m²), which means tile budgets go further and you can spec a higher-end finish for less money.
The two non-negotiables:
- Adequate ventilation — guest bathrooms often sit in the middle of the home with no external window. Either a window or a mechanical extract vented to the outside is mandatory under NZ Building Code Clause G4 (per building.govt.nz).
- A solid soft-close toilet seat. Guests will not be gentle.
Wet Room and Shower Room Design
We covered the wet room layout earlier. The design details specific to wet rooms:
- Anti-slip matte tile floor. Gloss tile in a wet room is a slip-and-fall waiting to happen. Matte porcelain with a minimum R10 slip rating is the baseline.
- A linear drain over a point drain. Linear drains are cleaner-looking, easier to clean, and the fall is simpler to set out.
- Heated floor where budget allows. A wet room floor stays wet for longer between uses. Underfloor heating dries it faster and the room feels warmer in winter.
- A single fixed glass panel — not a full enclosure. The whole point of a wet room is that it doesn’t read as a shower box.
Important note: Wet rooms require a full Type A waterproof membrane to NZS 4404 standard, with the membrane extended 1.8m up shower walls and 150mm above the floor elsewhere. Always ask your renovator to supply a Producer Statement (PS3 or PS4) from the waterproofing contractor — this protects you at resale.
Bathroom Lighting That Does Three Jobs at Once

Lighting is the single most underspent line item in most bathroom renovations. People will pay $4,000 for a vanity and $180 for the lights above it. Then they wonder why the room feels flat.
Good bathroom lighting has three jobs: task lighting at the mirror (for grooming), ambient lighting overhead (to fill the room evenly), and accent lighting (to add warmth and depth). A well-lit bathroom has all three, on separate switches, ideally with dimming.
The four-circuit rule
For any bathroom over 4m², we plan a minimum of four lighting circuits:
- Vanity task lighting — backlit mirror or vertical LED strips either side of the mirror
- Overhead ambient — warm-white recessed downlights, ideally on a dimmer
- Shower zone — a single IP65-rated downlight directly over the shower, often on the same circuit as the extract fan
- Accent / mood — under-vanity LED strip, niche lighting, or a single feature pendant over the bath
Place the mirror light beside the mirror, not above it
This is the single most common bathroom lighting mistake. An overhead downlight casts your face into shadow — the very effect a bathroom mirror needs to avoid. Vertical lights on either side of the mirror, or a backlit mirror, throw light onto your face instead. The difference is dramatic and the cost is the same.
IP ratings — what they mean and which one goes where
Light fittings in bathrooms have to be rated for moisture exposure. The two ratings that matter:
- IP44 — minimum rating for Zone 2 (general bathroom area, away from direct water spray)
- IP65 — required for Zone 1 (directly over a bath or in a shower zone)
“The IP rating is the first thing we check on any light fitting a client picks themselves. A beautiful pendant from an overseas catalogue is useless if it isn’t rated for a humid Auckland bathroom — and the warranty is voided the moment you install it in a wet zone without the right rating.”
— Alison Yu, Designer, Superior Renovations
Layer warm light over cool
Cool-white light (5000K and up) makes a bathroom feel like a hospital. Warm-white (2700–3000K) makes it feel like a hotel. For a daily-use bathroom we spec warm-white at the vanity, slightly cooler overhead for grooming clarity, and warm dim-to-warm strips for the mood circuit. The contrast is what makes the room feel layered.
Hide the source, show the light

The most expensive-looking bathroom lighting is the lighting you can’t see. LED strips under floating vanities, behind niche shelves, above pelmet returns. The eye sees the glow but not the source — and the room feels deeper as a result. Plan these strips at the design stage; retrofitting them is awkward and the joinery rarely accommodates.
The bathroom skylight question
If you have a single-storey home or a top-floor bathroom, a skylight is the cheapest dramatic upgrade you can make. Diffused daylight does what no electric light can — it makes the room feel airy, the tile look its true colour, and it cuts the lights-on hours during the day. We add skylights to roughly one in five bathroom renovations, particularly in Auckland villas and bungalows where the bathroom is in the centre of the floor plan with no external wall.

What to do in a small bathroom

Small bathrooms benefit most from layered lighting because the room has nowhere to hide. The compressed plan:
- Vertical LED strips or a backlit mirror at the vanity
- A single warm-white downlight overhead, on a dimmer
- A small under-vanity LED strip
- One IP65 downlight in the shower zone
That’s four sources from a single 5m² room. The cost difference compared with a single ceiling light is maybe $400–$600 — well below 2% of a $30,000 bathroom budget.
Flooring, Fixtures and Storage — The Choices That Matter
Bathroom flooring options for Auckland conditions

For Auckland bathrooms in 2026 we spec one of three floor types, in order of how often:
| Floor type | Cost range (supplied + laid) | Best for |
|---|---|---|
| Large-format porcelain (600x1200mm or bigger) | $140–$220 per m² | Most bathrooms — durable, low maintenance, fewer grout lines |
| Composite terrazzo tile | $180–$280 per m² | Statement floors, recycled-content spec, mid-range and up |
| Natural stone (marble, travertine, slate) | $220–$450 per m² | High-end master ensuites, character renovations |
Three materials we don’t recommend for bathroom floors: timber (warps and stains), low-grade ceramic (chips and crazes under temperature change), and vinyl plank (cheap-looking after 18 months in a wet area, even the “waterproof” versions).
Vanities and stone tops
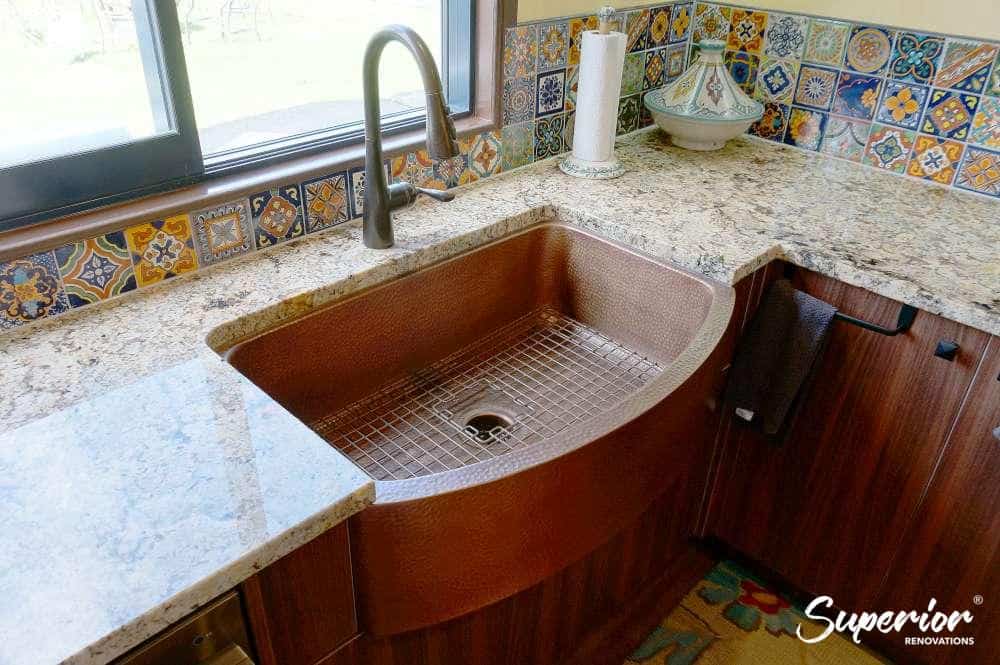
The vanity is the joinery centrepiece of any bathroom and the place a designer’s eye matters most. We design and build most of our vanities in-house using NZ-made cabinetry with melamine, laminate, or veneer fronts. The tops are usually engineered stone, composite, or solid surface — natural stone is reserved for ensuites where the client asks for it.
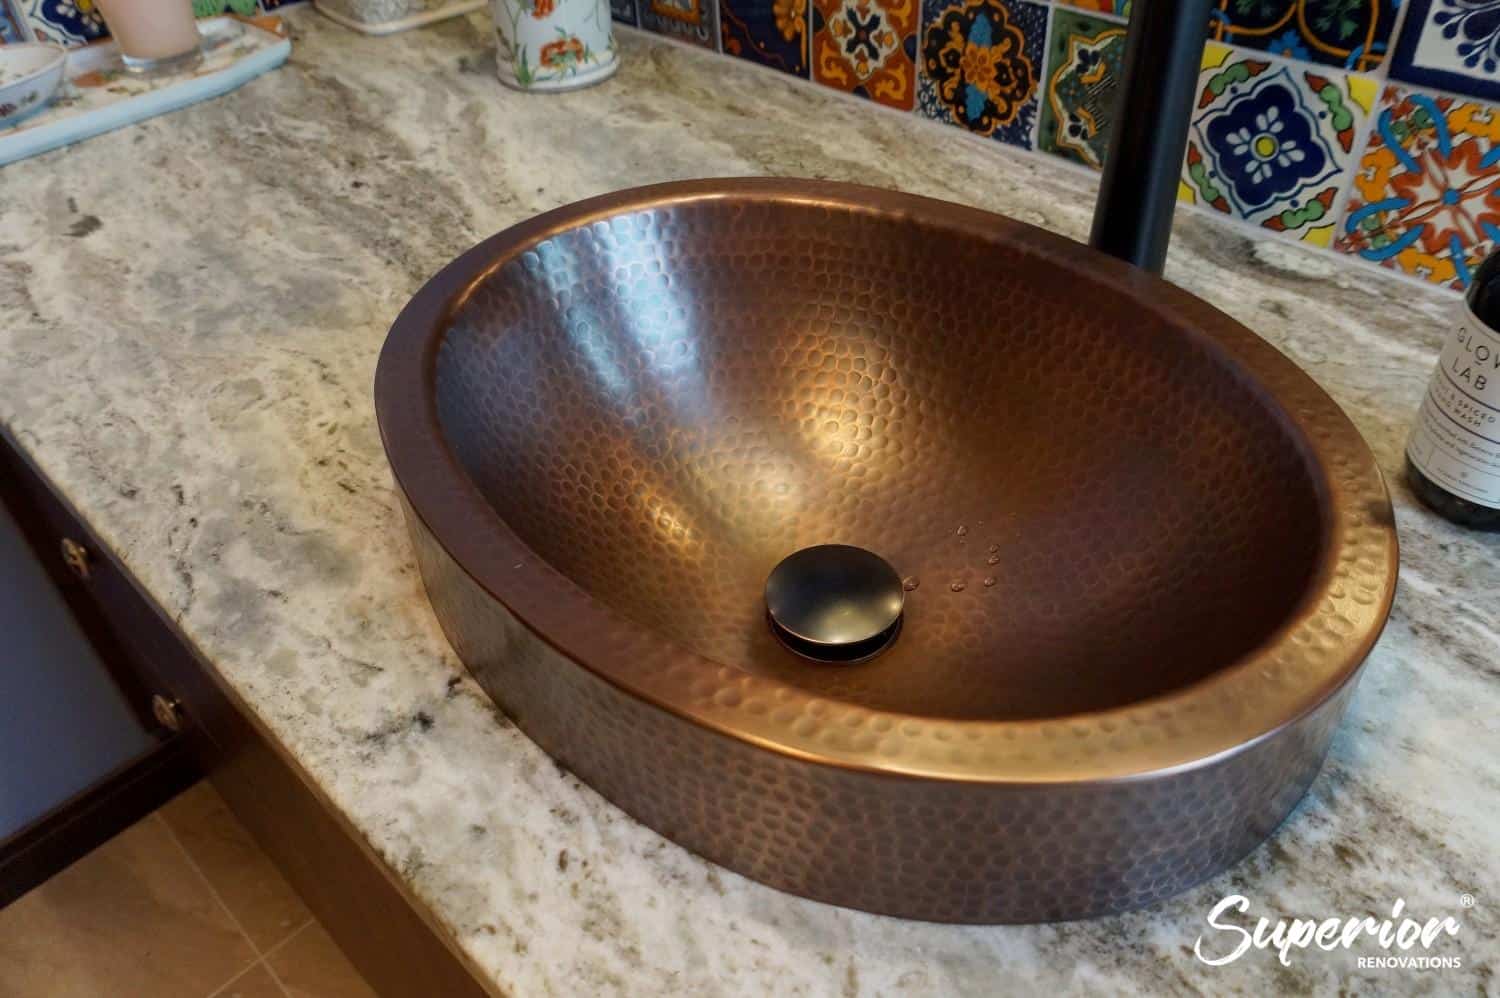
The right basin for the layout
- Undermount basin — clean lines, easy to wipe down. Pair with stone or solid-surface tops only.
- Vessel (above-counter) basin — statement piece, raises the height of the vanity, suits a powder room.
- Inset basin — practical, budget-friendly, suits a family bathroom.
- Wall-hung basin — frees up floor space in compact ensuites and powder rooms.
Tapware and brassware

Brassware is the wear-and-tear part of a bathroom. It’s used every day, it has water flowing through it, and replacing wall-mounted tapware is expensive once the wall is tiled. Spend more here than you think you should — the difference between a $200 mixer and a $600 mixer is felt every time you use it.
The current spec we’re using most across mid-range projects:
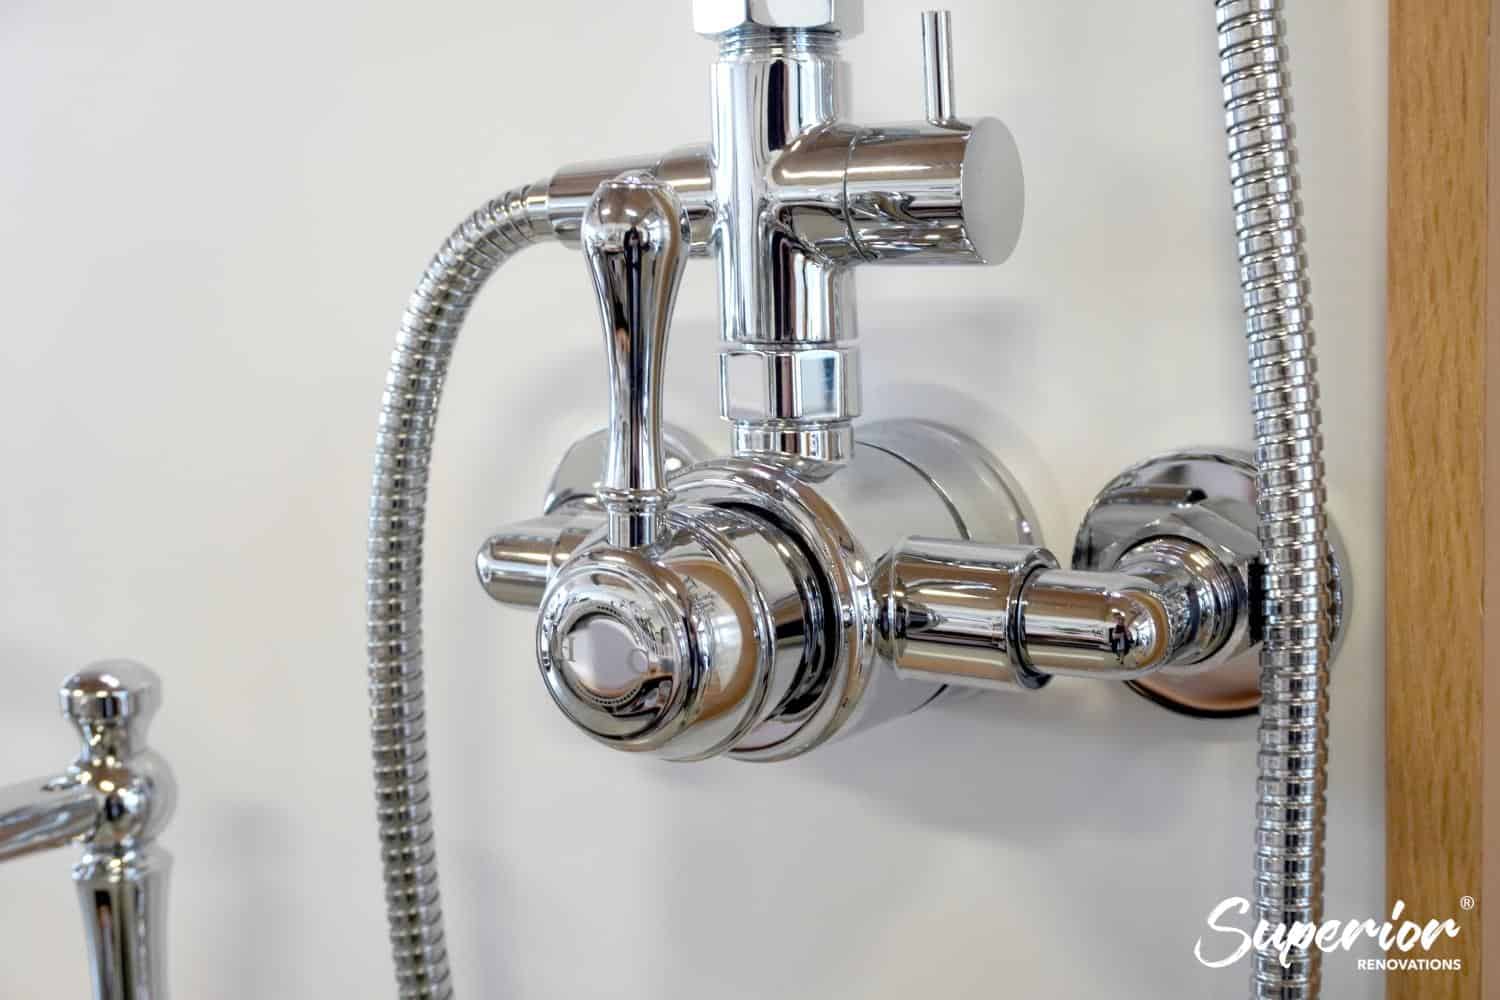
- Thermostatic shower mixer (capped temperature, anti-scald)
- Tall basin mixer for above-counter basins, low-flow standard mixer for inset basins
- Concealed wall mixer for the bath (the bath spout sits on its own)
- Soft-close toilet, ideally wall-faced (easier to clean behind)
Most of our tapware is specified from Reece, with finishes in brushed nickel, brushed brass, chrome, or matte black depending on the colour scheme.
Storage that disappears when not in use

Bathroom storage is predictable. Small things near the basin (toothbrush, contacts, daily skincare). Medium things behind doors (shampoo back-ups, medicines). Bulky things in a taller cabinet or linen cupboard (toilet rolls, towels).
Our default storage spec for a mid-range Auckland bathroom:
- Vanity with two drawers — top drawer for daily items, bottom drawer for back-stock
- Mirror cabinet above the vanity for daily-access toiletries (face-height, behind a mirrored door)
- A recessed shower niche at shoulder height
- One floor-to-ceiling cupboard near the bathroom for towels and bulk storage (in family bathrooms; ensuites usually borrow from a walk-in robe)
💡 Quick tip: If your vanity is wall-hung, use the cavity above the floor for a shallow toe-kick drawer — 60mm tall, full width. It’s the perfect place to store cleaning supplies and a hair dryer, and it doesn’t read as a drawer at all.
Mixing materials and finishes

The cleanest bathrooms use three materials maximum. One floor finish, one wall finish, one accent. Add a fourth and it starts to feel busy. We usually run porcelain on the floor, a paint or large-format porcelain on the walls, and a single timber-look or stone accent on the vanity or feature wall.
Glass shower screens

Frameless 10mm toughened glass is the standard now. Framed screens look dated and the frames trap soap scum. A single fixed glass panel is the cleanest visual, and it’s compatible with both walk-in showers and wet rooms. Treat the glass with a one-off hydrophobic coating at install and you’ll cut the cleaning time roughly in half over the life of the screen.
Bathroom Renovation Costs in Auckland — 2026 Reality
The single most common question we’re asked: how much does a bathroom renovation cost? The honest answer depends on size, spec, and whether you’re moving plumbing — but here are the current Auckland 2026 figures we’re quoting against.
| Tier | Cost range | What’s included |
|---|---|---|
| Budget refresh | $9,000–$16,000 | New paint, fittings, minor tiling, replace vanity in same spot |
| Mid-range full renovation | $25,000–$35,000 | Design, supply, all trades, full tile, new fixtures, project management |
| Luxury / custom | $45,000+ | Wet room, premium fixtures, stone tops, underfloor heating, custom joinery |
| Most Auckland projects land here | $25,000–$35,000 | Mid-range — a full proper renovation, not a refresh |
2026 pricing is 5–8% higher than 2025 across the board, driven by material and labour inflation. The figures above are reflective of what we’re quoting right now and are consistent with the published cost ranges on our FAQ.
Want a project-specific estimate in two minutes? Use our bathroom renovation cost calculator — it asks the right questions and gives you a realistic indicative range before you ever talk to us.
What drives the variation between $25,000 and $45,000+
- Whether plumbing moves. Same-position fixtures: cheaper. Moving the toilet or relocating the shower: adds $5,000–$10,000 in plumbing alone.
- Tile choice and area. Floor-to-ceiling porcelain in a 6m² bathroom is ~30m² of tile. Doubling the tile price-per-m² adds $1,500+ to that line alone.
- Joinery (the vanity). An off-the-shelf vanity is $800–$2,000. A custom NZ-made vanity with a stone top is $4,500–$8,000+.
- Tapware grade. Entry-level vs. mid-range vs. premium adds up across mixer, shower, basin, and bath — easily a $2,000–$4,000 swing.
- Consent. Standard like-for-like: no consent, no delay. Structural or plumbing changes: $3,000–$8,000 in consent and engineering fees plus 4–8 weeks added to the start date.
How long a bathroom renovation actually takes
A standard full bathroom renovation takes 3 to 4 weeks on site from the day demolition starts. That assumes design is locked, all materials are on hand, and no consent is required. If consent is needed, add 4–8 weeks at the front for Auckland Council processing before any work begins.
The week-by-week breakdown for a typical mid-range project:
- Week 1: Strip-out, demolition, plumbing rough-in, electrical rough-in, waterproofing inspection
- Week 2: Waterproof membrane application, GIB Aqualine to walls, tile preparation
- Week 3: Tiling (floor and walls), shower screen template, vanity install
- Week 4: Tapware fit-off, mirrors, accessories, final clean, handover
Important note: Watch out for renovators who quote 2 weeks for a full bathroom — they’re either skipping waterproofing dry time (which voids your insurance) or they’re using small-format tile that takes less time to lay. Both are red flags.
Bathroom Ventilation and Heating — The Two Things Most Renovations Get Wrong
Ventilation and heating are the two systems that quietly decide whether your bathroom stays looking new or starts mouldering at the corners within three years. They’re also the two systems most easily underspent during a renovation.
Ventilation done properly
NZ Building Code Clause G4 Ventilation requires mechanical extraction in any bathroom without an openable window, and even where a window exists, an extract fan is almost always required for code compliance and resale defensibility (per building.govt.nz).
What we spec on every renovation:
- A purpose-built bathroom extract fan — minimum 60L/s capacity for a standard bathroom, 90L/s for a larger room, mounted in the ceiling and ducted to the outside through the soffit or roof. Not into the ceiling cavity (that’s the most common shortcut and the cause of most ceiling mould problems).
- A humidity-sensing run-on timer — the fan keeps running for 10–15 minutes after you leave the bathroom, clearing the residual moisture rather than trapping it.
- Insulated ducting through any unheated cavity to prevent condensation inside the duct itself.
- An external grille — fitted with a backdraught flap so cold air doesn’t blow back through the system in winter.
The cost difference between a $90 builder-grade extract fan and a $350 properly specified one is recovered in the first winter you don’t have to repaint the ceiling.
Important note: A bathroom extract fan that vents into the ceiling cavity rather than to the outside is a fail point on a LIM check, a fail point on weathertightness reviews, and the single biggest cause of secondary moisture damage we see in older Auckland homes. If your current fan vents into the cavity, fix it during the renovation — not before, not after.
Heated towel rails — get the size right
A heated towel rail is the most cost-effective heating upgrade in any bathroom renovation. It dries towels, warms the room as a secondary effect, and runs on a few cents of power per day if specced and timed correctly.
The mistake most people make is going too small. A towel rail rated for a single bath sheet won’t dry two towels from a family bathroom — the rail can only put out so many watts, and damp towels block air flow to the bars they cover. Spec one bar wider than you think you need, and put it on its own timer so it runs in the hour before peak use rather than 24 hours a day.
Underfloor heating — when it’s worth it
Electric underfloor heating is a luxury upgrade with a real practical benefit: a warm tile floor in winter, and a much shorter time-to-dry for a wet floor after a shower. We install it most often in master ensuites and wet rooms, particularly in homes without ducted central heating.
The economics:
- Install cost — typically $1,500–$3,500 for a standard bathroom, layered under the tile bed
- Running cost — around $0.50–$1.50 per day if used on a 2-hour morning/evening timer through winter only
- Best paired with — porcelain or stone floor finishes (not vinyl or timber, which insulate the heat away from the surface)
If you’ve got a slab-on-grade bathroom on a south-facing wall, the case for underfloor heating is much stronger than on a suspended timber floor with a heated room above and below.
Panel heaters and infrared
For larger bathrooms with vaulted ceilings or compromised insulation, a small wall-mounted panel heater on a timer is a sensible backup. We rarely fit them as primary heating, but in older Auckland villas with high ceilings and minimal wall insulation, they can take the edge off a winter morning.
Infrared panel heaters are gaining traction in 2026 for compact ensuites — they heat people and surfaces rather than the air, which is more efficient in a room that empties out a few minutes after use. The technology is improving each year, and the running costs are competitive with electric underfloor heating.
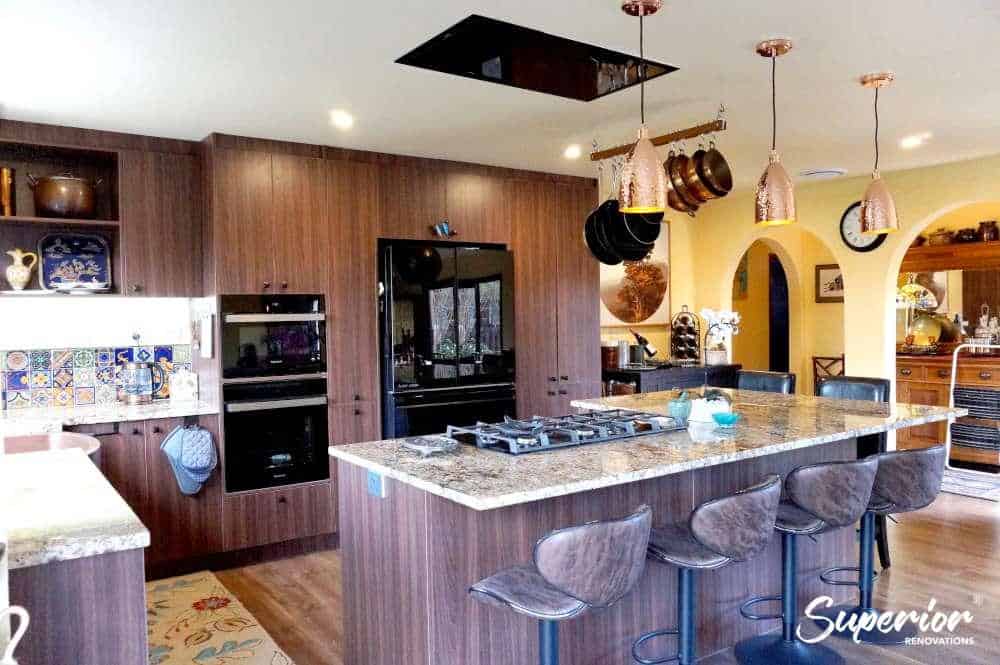
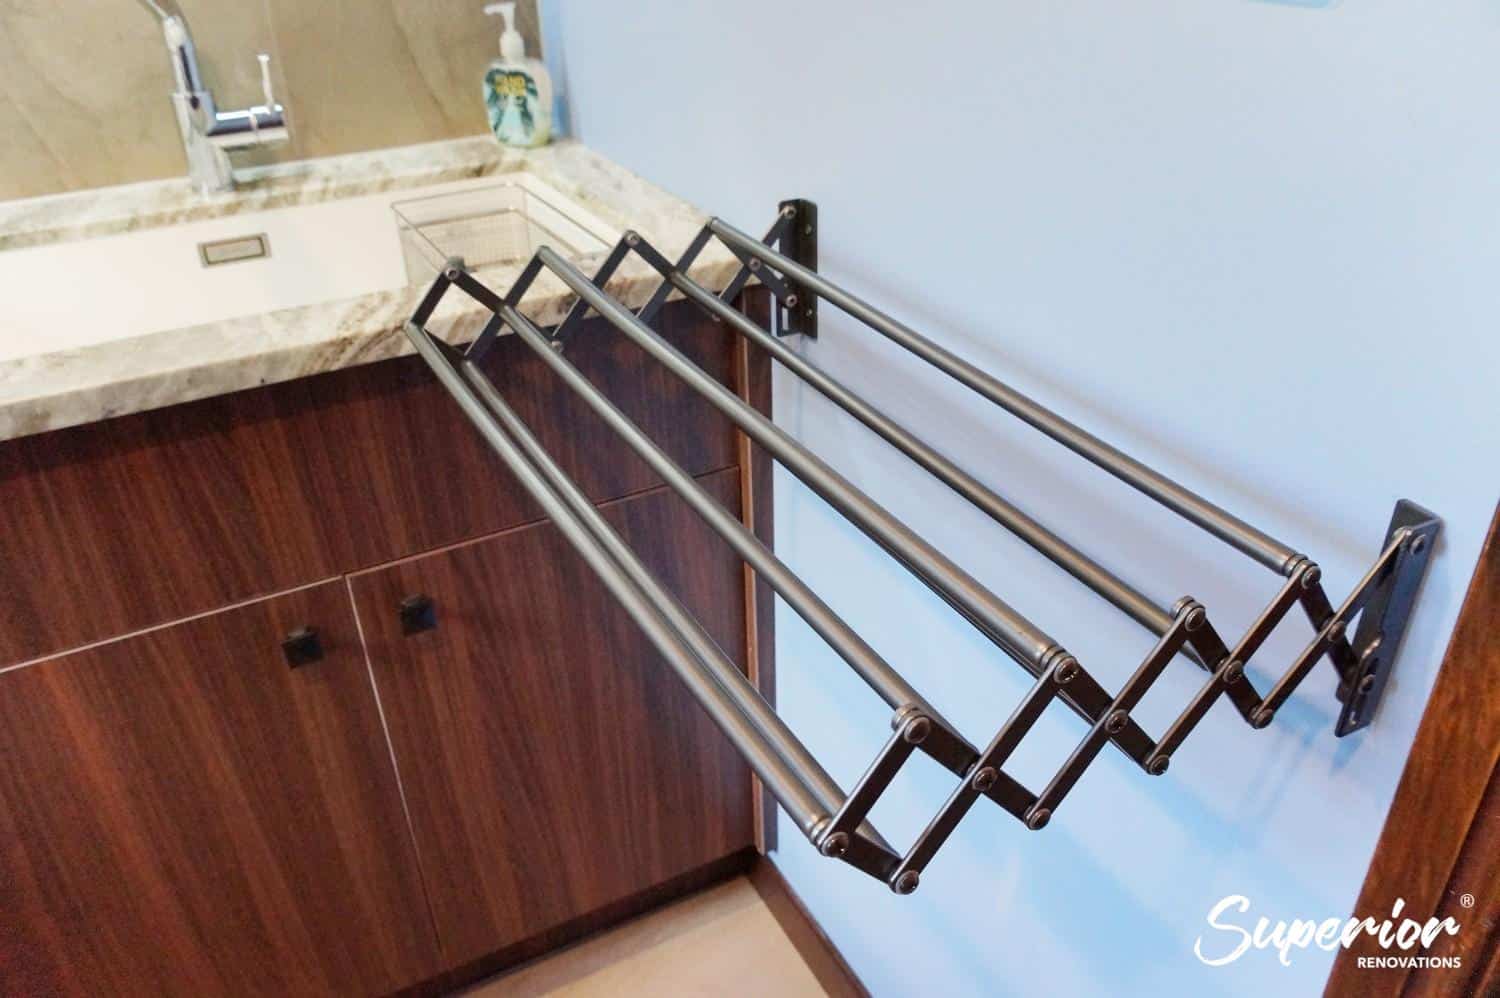
Combining the Bathroom and Laundry — A Smarter Auckland Renovation
Most older Auckland homes were built with a separate laundry — a small room with a washing machine, a tub, and somewhere to hang clothes. In 2026, that layout is increasingly being rethought. Combining the bathroom and laundry into a single larger wet zone solves three problems at once: it frees up the old laundry footprint for storage or living, it concentrates plumbing into one wall, and it usually reduces total renovation cost compared with renovating two rooms separately.
Why combining works
- Shared wet wall — laundry, basin, and (often) shower all draw from the same hot/cold supply and waste runs, reducing pipework
- One waterproof envelope — instead of waterproofing two rooms, you waterproof one
- Cabinetry economies — a single run of joinery covering the washing machine, dryer, basin, and storage costs less than two separate joinery runs
- Recovered floor space — the old laundry footprint becomes a walk-in linen cupboard, a pantry extension, or an entry mudroom
What we plan for in a combined room
- Sound separation. A washing machine on a spin cycle is loud. We mount machines on rubber anti-vibration pads and isolate the wall behind them with acoustic GIB.
- A dedicated drying solution. Either a heat-pump dryer stacked above the washer, or a retractable drying line over the bath, or both. Hanging wet clothes on the towel rail is what wrecks the towel rail.
- Storage that’s actually accessible. Laundry detergent, fabric softener, stain removers — at adult eye level, not buried under the sink. A pull-out laundry hamper is a quiet upgrade that gets used every day.
- A laundry sink (optional). Most modern households don’t need a separate laundry tub — a larger basin in the bathroom serves both functions. But if you do a lot of hand-washing or have specific stain-treating needs, a small dedicated tub still earns its place.
“The combined bathroom-laundry is one of the most underrated renovations we do. A West Auckland family last year saved $14,000 by combining instead of renovating both rooms separately — and they got a bigger, better-laid-out wet zone and a new walk-in linen cupboard out of the old laundry footprint.”
— Dorothy Li, Design Manager, Superior Renovations
Where it doesn’t work
If your bathroom is already tight (under 4m²) and the laundry is on the other side of the house, combining isn’t worth the plumbing cost. Combining works best when the existing rooms share a wall, are both small-to-medium in size, and a meaningful floor-plan improvement is possible by merging them.
If you’re considering a larger reshuffle — moving a kitchen, opening up living space, or adding a bathroom — see our guide to full home renovation in Auckland for how the wet-zone planning fits into a bigger scope.
Consent, Code, and the Small Stuff Most People Miss
This is the section every other bathroom guide skips. It’s also the section that most often costs people money when they renovate without it.
What needs consent in Auckland
Standard bathroom renovations — replacing tiles, vanity, toilet, and shower in the same positions — are typically a Schedule 1 exemption under the Building Act and don’t need consent. Per building.govt.nz:
- No consent typically required: Like-for-like replacement of fixtures, retiling, painting, replacing a vanity in the same footprint, replacing a shower screen.
- Consent typically required: Relocating the toilet, removing or adding walls, adding new electrical circuits (beyond standard replacements), changing the position of a window, any work that affects weathertightness.
Our team assesses this at the first free in-home consultation and manages any consent applications with Auckland Council on your behalf.
NZ Building Code clauses that affect your bathroom
- Clause E3 Internal Moisture — waterproofing requirements behind tiles, around baths, and in shower zones. Producer Statements (PS3 or PS4) from the waterproofing contractor should be retained for resale.
- Clause G1 Personal Hygiene — accessibility provisions, fixture requirements.
- Clause G4 Ventilation — extract ventilation requirements (mechanical extract to outside, not into the ceiling cavity).
- Clause H1 Energy Efficiency — insulation requirements where walls or ceilings are opened up.
- Clause B2 Durability — minimum durability requirements for plumbing, waterproofing, and structural elements.
Why your renovator should be a Licensed Building Practitioner (LBP)
Bathroom renovations that involve structural work, weathertightness, or moisture management classify as Restricted Building Work under the Building Act. That work has to be carried out or supervised by a Licensed Building Practitioner. You can check any builder’s LBP status at lbp.govt.nz.
Hiring a non-LBP for restricted work is a fast way to void your insurance and create a future resale problem when a LIM check reveals undocumented work.
Bathroom and laundry combined — group your wet zones
Grouping the bathroom, laundry, and kitchen together is one of the most cost-effective decisions you can make. Shared wet walls reduce plumbing runs, cut consent risk, and contain noise. When relocating fixtures, many simple swaps (replacing a bath with a shower in the same footprint) are Schedule 1 exempt — provided no structural changes occur.
If you’re considering a full house renovation rather than a standalone bathroom, take a look at our home renovation Auckland page — combining works almost always reduces total cost.
Will a Bathroom Renovation Add Value to Your Auckland Home?
Short answer: yes, more reliably than almost any other room in the house. Bathrooms and kitchens are the two rooms buyers scrutinise hardest, and a dated bathroom is the single most common reason a property gets discounted on offer.
The longer answer is: it depends on what kind of bathroom you currently have, what kind of home you live in, and how the local market values the renovation.
When bathroom renovations return strong ROI
- An outdated 1980s or 1990s family bathroom in a sought-after Auckland suburb — Mt Eden, Grey Lynn, Ponsonby, Remuera, Takapuna. Renovating a tired bathroom in this kind of home almost always pays back at sale, particularly if the rest of the home is presentable.
- Adding a second bathroom or ensuite to a single-bathroom home. Most three-plus-bedroom Auckland buyers expect at least two bathrooms. A home with one is structurally undersold.
- Removing a clearly cosmetic problem — yellowed grout, cracked tile, a 1990s burgundy palette. Visual fixes punch above their weight at sale.
When bathroom renovations don’t return their cost
- Over-specifying for the property. A $60,000 ensuite in an $850,000 home in Manurewa is unlikely to recoup. Match the spec to the property.
- Renovating one bathroom while leaving the rest of the house dated. Buyers compare like with like — a new bathroom and a 1995 kitchen sends a mixed message.
- Bathrooms with structural compromises. Removing a load-bearing wall to fit a bath where one shouldn’t go can lose value rather than add it.
Adding a second bathroom — what we’d consider
Some practical ways to add a second bathroom to an Auckland home without a major extension:
- Convert a small adjacent room (box room, old laundry, study) into an ensuite
- Use an upstairs landing or wide hallway space for a guest bathroom (single-storey to two-storey conversions especially)
- Add a powder room to an underutilised corner near the entry or living area
- Combine the laundry into the existing bathroom and convert the freed-up laundry space
The cheapest option is always the one closest to existing plumbing — adding a bathroom directly above or beside an existing wet zone (kitchen, laundry, bathroom) means short pipe runs and no need to chase walls or floors extensively.
If you’re considering an extension to add a bathroom (or a master suite), our partner firm Sonder Architecture handles the architectural and consent side, and we handle the build — see our house extensions Auckland page for the combined process.
💡 Quick tip: If resale within five years is a real possibility, get a property valuation done before finalising your bathroom spec. A registered valuer will give you a realistic ceiling for what the suburb supports — which informs how far to push the budget.
What Makes a Good Bathroom — The Honest Answer

After more than 1,000 bathrooms, the answer is simpler than most design publications make it. A good bathroom does three things at once:
- It works at 7am. Two people can use it without bumping into each other, the light is right for grooming, the storage absorbs the daily clutter, the shower runs hot fast.
- It works at 9pm. The same room dims down, feels like a retreat rather than a service space, and gives you a moment of separation from the rest of the house.
- It stays looking good for ten years. Materials chosen for durability over fashion, fixtures specced one tier above where you think you need to, and a layout that suits your stage of life now and in 2036.
Get those three right and the tile colour barely matters.
The biggest single mistake we see
Underspending on the parts you’ll touch every day. The mixer you use 3,000 times a year. The shower head that hits your back every morning. The drawer runners that slam or glide. People will pay an extra $5,000 for nicer tiles and save $300 by buying budget tapware — that’s the wrong way round. Tile is a one-time visual decision; tapware is a daily-use experience.
If you take one thing from this guide
Spend the planning time. A bathroom that’s been properly designed before construction starts will cost less, get built faster, and look better than a bathroom designed on the fly. We’ve never had a client regret spending too long at the design stage — we’ve had plenty regret the opposite.
If you want to see what a proper design process looks like, the Design Studio page walks through ours — from the first sketch to the final 3D render to the locked specification. The Bathroom Design Gallery shows the outcome. The case studies show the journey.
A note on interior styling
Bathroom design ends when the build finishes. Bathroom styling starts the day after. If you want help with the soft layer — towels, plants, art, accessories, the soft furnishings that pull the room together — our sister brand Little Giant Interiors handles the interior styling and furniture side independently of the build.
Ready to Plan Your 2026 Bathroom Renovation?
If you’ve got this far, you’re past the inspiration stage and somewhere on the planning side. The next sensible step is a conversation — at your home, in your bathroom, with someone who’s drawn and built hundreds of them.
Our free in-home consultation runs about 60–90 minutes. Our designer will look at your existing bathroom, measure the space, ask what you’re trying to achieve, and tell you honestly what’s realistic for your budget and your home. There’s no obligation and no upsell — about half our consultations lead to a second meeting, the other half lead to homeowners going away with a clearer head and a better brief for whoever they eventually hire.
From there, if we’re a good fit, we’ll move through our Design-to-Build Action Plan: scope, layout, 3D render, fixed specification, fixed-price quote. By the time we start work, every decision has been made on paper.
➡ Book your free in-home consultation with Superior Renovations
➡ Get an Auckland bathroom renovation cost estimate in 2 minutes
➡ Request a free feasibility report for your project
Frequently Asked Questions — Bathroom Design NZ 2026
How much does a bathroom renovation cost in Auckland in 2026?
In Auckland in 2026, a mid-range full bathroom renovation costs $25,000–$35,000, covering design, supply, all trades, and project management. Budget refreshes (paint, fittings, minor tile work) start from $9,000–$16,000, and luxury or custom bathrooms with wet rooms, stone tops, and premium fixtures start from $45,000 and up. Most Auckland projects land in the $25,000–$35,000 range. 2026 pricing is roughly 5–8% higher than 2025 due to material and labour inflation.
How long does a bathroom renovation take in Auckland?
A standard full bathroom renovation takes 3 to 4 weeks on site from the day demolition starts, assuming design is locked and materials are on hand. If Auckland Council consent is required (moving plumbing or structural changes), add 4 to 8 weeks for council processing before work begins. We give every client a week-by-week schedule before construction starts so you know exactly what's happening when.
Do I need a building consent for my bathroom renovation?
Most bathroom renovations don't require Auckland Council consent — replacing tiles, vanity, toilet, and shower in the same positions is generally a Schedule 1 exemption under the Building Act. Consent is typically required when you're moving plumbing to a new location, removing or adding walls, adding new electrical circuits, or working on a heritage-overlay property. Our team assesses this during the free consultation and manages all consent applications with Auckland Council on your behalf.
What is the best bathroom layout for a small space?
For bathrooms under 5m², the wet room layout — a fully waterproofed room with a single glass panel, anti-slip matte tile, and a linear drain — gives the most usable space. A wall-hung vanity, sliding cavity door, and large-format porcelain tile (600x1200mm or larger) all make a small bathroom read larger. Avoid acrylic shower boxes and over-bath shower curtains; both make small bathrooms feel smaller and date quickly.
What are the bathroom design trends for 2026 in NZ?
The 2026 trends Auckland homeowners are actually installing: terrazzo and large-format porcelain flooring, backlit and vanity-mounted mirrors, warm-neutral and earthy colour palettes, wet-room layouts with linear drains, wall-hung floating vanities, brushed nickel tapware (replacing matte black), recessed shower niches, sliding cavity doors, layered smart lighting controls, and future-proof universal-access features. Terrazzo is the strongest single trend we're seeing in mid-range and above projects.
Should I have a bath or a walk-in shower?
If you have children under 10, a bath is still worth keeping — bathing kids in a walk-in shower is awkward and exhausting. For households without small children, a generous walk-in shower will get more use than a bath ever will. The best of both worlds is the bath-plus-separate-shower layout if your bathroom is over 8m². For master ensuites, we usually recommend a freestanding bath only if there's a separate family bathroom in the home.
How long should bathroom tile and tapware last?
Quality porcelain or terrazzo flooring should last 25+ years with minimal maintenance. Mid-range tapware with a PVD finish (brushed nickel, brushed brass) holds its appearance for 10–15 years before showing wear. Budget tapware with powder-coated finishes can start chipping and flaking within 12–18 months in a humid Auckland bathroom — this is the most common reason we get called back to do early replacements. Spend more on tapware than you think you should.
What is the best lighting for a bathroom?
The four-circuit rule: vanity task lighting (backlit mirror or vertical LED strips beside the mirror, not above), overhead ambient downlights on a dimmer, a single IP65-rated downlight in the shower zone, and a mood/accent circuit (under-vanity LED strip or feature pendant over the bath). Warm-white (2700–3000K) for evening atmosphere, slightly cooler at the vanity for grooming. Avoid placing the main light source above the mirror — it casts your face into shadow.
What's the difference between a wet room and a regular bathroom?
A wet room is a fully waterproofed bathroom where the shower zone has no tray, no step, and no full enclosure — just a tiled floor with a linear drain and usually a single fixed glass panel. The whole room is treated as a waterproof envelope. Wet rooms suit small bathrooms (the open floor makes them feel larger), accessible bathrooms (no trip hazards), and contemporary designs. They cost slightly more to build because the waterproofing scope is larger, but they're easier to clean and last longer than a traditional shower box setup.
Can I keep my existing bathroom layout to save money?
Yes — keeping the toilet, basin, bath, and shower in their existing positions is the single biggest cost saver in a bathroom renovation. Moving the toilet is the most expensive change (it requires new soil pipe drainage), so if the existing layout works, leave it. We can usually rework storage, lighting, finishes, and fixture quality dramatically while keeping the wet plumbing in place — and that combination of major visual change with minimal plumbing work is the sweet spot for value.
Does an extra bathroom add value to my Auckland home?
In most Auckland suburbs, yes — particularly for three-plus-bedroom homes that currently only have one bathroom. Buyers expect a minimum of two bathrooms in a family home, and a single-bathroom property is structurally undersold in the market. Adding an ensuite to a master bedroom, converting a small adjacent room into a guest bathroom, or adding a powder room near the entry are all reliable value-add renovations. Match the spec to the property — over-specifying in a budget suburb won't return the cost.
Should I use a designer or just a builder for my bathroom?
For a budget refresh under $15,000, a builder alone is usually enough. For anything above that, a designer (or a design-and-build company with an in-house design team) saves you money in the long run. Designers spot layout improvements builders won't, specify materials that age well, coordinate trades efficiently, and produce 3D renders so you can see the result before you commit. The cost of design is typically 5–10% of the project budget and almost always recovered through avoided change orders and better product specification.
Further Resources for your bathroom renovation
- Featured projects and client stories to see specifications on some of the projects.
- Real client stories from Auckland
Need more information?
Take advantage of our FREE Complete Home Renovation Guide (48 pages), whether you’re already renovating or in the process of deciding to renovate, it’s not an easy process, this guide which includes a free 100+ point check list – will help you avoid costly mistakes.
Download Free Renovation Guide (PDF)
Still have questions unanswered?
Book a no-obligation consultation with the team at Superior Renovations, we’d love to meet you to discuss your renovation ideas!
Or call us on 0800 199 888

Have you been putting off getting renovations done?
We have partnered with Q Mastercard ® to provide you an 18 Month Interest-Free Payment Option, you can enjoy your new home now and stress less.
Learn More about Interest-Free Payment Options*
*Lending criteria, fees, terms and conditions apply. Mastercard is a registered trademark and the circles design is a trademark of Mastercard International Incorporated.
 - Choosing the right tapware for your bathroom design 28")