
House Renovation

drainage
House Renovation

How to Future-Proof an Older Auckland Home Against Weather

Weatherproofing Your Auckland Home: Renovation Upgrades for NZ’s New Weather Reality

Free cost calculator

How much will your renovation cost?

Get an instant Auckland price range for your project — no details required to see it.

Try our free cost calculators →

Quick answer: Most Auckland homes — especially those built before the 1990s — have gutters, drainage systems, and building envelopes designed for normal NZ rainfall, not the extreme weather events the city has experienced since 2023. Weatherproofing these gaps during your renovation is the most cost-effective protection you can give your home long-term.

27 January 2023. For a lot of Aucklanders, that date is now fixed in memory. In a matter of hours, central Auckland’s Albert Park alone took 280mm of rain in under 24 hours — what NIWA described as at least a 1-in-200-year event and the wettest day on record at multiple Auckland sites. Then, barely a fortnight later, Cyclone Gabrielle swept through. By the time both events were done, the Insurance Council of New Zealand had logged more than 118,000 insurance claims worth around $3.8 billion in insured losses, and the Treasury put the total cost to the economy as high as $14.5 billion. For the Auckland Anniversary floods alone, around 48,000 claims were lodged. Fifteen people lost their lives across the two events.

Most of that damage wasn’t inevitable.

What we’ve heard repeatedly from clients who came to us in the aftermath — and from those who called to ask “what should we be doing?” before the next one — is that a lot of Auckland homes simply weren’t equipped for that scale of rainfall. Not because they were badly built, necessarily, but because they were built for a different era. Pre-1990s homes across Henderson, Grey Lynn, Papakura, and West Auckland were designed using rainfall standards that assumed far less intense, less frequent downpours than Auckland now sees. The reality since 2023 is that the city has been getting theoretical once-in-a-lifetime events closer to back-to-back.

The clients asking us about weatherproofing aren’t panicking. They’re thinking ahead. And that’s exactly the right instinct. This guide covers the practical changes Auckland homeowners should make — or consider — when renovating. Gutter sizing and downpipe placement. Internal gutters. Foundation and perimeter drainage. Sealing eaves and gaps. Double glazing and heat pumps. Outdoor structures in wind-exposed areas. Some of these are simple. Others require more planning and budget. All of them make a measurable difference to how your home performs when the weather turns.

Sound familiar? You’ve been meaning to do something about the gutters that overflow every winter, or the damp corner near the front door, or the way the single-glazed windows run with condensation every time it rains. This is where all of it comes together.

Weatherproofing an Auckland home during a full renovation


Your Gutters and Downpipes Are Probably Undersized for Modern Auckland Weather

Most Auckland homeowners don’t think about their gutters until they’re watching water cascade down the side of the house in a heavy downpour. By that point, the damage is already in progress — water pooling at the foundation, seeping into subfloor spaces, eroding the soil against the perimeter walls.

The core problem: gutter and downpipe systems on most older Auckland homes were sized using 10-year rainfall intensity figures. New Zealand Building Code clause E1 (Surface Water) governs roof drainage, and its Acceptable Solution, E1/AS1, uses those figures. But according to the NZ Metal Roofing Manufacturers, that approach leaves a real gap. Rainfall measured over a one-minute period can be as much as 4.4 times more intense than the same rainfall averaged over 10 minutes — and roofs can flood in under a minute. The Building Code requires buildings to have no more than a 2% probability of flooding, which demands 50-year recurrence-interval rainfall data — yet the E1/AS1 charts use 10-year data. That discrepancy alone accounts for roughly a further 34% variation in how much rain a “compliant” gutter system is actually sized to handle.

If your home was built before the 2000s, there’s a real possibility your spouting system wasn’t designed for what Auckland now regularly delivers.

Too Few Downpipes in the Wrong Locations

One of the most common things we find during full home renovations is inadequate downpipe coverage. A typical 1970s brick-and-tile in Manurewa or Papakura might have one downpipe serving a long roof run — functional for a light shower, completely overwhelmed in heavy rain. The fix is often more straightforward than people expect.

Additional downpipes, positioned to break up long roof runs and placed at the lowest points where water accumulates, can dramatically improve how your spouting system performs. The NZ Metal Roofing Manufacturers’ Code of Practice recommends a minimum 1:200 fall (5mm per metre) for gutters — meaning gutters should slope gently toward the downpipe so water flows rather than pools. Many older homes have inadequate fall, or gutters that have settled flat over time. Standing water in a gutter leads to overflow, premature rusting, and leaking at the joints.

When you’re replacing guttering as part of a renovation — or even if it’s a standalone job — a licensed roofer can assess the fall and downpipe positions at the same time as they’re cleaning or replacing the system. It costs very little extra to add a downpipe while the scaffold is up.

Gutter Guards — Worth It, But Choose Carefully

Gutter guards and hedgehog-style filters (sometimes called gutter whiskers) are worth considering for any home near mature trees. They reduce blockage frequency by stopping leaves and debris from entering the gutter. But there’s a catch. If silt builds up around the filter insert, it can actually impair water flow — making overflow more likely, not less. Regular inspection is still required even with a guard in place, particularly after storms.

The best-performing option for high-debris environments is a solid-top guard with a drip edge that allows leaves to blow off while water passes through. For homes near pohutukawa or pines — which drop needles as well as leaves — this matters more than it does for clear sections. Get advice from a licensed roofer before committing to a product. The right choice varies by roof pitch, nearby tree species, and gutter profile.

💡 Quick tip: If your gutters overflow in heavy rain, the most likely causes are a blockage, inadequate fall toward the downpipe, or too few downpipes — not that the gutters themselves are too small. Have a roofer assess before replacing everything. A diagnosis first saves money.

Internal Gutters — An Older Home’s Hidden Vulnerability

This one surprises a lot of Auckland homeowners. Many homes from the 1980s and early 1990s were built with internal gutters — drainage channels set within the roof structure, rather than hanging off the eaves. They look tidy from the street and were popular with the architects of the era. They are also, to use the industry’s own language, a known problem.

A survey of designers by the NZ Metal Roofing Manufacturers found 58% had experienced problems with flooding internal gutters. Internal gutters designed to the E1/AS1 Acceptable Solution fail for the same reason external gutters do — they’re sized to 10-year rainfall data, not 50-year. When an internal gutter overflows, the water doesn’t cascade off the eaves. It goes inside the building — into the ceiling cavity, down the wall frames, and onto your floor.

Converting internal gutters to an external system used to cost $40,000 or more. NZ-manufactured systems have brought that cost down significantly, but it’s still a project requiring a Licensed Building Practitioner (LBP) and, for any structural modification, a building consent from Auckland Council. If your home has internal gutters and you’re planning a renovation, now is the time to have them assessed. The cost of fixing a failed internal gutter after water damage has occurred is always higher than the cost of converting it beforehand.

“When we’re working on a full home reno and the roof drainage hasn’t been touched in 30 years, I always flag it. Not because gutters are anyone’s idea of an exciting renovation — they’re not — but because we’ve seen what happens when they’re ignored. Water finds a way in, and once it does, you’re spending a lot more than you would have on a gutter upgrade.”
— Dorothy Li, Design Manager, Superior Renovations
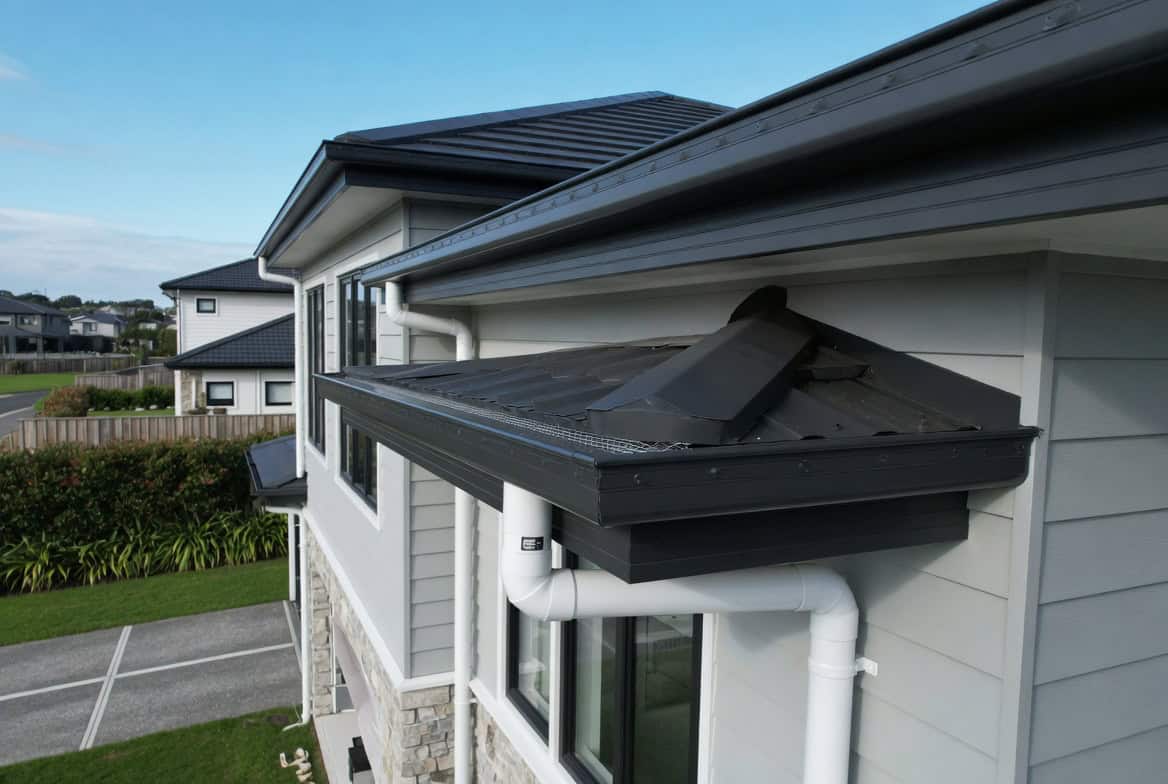
Roof drainage and gutter assessment during an Auckland home renovation


What High Winds Do to Tile Roofs — and How to Check Yours Before the Next Cyclone

Auckland doesn’t get the sustained winds Wellington is famous for, but the gusts that came with Cyclone Gabrielle — well over 100 km/h at exposed sites — were enough to lift, shift, and dislodge concrete and terracotta tiles across hundreds of properties. A heavy concrete tile does a great job of keeping water out when it’s sitting flat and correctly mortared. When it shifts, it creates a direct opening into your roof cavity.

If your home has a tile roof and you can’t remember the last time someone went up there to look at it properly, this section is worth reading carefully.

Ridge and Hip Mortar — The Most Exposed Point on Your Roof

The pointed mortar along the ridge (the peak of the roof) and the hips (the diagonal edges where two roof planes meet) takes the most exposure of any part of the roof. UV, thermal cycling, and the small movements a house makes over time cause it to crack and crumble over the years. Once the pointing is compromised, wind can get under the ridge capping and lift entire sections in a storm.

If your home is more than 15 years old and you can’t remember the last time the ridge and hip pointing was inspected, assume it needs attention. Caught early, re-pointing ridges and hips is a relatively affordable job — a tiler can often work through a standard single-level home in a day. Left for another five years, you’re looking at tiles off the roof in the next significant wind event, and the repair becomes a much larger conversation.

Valleys and Flashings — Where Water Gets In During Sustained Rain

Water follows the path of least resistance. On a tile roof, the most vulnerable points are always the valleys (where two roof planes meet and channel water to the eaves) and the flashings (metal strips at chimneys, skylights, parapets, and wall junctions). These are the points most likely to fail under sustained heavy rainfall or during high winds — and they’re often invisible from the ground until water appears on the ceiling below.

During any roof inspection — and ideally before committing to a renovation budget — ask a licensed roofer to check that valley trays are clear of debris and not corroded, that flashings are sealed and not lifting at their edges, that ridge and hip capping is firmly mortared with no visible gaps, and that no individual tiles are cracked, shifted, or sitting proud of the surrounding surface.

In our experience, a professional roof inspection in Auckland typically costs $200–$500. For context, a single failed valley tray that allows water ingress over an Auckland winter can cause ceiling, insulation, framing, and GIB board damage that easily runs $5,000–$15,000 to repair properly. The inspection is cheap insurance.

💡 Quick tip: Do your roof inspection before your renovation starts — not after. Problems found early can often be incorporated into the build, saving on mobilisation costs. A roofer visiting for an inspection costs far less than a roofer returning for a separate visit later.

Metal Roofs and Wind Uplift

If your home has a Colorsteel or other metal roof — common on newer Hobsonville, Flat Bush, and Millwater builds, and on renovated homes where tile has been replaced — wind uplift at the fixings is the main thing to check. Sheet metal roofing held by screws into purlins can be lifted if the screws are through-fastened into degraded timber, or if the screw pattern doesn’t meet current wind loading requirements for your site.

Coastal properties in West Harbour, Muriwai, and around the North Shore require particular attention here, as salt exposure degrades metal fixings faster than inland sites. If you’re in a coastal location and the roof was installed more than 10 years ago, a fixings check by a licensed roofer is worth adding to your renovation preparation list.

“The 2023 floods and cyclone were a real wake-up call for a lot of Auckland clients. The homes that had the most damage weren’t necessarily old or poorly built — they were homes where the small maintenance jobs had been put off year after year. A cracked valley tray, a lifting flashing, a few shifted tiles. None of those things are dramatic on a dry Tuesday. In a cyclone, they’re catastrophic.”
— Eunice Qin, Designer, Superior Renovations
Tile roof inspection before an Auckland renovation


Water at the Foundation — the Drainage Problem Most Auckland Homeowners Don’t See Coming

Here’s something that doesn’t get enough attention: Auckland’s soils are predominantly clay-based. Clay holds water. When a major downpour lands, clay-heavy ground around a house can become fully saturated within hours — and saturated clay pushes water sideways. Straight against your foundations.

Homes built before 1980 in Auckland — particularly those on uneven contoured sites across the isthmus, South Auckland, and West Auckland — were often built without subsoil drainage at all. It simply wasn’t standard practice. Groundwater that would be intercepted and redirected on a modern build just sits against the foundation, seeps through concrete block or stone, and slowly makes its way into subfloor spaces and lower rooms.

We had a client in Henderson with consistent flooding in their ground floor garage every winter — water seeping through the concrete block wall after heavy rain. The existing drainage system was original to the house. Thirty years old. We installed a perimeter subsoil drain around the garage, added a waterproofing membrane to the exterior wall, and the problem was gone. Straightforward in execution. Worth doing much, much earlier.

French Drains and Perimeter Drainage — What They Actually Do

A French drain — also called a subsoil drain or perimeter drain — is a trench dug around your home’s foundation, filled with gravel and a perforated pipe wrapped in geotextile fabric. Water from saturated soil flows into the pipe before it can reach the foundation, and gravity carries it to a discharge point — typically the street stormwater drain or an approved outfall.

Nobody puts subsoil drainage on Instagram. It’s invisible once installed. But for Auckland homes on clay-heavy sites — which includes most of Grey Lynn, Epsom, Mt Eden, Remuera, and large portions of West Auckland — a perimeter drain is one of the highest-value things you can add during a renovation. It’s most cost-effective when installed during works that already involve excavation, since trenching is the main cost driver. In our experience, adding it to a landscaping scope or a house extension project costs far less than doing it as a standalone job later.

Auckland’s clay soils also mean that any site with ground sloping toward the house — common on older hillside sections in Titirangi, Hillsborough, and the western isthmus — is at higher risk of water running toward the foundation after heavy rain. If this describes your site, a drainage assessment before your renovation starts is time well spent.

Grading the Ground Away from the House

This is basic and consistently overlooked. The ground immediately around your home should slope away from the foundation at a minimum 1:20 fall — 50mm of drop for every metre out from the building — for at least 1.5 metres. On many older Auckland sections, gardens have been built up against the house over decades, concrete paths have settled flat, and soil has accumulated at the base of the wall. Water now pools at the foundation rather than running away from it.

When you’re landscaping during a renovation, correcting the ground grade costs very little. When a building has been sitting in a wet zone for years, you’re looking at foundation repairs, framing replacement, and sometimes re-piling. The comparison isn’t subtle.

Subfloor Moisture and Ground Moisture Barriers

Many older Auckland homes — the timber-framed villas and bungalows in Grey Lynn, Ponsonby, and Kingsland, and plenty of 1950s and 1960s homes further south — sit on piles with an open or semi-enclosed subfloor. If there’s no ground moisture barrier (a polythene sheet on the subfloor ground), rising damp is a persistent and often invisible problem.

Under the Healthy Homes Standards — which Tenancy Services administers — rental properties with enclosed subfloor spaces must have a ground moisture barrier, but owner-occupiers in the same situation get no such mandate. A 0.25mm polythene sheet across the subfloor area dramatically reduces moisture rising from the soil into the floor structure. Combined with adequate subfloor ventilation, this addresses most damp subfloor problems. It’s not glamorous work, but it costs a fraction of replacing rotted floor framing later.

💡 Quick tip: A musty smell at floor level in a timber-framed Auckland home, or mould on skirting boards and lower walls in winter, almost always points to groundwater or rising damp — not a ventilation issue. A subfloor inspection is the first step, and it usually costs nothing to check.


Eaves, Cladding, and Gaps — Where Wind-Driven Rain Gets Into Your Home

During the 2023 Auckland floods, a significant portion of the interior damage to homes wasn’t from rising water. It was from wind-driven rain forcing its way through the building envelope — around windows, through gaps in weatherboards, via deteriorated eaves soffits, and through cladding flashings that hadn’t been touched since the house was built.

Old NZ homes were not built airtight. Pre-war villas and bungalows used single-skin construction with limited air sealing. Homes from the 1980s and early 1990s frequently have rubber window seals that have hardened and cracked with age. When you add winds driving rain horizontally against a wall, water finds every gap — and in older homes, there are more gaps than most owners realise.

Eaves and Soffits — the Part Nobody Looks At

The soffit boards (the horizontal boards under the eaves overhang) are a key line of defence against horizontal rain. On many older Auckland homes, these boards have gaps at the wall junction, open joints between boards, or unsealed penetrations where plumbing or cables pass through. During a sustained wind-rain event, these gaps allow water to enter the wall cavity from above — where it’s hardest to detect and hardest to repair.

Check your soffits from both inside and outside. Look for daylight showing through at wall junctions. Look for water staining on ceiling boards near the eaves. Any gap should be sealed with a flexible, paintable sealant. If the soffit boards themselves are deteriorated — soft, delaminating, or heavily stained — replace them. James Hardie fibre-cement soffit lining is a low-maintenance, dimensionally stable option that handles NZ weather far better than the compressed sheet products common in 1970s and 1980s homes.

Want a ballpark for your renovation?
See the calculators →

Window and Door Seals — First to Degrade, Last to Be Replaced

Rubber window seals have a finite lifespan. Most aluminium joinery from the 1990s and early 2000s has original seals that are now 20–30 years old. That rubber has hardened, cracked, and often shrunk away from the frame. In horizontal rain, a compromised window seal lets in far more water than most homeowners realise — often into the wall cavity in places that aren’t obvious until there’s visible damage inside.

During a renovation, replacing window seals is a low-cost job with outsized value. Ask your builder to check the condition of all seals and flashings around windows and doors at the assessment stage. If any window is being touched during the renovation — because a new internal lining is going in, or new cladding is being installed around it — replace the seal and re-flash it at the same time. Mobilisation cost for a second visit to do it later is always higher than doing it while the builder is already there.

Cladding Flashings and the Leaky Building Era

Where cladding meets windows, doors, ground level, decks, and any penetration (pipes, cables, vents), a flashing is required to shed water away from the building. Old or poorly detailed flashings — particularly on homes built during the leaky building era (mid-1990s to mid-2000s) — are among the most common causes of ongoing water ingress in Auckland.

If your home is from this period and hasn’t had a weathertightness assessment, doing so before or during your renovation is worth the investment. A LIM report from Auckland Council will flag any weathertightness history on record, and a licensed building inspector can identify problem areas before they become structural failures. If recladding is on your radar, our guide to what a recladding project involves covers the process and what to expect.

💡 Quick tip: If you notice paint bubbling, soft GIB board near a window frame, or a damp smell adjacent to an exterior wall — don’t paint over it. Get a moisture reading taken first. These are signs of water in the wall cavity, and covering them delays the diagnosis while the damage continues.
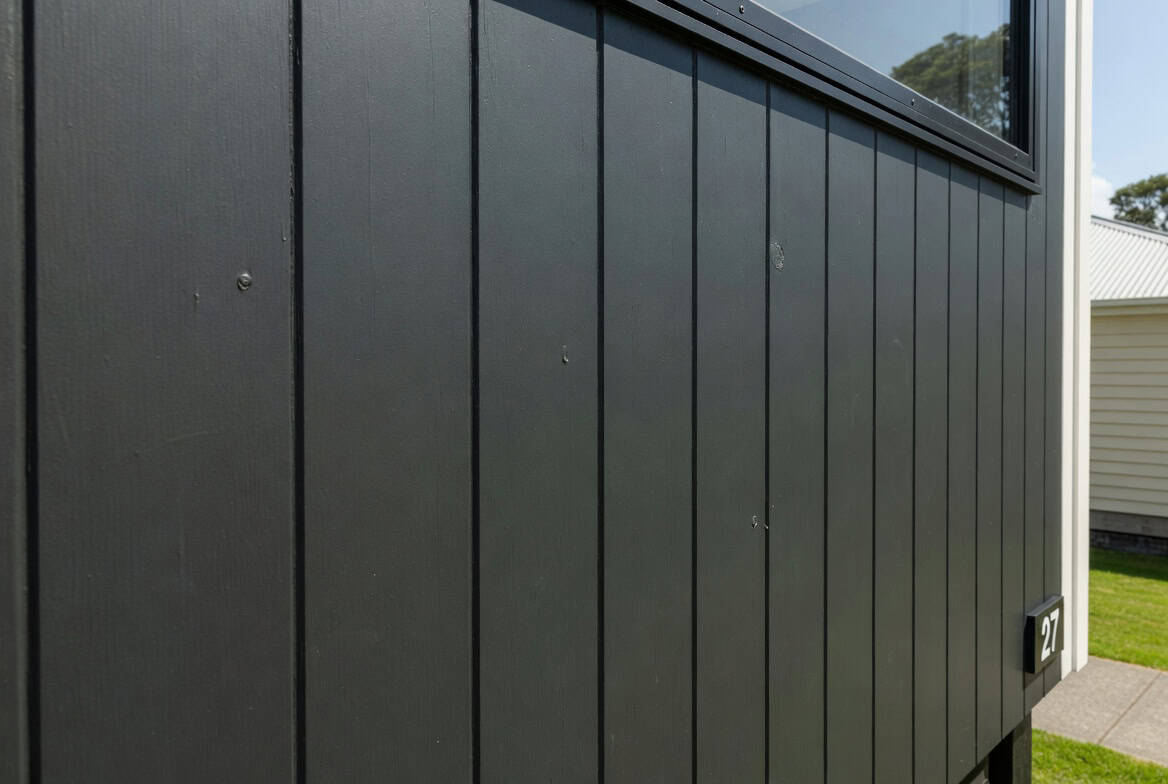
Cladding and weathertightness work on an Auckland leaky-era home


Double Glazing and Heat Pumps — Staying Dry, Warm, and Cool Through Auckland’s Variable Weather

Most people think of double glazing as a comfort upgrade. It is. But it’s also a weatherproofing decision — and that distinction changes how you think about the priority and timing.

Single-glazed windows are cold. Cold glass surfaces attract moisture from warm interior air, which condenses on the pane and runs down into the timber sill below. Over years, that condensation causes timber rot, promotes mould growth on adjacent walls, and creates a cycle of damp that’s genuinely hard to break without addressing the root cause. According to BRANZ’s Level guidance, windows can account for up to 40% of a home’s heat loss in a house built to little more than the minimum Building Code. That heat loss is also moisture vulnerability — because a home that can’t hold warmth has larger temperature swings, and larger temperature swings create more condensation.

When you upgrade to double glazing, the inner pane stays closer to room temperature. Condensation reduces substantially. Mould risk drops. And the home holds temperature far better, which matters specifically for Auckland — where weather can shift from a humid 26°C afternoon to a wet 10°C evening between lunch and dinner.

What Double Glazing Costs and What to Expect

Full window replacement to double glazing — new thermally broken frames and insulated glass units — is a significant investment, typically around $35,000 for an average 100m² Auckland home, scaling with window count, size, and complexity. Use our double glazing cost calculator to get an indicative figure for your specific home before you start gathering quotes, and our explainer on what double glazing costs and the R-values involved for the detail behind the numbers.

Retrofit double glazing — replacing the glass only within existing aluminium frames — is a more cost-effective entry point for older homes where the joinery itself is in good condition, generally around $18,000–$28,000 for a 100m² home. Low-E glass with an argon-filled cavity outperforms standard clear glass, and EECA notes that a well-insulated home can save up to $330 a year on power bills. Glazing isn’t the whole insulation story, but warmer glass paired with insulated ceilings and floors is what produces those savings — and over the life of the windows, the reduced moisture damage is often worth as much as the energy saving.

If you’re renovating a kitchen or bathroom, ask whether any adjacent windows should be addressed at the same time. Getting glazing work done while builders are already on site removes one mobilisation cost and simplifies the sequencing.

Pairing Double Glazing with a Heat Pump

A heat pump and double glazing work together. On their own, each delivers real improvement. Together, they change how a home actually feels — and how it performs through a full Auckland winter.

A heat pump in the main living area maintains consistent temperature, which reduces the humidity swings that drive condensation and mould. Combined with double glazing that retains warmth in winter and blocks solar heat gain in summer, you end up with a home that stays genuinely comfortable year-round — not just comfortable when the weather cooperates.

EECA’s Warmer Kiwi Homes programme offers eligible homeowners up to 90% off the cost of a heat pump installation, with the grant capped at $3,450 including GST. The heating grant is targeted at those most in need — to qualify you must own and live in a pre-2008 home and either hold a Community Services Card or SuperGold Combo Card, or live in one of the highest-need areas. Eligible homeowners typically pay $400–$700 out of pocket once the grant is applied. Check your eligibility at eeca.govt.nz before budgeting for this part of your renovation.

Important note: From 9 January 2026, EECA’s Warmer Kiwi Homes programme no longer accepts new applications for wood or pellet burner grants (existing quotes had to be processed by 27 February 2026). Heat pumps are now the primary funded heating option under the scheme. If you were planning on a wood burner as part of your renovation heating strategy, check the EECA website for current grant status.

“On a lot of the kitchen renovations I work on, the windows haven’t been touched in 20 or 30 years. Single glazing, degraded rubber seals, timber sills that are soft from years of condensation. We do the kitchen properly, but the window is still losing heat and creating damp. Addressing the glazing at the same time as the renovation just makes sense — you’re already in the walls, the builder’s already there.”
— Alison Yu, Designer, Superior Renovations

💡 Quick tip: When pairing a heat pump with a double glazing upgrade, size the heat pump for the room after the glazing is installed — a well-insulated room needs a smaller unit, which runs more efficiently and costs less over time. A heat pump sized for a draughty single-glazed room will be oversized and inefficient once the glazing is in.

Double glazing and heat pump upgrade in an Auckland renovation


Outdoor Structures, Flood-Proof Entries, and Getting Stormwater Away from Your Home

The outdoor environment around your home is the first place water encounters your property. What happens to rainfall when it hits your paths, your driveway, your lawn, and the areas around your doorways directly determines whether your interior stays dry. And if you have a pergola, deck, or carport — what happens to those structures when high winds arrive matters too.

Diverting Water Away from Entrances and Doorways

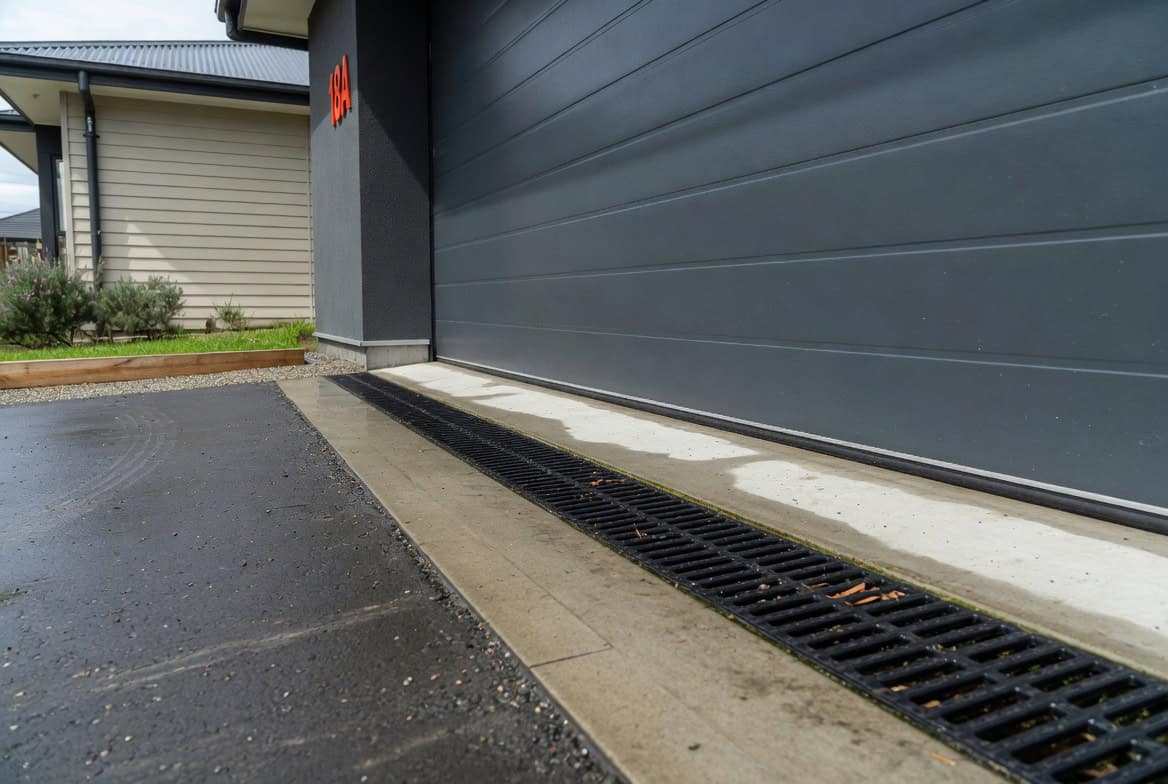
In the 2023 Auckland floods, a significant number of homes had water entering through front doors and covered entryways. Not because the doors weren’t watertight, but because surface water accumulated on paths, decks, and driveways and had nowhere to go except under the threshold. The solution is twofold: slope and a drainage channel.

Any hardscaped surface adjacent to a door should slope away from the threshold, with a channel drain (slot drain) installed at the entry if the slope can’t be improved enough to divert water clear of the doorway. Slot drains are straightforward to install during landscaping works and highly effective at intercepting surface runoff before it reaches a door. For steeply sloping driveways, a full-width channel drain at the base — directing water to the street stormwater system — is often the right call.

Permeable paving is worth considering if you’re resurfacing a driveway or path as part of your renovation. Rather than sending all runoff to the street drain at once, permeable paving allows water to soak through the surface into a prepared subbase — reducing the peak volume of surface runoff during heavy rainfall. On a heavily paved section, this can make a meaningful difference to how quickly your site drains after a downpour.

Pergola and Outdoor Structure Strength in High-Wind Exposed Locations

If you’re planning a pergola or deck as part of your renovation, Cyclone Gabrielle made one thing very clear: structural adequacy in high-wind conditions is not optional, and it’s not something to sort out after the structure is built.

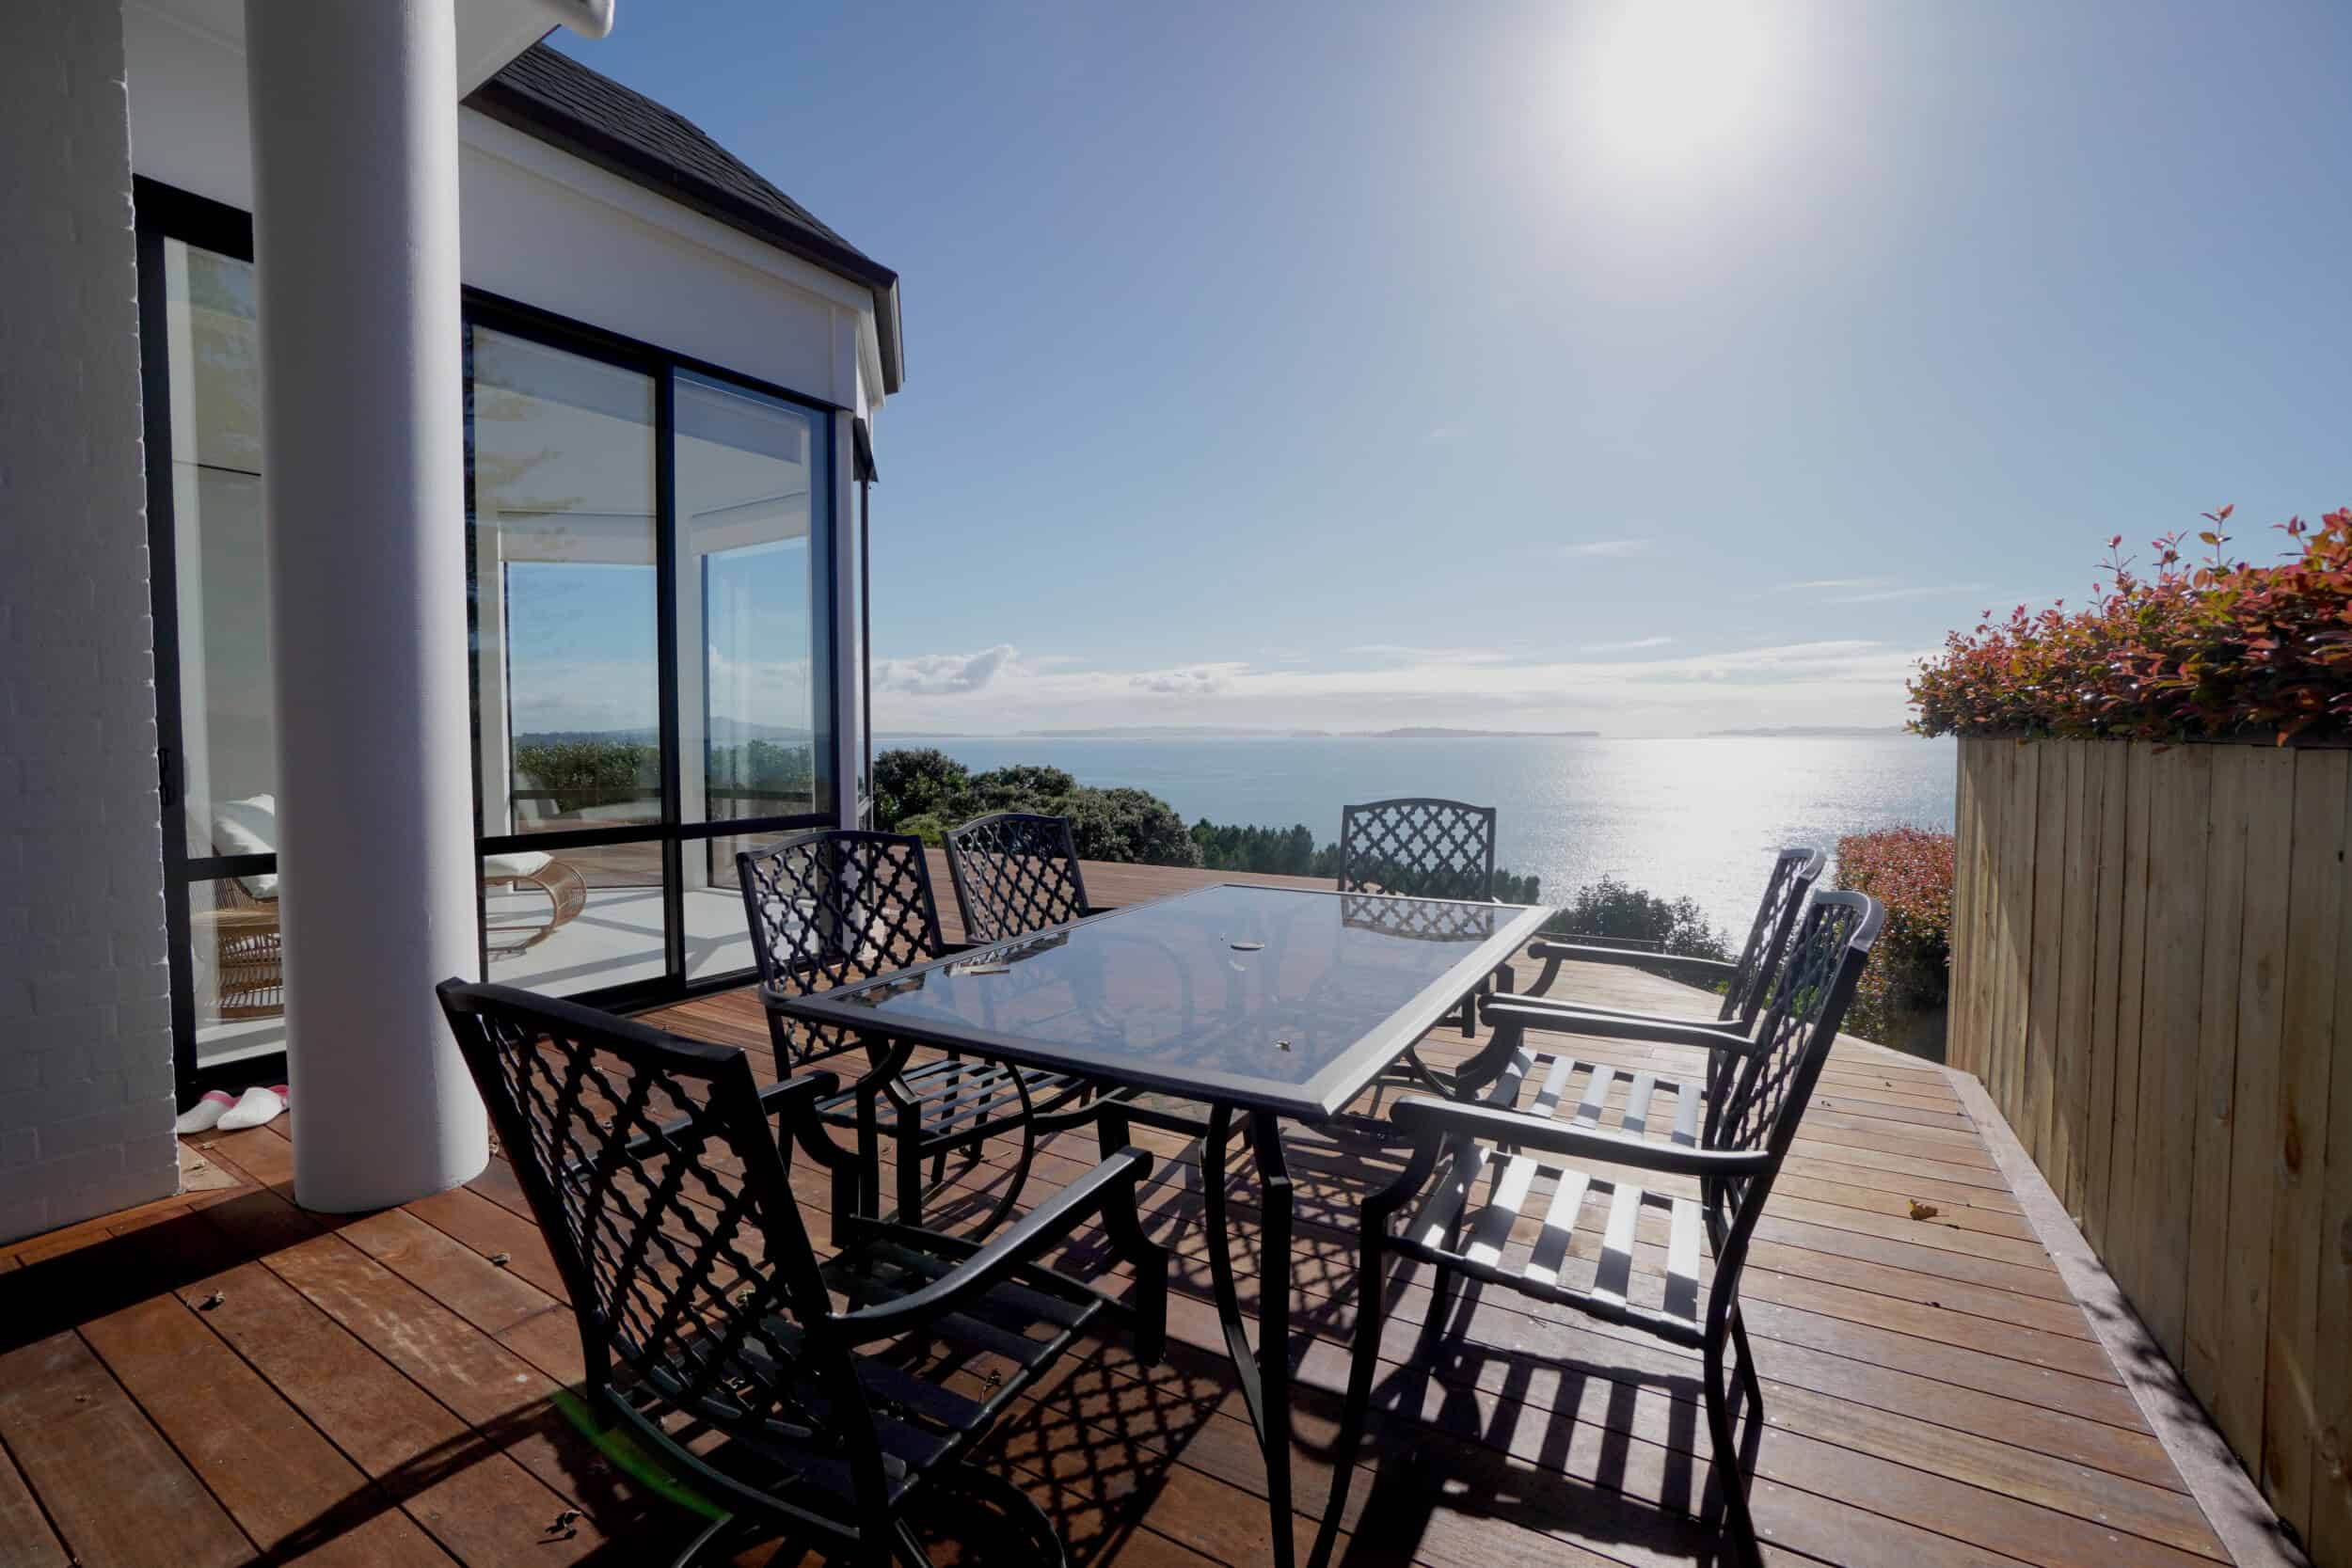
Under Schedule 1 of the Building Act 2004, an unroofed pergola is consent-exempt regardless of its size — there’s no area limit, provided it stays unroofed (add a solid or louvred roof and it’s no longer a pergola for that exemption, which changes the consent picture). But consent-exempt does not mean engineering-free — the NZ Building Code still requires any structure to be fit for purpose, and that requirement applies whether or not consent was needed. For pergolas in wind-exposed locations — coastal properties in West Harbour, Muriwai, Takapuna, Hobsonville Point, or elevated sections anywhere in Auckland — discuss wind loading requirements with your builder or a structural engineer before settling on a design.

A poorly anchored freestanding pergola in a cyclone doesn’t just get damaged. It becomes a hazard to adjacent property and people. This is not a hypothetical. The 2023 events produced footage of outdoor structures across Auckland doing exactly that.

For attached pergolas and covered outdoor areas, the connection to the house structure is the most critical point. An attached pergola that pulls away from the wall under wind uplift — because the fixings weren’t adequate — damages both the pergola and the cladding behind it. Make sure your builder specifies fixings appropriate for your site’s wind zone. Most of Auckland is classified as a medium wind zone, but exposed coastal and elevated sites may require engineering to a higher wind classification. Our landscaping and outdoor renovations page has more on what’s involved.

Landscaping for Stormwater Management

Smart landscaping isn’t just about how your section looks. During heavy rain, it determines how much water accumulates around your home versus how much flows away. Deep-rooted plants, swales (shallow grassed channels that direct surface runoff), rain gardens, and retention areas can all reduce the volume and speed of stormwater running toward your house during a storm.

For sections where Auckland Council’s stormwater system is the downstream discharge point, check that you’re not directing water in ways that overload your connection point. Auckland Council has guidance on reducing flooding risks on your property, including permeable paving, shaping paved areas to drain away from the house, and keeping overland flow paths clear.

💡 Quick tip: For any freestanding pergola on an exposed site, ask your builder for the specific post anchor and footing specification before you sign off on the design. The footing depth, anchor type, and bracket specification vary with wind zone — and getting it right upfront costs nothing extra compared to retrofitting a compliant anchor system after the structure is built.
Storm-ready outdoor structure and landscaping on an Auckland section


Want a ballpark for your renovation?
See the calculators →

Putting It All Together — What to Prioritise When Renovating

The homes that came through the 2023 Auckland floods and Cyclone Gabrielle in the best condition weren’t necessarily the newest. They were the ones where someone had thought carefully about water — where it comes from, where it goes, and what happens when more of it arrives than the original design anticipated.

That’s what weatherproofing really is. Not a single product or a single trade. It’s a series of considered decisions made at the right point in a renovation project. And the right point is always earlier than most homeowners expect.

If you’re planning a full home renovation in Auckland, these are the conversations to have at the design stage — with your renovation company and, where structural drainage or subsoil works are involved, your engineer. The work is almost always cheaper when it’s planned in from the start than when it’s retrofitted later as a separate project.

If you’re only doing a kitchen or bathroom this year, it’s still worth asking: are there any of these issues that could be cost-effectively addressed while the trades are already on site? The answer is usually yes.

➡ Book your free in-home consultation with Superior Renovations
➡ Learn more about full home renovation services in Auckland
➡ Request a free feasibility report for your renovation project


What are the most important weatherproofing upgrades for an older Auckland home?

For most pre-1990s Auckland homes, the priority upgrades are: (1) assessing and resizing gutter and downpipe systems for 50-year rainfall events rather than the 10-year standard used in older construction; (2) installing perimeter subsoil drainage if none exists, particularly on clay-heavy sites; (3) checking and repointing ridge and hip mortar on tile roofs; (4) sealing eaves gaps and replacing degraded window seals; and (5) upgrading to double glazing to reduce condensation and moisture risk. These often cost far less when done during a broader renovation than as standalone projects.

How do I know if my gutters and downpipes are undersized?

The most obvious sign is water overflowing from the gutters during heavy rain — but overflowing can also be caused by blockages or insufficient fall, not just undersizing. Have a licensed roofer assess gutter fall, downpipe positions, and the number of downpipes serving each roof section. The NZ Metal Roofing Manufacturers recommend sizing roof drainage to 50-year rainfall recurrence data — the older E1/AS1 Acceptable Solution used 10-year figures, which can leave systems undersized for today's Auckland weather events.

What are internal gutters and why are they a problem in NZ homes?

Internal gutters are drainage channels built within the roof structure — set inside the building envelope rather than hanging off the eaves. They were common in NZ homes built in the 1980s and early 1990s. The problem is that they're sized to older, less conservative rainfall standards and, when they overflow, water goes into the ceiling and walls rather than off the eaves. A survey by the NZ Metal Roofing Manufacturers found 58% of designers had experienced flooding internal gutters. Conversion to an external system is the recommended fix — previously $40,000-plus, but now more affordable with NZ-manufactured conversion systems.

Do I need building consent for weatherproofing work in Auckland?

It depends on the scope. Maintenance work — replacing gutter systems, repointing ridge mortar, installing ground moisture barriers — is generally consent-exempt under Schedule 1 of the Building Act 2004. But any structural modification, including converting internal gutters where roof structure is altered, installing major drainage that connects to public stormwater, or foundation waterproofing that involves excavation below the building, may require consent from Auckland Council. Work must be done by a Licensed Building Practitioner (LBP) where LBP work is involved. When in doubt, check with Auckland Council's building consent team or your renovation company.

How much does it cost to add a French drain or perimeter drain in Auckland?

The cost of a French drain or perimeter subsoil drain in Auckland varies significantly based on the length of the perimeter, site access, soil conditions, and the discharge point available. A simple perimeter drain on one side of a house might start from $2,000–$5,000 installed. A full perimeter drain around a larger home with difficult access or significant excavation depth can cost considerably more. The most cost-effective time to install one is during a renovation that already involves landscaping or excavation works — where the trenching equipment is already on site.

How do double glazing and heat pumps help with weatherproofing?

Double glazing reduces condensation by keeping the inner pane close to room temperature — warm indoor air no longer contacts a cold glass surface, so moisture doesn't condense and run into window sills and frames. This directly reduces timber rot and mould risk. A heat pump maintains consistent interior temperature, which further reduces the humidity swings that drive condensation. Together, they create a home that stays drier internally, which complements the external weatherproofing done on gutters, drainage, and sealing. BRANZ's Level guidance notes windows can account for up to 40% of heat loss in homes built to little more than the minimum Building Code.

What should I check on a tile roof before Auckland's winter?

Before winter, a licensed roofer should check: ridge and hip mortar for cracking or missing sections; valley trays for debris blockage and corrosion; flashings around chimneys, skylights, and wall junctions for lifting or failing seals; individual tiles for cracking, shifting, or loose positioning; and gutters for adequate fall and blockage. In our experience a professional roof inspection in Auckland typically costs $200–$500. Finding and fixing a failed valley tray or loose ridge cap before winter costs far less than repairing the ceiling and wall damage caused by water ingress during a storm.

How can I prevent water entering through my front door or garage in heavy rain?

The most effective approaches are: (1) ensuring the hardscaped surface in front of the door slopes away from the threshold; (2) installing a slot drain or channel drain at the door entry to intercept surface runoff before it reaches the threshold; (3) checking that the door seal is in good condition and replacing it if degraded; and (4) for driveways that slope toward a garage, installing a full-width channel drain at the base of the driveway to redirect water to the stormwater system before it reaches the garage door. These are relatively affordable fixes during a landscaping or renovation project.

What is the Warmer Kiwi Homes grant and how does it apply to weatherproofing?

The Warmer Kiwi Homes programme, administered by EECA, offers eligible homeowners grants of 50–90% off ceiling and underfloor insulation, and up to 90% off an approved heat pump (capped at $3,450 including GST). Eligible homeowners typically pay $400–$700 out of pocket for a heat pump after the grant. To qualify for the heating grant you must own and live in a pre-2008 home and either hold a Community Services Card or SuperGold Combo Card, or live in one of the highest-need areas. The grant does not cover double glazing, but several banks offer green home loans for glazing and insulation upgrades. Check eligibility at eeca.govt.nz.

Are pergolas and outdoor structures safe in high-wind conditions?

A properly designed and anchored pergola — built to the NZ Building Code requirements for the site's wind zone — is designed to be safe. Under Schedule 1 of the Building Act 2004, an unroofed pergola is consent-exempt regardless of size, but consent-exempt does not mean engineering-free: the structure must still be fit for purpose under the Building Code, including for wind loading. Problems arise where post anchors and footings aren't specified for the site's exposure. Auckland is generally a medium wind zone, but coastal and elevated sites may require engineering to a higher wind classification. Always ask your builder for the footing and anchor specification before the structure is built.

How do I protect my Auckland home's foundation from water damage?

The key steps are: (1) ensure the ground around the house slopes away from the foundation at a minimum 1:20 fall for at least 1.5 metres; (2) install perimeter subsoil drainage (a French drain) if none exists, particularly on clay-heavy sites common across Auckland; (3) apply a waterproofing membrane to exterior foundation walls where ground level is close to or above internal floor level; and (4) install a ground moisture barrier (polythene sheeting) in enclosed subfloor spaces to prevent rising damp. These are best addressed during a renovation when excavation or landscaping works are already underway.


Further Resources for your home weatherproofing and renovation

  1. Featured projects and client stories to see specifications on some of our renovation projects
  2. Real client stories from Auckland homeowners who’ve been through full home renovations
  3. Use our double glazing cost calculator to estimate glazing upgrade costs for your home
  4. Visit EECA’s Warmer Kiwi Homes page to check eligibility for insulation and heat pump grants
  5. Auckland Council guidance on reducing flooding risks on your property

Need more information?

Take advantage of our FREE Complete Home Renovation Guide (48 pages), whether you’re already renovating or in the process of deciding to renovate, it’s not an easy process, this guide which includes a free 100+ point check list – will help you avoid costly mistakes.

Download Free Renovation Guide (PDF)



18 months 0 percent interest long term finance badge

Have you been putting off getting renovations done?

We have partnered with Q Mastercard ® to provide you an 18 Month Interest-Free Payment Option, you can enjoy your new home now and stress less.

Learn More about Interest-Free Payment Options*

*Lending criteria, fees, terms and conditions apply. Mastercard is a registered trademark and the circles design is a trademark of Mastercard International Incorporated.


Still have questions unanswered?

Book a no-obligation consultation with the team at Superior Renovations,
we’d love to meet you to discuss your renovation ideas!

    Services

    Home RenovationKitchen RenovationBathroom RenovationOutdoor RenovationHouse ExtensionCommercialDesign ServicesOther

    By submitting this form, you agree to receive communications from us via email or text regarding our services, you can unsubscribe at any time.

    This site is protected by reCAPTCHA and the Google

    Privacy Policy and Terms of Service apply.


    References

    1. NIWA — Auckland suffers wettest month in history (27 Jan 2023 rainfall, 1-in-200-year event)
    2. Insurance Council of New Zealand — North Island Weather Events: The Insurance Industry Response (Feb 2025)
    3. NZ Metal Roofing Manufacturers — Roof Drainage (Code of Practice, technical)
    4. BRANZ Level — Glazing systems and units (heat loss through windows)
    5. EECA — Warmer Kiwi Homes programme (insulation and heating grants)
    6. Tenancy Services — Healthy Homes moisture ingress and drainage standard
    7. Building Performance (MBIE) — Schedule 1 exemption 6: Pergolas
    8. Auckland Council — Reduce flooding risks on your property
    Living room/ Lounge
    House Renovation

    Smart Home Integration Auckland: What to Plan During Your Reno

    Smart Home Integration Auckland: What to Plan Before the Walls Close Up

    Free cost calculator

    How much will your renovation cost?

    Get an instant Auckland price range for your project — no details required to see it.

    Try our free cost calculators →

    Quick answer: The best time to integrate smart home technology into an Auckland home is during a renovation — before walls are closed and cables can be run cleanly. Smart lighting, climate control, security, motorised blinds, and EV charging can all be built in from as little as $1,500 for a single-room start, up to $15,000–$30,000 for a whole-home, multi-system setup.

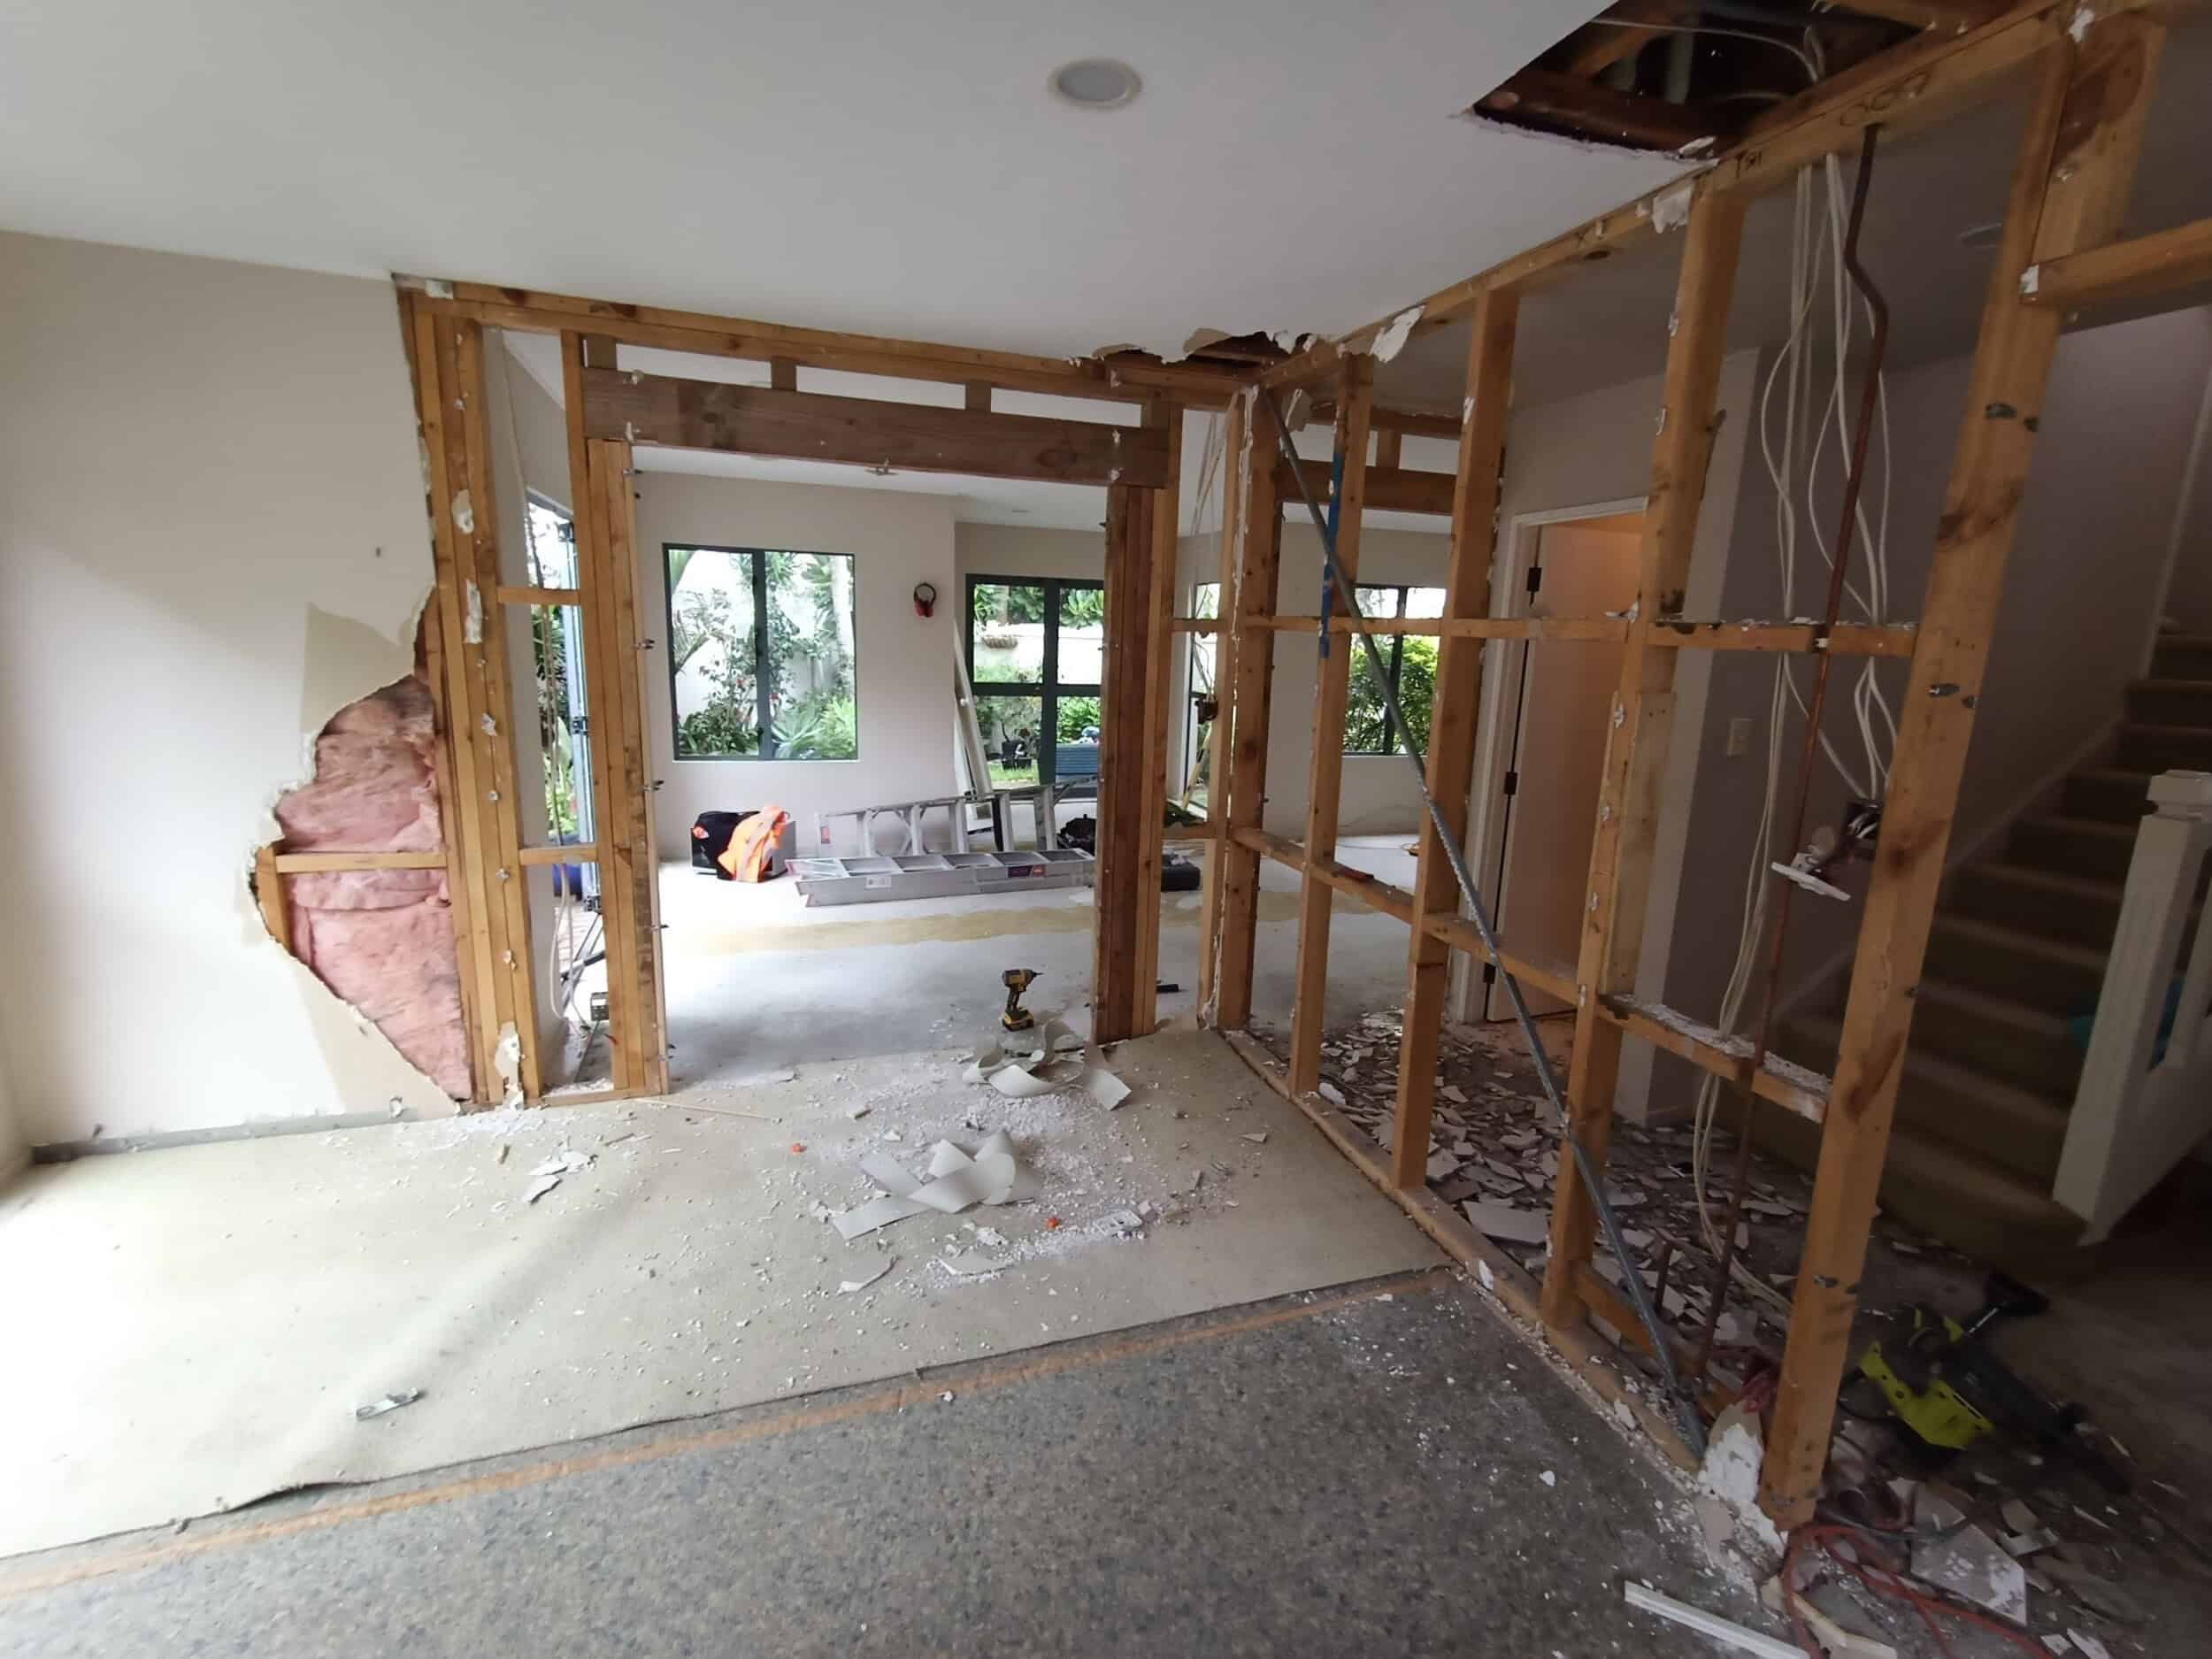
    There’s a moment in every renovation where the walls are open, the ceiling is stripped back, and every tradie on site can see exactly where the wires run. It lasts about a week. After that, the GIB goes on and the opportunity to future-proof your home without ripping it apart again is gone.

    That’s the window. Most Auckland homeowners miss it — not because they don’t want smart tech, but because nobody raised it early enough in the planning process.

    We’ve been doing this long enough to know that smart home integration is almost always an afterthought. A client in Remuera called us six months after their kitchen renovation was complete, wanting to add automated lighting and a security camera system. The kitchen looked great. Getting the wiring in cost nearly double what it would have during the original job.

    This guide is for homeowners who are renovating — or thinking about it — and want to know what’s actually worth planning ahead for. Not a wishlist of gadgets. A practical breakdown of what each system involves, what you need to run it properly, how much to budget, and what to ask your renovation company before work begins.

    We’re not selling you a smart home. We’re telling you what we’ve learned from building them.


    Why a Renovation Is the Right Time to Think About Smart Home Technology

    The Infrastructure Problem Nobody Talks About

    Smart home technology gets marketed like it’s plug-and-play. Sometimes it is. Smart bulbs, a video doorbell, a connected heat pump controller — you can add these to almost any home without touching a wall.

    But the good stuff requires infrastructure. Conduit runs. Dedicated circuits. Data cabling. Flush-mounted keypads. A properly sized switchboard. If you want smart technology that’s actually integrated into your home — not just a collection of apps on your phone — the bones need to be right. And those bones are cheapest to get right when the walls are already open.

    Think about what a renovation typically exposes: the ceiling cavity, the wall framing, the subfloor. An electrician working alongside your renovation team can run Cat6 data cable, low-voltage speaker wire, or conduit for motorised blinds in hours. The same job in a completed, lined home takes days and leaves a trail of patched GIB and repainted walls.

    💡 Quick tip: Ask your renovation company to co-ordinate a smart home electrician during the rough-in phase — before GIB goes on. One conversation at the right moment saves thousands later.

    What Auckland Homes Actually Need

    Auckland housing stock creates its own challenges. The older villas in Grey Lynn and Mt Eden weren’t wired for a 10-circuit smart lighting system — they were built when two power points in the kitchen felt modern. Many have been partially rewired over the decades, leaving a mix of old and new cabling that doesn’t sit well with smart home controllers.

    If your home was built before 1990, there’s a reasonable chance a switchboard upgrade is part of the smart home conversation before anything else. An undersized switchboard — still common in 1970s brick-and-tiles across Henderson and Manurewa — can’t safely handle the additional load from EV charging, climate systems, and smart appliances running simultaneously. An upgrade runs approximately $2,000–$5,000 in Auckland depending on scope. Not glamorous, but it’s the foundation everything else sits on.

    For homes built after 2000, the infrastructure is usually better. But even newer builds in subdivisions like Hobsonville and Millwater often weren’t spec’d for whole-home automation — they were built to a budget, with standard switches and a basic switchboard. The wiring is modern, but the capacity for smart systems often needs a top-up.

    Starting Small Is a Legitimate Strategy

    You don’t have to do it all at once. This is important to say because the smart home industry has a habit of making everything sound like an all-or-nothing commitment.

    It isn’t. PDL Wiser — one of the most widely used smart home systems in NZ and a product we work with regularly — is explicitly designed to scale. You can start with smart lighting in the kitchen during your renovation, and expand to climate control, blinds automation, and security monitoring over the following years. The Zigbee 3.0 and Bluetooth Low Energy protocol means devices talk to each other without requiring complex professional reprogramming each time you add something.

    The key is making sure the conduit, cabling pathways, and switchboard capacity are sorted during the renovation. That’s the upfront cost. Everything else can come later, when your budget allows.

    “The clients who get the most out of smart home technology are the ones who thought about it at the design stage — not the ones who decided they wanted it after the GIB was on. Even if the budget isn’t there right now, running the conduit costs almost nothing during a reno. It costs a lot when the walls are done.”
    — Eunice Qin, Designer, Superior Renovations

    The question isn’t whether smart home tech is worth it. For most Auckland homeowners renovating a family home they plan to stay in, it is — both for daily comfort and for resale value. The question is which systems matter most for how you actually live, and when to spec them in.

    The sections below break down each major category. Read the ones relevant to your renovation — kitchen, bathroom, living areas, outdoor spaces — and use them as a checklist before your build starts.


    Smart Lighting and Electrical — The Highest-ROI Upgrade in Any Renovation

    Why Lighting Is Always the Starting Point

    Ask any smart home installer in Auckland where most clients start. Lighting. Every time. And there’s a good reason for it — smart lighting is immediately visible, immediately useful, and delivers a noticeably better result than standard switching without requiring you to change how you live.

    The difference between a standard kitchen renovation and one with properly specified smart lighting isn’t subtle. Walk in at 6am to make coffee — the lights come up at 30% warmth automatically. Shift to meal prep — full task lighting over the bench at 5000K. Dinner party — the lights drop, the atmosphere changes, all from a single tap or a voice command to Google Home or Amazon Alexa. That’s not a gimmick. That’s a kitchen you actually want to be in.

    PDL Wiser — The NZ Smart Lighting System Worth Knowing About

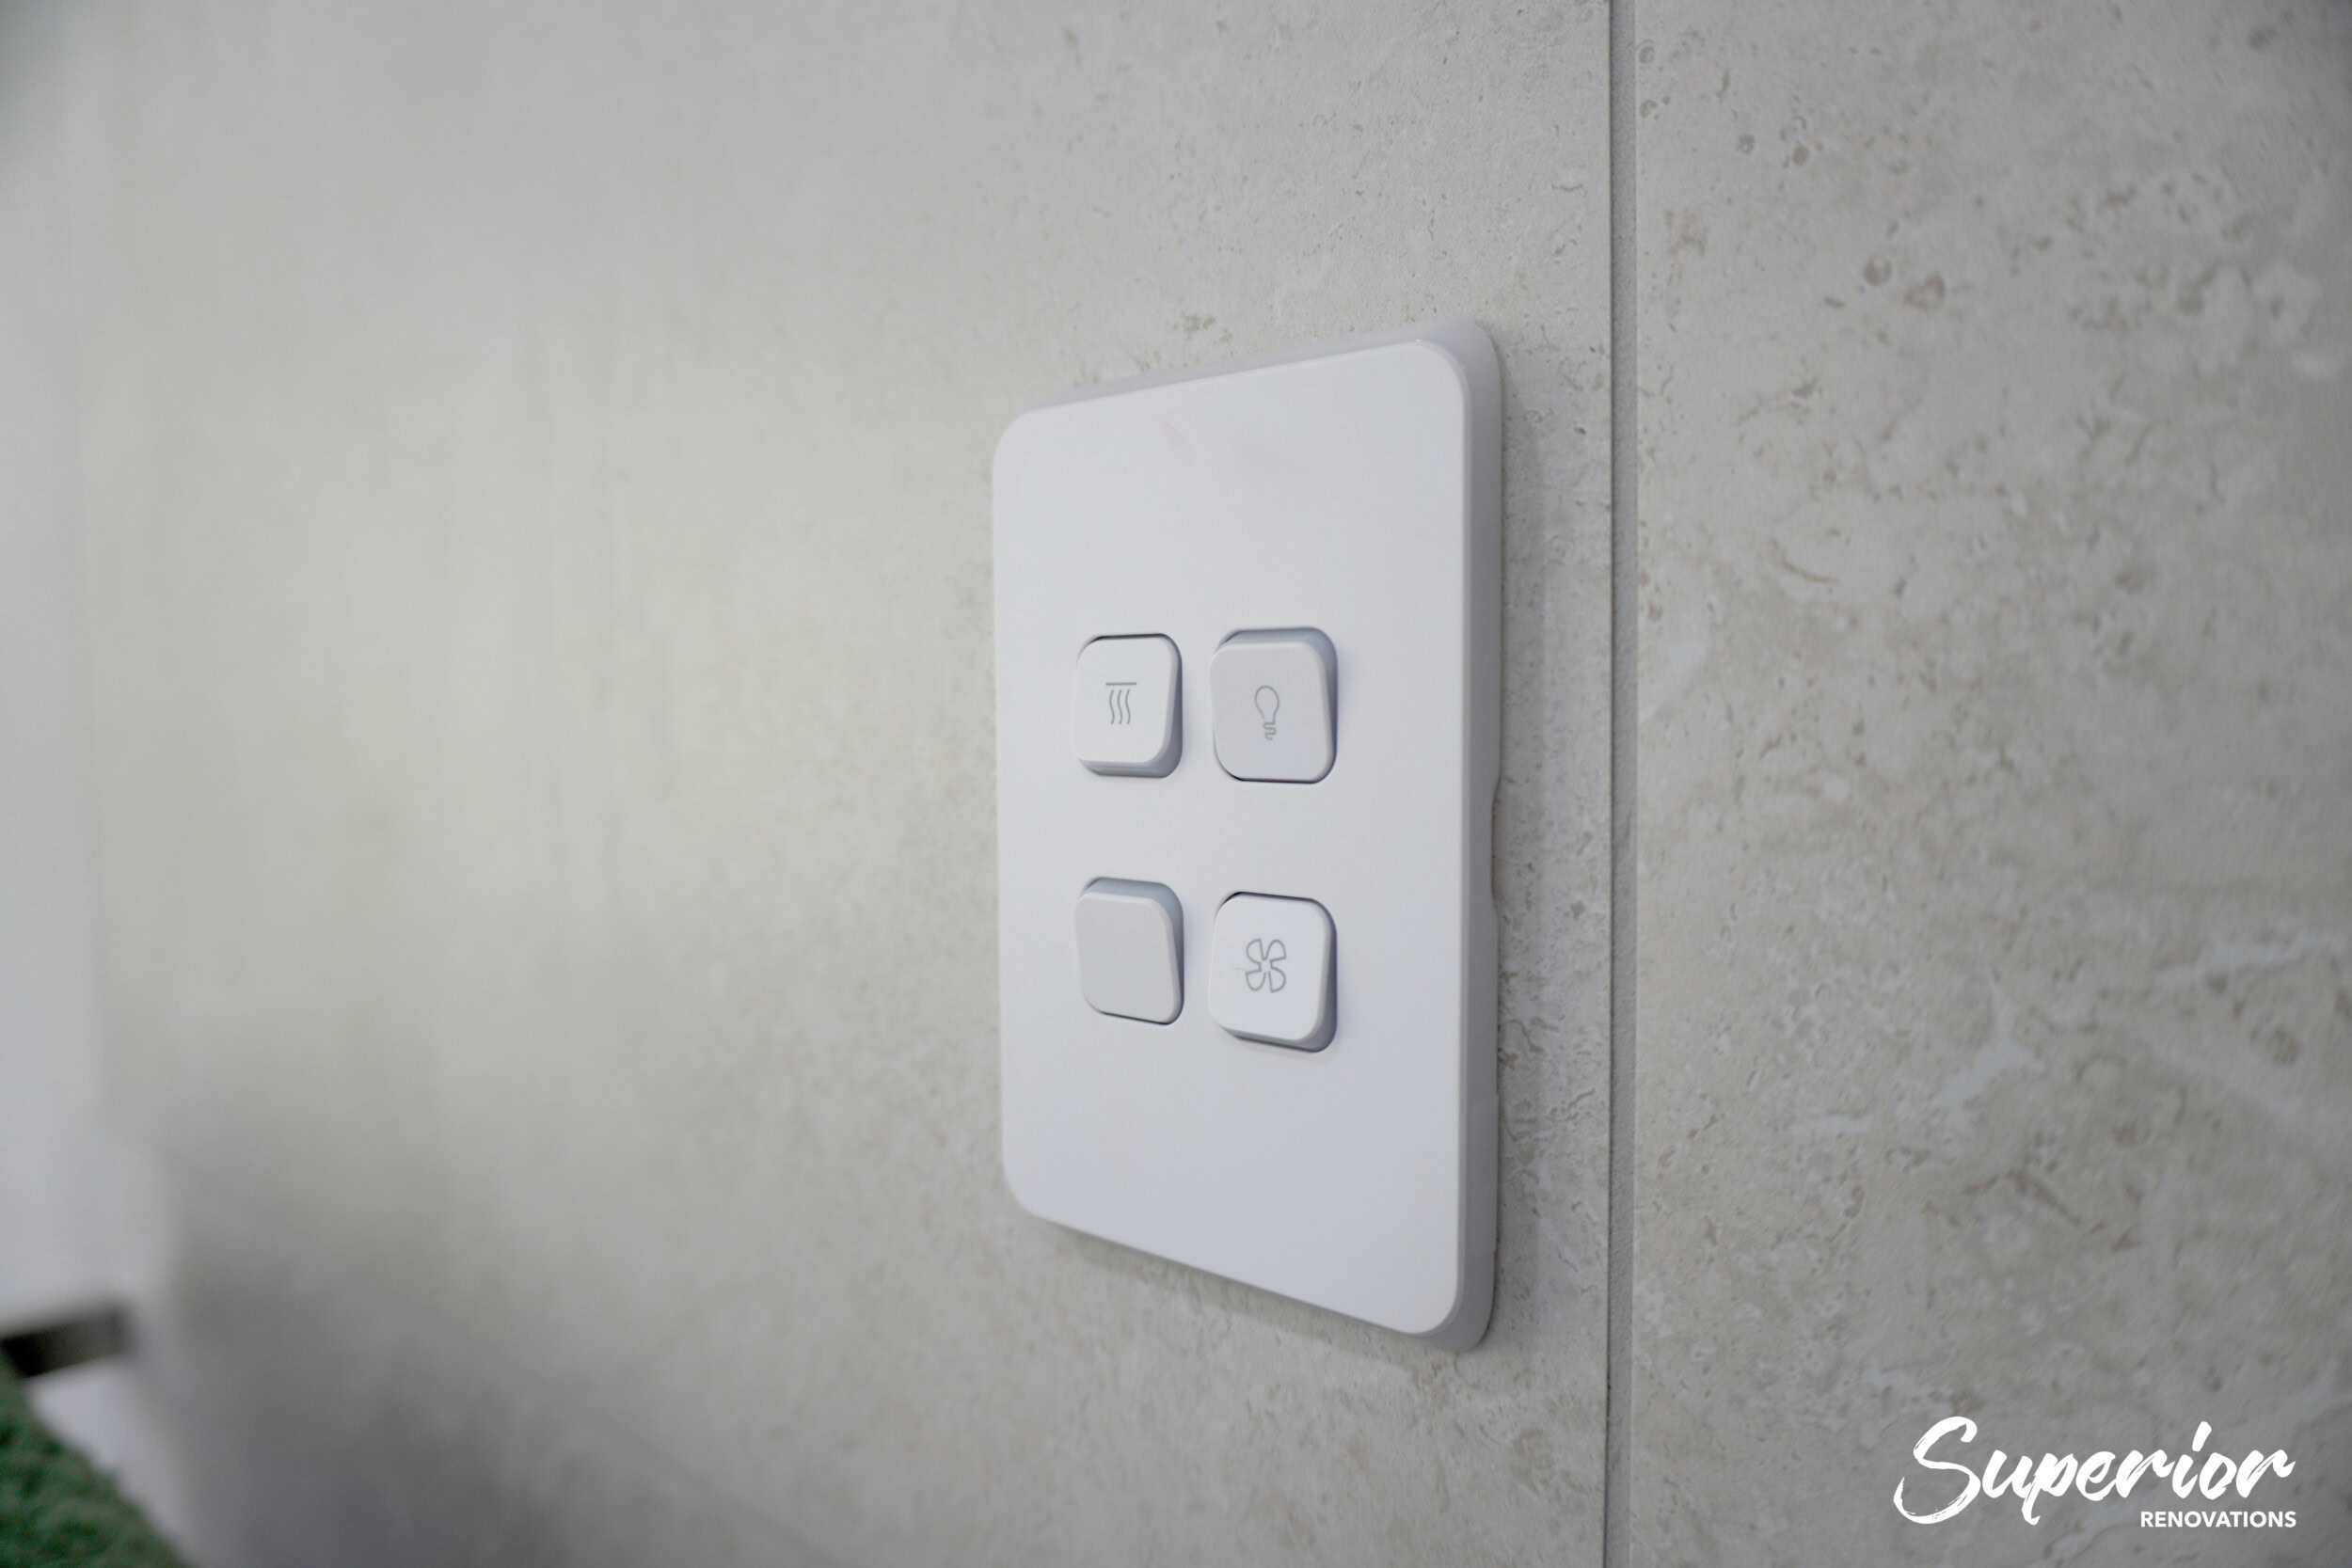
    We partner with PDL by Schneider Electric for smart home electrical because their Wiser system was developed specifically for the NZ market, has been in local homes for over two decades, and integrates directly with their award-winning Iconic switch range. That last point matters more than it sounds.


    pdl - Superior Renovations


    PDL Wiser’s Iconic switches look like standard switches. Clean. Minimal. They don’t scream “smart home” or date the way some systems from a decade ago do. During a kitchen or bathroom renovation, they can be specified in the same way any other switch would be — your designer selects the finish that suits the aesthetic, and the smart functionality sits behind it quietly.

    The system runs on Zigbee 3.0 — a reliable mesh protocol that doesn’t depend on a single Wi-Fi router for coverage. For larger Auckland homes or multi-storey renovations, this makes a real difference in reliability.

    💡 Quick tip: PDL Wiser’s Iconic connected dimmers and switches are compatible with existing PDL wiring — if you’re renovating and your home already has PDL standard switches elsewhere, the upgrade path is straightforward. No need to touch wiring that doesn’t need changing.

    What Smart Lighting Actually Costs in an Auckland Renovation

    Budget ranges vary significantly depending on how many circuits you’re automating and what level of control you want. Here’s a practical breakdown for Auckland conditions, based on what we see across our own projects.

    Scope What’s Included Approximate Cost (NZD incl. GST)
    Single room (e.g. kitchen) Smart dimmer switches, connected LED downlights, Wiser Hub, app control $1,500–$3,500
    Main living areas (3–4 rooms) Smart switches/dimmers throughout, scenes, voice control integration $4,000–$9,000
    Whole home (3–4 bedroom) Full Wiser system, all rooms, outdoor lighting, motion sensors, automation scenes $8,000–$18,000
    Switchboard upgrade (if required) Pre-1990s homes, older fuse boxes, additional circuit capacity $2,000–$5,000

    These are real-world figures for Auckland in 2026, not best-case scenarios. Labour rates for licensed electricians sit at $90–$120 per hour — consistent with the broader Auckland trade market. If you’re mid-renovation and an electrician is already on site, you’ll save significantly on labour by adding smart lighting to the scope at that point rather than returning later.

    Important note: Any new wiring, dedicated circuits, or switchboard work is “prescribed electrical work” under the Electricity (Safety) Regulations 2010. It must be carried out by a registered electrician and comply with AS/NZS 3000 (the Wiring Rules), with a Certificate of Compliance issued once the work is finished. Plug-in smart devices you set up yourself don’t count — but anything behind the wall does.

    Pull Points and Power Points — The Overlooked Detail

    While the conversation is usually about switches and dimmers, it pays to think about power point placement too. Benchtop power points in kitchens — the retractable kind that sit flush when not in use — have become one of the most requested features in Auckland kitchen renovations over the past few years. They’re practical, they look clean, and they’re significantly cheaper to install during a renovation than after.

    The same logic applies to USB-C charging points in bedrooms, outdoor weatherproof power points for entertaining areas, and dedicated circuits for home office equipment. Think about where you actually use power in your home, and plan those positions before the GIB goes on. An electrician making changes after lining is completed typically charges for each patch and repaint — costs that add up fast.


    Smart Climate Control — Heating, Cooling and Ventilation for Auckland’s Climate

    Auckland’s Climate Makes This Category Non-Negotiable

    Auckland doesn’t get cold the way Christchurch or Queenstown does. It gets damp. The winters here are mild enough that people underestimate how much moisture does to an older, under-insulated home. Mould in bathrooms, condensation on windows, musty carpet in poorly ventilated bedrooms — these aren’t aesthetic problems. They’re health problems, and they’re common across Auckland’s older housing stock in suburbs like Glen Eden, Avondale, and Otahuhu where ventilation was never designed into the build.

    Smart climate control — done properly — addresses all of this. It’s not just heat pumps on a timer. It’s an integrated approach to temperature, humidity, and air quality that you set once and largely forget.

    Smart Heat Pump Control

    Most modern heat pumps from Mitsubishi Electric, Panasonic, and Daikin — all widely available and well-serviced in New Zealand — have smart control capability built in or available as an add-on. A smart controller lets you set schedules, monitor energy use, and operate the unit remotely from your phone.

    The practical benefit for Auckland homeowners isn’t turning the heat pump on from the couch. It’s setting it to warm the house to 19°C before you get out of bed on a July morning, then dropping back to 17°C while nobody’s home. Over a year, that kind of scheduling reduces energy consumption meaningfully. According to EECA’s Gen Less programme, the average New Zealand heat pump puts out around three times more heat than the power it draws, and runs at roughly a quarter of the cost of plug-in electric (bar and column) heaters — a real saving across Auckland’s long, damp heating season.

    PDL Wiser’s IR Converter integrates directly with most heat pump brands, allowing control through the Wiser app without needing a separate system. For renovations where a new heat pump is being installed anyway, specifying a compatible unit from the start costs nothing extra.

    Ventilation and Humidity — The Problem Most Systems Ignore

    Heat is only part of the equation. Auckland homes — particularly those built before the updated H1 insulation requirements under the NZ Building Code — suffer from inadequate ventilation. When you renovate a bathroom, a kitchen, or seal up windows for double glazing, you often change the airflow patterns in a home without accounting for it.

    Smart ventilation systems — including humidity-triggered bathroom extraction fans and heat recovery ventilators (HRV systems) — address this without the homeowner needing to manage it manually. Under the Healthy Homes ventilation standard, an extractor fan vented to the outside is required in the kitchen and bathroom of every rental property — but that’s a Tenancy Services rule for rentals, not a blanket requirement for owner-occupied homes. For your own home, the difference between a basic extract fan and a humidity-triggered smart fan is around $200–$400 per unit. Given that mould remediation in a wet Auckland bathroom starts at around $1,500, it’s rarely a hard case to make.

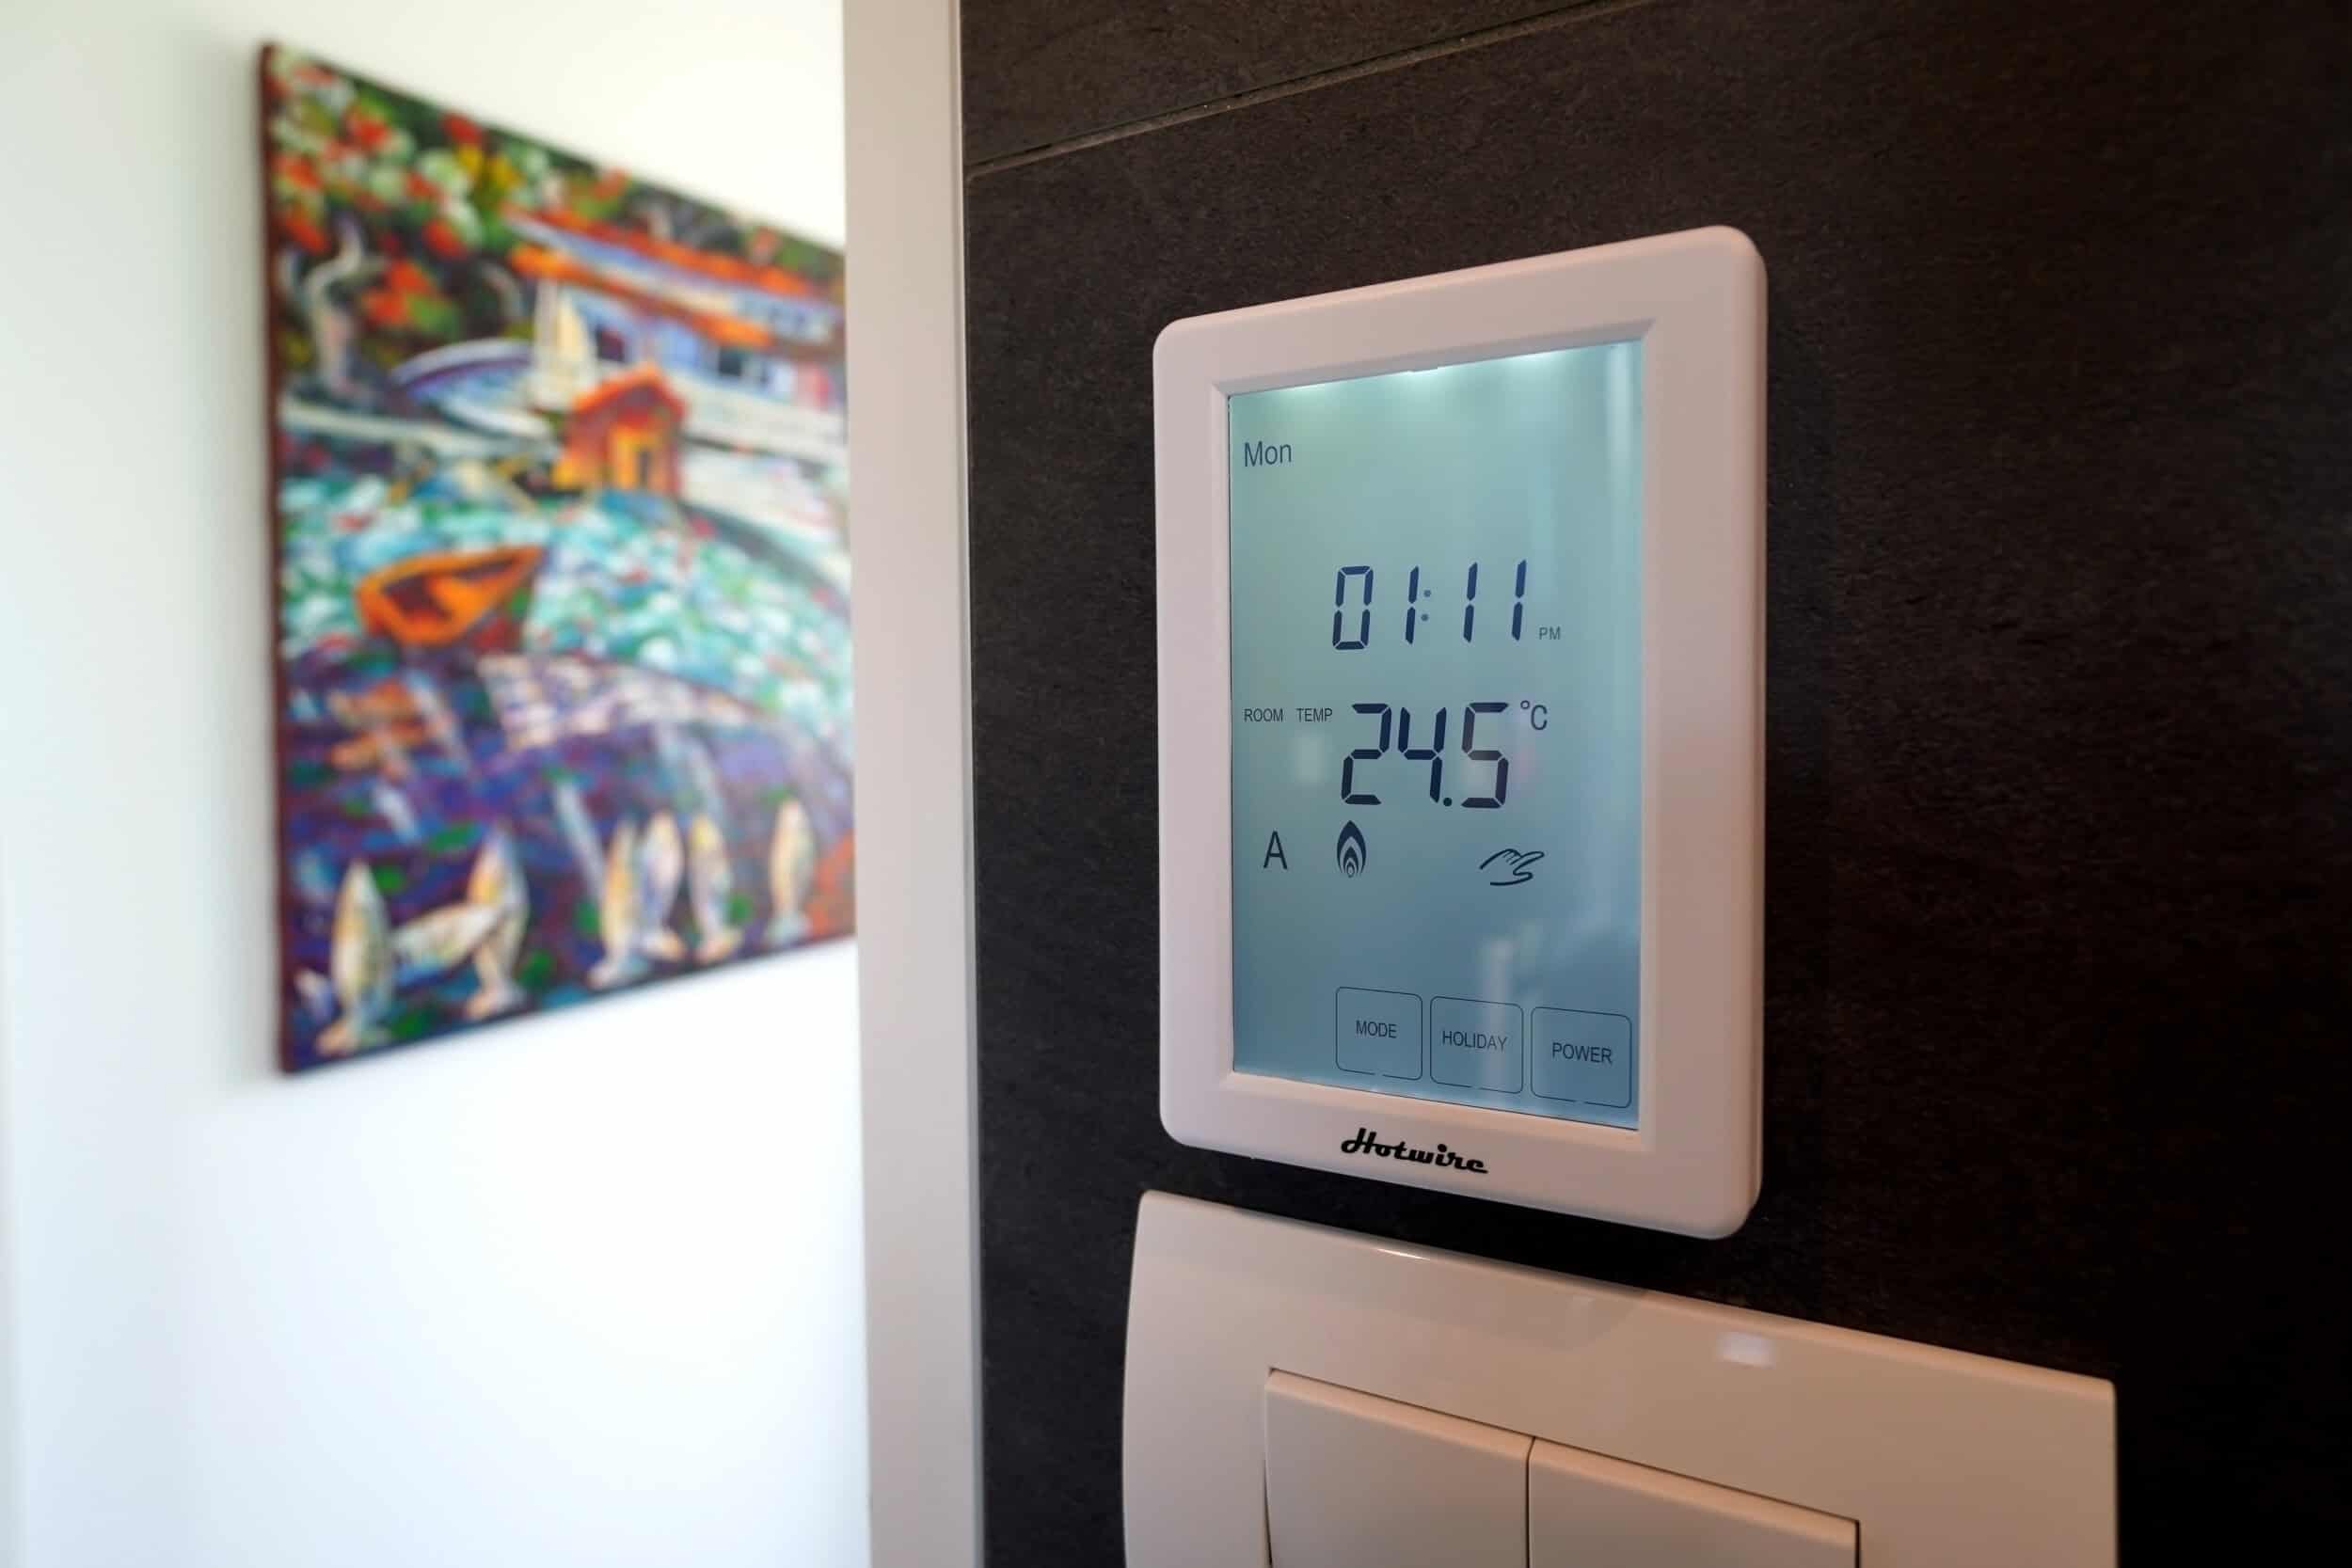
    close-up of a Hotwire smart underfloor heating touchscreen thermostat on a wall

    Luxury Bathroom Design – Redvale

    Underfloor Heating — Worth It in Bathrooms and Kitchens

    Electric underfloor heating has become a standard inclusion in mid-range and above bathroom renovations in Auckland. It costs $800–$2,500 to install during a tiled bathroom renovation (the heating element goes in before the tiles, which is the only sensible time to do it). Running costs on a smart timer — set to warm the floor for 45 minutes before the alarm goes off — are minimal. Most systems draw around 150W per square metre.

    Smart thermostats for underfloor systems allow scheduling and remote control, meaning you’re not heating an empty bathroom on days you’re working from home or away. The key is specifying the thermostat at the time of renovation so the wiring is run correctly — retrofitting after tiling involves taking tiles up. Not a fun day for anyone.

    💡 Quick tip: If you’re tiling a bathroom floor during your renovation, always run the conduit for underfloor heating — even if you’re not installing it now. The conduit costs less than $50 and means you can add the heating element years later without lifting a single tile.

    Climate Control Budget Guide

    System Approximate Cost (NZD incl. GST) Best Time to Install
    Smart heat pump controller (add-on to existing) $200–$600 Anytime
    Bathroom underfloor heating (incl. smart thermostat) $800–$2,500 During tiling — not after
    HRV / ventilation system (whole home) $3,000–$6,000 During renovation (ceiling access)
    Smart humidity-triggered bathroom fans (per unit) $350–$700 During bathroom renovation
    Wiser Temperature/Humidity Sensor (per room) $150–$250 Anytime (wireless device)

    “A bathroom renovation is one of the best opportunities to sort humidity properly. Most Auckland bathrooms we work on are extracting moisture too slowly, or not at all. Pairing a good extraction system with a humidity sensor means you’re not relying on people remembering to run the fan — it just happens. That’s what keeps mould out long-term.”
    — Cici Zuo, Head of Sales, NZ Dip. Interior Design, Superior Renovations


    Want a ballpark for your renovation?
    See the calculators →

    Smart Security, Motorised Blinds and Home Automation — The Layer Most People Overlook

    Smart Security — What’s Actually Useful

    Home security has an image problem. The marketing makes it sound like you need a control room and a monthly monitoring contract. Most Auckland homeowners don’t. What they actually want is reasonably simple: know who’s at the door without getting up, see what’s happening at the property when you’re away, and get an alert if something’s wrong.

    A basic smart security setup during a renovation costs a fraction of a monitored alarm system and delivers most of the practical benefit. The PDL Wiser security range — which we spec for clients regularly — includes indoor and outdoor IP cameras, door and window sensors, and motion detectors that all feed back to the same Wiser app. No separate subscription. No extra hub.

    The cameras deliver HD recording with motion tracking and alert on any detected movement. For Auckland homeowners who travel regularly or have a rental property on the same section, remote access to live camera feeds from a phone is the single feature they use most. A client in Glendowie with two properties on a combined site told us it changed how comfortable they felt leaving both places empty over summer.

    What the Renovation Window Enables for Security

    Retrofit security cameras are fine. But wired cameras — run during a renovation — are more reliable, don’t have battery management issues, and can be hidden more cleanly in eaves and ceiling spaces. The difference in appearance between a cleanly surface-mounted camera and one on a visible cable run down an external wall is significant, particularly on heritage-character homes in suburbs like Remuera or Parnell.

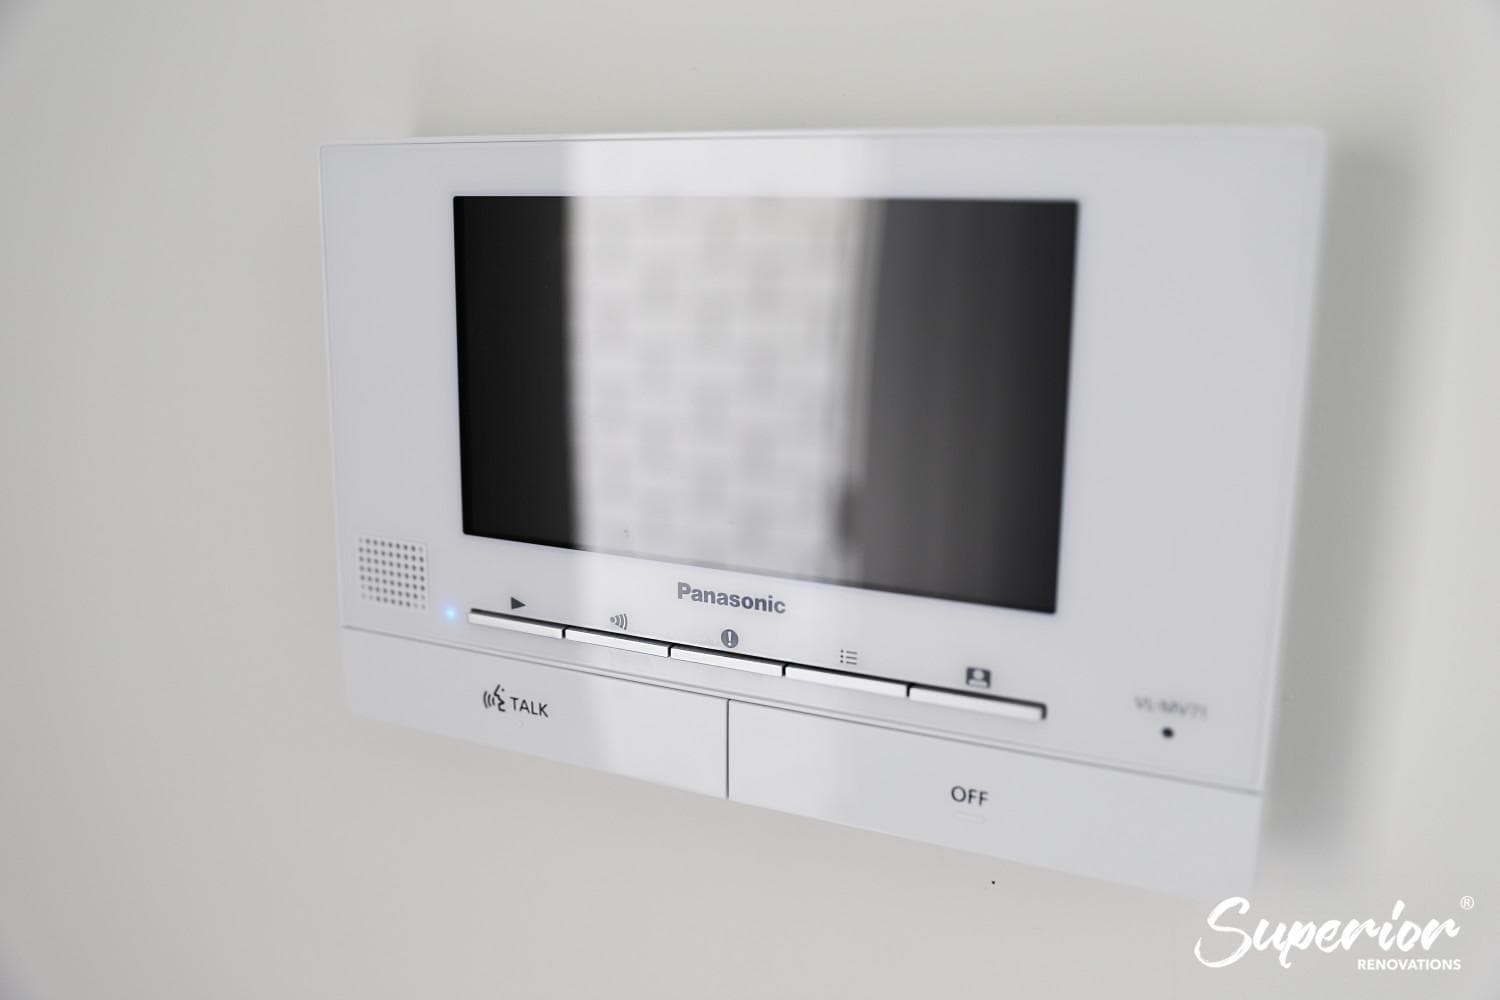
    During a renovation, an electrician can run low-voltage cabling for cameras, door sensors, and intercom systems inside the wall cavity — invisible when the job’s done. The same goes for a smart doorbell with intercom capability: wired during the reno, it’s flush, clean, and powered without needing a battery change every few months.

    💡 Quick tip: When planning camera positions, think about coverage angles before walls close. An electrician can stub out cable at any point — ceiling, soffit, exterior wall cavity — for almost nothing during rough-in. Deciding where cameras go after the fact is a visible, expensive problem.

    Motorised Blinds — More Useful Than They Sound

    Motorised blinds were a luxury product five years ago. The price has come down considerably. For Auckland west-facing living rooms — particularly the villas and bungalows in Grey Lynn, Westmere and Pt Chevalier that bake in afternoon sun — motorised blinds on a light sensor or schedule are genuinely practical. They close automatically when the sun hits the west-facing window at 2pm, keep the room cooler, reduce UV on furniture, and can integrate with your heat pump schedule to improve efficiency.

    PDL Wiser’s Micro Module Blind Controller transforms any standard double push-button switch into a connected blind controller — no specialist blind system required. For homes where new blinds are being specified during a renovation anyway, adding motorisation is a relatively small incremental cost.

    Budget: Motorised blind per window (mid-range system, installed) typically runs $400–$900 per blind depending on size and fabric. For a renovation where blinds are being replaced throughout, the motorisation premium per blind is often $150–$250 on top of the standard blind cost.

    Multi-Room Audio

    Pre-wiring for ceiling speakers during a renovation is one of the lowest-cost, highest-impact infrastructure decisions you can make. Speaker cable in a wall cavity costs almost nothing. Installing ceiling speakers after lining involves cutting holes, patching, and painting — trade time that adds up.

    Sonos is the system most commonly specified in New Zealand renovations and is widely available here. The Sonos Amp connects to in-ceiling speakers and integrates with the broader smart home ecosystem, including voice control via Amazon Alexa and Google Home. A typical living area and kitchen zone — covering open-plan spaces common in Auckland renovation briefs — runs $1,500–$3,000 for a mid-range Sonos setup including installed ceiling speakers.

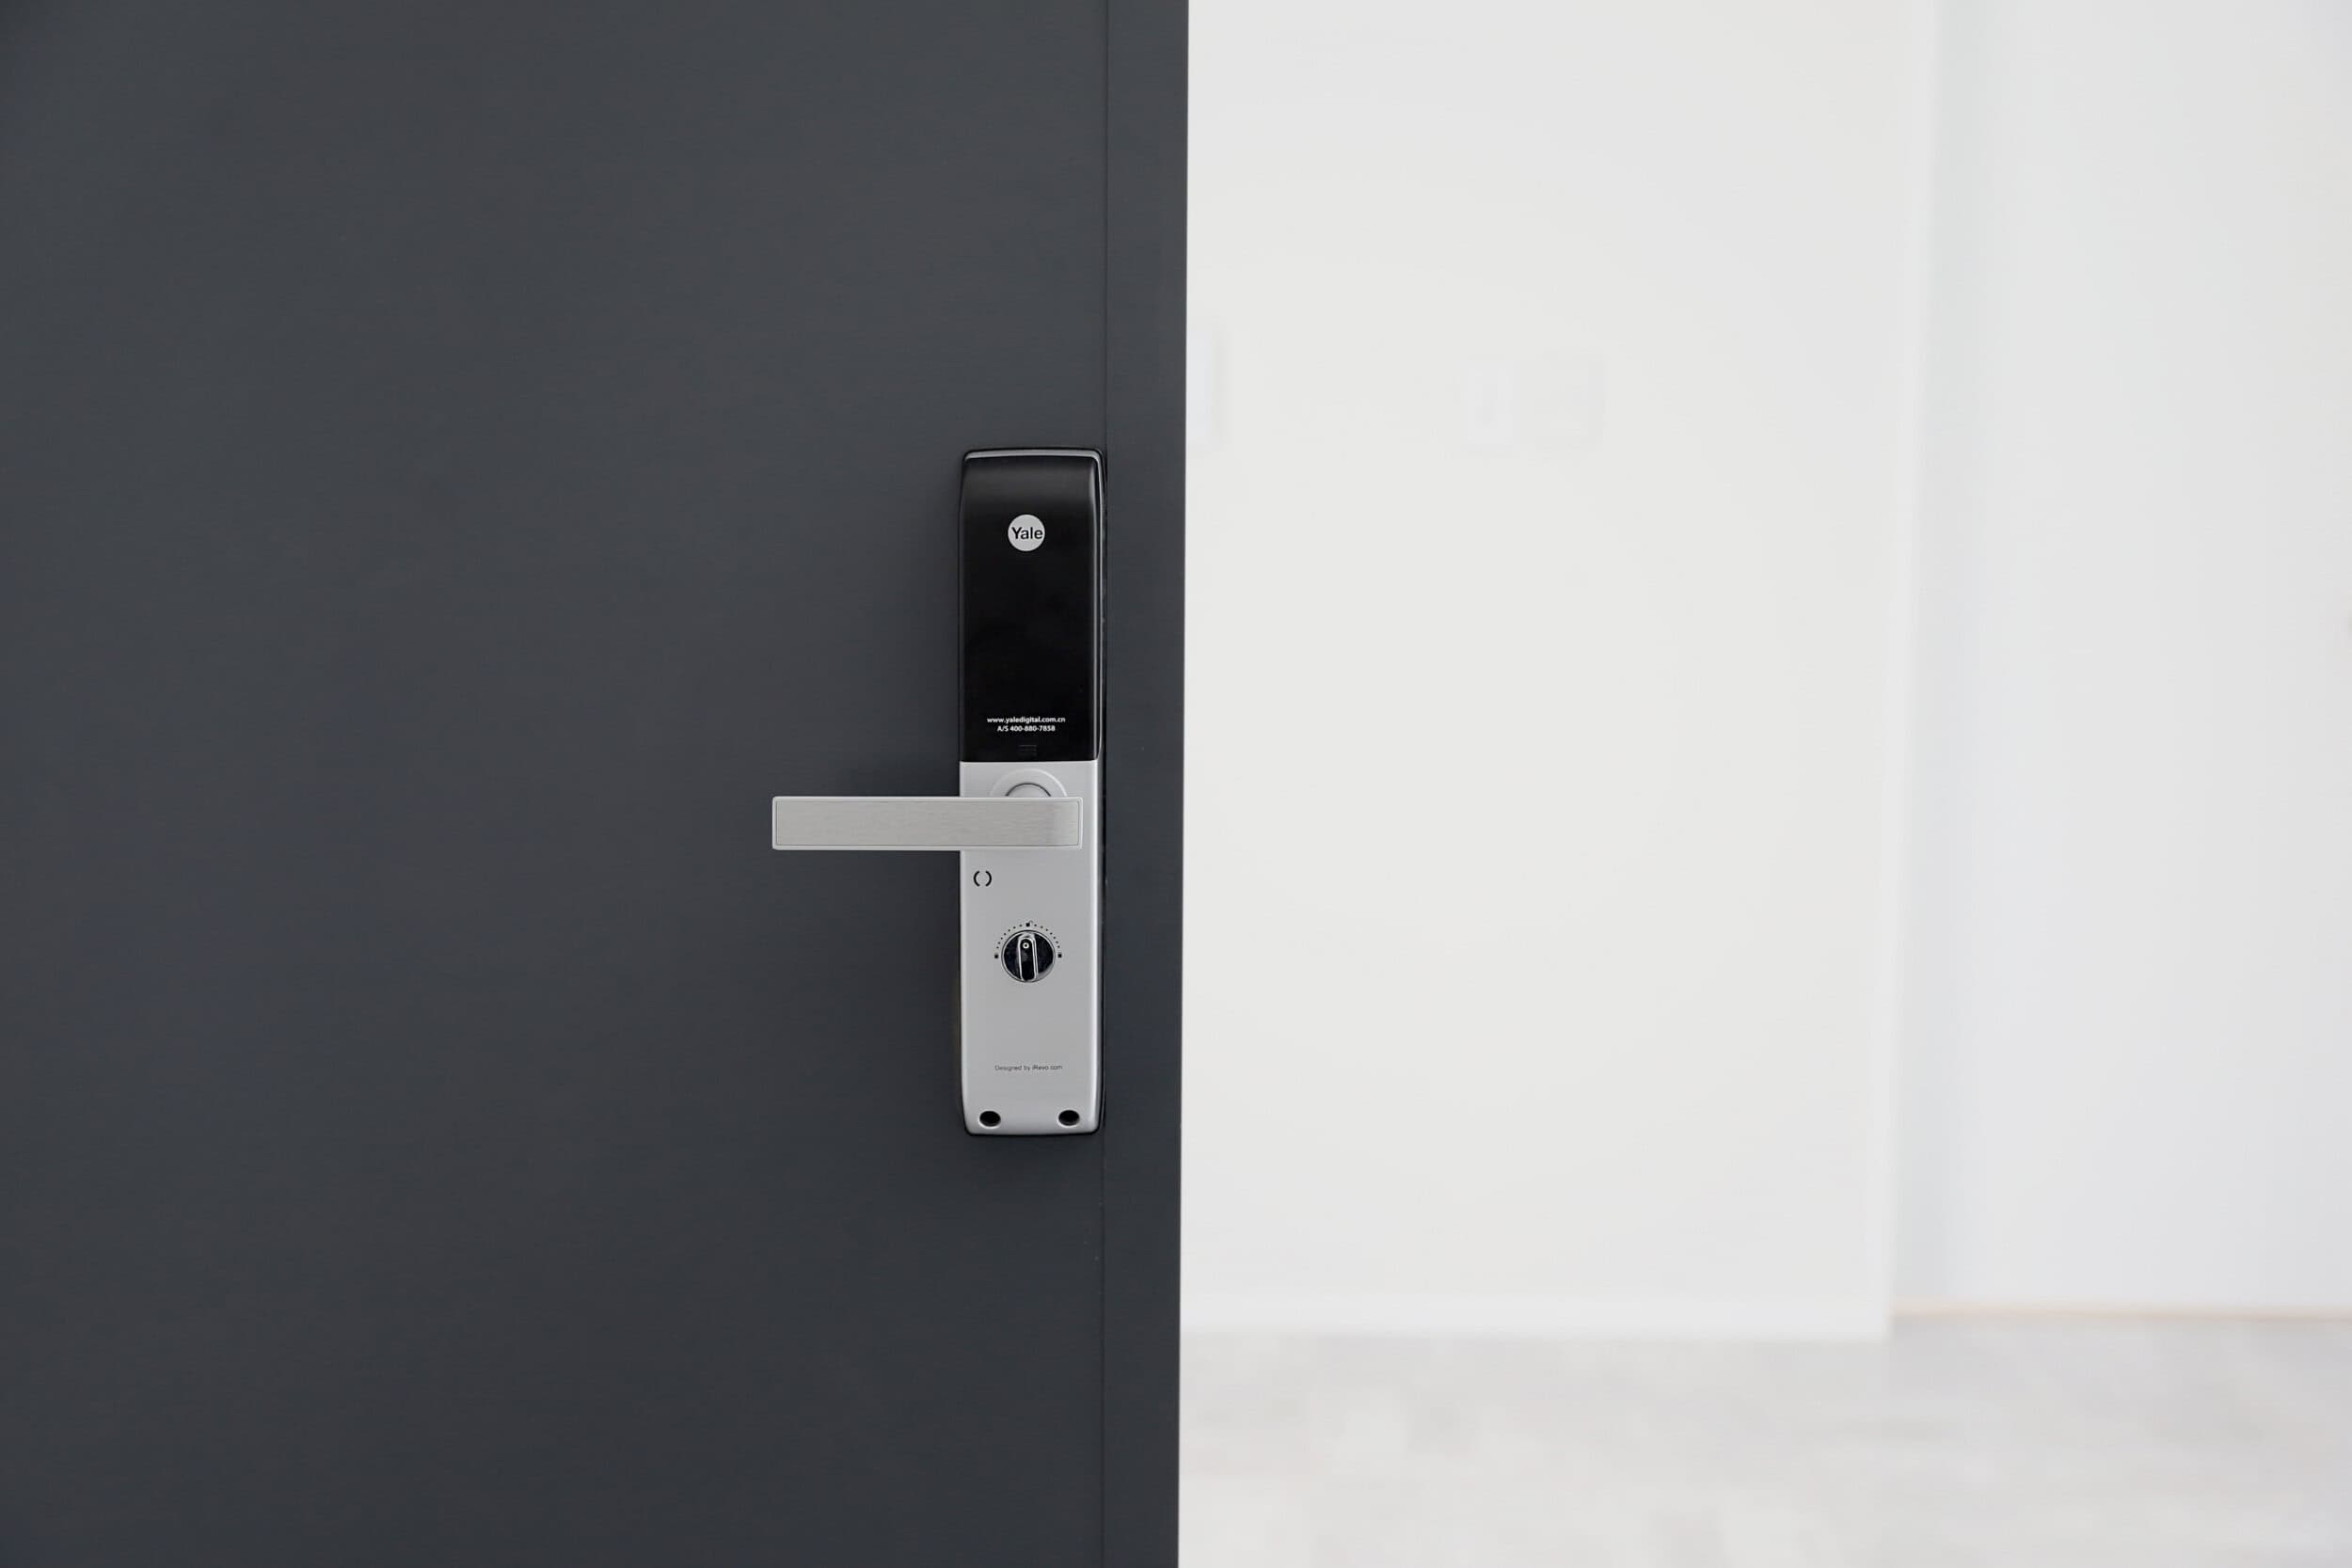
    close-up of a Yale digital smart door lock with keypad on a dark front door

    Superior Renovations

    Smart Locks and Access Control

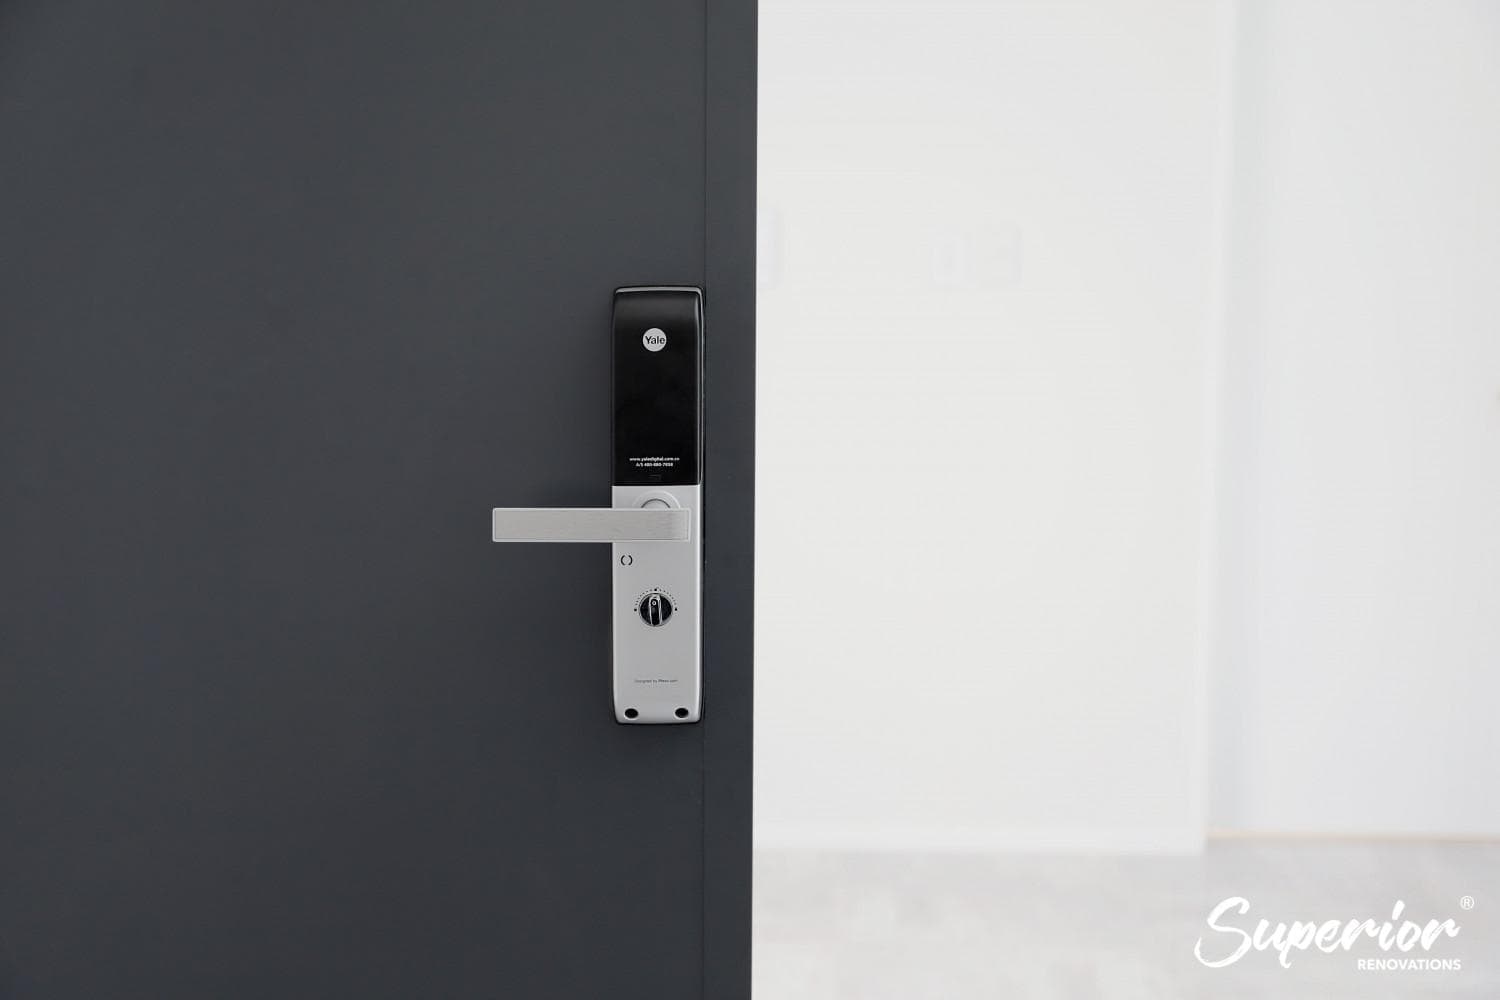
    Smart locks — keypad or phone-based entry — have become a standard request for Auckland renovations involving front door replacements or new external doors in house extensions. The appeal is practical: no more hiding a spare key under a pot plant. Guests, cleaners, or tradespeople can be given a time-limited code. Access logs mean you know who came and went, and when.

    Most smart locks in New Zealand — including Schlage and Yale models available from Mitre 10 and specialist suppliers — are retrofit-friendly. But if you’re installing a new front door as part of a renovation, specifying the lock prep and correct door bore at that stage avoids adapter issues later.


    EV Charging, Network Infrastructure and Future-Proofing Your Auckland Home

    EV Charging — The Upgrade With a Clear Payback Timeline

    By early 2026, New Zealand’s plug-in electric vehicle fleet — battery EVs and plug-in hybrids combined — had passed 100,000, according to Ministry of Transport and NZTA fleet data. In Auckland — where commuting distances, off-peak electricity rates, and the relative density of home garages make home charging the primary option — EV ownership has grown steadily. If you’re renovating and have a garage or carport, not thinking about EV charging infrastructure is a decision you’re likely to reverse in five years at higher cost.

    A Level 2 home wallbox charger — the kind that can fully charge most EV batteries overnight — requires a dedicated 32-amp circuit and appropriate switchboard capacity. Installing that circuit during a renovation, when an electrician is already on site, typically costs $800–$1,800 depending on the run distance from your switchboard to the garage. Installing it later — after a wall is lined, a concrete path is poured, and trades need to be re-mobilised — can cost $2,500–$4,500 for the same outcome.

    At current NZ electricity rates, EV owners on off-peak overnight charging plans typically pay somewhere around $0.12–$0.17 per kWh. A full charge on a typical family EV costs roughly $8–$15. Compare that to $90–$110 to fill a mid-size petrol SUV. The infrastructure investment pays back quickly for most Auckland households.

    💡 Quick tip: Even if you don’t own an EV now, ask your electrician to stub out a 32-amp circuit to the garage during the renovation. Capping it off costs almost nothing and the circuit is there when you need it. Future buyers will notice it on a property inspection — it’s increasingly on the checklist.

    Network Infrastructure — Wired Is Still Better

    Wi-Fi has improved enormously. Mesh systems from vendors like TP-Link and Eero — both available in NZ — handle large homes much better than the single router of a decade ago.

    But for smart home reliability, nothing beats a wired Cat6 Ethernet backbone. Wired access points don’t have interference issues, don’t compete with the microwave or the neighbours’ routers, and deliver consistent speeds regardless of how many devices are connected. For Auckland homes where remote work has become permanent and smart home devices are multiplying — cameras, speakers, thermostats, connected appliances — a wired backbone is the difference between a system that works reliably and one that doesn’t.

    Running Cat6 cable during a renovation costs around $80–$150 per point for material and labour when done alongside other electrical work. Running it later involves cutting into lined walls. The maths is straightforward.

    The key positions to wire: main router location (near the modem/ONT), living areas, home office, master bedroom, and any outdoor entertainment area. A six-point Cat6 installation during a renovation typically runs $800–$1,500 all in — easily the best value infrastructure investment in a home renovation.

    Want a ballpark for your renovation?
    See the calculators →

    Planning for Future Technology

    Nobody can predict exactly what home technology looks like in 2030. But some trends are clear enough to plan for now.

    Solar panels and home battery storage — already mainstream in New Zealand with products like Tesla Powerwall and Enphase — are increasingly being integrated into smart home systems. If solar is on your radar, the switchboard and metering setup during a renovation should be selected with solar in mind. Retrofitting the right inverter connections and export metering later is possible, but it’s easier and cheaper to leave the pathway clear from the start.

    Home EV chargers with bidirectional capability — charging the car from the grid at night, sending power back to the home during peak demand — are available on newer EV models in 2026. This “Vehicle to Home” (V2H) technology requires specific charger and switchboard setup. Pre-wiring for it during a renovation positions your home for that upgrade without requiring a future electrician to work around completed finishes.

    “We encourage every client doing a kitchen or full home renovation to think about where their garage is and what they’re going to want to park in it in five years. The conversation about EV charging infrastructure takes about five minutes. Not having it is a conversation that takes longer — usually after they’ve already moved back in.”
    — Dorothy Li, Design Manager, Superior Renovations

    The Complete Infrastructure Checklist for a Smart-Ready Renovation

    Item Why It Matters Approximate Cost During Reno
    Switchboard upgrade (if pre-1990s) Foundation for all smart systems and EV charging $2,000–$5,000
    Cat6 cabling (6 points) Reliable backbone for Wi-Fi access points and smart devices $800–$1,500
    EV charging circuit to garage Dedicated 32A circuit for home wallbox charger $800–$1,800
    Speaker cable pre-wire (living/kitchen) Enables clean in-ceiling audio without visible cable runs $200–$500
    Security camera cable stubs Hidden wired camera runs, no surface cable $150–$400 per point
    Underfloor heating conduit (bathrooms) Enables heating element addition without tile removal $30–$80 per bathroom
    Solar-ready switchboard/metering setup Pathway clear for future solar without rework $300–$800 (marginal cost)

    The total for a complete infrastructure package — covering most of the items above — sits in the $5,000–$10,000 range when completed alongside a renovation. Doing the same work in a completed home often runs $15,000–$20,000 for equivalent scope. The arithmetic is clear.

    If you’re planning a home renovation in Auckland, talk to our team about incorporating smart home infrastructure into the design brief from the start. It costs almost nothing to plan well. It costs significantly more to fix later.

    ➡ Book your free in-home consultation with Superior Renovations
    ➡ Explore our home renovation services in Auckland
    ➡ Request a free feasibility report for your project


    When is the best time to add smart home technology to my Auckland home?

    During a renovation — before walls are lined and ceilings are closed. Running cabling, conduit, and circuits at this stage costs a fraction of what the same work costs in a completed home. Even if you're not ready to install smart devices immediately, stubbing out cable positions and running conduit during a renovation is cheap and preserves every future option.

    How much does a smart home system cost in New Zealand?

    A single-room smart lighting setup starts from around $1,500–$3,500 installed. A whole-home system covering lighting, climate, security, and motorised blinds in a three or four-bedroom Auckland home typically runs $15,000–$30,000. The cost depends heavily on scope and whether the home is being renovated (where infrastructure costs are lower) or retrofitted after completion.

    Do I need a building consent to install smart home technology in Auckland?

    Not usually — and electrical work is separate from building consent. The smart devices themselves don't need consent. But new wiring, dedicated circuits, EV charging circuits, and switchboard upgrades are prescribed electrical work that must be done by a registered electrician and certified with a Certificate of Compliance under the Electricity (Safety) Regulations 2010. That certification is issued by the electrician, not lodged with Auckland Council. Building consent only applies if your wider renovation involves structural or other consentable work. See building.govt.nz and worksafe.govt.nz for guidance.

    What is PDL Wiser and is it available in New Zealand?

    PDL Wiser is a smart home automation system developed by PDL by Schneider Electric, specifically for the New Zealand and Pacific market. It uses Zigbee 3.0 and Bluetooth Low Energy, integrates with Amazon Alexa and Google Home, and is compatible with PDL's award-winning Iconic switch range — which looks like a standard switch. It's scalable, starting with a single room and expanding over time. Available throughout NZ including Auckland.

    Can smart home technology be added to an older Auckland villa or bungalow?

    Yes, though older homes (pre-1990s) often need a switchboard upgrade first — typically $2,000–$5,000 — to safely handle the additional load. PDL Wiser's Iconic Bluetooth switches require no special wiring and can be added to existing wiring systems, making them well-suited to heritage character homes in suburbs like Grey Lynn, Mt Eden, and Remuera where rewiring every circuit isn't practical.

    How much does EV charger installation cost in Auckland?

    Installing a Level 2 home wallbox charger during a renovation — when an electrician is already on site — typically costs $800–$1,800 including a dedicated 32-amp circuit. Doing the same work after a renovation is complete often runs $2,500–$4,500. The wallbox charger itself (not including installation) costs $600–$2,500 depending on the model and charging speed. Installation is prescribed electrical work and must be done by a registered electrician.

    Does smart home technology increase property value in Auckland?

    There's no hard NZ dataset putting a dollar figure on it, and we won't pretend otherwise. What we see on the ground in Auckland is that smart-ready features — particularly EV charging infrastructure, smart security, and energy management — increasingly get noted by buyers and agents as genuine positives. Pre-wired, infrastructure-ready homes appeal to buyers who want the lifestyle without the retrofit cost and disruption. At the higher-value end of the market, it's shifting from novelty to expectation.

    What smart home systems can I control with my phone?

    Most modern NZ smart home systems — including PDL Wiser — are fully app-controlled. The Wiser by SE app lets you control lighting, climate, blinds, and security from anywhere with an internet connection. Compatibility with Amazon Alexa and Google Home enables voice control. For Apple users, some systems support Apple HomeKit, though compatibility varies — check with your installer before specifying.

    Do I need a smart home hub?

    For basic Bluetooth-only devices, no hub is required. For a whole-home system using Zigbee 3.0 — which provides longer range, better reliability, and true automation capability — a hub is required. The PDL Wiser Hub connects all devices and enables remote access via the app. It's a one-time cost, typically $150–$300, and sits in a cupboard or utility space.

    Can I add smart home features to my renovation without changing everything at once?

    Yes. This is one of the most practical aspects of modern NZ smart home systems. PDL Wiser is explicitly designed to be scalable — you can start with smart lighting in the kitchen or living room and add climate control, blinds, and security over subsequent years. The key is running the necessary cabling and conduit during the renovation so expansion is clean and cable-free later.

    What should I ask my renovation company about smart home integration?

    Ask: Will a registered electrician be on site during rough-in? Can we run Cat6 cabling, speaker cable, and conduit stubs alongside the existing electrical scope? Is the switchboard adequate for additional smart home load? Can we add an EV charging circuit to the garage? Will smart switch positions be co-ordinated with the design layout? Asking these questions at the design stage adds minimal cost. Asking after the GIB goes on adds significant cost.


    Further Resources for your home renovation

    1. Featured projects and Client stories to see specifications on some of the projects.
    2. Real client stories from Auckland homeowners

    Need more information?

    Take advantage of our FREE Complete Home Renovation Guide (48 pages), whether you’re already renovating or in the process of deciding to renovate, it’s not an easy process, this guide which includes a free 100+ point check list – will help you avoid costly mistakes.

    Download Free Renovation Guide (PDF)


    18 months 0 percent interest long term finance badge

    Have you been putting off getting renovations done?

    We have partnered with Q Mastercard ® to provide you an 18 Month Interest-Free Payment Option, you can enjoy your new home now and stress less.

    Learn More about Interest-Free Payment Options*

    *Lending criteria, fees, terms and conditions apply. Mastercard is a registered trademark and the circles design is a trademark of Mastercard International Incorporated.


    Still have questions unanswered?

    Book a no-obligation consultation with the team at Superior Renovations,
    we’d love to meet you to discuss your renovation ideas!

      Services

      Home RenovationKitchen RenovationBathroom RenovationOutdoor RenovationHouse ExtensionCommercialDesign ServicesOther

      By submitting this form, you agree to receive communications from us via email or text regarding our services, you can unsubscribe at any time.

      This site is protected by reCAPTCHA and the Google

      Privacy Policy and Terms of Service apply.


      References

      1. EECA / Gen Less — Choose an efficient heat pump for your home
      2. NZ Transport Agency Waka Kotahi — Electric vehicles (Ministry of Transport fleet data)
      3. Tenancy Services — Healthy Homes ventilation standard
      4. WorkSafe NZ — Electrical certification (Certificate of Compliance)
      5. Building Performance (MBIE) — Projects and consents
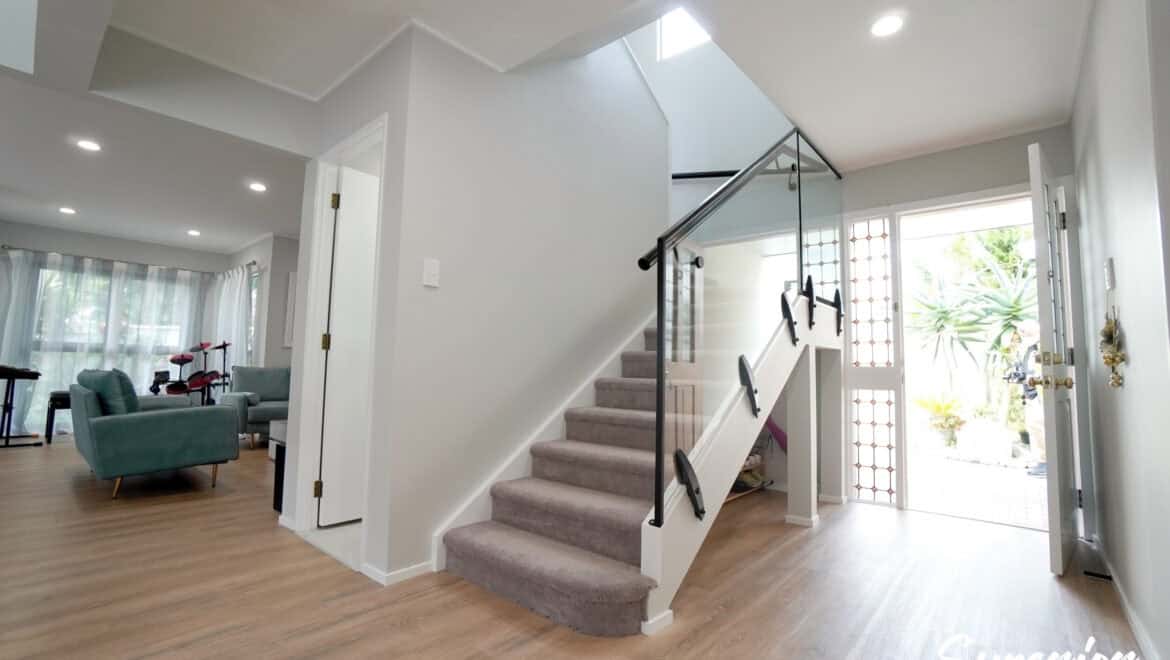
      full house renovation auckland 17 - Superior Renovations
      House Renovation

      Open Plan Living Renovation Auckland: Wall Removal Guide

      Open Plan Living Renovations Auckland: How to Remove Walls the Right Way

      Free cost calculator

      How much will your renovation cost?

      Get an instant Auckland price range for your project — no details required to see it.

      Try our free cost calculators →

      Quick answer: Removing walls for open-plan living in Auckland requires a structural engineer assessment, building consent from Auckland Council for any load-bearing wall, and a budget ranging from $15,000 for a simple non-structural removal up to $80,000+ when structural beams, consent, trades rerouting, and full finishing are included.

      There’s a moment every Auckland homeowner knows. You’re standing in that cramped lounge, separated from the kitchen by a wall that serves absolutely no social purpose, watching your family exist in three separate boxes instead of one connected home. The fix feels obvious: knock it down. But how you go about that — the engineering, the consent, the hidden costs inside the wall, the design decisions that follow — determines whether your open-plan renovation becomes the best thing you ever did to your home, or a budget blowout that haunts you for years.

      We’ve completed open-plan renovations across Auckland — from 1910s villas in Grey Lynn where every wall is structural, to 1970s brick-and-tile homes in Pakuranga where the walls look load-bearing but aren’t, to newer plasterboard homes in Albany where the conversion is genuinely simple. The one thing that’s consistent? The homeowners who come to us with a clear understanding of the process — consent, engineering, hidden services, design integration — always end up with better outcomes and fewer surprises.

      This guide covers the whole picture. We’re talking about how to identify what kind of wall you’re dealing with, what building consent actually involves (and how long it takes), the real costs broken down line by line, what’s lurking inside Auckland’s older walls that will absolutely affect your budget, and how to design the open space once the wall is gone so it actually feels like a home — not just a big empty room. We’ll also cover the specifics for Auckland’s most common housing types, because removing a wall in a 1920s bungalow in Mt Eden is a very different project from doing the same in a 1990s townhouse in Newmarket.

      living room renovation showing wall art mirrors and new lighting fixtures

      oppo_0

      open-plan dining and living area renovation with staircase and skylight

      Full House Renovation – Epsom Auckland


      Load-Bearing vs Non-Load-Bearing Walls: What Auckland Homeowners Need to Know First

      Before anyone picks up a hammer, the single most important question is the one that determines everything else about your project: is that wall doing structural work, or is it just dividing space?

      This distinction drives your consent requirements, your engineering costs, your project timeline, and your budget. Get it wrong — either by assuming a wall isn’t structural when it is, or by hiring a builder who doesn’t check — and you’re looking at either a dangerous structure or an illegal renovation that will cause serious problems when you try to sell.

      How to Identify a Load-Bearing Wall (Before You Call Anyone)

      There are a few useful rules of thumb that help Auckland homeowners identify potentially load-bearing walls before bringing in a professional. None of these are definitive — only a structural engineer or experienced Licensed Building Practitioner (LBP) can confirm — but they’re a good starting point for understanding what you might be dealing with.

      Walls running perpendicular to floor joists are very commonly load-bearing. If you can access the ceiling space or the subfloor space (most older Auckland homes with pile foundations give you this access), look at which direction the joists run. A wall running across them — at 90 degrees — is almost certainly carrying load. A wall running parallel to the joists may well be non-structural.

      Central walls in single-storey homes are prime candidates. In many 1950s, 1960s, and 1970s Auckland homes, there’s a central spine wall running the length of the house. This wall typically carries the ridge beam load from the roof. It’s very often the wall homeowners most want to remove to create open-plan flow — and it’s very often structural.

      Any wall on the ground floor of a two-storey home should be treated as load-bearing until proven otherwise. The upper level sits on something, and in most New Zealand construction, that something is an interior wall on the level below.

      Older homes in Auckland’s character suburbs — Mt Eden, Grey Lynn, Ponsonby, Herne Bay, Remuera — present their own complexity. Villas and bungalows from the 1900s–1940s were built at a time when almost every wall had some structural function. The framing, the bracing, and the load paths in these homes don’t always behave like modern construction. What looks like a simple partition wall in a villa can be integral to the bracing system. This is why we always insist on a CPEng (Chartered Professional Engineer) assessment for any wall removal in a pre-war Auckland home.

      The Role of the Structural Engineer — And Why You Can’t Skip This Step

      A Chartered Professional Engineer (CPEng) assessment is the non-negotiable first step in any load-bearing wall removal project in Auckland. This isn’t bureaucratic box-ticking — it’s the document that tells your builder exactly what beam size and type is required, where the load transfer points need to be, and whether any foundation reinforcement is needed before work can begin.

      The engineer’s report and drawings also form a critical part of your building consent application to Auckland Council. Without them, your consent application will stall.

      Structural engineering fees for a residential wall removal in Auckland typically run between $1,500 and $4,000 depending on the complexity of the assessment and the number of drawings required. For older heritage homes where bracing and load paths are more complex, expect the higher end of that range.

      “The structural engineering phase isn’t just about finding out whether your wall is load-bearing — it’s about understanding the whole load path through your home. In older Auckland villas and bungalows, loads travel through the building in ways that aren’t always obvious. You might remove one wall and inadvertently affect a bracing system three metres away. The engineer’s job is to see the whole picture before a single stud gets cut.”
      — Dorothy Li, Design Manager, Superior Renovations

      Partition Walls: The Good News

      Not every wall removal is a major engineering exercise. Non-structural partition walls — typically lighter framing at around 90mm thickness, running parallel to floor joists — can often be removed without a structural engineer or building consent, depending on what’s inside them and the scope of the finishing work required.

      That said, “no structural engineer required” does not mean “no professional required.” Even a simple partition wall removal involves trades: an electrician to safely reroute any wiring inside the wall (this is licensed work in New Zealand under the Electrical Workers Registration Board), and potentially a plasterer, painter, and floor finisher to make the result look seamless.

      💡 Quick tip: Before assuming a wall is non-structural, check Auckland Council’s online GIS mapping or your LIM report for the original house plans — many Auckland homes have these on file and they can tell you a great deal about which walls were designed to carry load.

      The most important thing to understand is that from the outside, a load-bearing wall and a partition wall can look identical. The differences are structural, not cosmetic. This is why we strongly advise Auckland homeowners never to start removing any wall without professional assessment, even if a neighbour or a YouTube video suggests it looks straightforward.

      In the next section, we’ll walk through exactly what building consent involves for open-plan renovations in Auckland — including realistic timelines, what documents are required, and the costs you should budget for.


      Building Consent for Open-Plan Renovations: What Auckland Council Actually Requires

      Building consent is one of those topics that Auckland homeowners either obsess over or try to avoid thinking about entirely. Neither extreme serves you well. The reality is that consent for a well-planned open-plan renovation is a manageable process — but it takes time, it has real costs, and skipping it creates problems that will follow your property for years.

      When Does Wall Removal Require Building Consent in Auckland?

      Under the Building Act 2004, any structural change to your home — including the removal of a load-bearing wall, the installation of a structural beam, or alterations to bracing systems — requires building consent from Auckland Council. This is not optional, and it’s not something you can sort out after the fact without significant pain.

      Non-structural partition wall removal may fall under Schedule 1 of the Building Act as exempt building work, but only if it doesn’t affect the building’s structural integrity, fire safety, weathertightness, or means of escape. If any of those conditions are in play — and in older Auckland homes they often are — consent is required regardless of whether the wall is structural.

      Work that triggers consent includes structural changes like removing or altering load-bearing walls, significant plumbing or drainage alterations, alterations affecting fire safety or means of escape, and work affecting weathertightness.

      The Auckland Council Consent Process — Step by Step

      Here’s how the process actually works for a standard open-plan wall removal project in Auckland:

      Step 1 — Structural engineer assessment and drawings. Your engineer assesses the wall, calculates the required beam size and foundation requirements, and produces the engineering drawings and producer statement (PS1) that form the basis of your consent application.

      Step 2 — Architectural drawings. Depending on the complexity of your project, you’ll need architectural drawings showing the existing layout and proposed changes. For a straightforward wall removal, this may be something a draftsperson can handle. For more complex layouts, a qualified architect or Sonder Architecture (our architectural partners) will produce full consent-ready drawings.

      Step 3 — Consent application lodgement. Your builder or project manager lodges the application with Auckland Council, including all engineering and architectural documents, a producer statement from the engineer (PS1), and the relevant fee payment.

      Step 4 — Processing. Auckland Council typically takes 4 to 8 weeks to process consent applications. Note this is processing time after lodgement — a complete, well-prepared application moves faster than one that triggers Requests for Information (RFIs) from the council’s building control officers.

      Step 5 — Inspections during construction. Your builder is required to book inspections at key stages — typically a pre-line inspection (before wall linings are reinstated, so the council officer can see the framing and beam installation) and a final inspection on completion.

      Step 6 — Code Compliance Certificate (CCC). Once all inspections are passed, you apply for your CCC. This is the document that officially closes out your building consent and confirms the work was completed in accordance with the approved plans. Without a CCC, your renovation is not legally complete and will create complications when you sell or refinance the property.

      Important note: Unconsented structural work is one of the most common issues discovered during property sales in Auckland. If you proceed without consent and the work is later discovered, you may be required to obtain a Certificate of Acceptance (which is harder and more expensive to get than the original consent) or even reinstate the original structure. It’s not worth the risk.

      How Much Does Building Consent Cost for a Wall Removal in Auckland?

      Auckland Council’s building consent fees are cost-recovery based — you pay for the processing time, inspections, and administration at specified hourly rates, plus national levies (MBIE and BRANZ levies, calculated per $1,000 of declared project value). This means your final consent cost isn’t known precisely until processing is complete, but you can budget a reasonable estimate.

      Cost Component Typical Auckland Range Notes
      Structural engineering report + drawings $1,500–$4,000 Higher for heritage homes
      Architectural drawings (if required) $1,500–$3,500 Draftsperson vs. architect
      Auckland Council consent fee (deposit) $2,000–$5,000 Varies by project value and complexity
      Inspections (pre-line + final) $500–$1,500 Charged at council hourly rate
      MBIE + BRANZ levies $100–$500 Per $1,000 of project value
      Total consent-related costs $5,500–$14,500 Budget at the upper end for heritage homes

      These figures are for the consent process itself — they don’t include the actual construction work. We’ll break down the full project costs in the next section.

      open-plan dining and living room renovation with a heat pump and new carpetopen-plan kitchen and dining renovation with a quartz waterfall island and bar stools

      For a full breakdown of what building consent involves for Auckland home renovations, see our detailed building consent guide for Auckland renovations. In the next section, we’ll cover the full construction cost breakdown — and the hidden costs inside Auckland’s walls that most guides conveniently leave out.


      The Real Cost of an Open-Plan Renovation in Auckland: Full Breakdown Including Hidden Costs

      Here’s the thing about open-plan renovation costs: most guides give you the headline number without explaining what’s actually driving it. “Wall removal costs $5,000–$15,000” — sure, but that’s just the demolition and beam. By the time you’ve sorted out what’s inside the wall, patched the floor, fixed the ceiling, dealt with the electrical rerouting, and finished the space, you’re looking at a very different number.

      We’re going to give you the full picture, broken down into every cost component — because that’s the only way to budget properly.

      Cost Component 1: Demolition and Beam Installation

      The actual physical removal of the wall and installation of the structural beam is typically the smallest line item in your total project cost. For a load-bearing wall in a single-storey Auckland home, demolition and beam installation (including all labour) runs approximately $8,000–$18,000 depending on:

      • The span of the opening (a 3-metre beam costs less than a 6-metre beam)
      • The beam material — LVL (Laminated Veneer Lumber) is standard for residential projects; steel is more expensive but may be required for larger spans
      • Whether foundation reinforcement (a new concrete pad or pile) is required at the beam support points
      • The complexity of the ceiling framing above the opening

      Cost Component 2: What’s Inside the Wall — The Budget Wildcard

      This is the section other guides skip. The biggest variable in any Auckland wall removal project is what’s living inside the wall you’re removing. And in Auckland’s diverse housing stock — spanning everything from 1910s villas to 1980s weatherboard to 1990s brick veneer — what’s inside can vary dramatically.

      Electrical wiring. Almost every internal wall in an older Auckland home has electrical wiring running through it — power circuits, lighting circuits, sometimes data cabling. All of this needs to be safely rerouted by a Registered Electrical Inspector (REI) or licensed electrician. Budget $1,500–$4,000 for electrical rerouting on a standard wall removal, more if you’re also wanting to upgrade your lighting design in the new open space.

      Plumbing pipes. In some layouts — particularly where kitchens back onto dining areas — the wall you want to remove might contain waste pipes, supply lines, or even a wet vent stack. Rerouting plumbing is complex, expensive, and may require a separate plumbing consent. Budget $2,000–$6,000 if plumbing rerouting is involved.

      Ducting and ventilation. In homes with ducted heating, HVAC, or rangehood ventilation routed through walls, these services need to be accommodated in the new design. An HVAC technician may need to reconfigure the ducting layout. Budget $1,000–$3,000.

      Asbestos. This is a serious consideration for any Auckland home built or renovated before 1990. Asbestos was used in a wide range of building materials up until the late 1980s — not just in the visible cladding, but in textured wall linings (sometimes called “Gib Asbestos”), floor adhesives, ceiling tiles, and pipe insulation. Before demolishing any wall in a pre-1990 home, an asbestos assessment by a licensed assessor is legally required. If asbestos is found, certified removal must happen before construction continues. Budget $800–$3,000 for assessment and removal depending on extent.

      💡 Quick tip: If your home was built between 1940 and 1990, always budget for an asbestos assessment before any wall removal work begins. In our experience renovating Auckland homes, pre-1980s properties have a surprisingly high incidence of asbestos-containing materials in wall linings — and discovering it mid-demolition without a removal plan causes serious delays.

      Cost Component 3: Finishing — The Biggest Surprise for Most Homeowners

      Removing the wall is just the beginning. The finishing work that follows a wall removal often costs more than the demolition itself, and it’s the finishing that determines whether your open-plan renovation looks professional or patched together.

      Flooring continuity. When you remove a wall, you’re left with a section of subfloor or floor covering that needs to match the surrounding area. For tile and polished concrete, this is manageable. For timber — the most common flooring in Auckland’s character homes — matching existing boards is genuinely difficult. Reclaimed timber from a demolition yard might match reasonably well; new timber almost certainly won’t. Budget $2,000–$8,000 for flooring continuation, potentially more for premium timber in a large open area.

      Ceiling patching and finishing. The wall sat between a ceiling above — and now that the wall is gone, there’s a void in the ceiling plasterboard where the top plate was. This needs to be carefully patched, stopped, and painted so it’s invisible. Depending on ceiling texture (smooth paint versus textured plasterboard, or the ornate pressed tin ceilings of older villas), this can be straightforward or a skilled trade job. Budget $800–$2,500.

      Replastering and painting. The adjacent walls where your removed wall connected will need replastering at the junction points, and the entire space typically benefits from a repaint to ensure colour consistency. Budget $1,500–$4,000 depending on area.

      Total Cost Ranges: Auckland Open-Plan Renovation

      Project Type Total Indicative Cost (Auckland) What’s Included
      Simple non-structural partition removal $8,000–$15,000 Demo, electrical rerouting, basic finishing
      Load-bearing wall, single storey, simple beam $25,000–$45,000 Engineering, consent, beam, trades, finishing
      Load-bearing wall + kitchen open-plan integration $45,000–$80,000 Above plus new kitchen layout, flooring, full repaint
      Heritage home (pre-1940 villa or bungalow) $50,000–$100,000+ Complex bracing, heritage finishing, asbestos, character restoration

      These figures align with real NZ project data. For your full home renovation in Auckland, wall removal as part of a larger scope typically delivers better value than a standalone wall-only project, as trades are already mobilised on site.

      “The clients who come to us with the most realistic budgets are the ones who’ve already thought about the finishing — the floor, the ceiling, the paint. It’s very easy to get excited about the demolition and forget that making the new space look seamless costs real money. We always talk through the full scope from day one so there are no shocks at the other end.”
      — Eunice Qin, Designer, Superior Renovations

      Use our home renovation services page or request a free feasibility report to get a realistic picture of your specific project before committing to any scope.


      Auckland’s Housing Stock: How Your Home’s Era Affects Your Open-Plan Renovation

      Auckland is a city of wildly diverse housing stock, and the era your home was built in has a direct impact on how complex — and how expensive — your open-plan renovation will be. The structural logic of a 1920s villa is completely different from a 1970s brick-and-tile bungalow, which is different again from a 2000s weatherboard. Understanding where your home sits on this spectrum is essential planning intelligence.

      Pre-1940 Villas and Bungalows (Grey Lynn, Ponsonby, Herne Bay, Parnell, Mt Eden)

      Pre-war Auckland homes are structurally unique — and that uniqueness makes wall removal more complex than in any other era. These homes were built with timber framing that doesn’t always follow the load-path logic of modern construction. Walls that appear to be simple partitions often turn out to be critical bracing elements. The relationship between the wall framing, the roof structure, and the floor framing in a 100-year-old home requires a structural engineer with specific experience in heritage residential buildings.

      There’s also the character question. In villas and bungalows, the ornate details — cornices, ceiling roses, picture rails, skirting profiles — are part of what makes these homes special. Removing a wall and leaving a butchered cornice or a mismatched ceiling profile is a renovation own goal. Budget for a skilled plasterer who can replicate heritage profiles, and for timber workers who understand period joinery.

      The upside? When you get it right, an open-plan villa or bungalow is genuinely spectacular — the high ceilings, timber floors, and character detailing shine in a connected space in a way they simply can’t in chopped-up separate rooms.

      Want a ballpark for your renovation?
      See the calculators →

      1940s–1960s State and Suburban Homes (Henderson, Avondale, Mangere, Mt Roskill, Hillsborough)

      Post-war Auckland housing is typically robust timber framing with steel-corrugated or tile roofing — honest, straightforward construction that generally presents fewer surprises than the heritage stock. Many of these homes have a clear central load-bearing wall running the length of the home, with lighter partition walls dividing individual rooms.

      The good news is that this era of home often delivers the most dramatic open-plan transformations. The lounge-dining-kitchen layout in a 1950s or 1960s Auckland home is almost always three separate rooms, and combining them into one connected space changes the feel of the home dramatically.

      The specific watch-out for this era: asbestos. As mentioned above, 1940s–1960s homes in Auckland have a high probability of asbestos-containing materials in wall linings. Budget for the assessment and factor in removal costs.

      1970s–1990s Brick-and-Tile and Weatherboard (Pakuranga, Howick, Botany, Manurewa, Papakura)

      This era of home presents interesting structural dynamics. Many 1970s–1990s Auckland homes were built with timber frame construction and plasterboard linings, but with bracing concentrated in specific locations rather than distributed through all walls. Removing what appears to be a non-structural wall can sometimes affect the overall bracing scheme — which is why engineer assessment is still valuable even if the wall itself isn’t carrying direct load.

      The materials inside walls from this era vary considerably. Some have older-style wiring (including aluminium wiring in some 1970s homes) that may need upgrading during rerouting. This is actually an opportunity — renovations that open up walls give access to electrical infrastructure that’s otherwise inaccessible, and upgrading the wiring while trades are already on site is smart.

      Post-2000 Homes (Albany, Hobsonville, Flat Bush, Silverdale)

      Newer Auckland homes, particularly in the master-planned suburbs of the North Shore and South Auckland, are often built with lightweight timber frame or light steel frame construction. Structural wall removal in post-2000 homes is typically the most straightforward category — modern engineering documentation means the building’s structural system is well-understood, and the materials inside walls are generally standard.

      💡 Quick tip: If you’re buying an Auckland home with open-plan renovation ambitions, check the era of construction before you commit. A 1920s villa in Ponsonby is a more complex and expensive open-plan project than a 1985 weatherboard in Glenfield — but it’s also likely to produce a more spectacular result if you budget correctly.

      living room renovation with wall art mirrors and new lighting fixturesopen-plan kitchen renovation with black cabinetry timber overhead unit and island bar seating

      Our Auckland home renovation team has experience across all of these housing types. For projects involving significant structural work or heritage considerations, we work alongside Sonder Architecture to ensure the engineering and consent process is handled correctly from day one.


      Designing Your Open-Plan Space: How to Make It Feel Like a Home, Not a Warehouse

      Here’s a truth that surprises many homeowners: removing walls is the easy part. The harder design challenge is what you do with the open space once the walls are gone. An open-plan renovation that isn’t thoughtfully designed can feel cold, cavernous, and acoustically unpleasant — the exact opposite of the warm, connected home you were imagining.

      This is the section that most wall-removal guides skip entirely. We’re not going to do that.

      Zoning Without Walls: How to Define Different Areas in an Open Space

      The best open-plan renovations create distinct zones — living, dining, kitchen — without reinstating the walls that were just removed. This is achieved through a combination of design elements that signal spatial changes without physically dividing the space.

      Flooring transitions. Different floor materials or colours in different zones create a clear visual hierarchy. Kitchen in large-format tile, dining in timber, living area in a contrasting timber or carpet — each material signals a different function. Even a change in tile grout direction can subtly shift the spatial character of an area.

      Ceiling definition. Bulkheads, dropped ceiling sections, and pendant lighting placement can define zones without walls. A cluster of pendants above the dining table signals “this is the dining zone” far more effectively than a physical boundary.

      Furniture placement as spatial architecture. A kitchen island is one of the most powerful zoning tools available — it creates a psychological boundary between kitchen and living without blocking sightlines or light. A well-placed sofa with its back to the kitchen achieves something similar in the living zone.

      Rug layering. Simple, effective, and often underestimated. A large rug under the dining table and another under the sofa arrangement create distinct “rooms” within the open space without a single physical division.

      The Acoustics Problem — And How to Solve It

      Open-plan living has one well-documented downside: sound travels. The cooking noise, the TV, a phone conversation in the kitchen — in a closed-floor-plan home, walls absorb and contain these sounds. Remove the walls, and every sound in every zone is shared with every other zone.

      In Auckland, where many open-plan renovations combine kitchen, dining, and living in a single connected space, this matters. The good news is that acoustic design tools are available that don’t compromise the open feel:

      Soft furnishings — upholstered sofas, rugs, curtains, cushions — absorb sound rather than reflecting it. Hard surfaces (tile, polished concrete, plaster walls) reflect sound and create echo. A well-furnished open-plan space with appropriate soft furnishings sounds dramatically better than the same space furnished entirely in hard materials.

      For rangehood noise (a common complaint in open-plan kitchen-living areas), invest in a ducted rangehood with a remote motor mounted in the ceiling cavity or outside the living zone. A powerful but quiet rangehood is one of the smartest investments in an open-plan kitchen renovation.

      Light Design in Open-Plan Spaces

      One of the primary reasons homeowners want open-plan living is for better light. But an open-plan space with a single central light source — or worse, no natural light source in the centre — can actually feel dimmer than the separate rooms it replaced.

      Layered lighting design is essential in open-plan spaces. This means:

      • Task lighting at bench level in the kitchen (under-cabinet LEDs)
      • Ambient lighting from recessed ceiling fixtures or track lighting throughout the space
      • Feature lighting above the dining table (pendants) and in the living zone (floor lamps, table lamps)
      • Natural light strategies: skylights, enlarged windows, or bifold doors that draw light deep into the combined space

      Our design team at Superior Renovations includes specialists in spatial design and lighting layout, and for clients wanting significant interior design input, we work with Little Giant Interiors who bring exceptional expertise in furniture, material, and spatial design to open-plan renovation projects.

      “An open-plan space should tell a coherent design story from one end to the other. That means your kitchen cabinetry palette, your dining furniture, and your living zone all need to speak the same language — even if they’re not identical. The biggest mistake I see in open-plan renovations is clients treating each zone as a separate room in terms of materials and colour, then wondering why the space feels disjointed despite the walls being gone.”
      — Dorothy Li, Design Manager, Superior Renovations

      Cooking Smells and Ventilation: The Practical Reality

      Nobody puts this in a design guide, but everyone thinks about it once they’re living in an open-plan home: cooking smells travel. Searing a steak or making a fish curry in an open-plan kitchen means the entire living space smells like dinner — and not always in a good way.

      A high-quality ducted rangehood is non-negotiable in an open-plan kitchen-living design. Recirculating rangehoods (which filter air and return it to the room) are not adequate for open-plan spaces. You need ducted extraction that takes cooking vapours out of the building entirely. If your existing kitchen position doesn’t accommodate direct-to-outside ducting, factor in the ductwork rerouting cost as part of your renovation scope.

      dated dark timber kitchen before an open-plan renovation

      open-plan kitchen with granite island bench copper pendant lights and hanging pot rack

      Superior Renovations

      💡 Quick tip: Visit our kitchen design gallery and case studies to see how we’ve designed open-plan spaces for Auckland homeowners across different housing types — and get a feel for what’s possible at different budget levels.


      How Superior Renovations Manages an Open-Plan Wall Removal Project End to End

      One of the most common frustrations we hear from Auckland homeowners who’ve attempted to manage wall removal projects themselves — or with a builder-only arrangement — is the coordination complexity. A wall removal project involves a structural engineer, an architect or draftsperson, Auckland Council, a Licensed Building Practitioner, an electrician, a plumber, a plasterer, a painter, and potentially a flooring specialist. Coordinating all of these disciplines, in the right sequence, with the right documentation, is a project management exercise in itself.

      This is precisely why a full-service renovation approach delivers better outcomes for projects of this nature. At Superior Renovations, we manage every element of your open-plan renovation from initial feasibility through to Code Compliance Certificate — one fixed price, one point of contact, no coordination headaches.

      Want a ballpark for your renovation?
      See the calculators →

      Our Process for Open-Plan Renovation Projects

      Stage 1 — Consultation and Feasibility. We visit your home, assess the walls you want to remove, review the existing structure, and give you an honest assessment of what’s involved before any money is spent. Request a free feasibility report to start this process.

      Stage 2 — Design. Our design team works with you to define the open-plan layout, the kitchen configuration (if relevant), the zoning strategy, flooring, ceiling design, and lighting plan. For projects involving architectural changes, we engage Sonder Architecture at this stage.

      Stage 3 — Engineering and Consent. We coordinate the structural engineering assessment and drawings, prepare the consent application package, and lodge with Auckland Council. We manage all Requests for Information and keep you updated on processing progress.

      Stage 4 — Construction. Our LBP-qualified builders carry out the wall removal and beam installation in accordance with the consented drawings. All trades — electrical, plumbing, plastering, painting, flooring — are coordinated through our project management system so there are no gaps or delays between disciplines.

      Stage 5 — Inspections and CCC. We book all required council inspections and manage the Code Compliance Certificate application on your behalf.

      Timing: How Long Does an Open-Plan Renovation Take in Auckland?

      Phase Typical Duration Notes
      Design and feasibility 2–4 weeks Faster for simple projects
      Engineering and drawings 2–4 weeks Heritage homes may take longer
      Auckland Council consent processing 4–8 weeks Well-prepared applications process faster
      Construction (wall removal through finishing) 3–8 weeks Varies by scope and what’s found inside walls
      Inspections and CCC 1–3 weeks After all construction complete
      Total project timeline 3–6 months From first consultation to CCC

      The most significant variable is consent processing. A well-prepared, complete consent application with all engineering documentation in order will process faster than one that generates RFIs from Auckland Council’s building control team. This is another reason professional project management pays dividends — experienced teams know exactly what Auckland Council needs to see and submit it correctly the first time.

      💡 Quick tip: If you’re planning an open-plan renovation with a specific completion date in mind — before a family event, before Christmas, or before your kids start at a new school — work backwards from that date and add at least three months for the consent process alone. The worst outcome is starting construction without consent in place because the timeline felt too long. That path leads to far bigger problems.

      Finance Options for Your Open-Plan Renovation

      Open-plan renovations typically sit in the $25,000–$80,000 range for most Auckland homes — a meaningful spend that many homeowners choose to finance rather than fund entirely from savings. Superior Renovations offers access to an 18-month interest-free payment option through Q Mastercard, and we work with Loan Market to help clients explore renovation finance options. See our finance options page for details.

      ➡ Book your free in-home consultation with Superior Renovations
      ➡ Explore our full home renovation Auckland services
      ➡ Request a free feasibility report for your project


      Do I need building consent to remove a wall in Auckland?

      Yes — if the wall is load-bearing or affects your home's structural integrity, bracing system, fire safety, or weathertightness, you need building consent from Auckland Council before any work begins. Non-structural partition walls may qualify as exempt building work under Schedule 1 of the Building Act 2004, but even then, you should get professional advice before assuming consent isn't required. All load-bearing wall removals require consent, a structural engineer's report, and licensed tradesperson involvement.

      How much does it cost to remove a load-bearing wall in Auckland?

      In Auckland, removing a load-bearing wall and replacing it with a structural beam typically costs $25,000–$45,000 for a straightforward single-storey project, including engineering fees, building consent, beam and installation, trades rerouting, and finishing. Projects that also incorporate kitchen or living area renovation, or involve heritage homes with complex bracing, can run $50,000–$100,000+. The consent process alone (engineering plus council fees) typically adds $5,500–$14,500 to any structural wall removal project.

      How long does an open-plan renovation take in Auckland?

      From first consultation to a Code Compliance Certificate, most open-plan renovations in Auckland take 3–6 months. The largest time variable is Auckland Council consent processing, which typically takes 4–8 weeks after a complete application is lodged. Construction itself (wall removal through all finishing trades) usually takes 3–8 weeks depending on scope. Well-prepared consent applications with all engineering documentation in order move faster through the council process.

      How do I know if my wall is load-bearing?

      The most reliable way is to engage a Chartered Professional Engineer (CPEng) or experienced Licensed Building Practitioner to assess your home. Some useful indicators: walls running perpendicular to floor joists are commonly load-bearing; central spine walls in single-storey Auckland homes often carry roof load; any internal wall on the ground floor of a two-storey home should be treated as load-bearing until assessed otherwise. Pre-war Auckland villas and bungalows require special care as their structural systems don't always follow modern construction logic.

      What's inside Auckland walls that affects renovation costs?

      Several things can be inside a wall that significantly affect your renovation budget: electrical wiring (needs rerouting by a licensed electrician, $1,500–$4,000); plumbing pipes ($2,000–$6,000 to reroute); HVAC ducting ($1,000–$3,000); and asbestos-containing materials in pre-1990 homes ($800–$3,000 for assessment and removal). These hidden services are often the biggest cost variable in any Auckland wall removal project — and the reason why a detailed scope review before committing to a fixed budget is essential.

      Can I remove a wall in my Auckland heritage villa or bungalow?

      Yes, but heritage homes from the pre-1940 era require specialist structural assessment. The load paths in older villas and bungalows don't always follow modern construction logic — walls that appear to be partitions can be integral to the bracing system. You'll also need to budget for heritage-quality finishing: matching cornices, ceiling profiles, and timber joinery that respect the home's character. When done right, open-plan renovations in Auckland heritage homes are spectacular — but they require more budget and more care than modern home projects.

      Do I need a structural engineer for every wall removal?

      A Chartered Professional Engineer (CPEng) assessment is required for any load-bearing wall removal in Auckland — it's not optional. The engineer's report and drawings are required for your building consent application. For non-structural partition walls, a structural engineer may not be required, but an experienced Licensed Building Practitioner should still assess the wall before demolition begins to confirm it's truly non-structural and to identify any services inside that need rerouting.

      What makes a good open-plan renovation design in Auckland?

      The best open-plan renovations define distinct zones — kitchen, dining, living — using design tools rather than walls: flooring transitions, pendant lighting placement, kitchen islands, furniture arrangement, and rug layering. They also address acoustics (soft furnishings to absorb sound, ducted rangehood for cooking noise), lighting design (layered task, ambient, and feature lighting), and material consistency across the connected space. Our design team at Superior Renovations addresses all of these elements as part of the renovation brief.

      Is a building consent required if I only want a partial wall removal?

      It depends on what the wall is doing structurally. Removing part of a load-bearing wall — even a single section — still requires building consent and engineering assessment, because any change to a structural element affects the load path through the building. Removing part of a non-structural partition may be exempt, but you need professional confirmation before starting. There's no safe DIY shortcut for partial wall removal in load-bearing situations.

      How do I deal with cooking smells in an open-plan kitchen?

      Install a ducted rangehood — not a recirculating filter unit — that takes cooking vapours out of the building entirely. For open-plan spaces where the kitchen is central to the living area, a remote motor rangehood (with the motor mounted in the ceiling cavity or outside the living zone) delivers powerful extraction with minimal noise inside the home. This is a non-negotiable element of any open-plan kitchen design for Auckland homes.

      What is a Code Compliance Certificate and do I need one for a wall removal?

      A Code Compliance Certificate (CCC) is the formal document from Auckland Council confirming that consented building work has been completed in accordance with the approved plans and the New Zealand Building Code. You absolutely need one for any consented wall removal. Without a CCC, your renovation is not legally complete and will create complications when you sell or refinance your property. At Superior Renovations, we manage the CCC application on your behalf as part of our end-to-end project management.


      Further Resources for your open-plan renovation

      1. Featured projects and Client stories to see specifications on some of our open-plan and full home renovation projects.
      2. Real client stories from Auckland homeowners who’ve renovated with us
      3. Our full building consent guide for Auckland renovations — everything you need to know before lodging
      4. The ultimate guide to renovating villas and bungalows in NZ — essential reading if your home is pre-1940

      Need more information?

      Take advantage of our FREE Complete Home Renovation Guide (48 pages), whether you’re already renovating or in the process of deciding to renovate, it’s not an easy process, this guide which includes a free 100+ point check list – will help you avoid costly mistakes.

      Download Free Renovation Guide (PDF)


      18 months 0 percent interest long term finance badge

      Have you been putting off getting renovations done?

      We have partnered with Q Mastercard ® to provide you an 18 Month Interest-Free Payment Option, you can enjoy your new home now and stress less.

      Learn More about Interest-Free Payment Options*

      *Lending criteria, fees, terms and conditions apply. Mastercard is a registered trademark and the circles design is a trademark of Mastercard International Incorporated.


      Still have questions unanswered?

      Book a no-obligation consultation with the team at Superior Renovations,
      we’d love to meet you to discuss your renovation ideas!

        Services

        Home RenovationKitchen RenovationBathroom RenovationOutdoor RenovationHouse ExtensionCommercialDesign ServicesOther

        By submitting this form, you agree to receive communications from us via email or text regarding our services, you can unsubscribe at any time.

        This site is protected by reCAPTCHA and the Google

        Privacy Policy and Terms of Service apply.

        Entrance After - Superior Renovations
        House Renovation

        What Is the Most Expensive Part of a Renovation? | NZ 2026 Guide

        What Is the Most Expensive Part of a Renovation? A Complete Auckland & NZ Cost Guide (2026)

        Free cost calculator

        How much will your renovation cost?

        Get an instant Auckland price range for your project — no details required to see it.

        Try our free cost calculators →


        modern kitchen design

        Picture this: you’ve finally decided to do something about that kitchen. The cupboards are held together with optimism and a couple of old hinges. The bench wipes clean, technically, but it hasn’t looked clean since 2009. You hop online, get a rough number in your head — let’s say $25,000 — and book a consultation feeling pretty sorted.

        Then the quote arrives. And suddenly $25,000 seems like a very charming opening bid.

        You’re not alone. Every year, thousands of Auckland homeowners face the same reckoning — the gap between what they imagined a renovation would cost and what it actually costs once all the trades, materials, consents, and inevitable surprises are factored in. It’s not because renovators are overcharging. It’s because renovations are genuinely, legitimately complex projects. And understanding where the money goes is the first step to spending it well.

        This series is for anyone planning a home renovation in Auckland or wider New Zealand in 2026 — whether you’re tackling a single bathroom, a full kitchen overhaul, or starting to seriously think about a whole-home transformation. We’ve drawn on first-hand project experience, real Auckland cost data, NZ authority sources, and honest input from our design team to give you the clearest, most useful guide to renovation costs available in this market right now.

        Quick answer: The most expensive parts of a home renovation in NZ are typically the kitchen (cabinetry, benchtops, appliances), the bathroom (multi-trade complexity, waterproofing, fixtures), labour (40–50% of most budgets), and structural or consent-related work — especially in older Auckland homes where hidden conditions frequently add cost. A 15–20% contingency is strongly recommended for all Auckland renovation projects.

        Here’s the breakdown of what we cover in this five-part series:

        Use the links above to jump to the section most relevant to your project right now — or read the whole thing over a coffee. Either way, you’ll finish knowing exactly where your renovation money goes, and how to make the most of every dollar.


        1: Why the Kitchen Is Usually the Most Expensive Room to Renovate in Auckland

        Kitchen renovation and Kitchen design in westmere

        Ask any experienced renovation company in Auckland what the single most expensive room to renovate is, and the answer is almost always the same: the kitchen. And yet, clients are consistently surprised when the quotes arrive. It’s not because the numbers are inflated — it’s because kitchens involve more decisions, more trades, more materials, and more potential surprises than virtually any other room in the house.

        There’s a reason we often say that a kitchen renovation is really ten renovations happening in the same 12 square metres at the same time. Once you understand why kitchens are expensive, you can make much smarter decisions about where to invest and where to pull back.

        What Does a Kitchen Renovation Cost in Auckland in 2026?

        Let’s start with the real numbers — drawn from our completed projects across Auckland and aligned with current market rates as of 2026. Auckland consistently runs 10–20% higher than the national average, driven by higher labour demand, higher hourly rates ($120–$150/hour for most trades), and greater compliance costs through Auckland Council.

        Renovation Level Auckland Cost Range (incl. GST) Typical Scope
        Budget Refresh $15,000 – $25,000 Pre-made cabinets, laminate benchtops, basic appliances, no layout changes
        Mid-Range Renovation $30,000 – $50,000 Custom cabinetry, engineered stone benchtops, mid-range appliances, minor layout tweaks for 10–12m² kitchen
        Premium / Luxury $90,000 – $138,000+ Custom joinery, natural stone, scullery/butler’s pantry, premium European appliances, full layout redesign

        Source: Kitchen Renovation Cost NZ 2026 — Superior Renovations. Per m² estimate: $2,500–$4,000 depending on scope. Always include a 10–15% contingency for surprises.

        For context: a small, smart kitchen in Greenlane with neutral tones and clever storage came in at $22,000 for us recently. A modern, open-plan renovation in Avondale with premium stone benchtops and integrated appliances hit $95,000. The range is real — and it’s driven by the choices below.

        The Five Biggest Cost Drivers in Any Kitchen Renovation

        1. Cabinetry — Often 30–40% of Your Total Budget

        This is, more consistently than anything else, the biggest single line item in a kitchen renovation. Custom cabinetry for a typical Auckland kitchen (10–12m²) runs $10,000–$20,000+. Why? Because it’s built specifically to your space, your configuration, and your finish specification — every panel, every hinge, every soft-close drawer. Pre-made flat-pack options can trim this to $3,000–$7,000, but they require compromises in fit and finish that tend to show over time.

        Our partners at Little Giant Interiors specialise in precision kitchen cabinetry that genuinely bridges the gap between custom quality and mid-range pricing — worth a look if you’re weighing that decision.

        kitchen design in henderson


        💡 Skimmer’s Tip: Cabinetry is where you get what you pay for. Pre-made saves money upfront but often costs more in replacements or frustration within 5–7 years. If you’re planning to stay in the home long-term, lean toward custom.

        2. Benchtops — The Statement Piece That Eats Budget Fast

        Stone benchtops are having a significant moment in Auckland right now — and for excellent reasons. Engineered stone from suppliers like our partner Caesarstone NZ runs $500–$1,200 per linear metre installed. Natural stone (granite, marble) can reach $1,500/m² and beyond. Laminates from Laminex NZ — which have improved dramatically in quality and realism — sit at $200–$500/m² and offer surprising value at the mid-range.


        Kitchen renovation auckland


        3. Appliances — Where Budgets Stretch Fastest

        Appliances can swing from $2,000 for a basic functional set to $30,000+ if you’re eyeing top-tier European brands. Our partner Harvey Normans – is the place to go if quality appliances matter to you. For energy-conscious Aucklanders, choosing ENERGY STAR–rated appliances also makes long-term financial sense as power costs continue to climb.


        4. Layout Changes — The Hidden Cost Multiplier

        Keeping your existing plumbing and electrical layout is the single most effective way to control kitchen renovation costs. The moment you start relocating the sink, moving a gas point, or shifting electrical circuits, you trigger a cascade: licensed plumber fees, registered electrician charges, potential building consent requirements through Auckland Council, and additional builder hours to make good the walls and floors behind everything. In Auckland’s stock of older villas and bungalows — think Grey Lynn, Mt Eden, Ponsonby — this cascade can add $2,000–$10,000 to a project’s cost.

        According to MBIE’s Building Performance guidance, moving plumbing fixtures requires a building consent. It’s not bureaucracy for its own sake — it’s a compliance requirement that exists to protect you. But it does cost money and time, so plan accordingly.

        5. Flooring, Splashbacks & Lighting — The “Finishing” Costs That Aren’t Small

        People reliably budget for cabinets, benchtops, and appliances — and then look slightly pale when flooring ($50–$180/m²), splashbacks ($200–$1,500+), and lighting ($500–$3,000+) appear on the invoice. These aren’t optional extras — they’re part of what makes a kitchen feel finished and function well. Our partner Lighting Plus offers an excellent range of architectural kitchen lighting, from under-cabinet strips to statement pendants, that can transform how a kitchen feels without blowing the entire budget.

        kitchens north shore

        Why Kitchens Deliver the Strongest Renovation ROI in Auckland

        Here’s the important counterweight to all of those costs: kitchens consistently deliver the best return on investment of any renovation project in the Auckland property market. Real estate professionals consistently cite kitchens as one of the top two value-adding renovations (alongside bathrooms), with a well-executed mid-range job capable of returning 60–80% of its cost in added property value — and in some inner-city suburbs, considerably more. A $40,000 kitchen renovation that adds $55,000 to your home’s value isn’t a cost — it’s a strategy.

        “The kitchen is where people initially hold back — and then regret it. I always say: if you’re going to live in this home for the next five to ten years, this is the one room where investing in quality materials pays you back every single day — in enjoyment, in function, and in resale value. I’ve seen thoughtful mid-range kitchen investments add $40,000–$80,000 to a home’s value in the right Auckland suburb. The math is almost always better than people expect.”

        — Dorothy Li, Interior Designer, Superior Renovations

        Want to see what different kitchen budgets actually produce? Browse our Kitchen Design Gallery or use our free Kitchen Renovation Cost Calculator to model your specific project. For a deeper dive into all kitchen cost variables, our Kitchen Renovation Cost NZ 2026 Guide covers everything.


        2: The Hidden Reason Bathroom Renovations Cost More Than They Look

        renovation west auckland

        Superior Renovations


        “It’s just a small room, though.” If there’s one phrase that reliably precedes a budget shock, it’s that one. The bathroom might be the smallest room in your Auckland home — typically 5–12m² — but it’s almost certainly the most complex renovation you’ll ever undertake. More trades, more materials per square metre, more compliance requirements, and more potential for hidden conditions than any other room in the house.

        As our Information Pack puts it plainly: “Did you know renovating a bathroom is the most complex renovation of them all? It may sound like a small project considering the space involved, but the reason it’s the most complex is because it involves the most people to get it done.”

        That’s not hyperbole. It’s logistics.

        What Does a Bathroom Renovation Cost in Auckland in 2026?

        Bathroom renovation costs in Auckland have risen approximately 5–8% from 2025 levels, driven by material inflation and continued tradie demand. The national mid-range sits at $18,000–$26,000 — but Auckland’s premium is real and consistent across the board.

        Renovation Level Auckland Cost (incl. GST) Typical Scope
        Budget / Cosmetic Refresh $9,000 – $16,000 Paint, new fittings, minor tiling — no structural changes or full waterproofing
        Mid-Range Full Renovation $26,000 – $35,000 Full tile replacement, new fixtures, waterproofing, lighting, project management
        Luxury / Wet Room $45,000+ Wet room format, high-end brands, underfloor heating, custom joinery, premium finishes

        Source: Bathroom Renovation Cost NZ 2026 Guide — Superior Renovations. Full overhauls in Auckland can reach $40,000–$60,000. Moody Parnell finishes at the premium end; Henderson Valley matte-black contemporary under $30,000 at the smart mid-range.

        Why Does a Tiny Room Cost So Much? Let’s Count the Trades.

        A standard full bathroom renovation in Auckland involves coordinating — in the right sequence, in a tight space, on a strict timeline — the following trades: demolition crew, waterproofing specialist, tiler, grouter, plumber, registered electrician, builder, plasterer, painter, and installer. That’s ten separate skill sets. Now imagine fitting them all into 6m² without any one of them causing a day’s delay for the next. That’s the coordination challenge that drives bathroom renovation costs, and it’s why project management isn’t just a convenience — it’s a necessity.

        Consumer NZ’s renovation guide notes that even something as seemingly simple as replacing a hand basin and vanity could involve “a plumber, builder, plasterer, painter, tiler, electrician, and floor layer.” For a full bathroom renovation, double that complexity and you’re getting close to reality.

        The Cost Items That Catch Auckland Homeowners Off Guard

        Waterproofing — Non-Negotiable, Legally Required, and Not Cheap

        Waterproofing is mandatory under the New Zealand Building Code for all wet areas. It must be completed by a licensed professional. According to MBIE Building Performance, even replacing or making a new tiled shower area requires a building consent. Skip waterproofing or cut corners, and you risk water damage that can cost tens of thousands to remediate — damage that may not be covered by insurance if it results from non-compliant work.

        Budget $1,500–$3,500 for proper waterproofing. Never treat it as optional. Never let a renovator talk you out of it to reduce their quote.

        💡 Skimmer’s Tip: If a bathroom renovation quote seems suspiciously cheap, the first thing to check is whether proper waterproofing is included. It often isn’t in low-ball quotes. Ask explicitly.

        Tiling — Where Budget and Beauty Collide Most Dramatically

        Tiling in a bathroom renovation typically costs $4,000–$9,000, depending on tile size, pattern complexity, and installer skill. Large-format tiles — a dominant 2026 trend in Auckland bathrooms — look stunning but are labour-intensive, requiring precise preparation and experienced hands. Our partners at Tile Depot and Tile Space offer ranges that cover everything from budget-smart ceramic to premium large-format porcelain — the ability to modulate your tile spend is real, and a good designer will help you identify where the visual impact comes from versus where you can save.


        Bathroom Renovator West Auckland

        Fixtures, Vanity & Tapware — Where Small Decisions Hit Hard

        The fixture choices stack up quickly: floating vanity ($1,000–$6,000), freestanding bath ($2,500–$10,000+), frameless glass shower screen ($1,200–$3,500), toilet ($500–$3,500), heated towel rail ($400–$1,500). Our partners at Reece New Zealand carry an exceptional premium range of bathroom fixtures and tapware — their Auckland showrooms are genuinely worth visiting before you finalise your fixture specification, because seeing and touching the products makes a real difference to the decisions you make. For quality at competitive prices, our partner Mico Plumbing is our preferred go-to for plumbing fixtures across a range of budgets.

        Bathroom Renovator West Auckland

        bathroom renovation north shore

        The Old Auckland Home Problem — What Lives Inside Your Walls

        Auckland has a wealth of beautiful character homes — the timber-framed villas of Ponsonby, the bungalows of Mt Eden, the interwar homes of Epsom. Renovating them is rewarding. It can also be humbling. Pre-1990 homes in particular are known to contain asbestos (in floor vinyl, wall texture, ceiling tiles, and sometimes roof cladding), outdated plumbing that needs upgrading before new fixtures can be installed, and electrical wiring that isn’t up to current code. Opening a bathroom in a 1965 Remuera bungalow has surprised us more times than we can count — and every surprise adds to the cost.

        The Consumer NZ renovation guide advises thorough pre-renovation assessment precisely for this reason. Budget a 15–20% contingency for any bathroom renovation in a pre-1980 Auckland home. It’s not pessimism — it’s the single most reliable form of renovation budget protection available to you.

        “Clients often arrive with a beautiful bathroom photo and a number they’ve found online. My job isn’t to crush their vision — it’s to help them understand what that vision actually requires, and where the smart trade-offs are. A bathroom renovation in Auckland at $15,000 is absolutely achievable. But it means making targeted, deliberate choices: keep the layout, choose quality mid-range tiles, and prioritise the fixtures you touch every single day. The rest is details — beautiful details, but details.”

        — Alison Yu, Interior Designer, Superior Renovations

        Does Renovating a Bathroom Add Value in Auckland?

        Consistently and reliably — yes. Bathrooms and kitchens are the two rooms property buyers examine most closely, and a dated bathroom can hold back an otherwise good home. A thoughtful mid-range bathroom renovation adds meaningful resale appeal, particularly when it improves usability through features like a double vanity, a larger shower, or better storage. As one NZ industry source notes, mid-range bathroom renovations can significantly boost resale appeal in our market.

        For more inspiration, explore our Bathroom Design Gallery. And if budget is a real constraint, our honest guide on renovating a bathroom for $10,000 in NZ walks through what’s genuinely achievable at that price point. We also have an extensive guide on small bathroom renovation layouts, costs and designs for those working with compact spaces.


        3: Labour Costs in NZ Renovations — The Budget Line Everyone Underestimates

        bathroom renovation north shore

        Here’s something that surprises almost every first-time renovator: the most expensive single category in most renovation budgets isn’t the kitchen cabinets, the stone benchtop, or even the bathroom tiles. It’s the people. The plumbers, electricians, tilers, builders, waterproofers, painters, plasterers, and project managers who make the whole thing actually happen — legally, safely, and to a standard that will last.

        In Auckland in 2026, labour typically accounts for 40–50% of most residential renovation budgets. For bathroom renovations specifically — where more specialist trades work in less space — that proportion can push 50–60%. Understanding why helps you budget more accurately, get better quotes, and appreciate what “value” actually means in a renovation context.

        What Do Tradespeople Actually Charge in Auckland in 2026?

        Trade Typical Auckland Rate (2026) Key Notes
        Licensed Plumber $100 – $140/hour Legally required for all plumbing work under the Plumbers, Gasfitters and Drainlayers Act
        Registered Electrician $100 – $130/hour All electrical work must be completed by a registered electrician — non-negotiable in NZ
        Tiler $60 – $120/hour Experience-dependent; complex patterns and large-format tiles at the higher end
        Builder / Carpenter $80 – $120/hour LBP required for Restricted Building Work (structural/weathertightness)
        Painter / Plasterer $60 – $90/hour Premium finishes at the higher end
        Waterproofing Specialist $70 – $100/hour + materials Must be licensed; often minimum call-out charges apply
        Project Manager Included in renovation company fee or 10–15% of project cost Coordinates sequencing, quality, communication — not optional for complex renovations

        These are real Auckland rates in 2026 — not estimates. They reflect the current labour market, where skilled tradespeople remain in strong demand following the post-COVID construction boom. Industry data confirms that labour costs make up 40–50% of total renovation budgets, with urban areas consistently at the higher end.

        Why These Aren’t Optional Costs — The Legal Reality

        In New Zealand, plumbing, electrical, and gasfitting work must legally be carried out by licensed or registered professionals. This isn’t red tape — it’s protection for you, your family, and anyone who buys your home later. The MBIE Building Performance guidelines are clear on this: using an unlicensed operator for restricted building work means your consent is invalid, your insurance may be void, and you’ll face serious complications if you try to sell. Consumer NZ advises always verifying licences through public registers (lbp.govt.nz for builders, pgdb.co.nz for plumbers). It’s a two-minute check that matters.

        And beyond legality — licensed tradespeople bring warranties, accountability, and faster execution. They’ve done this before, specifically and repeatedly. That experience is genuinely worth paying for.

        The Coordination Problem: Why Labour Costs Are Higher Than the Hours Suggest

        Labour costs in renovations aren’t purely about hourly rates. They’re also about the cost of getting all those trades in the right place, in the right order, at the right time. A bathroom renovation can involve 10 different trades. A kitchen renovation, 6–8. A full home renovation, 20 or more. Get the sequencing wrong — tilers can’t start until waterproofing is done, painters can’t finish until plumbers are done, cabinetry can’t go in until the floor is right — and one delayed trade cascades into a week of downtime for everyone else.

        This is precisely why Consumer NZ notes that managing trades yourself “can still be a huge time commitment” and that the lack of control over subcontractors when there’s no main contractor means “they can’t guarantee subbies will turn up when required.” The coordination overhead is real — and it’s a large part of what you’re paying for when you engage a renovation company with a dedicated project manager.

        “Labour is the last place you want to be cutting corners, and honestly, it’s often the first place people look when a quote comes in higher than expected. I’ve seen homeowners save $3,000 by hiring an uncertified tiler, then spend $8,000 fixing waterproofing failure eight months later. The trades we use are vetted, licensed where required, and they know how to work as a coordinated team within a tight space and schedule. That coordination is where the real value comes from — not just in quality, but in time.”

        — Cici Zuo, Head of Sales, Superior Renovations

        Renovation Company vs. Managing Trades Yourself: An Honest Comparison

        Factor Renovation Company (Fixed Price) DIY Trade Management
        Budget certainty ✅ Fixed quote before work starts ❌ Highly variable — charge-up risk
        Trade coordination ✅ Project manager handles all sequencing ❌ Your time, your stress, your risk
        Compliance assurance ✅ LBPs, licensed plumbers/electricians managed ⚠️ Your responsibility to verify
        Material pricing ✅ Trade relationships = better prices ❌ Retail prices
        Time commitment from you ✅ Minimal — single point of contact ❌ Effectively a part-time job
        Post-completion support ✅ Guarantees, warranties, ongoing PM access ❌ You’re on your own with each trade

        💡 Skimmer’s Tip: Always insist on a fixed-price contract rather than a charge-up (hourly) arrangement. Fixed prices protect you from budget blowouts. Every Superior Renovations project starts with a detailed fixed proposal — no surprises, no “we’ll figure it out as we go.”

        Learn more about how Superior Renovations’ project management approach works at our Auckland house renovation page, or see how previous clients experienced the process in our video testimonials.


        4: Structural Work & Building Consents — What’s Hiding Inside Auckland’s Walls

        scaffolding around a two-storey home extension with new brick cladding and weatherboard

        You’ve budgeted for materials. You’ve factored in labour. You’ve added a contingency. And then, somewhere mid-project, someone says the sentence no renovator wants to hear: “We’re going to need a building consent for that.”

        Or worse: “There’s asbestos behind the wall.”

        Structural work and building consents are among the most misunderstood — and most consistently underbudgeted — aspects of home renovation in Auckland. They can add thousands to a project, or tens of thousands. Understanding when they apply and what they cost is genuinely important for anyone planning a renovation in this market.

        When Does a Renovation Require a Building Consent in Auckland?

        Not all renovation work requires a building consent. But more of it does than most homeowners realise — particularly in Auckland, where Auckland Council compliance requirements are among the more stringent in the country.

        According to MBIE’s Building Performance guidance, you generally need a building consent if your renovation involves:

        • Structural building work — including additions, alterations, some demolition, and re-piling
        • Adding new plumbing fixtures (toilet, basin, shower, sink) — not just replacing like-for-like
        • Replacing or creating a new tiled shower area
        • Removing or altering load-bearing walls
        • Electrical consumer board changes or major electrical alterations
        • External wall insulation installation
        • Changes to the external footprint of the building

        You can check whether your specific project needs consent using Auckland Council’s building and renovation consents guidance, or the MBIE’s own tool at canibuildit.govt.nz. For Kitchen and bathroom-specific consent requirements, Auckland Council has dedicated guidance at their building and renovation projects page.

        Important to know: if you carry out building work that requires consent without getting one, you may be fined up to $200,000 — and a further $10,000 for every day the work continues. Beyond the legal risk, unconsented work makes insurance complicated and creates serious issues when you try to sell. Don’t risk it.

        For a good summary of the 2025 reforms that eased some consent requirements (including granny flat exemptions up to 70m²), read our blog on eased building consents in NZ 2025.

        How Much Do Building Consents Actually Cost in Auckland?

        Cost Category Estimated Auckland Cost (2026)
        Building consent application deposit (lodging) $2,000 – $4,000
        Processing & inspection fees (Auckland Council) $150 – $250 per hour
        Total consent budget for a standard residential renovation $5,000 – $12,000
        Engineering / architectural drawings (if required) $2,500 – $8,000+
        Kitchen or bathroom consent specifically $2,500 – $6,500

        Note that Auckland Council’s processing times and fees are set independently, and MBIE guidelines note councils have up to 20 working days to process applications — though poor or incomplete applications extend this timeline. A well-prepared, complete application submitted through an experienced renovation company moves significantly faster than one put together piecemeal.

        Structural Work — Where Renovation Budgets Can Really Stretch

        Structural changes are where renovation budgets face their biggest tests. Opening a wall, adding a structural beam, reconfiguring a floor plan — these are not cosmetic tasks. In an older Auckland character home, what starts as a “quick structural fix” can rapidly become a $15,000–$40,000 engineering exercise, particularly if the structure reveals unexpected conditions once opened.

        The specific risks for Auckland homeowners include:

        • Load-bearing wall removal requires a structural engineer’s assessment ($1,500–$4,000), consent drawings, the physical structural work, and Council sign-off. Doing this without the right people is legally a Restricted Building Work matter — requiring a Licensed Building Practitioner (LBP).
        • Asbestos is present in a significant proportion of Auckland homes built before 1990 — in floor vinyl, ceiling tiles, wall texture (Gibraltar board), and some roof products. Professional testing costs relatively little ($200–$500 per sample); professional removal costs $1,500–$10,000+ depending on extent and location.
        • Subfloor and framing rot is endemic in Auckland’s timber-framed housing stock, particularly in character homes that have experienced moisture issues over decades. Uncovering this mid-renovation adds builder hours, materials, and sometimes further structural assessment.
        • Outdated electrical switchboards — pre-1980 homes often have consumer boards that need upgrading to handle modern loads, particularly when adding heat pumps, underfloor heating, or high-draw kitchen appliances. Budget $1,000–$2,500 for a switchboard upgrade if your home is pre-1980.

        “Structural surprises in older Auckland homes are a ‘when,’ not an ‘if.’ I always tell clients before we start: plan to find something unexpected, and budget for it. The clients who go into their renovation with a realistic contingency feel in control when we hit a surprise — because we handle it quickly and move on. The clients who’ve budgeted every last dollar with no buffer are the ones who feel the stress most acutely. The contingency isn’t pessimism. It’s the single most valuable line item in your renovation budget.”

        — Eunice Qin, Design Consultant, Superior Renovations

        Want a ballpark for your renovation?
        See the calculators →

        Insulation — A Renovation-Adjacent Cost Worth Knowing About

        New Zealand has increasingly strong insulation standards for residential properties, particularly for rentals. Many Auckland homeowners who are already doing a significant renovation choose to upgrade insulation at the same time — it’s cost-effective to do while walls are open, and EECA (Energy Efficiency and Conservation Authority) notes that good insulation reduces heating costs significantly over a home’s life. Our comprehensive guide to insulating your home in NZ covers costs, rules, and eco-friendly options in detail. Visit eeca.govt.nz for information on current energy efficiency guidance and potential government support.

        💡 Skimmer’s Tip: If your project involves any structural changes, consent work, or pre-1980 homes, get a pre-renovation assessment before you commit to a final budget. Superior Renovations offers a free feasibility report that identifies these issues and costs before you’re contractually committed — saving the unpleasant mid-project surprise.


        5: Where to Save and Where to Splurge — A Real Auckland Homeowner’s Guide

        ensuite renovation with dark tiled walls freestanding bath double vanity and round mirror

        Luxury Bathroom Design – Redvale

        close-up of a round mirror towel rail and vanity basin in a dark-tiled ensuite renovation

        Luxury Bathroom Design – Redvale

        By now you have a clear picture of where renovation money goes. But knowing the cost drivers doesn’t automatically tell you how to make the best decisions with a finite budget. That’s what this section is for.

        The goal here isn’t to cut every corner you can find — it’s to spend strategically. Putting money into the things that last, perform well over time, add genuine resale value, and improve your daily experience. And saving intelligently on the things that don’t need to cost what you might assume they do.

        The Golden Rule of Renovation Budgeting in Auckland

        Don’t overcapitalise. This is the most consistent piece of advice from experienced renovation professionals and real estate agents alike: don’t spend significantly more on renovations than the resulting improvement in property value justifies for your specific home in your specific suburb.

        A useful rule of thumb: keep your total renovation investment for any single project within 10–15% of your home’s current market value. Spend $100,000 renovating a kitchen in a $600,000 home and the maths rarely works in your favour. Spend $45,000 on the same kitchen in a $1.4M Herne Bay home? A very different conversation. As our guide to Auckland renovation ideas that add value explains, the suburb and the home’s current standing in that market matter enormously to ROI calculations.

        Where to Splurge: The Investments Worth Making

        1. Waterproofing — Every Single Time, Without Exception

        We’ve said it twice already in this series, and here it is a third time because it matters that much: never cut costs on waterproofing. Water ingress is the most destructive long-term threat to an Auckland home, and the damage is almost always invisible until it’s very expensive. Proper waterproofing in a bathroom costs $1,500–$3,500 and protects a $25,000+ renovation investment for decades. Inadequate waterproofing can fail in months and cost far more to remediate than you saved. MBIE’s Building Code requires it for a reason. Honour that requirement fully, not minimally.

        2. Benchtop Quality in the Kitchen

        Your kitchen benchtop takes more daily punishment than almost anything else in your home — heat, weight, water, cutting, spills. This is not the place to save $200/m² and regret it within two years. Stone products from Caesarstone NZ are built to last decades and look genuinely better with age in the right environment. If stone isn’t in budget, premium laminates from Laminex NZ have improved so substantially that the quality gap between stone and a well-chosen Laminex finish is far smaller than it used to be — at significantly lower cost.

        kitchen renovation with marble-look splashback gas cooktop and integrated double ovens

        3. The Fixtures You Interact With Every Day

        The taps, the shower mixer, the toilet flush, the drawer handles — these are the things you touch every single day of your life in the renovated space. Quality here pays dividends in pleasure, reliability, and durability. Tapware from our partners Reece NZ and Mico Plumbing is designed for NZ conditions — water pressure, water chemistry, and the humidity patterns Auckland’s climate creates. Cheaper imported tapware may save money on day one and cost far more in replacement and repair by year three.

        4. Professional Project Management

        Coordinating 8–10 trades yourself in a tight Auckland renovation timeline is, by most accounts, a recipe for stress, unexpected costs, and a timeline that slips well beyond what you planned. The cost of professional project management — built into a renovation company’s fixed price — is one of the most reliably worthwhile investments you can make. It pays for itself in time, in avoided mistakes, and in the certainty of a fixed budget. Read our client testimonials to see how Auckland homeowners consistently describe the value of having one clear point of contact throughout their renovation.

        Where to Save: Smart Decisions That Don’t Compromise Quality

        1. Keep the Existing Layout

        This is the most powerful single budget decision available to any Auckland homeowner planning a kitchen or bathroom renovation. Moving your kitchen sink to the other side of the bench — visually appealing on Instagram, ruinously expensive in practice. Moving a toilet 500mm to improve flow — easily $2,000–$5,000 in plumbing work alone. Every time you move a plumbing point or electrical circuit, you’re paying licensed professionals for time, potentially triggering a consent requirement, and opening up walls that will then need to be made good. Unless you have a compelling functional reason to move something, don’t. A good designer can make any existing layout feel significantly better without moving a single pipe.

        2. Mid-Range Appliances Over High-End (for Most Kitchens)

        Unless you are a serious home cook who will genuinely use every capability of a premium induction hob or steam oven — and there are people who will — the performance gap between a $15,000 Miele range and a quality $3,500 mid-range equivalent is not $11,500 worth of daily difference. Our partners at Harvey Norman Commercial Division offer an excellent range of mid-tier appliances that deliver solid performance, look premium, and don’t consume your entire appliance budget on a single item.

        white kitchen renovation with marble-look splashback gas cooktop and built-in fridge freezer

        3. Strategic Tile Selection — Spend on Focal Points, Save on Secondaries

        Tiles don’t all need to be the same price. In a bathroom, the feature wall behind the bath or the shower floor is where the eye goes — invest here. The walls on the secondary sides of the space? This is where a quality mid-range tile from Tile Depot or Tile Space does the same visual job at a meaningfully lower cost. A skilled designer will tell you exactly where the tile spend matters and where it doesn’t.

        4. Respraying Cabinets Instead of Replacing (When Structurally Sound)

        If your existing kitchen cabinets are structurally solid — just dated in colour or finish — a professional cabinet respray with quality paint from our partner Dulux NZ can transform a kitchen for $500–$2,000, rather than $10,000+ for full replacement. Same potential applies to bathroom vanities in some cases. An experienced designer will give you an honest assessment of which cabinets are worth painting and which genuinely need replacing. Don’t assume replacement is the only option.
        kitchen island renovation with stone benchtop drawer units and integrated oven

        5. Smart Renovation Financing

        Sometimes the smartest renovation decision is financial rather than material. Many Auckland homeowners are now accessing their home equity through renovation financing to fund projects without depleting savings or artificially constraining scope. Our partner Loan Market specialises in helping homeowners find the most cost-effective financing structure for renovation projects. Explore our Finance Options page for interest-free and low-rate options available through Superior Renovations.

        The Renovation Decision Framework — Is It Worth It?

        Decision Point Verdict Why
        Stone benchtop vs. premium laminate ⚖️ Both are valid — budget decides Stone lasts longer, looks more premium; Laminex saves $500–$1,000/m²
        Premium tiles on all surfaces 💰 Save — tile strategically Invest in feature/focal areas; save on secondary surfaces
        Moving plumbing layout 💰 Save — keep the layout if possible $2,000–$10,000 in avoidable cost for minimal visual impact
        Professional project management ✅ Splurge — always worth it Saves time, stress, mistakes, and often money through better coordination
        High-end vs. mid-range appliances 💰 Save on most items Performance gap rarely justifies 4x price difference for typical household
        Waterproofing quality ✅ Never, ever cut corners Failure costs 5–10x the savings, may void insurance
        Custom vs. pre-made cabinetry ⚖️ Depends on longevity plan Custom for long-term homes; pre-made saves $5,000–$10,000+ for shorter horizons
        Cabinet replacement vs. respray 💰 Respray if structurally sound $500–$2,000 vs. $10,000+ — huge saving, similar visual result

        💡 Skimmer’s Tip: Use Superior Renovations’ free Renovation Cost Estimate Tools to model different scenarios before committing. And for a complete understanding of what you can achieve at your specific budget, our free Feasibility Report gives you a realistic picture before you’re committed to anything.


        6: Three Renovation Scenarios — How the Most Expensive Part Changes Depending on Scope

        Everything above breaks down the expensive parts of a renovation room by room and cost by cost. That’s useful when you’re planning. But there’s a bigger point that most renovation guides miss entirely: the most expensive part of your renovation shifts dramatically depending on how deep you’re going.

        A cosmetic refresh, a mid-range kitchen-and-bathroom renovation, and a full structural strip-out are three completely different animals. The cost profile across them has almost nothing in common. Here’s what we mean.

        Cosmetic Refresh ($30,000–$55,000): Flooring Leads

        Picture a 120m² three-bedroom in Hillsborough. 1990s build, original carpet, dated paint, tired fittings. The bones are fine — the owners just want to modernise the look. No walls come down. No plumbing moves. No consent required.

        In a cosmetic refresh, flooring is almost always the single biggest line item — roughly 25–30% of the total spend. That surprises people who assumed it’d be the kitchen. But when you’re not ripping out cabinetry or moving plumbing, the kitchen facelift is relatively contained (new doors, handles, maybe a fresh benchtop: $5,000–$10,000). Flooring, on the other hand, touches every room.

        Even mid-range options add up fast across 120m². Hybrid vinyl plank — popular in Auckland right now for its waterproof properties and ease of installation — runs $45–$75/m² installed. Carpet in bedrooms adds $35–$60/m² laid. By the time you’ve covered the whole house, you’re looking at $8,000–$15,000 without choosing anything exotic.

        Item Approx. Cost % of Total
        Flooring (carpet + vinyl/laminate) $8,000–$15,000 25–30%
        Interior painting (full house) $7,000–$12,000 20–25%
        Kitchen facelift (doors, handles, benchtop) $5,000–$10,000 15–20%
        Bathroom refresh (vanity, tapware, paint) $3,000–$6,000 8–12%
        Light fixtures + electrical fittings $2,000–$4,000 5–8%
        Labour (painters, flooring installer) $5,000–$10,000 15–20%
        Total $30,000–$55,000 100%

        💡 Quick tip: If budget is tight on a cosmetic refresh, keep existing flooring in rooms where it’s still serviceable and focus new flooring on high-traffic areas — living room, hallway, kitchen. It halves the flooring bill without compromising the overall feel.

        Mid-Range Renovation ($100,000–$160,000): The Kitchen Takes Over

        Same house. But now the owners want a new kitchen, a new bathroom, open-plan living (which means removing a wall between the kitchen and lounge), new flooring throughout, a full repaint, and updated electrics. This is the renovation type we see most often at Superior Renovations — the sweet spot where the home gets a genuine transformation without a full structural strip-out.

        In this scenario, the kitchen consistently accounts for 25–30% of total spend — making it the single most expensive component by a clear margin. A mid-range Auckland kitchen with custom MDF cabinetry, engineered stone benchtops, and decent appliances lands between $28,000 and $45,000. The bathroom is second at $25,000–$35,000. Together, the wet areas eat roughly half the entire budget.

        Item Approx. Cost % of Total
        Full kitchen renovation (mid-range) $28,000–$45,000 25–30%
        Full bathroom renovation $25,000–$35,000 18–25%
        Wall removal + structural beam $5,000–$12,000 5–8%
        Flooring (full house) $10,000–$18,000 10–12%
        Interior painting + electrical upgrades + consent fees $18,000–$34,000 17–22%
        Project management + contingency $10,000–$18,000 10–12%
        Total $100,000–$160,000 100%

        Why does the kitchen beat the bathroom on cost? Both rooms involve plumbing, electrical, and specialist trades. But kitchens are larger (typically 10–18m² vs. 4–8m² for a bathroom), involve more cabinetry, more benchtop surface area, and more appliances. A kitchen has a rangehood, an oven, a cooktop, a dishwasher, sometimes a fridge plumbed for water — each with its own supply line and installation. A bathroom has a shower, a toilet, and a vanity. The sheer number of components is what pushes the kitchen to the top of the cost sheet in almost every mid-range project we quote.

        💡 Quick tip: If you’re doing both a kitchen and a bathroom, running them concurrently with a project manager coordinating trades is far more efficient than doing them one after the other. It avoids paying for trade mobilisation twice and compresses the overall timeline. It’s one of the main reasons we work on a fixed-price contract — everything is scoped, scheduled, and managed as a single project.

        Full Structural Overhaul ($250,000–$400,000+): The Invisible Work Dominates

        Now the big one. A 1970s brick-and-tile in Glenfield that hasn’t been touched in 40 years. The owners want everything: strip it back to framing, replace all the GIB, upgrade insulation to current NZ Building Code H1 requirements, rewire the entire house, replumb it, install double glazing, build a new kitchen and two new bathrooms, and reconfigure the layout to create open-plan living.

        This is a full home renovation in the truest sense. And the cost breakdown is dramatically different from the first two scenarios.

        The combined cost of rewiring ($10,000–$18,000), replumbing ($8,000–$15,000), new GIB lining ($15,000–$25,000), insulation ($8,000–$15,000), double glazing ($20,000–$35,000), and structural modifications ($15,000–$30,000) totals $76,000–$138,000. That’s 30–35% of the entire budget — spent on things you’ll never see once the house is finished.

        The kitchen and two bathrooms are still big numbers — $85,000–$125,000 combined. But they’re no longer the dominant cost. The infrastructure is.

        Item Approx. Cost % of Total
        Demolition + waste removal $8,000–$15,000 3–4%
        Full rewiring $10,000–$18,000 4–5%
        Full replumbing $8,000–$15,000 3–4%
        New GIB lining (all walls + ceilings) $15,000–$25,000 5–7%
        Insulation upgrade (walls + ceiling) $8,000–$15,000 3–4%
        Double glazing (full house replacement) $20,000–$35,000 7–9%
        Structural modifications (walls, beams, framing) $15,000–$30,000 5–8%
        Kitchen renovation (mid-to-high spec) $35,000–$55,000 10–14%
        Two bathroom renovations $50,000–$70,000 15–18%
        Flooring + painting (interior + exterior) $24,000–$40,000 8–10%
        Consents, architect, structural engineer $15,000–$25,000 5–7%
        Project management + contingency (15–20%) $30,000–$55,000 10–14%
        Total $250,000–$400,000+ 100%

        This is the scenario where Auckland’s regulatory environment also starts to bite. A renovation of this scale requires building consent from Auckland Council, a Licensed Building Practitioner (LBP) for all restricted building work, structural engineering sign-off, and typically an architect if you’re reconfiguring the floor plan. Our partners at Sonder Architecture handle the consent and architectural design side of projects like these — and it’s not uncommon for professional fees alone to reach $15,000–$25,000.

        One of our recent projects in Henderson — a 1972 brick-and-tile, full interior strip-out — had 14 different trades on site across 16 weeks. The labour component of that project was north of $140,000. The homeowner said afterwards: “I didn’t expect the trades to cost more than the materials.” That’s the reality of structural renovation. The work itself is the most expensive part.

        “With a cosmetic reno, you’re shopping — picking finishes and fittings that suit your taste and your wallet. With a structural reno, you’re problem-solving — responding to what the house needs. The budget for shopping is flexible. The budget for problem-solving is dictated by the building. That’s the fundamental difference, and it’s why the most expensive part changes completely depending on what level you’re working at.”

        — Cici Zuo, Head of Sales (NZ Dip. Interior Design), Superior Renovations

        💡 Quick tip: If you’re considering a full strip-out renovation, get a free feasibility report done first. It identifies what’s behind your walls before you commit to a budget — and it’s the single best way to avoid the “we opened it up and found…” surprise that adds $20,000 to a job.

        Want a ballpark for your renovation?
        See the calculators →

        The Pattern: Three Renovations, Three Different Answers

        Scenario Total Budget Most Expensive Part % of Budget
        Cosmetic refresh $30,000–$55,000 Flooring 25–30%
        Mid-range reno (kitchen + bathroom) $100,000–$160,000 Kitchen 25–30%
        Full structural overhaul $250,000–$400,000+ Invisible infrastructure (wiring, plumbing, GIB, insulation, glazing) 30–35%

        As renovation scope increases, the most expensive part shifts from what you can see to what you can’t. That’s worth sitting with for a moment — because it changes how you should think about budgeting. If you’re planning a cosmetic refresh, your budget decisions are about finishes. If you’re planning a mid-range renovation, your biggest call is the kitchen specification. And if you’re planning a full structural renovation, the cost is mostly determined by the condition of what’s behind your walls — something you won’t know until you open them up.

        Which is exactly why we recommend a 15–20% contingency on structural projects, and 25% if you’re working with a character home. Villas in Grey Lynn, bungalows in Mt Eden, leaky-era homes in Albany — they all have a habit of revealing surprises once the GIB comes off.


        Conclusion: The Most Expensive Part of a Renovation Is the One You Didn’t Plan For

        So — what is the most expensive part of a renovation?

        The honest, complete answer is that it depends on what you’re doing, where you live, and what you find when the walls come open. But if we’re talking about the consistent, reliable budget-drivers for Auckland homeowners in 2026, the list looks like this:

        • The kitchen — particularly custom cabinetry, quality benchtops, layout changes, and appliances
        • The bathroom — driven by multi-trade complexity, mandatory waterproofing, fixtures, and tiling
        • Labour — 40–50% of almost every renovation budget, legally non-negotiable for licensed trades
        • Structural and consent work — often the largest single surprise, especially in pre-1980 Auckland character homes
        • Hidden conditions — asbestos, rot, old wiring, subfloor issues — the unavoidable unknown in older homes

        The encouraging truth is that every one of these costs is manageable with the right planning, the right partner, and a realistic contingency. The Auckland homeowners who come through their renovations feeling genuinely in control — and genuinely happy with the result — are, almost without exception, the ones who went in with clear eyes, engaged a trusted renovation company, fixed their price before work started, and built a realistic buffer for the unexpected.

        At Superior Renovations, we’ve been navigating these costs across Auckland for years. We know where the surprises live, how to plan around them, and how to deliver a renovation that genuinely meets the brief — without the stress, the budget blowouts, or the coordination chaos that characterises so many Kiwi renovation stories.

        Ready to find out what your renovation actually looks like — and what it actually costs? Book a free consultation with our team, or start with our free Feasibility Report. You can also reach us on 0800 199 888.

        Have questions about your specific situation? Drop them in the comments below — we genuinely read them and love helping Auckland homeowners figure this stuff out before they’re committed to a path.


        Frequently Asked Questions: Renovation Costs in Auckland & New Zealand (2026)

        What is the most expensive part of a home renovation in NZ?

        The most expensive parts of a home renovation in New Zealand are typically the kitchen and bathroom, due to the number of specialist trades required (plumbers, electricians, tilers, waterproofers), the cost of cabinetry and fixtures, and — in Auckland — significantly higher-than-average labour rates. Labour alone accounts for 40–50% of most renovation budgets. Structural work and building consent costs are also major contributors, especially in Auckland's older character homes.

        Why is bathroom renovation so expensive in Auckland?

        Bathroom renovations are expensive because they involve the highest density of specialist trades in the smallest space — typically 10 different trades in a single project. Waterproofing (legally required under the NZ Building Code), tiling, licensed plumbing, and registered electrical work are all mandatory, not optional. Labour alone is 40–60% of the total cost. Auckland's higher hourly rates ($90–$140/hour for most trades) add a further premium over national averages.

        Why is kitchen renovation so expensive?

        Kitchen renovations are expensive because they combine high-cost components — custom cabinetry ($10,000–$20,000+), stone benchtops ($500–$1,200/m²), appliances ($2,000–$30,000+), and finishing elements — with licensed trade labour. Layout changes trigger further costs through plumbing and electrical work, and potentially building consents. In Auckland, labour runs $120–$150/hour and makes up 40–50% of the budget.

        How much does a kitchen renovation cost in Auckland in 2026?

        A mid-range kitchen renovation in Auckland costs approximately $30,000–$50,000 in 2026. Budget refreshes start at $15,000–$25,000. Premium or luxury renovations reach $90,000–$138,000+. Auckland runs 10–20% higher than the national average due to demand, labour costs, and compliance requirements. Always include a 10–15% contingency.

        How much does a bathroom renovation cost in Auckland in 2026?

        A mid-range full bathroom renovation in Auckland costs approximately $26,000–$35,000 in 2026, up 5–8% from 2025 due to material and labour inflation. Budget cosmetic refreshes start at $9,000–$16,000. Luxury wet room renovations start from $45,000. The national mid-range is $18,000–$26,000.

        When do I need a building consent for a renovation in Auckland?

        You need a building consent in Auckland for structural alterations, adding new plumbing fixtures, creating or replacing a tiled shower area, removing load-bearing walls, major electrical alterations, or changing your home's external footprint. Like-for-like replacements generally don't require consent.

        What are the hidden costs of renovation in Auckland?

        Common hidden renovation costs in Auckland include: asbestos removal in pre-1990 homes ($1,500–$10,000+), subfloor and framing rot repairs, electrical switchboard upgrades ($1,000–$2,500), building consent fees ($5,000–$12,000), structural engineering reports ($1,500–$4,000), and post-consent inspection fees. Budget a 15–20% contingency for all Auckland renovations, rising to 25% for character homes built before 1980.

        What percentage of a renovation budget goes to labour in NZ?

        Labour typically accounts for 40–50% of a standard renovation budget in NZ, and up to 60% for bathrooms specifically. Auckland trades charge $90–$150/hour depending on the trade. Licensed plumbers and electricians are legally required for plumbing and electrical work — these are non-negotiable costs under NZ law.

        How can I reduce renovation costs in Auckland without compromising quality?

        The most effective strategies: keep your existing plumbing layout (saves $2,000–$10,000), bundle multiple rooms into one project (shared trade mobilisation), choose mid-range appliances, use quality laminates where premium stone isn't necessary, consider cabinet respraying over replacement, and engage a renovation company with established supplier relationships for trade pricing on materials. Never cut costs on waterproofing, licensed trades, or structural compliance.

        Does a kitchen or bathroom renovation add value in Auckland?

        Yes — consistently. Kitchens and bathrooms are the two rooms Auckland property buyers examine most closely. A well-executed mid-range kitchen renovation can add $40,000–$80,000 to property value in the right suburb. Keep total renovation spend within 10–15% of your home's current market value to avoid overcapitalising.

        How long does a kitchen or bathroom renovation take in Auckland?

        A standard bathroom renovation takes 3–4 weeks with professional project management (no structural changes or consents required). A kitchen renovation typically takes 4–6 weeks. Full home renovations can run 3–6+ months. Consent-dependent work adds 4–8+ weeks to any timeline. Delays from hidden conditions (asbestos, old plumbing) should be expected in pre-1980 homes.

        What renovation finance options are available in NZ?

        Auckland homeowners can access renovation finance through mortgage top-ups, home equity loans, and specialist renovation lending. Superior Renovations works with Loan Market to offer interest-free and low-rate options. Explore at superiorrenovations.co.nz/finance-options/.

        This guide is written by the design and project management team at Superior Renovations — Auckland’s specialist residential renovation company. With hundreds of completed projects across Auckland, from Remuera to West Harbour and Grey Lynn to Albany, every cost figure and recommendation in this series reflects genuine, first-hand project experience.


        Further Resources for your house renovation

        1. Featured projects and Client stories to see specifications on some of the projects.
        2. Real client stories from Auckland

        Need more information?

        Take advantage of our FREE Complete Home Renovation Guide (48 pages), whether you’re already renovating or in the process of deciding to renovate, it’s not an easy process, this guide which includes a free 100+ point check list – will help you avoid costly mistakes.

        Download Free Renovation Guide (PDF)


        18 months 0 percent interest long term finance badge

        Have you been putting off getting renovations done?

        We have partnered with Q Mastercard ® to provide you an 18 Month Interest-Free Payment Option, you can enjoy your new home now and stress less.

        Learn More about Interest-Free Payment Options*

        *Lending criteria, fees, terms and conditions apply. Mastercard is a registered trademark and the circles design is a trademark of Mastercard International Incorporated.


        Still have questions unanswered?

        Book a no-obligation consultation with the team at Superior Renovations,
        we’d love to meet you to discuss your renovation ideas!

          Services

          Home RenovationKitchen RenovationBathroom RenovationOutdoor RenovationHouse ExtensionCommercialDesign ServicesOther

          By submitting this form, you agree to receive communications from us via email or text regarding our services, you can unsubscribe at any time.

          This site is protected by reCAPTCHA and the Google

          Privacy Policy and Terms of Service apply.


          References

          1. Building Performance (MBIE)
          2. Consumer NZ
          3. Building Performance (MBIE)
          4. Building Performance (MBIE)
          5. Consumer NZ
          6. Consumer NZ
          DSC06516 - Superior Renovations
          House Renovation

          16个紧凑型厨房设计理念(新西兰)| 小厨房装修指南 — Superior Renovations

          没有人愿意在烹饪时体验幽闭恐惧的感觉。对于空间紧凑的小户型公寓和住宅来说,厨房的局促感是个真实的问题——但只要空间得到有效利用,它很容易解决。

          规划是紧凑型厨房设计的关键。人工和项目管理等基础成本不会因为厨房小而减少——安装工、电工、水管工、瓦工、油漆工一个都不能少——但材料成本会更低:橱柜更少、瓷砖更少。省下来的预算,正好可以投入到创新的收纳方案上。

          比如:打造融入生活空间的隐藏式储物柜,把电器收进去而不让空间显得局促;或者定制通顶橱柜,把不常用的电器放在最上层,再配一把兼具装饰功能的梯子。Kitchen Things(我们的首选家电供应商)有大量专为小户型设计的顶级品牌电器——可以拆分收进橱柜,不占用任何台面空间。

          以下是 16 个针对新西兰紧凑型厨房的设计理念,全部来自我们在奥克兰完成的真实项目经验。


          扫描二维码,在小红书上找到我们

          Superior Renovations 小红书二维码

          体验家居改造的艺术,选择 Superior Renovations!我们是奥克兰首屈一指的浴室、厨房及全屋装修专家。从概念设计到完工,我们的团队确保每个细节都完美无缺。扫描二维码,在小红书上关注我们,获取最新项目、装修技巧和灵感。

          扫描二维码,通过微信联系我们

          Superior Renovations 微信二维码

          想开始您的装修之旅吗?通过微信与 Superior Renovations 联系,享受便捷、个性化的中文服务。立即扫描,提问、获取专家建议,踏出家居改造的第一步!


          厨房装修费用计算器

          想知道翻新自己的厨房大概要多少钱?使用我们免费的厨房装修费用计算器——输入您的具体需求,估算结果几秒内发送到邮箱。


          1. 玩转你的色彩

          有些颜色容易让空间显得狭小,有些则擅长营造空间放大的错觉。我们建议客户以中性色作为厨房的主色调——例如 Dulux 的 Mason Bay Quarter 或 Epsom 系列——让空间最大程度地舒展开。

          用中性色或深浅不一的白色,并不意味着厨房一定沉闷无聊:选择一块有色彩或有质感的防溅板来吸引视线、制造趣味;橱柜颜色可以适当加深以形成对比;再用彩色的把手和水龙头点缀色彩感。

          2. 灯光照明很重要

          自然采光是厨房里最好的照明。可以通过大型垂直窗户营造高度感,或增加天窗抬升视觉上的天花板高度(顺便为更多橱柜创造空间),最大限度地引入自然光。如果这些都做不到,仍有很多办法把照明融入厨房设计:

          • 贴近天花板的照明设备:考虑吸顶灯或贴近天花板的灯具,避免低垂的吊灯——它们会让小厨房显得笨重。省下墙面照明的位置,墙面就能用来装置物架。
          • 嵌入式照明:在不牺牲任何空间的前提下照亮厨房的特定区域,是小厨房的理想选择。
          • 吊线灯:由金属线或链条悬挂的单体灯具——枝形吊灯的轻量版,占用空间小。可以成组使用也可以只用一盏,既营造氛围又增添个性。
          • 橱柜下方的 LED 灯带:在橱柜和把手下方安装 LED 灯带,省空间又提氛围——大多数灯带可调光,氛围感再加一层。
          • 筒灯(埋入式照明):奥克兰多数房子都有筒灯——样式丰富、极度省空间。
          橱柜下方 LED 灯带 — 奥克兰小厨房设计

          橱柜下方的 LED 灯带

          吊线灯 — 奥克兰 Epsom 厨房翻新

          吊线灯

          吊线灯 — 奥克兰 Epsom 厨房翻新

          吊线灯

          厨房照明设计 — Massey 厨房翻新 厨房照明设计 — Parnell 厨房翻新 厨房照明设计 — 奥克兰厨房翻新

          以上是可以应用到您厨房设计中的照明实例。

          3. 明智地选择你的电器

          为厨房挑电器本来就不容易——空间小,就更难。好在厨房翻新中最实用的思路之一,就是选用更智能的新产品:专为狭小空间设计的电器,无论厨房多小,都灵活、多变、高效。博世(Bosch)和 Kitchen Things 都有专为小厨房设计的产品线——比如可以拆卸收进抽屉的电器,而不是常年占据台面的大家伙。

          一个例子:用可以收进抽屉的手持式搅拌机或研磨机,替代笨重的台式搅拌机。还可以考虑多功能电器——一台机器搞定搅拌、研磨、打蛋等多项任务,台面立刻清爽。

          4. 成为一名置物架大师

          翻新或设计紧凑型厨房,核心是规划合适的空间方案。很多室内设计师都认同:最好的厨房设计离不开恰当的收纳——这正是置物架的价值所在。

          壁挂置物架

          壁挂置物架是为厨房增加储物空间最物美价廉的方式——放香料、杯子、茶叶和咖啡壶都很合适,同时为厨房设计增添个人色彩。翻新厨房时,可以让悬浮置物架与其他橱柜搭配使用;它们同样适合加在用餐区。再配上彩色的杯盘和厨房配件,收纳和装饰一举两得。

          壁挂置物架 — Mangere Bridge 厨房改造

          位于 Mangere Bridge 的全厨房改造——壁挂置物架不仅是厨房的视觉焦点,还增加了存储空间

          抽屉和厨房储物架

          抽屉内的分层架让收纳更轻松——可以在抽屉里加架子存放餐具。另一个趋势是在储物柜内加装可拉出的储物架,让橱柜整洁不凌乱。这种收纳形式也可以延伸到厨房之外的其他生活区域。

          5. 厨房收纳

          收纳对任何厨房都重要,对紧凑型厨房则是生死攸关。最有效的扩容方式:在基础橱柜上方加装壁挂橱柜,直接把储物潜力翻倍。

          Papatoetoe 厨房收纳方案 — Superior Renovations 小厨房收纳设计 — Superior Renovations Papatoetoe 厨房拉出式收纳 — Superior Renovations
          Papatoetoe 厨房抽屉收纳 — Superior Renovations Papatoetoe 厨房储物设计 — Superior Renovations 厨房储物解决方案 — Superior Renovations

          以上是我们为奥克兰客户打造的收纳方案。

          紧凑型厨房收纳最大化的 5 种方法

          • 通顶开放式搁板:既实用,又能为厨房营造更开放的感觉。
          • 魔术角(Magic Corner):转角柜深处的空间常年被浪费——魔术角的拉出式手推车抽屉能把这块”死角”彻底盘活。我们常用 Blum 的产品,他们在紧凑型厨房收纳方案上非常创新。
          • 岛台兼作收纳:对多数人来说,储物空间永远不嫌多。早餐岛台可以定制储物柜和抽屉,把台面下方全部变成收纳。
          • 柜内收纳架:如上文所述,柜内收纳架让抽屉井井有条;食品柜抽屉(pantry drawers)也正在成为节省空间的流行方式。
          • 墙面挂钩:锅碗瓢盆和厨房器皿挂上墙,橱柜空间立刻释放。风格建议:选色彩鲜艳、有活力的器皿,挂出来也好看。

          6. 兼具储物和用餐功能的厨房岛台

          无论厨房大小,岛台都已是厨房设计的重要组成——它既是备餐台面,又能兼作用餐区和收纳空间,一物三用。

          Blockhouse Bay 厨房岛台 — Superior Renovations

          位于 Blockhouse Bay 的厨房改造——这个岛台提供了大量的储物柜以及台面空间

          展厅样板:岛台收纳最大化的案例

          应客户日益增长的需求,我们在奥克兰开设了家装展厅,完整展示我们装修的厨房和浴室品质。下图是展厅中由我们设计并施工的现代厨房——岛台两侧都有存储空间。

          Superior Renovations 奥克兰展厅样板厨房岛台

          我们的家装展厅位于奥克兰 Wairau Valley。乍看之下,这个岛台是一个无缝的整体,似乎没有任何橱柜或抽屉。实际上:朝向走廊的一侧有 2 个双层储藏柜和 1 个单层储藏柜;面向厨房的一侧有 2 个拉出式调味品柜和 2 个双抽屉,其中还藏着一个隐藏抽屉——正是这个隐藏式设计成就了无缝的外观。

          相关阅读:哪种布局更适合你的厨房?

          很多人以为紧凑型厨房装不下岛台——并非如此。紧凑型厨房常处于开放式生活空间中:一面墙容纳台面、灶台和洗碗机,中间加一个小早餐吧,就能把厨房和客厅自然”分开”。您甚至可以取消独立用餐区,让早餐吧同时充当餐桌和备餐台面。

          Greenlane 厨房岛台用餐区 — Superior Renovations

          位于 Greenlane 的厨房改造——岛台作为用餐区,配有水槽和操作台面,另一侧是橱柜形式的存储空间

          如果您的紧凑型厨房是封闭式的,考虑拆除厨房与客厅之间的墙——变成开放式后的宽敞感会让您惊讶。

          更多收纳方案灵感,请查看以下项目:

          7. 隐藏式厨房

          近几年逐渐流行的一个概念:隐藏式厨房——由柜门和抽屉分隔的紧凑型厨房空间,需要时可以瞬间”隐身”。有了这样的设计,您可以轻松藏起厨房的杂乱,几秒钟内把”带厨房的客厅”变回一个完整的客厅。

          8. 紧凑型厨房的布局

          改造紧凑型厨房的方法很多,但动工前必须先想清楚布局——布局直接决定厨房用起来顺不顺手、舒不舒服。无论是从零开始还是改造现有空间,都要思考您实际怎么使用厨房、最常做哪些事——不要停留在”早餐和晚餐”的层面,要更具体。

          如果您偏爱 L 形厨房,但它让空间显得拥挤,那就把橱柜集中在一侧,转而增加一个小岛台——既补回橱柜空间,又能兼作用餐区。封闭式厨房则考虑拆除与生活空间之间的墙:开放式厨房通常让空间显得更大,也让整个生活区更有整体感。

          9. 使用更大的瓷砖铺设厨房地板

          与直觉相反,更大的瓷砖反而让空间显得更大。如果厨房地面打算铺瓷砖,考虑 900×600 或 600×600 的规格——灌浆线更少,视觉”断裂”更少,地面自然显得开阔。想深入了解大尺寸瓷砖如何制造空间错觉,请阅读我们与 Tile Depot 的问答文章。

          10. 用抽屉取代厨房橱柜

          普通柜门式橱柜的储物效率其实不高——塞在最里面的东西很难拿到。改用拉出式抽屉,所有内容物一目了然,收纳效率立刻提升。

          相关阅读:奥克兰经典、传统、当代、现代、田园和工业风厨房的设计指南

          11. 关注橱柜的纹理,并合理运用镜子

          紧凑型厨房选材的原则:不让材料把空间”压小”。闪亮、光滑的表面会反射光线,让厨房显得更大。多数紧凑型厨房走简约现代风效果最好;如果那不是您想要的,至少记住别让材料过于花哨和灰暗——它们会让厨房显得更小。

          喜欢现代和当代风格的话,可以用玻璃做防溅板,制造空间错觉;走经典路线则可以在墙上加一面镜子——比如配白色画框的大平面镜。五金选择上:现代/当代风格选隐藏式把手;传统、乡村、古典或田园风格选小巧的亚光旋钮,而不是笨重的把手。

          12. 厨房小推车和高餐桌

          紧凑型厨房最缺的就是台面。两个有创意的补救办法:一是厨房小推车——备餐和储物的移动台面,不用时推走或折叠收纳;二是高餐桌——站立时可以直接当备餐台用,再配几把高脚凳,空间设计感也上来了。

          13. 把墙饰和背景墙作为设计元素

          紧凑型厨房的橱柜线条流畅,没有太多位置摆装饰品——但您可以用一面背景墙为厨房注入个性。避免在墙上挂画或摆饰(容易让小厨房显得封闭),改用鲜艳的瓷砖或与厨房其他部分形成对比的涂料来吸引视线;有纹理的瓷砖还能为厨房增加一个额外的维度。

          14. 将大自然带进你的紧凑型厨房

          自然元素能为厨房增添急需的温暖。大厨房可以自由混搭木材和石材,但紧凑型厨房如果堆太多木质元素,容易显得封闭。更聪明的做法:在橱柜角落摆绿植,或让爬藤类植物从柜顶垂落。

          真想要木质感的话,在背景墙上用木纹瓷砖——有木头的纹理和外观,却容易清洁。墙面使用木纹砖时,请选浅色而非深色。

          相关阅读:顶级厨房设计趋势与注意事项

          15. 让厨房橱柜与墙壁颜色协调统一

          橱柜颜色与墙面相匹配,能营造出轻快、宽敞的厨房。为了让中性厨房不显单调,可以加一面彩色背景墙,再用对比鲜明的灯具和橱柜把手提亮。

          16. 安装大水槽

          紧凑型厨房里装一个大水槽非常实用——尤其在没有洗碗机的情况下。大水槽不仅洗碗方便,做饭时还能把未洗的碗”藏”进去,台面始终保持清爽。


          小空间的特色厨房装修案例

          位于 Parnell 的豪华都市风厨房装修

          这栋联排别墅位于 Parnell 的中心位置,但厨房很小、台面空间不足。我们彻底改变了布局——把厨房从左侧区域移到右侧,并在用餐区增加了橱柜作为扩展存储。这组柜子配有带内部灯光的搁架,需要时可以打开展示。查看改造前后图片和项目细节

          Parnell 小厨房翻新 — Superior Renovations Parnell 厨房储物设计 — Superior Renovations Parnell 厨房布局改造 — Superior Renovations
          Parnell 厨房细节 — Superior Renovations Parnell 都市风厨房 — Superior Renovations

          位于 Greenlane 的紧凑型厨房

          Joanna 和 Steve 想让他们的老房子更现代化。原来的厨房是封闭式的——我们拆除了一面墙,把它变成开放式生活空间。空间有限,所以我们打造了一个早餐吧台:增加储物、扩充台面、兼作早餐吧,一举三得。了解更多

          Greenlane 紧凑型厨房早餐吧 — Superior Renovations Greenlane 开放式小厨房 — Superior Renovations
          Greenlane 厨房翻新 — Superior Renovations Greenlane 厨房改造细节 — Superior Renovations

          更多家居设计资源

          1. 了解更好的厨房收纳方案,请查看上文列出的四个项目详情(Bucklands Beach、Avondale、Papatoetoe、Hillsborough)
          2. 在我们的奥克兰厨房装修图库中获取设计灵感
          3. 特色项目与客户案例——查看真实项目的规格
          4. 来自奥克兰客户的真实评价
          5. 想了解翻新费用?阅读厨房翻新费用完整指南,或直接使用厨房装修费用计算器

          常见问题

          我需要自己找厨房设计师吗?

          不需要。作为一家提供从设计到装修全方位服务的公司,我们配有内部厨房设计师——帮您选择合适的装修材料、提供创意设计、打造更具功能性的空间,并制作 3D 设计图和效果图,让您在动工前就能直观看到未来的厨房。

          我需要自己找水管工或电工吗?

          不需要。我们不只是橱柜制造商——从设计、拆除旧厨房,到定制橱柜和台面并安装,我们提供全部装修工种:油漆工、电工、水管工、木工等。我们还会带您到供应商展厅以批发价挑选电器、地板和灯具。整个装修过程由项目经理统筹进度和交付,并作为您的唯一联系人。

          厨房装修需要多少钱?

          在奥克兰,通过装修公司完成一次标准整体厨房翻新的平均费用为 19,000 至 29,000 纽币,含设计、拆除、定制橱柜与台面、安装、水电和项目管理,不含电器。我们提供固定报价,具体金额取决于您选择的材料和厨房尺寸。您可以使用我们免费的厨房装修费用计算器获取个性化估算。

          小厨房可以安装岛台吗?

          可以。紧凑型厨房常处于开放式生活空间中——在厨房和客厅之间加一个小早餐吧台,既能自然分隔空间,又能同时充当用餐区、备餐台面和储物空间。岛台可以定制储物柜和抽屉,进一步扩充收纳。

          小厨房应该用大瓷砖还是小瓷砖?

          用大瓷砖。900×600 或 600×600 规格的瓷砖灌浆线更少、视觉断裂更少,反而会让小空间显得更大——这与多数人的直觉相反。

          什么颜色能让小厨房显得更大?

          以中性色和浅色调为主色——浅色和光滑闪亮的表面会反射光线,营造空间放大的错觉。再用有色彩或质感的防溅板、对比色橱柜和彩色五金件来避免单调。


          还有问题没解决?预约 Superior Renovations 团队的免费咨询


            This site is protected by reCAPTCHA and the Google

            Privacy Policy and Terms of Service apply.

            由 Superior Renovations 撰写

            Superior Renovations 迅速成为奥克兰最受推荐的装修公司之一,这归功于我们友好的态度、透明的定价和公开的工作方式。当您的奥克兰房屋需要装修改造服务时,Superior Renovations 是您可以信赖的团队——高质量的工艺、高效的进度和具有成本效益的解决方案。

            或致电我们:0800 199 888


            18个月免息分期付款 — Superior Renovations

            一直在推迟您的装修计划吗?

            我们与 Q Mastercard® 合作,为您提供 18 个月免息分期付款方案——现在就享受您的新家,减少资金压力。

            了解更多:免息分期付款方案*

            *Lending criteria, fees, terms and conditions apply. Mastercard is a registered trademark and the circles design is a trademark of Mastercard International Incorporated.

            DSC07727 1 - Superior Renovations
            House Renovation

            Most Expensive Suburbs in Auckland (2026): Why Home Value Matters When Renovating

            This blog has been republished with updated market data and refreshed renovation guidance for May 2026.
            If you’re planning a kitchen, bathroom, or full-home renovation in Auckland, your suburb is doing more work in that decision than you probably realise. The median sale price on your street sets the ceiling on what your finished home can credibly sell for — which sets the ceiling on what you should sensibly spend renovating it. Overspend, and the market won’t reward you. Underspend, and you leave value on the table at resale.

            We’re Superior Renovations. We’ve completed 1,000+ renovations across Auckland — kitchens, bathrooms, extensions, full home rebuilds — and we publish this guide because suburb price is the single most useful input we use when we sit down with a homeowner to size up a renovation budget. Below is Auckland’s 20 most expensive suburbs in 2026, with median prices, what’s driving each one, and — more usefully — what each suburb’s ceiling actually means for how much you can spend before you overcapitalise.

            If you want a quick read on your own home’s value before working through the list, QV.co.nz is a fast free starting point. Then we’d recommend looking at the most recent three or four sales on your street, because suburb medians can mask a wide range.

            Auckland Property Market 2026: Where We Are Right Now

            Free cost calculator

            How much will your renovation cost?

            Get an instant Auckland price range for your project — no details required to see it.

            Try our free cost calculators →

            Before working through the suburb list, the honest market context. On the most recent REINZ data (July 2026), Auckland’s median sale price is $940,000, and the REINZ House Price Index for Auckland remains below its level of a year ago. Over the longer view, Opes Partners’ data has Auckland’s median growing 4.47% per year on average over the 20 years to July 2026.

            So 2026 isn’t a hot market — it’s a stable one with slight downward pressure. That actually makes the renovation budget conversation more important, not less. In a flat market, overcapitalisation isn’t hidden by rising prices. The dollar you don’t recoup is gone.

            Auckland’s Wealthiest Suburbs in 2026 — At a Glance

            Auckland’s wealthiest suburbs in 2026 are led by Herne Bay ($3.2M median), Remuera ($2.9M), St Mary’s Bay ($2.7M), Parnell ($2.5M), and Orakei ($2.4M). The full ranking of the top 20 by median sale price runs Herne Bay through to Point Chevalier ($1.4M), spanning central waterfront pockets, North Shore coastal suburbs, Eastern Bays, and a handful of inner-west character suburbs. Prices in the table below draw on REINZ, OneRoof, Homes.co.nz, and Opes Partners (2026 data).

            The 20 Most Expensive Suburbs in Auckland (2026)


            1. Herne Bay

            • Median House Price (2026): $3.2 million
            • Why Herne Bay?
              • Harbour views: Waitematā vistas from clifftop and elevated streets — the irreplaceable asset.
              • Heritage stock: Edwardian villas and marine-style homes; tightly held, rarely subdivided.
              • CBD proximity: Inner-fringe location with Jervois Road amenity on the doorstep.
              • Land scarcity: Very limited new supply — peninsula geography caps it.
            • What your ceiling means for your renovation budget: At a $3.2M median, your absolute upper renovation budget is 8–12% of property value, or roughly $250K–$380K — and the buyers who pay at this tier are paying for view, heritage detail, and uncompromised finish, not square metres. Spend goes furthest on view-amplifying work (frameless glazing, harbour-facing extensions) and on heritage-sensitive kitchen and bathroom rebuilds with stone benchtops and integrated appliances. Where this tier gets burnt: $200K imported marble kitchens that don’t move past comparable sales on the same street.

            1. Remuera

            • Median House Price (2026): $2.9 million
            • Why Remuera?
              • Land and scale: Big sections, tree-lined avenues (Victoria Avenue, Arney Road, Omahu Road), grand homes.
              • Double Grammar zone: Auckland Grammar plus Epsom Girls’ Grammar — the family-buyer magnet.
              • Central but quiet: Newmarket and the CBD close, residential streets calm.
              • Generational ownership: A lot of stock turns over family-to-family or family-to-renovator.
            • What your ceiling means for your renovation budget: $2.9M with school-zone family buyers competing — your renovation logic isn’t “go full luxury”, it’s “make this work harder for a family with two kids and a homework problem”. Budget at 12–15% of value ($350K–$435K), and prioritise extra bedrooms or a study, a second bathroom or a refreshed ensuite, and a functional family kitchen that flows to outdoor living. Heritage details (ornate ceilings, polished floors) are protected — they’re part of what buyers pay for.

            “Parents in the Double Grammar zone scrutinise flow and functionality — adding a dedicated study or a second bathroom often turns a good offer into a bidding war. A well-planned second bathroom lifts appeal – see our bathroom design ideas.” — Cici Zuo, Head of Sales, Superior Renovations.

            Double Grammar (Epsom/Remuera) and Macleans College (Mellons Bay/Glendowie) zones command a clear premium on comparable sales in the same suburb. The renovations that capture that uplift are deeply practical: extra bedrooms or studies, durable family bathrooms with non-slip flooring and easy-clean surfaces, and quiet outdoor zones where teenagers can disappear with a laptop.


            1. St Mary’s Bay

            • Median House Price (2026): $2.7 million
            • Why St Mary’s Bay?
              • Waterfront, quieter: Same harbour orientation as Herne Bay, lower-density streets.
              • Victorian and Edwardian stock: Ornate detail, original features that buyers protect aggressively.
              • Ponsonby proximity: Walkable to Ponsonby Road without the through-traffic.
              • Tight stock: Small footprint suburb — under 500 dwellings.
            • What your ceiling means for your renovation budget: Heritage-buyer suburb. At $2.7M, budget 10–14% of value ($270K–$380K), and treat the original features as the asset they are. Renovations that pay: preserved villa fronts, internally reconfigured open-plan living to the rear, modern kitchens and bathrooms that respect the architectural era. Don’t try to modernise the street-facing façade — buyers in St Mary’s Bay actively penalise overly contemporary additions to character homes. See our house renovation approach for character properties.

            1. Parnell

            • Median House Price (2026): $2.5 million
            • Why Parnell?
              • Inner-east character: Cottages, villas, terraced homes a short walk from the CBD.
              • Parnell Road amenity: Cafés, galleries, the Rose Gardens, the museum.
              • Mixed buyer base: Young professionals, downsizers, urban-minded families.
              • Walkable village feel: Rare for an inner-city suburb at this price point.
            • What your ceiling means for your renovation budget: At $2.5M, budget 10–14% ($250K–$350K). Parnell rewards smart small-footprint renovations — courtyards converted into outdoor rooms, attic and basement conversions for extra liveable floor area, intelligent storage. Mixed buyer base means slightly more flexibility on style than St Mary’s Bay, but heritage protections still apply in much of the suburb. Check the Auckland Unitary Plan overlay before you commit to anything structural.

            1. Orakei

            • Median House Price (2026): $2.4 million
            • Why Orakei?
              • Bayside outlook: Rangitoto and Waitematā views from elevated streets.
              • Mixed housing stock: 1950s/60s holiday homes alongside modern architectural rebuilds.
              • Eastern Bays connectivity: Mission Bay and St Heliers on the doorstep.
              • Coastal scarcity: Limited new build supply on the water-facing side.
            • What your ceiling means for your renovation budget: Views are the asset. At $2.4M, budget 10–15% ($240K–$360K) and put the bulk into anything that captures or amplifies the outlook — floor-to-ceiling glazing, elevated decks, second-storey additions where consent allows, kitchen and living spaces reoriented to face the water. The renovation logic in Orakei is geometric: line of sight wins.

            1. Westmere

            • Median House Price (2026): $2.3 million
            • Why Westmere?
              • Coastal, low-key: Coxs Bay, Meola Reef on the doorstep without the Ponsonby noise.
              • Bungalow stock: Strong renovation-ready inventory.
              • Schooling and amenity: Western Springs College, decent café strip.
              • Steady appreciation: Less volatile than the inner-fringe trendsetters.
            • What your ceiling means for your renovation budget: A bungalow renovation suburb. Budget 12–15% of value ($275K–$345K). Westmere’s buyer is typically a family or established couple paying for a finished, livable home rather than a project — so prioritise the trifecta that drives offers: open-plan kitchen-dining, bi-fold doors to a north-facing deck, and a tidy second bathroom or ensuite. Bungalow restoration done well sells in days here.

            1. Epsom

            • Median House Price (2026): $2.2 million
            • Why Epsom?
              • Double Grammar zone: The same family-buyer pull as Remuera.
              • Section sizes: Generous lots, room to add or extend.
              • Central location: Newmarket and CBD within ten minutes.
              • Long-established prestige: A safe-choice suburb that holds value through cycles.
            • What your ceiling means for your renovation budget: School zone logic — same as Remuera but at a different price point. Budget 12–15% ($265K–$330K) and target what families pay premiums for: an extra bedroom or study, a second living area, a usable backyard. Extensions work particularly well in Epsom given the section sizes. Where renovators get this wrong: ultra-high-end finishes that don’t add a single bedroom.

            1. Mission Bay

            • Median House Price (2026): $2.1 million
            • Why Mission Bay?
              • Beach on the doorstep: Genuine sand, swimmable water, ten minutes from town.
              • Tamaki Drive amenity: Restaurants, cafés, the cinema.
              • Lifestyle premium: The suburb people move to for the weekends.
              • Apartment-to-villa range: Wide buyer market from downsizers to families.
            • What your ceiling means for your renovation budget: A lifestyle suburb — the renovation has to support how people actually live here. Budget 12–18% ($250K–$380K) and put real money into outdoor flow: covered decks with outdoor kitchens, bi-folds that disappear in summer, weatherproof entertaining zones for the half of the year you can use them. A high-end interior with a token deck loses to a slightly less luxe interior with a great outdoor room.

            Maximising Waterfront Premiums Without Overspending

            Views add a substantial premium to comparable sales, but the renovations that capture that uplift are surprisingly disciplined: strategic glazing (full-height where privacy allows, considered framing where it doesn’t), elevated decks that frame the sightline (Rangitoto from Orakei, the harbour from Herne Bay), and minimal-obstruction landscaping — low planters rather than tall hedging. The most common waterfront renovation mistake is blocking your own view to gain a metre of bench space. A protected view is also one of the few features that reliably shortens time on the market compared with view-compromised equivalents in the same suburbs.

            “A well-positioned terrace in Mission Bay can add six figures in perceived value — focus on clean sightlines and weatherproof outdoor living to capture that premium.” — Steven Ngov, General Manager, Superior Renovations.


            1. Ponsonby

            • Median House Price (2026): $2.0 million
            • Why Ponsonby?
              • Inner-fringe culture: Ponsonby Road, bars, restaurants, design retail.
              • Restored villa stock: A renovation suburb almost by definition.
              • Walkability: Hardly any reason to drive.
              • Professional buyer base: 30s–50s urban professionals dominate.
            • What your ceiling means for your renovation budget: $2M with a design-literate buyer means execution matters more than scope. Budget 12–15% ($240K–$300K) and aim for finish quality rather than square metres. Bold but considered interiors land here — matte black hardware, statement lighting, designed (not domestic) kitchens. The fastest-moving Ponsonby renos pair a preserved villa front with a deeply modern internal rebuild.

            1. Grey Lynn

            • Median House Price (2026): $1.9 million
            • Why Grey Lynn?
              • Bungalow heartland: The renovation suburb of choice for design-led families.
              • Inner-west character: Grey Lynn Park, Williamson Ave, the markets.
              • Ponsonby spillover: Same culture, slightly different price point.
              • Bohemian to professional transition: Demographics still shifting upward.
            • What your ceiling means for your renovation budget: Heritage-buyer suburb with a creative bias. Budget 12–15% ($230K–$285K), restore the bungalow front, open up the rear. Modern materials are welcome at the back of the home — polished concrete floors, dark joinery, raw timber — but the street-facing elevation needs to honour the character. Restored Grey Lynn villas regularly sell in the first week of marketing.

            What Buyers Actually Pay Premiums For in Auckland’s Top Tiers (2026)

            • $2.5M+ tier (Herne Bay, Remuera, St Mary’s Bay, Parnell, Orakei): Lifestyle prestige dominates. Buyers chase unobstructed harbour or Rangitoto views (a clear premium on view-positive properties) and walkable elite amenity. Smaller lots are accepted in exchange for location.
            • $1.8M–$2.4M tier (Westmere, Epsom, Mission Bay, Ponsonby, Grey Lynn): Family-plus-lifestyle balance. Top schools (Double Grammar pull in Epsom/Remuera) or beach proximity (Mission Bay) drive bids; well-renovated character homes move fastest.
            • $1.4M–$1.7M tier (Takapuna, Devonport, Mellons Bay, Point Chevalier): Emerging coastal and commuter appeal — buyers want value-relative prestige and room to put their own stamp on the property.

            “In the ultra-premium tier, buyers aren’t just buying bricks — they’re buying status and views. Renovations that amplify those elements, like frameless glass to maximise sightlines in Herne Bay, deliver the strongest returns.” — Kevin Yang, Managing Director, Superior Renovations.


            1. Takapuna

            • Median House Price (2026): $1.85 million
            • Why Takapuna?
              • Beach plus lake: Takapuna Beach and Lake Pupuke on either side.
              • Hurstmere Road amenity: Retail, dining, café strip.
              • Bridge convenience: Direct CBD access via the harbour bridge.
              • Apartment-to-house mix: Wide buyer base, from downsizers to families.
            • What your ceiling means for your renovation budget: Budget 12–18% of value ($220K–$330K). Takapuna rewards a coastal-modern aesthetic — light, open, glazed — but the practical detail matters: salt-air resilience on the exterior, generous storage, easy maintenance materials. A bright open-plan kitchen and a refreshed ensuite often outperform whole-home redos at this price point.

            1. Stanley Point

            • Median House Price (2026): $1.8 million
            • Why Stanley Point?
              • Harbour views, elevated: One of the best outlooks in the inner harbour.
              • Devonport-adjacent: Ferry, village amenity, history.
              • Heritage stock: Many original villas, low subdivision activity.
              • Very tight supply: Tiny suburb footprint.
            • What your ceiling means for your renovation budget: Heritage-and-view suburb. Budget 10–15% ($180K–$270K). The renovation playbook: protect the character, lift the light (skylights, raised ceilings where structure allows), and reorient living spaces toward the harbour. Stanley Point is too view-sensitive for aggressive vertical additions — second-storey work needs careful design and consent navigation.

            1. Devonport

            • Median House Price (2026): $1.75 million
            • Why Devonport?
              • Seaside village: Ferry-accessible, walkable, distinct identity.
              • Victorian and Edwardian stock: Heritage protection across much of the suburb.
              • Mt Victoria and North Head: Defining geography.
              • Second-home buyer pool: Wealthier downsizers from across Auckland.
            • What your ceiling means for your renovation budget: Heritage suburb with strict character protections. Budget 12–15% ($210K–$265K), respect the consent framework, and concentrate spend on internal modernisation — kitchens, bathrooms, outdoor decks with pergolas, indoor-outdoor flow. Don’t try to win Devonport with bold contemporary additions; the buyer pool actively prefers homes that read as preserved and updated, not transformed.

            1. Mellons Bay

            • Median House Price (2026): $1.7 million
            • Why Mellons Bay?
              • Eastern Bays coastal: Howick-adjacent, quieter than Mission Bay.
              • Macleans College zone: The high-decile family pull.
              • Section sizes: Larger than the inner-fringe equivalents.
              • Limited new supply: Mature suburb, tightly held.
            • What your ceiling means for your renovation budget: Family-buyer, school-zone suburb. Budget 12–15% ($205K–$255K) and prioritise bedrooms, bathrooms, family living spaces. A refreshed family bathroom or ensuite with a freestanding tub punches above its weight — the photos work hard in marketing material. See our case studies for an example of a recent indoor-outdoor renovation in Mellons Bay.

            1. Murrays Bay

            • Median House Price (2026): $1.65 million
            • Why Murrays Bay?
              • North Shore coastal: Beach access, Rangitoto Channel outlook.
              • Rangitoto College zone: Schooling drives premium.
              • Family-home stock: 4-5 bedroom suburb.
              • Established and stable: Less price volatility than fringe suburbs.
            • What your ceiling means for your renovation budget: Suburban family suburb with a schooling overlay. Budget 12–15% ($200K–$245K) and target the family pain points — open-plan living that handles two adults working from home and two kids doing homework, a usable backyard, durable surfaces. Media rooms and second living areas pull weight in this price tier.

            1. Whitford

            • Median House Price (2026): $1.6 million
            • Why Whitford?
              • Rural-residential: Lifestyle blocks, equestrian properties, semi-country feel.
              • City-adjacent: Whitford is technically Auckland — proximity without density.
              • Low density: Big lots, low building density, exclusivity.
              • Specialist buyer base: Buyers actively choosing rural-lifestyle.
            • What your ceiling means for your renovation budget: Lifestyle block buyer — your renovation needs to support that brief. Budget 12–18% ($195K–$290K). The work that pays: covered outdoor rooms, pools and cabanas where the section supports them, robust kitchens that handle entertaining, generous garaging and workshop spaces. Don’t try to make a Whitford home read as inner-suburban — buyers come here specifically because it doesn’t.

            1. Waiheke Island (selected areas)

            • Median House Price (2026): $1.55 million
            • Why Waiheke Island?
              • Island lifestyle: Beaches, vineyards, distinct identity.
              • Holiday-home premium: Second-home buyers from across NZ and offshore.
              • Ferry connectivity: 40-minute commute when needed.
              • View premium concentrated: Oneroa, Palm Beach, Onetangi sit well above the suburb average.
            • What your ceiling means for your renovation budget: Holiday-home logic — the renovation has to deliver the island experience the buyer is paying for. Budget 12–18% ($185K–$280K). Decks with sea views, weatherproof outdoor entertaining, an open-plan layout that handles a full house at Christmas. Take a look at our recent Waiheke / Mellons Bay indoor-outdoor project for one approach to coastal lifestyle renovations.

            1. Glendowie

            • Median House Price (2026): $1.5 million
            • Why Glendowie?
              • Eastern Bays family suburb: Quiet, coastal-adjacent.
              • Glendowie College zone: Schooling pull at this price point.
              • Mid-century housing stock: 1950s–1970s family homes, well-built, ready for renovation.
              • Stable values: Less speculative than inner-fringe.
            • What your ceiling means for your renovation budget: A practical family suburb. Budget 12–18% ($180K–$270K) and concentrate on modernising what’s already a structurally sound home — open-plan kitchen with island, updated bathrooms, indoor-outdoor flow to a north-facing yard. Glendowie buyers reward functional updates over ambitious transformations.

            1. Want a ballpark for your renovation?
              See the calculators →

              Kohimarama

            • Median House Price (2026): $1.45 million
            • Why Kohimarama?
              • Beach suburb: Selwyn Reserve, Kohimarama Beach.
              • Tamaki Drive amenity: Same café/restaurant strip as Mission Bay.
              • Family-safe: Quiet streets, walkable, schools.
              • Lifestyle premium: Coastal living within a 15-minute CBD drive.
            • What your ceiling means for your renovation budget: Coastal-family suburb. Budget 12–18% ($175K–$260K). The Kohimarama renovation playbook: outdoor entertaining areas with built-in BBQ and weather protection, a usable beach-storage-and-laundry zone, sand-tolerant flooring choices. Don’t underestimate the outdoor brief here — it’s half the reason people buy.

            1. Point Chevalier

            • Median House Price (2026): $1.4 million
            • Why Point Chevalier?
              • Coastal inner-west: Beaches and parks, close to the CBD.
              • Bungalow stock: Strong renovation-ready inventory.
              • Café culture growing: Point Chev Road has built a genuine strip.
              • Family bias: Demographics increasingly families with young children.
            • What your ceiling means for your renovation budget: A bungalow renovation suburb in the affordable inner-west category. Budget 12–18% ($170K–$250K). The brief: open-plan living with vintage detailing preserved, a functional family kitchen, an outdoor room. Point Chev rewards renovators who restore character and add livability rather than rebuild — the buyer pool actively prefers it.

            Auckland’s Most Expensive Streets (and What It Tells You)

            Within these 20 suburbs, certain streets sit materially above the suburb median. Paritai Drive in Orakei has long been Auckland’s most expensive single street, with individual sales clearing $20M+. Victoria Avenue in Remuera, Cremorne Street and Sentinel Road in Herne Bay, Arney Road and Omahu Road in Remuera, and the harbour-facing pockets of Stanley Point all command material premiums over their respective suburb averages. If your home sits on a premium street within a premium suburb, your renovation ceiling is set by the street, not the suburb median — pull comparable sales from the last 18 months on your specific street before committing to a budget.


            Where Overcapitalisation Hurts Most in Auckland’s Priciest Suburbs

            • $3M+ tier (Herne Bay, St Mary’s Bay): Cap renovation spend at 8–12% of value. At this tier, luxury overkill (a $150K imported marble kitchen, an over-specified primary bathroom) rarely recoups if it exceeds local comparables. The ceiling is set by what view-equivalent neighbours have sold for, not what you spent.
            • $2M–$2.9M tier (Remuera, Parnell, Epsom): Stay under 15%. School-zone families want practical extras (study nooks, extra bathrooms, real storage) over ultra-high-end finishes. The marble does less work here than the second bathroom.
            • $1.5M–$2M tier (Mission Bay, Takapuna, Devonport): 12–18% ceiling. Coastal buyers reward outdoor flow (decks, bi-folds) but penalise mismatched opulence in smaller footprints. Mismatched renovations routinely sit on the market far longer in these brackets.

            “We’ve seen beautiful $200K kitchens sit unsold in $1.8M suburbs because they screamed ‘over-improved’ — always benchmark against recent sales in the same street.” — Dorothy Li, Design Manager, Superior Renovations.

            Heritage Buyers vs Modern Buyers — Renovation Strategy Split

            • Heritage buyers (St Mary’s Bay, Devonport, Grey Lynn, Westmere): Prioritise preserved Edwardian and Victorian detail — ornate ceilings, original architraves, polished floors. Renovations that honour those features while quietly adding modern comfort (hidden underfloor heating, contemporary internal layouts behind a preserved façade) command 8–12% premiums.
            • Modern buyers (Ponsonby, Parnell, Takapuna): Want clean lines and open-plan living. Bold updates land here — matte black hardware, statement islands, considered minimalism. Over-restoration can put this buyer off. Premium buyers tend to want a blended approach — modern function inside a character shell — and the split is sharper in heritage pockets.

            “In St Mary’s Bay, one wrong modern addition can kill a sale — our heritage-sensitive renovations preserve the character while quietly upgrading livability for today’s families.” — Alison Yu, Designer, Superior Renovations.


            How to Use This List to Plan Your Renovation

            The point of this guide isn’t a tour of property prices — it’s a practical filter for your renovation decisions. Three things to take away from your suburb’s median:

            1. Your renovation budget cap is a function of your suburb’s ceiling, not your aspirations. The maximum you can sensibly spend is what the next sale in your street can support after your work is done. If your suburb median is $1.5M and your house is currently worth $1.4M, you don’t have $500K of upside — you probably have $150K–$250K depending on how much premium your specific street holds.
            2. The TYPE of renovation that pays back varies by tier. $3M+ suburbs reward view-amplification and uncompromised finish. $2M+ school-zone suburbs reward bedrooms, bathrooms, and family functionality. $1.5M–$2M coastal suburbs reward outdoor flow. $1.4M–$1.7M family suburbs reward smart modernisation of structurally sound homes.
            3. Buyer profile dictates style. Heritage-buyer suburbs penalise over-modernisation. Modern-buyer suburbs penalise over-restoration. Get this wrong and a beautiful $300K renovation can sit unsold for nine months.

            This is the working framework we use at Superior Renovations across 1,000+ Auckland renovation projects — and it’s what our in-house designers at the Wairau Valley Design Studio work through with every client before we settle on a scope or a quote.

            Why Your Suburb’s Ceiling Sets Your Renovation Budget

            Your suburb’s median is your renovation compass. Take a $2M Westmere bungalow: overspend, and the dollar above the local ceiling doesn’t come back at resale; underspend on the right items, and the home reads as unfinished in a suburb where buyers expect a turn-key product.

            Three reasons it matters:

            • Suburb fit: Herne Bay buyers pay for view and finish. Point Chev buyers pay for restored character and practical livability. Same dollar, very different outcomes.
            • Resale reality: Auckland’s median has grown 4.47% per year on average over the 20 years to July 2026 (Opes Partners). Renovations that match or beat that long-term trend hold up. Renovations that ignore the suburb ceiling don’t.
            • Spend logic: Overcapitalise and the dollar above the ceiling is gone. Underspend on the elements the buyer pool actually pays for, and the resale tops out below where the suburb supports.

            Check your current value at QV.co.nz as a starting point, then look at the most recent three to four sales on your specific street.

            How to Avoid Overcapitalising on Your Renovation

            Overcapitalising is the most common renovation mistake at the top end of any suburb — spending more than the local market can return when you sell. A $300K kitchen in a $1.5M Glendowie home where the suburb ceiling is around $1.7M leaves a real gap. We see this regularly at Superior Renovations.

            Five steps to avoid it:

            1. Know your ceiling. OneRoof and Opes Partners both have current suburb-level medians; Homes.co.nz holds recent sales data on your specific street.
            2. Match the buyer profile. Luxury for ultra-premium tiers, practical-and-bedrooms for school-zone tiers, outdoor-flow for coastal tiers.
            3. Cap your spend. 8–18% of current value depending on tier (see the table below).
            4. Specify for resale, not for personality. Neutrals over quirky finishes; classic over trend-led.
            5. Use real market data, not generic averages. Auckland’s 20 priciest suburbs each have a different buyer profile — the framework changes suburb to suburb.

            The Five Renovations That Add the Most Value to an Auckland Home in 2026

            Across the 1,000+ Auckland renovations we’ve completed at Superior Renovations, five renovation types deliver the most consistent return — provided they’re matched to the right suburb and the right budget. This is where to put the money.

            1. Kitchen Renovations

            Kitchens are the highest-impact single-room renovation in Auckland in 2026. Browse the kitchen designs we’ve completed to see what that looks like across suburbs. A well-executed kitchen renovation is one of the most reliable value-adds, and listings with modernised kitchens consistently sell faster than those with dated kitchens at the same price point. A mid-range Auckland kitchen renovation runs $25,000–$50,000; a high-end kitchen in a Herne Bay or Remuera home regularly runs $80,000+.

            What works: Open-plan layouts with smart storage (pull-out pantries, integrated bins), stone benchtops (Caesarstone-style engineered quartz remains the dominant choice in this price tier), integrated appliances, and considered handle-less or matte black hardware. See our kitchen renovation service for current Auckland pricing and process.

            2. Bathroom Renovations

            Bathrooms recoup well — typically 5–10% value lift for a single bathroom done properly, more for an ensuite redo in a school-zone suburb where families are paying for “two adults, two teenagers, two bathrooms minimum”. A full bathroom renovation in Auckland runs $25,000–$45,000 for mid-range; $60,000+ for higher-end with a freestanding tub, double vanity, and underfloor heating.

            What works: Double vanities in family suburbs (Orakei, Mellons Bay, Glendowie), freestanding tubs for the resale photography premium, rainfall showers, underfloor heating for the comfort premium, low-VOC and water-efficient fixtures. Our bathroom renovation process.

            3. Outdoor Living and Indoor-Outdoor Flow

            Auckland buyers actively pay for outdoor living — and the climate supports it eight months of the year. A covered deck with a built-in barbecue, weatherproof outdoor entertaining zone, or proper indoor-outdoor flow through bi-fold doors regularly lifts property value 8–12% in coastal suburbs. A $15,000–$25,000 deck in Mission Bay or Kohimarama can add $40,000+ to the sale price.

            What works: Covered or semi-covered structures (Auckland summer rain is real), weatherproof outdoor kitchens for the entertaining premium, considered orientation toward the sun rather than the view (you’ll thank yourself in June). Outdoor renovations and landscaping.

            Want a ballpark for your renovation?
            See the calculators →

            4. Extra Liveable Space

            More usable floor area is the cleanest value lift in any suburb. A well-executed extension, attic conversion, basement conversion, or garage-to-rumpus conversion can add 10–20% to property value. A $60,000 extension in Epsom adding a bedroom and an extra bathroom routinely returns $120,000+.

            What works: Studies and home offices (remote work hasn’t reversed), extra bedrooms in school-zone suburbs, second living areas for older families, garage conversions in inner-west suburbs where car dependence is lower. Extensions and additions.

            5. Energy Efficiency and Healthy Homes Upgrades

            Quiet but consistent value lift. Double glazing, ceiling and underfloor insulation top-ups, heat pump installations and rainwater systems add 3–5% to property value, and the buyer pool actively expects them at the upper end of the market. A $10,000 double-glazing upgrade typically returns $15,000–$25,000 at resale. Warmer Kiwi Homes subsidies are still available for insulation in older Auckland homes.

            What works: Double glazing in older villa and bungalow stock (massive comfort improvement and a real resale signal), efficient heat pumps with proper sizing, solar where the roof orientation supports it, low-VOC paints and finishes for indoor air quality.

            Renovation Spending Guide: How Much Should You Spend?

            The budget framework we use at Superior Renovations, calibrated against current Auckland market data. Percentages are tied to your current property value — adjust within the range for your suburb’s specific tier.

            Renovation Type % of Home Value $1.5M Home $3M Home Notes
            Kitchen Renovation 3–6% $45K–$90K $90K–$180K Premium finishes ($150K+) only make sense in Herne Bay/Remuera tier.
            Bathroom Renovation (single) 2–4% $30K–$60K $60K–$120K Freestanding tubs and underfloor heating concentrated in $2M+ suburbs.
            House Extension 8–15% $120K–$225K $240K–$450K Best value-per-dollar in school-zone family suburbs (Epsom, Remuera, Mellons Bay).
            Full House Renovation 12–20% $180K–$300K $360K–$600K Highest overcapitalisation risk — benchmark hard against recent street sales.
            Outdoor Living (deck/pergola) 2–5% $30K–$75K $60K–$150K Highest percentage return in coastal suburbs (Mission Bay, Kohimarama, Takapuna).
            Energy Efficiency 1–3% $15K–$45K $30K–$90K Double glazing the single best dollar-for-dollar upgrade in older Auckland stock.

            Green Upgrades Premium Auckland Buyers Now Expect (2026 Shift)

            At $2M+, sustainability has shifted from optional to baseline. Premium buyers expect double glazing, efficient heating, low-VOC finishes, and (where possible) solar-readiness or solar installed. These features add 3–7% to perceived value without screaming “eco” — the integration is the point. In coastal and green-leaning suburbs (Westmere, Remuera, Devonport) the expectation is sharper.

            “In premium suburbs, sustainability is no longer optional — it’s table stakes. Discreet upgrades like high-performance glazing sell faster to eco-conscious executives.” — Dorothy Li, Design Manager, Superior Renovations.

            2026 Outlook: What Auckland Buyers Will Be Looking For

            Mortgage rates have eased through the first half of 2026, and buyer activity has been recovering modestly from the soft 2024–2025 period. Forecasts point to further modest softening through the rest of 2026, which means buyers will keep negotiating hard and will keep punishing overspecified renovations. The renovations that win this market: realistic budgets, demonstrably current finishes, and a clear answer to “why does this home sit at this price in this suburb.”

            Before committing to any renovation, three steps we’d recommend:

            1. Pull your current QV valuation as a starting point.
            2. Pull the most recent three or four sales on your street (not just your suburb).
            3. Cap your renovation budget at 12–15% of your current value as a default, then adjust within the tier-specific ranges in the table above.

            “2026 looks like the year buyers return to premium suburbs with reno budgets in hand — and the projects that win start with accurate comparables and a realistic ceiling.” — Kevin Yang, Managing Director, Superior Renovations.


            What are the most expensive suburbs in Auckland in 2026?

            Auckland's 20 most expensive suburbs in 2026, by median sale price: Herne Bay ($3.2M), Remuera ($2.9M), St Mary's Bay ($2.7M), Parnell ($2.5M), Orakei ($2.4M), Westmere ($2.3M), Epsom ($2.2M), Mission Bay ($2.1M), Ponsonby ($2.0M), Grey Lynn ($1.9M), Takapuna ($1.85M), Stanley Point ($1.8M), Devonport ($1.75M), Mellons Bay ($1.7M), Murrays Bay ($1.65M), Whitford ($1.6M), Waiheke ($1.55M), Glendowie ($1.5M), Kohimarama ($1.45M), and Point Chevalier ($1.4M).

            What is the average house price in Auckland in 2026?

            As of July 2026, Auckland's median sale price is $940,000 according to REINZ, with the House Price Index still below its level of a year earlier. Long-term, Auckland's median has grown 4.47% per year on average over the 20 years to July 2026 (Opes Partners).

            What is the richest suburb in Auckland?

            Herne Bay is Auckland's most expensive suburb in 2026, with a median sale price of approximately $3.2 million — roughly 308% of Auckland's region-wide median. Remuera ($2.9M) and St Mary's Bay ($2.7M) follow.

            How do I avoid overcapitalising on my renovation?

            Cap your renovation spend within the percentage range for your suburb's tier (8–12% for $3M+ suburbs, 12–15% for $2M–$2.9M suburbs, 12–18% for $1.5M–$2M coastal suburbs), benchmark against the last 3–4 sales on your specific street, and match the renovation TYPE to the buyer profile of your suburb (luxury for ultra-premium, bedrooms-and-bathrooms for school-zone, outdoor-flow for coastal).

            How much should I spend on a renovation in Auckland in 2026?

            Mid-range Auckland kitchen renovations run $25,000–$50,000, bathrooms $25,000–$45,000, extensions from $120,000–$450,000+ depending on scope and property tier, and full home renovations 12–20% of property value. See the full Renovation Spending Guide table for tier-specific budgets.


            Further Resources

            1. Featured projects and case studies — see specifications, budgets, and outcomes from recent Auckland renovations.
            2. Real client stories from across Auckland.
            3. The Design Studio at Wairau Valley — where our in-house design team works through scope, materials, and budget before any quote.

            Suburb price levels here reflect recent Auckland sales data and shift over time. For the current figures, REINZ publishes monthly median sale prices by area, and Auckland Council holds the rating valuations behind them.

            Need more information?

            Take advantage of our FREE Complete Home Renovation Guide (48 pages). Whether you’re already renovating or still deciding, the guide — which includes a free 100+ point checklist — will help you avoid the most common renovation mistakes.

            Download Free Renovation Guide (PDF)


            18 months 0 percent interest long term finance badge

            Have you been putting off getting renovations done?

            We have partnered with Q Mastercard ® to provide you an 18 Month Interest-Free Payment Option, you can enjoy your new home now and stress less.

            Learn More about Interest-Free Payment Options*

            *Lending criteria, fees, terms and conditions apply. Mastercard is a registered trademark and the circles design is a trademark of Mastercard International Incorporated.


            Still have questions unanswered?

            Book a no-obligation consultation with the team at Superior Renovations,
            we’d love to meet you to discuss your renovation ideas!

              Services

              Home RenovationKitchen RenovationBathroom RenovationOutdoor RenovationHouse ExtensionCommercialDesign ServicesOther

              By submitting this form, you agree to receive communications from us via email or text regarding our services, you can unsubscribe at any time.

              This site is protected by reCAPTCHA and the Google

              Privacy Policy and Terms of Service apply.

              Last updated: May 2026


              References

              1. REINZ
              2. Auckland Council
              granny flat - Superior Renovations
              House Renovation

              Eased Building Consents NZ 2025: DIY Sheds & Granny Flats Auckland

              Hey Auckland mates, if you’re staring at your backyard in Grey Lynn or Remuera, itching to chuck up a shed or granny flat without drowning in council red tape, these new eased building consents are a game-changer. As of October 2025, NZ’s rules let you build small structures like sheds up to 30m² consent-free, saving you heaps of time and cash—think $2k-plus—while boosting your home’s value in our skyrocketing market. It’s all about cutting the bureaucracy for Kiwi homeowners.

              Not sure whether your project needs a building consent? Sonder Architecture’s free building consent checker tests it against the Schedule 1 exemptions in about a minute.

              Free cost calculator

              How much will your renovation cost?

              Get an instant Auckland price range for your project — no details required to see it.

              Try our free cost calculators →

              What’s the Deal with These New Consent Exemptions in NZ?

              Straight up, the government’s tweaked the Building Act Schedule 1 to make life easier. No more waiting 20 days for approvals on single-storey sheds, garages, or sleepouts up to 30m²—as long as they’re code-compliant and fit your Auckland Unitary Plan zone. For spots under 10m², you can build right to the fence; 10-30m² needs just a 1m setback. We’ve seen clients in Howick squeeze in a 25m² sleepout for Airbnb, turning dead space into rental gold without the hassle.

              How Do You Nail a DIY Shed or Garage in Auckland Without Stuffing It Up?

              First off, check your local Unitary Plan for height and coverage limits—don’t be that Onehunga bloke with a leaky roof from skimping on pitch. Use solid Kiwi materials like Colorsteel for the top and pier foundations to avoid tilts. Pro tip: If it’s got plumbing or electrics, rope in a licensed builder. Our designer Dorothy Li reckons it’s saved families thousands, like that Mount Eden crew who reclaimed their lawn for a gym shed. Quick wins: Zero setbacks for tiny builds mean more room for the barbie gear.

              When Can Kiwis Start Building Consent-Free Granny Flats?

              Hold tight—early 2026 brings exemptions for detached granny flats up to 70m², perfect for multi-gen whānau or extra income at $500 a week in rentals. Stick to insulation standards and notify your council post-build. Pair it with solar panels (now easier to install boundary-close) for eco points and bill cuts up to 30%. Building Minister Chris Penk calls it a productivity boost, and RNZ predicts a DIY explosion—spot on for Auckland’s rental crunch.

              Fancy turning your Ponsonby patch into something epic? Drop us a line at Superior Renovations for a free audit—what’s your backyard dream?

              Boom in DIY Building: Eased Consent Rules Unlock Auckland Home Renovations

              Remember that time you eyed up your poky backyard in Grey Lynn, dreaming of a shed for the mountain bikes but baulked at the council paperwork? Or maybe you’re in Remuera, plotting a sleepout for the teens without the consent circus. Well, grab your hammer – New Zealand’s building rules just got a massive Kiwi makeover. As of late October 2025, DIY building consents are slashed for sheds up to 30m², solar panels, and granny flats incoming early 2026. At Superior Renovations, we’ve nailed over 500 Auckland projects, and these changes? They’re your ticket to faster, cheaper backyard bliss.

              What does that mean?

              • Sheds/sleepouts ≤10m²: ZERO setback – build to the fence!
              • 10-30m²: Just 1m away. No consent. Save $2k+.
              • Granny flats ≤70m²: Consent-free from Q1 2026. Rental gold!
              • Solar panels: Easier installs, boundary tweaks.
              • Why care? Boost home value 10-20% in our hot market, ditch delays.

              These tweaks to Schedule 1 exemptions hit on 23 October 2025. RNZ calls it a DIY boom – and they’re spot on. Building Minister Chris Penk nailed it: “Boosting productivity means cutting red tape… a win for property owners.”

              Decoding NZ’s Building Consent Shake-Up: Essential Know-How for Auckland Kiwis

              Let’s paint a picture. It’s a drizzly Saturday in Mount Eden. You’re knee-deep in kitchen reno dreams, but first, that garage for the BBQ gear. Pre-2025? You’d front $2,500 for consent, wait 20 days, and pray your setback matched the height. Nightmare, right? We’ve fielded those tears at Superior – clients in Ponsonby ghosting projects over red tape.

              Enter the heroes: Government amendments to the Building Act Schedule 1. Immediate wins: Single-storey detached builds (sheds, garages, sleepouts) up to 30m² skip consents entirely – if code-compliant and Unitary Plan friendly.

              Old Rules (Painful) New Rules (Oct 2025 – Yay!) Your Savings
              Setback = building height ≤10m²: 0m setback $1k-3k + 4 weeks
              Consent for close builds 10-30m²: 1m setback DIY weekend warrior
              Delays galore Build now, compliant materials Property value spike

              Skimmer tip: Pop Auckland Unitary Plan into Google for your zone’s height/coverage limits. Breach it? Consent still needed. “We’ve redesigned 50+ backyards post-changes,” beams Dorothy Li, our star designer. “One Howick fam squeezed a 25m² sleepout – perfect for Airbnb trials.”

              Broader reforms? Councils merging consents for speed, proportionate liability (no more ratepayer hits). RNZ covered the August announcement. For you? Fewer headaches, more hammering.

              Transform Your Backyard: No-Consent Sheds, Garages & Sleepouts in Auckland

              Shrinking sections? Blame Auckland’s medians at 600m². That Bunnings shed’s been winking at you. Now? Build ≤30m² detached, single-storey – consent-free!

              “Picture this: Your Grey Lynn lawn reclaimed,” chuckles Alison Yu. “We’ve sketched dozens; clients love the 1m flex.” Steps? 1) Measure zone. 2) Pick code-compliant kit (e.g., Hammer steel frames). 3) Erect. Done.

              Pro tips for skim-readers:

              • Foundations: Pier + bearers, no frost heave.
              • Roof: 3° min pitch, durable like Colorsteel.
              • Notify council? Not required, but smart for records.

              Anecdote time: Mate in Onehunga built a 12m² gym shed to the fence. “Saved my marriage – no more lounge weights!” Roof pitch wrong? Leaks. We’ve fixed ’em – don’t be that guy.

              Table for wins:

              Size Setback Best For
              ≤10m² 0m Tool storage
              20m² 1m Teen sleepout
              30m² 1m Garage + gym


              Granny Flats Without Consents: 70m² Rentals Explode in Auckland 2026

              Rental drought? 70m² granny flats consent-free from early 2026! Per Building Performance, build compliant – rent for $500/wk.

              “Game-changer for multi-gen families,” says Cici Zuo. “Remuera plots? Instant income.” Conditions: Detached? Detached ok, code standards (insulation GIE). Notify BCA within 20 days post-build.

              Savings: $10k+ consents. ROI? 18 months. Tip: Pair with solar for eco-renters.

              Solar Panels & Low Decks: Quick Wins Under New Exemptions

              Sunny Auckland? Solar installs simplified – no consent for most roofs. New boundary rules too. Low decks ≤1.5m? Exempt. Save $500/yr power.

              Tip: LBP for wiring. We’ve integrated in 100+ renos.

              Want a ballpark for your renovation?
              See the calculators →

              DIY Success Tips: Avoid Pitfalls in Auckland Renovations

              Checklist:

              1. Zone check: Unitary Plan.
              2. Materials: Hammer/Tile Choice.
              3. Pros when? Plumbing/electrics. Call us!
              4. Insurance: Cover DIY.

              “Don’t rush foundations,” warns Kevin Yang. “Seen too many tilts.”

              Why These Changes Matter: Skyrocketing Auckland Home Values & Lifestyles

              Boost: +$50k value easy. Rentals ease crunch. Eco? Solar cuts bills 30%. Future-proof your slice of Auckland paradise.

              We’ve seen it: Post-reno sales fly. Your turn?

              DIY Boom Series Intro

              Dive into consent-free renos with Superior…

              Wrapping It Up: Your Auckland Backyard Just Got a Whole Lot Bigger – Time to Build!

              We’ve hammered through this series like a pro – from zero-setback sheds hugging your fence in Grey Lynn to solar-powered granny flats lighting up Remuera come 2026. These Schedule 1 tweaks aren’t just paperwork wins; they’re your fast-track to more space, slashed costs, and homes that scream “sold!” in our frenzy market.

              Quick-fire recap for the scrollers:

              • Sheds & sleepouts ≤30m²: Consent? Nah. 0-1m setbacks. Save $2k-5k, build this weekend!
              • Solar panels: Slap ’em on, power your EV, pocket the savings – no council nod needed.
              • Granny flats ≤70m²: Early 2026 green light. Rent for $600/wk, fund the fam forever.
              • Big picture: +10-25% property value, faster flips, eco-bragging rights.

              “These changes are Auckland’s love letter to homeowners,” grins Kevin Yang, our design guru. “Backyards reborn, families closer, wallets fatter. We’ve got your back – from sketches to sparkly finishes.”

              Why it matters right now: With medians at $1.1m and rentals scarcer than parking in Ponsonby, these rules level the field. Beat inflation, house the whānau, go green – all compliant via Building Performance guidance. Check your Unitary Plan, grab code-compliant gear, and get cracking!

              DIY Win Auckland Impact
              Time saved 20 days → 0
              Cash saved $3k avg per project
              Home value + $40k-80k

              Ready to transform? Hit us up at Superior Renovations for a free backyard audit: Here’s to consent-free adventures. Nail it!


              Need ideas? Check out our Kitchen Design Gallery or dive into our Bathroom Design Gallery for inspiration!


              Need more information?

              Take advantage of our FREE Complete Home Renovation Guide (48 pages), whether you’re already renovating or in the process of deciding to renovate, it’s not an easy process, this guide which includes a free 100+ point check list – will help you avoid costly mistakes.


              18 months 0 percent interest long term finance badge

              Have you been putting off getting renovations done?

              We have partnered with Q Mastercard ® to provide you an 18 Month Interest-Free Payment Option, you can enjoy your new home now and stress less.

              Learn More about Interest-Free Payment Options*

              *Lending criteria, fees, terms and conditions apply. Mastercard is a registered trademark and the circles design is a trademark of Mastercard International Incorporated.


              Still have questions unanswered?

              Book a no-obligation consultation with the team at Superior Renovations,
              we’d love to meet you to discuss your renovation ideas!

                Services

                Home RenovationKitchen RenovationBathroom RenovationOutdoor RenovationHouse ExtensionCommercialDesign ServicesOther

                By submitting this form, you agree to receive communications from us via email or text regarding our services, you can unsubscribe at any time.

                This site is protected by reCAPTCHA and the Google

                Privacy Policy and Terms of Service apply.


                References

                1. Building Performance (MBIE)
                2. Building Performance (MBIE)
                3. Auckland Council
                4. Building Performance (MBIE)
                5. Building Performance (MBIE)
                DSC04028 1 - Superior Renovations
                House Renovation

                Top 7 Renovation Ideas to Boost Auckland Home Value in 2025

                If you’re planning a renovation in Auckland this year — whether to add value before a sale or simply make your Mt Eden villa or Takapuna home more livable — these seven ideas consistently deliver the strongest returns. Kitchen upgrades through to energy efficiency: all suited to Auckland’s climate, Kiwi lifestyle preferences, and the reality of not overcapitalising your Grey Lynn villa or your Henderson family home.

                Free cost calculator

                How much will your renovation cost?

                Get an instant Auckland price range for your project — no details required to see it.

                Try our free cost calculators →

                What’s the Smartest Way to Boost Your Auckland Home Value with a Reno This Year?

                Focus on high-ROI areas — kitchens and outdoor decks in particular — that signal move-in ready to buyers. Dorothy Li from Superior Renovations is direct about it: a modern kitchen isn’t just a functional room, it’s what Auckland buyers in Remuera or Ponsonby will pay a premium for, often returning 80% of the renovation cost. Work with neutral Resene tones, moisture-resistant materials suited to Auckland’s damp winters, and eco-efficient products where possible. From our completed projects: a $30,000 Mt Eden kitchen remodel added $40,000 in value; a $22,000 Devonport deck added $30,000. As a general rule, keep renovation spend within 5–10% of your property’s value.

                Which Renovations Give the Best Bang for Buck in NZ’s Market?

                Kitchens come first — open layouts with quartz benchtops and bi-fold doors for indoor-outdoor flow, at $25,000–$45,000 mid-range. Decks follow, using composite or Kwila timber ($15,000–$25,000) — perfect for the Auckland summer barbecue. Master ensuites ($25,000–$40,000) create a practical retreat that buyers in older Auckland homes particularly value. Family bathroom refreshes with frameless showers return 60–75% ROI ($15,000–$30,000). Basement conversions add floor space on tight sections ($30,000–$50,000), exterior refreshes improve kerb appeal ($10,000–$20,000), and energy upgrades like double-glazing reduce bills and attract eco-conscious buyers ($15,000–$30,000). All require checking Auckland Council consent requirements.

                How Do You Pick Ideas That Suit Your Suburb and Avoid Overcapitalising?

                Match the specification to the suburb — premium quartz and smart appliances make sense in Parnell; modest updates are the right call in Henderson. Check whether structural changes require consent (fees $500–$5,000), use local suppliers like Mitre 10 to keep materials costs in check, and build in a 10–20% contingency. Dorothy’s consistent advice: waterproofing is non-negotiable in Auckland’s humidity. Native flax or pohutukawa landscaping handles Auckland’s conditions well and reads as intentional rather than generic.

                Ready to plan a renovation that actually pays off? Get in touch with Superior Renovations for a free consultation.

                In a market as competitive as Auckland’s, the renovations that pay off aren’t necessarily the most expensive ones — they’re the ones that speak directly to what local buyers want. Functionality, indoor-outdoor connection, low maintenance, and sustainability are consistent priorities across suburbs from Remuera to Papatoetoe. This guide covers seven renovation types, each with realistic costs and ROI ranges backed by industry data from sources like Building Guide NZ, and each tailored to Auckland’s climate and buyer preferences.

                open-plan living room renovation with a built-in entertainment unit and electric fireplace

                Why Renovate Your Auckland Home?

                Auckland buyers consistently look for homes that are ready to move into — not projects. A well-specified kitchen, a functional ensuite, or a properly insulated home can be the difference between a strong sale and a slow one. According to Builder Connect NZ, planned renovations can increase home value by 5–15%, with 60–80% of renovation costs typically recovered at resale. The right upgrade also changes how you live in the property now — not just what it’s worth when you sell.

                “In Auckland, the right renovation doesn’t just transform your home—it transforms your sale price.”

                Explore our home renovation ideas to find the right starting point for your project.


                If you’re looking for specific cost estimates, try our Renovation Cost Calculator Tools


                Planning to sell your house?

                Here are the renovation ideas most likely to improve your resale value.

                A renovation can serve several goals at once — improving the way you live in your home now, rescuing a period property, or adding value before a sale. Since the costs involved are significant, knowing which upgrades return the most is worth understanding before you commit to anything.

                Revamp Your Kitchen: The Renovation That Consistently Delivers in Auckland

                The kitchen is where Auckland homes are won or lost with buyers. A dated kitchen with tired cabinetry or outdated appliances is one of the most common reasons buyers either discount an offer or walk away — while a well-executed renovation signals a home that’s been taken care of and is ready to live in. A kitchen remodel consistently returns one of the highest ROIs of any renovation type, often recovering up to 80% of the cost at resale.

                Why a Kitchen Remodel Adds the Most Value

                A $25,000 kitchen renovation in Auckland can recover a meaningful portion of its cost at resale, and in high-demand suburbs like Grey Lynn or Mt Eden, the return is often higher. The driving factors aren’t just visual — functionality, energy efficiency, and layout all play a role in how buyers perceive the space. A kitchen that flows into an outdoor area, handles Auckland’s humidity well, and doesn’t require immediate updating is the kind of specification that closes sales.

                “A modern kitchen isn’t just a room—it’s a lifestyle upgrade that buyers in Auckland are willing to pay a premium for.”

                The principle holds from Ponsonby to Papakura. It’s about giving buyers a space they can actually use from day one, rather than one that goes straight to the reno wishlist. Open layouts, smart storage, and materials that hold up in a coastal climate are what make the difference.

                Key Elements of a High-Value Kitchen Renovation

                The upgrades that deliver the strongest ROI tend to focus on layout, durability, and broad appeal rather than personal preference. Here’s where to put the money:

                • Open-concept layout: Auckland buyers consistently prioritise kitchens that connect to dining and living areas. Opening up the floor plan makes a home feel larger and better suited to the way most Kiwi families actually live and entertain.
                • Energy-efficient appliances: Induction cooktops and energy-rated fridges reduce running costs and tick the sustainability box for environmentally minded buyers.
                • Durable materials: Quartz benchtops and ceramic tile splashbacks handle Auckland’s humidity well and are easy to maintain — both practical selling points.
                • Smart storage: Pull-out pantries, corner drawers, and built-in shelving maximise usable space, particularly relevant in smaller Auckland homes.
                • Neutral aesthetics: Resene greys and warm whites hold broad appeal and date less quickly than trend-driven palettes. A statement benchtop or quality tapware adds interest without limiting buyer appeal.
                Kitchen Design in Westmere Auckland

                Designer Kitchen By Superior Renovations

                Cost vs. Value: Understanding the ROI Formula

                A straightforward way to calculate renovation ROI:

                ROI = (Increase in Home Value – Renovation Cost) / Renovation Cost x 100

                For example, a $25,000 kitchen remodel that increases your home’s value by $30,000:

                ($30,000 – $25,000) / $25,000 x 100 = 20%

                In Auckland’s stronger suburbs like Grey Lynn or Mt Eden, the actual return is often considerably higher — 80% or more is achievable with the right specification. The key constraint is overcapitalising. For a $500,000 home, industry guidance suggests keeping kitchen spend to $25,000–$30,000, per Dominator. Spending significantly more than this risks pricing the home out of the local market.

                Renovation Type Estimated Cost (NZD) Potential ROI Key Considerations
                Basic Kitchen Upgrade $15,000–$25,000 60–80% New fittings, appliances, paint
                Mid-Range Remodel $25,000–$45,000 70–85% Open-plan layout, quartz countertops
                Luxury Renovation $50,000+ 50–70% High-end materials, custom designs

                “Don’t overspend on luxury finishes unless your home’s value supports it — quality and functionality return more than premium materials in most Auckland suburbs.”

                Planning Your Kitchen Renovation in Auckland

                Getting the planning right upfront avoids the budget blowouts that derail most kitchen projects. Key steps:

                1. Set a realistic budget: Include materials, labour, permits, and a 10–20% contingency for unexpected costs — hidden plumbing issues are common in older Auckland villas. Our renovation costs guide covers budgeting in detail.
                2. Use licensed tradespeople: Auckland’s building codes are strict, particularly for plumbing and electrical work. Licensed trades ensure compliance, as set out by the New Zealand Government.
                3. Get council consents: Structural changes and major plumbing or electrical work require Auckland Council approval. Consent fees range from $500 to several thousand dollars depending on scope.
                4. Work with a designer: A designer maximises layout, flow, and energy efficiency, and can manage the consent process — useful if you haven’t been through it before.
                5. Source locally: Auckland suppliers like Mitre 10 and PlaceMakers reduce material costs and lead times.

                Local Considerations for Auckland Kitchens

                Auckland’s humid, coastal conditions mean moisture-resistant materials like ceramic tiles and stainless steel will outlast cheaper alternatives. Indoor-outdoor connection — bi-fold doors onto a deck or garden — is a consistent priority for Auckland buyers across most suburbs and price points. In Herne Bay and Remuera, the market supports mid-to-high-end specification. In Manukau or Henderson, the same spend won’t return the same value — moderate, well-executed upgrades perform better there.

                “In Auckland, a kitchen that connects to the outdoors and handles humidity well is the specification that wins buyers.”

                See how we’ve approached this across Auckland in our Kitchen Design Gallery.

                Common Mistakes to Avoid

                • Overcapitalising: A $50,000 kitchen in a $400,000 home won’t return its cost. Research local property values before setting your budget.
                • Prioritising looks over function: A visually impressive kitchen with insufficient bench space or storage will frustrate buyers. Workflow and storage come first.
                • Skipping permits: Unpermitted work creates problems at sale and can trigger fines. Check with Auckland Council before starting.
                • Cheap materials: Low-quality fittings are visible and undermine buyer confidence. False economy in most cases.

                Villa Kitchen Design

                Real-World Example: A Kitchen Transformation in Mt Eden

                A dated 1980s Mt Eden kitchen — closed-off floor plan, worn cabinets — became a modern open-plan hub. Quartz benchtops, energy-efficient appliances, and bi-fold doors to the deck were the key changes. The $30,000 renovation added an estimated $40,000 in value. The kitchen went from being the property’s biggest liability to its strongest selling point.

                “Our Mt Eden clients couldn’t believe how much their new kitchen transformed their home — it’s now the heart of every family gathering and a major selling point.”

                Quality specification, Auckland-appropriate materials, and a layout that works for real life — those are the variables that drive kitchen ROI. Whether you’re selling soon or staying long-term, a kitchen done right is money well spent.

                Deck Addition: Delivering on Auckland’s Outdoor Living Expectation

                Auckland buyers have a clear expectation of outdoor living. A home with a well-designed deck that connects to the interior isn’t a bonus — it’s what buyers in Devonport, Parnell, and even more modest suburbs like Mangere have come to expect. A deck costing $15,000–$25,000 regularly adds $20,000 or more to a home’s value, making it one of the more cost-effective renovations available in the Auckland market.

                Kwila decking

                Why a Deck Addition Boosts Home Value

                The connection between indoor and outdoor living is deeply embedded in how Kiwis use their homes — summer barbecues, winter gatherings under a pergola, kids’ space that doesn’t live inside. A deck that delivers this well is not a cosmetic upgrade; it adds genuinely usable square metres to the property. Eco-conscious buyers respond to FSC-certified timber or composite decking, and the low-maintenance argument resonates with busy Auckland families.

                “A deck isn’t just an outdoor space — it’s an extension of your home that Auckland buyers see as a lifestyle upgrade.”

                Key Features of a High-Value Deck

                • Indoor-outdoor connection: Bi-fold doors or large sliding windows from the kitchen or lounge are the feature Auckland buyers respond to most consistently.
                • Durable materials: Kwila timber and composite decking both handle Auckland’s humidity and coastal salt air. Neither requires the intensive maintenance that cheaper timber does.
                • Versatile design: Built-in seating, pergolas, or an outdoor kitchen area extend the deck’s usefulness across seasons — a strong selling point in Auckland’s variable weather.
                • Lighting and heating: LED lighting and outdoor heaters make the deck usable year-round, not just on Auckland’s warmest days.
                • Privacy and planting: Privacy screens and native plantings like flax or pohutukawa suit the Auckland aesthetic and create a sense of enclosure without blocking light.

                kwila decking

                Cost vs. Value: Calculating Deck ROI

                ROI = (Increase in Home Value – Renovation Cost) / Renovation Cost x 100

                A $20,000 deck that increases your home’s value by $25,000:

                ($25,000 – $20,000) / $20,000 x 100 = 25%

                In Takapuna or Epsom, decks typically achieve ROIs of 65–80% when they genuinely improve outdoor living without requiring substantial structural work. Spending $30,000 on a deck for a $1.5M Remuera property makes financial sense. The same spend on a $600,000 Papatoetoe home probably doesn’t, per Building Guide NZ.

                Deck Type Estimated Cost (NZD) Potential ROI Key Features
                Basic Timber Deck $10,000–$15,000 60–75% Simple design, small footprint
                Mid-Range Deck $15,000–$25,000 65–80% Composite materials, built-in seating
                Premium Deck $30,000+ 50–70% Outdoor kitchen, pergola, lighting

                “A well-designed deck doesn’t have to be expensive — match the scale and specification to what your property’s value can support.”

                Planning Your Deck in Auckland

                1. Check council rules first: Auckland Council requires consent for decks over 1.5m high or those exceeding 20m². Consent costs range from $500–$2,000 depending on complexity. See Auckland Council’s building consents page.
                2. Use licensed builders: Structural work and code compliance require licensed professionals. This also matters to buyers — a permitted, professionally built deck is a selling point, not just a tick-box.
                3. Specify for Auckland’s climate: Materials need to handle moisture and UV. Timber requires sealing every 1–2 years — factor this into the maintenance picture buyers will consider.
                4. Work with the section: Small Auckland sections can still accommodate well-designed decks. Multi-level or corner configurations work well in suburbs like Mt Albert or Onehunga where garden space is limited.
                5. Consider a designer: A good designer ensures the deck complements the home’s architecture and sits naturally in the outdoor space — important for buyer perception.

                replaced double-glazed window frames on a weatherboard house deck after renovation

                Local Considerations for Auckland Decks

                Coastal suburbs like Mission Bay and St Heliers demand materials that can handle salt air — composite or treated pine outperforms untreated timber here. Native plantings rather than generic garden centre purchases signal care and local knowledge to buyers. In Grey Lynn or Ponsonby where sections are compact, elevated or wraparound designs recover usable space without consuming the garden. Shade sails or retractable awnings extend the deck season — worth considering in Auckland’s changeable spring and autumn.

                “In Auckland, a deck that handles the elements and connects seamlessly to the house is the brief that consistently wins buyers over.”

                Common Mistakes to Avoid

                • Overbuilding for the section: A large deck on a small section can consume the garden and leave buyers with less outdoor flexibility, not more.
                • Underspecifying the timber: Unsealed or low-grade timber deteriorates quickly and registers as neglect to buyers. Spend correctly upfront.
                • Skipping consents: An unpermitted deck creates problems at settlement. Always check requirements before starting.
                • Poor connection to the house: A deck with no direct access from the main living areas misses the entire point. Connection is the value proposition.

                Real-World Example: A Deck Transformation in Devonport

                An underused Devonport backyard became a properly designed outdoor room: composite decking, built-in seating, LED lighting, and a pergola for shade. The connection to the living room was via bi-fold doors. The $22,000 project added an estimated $30,000 to the home’s value. The deck became the feature buyers remembered — and the one that closed the sale.

                “Our Devonport clients now host every family event on their new deck — it’s become the heart of their home and a major selling point.”

                Quality materials, genuine indoor-outdoor connection, and a design that works for the section — that’s the formula that makes decks one of Auckland’s most reliable renovation investments.

                Building a Master Ensuite: A Practical Upgrade Auckland Buyers Pay For

                In Auckland’s older housing stock — villas, bungalows, and the 1970s brick-and-tile houses spread across most suburbs — a master ensuite is often conspicuously absent. Adding one converts a standard bedroom into something buyers in Herne Bay, Epsom, and Henderson all recognise as genuinely valuable. A well-executed ensuite costing $20,000–$35,000 can increase a home’s value by $25,000–$50,000, making it one of the more reliable renovation investments for Auckland homeowners.

                Why a Master Ensuite Adds Significant Value

                Privacy and convenience are what buyers are purchasing. For older properties lacking a second bathroom, an ensuite removes a practical objection that would otherwise reduce buyer interest or depress offers. For inspiration, browse our bathroom designs. It also changes how the master bedroom functions — from a room with a shared bathroom arrangement to a genuinely self-contained retreat, which is what Auckland buyers across most price brackets now expect.

                “A master ensuite turns your bedroom into a sanctuary, and in Auckland, that’s a feature buyers will pay top dollar for.”

                Whether it’s a Grey Lynn villa or a St Heliers modern home, an ensuite done well adds the kind of sophistication that makes a property feel complete rather than almost-there.

                bathroom renovation with dark timber vanity and freestanding bath beside a glass shower

                Key Features of a High-Value Master Ensuite

                • Space-efficient layout: Walk-in showers and wall-mounted vanities recover visual and physical space in compact rooms — particularly relevant in smaller Auckland properties, as noted by Hunter Furniture.
                • Quality fixtures: Rainfall showerheads, frameless glass, and modern tapware deliver a premium feel that buyers register immediately — and that doesn’t require a luxury budget to achieve.
                • Waterproofing and ventilation: Non-negotiable in Auckland’s humid climate. An extractor fan is a functional requirement, not an optional extra.
                • Neutral finishes: Resene’s Alabaster or Sea Fog, textured tiles, and natural stone accents create a timeless result that holds its appeal across buyer demographics.
                • Water-efficient fixtures: Water-saving showerheads and LED lighting reduce running costs and resonate with Auckland’s sustainability-conscious buyers.

                Cost vs. Value: Calculating Ensuite ROI

                ROI = (Increase in Home Value – Renovation Cost) / Renovation Cost x 100

                A $25,000 ensuite that increases your home’s value by $35,000:

                ($35,000 – $25,000) / $25,000 x 100 = 40%

                In Remuera or Mt Eden, ensuites achieve ROIs of 60–75% — particularly strong in homes that currently only have one bathroom. A $30,000 ensuite in a $1M home is a reasonable investment; the same spend in a $500,000 home carries more risk, per Building Guide NZ.

                Ensuite Type Estimated Cost (NZD) Potential ROI Key Features
                Compact Ensuite $15,000–$25,000 60–70% Walk-in shower, single vanity
                Mid-Range Ensuite $25,000–$40,000 65–75% Double vanity, frameless glass
                Luxury Ensuite $40,000+ 50–65% Freestanding bath, custom tiles

                “The ensuite budget should be proportionate to the property’s value — a well-specified mid-range ensuite consistently outperforms a luxury one in all but the highest-value Auckland suburbs.”

                bathroom renovation with glass shower and vessel basin on a black stone vanity

                Planning Your Master Ensuite in Auckland

                1. Assess what space is available: An existing wardrobe, a spare room corner, or a section of the master bedroom itself can all work. Older Auckland villas often need some layout reconfiguration, which requires council approval.
                2. Licensed tradespeople only: Plumbing and electrical work under the Building Code requires licensed trades, per the New Zealand Government.
                3. Secure council consent: Structural changes and new plumbing points require Auckland Council approval. Consent fees typically run $1,000–$3,000.
                4. Use a designer: Small ensuites are where design earns its fee — optimising layout in a compact space prevents the claustrophobic result that undermines the investment.
                5. Source locally: Auckland suppliers like Mitre 10 and Bunnings stock a solid range of tiles, fixtures, and vanities at reasonable prices.

                Local Considerations for Auckland Ensuites

                Waterproofing and ventilation are the two things that determine whether an ensuite performs well in Auckland’s humidity — not optional considerations. In Mission Bay or Takapuna, this is particularly important. Smaller homes in Onehunga or Mt Albert benefit from corner showers and sliding doors over hinged ones. Premium suburbs like Parnell or Herne Bay support more luxurious specification — quality tiles or a freestanding bath, if the property value justifies it. Water-efficient fixtures are increasingly a decision factor for Auckland buyers who are utility-conscious.

                “In Auckland, an ensuite that’s functional, properly waterproofed, and built to last is what moves properties.”

                See our bathroom renovation ideas for ensuite inspiration across Auckland property types.

                Common Mistakes to Avoid

                • Overcapitalising: A $50,000 ensuite in a $600,000 home won’t return its cost. Budget proportionately.
                • Poor space planning: Too many features in a small room creates a claustrophobic result. Prioritise function and flow.
                • Inadequate waterproofing: Auckland’s humidity turns this into a mould problem quickly. Quality membranes and ventilation are the baseline, not the upgrade.
                • Trend-driven finishes: Statement colours and niche design directions can put off buyers. Neutral and timeless serves resale better.

                black towel rail and timber vanity in a bathroom renovation with patterned floor tiles

                Real-World Example: An Ensuite Transformation in Remuera

                An underused wardrobe became a frameless glass shower, double vanity, and eco-friendly fixtures — neutral, sophisticated, and exactly the kind of feature Remuera buyers expect. The $28,000 project added an estimated $40,000 in value. The ensuite’s connection to the master bedroom was seamless, and it was consistently mentioned by agents as the property’s standout element.

                “Our Remuera clients love their new ensuite — it’s their personal retreat and a feature that’s sure to impress future buyers.”

                A master ensuite is one of those renovations that improves how you live in the property now and performs strongly when you’re ready to sell. Quality specification and proportionate spend are what make it work.

                Bathroom Renovation: A Consistent Performer in Auckland’s Property Market

                A dated bathroom does disproportionate damage to buyer perception. Cracked tiles, old tapware, and insufficient storage signal deferred maintenance rather than a single room in need of work. A well-executed bathroom renovation at $15,000–$30,000 typically adds $20,000–$40,000 to an Auckland home’s value, making it one of the more reliable mid-range renovation investments available.

                Why a Bathroom Renovation Boosts Home Value

                Buyers across Auckland’s price bands — Mt Eden, Takapuna, Manukau — are consistent on this point: they want bathrooms that don’t require immediate work. A refreshed bathroom communicates care and readiness in a way that photographs well and holds up on inspection. Dorothy Li from Superior Renovations notes that bathrooms are one of the primary selling points for Auckland homes when they get the balance of practicality and quality right.

                “A modern bathroom isn’t just about aesthetics — it’s a functional space that Auckland buyers see as a non-negotiable for their next home.”

                From Henderson to Remuera, the principle is the same — durability, good design, and a finish that doesn’t immediately look like it needs changing again.

                Key Features of a High-Value Bathroom Renovation

                • Walk-in showers: Frameless glass is the dominant preference among Auckland buyers — accessible, visually open, and easy to maintain. Particularly valued in family homes and properties suited to aging-in-place buyers.
                • Quality waterproofing: Auckland’s humidity requires serious waterproofing investment. High-quality membranes and sealants are the difference between a bathroom that performs and one that develops mould problems within a few years.
                • Eco-friendly fixtures: Water-saving showerheads, dual-flush toilets, and LED lighting reduce running costs and register with Auckland’s increasingly sustainability-focused buyer pool.
                • Timeless design: Resene’s Sea Fog or Black White, textured tiles, natural stone accents — finishes that won’t read as dated in five years.
                • Smart storage: Built-in niches, floating vanities, mirrored cabinets — space is at a premium in many Auckland homes, and bathroom storage is consistently undervalued until it’s missing.
                Want a ballpark for your renovation?
                See the calculators →

                bathroom design auckland

                Cost vs. Value: Calculating Bathroom ROI

                ROI = (Increase in Home Value – Renovation Cost) / Renovation Cost x 100

                A $20,000 bathroom remodel that increases your home’s value by $28,000:

                ($28,000 – $20,000) / $20,000 x 100 = 40%

                In Grey Lynn or Devonport, bathroom renovations achieve ROIs of 60–75% — particularly in homes with a single bathroom where the addition of a second facility is not practical. Keeping spend proportionate matters: $25,000 on a bathroom for an $800,000 home is sensible; the same spend on a $400,000 property requires more careful consideration, per Building Guide NZ.

                Bathroom Type Estimated Cost (NZD) Potential ROI Key Features
                Basic Refresh $10,000–$15,000 55–70% New fixtures, paint, basic tiles
                Mid-Range Remodel $15,000–$30,000 60–75% Walk-in shower, floating vanity
                Luxury Renovation $35,000+ 50–65% Freestanding bath, premium tiles

                “Bathroom spend should be proportionate to the property value — the mid-range tier consistently delivers the strongest ROI for most Auckland homes.”

                Planning Your Bathroom Renovation in Auckland

                1. Set a realistic budget: Materials, labour, permits, and a 10–15% contingency for plumbing surprises common in older Auckland homes. Our renovation costs guide covers this in detail.
                2. Licensed tradespeople: Plumbing, electrical, and waterproofing work must comply with the NZ Building Code, per the New Zealand Government.
                3. Council consent: Major plumbing or structural changes need Auckland Council approval. Consent fees typically run $1,000–$3,000.
                4. Work with a designer: Compact bathrooms need good layout decisions. A designer prevents the expensive mistake of committing to a configuration that doesn’t actually work.
                5. Source locally: Mitre 10 and PlaceMakers stock quality tiles, fixtures, and vanities at realistic Auckland prices.

                bathroom renovation design

                Local Considerations for Auckland Bathrooms

                Waterproofing and ventilation are the two variables that determine whether a bathroom holds up in Auckland’s climate — not optional decisions. Mission Bay and St Heliers are the most demanding environments for this. Smaller homes in Mt Albert or Onehunga benefit most from wall-mounted vanities and corner showers that recover usable floor space. Parnell and Herne Bay support premium specification — quality tiles and statement vanities — if the property value can absorb it. Water-efficient fixtures are increasingly a positive signal for Auckland buyers who are thinking about running costs.

                “In Auckland, a bathroom that’s durable, well-designed, and eco-friendly gets noticed by buyers — and by agents advising on what the property is worth.”

                See our bathroom renovation ideas for design direction suited to Auckland homes.

                Common Mistakes to Avoid

                • Overcapitalising: A $40,000 bathroom in a $500,000 home is a budget problem, not a renovation strategy.
                • Inadequate ventilation: Mould is expensive to remediate and immediately visible to buyers. A quality extractor fan is a basic requirement.
                • Trend-driven design: Bold colour choices or niche styling limit buyer appeal. Neutral and timeless consistently outperforms.
                • Unpermitted work: Fines and settlement delays. Check with Auckland Council before starting any significant plumbing or structural work.

                double vanity bathroom renovation with grey stone tiles and skylight-lit shower

                Real-World Example: A Bathroom Transformation in Grey Lynn

                A cramped Grey Lynn villa bathroom — dated, poorly lit, and short on storage — became a neutral, functional space with a walk-in shower, floating vanity, and water-saving fixtures. Textured tiles added some warmth without narrowing buyer appeal. The $22,000 project added an estimated $32,000 in value. The open feel was the feature agents highlighted.

                “Our Grey Lynn clients were happy with the result — it’s now the room that holds up during inspections rather than undermining them.”

                A bathroom renovation done right — proper waterproofing, good layout decisions, durable materials — is one of the most reliable ways to add value and remove objections in an Auckland sale.

                Upgrading Your Basement: Adding Floor Space Without Expanding the Footprint

                In Auckland, where sections are often compact and extending outward isn’t always practical or permitted, a basement conversion offers a way to add genuinely usable floor space without touching the property’s footprint. A well-executed conversion at $30,000–$50,000 can increase a home’s value by $40,000–$70,000 — a strong return in suburbs like Ponsonby, Mt Eden, and Papatoetoe where additional living space is consistently in demand.

                Why a Basement Upgrade Adds Significant Value

                Most Auckland basements are used for storage or left entirely unfinished. Converting one into a functioning room — home office, guest suite, media room, or self-contained flat — changes the property’s floor plan without changing its building envelope. Buyers understand square metres. A property with a properly finished basement commands a different price than one without.

                “A converted basement isn’t just extra space — it turns a storage liability into a liveable asset that buyers will pay for.”

                From a home cinema in Devonport to a rental-ready flat in Henderson, the versatility of a converted basement appeals across Auckland’s diverse buyer pool — families needing space, investors seeking yield, and remote workers wanting a dedicated room away from the main living areas.

                Key Features of a High-Value Basement Conversion

                • Waterproofing and insulation: The two non-negotiables. Auckland’s humidity will find any gap in a basement membrane. Quality insulation makes the space comfortable year-round, not just in summer.
                • Natural light: Egress windows or light wells are what prevent a converted basement from feeling like a converted basement. Dorothy Li at Superior Renovations consistently highlights this as the feature that makes or breaks buyer perception of these spaces.
                • Versatile layout: A room that can be a bedroom, office, or media space without significant reconfiguration appeals to a wider range of buyers than one designed for a single use.
                • Moisture-resistant flooring: Ceramic tiles or vinyl planks handle Auckland’s conditions and present well without requiring the maintenance that timber or carpet demand in a below-grade space.
                • Separate access: Where the layout allows, a separate entrance creates the option for a self-contained flat — a significant addition in Auckland’s rental market.

                glass shower and round vessel basin on a wood vanity in a bathroom renovation

                Cost vs. Value: Calculating Basement ROI

                ROI = (Increase in Home Value – Renovation Cost) / Renovation Cost x 100

                A $40,000 basement conversion that increases your home’s value by $55,000:

                ($55,000 – $40,000) / $40,000 x 100 = 37.5%

                In Herne Bay or Takapuna, basement conversions achieve ROIs of 50–70% — stronger in homes where additional living space is scarce. $50,000 in a $1.2M property is a proportionate investment; the same spend in a $600,000 home requires more careful assessment, per Building Guide NZ.

                Basement Type Estimated Cost (NZD) Potential ROI Key Features
                Basic Conversion $20,000–$30,000 50–65% Basic finishes, single room
                Mid-Range Conversion $30,000–$50,000 55–70% Multiple rooms, egress windows
                Self-Contained Flat $60,000+ 50–65% Separate entrance, kitchenette

                “A basement conversion should add usable floor space without overcommitting — match the investment to the property value and what the market in your suburb supports.”

                Planning Your Basement Conversion in Auckland

                1. Assess the space first: Dampness, low ceilings, and structural issues are common in Auckland’s older villa basements. A professional assessment before committing to a design is time and money well spent.
                2. Licensed tradespeople: Structural, plumbing, and electrical work must comply with the NZ Building Code, per the New Zealand Government.
                3. Council consent: Converting a basement to habitable space or adding a separate entrance requires Auckland Council approval. Consent fees typically run $1,500–$5,000.
                4. Designer input: Layout, light, and ventilation are the three variables that determine whether a basement conversion feels like a legitimate room or a storage area with paint on the walls.
                5. Local suppliers: Mitre 10 and Bunnings stock the insulation, flooring, and lighting materials these projects require at competitive Auckland prices.

                Local Considerations for Auckland Basements

                Moisture is the primary challenge — non-negotiable waterproofing, particularly in low-lying suburbs like Onehunga or coastal areas like Mission Bay. Natural light is the feature that separates a finished basement from a dark space buyers don’t know what to do with — egress windows or skylights are worth the investment. In Parnell or St Heliers, buyers expect finished quality — quality flooring and built-in storage support the premium price. For rental yield, a kitchenette and separate entrance changes what the property can offer to investors and multi-generational families — a growing need in Auckland’s market.

                “In Auckland, a basement that’s dry, light, and genuinely liveable is one fewer objection at inspection and one more reason to make an offer.”

                Common Mistakes to Avoid

                • Overcapitalising: $70,000 in a $700,000 home requires a specific return calculation. Run the numbers before committing.
                • Cutting waterproofing costs: Dampness in a basement is the problem that derails sales. Quality membranes upfront are significantly cheaper than remediating the alternative.
                • Underinvesting in light: A dark basement deters buyers regardless of everything else. Egress windows are not optional.
                • Skipping consents: Unpermitted habitable space creates settlement problems. Always check with Auckland Council.

                empty renovated living room with new floor-to-ceiling windows and doors to the garden

                Real-World Example: A Basement Conversion in Mt Eden

                A damp, unused Mt Eden villa basement became a home office and guest suite — egress windows, robust waterproofing, and vinyl plank flooring created a bright, practical space that works for remote work and guests equally well. The $35,000 project added an estimated $50,000 to the home’s value. The flexibility of the space was what agents highlighted during the eventual sale.

                “Our Mt Eden clients use the basement daily — it’s the room that makes the whole house work better, and it showed in the sale price.”

                A basement conversion adds floor space, buyer appeal, and flexibility. Quality waterproofing, sufficient light, and a versatile layout are the decisions that determine whether the investment returns what it should.

                Exterior Refresh: First Impressions That Hold Up to Scrutiny

                In Auckland’s property market, a buyer’s first impression of a property is formed before they step through the front door. Peeling paint, tired weatherboards, and an overgrown garden signal deferred maintenance — a story buyers then apply to everything else they see inside. An exterior refresh at $5,000–$25,000 is one of the most cost-effective ways to reposition a property’s perception, typically returning $10,000–$25,000 in added value, per Building Guide NZ.

                Why an Exterior Refresh Boosts Home Value

                A polished exterior communicates care. It tells buyers the property has been looked after — and that presumption carries through to their assessment of everything else. Fresh paint or updated cladding can increase home value by 3–5%, per Superior Renovations data. A $15,000 exterior refresh can add $20,000–$30,000 to a home’s value in high-demand suburbs like Remuera or Takapuna.

                “A well-presented exterior doesn’t just improve photographs — it changes how buyers feel about the property before they’ve seen a single room.”

                Heritage villas in Ponsonby, brick-and-tile bungalows in Mt Albert, modern builds in Botany Downs — exterior refresh applies across all Auckland property types. The specification changes; the principle doesn’t.

                weatherboard villa entrance before painting with pale blue and white trim
                weatherboard villa entrance after exterior painting in dark navy with white trim

                Key Features of a High-Value Exterior Refresh

                • Fresh exterior paint: Resene’s Lumbersider in neutral tones like Sea Fog is durable, widely appealing, and protects the underlying substrate from Auckland’s moisture.
                • Updated cladding: Timber weatherboards for heritage suburbs like Herne Bay; modern panels for newer builds in Newmarket or Albany. Match the material to the home’s character and suburb.
                • Native landscaping: Flax, pohutukawa, and native ground cover paired with mulch — low maintenance, ecologically appropriate, and visually considered.
                • Front door replacement: A well-specified steel or fibreglass door updates the entry immediately and can return up to 100% of its cost in buyer perception.
                • Outdoor features: A pathway, small patio, or pergola adds usability and improves how the property photographs.

                Cost vs. Value: Calculating Exterior ROI

                ROI = (Increase in Home Value – Renovation Cost) / Renovation Cost x 100

                A $15,000 exterior refresh that adds $22,500 to the property value:

                ($22,500 – $15,000) / $15,000 x 100 = 50%

                In Parnell or Devonport, exterior upgrades achieve ROIs of 60–70% — particularly for heritage homes where presentation relative to other properties in the street makes a meaningful difference. $20,000 is appropriate for a $1M property; the same spend on a $600,000 home needs more careful consideration, per Renovation Works.

                Exterior Upgrade Estimated Cost (NZD) Potential ROI Key Features
                Basic Refresh $5,000–$10,000 50–65% Paint, basic landscaping
                Mid-Range Upgrade $10,000–$20,000 55–70% Cladding, new door, pathways
                Premium Upgrade $25,000+ 50–65% Full recladding, extensive landscaping

                “Exterior spend should be proportionate to the property value — a well-executed mid-range refresh consistently outperforms expensive recladding in most Auckland suburbs.”

                Planning Your Exterior Refresh in Auckland

                1. Budget honestly: Materials, labour, and a 10–15% contingency for damaged substrate or cladding — common in older Auckland homes. Our renovation costs guide covers this.
                2. Licensed professionals: Painting, cladding, and structural work must comply with the NZ Building Code, per the New Zealand Government.
                3. Council consent for major work: Recladding or fences over 2.5m require Auckland Council approval. Fees of $1,000–$3,000 are typical, per Auckland Council.
                4. Colour consultant: Worth using for heritage properties or where the colour choice has significant impact on street presence. Gets the right result first time.
                5. Local suppliers: Resene, Mitre 10, and Kings Plant Barn keep material costs in check and stock appropriate NZ products.
                Want a ballpark for your renovation?
                See the calculators →

                cream weatherboard house before exterior repaint
                navy weatherboard house with white trim mid exterior repaint with scaffolding up

                Local Considerations for Auckland Exteriors

                Auckland’s humidity and coastal salt air require weather-resistant paints and durable cladding that won’t fail within a few years of application. Mission Bay and St Heliers are the harshest environments; anything used here needs to be rated for coastal exposure. Heritage zones in Ponsonby and Freemans Bay have specific requirements — traditional colour palettes and timber weatherboards are expected, and council restrictions are real. Modern homes in Albany and Botany Downs can support bolder accent colours and contemporary cladding. Native landscaping is increasingly a marker of care for Auckland’s eco-conscious market rather than a nice-to-have.

                “In Auckland, a well-presented exterior that suits the suburb’s character is worth more than one that simply looks expensive.”

                Common Mistakes to Avoid

                • Overcapitalising: $30,000 on a $500,000 property needs a clear return calculation. Don’t assume spending more automatically adds more value.
                • Low-quality materials: Cheap paint and substandard cladding fail quickly in Auckland’s climate. The cost of redoing this is greater than doing it properly the first time.
                • Heritage zone non-compliance: Unapproved changes in Grey Lynn or similar zones trigger fines. Check before starting anything.
                • Neglecting the garden: A freshly painted house with an untidy garden still reads as unmaintained. Landscaping completes the picture.

                Real-World Example: An Exterior Transformation in Remuera

                A tired Remuera bungalow — peeling paint, basic garden — received Resene Alabaster exterior paint, new weatherboard cladding, and native flax with gravel pathways. The $18,000 project added an estimated $28,000 in value. The property’s street presence changed substantially, and the exterior became the feature that differentiated it from comparable properties listed nearby.

                “Our Remuera clients were direct about it — the kerb appeal is what pulled people in to inspect. Everything else closed the deal.”

                An exterior refresh changes what a property says about itself before anyone walks through the front door. For the cost involved, it’s one of the most straightforward ways to improve buyer perception and add genuine value in Auckland’s market.

                Energy-Efficient Upgrades: Long-Term Value for Auckland Homes

                Energy-efficient upgrades have moved from a nice-to-have to a genuine decision factor for Auckland buyers. Double-glazing, insulation, and solar panels reduce running costs and signal a forward-thinking property — relevant for families in Henderson, professionals in Newmarket, and investors assessing long-term holding costs. A $25,000 investment in energy efficiency can add $30,000–$40,000 to a home’s value, per Builder Connect NZ, with ROIs of 50–65% across Auckland’s suburbs. Warmer Kiwi Homes grants cover ceiling and underfloor insulation and heat pumps for eligible owner-occupiers of homes built before 2008; double glazing, solar and LED lighting are not funded.

                Why Energy-Efficient Upgrades Add Value

                Buyers are doing the running-cost calculation now in a way they weren’t five years ago. A home with double-glazing, proper insulation, and LED lighting throughout presents differently in a listing and differently in an inspection. Energy-efficient windows can save 10–15% on heating and cooling bills, per Renovation Works — a real number that buyers factor into their assessment of affordability.

                “An energy-efficient home costs less to run and signals a property that’s been maintained with long-term thinking — both matter to Auckland buyers.”

                Retrofitting a Mt Eden villa or modernising a Manukau family home with efficiency upgrades aligns with Auckland’s sustainability direction and makes the property more competitive in a market where buyers have choices.

                Key Upgrades Worth Prioritising

                • Double-glazed windows: Reduce heat loss and noise — particularly valuable in coastal suburbs like Mission Bay. The energy saving is real and the comfort difference in an Auckland winter is significant.
                • Insulation: Wall, roof, and floor insulation with eco-friendly materials (wool or recycled polyester) addresses Auckland’s humid winters directly. Warmer Kiwi Homes grants cover ceiling and underfloor insulation and heat pumps for eligible owner-occupiers of homes built before 2008 — wall insulation is not funded, which is why a renovation, with the cavity already open, is the cheapest time to do it.
                • Solar panels: Auckland gets enough sun to make solar worthwhile, particularly in Henderson and similar inland suburbs. Reduces electricity costs and appeals to buyers who are looking at long-term running costs, per Superior Renovations.
                • Smart thermostats: Optimise heating and cooling costs while adding modern convenience — appeals to tech-oriented buyers.
                • LED lighting throughout: Reduces power use and presents well in an open-plan Auckland home.

                open-plan kitchen and living renovation with sea views through floor-to-ceiling windows

                Cost vs. Value: Calculating Energy-Efficient ROI

                ROI = (Increase in Home Value – Renovation Cost) / Renovation Cost x 100

                A $25,000 upgrade (double-glazing and insulation) that adds $35,000 to the home’s value:

                ($35,000 – $25,000) / $25,000 x 100 = 40%

                In eco-conscious suburbs like Ponsonby or Albany, ROIs of 50–65% are achievable. $30,000 in a $1.5M property is proportionate; in a $700,000 home it requires more careful consideration of which specific upgrades offer the most return.

                Upgrade Type Estimated Cost (NZD) Potential ROI Key Features
                Basic Upgrades $5,000–$15,000 50–60% LED lighting, smart thermostats
                Mid-Range Upgrades $15,000–$30,000 55–65% Double-glazing, insulation
                Premium Upgrades $40,000+ 50–60% Solar panels, full retrofit

                “Energy-efficient investment should match the property value — start with double-glazing and insulation before committing to solar if the budget is limited.”

                Planning Energy-Efficient Upgrades in Auckland

                1. Set a realistic budget: Include materials, labour, and a 10–15% contingency for wiring or insulation surprises common in older properties. Our renovation costs guide covers this.
                2. Licensed installers: Electrical and structural work must meet the NZ Building Code, per the New Zealand Government.
                3. Check available grants: Warmer Kiwi Homes subsidises insulation and heating upgrades for eligible homeowners — worth checking before committing to full-cost estimates.
                4. Energy consultant: A professional assessment of your home’s specific heat loss profile identifies which upgrades will deliver the most return in Auckland’s climate.
                5. Local suppliers: Eco Insulation and SolarCity are Auckland-based suppliers with relevant product knowledge for the region’s specific conditions.
                balcony deck renovation with harbour and city skyline views

                Superior Renovations

                Local Considerations for Auckland Energy Upgrades

                Auckland’s humid winters and variable summers mean heat retention is a more pressing concern than cooling for most properties. Older villas in Freemans Bay and similar suburbs are among the draughtiest homes in the city — double-glazing and insulation deliver an immediate, perceptible comfort improvement as well as a measurable cost saving. Solar performs better in Henderson and similar inland locations than in consistently overcast coastal pockets. LED lighting in open-plan layouts is the most cost-effective entry point for energy efficiency on a limited budget. Listing energy savings prominently when selling is increasingly relevant to Auckland buyers thinking about long-term affordability.

                “In Auckland, energy efficiency reduces running costs, improves comfort, and has become a genuine differentiator in a competitive market.”

                Common Mistakes to Avoid

                • Overcapitalising: $50,000 in energy upgrades in a $600,000 home requires a very specific return calculation. Start with the highest-impact upgrades first.
                • DIY electrical or insulation work: Work that doesn’t meet Building Code requirements fails inspection and reduces the property’s appeal. Licensed professionals only.
                • Missing available grants: Warmer Kiwi Homes subsidies exist specifically to reduce the cost barrier — check eligibility before pricing the project.
                • Over-specifying smart technology: Specialised smart home systems may not appeal to all buyers. Stick to features with broad usability.
                Panasonic wall control panel for a ducted air conditioning system

                Superior Renovations

                Real-World Example: An Energy Upgrade in Takapuna

                A Takapuna home that was expensive to heat and cool received double-glazed windows, wool insulation, and a smart thermostat. The $28,000 project added $38,000 to the home’s value and immediately reduced the household’s energy bills. The upgrades were highlighted in the property’s listing and referenced by the agent as a point of difference from comparable Takapuna properties.

                “Our Takapuna clients noticed the difference in their bills within the first quarter — and buyers noticed the difference in the listing.”

                Energy-efficient upgrades are a practical, forward-looking investment for Auckland homes. The right combination of double-glazing, insulation, and efficient lighting reduces costs, improves comfort, and positions the property well in a market where buyers are increasingly running the numbers on what a home will cost to live in.

                Summary: Top 7 Renovation Ideas for Auckland Homes

                The seven renovation types covered in this guide — kitchen remodel, deck addition, master ensuite, bathroom renovation, basement upgrade, exterior refresh, and energy-efficient upgrades — cover the range of what works for Auckland’s property market in 2026. ROIs of 50–80% are achievable across all of them when specification is proportionate to property value and appropriate to the suburb. The table below summarises the key numbers and Auckland-specific variables.

                Renovation Type Estimated Cost (NZD) Potential ROI Key Features Auckland Considerations
                Kitchen Remodel $20,000–$50,000 70–80% Open-plan layout, modern appliances, stone benchtops, smart storage Neutral designs for broad appeal; durable materials for humid climate
                Deck Addition $10,000–$30,000 65–75% Hardwood or composite decking, built-in seating, weatherproofing Indoor-outdoor connection; consents required for decks over 1.5m
                Master Ensuite $15,000–$40,000 60–75% Walk-in shower, double vanity, neutral tiles, ventilation Waterproofing essential; premium finishes appropriate in higher-value suburbs
                Bathroom Renovation $10,000–$35,000 60–75% Frameless shower, eco-friendly fixtures, smart storage, timeless design Mould-resistant materials; space-saving layouts for smaller homes
                Basement Upgrade $20,000–$60,000 50–70% Waterproofing, egress windows, versatile layout, durable flooring Moisture control in coastal areas; separate access for rental potential
                Exterior Refresh $5,000–$25,000 50–70% Fresh paint, modern cladding, native landscaping, new front door Heritage-appropriate finishes in villa suburbs; coastal-grade materials
                Energy-Efficient Upgrades $5,000–$40,000 50–65% Double-glazing, insulation, solar panels, LED lighting Warmer Kiwi Homes covers ceiling and underfloor insulation and heat pumps only — not glazing, solar or LEDs; solar strongest in inland suburbs

                For specific cost estimates, try our Renovation Cost Calculator Tools


                Planning Your Auckland Renovation

                These seven renovation types cover the full range of what moves the needle in Auckland’s market — from the kitchen, which most buyers assess first, to energy efficiency, which buyers are increasingly factoring into their long-term cost calculations. The common thread across all of them: proportionate spend, quality materials suited to Auckland’s climate, and specification that holds broad appeal rather than personal taste. Plan carefully, use licensed tradespeople, and keep renovation cost within a range the suburb’s property values can support.

                “The best renovations don’t just add value — they make your Auckland home a place you love and buyers can’t resist.”

                Talk to Superior Renovations about where to start — we can advise on what’s realistic for your suburb, your home, and your budget, and manage the process from consent through to completion. Our renovation costs guide covers budgeting in detail, and local suppliers like Mitre 10 and Bunnings can help with materials once you know what you need.

                Which renovation offers the best ROI for Auckland homes?

                Kitchen remodels typically offer the highest ROI, often 70–80%, as they're a focal point for buyers. Deck additions and bathroom renovations follow closely, with ROIs of 60–75%, per Renovation Works.

                How much should I spend on renovations to avoid overcapitalizing?

                Aim to spend 1–3% of your home's value on smaller projects (e.g., $20,000 for a $1M home) and up to 5–10% for major upgrades like kitchens or basements. Align your budget with local property values in suburbs like Parnell or Papatoetoe.

                Do I need council consents for these renovations?

                Yes, major renovations like decks over 1.5m, ensuites, basements, or structural exterior changes require Auckland Council approval. Consent fees range from $500–$5,000, depending on the project. Visit Auckland Council for details.

                How long do these renovations take?

                Timelines vary: a kitchen remodel or bathroom renovation takes 4–8 weeks, a deck or exterior refresh 2–4 weeks, and a basement conversion 8–12 weeks. Hire licensed professionals to ensure timely completion.

                Are energy-efficient upgrades worth it in Auckland?

                Yes. Double-glazing and insulation reduce running costs and appeal to buyers who are thinking about long-term affordability. ROIs of 50–65% are achievable. Per EECA, Warmer Kiwi Homes grants cover ceiling and underfloor insulation and heat pumps for eligible owner-occupiers of homes built before 2008 — double glazing, solar and LED lighting are not funded.

                Can I do these renovations myself to save money?

                DIY is risky for structural, plumbing, or electrical work — non-compliant work can trigger fines and reduce buyer confidence at inspection. Use licensed tradespeople for anything that requires Building Code compliance.

                How do I choose the right renovation for my Auckland home?

                Consider your property's value, what comparable properties in your suburb offer, and what buyers in that area prioritise. A consultation with Superior Renovations will give you specific, suburb-appropriate advice.


                18 months 0 percent interest long term finance badge

                Have you been putting off getting renovations done?

                We have partnered with Q Mastercard ® to provide you an 18 Month Interest-Free Payment Option, you can enjoy your new home now and stress less.

                Learn More about Interest-Free Payment Options*

                *Lending criteria, fees, terms and conditions apply. Mastercard is a registered trademark and the circles design is a trademark of Mastercard International Incorporated.


                Still have questions unanswered?

                Book a no-obligation consultation with the team at Superior Renovations,
                we’d love to meet you to discuss your renovation ideas!

                  Services

                  Home RenovationKitchen RenovationBathroom RenovationOutdoor RenovationHouse ExtensionCommercialDesign ServicesOther

                  By submitting this form, you agree to receive communications from us via email or text regarding our services, you can unsubscribe at any time.

                  This site is protected by reCAPTCHA and the Google

                  Privacy Policy and Terms of Service apply.


                  References

                  1. Auckland Council
                  2. Auckland Council
                  light wood contem - Superior Renovations
                  House Renovation

                  Renovate The Old & Living Like New in Auckland | Superior Renovations

                  Hey Aucklanders, if you’ve got a character-packed villa in Mt Eden or a classic bungalow in Grey Lynn and you’re torn between moving or giving it a proper glow-up, renovating the old to live like new is often the smarter play. It’s about blending modern comforts—like open-plan living, energy-saving tweaks, and smart tech—with that timeless Kiwi charm, all while navigating our humid climate and council rules to create a home that feels fresh, efficient, and uniquely yours.

                  Free cost calculator

                  How much will your renovation cost?

                  Get an instant Auckland price range for your project — no details required to see it.

                  Try our free cost calculators →

                  What’s It Really Mean to “Live Like New” in an Older Auckland Home?

                  It’s nailing that sweet spot where your place gets all the mod cons without losing its soul, eh? Think knocking down non-load-bearing walls for breezy open spaces in Ponsonby pads, swapping outdated fixtures for matte black taps and pendant lights, or upgrading flooring to polished hardwood that highlights original kauri. Add fresh low-VOC Resene paint and custom cabinets, and suddenly your heritage spot in Remuera or Parnell feels brand spanking new. Cici from our design team loves how it resolves those niggly discomforts families put up with for years—turning soggy, draughty villas into cosy, functional havens.

                  How Can You Boost Energy Efficiency and Sustainability in a Kiwi Reno?

                  Our damp winters and sunny summers make this a no-brainer—chuck in double-glazed windows, beefed-up insulation (Warmer Kiwi Homes grants cover ceiling and underfloor insulation for eligible owner-occupiers, but not glazing, LEDs or solar), LED lighting, and even solar panels for bill cuts. Upgrade HVAC with smart ventilation to beat humidity in coastal St Heliers or Devonport spots, and you’re future-proofing against rising power costs. Rust-resistant hardware’s key near the sea, and reclaimed materials from local salvage yards like The Junk Company add eco points without skimping on style.

                  Why Add Smart Features and Preserve Character at the Same Time?

                  Smart thermostats, lighting, and security systems slot right into older homes—perfect for busy families in Epsom or Kingsland wanting home office nooks. But don’t ditch the charm: Add crown molding, vintage-inspired appliances, or reclaimed kauri details to keep that heritage vibe buyers love in Freemans Bay or Herne Bay. It boosts value heaps more than a bland new build, especially with Auckland’s market craving unique stories over cookie-cutter stuff.

                  Dreaming of breathing new life into your classic Auckland gem? Give us a shout at Superior Renovations for a free consult—what’s the one thing you’d change first?

                  There’s something special about owning an older home in our vibrant city—those villas, bungalows, and weatherboard treasures tell stories of the past. But let’s be real: creaky floors, draughty windows, and dated layouts don’t always fit today’s Kiwi lifestyle. That’s where renovation comes in, and at Superior Renovations, we’re here to show you how to take the old and make it feel brand spanking new. In this blog, we’re diving into what “living like new” really means—modernizing interiors, boosting energy efficiency, adding smart tech, preserving character, and nailing the details.


                  If you’re looking for “specific” cost estimates, try our Renovation Cost Calculator Tools


                  Need ideas? Check out our Kitchen Design Gallery or dive into our Bathroom Design Gallery for inspiration!


                  We’ll share practical tips and Auckland-specific advice to transform your home into a modern masterpiece. Ready to renovate? Let’s get started!


                  1. Modernizing the Interiors

                  Ever walked into your older home and thought, “This place could use a glow-up”? You’re not alone. Renovating an old house to feel fresh and modern is a growing trend across New Zealand, especially here in Auckland, where heritage villas and bungalows dot the landscape. At Superior Renovations, we’re all about breathing new life into your space while keeping that Kiwi charm intact. So, what does it mean to “live like new” when modernizing your interiors?

                  Why Modernize Your Interiors?

                  Living like new isn’t just about aesthetics—it’s about making your home work for your lifestyle. Older Auckland homes, like those gorgeous villas in Ponsonby or Mount Eden, often come with small, boxed-in rooms, dated fixtures, and flooring that’s seen better days. A renovation focused on modernizing interiors opens up your space, updates the essentials, and brings your home into the 21st century—all while keeping it functional and cozy for Auckland’s unique climate.

                  Replace Outdated Fixtures

                  First things first: let’s tackle those relics from the past. Kitchens and bathrooms are prime renovation targets because they’re the heart and soul of any home. Swap out that chipped sink or rusty tap for sleek, modern designs—think matte black faucets or minimalist basin styles trending on ArchiPro. Updating lighting is another game-changer. Ditch those old fluorescent bulbs for chic pendant lights or recessed LEDs to brighten up your space.

                  Tip: Check Auckland Council’s building consent guidelines (aucklandcouncil.govt.nz) before starting—some fixture replacements might need approval if plumbing or electrical work is involved.

                  black undermount kitchen sink with matte black tapware and roll-up drying rack

                  Create Open Spaces

                  Nothing says “living like new” like an open-plan layout. Older homes often feel cramped with walls chopping up the floorplan. Knocking down a non-load-bearing wall (always consult a pro first!) between your kitchen and living area can create that airy, spacious vibe Aucklanders love. It’s perfect for entertaining or just soaking in the natural light from those big Kiwi skies.

                  Tip: Head to building.govt.nz to ensure your renovation complies with the New Zealand Building Code—safety first!

                  Update Flooring

                  Worn-out carpet or creaky floorboards? Time for an upgrade. Modern flooring options like hardwood, ceramic tiles, or even durable laminates can completely transform your home’s feel. Hardwood’s a fave for its timeless appeal, while tiles work wonders in Auckland’s humid summers.

                  Tip: Pop into a local Auckland showroom or browse ArchiPro for inspiration—seeing samples in person helps you nail the vibe you’re after.

                  Add Fresh Paint

                  A lick of paint is the easiest way to hit refresh. Modern colour palettes—think soft greys, earthy greens, or crisp whites—are all the rage in Auckland renovations. Want to spice it up? Add an accent wall in a bold hue like navy or terracotta to inject personality.

                  Tip: Use low-VOC paints for better indoor air quality—an eco-friendly bonus for your reno!

                  Install New Cabinets

                  Old cabinets can drag down even the most well-intentioned renovation. In kitchens and bathrooms, go for modern styles with clever storage solutions—think pull-out shelves or soft-close drawers. White shaker cabinets are a hit for their clean, contemporary look, but matte black or timber finishes are trending too.

                  Tip: Measure twice, order once—custom cabinets can max out your space but need precise planning.

                  Living Like New in Auckland

                  Modernizing your interiors isn’t just about keeping up with trends—it’s about crafting a home that feels fresh, functional, and yours. Imagine cooking in a sleek kitchen with new cabinets and updated fixtures, or lounging in an open-plan living area with gorgeous hardwood underfoot. That’s the beauty of renovation: you’re taking the old and making it feel brand spanking new, all while staying true to Auckland’s laid-back lifestyle.


                  1. Energy Efficiency & Sustainability

                  When you think of renovating your older home, do you picture lower power bills, a smaller carbon footprint, and a space that’s comfy year-round? That’s what “living like new” means when we talk energy efficiency and sustainability at Superior Renovations. Here in Auckland, where weather can swing from sunny to soggy in a heartbeat, a smart renovation can turn your dated home into an eco-friendly gem.
                  close-up of a white wall switch panel with heater light and fan icons

                  Why Focus on Energy Efficiency?

                  Older Auckland homes—think those charming Grey Lynn cottages or Parnell villas—weren’t built with today’s energy standards in mind. Leaky windows, poor insulation, and outdated systems can mean chilly winters and skyrocketing bills. A renovation that prioritizes efficiency not only saves you money but also aligns with New Zealand’s push for sustainability. Plus, who doesn’t want to brag about a greener home?

                  Add Energy-Efficient Features

                  Start with the big wins: solar panels, LED lighting, and energy-efficient windows. Solar’s a no-brainer in Auckland—our sunny days make it a solid investment. Check out building.govt.nz for the latest on solar installation regs, and you might even qualify for incentives (peek at Auckland Council’s site for updates). Swap old bulbs for LEDs—they use less power and last longer, cutting your reno’s long-term costs. And those draughty single-pane windows? Upgrade to double-glazed ones for better heat retention.

                  Improve Insulation

                  Insulation’s the unsung hero of any energy-efficient renovation. Many older Kiwi homes lack proper wall or ceiling insulation, letting heat escape faster than you can say “Auckland winter.” Beef it up with modern materials like wool or fibreglass batts—building.govt.nz has the scoop on minimum standards under the NZ Building Code. Don’t forget underfloor insulation too; it’s a game-changer for keeping toes toasty.

                  Tip: If you’re DIY-ing, wear gloves and a mask—insulation can be itchy business!

                  Upgrade HVAC Systems

                  That ancient heater chugging away in the corner? It’s probably costing you more than it’s worth. Modern HVAC systems—like heat pumps or ducted units—are quieter, more efficient, and better at maintaining Auckland’s tricky indoor temps. Look for energy-star-rated models to max out savings.

                  Tip: Auckland Council might require a consent for new HVAC installs, so double-check before you commit.

                  close-up of a wall-mounted Panasonic video intercom screen with talk and off buttons

                  Living Like New, Sustainably

                  What does “living like new” look like with an energy-efficient renovation? Picture this: you’re sipping coffee in a warm, well-lit lounge, knowing your solar panels are powering the moment and your insulation’s keeping the chill at bay—all while your energy bill shrinks. It’s about modern comfort with a nod to sustainability, perfectly suited to Auckland’s eco-conscious vibe.

                  Bonus Auckland Advice

                  Renovating for efficiency doesn’t have to break the bank. Explore funding options like the Warmer Kiwi Homes programme (if eligible) via energywise.govt.nz—it offers subsidies for insulation and heating upgrades. And while you’re at it, chat with your contractor about passive design tricks—like orienting windows for max sunlight.


                  1. Adding Smart Home Features

                  imagine this: you’re in your classic Herne Bay villa, adjusting the thermostat with your phone, dimming lights with a voice command, and checking your security cameras while sipping a flat white at a Ponsonby café. That’s what “living like new” means when you weave smart home tech into your renovation. At Superior Renovations, we’re seeing more Aucklanders embrace these upgrades to modernize their older homes. Let’s explore how adding smart features can level up your reno.

                  Why Go Smart with Your Renovation?

                  Older homes in Auckland—whether it’s a Mount Albert bungalow or an Epsom character house—weren’t built for today’s tech-driven world. A renovation that integrates smart home features brings convenience, efficiency, and a touch of futuristic flair to your space. It’s about making your home work smarter for you, all while fitting into Auckland’s laid-back yet innovative lifestyle.
                  close-up of a black door with a Yale smart lock and lever handle

                  Integrate Smart Home Technology

                  Let’s start with the fun stuff. Smart thermostats—like the Nest or Ecobee—let you control your home’s temp from anywhere, saving energy when you’re out exploring Auckland’s beaches. Smart lighting systems (think Philips Hue) allow you to set moods or schedules—perfect for those long summer evenings. And don’t sleep on smart security—cameras, doorbells, and locks you can monitor remotely add peace of mind, especially in Auckland’s bustling suburbs.

                  Create a Home Office Nook

                  With remote work still a big deal, a dedicated home office nook is a renovation must. Carve out a corner in your living room or spare bedroom, then deck it out with smart features—think automated blinds for glare control or a smart plug to power your setup efficiently. Add built-in shelving or a sleek desk to keep it functional and stylish.

                  Living Like New with Smart Tech

                  “Living like new” in a smart-renovated home means effortless control and modern comfort. Picture locking your front door from your phone as you head to the Viaduct, or pre-heating your home on a rainy Auckland afternoon—all without lifting more than a finger. It’s the kind of upgrade that makes your old house feel cutting-edge, blending seamlessly with the Kiwi love for innovation.
                  close-up of a smart speaker beside a smartphone showing a device setup screen

                  Auckland-Specific Smarts

                  Renovating in Auckland? Keep an eye on local quirks. Our humid climate means smart ventilation systems (like moisture-sensing extractors) can combat dampness—a must for older homes. And if you’re in a heritage overlay area (common in Remuera or Devonport), Auckland Council might have rules about external tech like security cameras—check their site to stay compliant.


                  1. Want a ballpark for your renovation?
                    See the calculators →

                    Preserving Character & Adding Value

                  Got a classic villa in Freemans Bay or a weatherboard beauty in St Heliers? Renovating an older home doesn’t mean stripping away its soul—it’s about blending that timeless Kiwi charm with modern upgrades. At Superior Renovations, we believe “living like new” is about keeping the character that makes your home special while boosting its value.

                  Why Preserve Character in a Renovation?

                  Auckland’s older homes are packed with history—think high ceilings, kauri floors, and those iconic bay windows. A renovation that respects these features not only honours the past but also makes your place stand out in a market full of cookie-cutter builds. Plus, adding value through thoughtful upgrades is a win for your wallet and your lifestyle.

                  Add Architectural Details

                  Want to enhance that old-school charm? Pop in some crown molding, wainscoting, or decorative trim. These touches elevate your interiors without clashing with the home’s original style.

                  Tip: If you’re in a heritage zone (hello, Parnell!), Auckland Council’s site has rules on what alterations need consent—don’t skip this step!

                  Use Reclaimed Materials

                  Sustainability meets character with reclaimed materials. Think kauri timber from a demo’d Kiwi home for a feature wall, or exposed brick for a cozy fireplace nook. These elements add texture and a story to your reno, all while keeping things eco-friendly—a big plus in NZ.

                  Tip: Source reclaimed goodies from local salvage yards like The Junk Company in Auckland—building.govt.nz encourages sustainable choices like this.

                  Choose Vintage-Inspired Appliances and Fixtures

                  Modern doesn’t have to mean sterile. Pick appliances and fixtures that nod to your home’s era but pack today’s tech. A retro-style Smeg fridge in a soft pastel hue or a clawfoot tub with modern taps can bridge old and new perfectly. ArchiPro’s NZ projects showcase how these choices keep the vibe authentic yet functional.

                  Living Like New with Character

                  What does “living like new” look like here? It’s stepping into a home where the past and present chat happily—sipping tea under ornate molding, cooking on a vintage-inspired range, and admiring a reclaimed timber shelf. It’s a renovation that feels fresh but familiar, boosting your home’s value while keeping its Auckland soul intact.

                  Adding Value, Auckland-Style

                  Renovating with character in mind can seriously up your property’s worth. Buyers in Auckland love homes with unique features—those preserved kauri floors or restored sash windows could seal the deal. Plus, if you’re in a heritage overlay (check Auckland Council’s Unitary Plan), sticking to the rules keeps your reno legal and marketable.


                  1. Other Considerations

                  So, you’re ready to renovate that charming old home in Point Chevalier or Kingsland and make it feel brand new. Beyond the big-ticket items like interiors and tech, there are some key “extras” that can tie your renovation together. At Superior Renovations, we’re here to help you think through every detail of “living like new.”

                  Home Renovation Loans

                  Renovating isn’t cheap, especially in Auckland where costs can climb fast. Whether you’re eyeing a full overhaul or just a few upgrades, financing might be your ticket. Kiwi banks like ANZ or Westpac offer home renovation loans, and some even have green options for energy-efficient projects.

                  Tip: Pop over to moneyhub.co.nz for a rundown of NZ lenders—compare rates and terms to keep your reno on budget.

                  Replace Hardware

                  It’s the little things that count. Swapping out dated door handles, hinges, and cabinet pulls for modern designs—like brushed nickel or matte black—can give your home a polished, cohesive look. These small tweaks scream “new” without breaking the bank.
                  close-up of a brushed brass shower mixer tap with hot and cold dial

                  Replace Old Doors

                  Creaky, warped doors are a vibe-killer in any old home. Replacing them with energy-efficient, modern designs not only boosts aesthetics but also improves insulation—crucial for Auckland’s damp winters. Go for solid timber or sleek glass-panelled options to suit your reno’s vibe.

                  Update the Cabinets (Again!)

                  We’ve touched on cabinets before, but they’re worth a second shout. If a full replacement isn’t in the cards, consider a refresh—new doors, a coat of paint, or modern handles can transform kitchen and bathroom storage. Think clever pull-outs or hidden drawers for that “living like new” feel.

                  Living Like New with the Details

                  “Living like new” isn’t just about the big wins—it’s the sum of smart choices. Picture walking through a freshly painted hall with smooth new doors, grabbing a snack from updated cabinets, and knowing your reno’s funded without stress. It’s a home that feels modern and yours, tailored to Auckland’s unique pace and place.

                  Auckland-Specific Nuggets

                  Renovating here? Don’t forget consents—Auckland Council’s site warns that even small changes (like swapping doors) might need approval if they affect structure or heritage rules. And with our coastal climate, opt for rust-resistant hardware—salt air’s no joke! For funding, keep an eye on council or government grants (energywise.govt.nz has deets) if your reno includes eco-upgrades.


                  Bringing It All Together for Your Auckland Renovation

                  And there you have it, Aucklanders—a roadmap to renovating the old and living like new! From sleek, modern interiors to energy-saving upgrades, smart home tech, character-rich details, and those final finishing touches, we’ve covered the lot. At Superior Renovations, we know every Auckland home is unique, whether it’s a heritage villa in Ponsonby or a cozy bungalow in Mount Roskill. Renovation isn’t just about fixing what’s broken—it’s about crafting a space that’s fresh, functional, and totally you. So, grab these tips, check those consents on aucklandcouncil.govt.nz, and let’s turn your old home into a new Kiwi classic. Got questions or ready to kick off your project? We’re just a call away—let’s make your renovation dreams a reality!

                  To Summarise…

                  What does “living like new” mean when renovating an old Auckland home?

                  It’s about updating your older home with modern comforts—like open spaces, energy efficiency, and smart tech—while keeping its unique charm, so it feels fresh and fits your lifestyle.

                  Do I need consents for my renovation in Auckland?

                  Yep, often! Anything structural (like knocking down walls), plumbing, electrical, or heritage-related needs a check with Auckland Council (aucklandcouncil.govt.nz). Even small stuff like new doors might require approval.

                  How can I modernize my interiors during a renovation?

                  Swap out old fixtures, open up spaces by removing walls, update flooring (hardwood’s a winner!), add fresh paint, and install modern cabinets—think sleek and storage-savvy.

                  What energy-efficient features should I add in an Auckland reno?

                  Go for solar panels, LED lights, double-glazed windows, better insulation, and a modern HVAC system. They’ll cut bills and suit Auckland’s climate.

                  Can I add smart home tech to an older Auckland house?

                  Absolutely! Smart thermostats, lighting, security systems, and even a home office nook with automation can bring your reno into the future.

                  How do I preserve my home’s character while renovating?

                  Add details like crown molding, use reclaimed materials (hello, kauri!), and pick vintage-inspired appliances that blend old charm with new functionality.

                  What financing options are there for a renovation in NZ?

                  Look into home renovation loans from Kiwi banks or subsidies like Warmer Kiwi Homes (eeca.govt.nz), which cover ceiling and underfloor insulation and heat pumps for eligible owner-occupiers of homes built before 2008.

                  Why bother with small details like hardware or doors?

                  Updating handles, hinges, and doors ties your reno together—small changes, big impact on that “new” vibe.

                  Where can I get more renovation inspo for Auckland?

                  Check ArchiPro for local projects, building.govt.nz for compliance tips, and chat with us at Superior Renovations for tailored advice!


                  Want a ballpark for your renovation?
                  See the calculators →

                  If you’re looking for “specific” cost estimates, try our Renovation Cost Calculator Tools

                  Need ideas? Check out our Kitchen Design Gallery or dive into our Bathroom Design Gallery for inspiration!


                  Need more information?

                  Take advantage of our FREE Complete Home Renovation Guide (48 pages), whether you’re already renovating or in the process of deciding to renovate, it’s not an easy process, this guide which includes a free 100+ point check list – will help you avoid costly mistakes.

                  Download Free Renovation Guide (PDF)


                  18 months 0 percent interest long term finance badge

                  Have you been putting off getting renovations done?

                  We have partnered with Q Mastercard ® to provide you an 18 Month Interest-Free Payment Option, you can enjoy your new home now and stress less.

                  Learn More about Interest-Free Payment Options*

                  *Lending criteria, fees, terms and conditions apply. Mastercard is a registered trademark and the circles design is a trademark of Mastercard International Incorporated.


                  Still have questions unanswered?

                  Book a no-obligation consultation with the team at Superior Renovations,
                  we’d love to meet you to discuss your renovation ideas!

                    Services

                    Home RenovationKitchen RenovationBathroom RenovationOutdoor RenovationHouse ExtensionCommercialDesign ServicesOther

                    By submitting this form, you agree to receive communications from us via email or text regarding our services, you can unsubscribe at any time.

                    This site is protected by reCAPTCHA and the Google

                    Privacy Policy and Terms of Service apply.

                    renovation architect auckland - Superior Renovations
                    House Renovation

                    Do You Need an Architect for a Renovation? (NZ Guide)

                    Do You Need an Architect for a Renovation? An Honest NZ Guide

                    Free cost calculator

                    How much will your renovation cost?

                    Get an instant Auckland price range for your project — no details required to see it.

                    Try our free cost calculators →

                    Quick answer: You don’t always need an architect for a renovation. For most kitchen, bathroom, and standard interior renovations in New Zealand, a licensed designer or a design-build renovation company can handle the design and consent work. You need a registered architect mainly for complex structural changes, heritage homes, and large extensions.

                    Most people Googling “do I need an architect for renovation” have already half-decided they probably do, and they’re bracing for the cost. Here’s the part no architect’s website will lead with: a good chunk of Auckland renovations never need one separately engaged at all.

                    After more than 1,000 Auckland renovations, we’ve sat across the table from homeowners who’d already paid for architectural drawings they didn’t need — and others who tried to skip the structural engineering they absolutely did. Knowing which side of that line your project sits on is worth a fair bit of money. So let’s sort it out.


                    Do You Actually Need an Architect for Your Renovation?

                    The honest answer turns on one thing: how much you’re changing the bones of the house. Move a tap and retile? No architect. Knock out a load-bearing wall, add a second storey, or reconfigure a leaky 2000s home in Albany? Now you’re in territory where design and structural input earn their fee.

                    Here’s the rough decision line we use with clients before they spend a dollar on drawings.

                    Your renovation Who you usually need Consent likely?
                    Bathroom or kitchen reno, same footprint Designer or design-build company Often not (like-for-like)
                    Removing a non-load-bearing wall, open-plan Designer + engineer if structural Sometimes
                    Load-bearing changes, internal reconfiguration Designer or architect + engineer Yes
                    Single-storey extension Designer or architect + engineer Yes
                    Second-storey addition or major extension Architect (often) + engineer Yes
                    Heritage or character home, significant change Architect (recommended) Yes, often Resource Consent too

                    💡 Quick tip: Before you engage anyone, pull your property file and LIM from Auckland Council. If your home is in a Special Character or Historic Heritage overlay — common across Ponsonby, Grey Lynn, and Mt Eden — that single fact often decides whether you need a registered architect.

                    What “needing an architect” really means

                    People use “architect” as shorthand for “someone who draws the plans.” In New Zealand that job is done by three different professionals, and only one of them is legally an architect. Get the distinction wrong and you either overpay or under-cover yourself. That’s the next section.

                    The honest test

                    Ask yourself: am I changing the layout, the structure, or the exterior envelope? If the answer to all three is no, you almost certainly don’t need an architect. If it’s yes to any, you need design input — but whether that’s an architect specifically depends on complexity, not on the word itself.

                    “Most clients who walk in convinced they need an architect actually need a designer who understands how Auckland houses are built. The drawings aren’t the hard part — knowing what’s behind a 1920s villa wall before you commit to a layout is. That’s where the money’s saved or lost.”
                    — Dorothy Li, Design Manager, Superior Renovations


                    Architect vs Architectural Designer vs Design-Build: Who Does What

                    This is the bit that saves people the most money, so it’s worth getting right. Three roles, three price points, three levels of legal scope.

                    Registered architect

                    In New Zealand, “architect” is a protected title. Only someone registered with the New Zealand Registered Architects Board (NZRAB) can legally use it. They’ve completed a five-year degree, logged supervised practice, passed registration, and carry professional indemnity insurance. For complex builds — heritage work, multi-level additions, anything architecturally ambitious — that depth matters.

                    Architectural designer (LBP)

                    A licensed building practitioner with a Design licence does most residential renovation drawings in this country. The Design class is tiered: Design 1 and Design 2 cover the great majority of home alterations, while Design 3 is for the more complex structural work. You can check anyone’s licence on the LBP public register. For a standard renovation or a straightforward extension, a good designer produces consent-ready plans for considerably less than an architect’s fee.

                    Design-build renovation company

                    This is the one most homeowners don’t realise is an option. A design-build company carries the design capability in-house and runs the build — so design, consent, and construction sit under one contract, one quote, and one point of contact. You’re not hiring an architect, briefing a builder, and refereeing between them when the drawings don’t match the site.

                    That’s how our in-house design-and-build renovation team works. Design happens at our Wairau Valley Design Studio, and for anything needing council sign-off we bring in our consent partner directly. More on that shortly.

                    💡 Quick tip: Whoever you engage, ask one question early: “Will the person who designs this also be accountable when it’s built?” With separate architects and builders, the answer is often no — and the gap between drawing and build is where variations and blowouts live.

                    If you’re weighing up who lays hands on the actual construction, we’ve written separately on what sets a renovation builder apart from a new-build builder — a different decision from the design one, and worth understanding on its own.


                    When You Genuinely Do Need a Registered Architect

                    We’re not anti-architect. For the right project, a great one is worth every cent. Here’s when we tell clients to engage one.

                    Heritage and character homes

                    If your home sits in a Special Character or Historic Heritage zone — think the villas of Herne Bay or the bungalows of Mt Eden — significant change usually triggers Resource Consent on top of Building Consent. An architect who knows the Auckland Unitary Plan and has fought these consents before is genuinely valuable here. Get it wrong and the council can send you back to the start.

                    Second-storey additions and major extensions

                    Going up is the most demanding thing you can do to an existing house. Loads have to travel down through the structure to the foundations, and the design has to resolve stairs, roofline, and weathertightness all at once. A second-storey addition in Auckland typically starts from around $150,000, and a ground-floor extension from around $80,000 — at that spend, proper design input pays for itself by catching problems on paper instead of on site.

                    Architecturally ambitious design

                    If your vision is genuinely sculptural — dramatic voids, complex glazing, a design that wins awards — that’s where a registered architect’s training shows. A standard reno doesn’t need it. A statement home does.

                    Curious where the cost of an extension actually lands before you commit to anyone? Run the numbers first with our house extension cost calculator, then decide what level of design the project warrants.

                    Important note: Whoever designs structural changes, the calculations behind load-bearing work must be done or checked by a Chartered Professional Engineer (CPEng). An architect or designer draws the intent; the engineer signs off that it’ll stand up. Both Auckland Council and your insurer will want that paperwork.


                    What Does an Architect Cost in NZ — and What’s the Alternative?

                    Let’s talk money, because it’s usually the real question behind “do I need an architect.”

                    Architect and designer fees

                    Architects in New Zealand typically charge 5% to 15% of the total construction cost for residential work, depending on scope and how involved they stay through the build. On a $200,000 project that’s $10,000 to $30,000 in design fees alone. Simpler jobs sit at the lower end; bespoke or heritage work pushes higher. An architectural designer covering the same consent drawings on a standard renovation will usually come in well under that.

                    Want a ballpark for your renovation?
                    See the calculators →

                    The design-build alternative

                    With a design-build company, design isn’t a separate line item you negotiate and then hand to someone else to build. It’s folded into a single fixed-price scope of works. You’re not paying a percentage of an unknown construction cost — you’re getting one quote that covers design, consent coordination, and the build, with the same team accountable from first drawing to handover.

                    For context on the build side of that number, a full home renovation in Auckland generally runs $80,000 to $160,000, with a comprehensive single-level renovation starting from around $140,000. Where your design dollars are best spent depends entirely on which of those scopes you’re in.

                    “The question isn’t ‘architect or no architect’ — it’s ‘who’s accountable when the design meets the actual house.’ We design in-house and bring in our architectural partner for consent work, so there’s no gap for the client to manage. One team owns the outcome, not three parties pointing at each other.”
                    — Cici Zuo, Head of Sales, NZ Dip. Interior Design, Superior Renovations


                    How Superior Renovations Handles Design and Consent

                    Here’s our actual process, so you can see where the architect question lands in a design-build model.

                    Design in-house at the Design Studio

                    Our design team works out of our showroom and Design Studio at 16B Link Drive, Wairau Valley. For the bulk of kitchen, bathroom, and full-home renovations across Auckland, the design happens here — layouts, material selection, 3D visualisation — without you needing to separately commission an architect.

                    Consent work through Sonder Architecture

                    When a project needs council consent — a garage conversion, an extension, structural change — we bring in our architectural partner Sonder Architecture, whose head office sits alongside our showroom at the same Wairau Valley address. The process is simple: your enquiry comes to us, we scope your requirements, and we connect you with Sonder’s lead architect directly for the consent documentation. You get registered-architect capability when the project genuinely needs it, coordinated by us, without managing a separate relationship yourself.

                    If you want the detail on how renovation consents actually move through Auckland Council, our guide to the renovation consent process walks through the steps.

                    💡 Quick tip: If you’re comparing a separate architect against a design-build company, compare the whole journey, not just the design fee. Factor in who manages the consent, who carries the variation risk, and who’s accountable if the drawings don’t match what’s behind the wall.


                    How to Choose an Architect or Designer If You Do Hire One

                    Say your project does warrant a registered architect — a heritage renovation in Remuera, a second storey in Takapuna. Here’s how to pick well.

                    Check the registration, not the word

                    Confirm NZRAB registration for an architect, or the LBP Design class for a designer. Both registers are free and public. If someone calls themselves an architect and isn’t on the NZRAB register, that’s not a grey area — the title is legally protected.

                    Match the experience to your home

                    An architect who’s only done new builds on flat sections will approach your 1925 villa differently from one who’s spent years inside Auckland’s older housing stock. Ask for renovation projects like yours — same era of home, same kind of change. A portfolio of glass-box new builds tells you little about how someone handles spongey framing behind a Grey Lynn bathroom wall.

                    Get fees and scope in writing

                    Whoever you engage, get a written scope: what the fee covers, whether it includes consent documentation, and whether they stay involved through construction. Vague “we’ll sort it” arrangements are where budgets quietly grow. The same discipline applies whether it’s an architect, a designer, or a design-build quote.

                    It’s also worth understanding the distinction between the two architect specialisms, because it changes who you should brief — we’ve covered how renovation architects differ from new-build architects in a separate piece.


                    The Bottom Line for Auckland Homeowners

                    Whether you need an architect comes down to how much you’re changing the structure and envelope of your home — not to the size of your budget or how serious you are about the project. A standard renovation rarely needs one separately engaged. A heritage overhaul or a second storey often does. And a design-build company can mean you need neither an architect nor a builder hired separately, because both sit under one roof.

                    The worst outcome is paying for the wrong level of professional — either over-engaging an architect for a job a designer could do, or under-covering structural work that needed proper input. Get the diagnosis right first, and the rest of the project follows more smoothly.

                    If you’re not sure which side of the line your renovation sits on, that’s exactly what a first consultation is for. We’ll tell you honestly whether you need a registered architect — even when the answer means less work for us.

                    ➡ Book your free in-home consultation with Superior Renovations
                    ➡ Estimate your project with our house extension cost calculator
                    ➡ Request a free feasibility report for your project


                    Frequently Asked Questions

                    Do I need an architect for a home renovation in NZ?

                    Not for most renovations. A standard kitchen, bathroom, or interior renovation on the same footprint can be designed by a licensed architectural designer (LBP) or a design-build renovation company. You generally need a registered architect for heritage homes, second-storey additions, large extensions, or architecturally ambitious designs. The deciding factor is how much you're changing the structure and exterior of the house, not the size of your budget.

                    What is the difference between an architect and an architectural designer in NZ?

                    Architect is a legally protected title in New Zealand — only those registered with the NZ Registered Architects Board (NZRAB) can use it, after a five-year degree and registration. An architectural designer is a Licensed Building Practitioner with a Design licence (Design 1 and 2 cover most home alterations, Design 3 the complex structural work). Designers handle the majority of residential renovation drawings at a lower fee than an architect.

                    How much does an architect cost in NZ?

                    Architects in New Zealand typically charge 5% to 15% of the total construction cost for residential projects. On a $200,000 renovation that's roughly $10,000 to $30,000 in design fees. Simpler projects sit at the lower end; bespoke or heritage work pushes toward the top. An architectural designer covering consent drawings on a standard renovation usually costs considerably less.

                    Can I do a renovation without an architect?

                    Yes. Many Auckland renovations are completed without separately engaging an architect. A licensed architectural designer can produce consent-ready plans, and a design-build renovation company carries design capability in-house. You only genuinely need a registered architect when the project involves significant structural change, heritage requirements, or complex multi-level work. Structural calculations must still be done or checked by a Chartered Professional Engineer regardless of who designs.

                    Do I need an architect or a builder first?

                    It depends on your model. In the traditional route you engage a designer or architect first to produce plans, then tender those to builders. In a design-build model you engage one company that does both, so the question disappears — design and build sit under a single contract and team. Design-build avoids the gap between drawing and construction where many variations and cost blowouts occur.

                    Do I need consent for my renovation in Auckland?

                    Like-for-like work such as replacing fittings in the same position often doesn't need Building Consent. Moving plumbing, removing load-bearing walls, extending, or changing the structure usually does. Heritage or Special Character zones — common in Ponsonby, Grey Lynn, and Mt Eden — can trigger Resource Consent as well. Auckland Council consent processing typically takes 4 to 8 weeks. Check your property file and the Auckland Unitary Plan before you start.
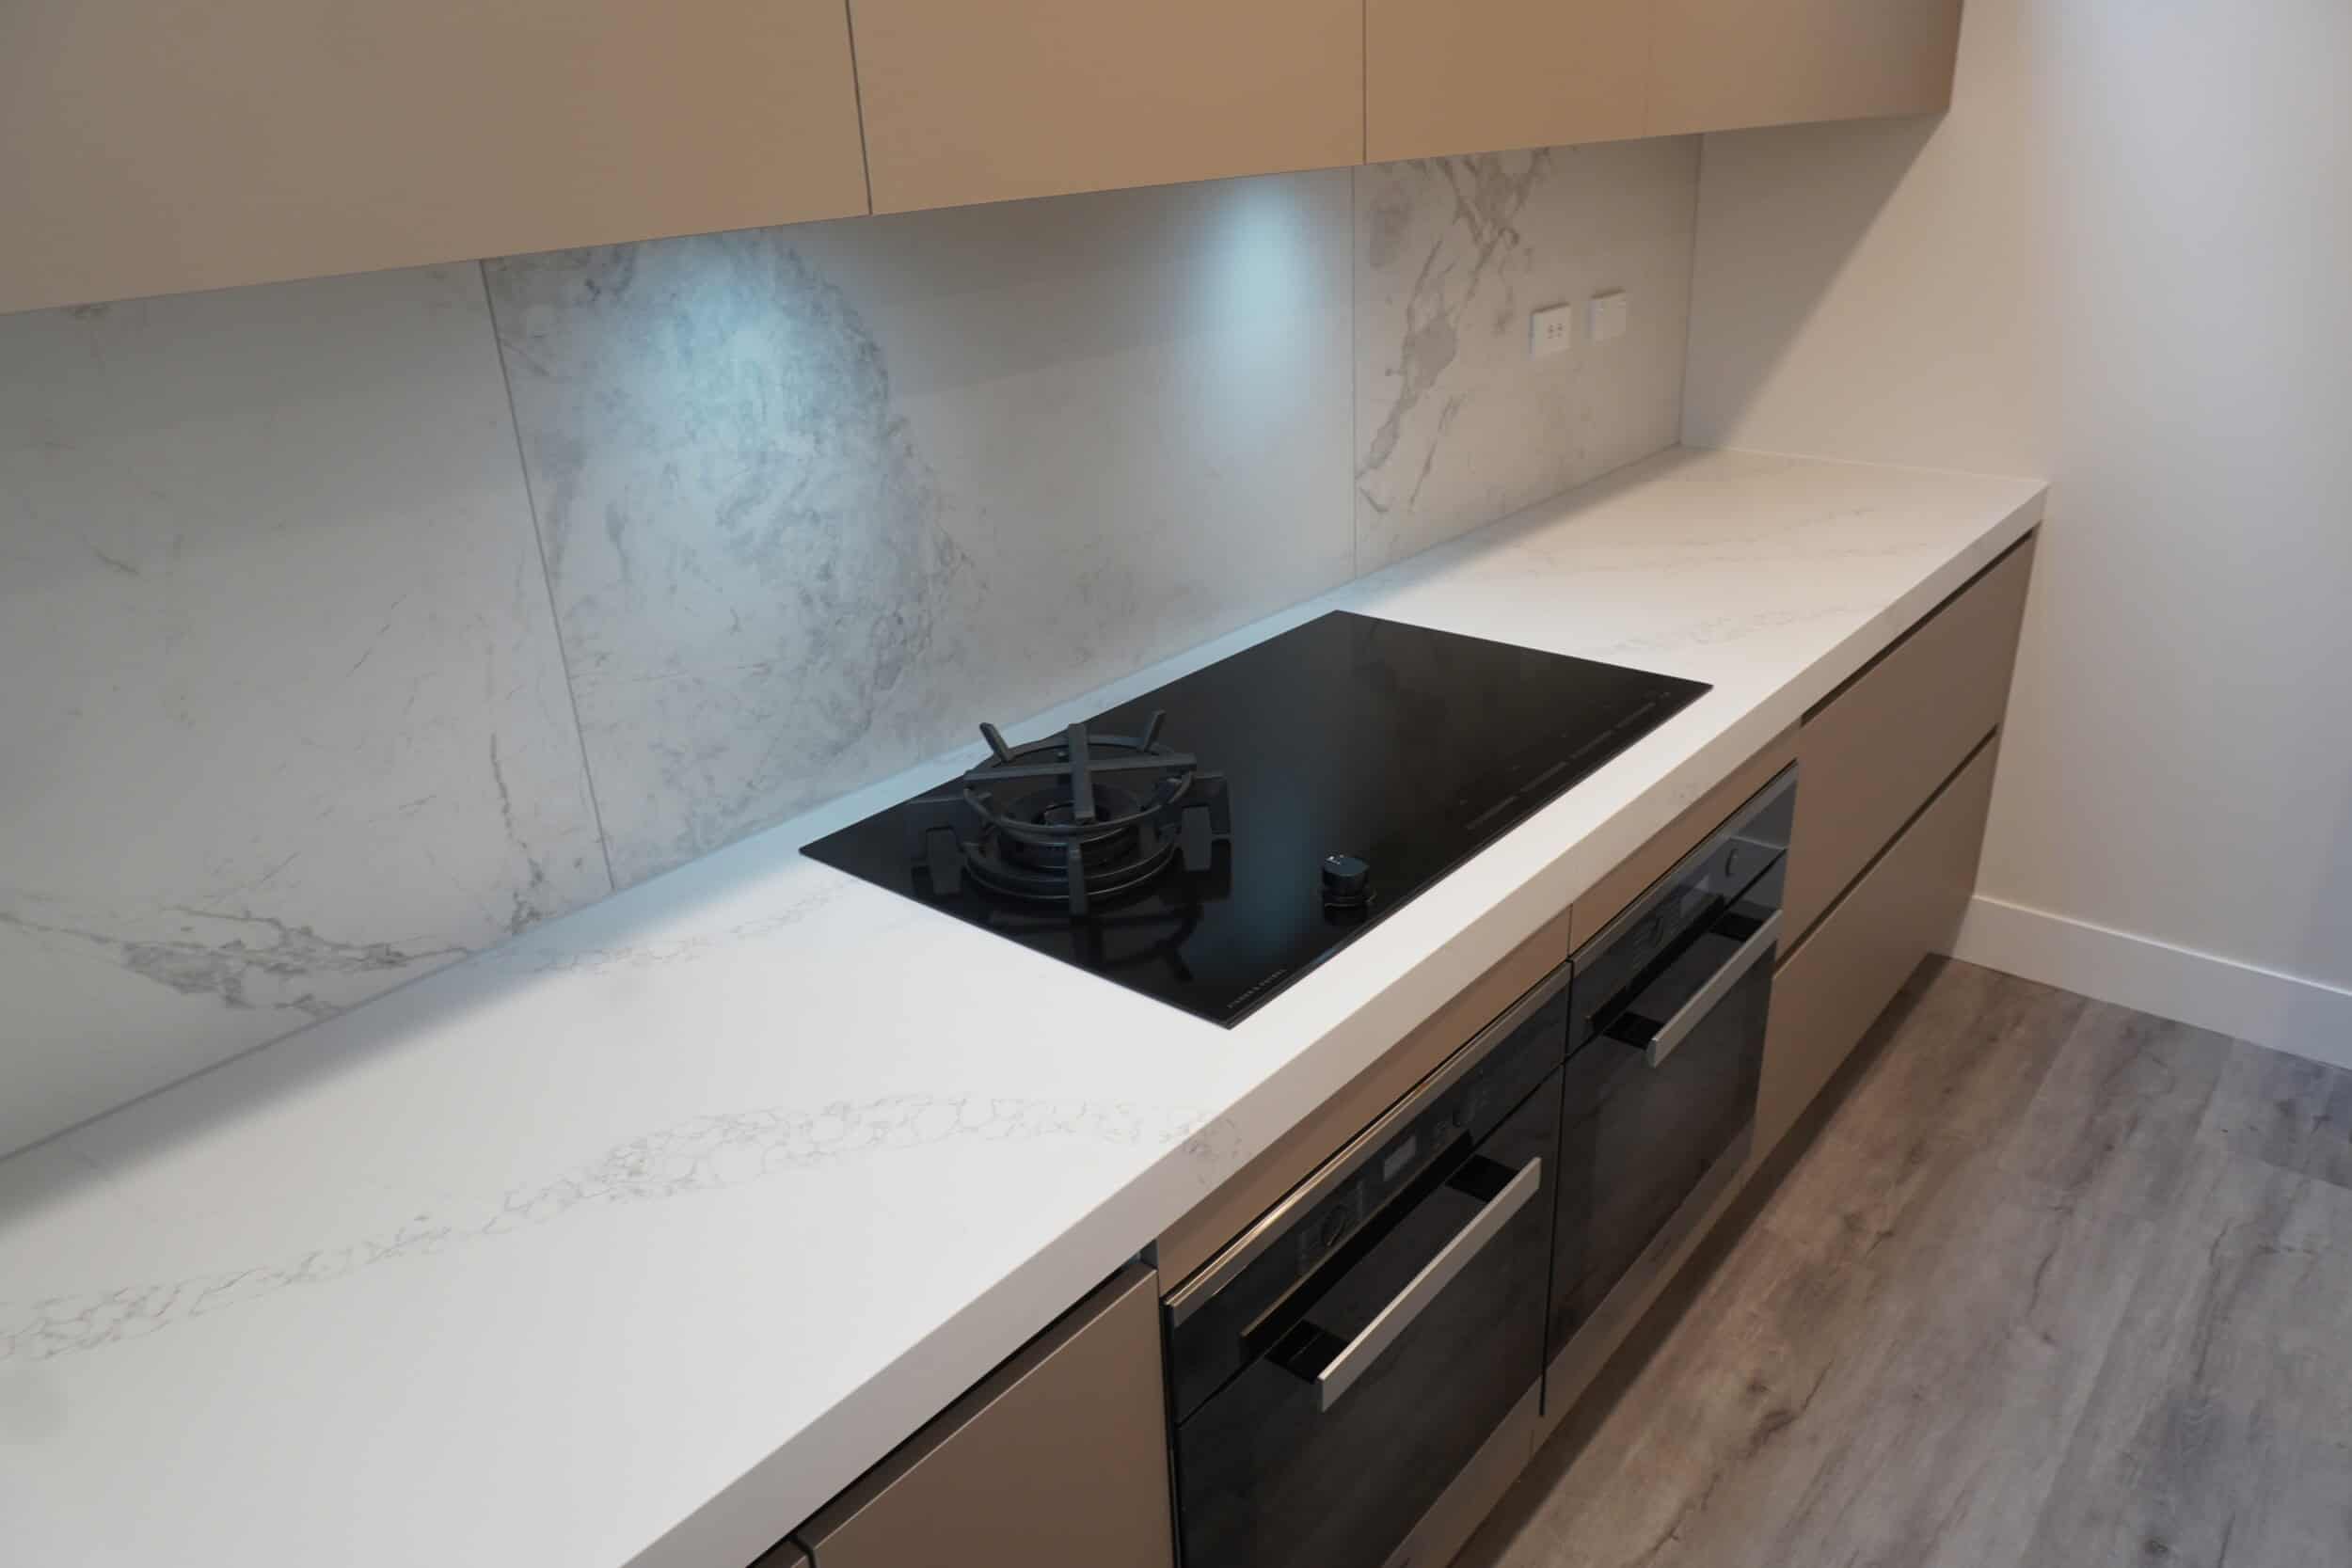
                    Do I need a registered architect for a house extension in Auckland?

                    Not always. A single-storey extension can often be designed by an architectural designer, while a second-storey addition more often warrants an architect because of the structural complexity. Ground-floor extensions in Auckland typically start from around $80,000 and second-storey additions from around $150,000. At that level of spend, proper design and engineering input pays for itself by resolving problems on paper rather than on site.

                    Does a design-build renovation company replace an architect?

                    For many projects, yes. A design-build company designs in-house and brings in a registered architect only when consent or complexity requires it. At Superior Renovations, design happens at our Wairau Valley Design Studio, and consent work runs through our architectural partner Sonder Architecture at the same address — so you get registered-architect capability when the project needs it, without managing a separate relationship yourself.
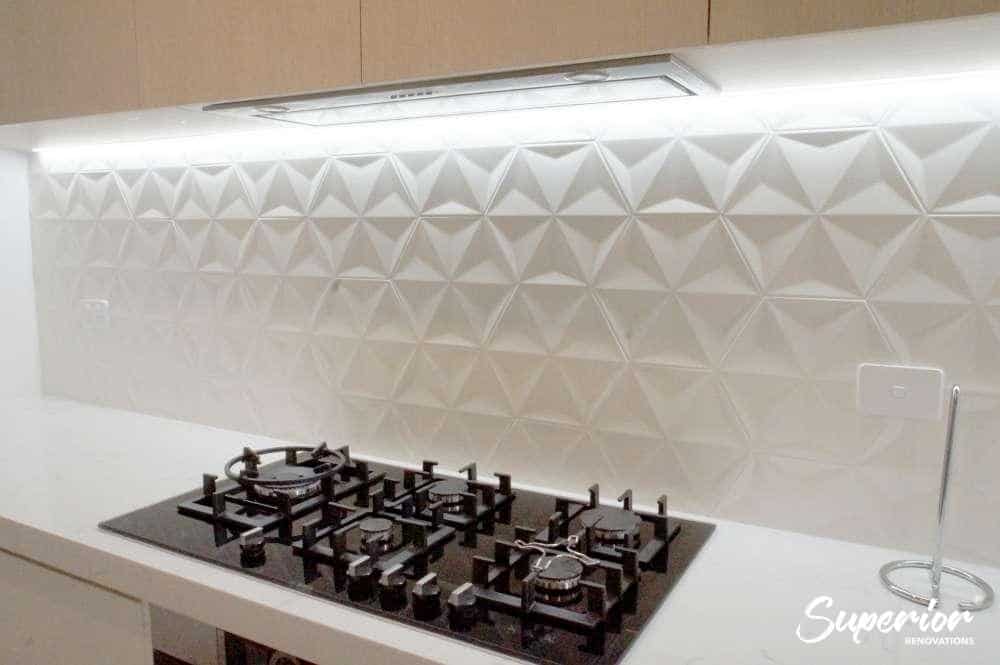
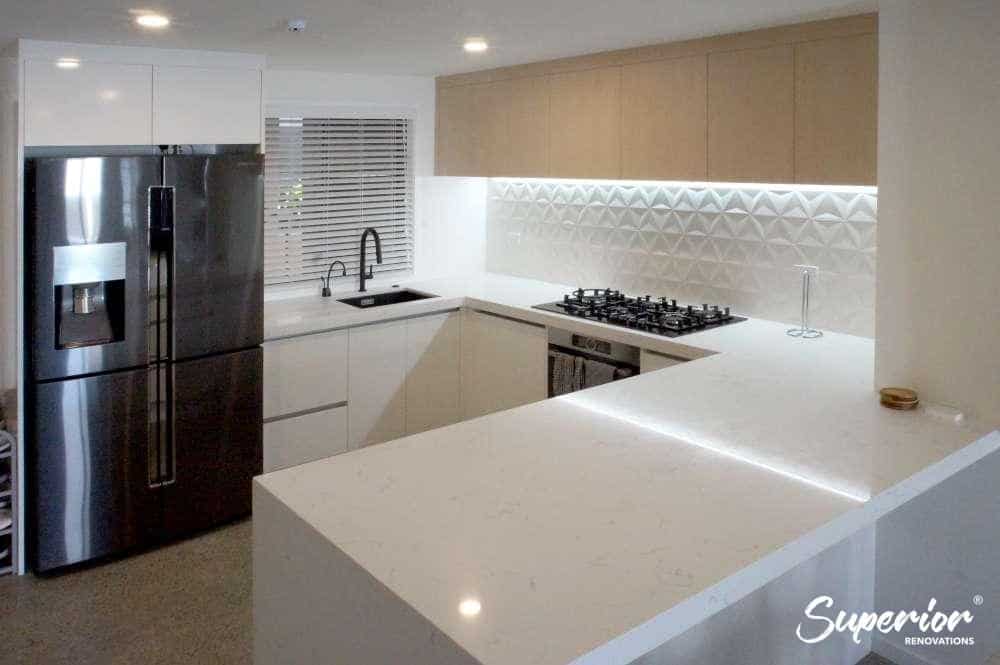
                    How do I check if an architect is registered in NZ?

                    Search the public NZRAB register at nzrab.nz to confirm a registered architect, and the LBP register at lbp.govt.nz to confirm an architectural designer's Design licence class. Both are free and take a couple of minutes. If someone uses the title architect but doesn't appear on the NZRAB register, they aren't legally entitled to it — and registration brings mandatory professional indemnity insurance that protects you if a design fault emerges later.


                    Further Resources for your home renovation

                    1. Featured projects and Client stories to see specifications on some of the projects.
                    2. Real client stories from Auckland

                    Need more information?

                    Take advantage of our FREE Complete Home Renovation Guide (48 pages), whether you’re already renovating or in the process of deciding to renovate, it’s not an easy process, this guide which includes a free 100+ point check list – will help you avoid costly mistakes.

                    Download Free Renovation Guide (PDF)


                    18 months 0 percent interest long term finance badge

                    Have you been putting off getting renovations done?

                    We have partnered with Q Mastercard ® to provide you an 18 Month Interest-Free Payment Option, you can enjoy your new home now and stress less.

                    Learn More about Interest-Free Payment Options*

                    *Lending criteria, fees, terms and conditions apply. Mastercard is a registered trademark and the circles design is a trademark of Mastercard International Incorporated.


                    Still have questions unanswered?

                    Book a no-obligation consultation with the team at Superior Renovations,
                    we’d love to meet you to discuss your renovation ideas!

                      Services

                      Home RenovationKitchen RenovationBathroom RenovationOutdoor RenovationHouse ExtensionCommercialDesign ServicesOther

                      By submitting this form, you agree to receive communications from us via email or text regarding our services, you can unsubscribe at any time.

                      This site is protected by reCAPTCHA and the Google

                      Privacy Policy and Terms of Service apply.

                      Exceptional Kitchen Renovation Experience

                      We recently had our kitchen renovated by Superior Renovations on Wairau Road, and we couldn’t be happier with the entire experience and, most importantly, the finished result.

                      From the very first day of demolition through to the final cabinet installation, every person involved in the project was exceptional. The quality of workmanship was consistently excellent, and it was clear that everyone took pride in the work they were doing.

                      A special mention has to go to Neil, who managed the entire project brilliantly. The biggest thing that stood out to us was how well organised everything was. The timeline was adhered to week after week, and we always knew exactly what was happening and who would be coming each day. It made what could have been a stressful renovation feel incredibly smooth and well managed.

                      Alison, who helped us with the initial design, was fantastic. She came up with a wonderful design that we immediately loved, and she was always happy to take the time to answer our questions, talk through options and make sure we were comfortable with every decision.

                      The plumber, electrician and cabinet maker were all outstanding, and the quality of their work really shows in the finished kitchen.

                      The transformation from our old kitchen to the new one has been incredible, and we absolutely love our new space. The attention to detail, workmanship, communication and project management were all first class.

                      We would recommend Superior Renovations to anyone and everyone without hesitation. If you’re looking for a company that delivers a quality renovation, keeps to its timeline and provides excellent value for money, we would definitely recommend giving them a call.

                      Thank you to Neil, Alison and the entire Superior Renovations team for giving us a kitchen we absolutely love! 👏👏
                      We have always loved working with Superior renovations and in particular Kevin. We felt like we were getting special one-on-one treatment at all hours of the day. They always produce their work super quick and to a good standard.
                      We added a new bathroom and upgraded the rumpus.
                      Superior Renovations offered a reasonable price and delivered professional services and work.
                      We recommend Superior Renovations for the house renovation.
                      This is our final and exceptionally positive review for Superior Renovations. First and foremost, we must emphasize that they are outstanding!

                      Superior Renovations has completed a comprehensive renovation of our entire house, both externally and internally, including the kitchen, bathroom, painting, carpeting, electronic gate, and more. Throughout the various projects over the past few months, we have been thoroughly impressed by their work and are delighted with the results. Their expertise and service continue to amaze us; they truly listen to our needs and engage in discussions whenever they believe improvements can be made.

                      We extend our gratitude to Cici, who not only served as the sales manager but also as the designer, transforming our kitchen from an early 2000s style to a modern and stylish new one. Neil, our project manager, worked with us daily, attending to every detail and going the extra mile to help us achieve an excellent result.

                      From the very first day of collaboration, we encountered no issues whatsoever, whether in communication, design discussions, or the execution by the on-site teams. We highly recommend Superior Renovations to anyone considering home renovation. Contacting them will reveal why we are so pleased with their work on our home.

                      David and Emily
                      SUPERIOR RENOVATIONS
                      Renovations on one full bathroom and one small ensuite at my home in Sunnynook, Auckland, were completed on 26th June 2026.
                      I am fully satisfied with the work done at my home by all workers and contractors and delighted with the results that I am now enjoying. All work is of a very high standard and attention to care leading to excellent results.
                      All staff of Superior Renovations and associated contractors were at all times helpful and happy to explain all aspects of their work and respectful in listening to any of my concerns or questions, with any changes where necessary being quickly and effectively carried out.
                      I have no hesitation in recommending Superior Renovations as your choice for any bathroom renovation.

                      Valerie Hepburn
                      4 Stoneleigh Court, Auckland
                      In early June, I hired Superior Renovation company to thoroughly renovate our two bathrooms. The project has now been completed and we are very satisfied. Thank you sincerely, and we highly recommend it.
                      Despite some delays, Eunice, Neil and the team at Little Giants have done a really good job on out kitchen renovation. Great finishing and very responsive to fixing up any little thing we weren't happy with.

                      Good work team!
                      ​From the very first consultation, our experience with this team has been nothing short of stellar.
                      ​
                      ​Working with Eunice, our sales consultant, set a high bar for the rest of the project.
                      Eunice is truly exceptional at what she does. When we first began our kitchen project, we went through several versions of our floor plan, and she was with us every step of the way—from the initial planning stages right through to the final concept. Her patience and dedication during the design process were remarkable.
                      Throughout the project, Eunice provided:
                      * **Invaluable Suggestions:** She has a keen eye for both aesthetics and functionality, pointing out details we never would have considered on our own.
                      * **Seamless Adjustments:** No matter how many tweaks we requested, she handled every change with professionalism and a "can-do" attitude.
                      * **Expert Guidance:** She transformed our vague ideas into a cohesive, stunning reality.
                      ​
                      ​Once the planning was complete, Neil, our project manager, took the reins and truly blew us away. Neil is a consummate professional who balances technical expertise with fantastic communication.
                      ​ He kept us informed at every stage, ensuring we knew exactly what to expect and when.
                      Whenever a minor pivot was needed, Neil handled it with grace and efficiency, keeping the timeline on track.
                      His standards for the renovation work were incredibly high, ensuring the final result was polished and beautiful.
                      ​
                      ​The transition from Eunice’s initial planning to Neil’s execution was flawless. If you are looking for a team that combines design expertise with top-tier project management, look no further. We are absolutely thrilled with our new kitchen and new flooring !
                      Superior Renovations has just finished a complete remodel of my bathroom. I can see, why the company has such a high reputation. At every stage, from sales, design, project management, and execution, the company excelled at every point. I am just so happy with the work that they have done and they have exceeded my expectations at every point.
                      Used Superior for a kitchen and bathroom renovation last year. They did an excellent job updating both rooms, communication was excellent ongoing tjrough the project, they coordinated all the tradies, synchronized so there was little downtime, and it all worked exactly as planned and on budget. Was really glad we chose Superior Renovations and plan to use again for our entrance way at some stage.
                      As I said to my work colleagues ‘I have just had the most pleasant experience’. When they realised it was with renovations at home they were shocked - ‘unheard of’ I was told.
                      Everything went to plan - timing, project management, costs, etc, etc. Neil communicated with me daily and made my whole bathroom renovation a pleasure.
                      The best decision I made was choosing Superior Renovations.
                      Thank you Kevin for our initial connection and for passing me on to Neil to manage the whole process.
                      We just finished a bathroom renovation and couldn’t be happier with the results. The craftsmanship is top-notch, and the attention to detail in the tiling and finishing is impressive. The team was professional, kept the workspace clean, and delivered exactly what we envisioned. Highly recommend them for anyone looking for a high-quality transformation.
                      Superior did an excellent job of renovating our ensuite. Project manager Jacob was easy to work with and communications were good.
                      This is our second review for Superior Renovations. They have done two projects earlier this year and we were so impressed by the work they have finished. After discussing and very careful consideration, we decided to go with more projects with them. So far, they have now completed stage 1 renovation of our house. We still amazed for their knowledge and services; they really listen to us and discuss anything with us if they feel/think could be better…
                      From the first day we work with them, we have no issue with them at all, from communication, discussing, designing to the teams working on the site.
                      Especially we are highly recommended to those who are considering doing the house renovation, please contact them and you will know why we are so pleased to have them to do our house renovation.
                      We are thanking Cici, Neil and the teams so much….
                      We are looking forward to seeing what the outcome will be.

                      David and Emily
                      We recently had our bathroom renovated by Superior Renovations and couldn’t be happier with the experience. Dorothy and Neil were an absolute pleasure to work with. They guided us through every step of the process, making what can be a stressful experience feel smooth and straightforward.
                      The quoting process was transparent and detailed, with no hidden fees or surprises. Neil was incredibly responsive and always available whenever we had questions or requests, which gave us real peace of mind throughout the project. We really love the end result and enjoy our new bathroom!
                      We’ll definitely be returning to the Superior Reno team for our next project. Highly recommended!
                      Our bathroom reno has just been completed & I am so happy. The whole process was easy & hassle free. Alison designed our bathroom & was very patient with our changes/then changes back again. Jacob our project manager was a delight to deal with. He always kept us informed of the scheduling & any other information we may have needed. All the tradies worked hard & the job was completed & signed off within 3 weeks. That's demo, full tiling, installation of new everything & delivery & pick up of the skip down a very tricky driveway. We absolutely love the new bathroom & would recommend Superior Renovations everyday. Future jobs I will definitely be contacting them again. Thank so much for your excellent work
                      Having explored our reno options, it was an easy decision to select Superior Renovations for our work. As first timers at anything like this we had to trust the system with grand old 100year old bungalow. We were so pleased to have Cici, Sonny and Kai working with us the whole way through. Be shout out to all the team, builders, plumbers, electricians, tilers and painters. A superb job delivered on budget and ahead of time. The communication from Cici and Sonny was first class. Would highly recommend working with Superior Renovations in fact, we already have more worked booked in. Thanks Superior you made Millie and Monty's parents very happy. 🐾
                      I am very happy with the recent renovation for my new kitchen.
                      The team worked really hard to get it done within the time frame.
                      The manager, Jacob, was very helpful and communicated well and always sorts out any issue immediately.
                      Thank you Irene
                      We couldn’t be happier with our new pergola! From start to finish, the team was professional, punctual, and easy to work with. They took the time to listen to what we wanted and offered great suggestions to make the design even better. The quality of the materials and workmanship is outstanding — everything feels solid, well-built, and beautifully finished. Kudos to Sinan Sun as she has been an amazing contact with the company.
                      We are very pleased with our bathroom reno by Superior Renovations! Jacob, Cici and the team always kept us up to date, were always friendly to deal with and finished ahead of schedule. Most importantly we are very happy with the quality of the work.
                      We have been working with Superior Renovations as a supplier now for over three years. In that time we have found the team to be very professional and well organised. Which is a welcome relief in this industry! Just recently we have become their sole supplier for portaloos, which recognises the collaboration we have forged over these three years.

                      In particular, Leanne and Elaine set a very high standard of communication and flexibility. This is of vital importance when scheduling deliveries and pickups with us, however, they understand not everything can be done at once and are willing to work with us for the best (supplier/contractor/client) outcome.

                      I would imagine this ethos would flow directly through to all their contracted renovation work. A pleasure to work with!
                      A very reliable supplier – we’ve been working with them for three years now, and they have never let us down. Well done to the team.
                      We have been working with these guys for the past 4 years and find them an awesome company to work with, very efficient and organised. I highly recommend!
                      Finding someone reliable for renovations has always been the most stressful thing for us. In the past, we had several painful renovation experiences—money was spent but the problems were never truly solved, and things often ended up worse than before. We really didn’t know where to find a trustworthy renovation company.

                      For more than ten years, our wish had been to renovate our bathroom, laundry, and toilet, so that we could finally enjoy a comfortable and functional living environment. Just when we were about to give up, we came across Superior Renovations online. We quickly made an appointment with Cici, who designed and provided us with a quote.

                      Throughout the whole process, I was deeply impressed by the professionalism of Superior Renovations. What stood out most was that they always delivered on their promises—everything agreed upon was completed on time. This built a relationship of trust and reliability. Up until completion, I was completely satisfied with their dedication and the quality of their workmanship.

                      During the renovation, we encountered some of the challenges that often come with older houses, but Cici and her team helped us resolve the discomforts we had been living with for years. We are truly grateful to the construction team.

                      Some say renovations are easy if you just have money, but I believe the most important thing is finding a trustworthy team that keeps their word, values quality, and cares about the customer’s experience.

                      Because of this renovation experience, we can now confidently plan our next project—the kitchen—and Superior Renovations will definitely be our first choice. We strongly recommend them.

                      Finally, I want to thank Cici and the team for helping us fulfill our dream.

                      Mark & Kate
                      Sinan is a very good consultant. She helps a lot during renovation. Very satisfied with their job.