
Author: Dorothy Li

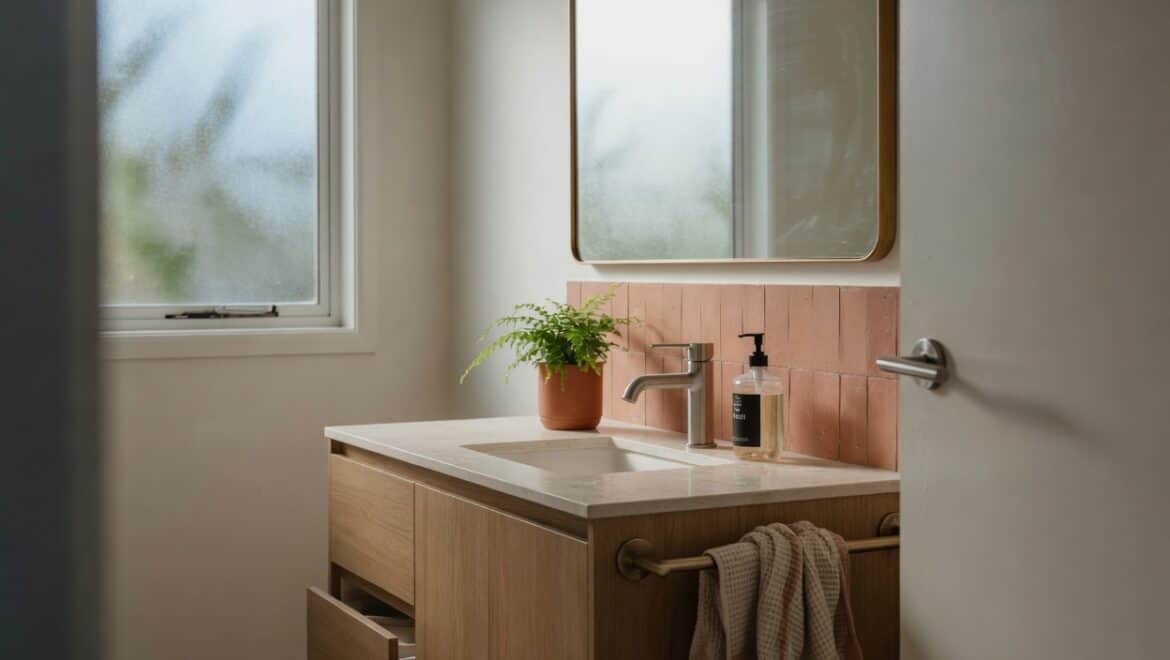
warm looking bathroom
Bathroom Renovation

Complete Guide to Bathroom Design & Bathroom Trends (2026)

Complete Guide to Bathroom Design & Bathroom Trends NZ (2026)

Free cost calculator

How much will your bathroom renovation cost?

Get an instant Auckland price range for your project — no details required to see it.

Open the Bathroom Cost Calculator →

Quick answer: Good bathroom design in 2026 starts with the layout, not the tapware, get the plumbing and traffic flow right, then layer in terrazzo, large-format porcelain, backlit mirrors, and a wet-room shower zone. In Auckland, a mid-range bathroom renovation runs $25,000–$35,000, takes 3–4 weeks on site, and adds genuine resale value when done well.

This guide was republished in 2026 with updated trends, current Auckland costs, NZ Building Code references, and fresh designer commentary from the Superior Renovations team.

2026 Bathroom Design Trends for NZ Homes, At a Glance

Earthy tones and terrazzo are still leading the way, but 2026 has added more universal-access features, layered smart lighting, and a clear move toward wet-room layouts. The winners we’re installing across Auckland right now:

  • Terrazzo and large-format porcelain for durable, low-grout wet areas
  • Backlit mirrors paired with under-cabinet LEDs for shadow-free grooming
  • Wet rooms with anti-slip matte finishes and a single glass panel
  • Sliding cavity doors and wall-hung vanities to open up small footprints
  • Statement freestanding baths paired with a separate walk-in shower
  • Brushed nickel tapware (the new neutral, softer than matte black)
  • Bathroom niches in the shower and above the basin for grout-free storage
  • Level-access showers and wider doorways for future-proof use

“Layered lighting is what separates a nice bathroom from one that feels like a hotel. Task LEDs down each side of the mirror, recessed warm-white spots overhead, and a single dimmable pendant for the bath, that’s three scenes from one room, controlled by one keypad.”
— Cici Zuo, Head of Sales (NZ Dip. Interior Design), Superior Renovations
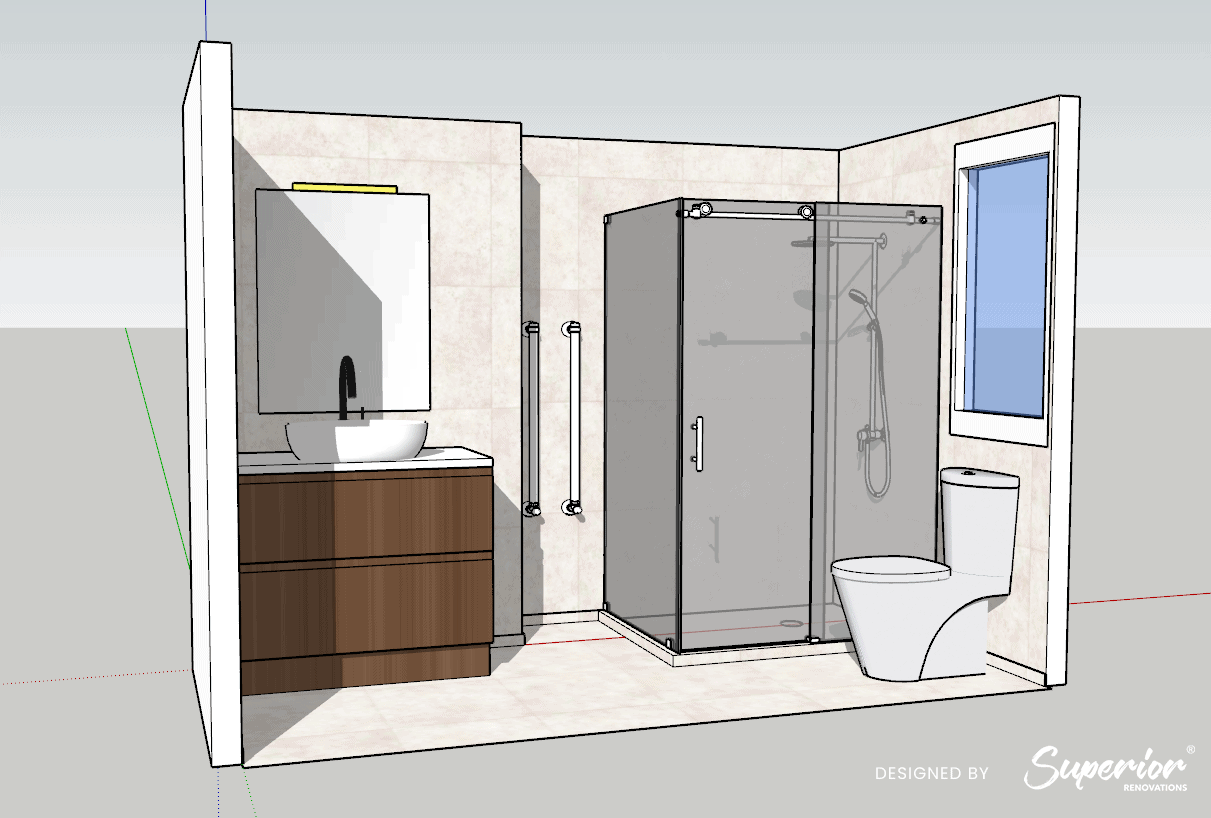
Small bathroom design Auckland, Superior Renovations


Where to Start: How We Approach Bathroom Design

Most renovation guides skip the part that matters most. They jump straight to tile boards and tapware without admitting that the bathroom you end up with is decided in the first design conversation, not the final material selection.

After more than 1,000 renovation projects across Auckland, we’ve learned the order matters: layout first, then function for who lives there, then materials, then trends. Try to start with trends and you’ll end up with a Pinterest board that doesn’t fit your section, your plumbing, or how your family actually uses the space at 7am.

The four questions we ask in every first consultation

  1. Who uses this bathroom, and at the same time? A family bathroom for two teenagers needs double basins and a separate toilet. An ensuite for two adults needs a generous shower and storage. A guest bathroom needs none of that.
  2. Where are the existing soil pipes? Moving the toilet is the single most expensive change you can make. We map this before drawing a layout.
  3. What’s the home worth, and what’s the renovation for? A $40,000 bathroom in a $900,000 Henderson home is sensible. The same bathroom in a $2.6m Remuera home is undercooking the asset. We tier the spec to the property, not the catalogue.
  4. What’s the wider plan? If a second bathroom is on the cards in three years, we plan the plumbing now and save you doing it twice.

“The fastest way to overspend on a bathroom is to design it twice. We use a Design-to-Build Action Plan that locks the scope, layout, and product selections before a single tile is ordered, that’s what keeps the quote a quote, not a guess.”
— Dorothy Li, Design Manager, Superior Renovations

💡 Quick tip: Before any design meeting, take a photo of your current bathroom from each corner and one straight down. Plumbers can identify pipe runs from those four photos faster than from any verbal description.

Why we recommend starting with a designer, not a builder

Plenty of builders can install a bathroom. Far fewer can design one that suits the way you live. We run a full in-house design team out of our Wairau Valley showroom for exactly that reason, every bathroom we build is drawn, specified, and 3D-rendered before a tradie sets foot on site.

If you want to see what that process looks like in practice, browse the Bathroom Design Gallery or the Design Studio pages. Both give you a clearer picture of how we work than any list of bullet points can.


Bathroom Layouts That Actually Work in Auckland Homes

Every bathroom in New Zealand is some version of four layouts. Knowing which one you’re working with, and which one you should be working with, is the foundation of every good bathroom design.

1. The Statement Bath Layout
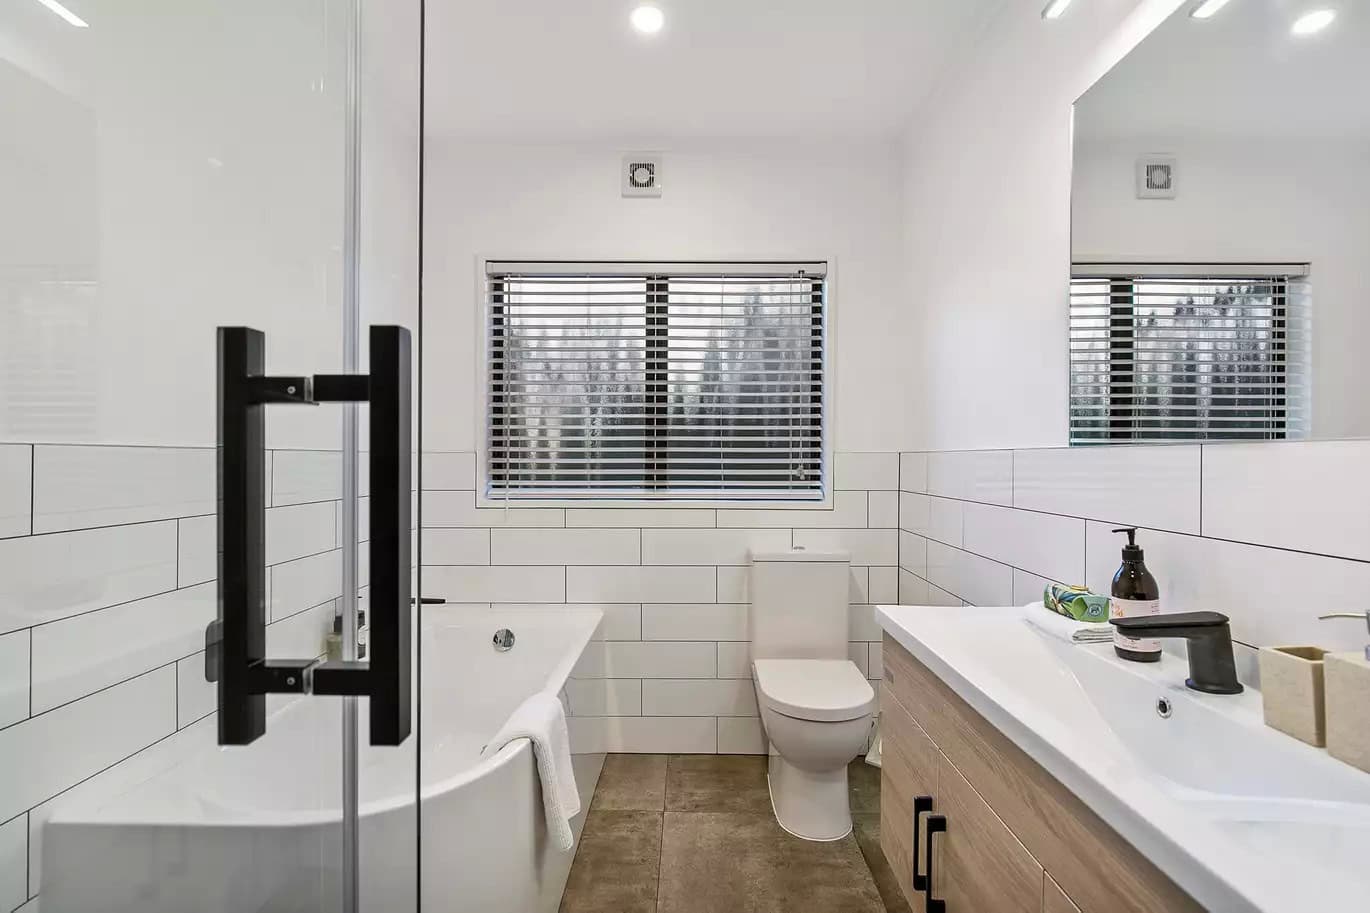
Statement bath layout, freestanding bath in St Heliers villa bathroom

A freestanding bath set against a window, a feature wall, or in the centre of the room. This works in larger bathrooms, usually masters in villas, character bungalows, or larger St Heliers and Remuera homes where the bathroom footprint is over 7m². The bath is the hero, the rest of the layout supports it.

Where it works: Villas with deep bathrooms, master ensuites over 8m², any bathroom with a window worth looking out of.

Where it doesn’t: Compact apartments, family bathrooms with high traffic, small ensuites under 5m².

See the St Heliers villa renovation where we used this layout →

2. The Over-Bath Shower Layout

The classic Kiwi family bathroom. A bath with a shower over it, glass screen or rail-mounted curtain, hand-held mixer for bathing kids. It’s the most space-efficient layout and still the right answer for many three-bedroom homes in West and South Auckland.

Where it works: Family bathrooms in homes under 130m², the main bathroom when an ensuite already has a separate shower, any layout under 5m².

The mistake to avoid: Don’t install an off-the-shelf acrylic shower box over the bath. It looks dated immediately and traps grime in the joins. A frameless glass panel costs marginally more and lifts the entire room. We’ve weighed both up properly in our guide to acrylic versus tiled showers.

💡 Quick tip: For an over-bath shower, spec a thermostatic mixer rather than a basic tap-style mixer. Kids can scald themselves on the latter, the thermostatic version caps the temperature at a safe maximum.

3. The Bath and Separate Shower Layout

Bath and shower layout, Auckland bathroom renovation with double basins

The full-house layout. A bath, a separate walk-in shower, and ideally double basins. This is what most Auckland homeowners aim for when they renovate a main bathroom or build a master ensuite. It needs at least 8–10m² to work without feeling cramped.

Where it works: Family bathrooms in homes over 150m², master ensuites in renovated villas, full-home renovations where you’re combining a bathroom and laundry into one larger room.

The detail most people get wrong: The shower and bath share a wet wall. Plan the plumbing chase carefully, if you don’t, the shower mixer ends up in a position where you have to step under cold water to turn it on. We always run a one-metre line ahead of the showerhead position.

See a bath + shower renovation in Albany → · Milford North Shore version →

4. The Wet Room (Shower Room) Layout

Wet room shower layout Auckland, anti-slip matte tile single glass panel

The fastest-growing layout in 2026, and the one we’d argue makes the most of a small space. A fully waterproofed room with anti-slip matte tile floor, a linear drain, a single glass panel, and no shower tray. The shower zone, toilet, and vanity all share the same waterproof envelope.

Where it works: Compact ensuites in apartments and townhouses, second bathrooms in renovated villas where the footprint is tight, accessible bathrooms for older homeowners (a level-access shower removes the trip hazard of a shower tray lip).

The thing to get right: Fall and drainage. A wet room needs a consistent fall toward the linear drain, and the whole shower area has to sit inside a properly applied waterproof membrane that extends above the shower rose, per Acceptable Solution E3/AS1 Internal Moisture (building.govt.nz). This is not a job for a handyman.

For a deeper breakdown of small-bathroom layouts specifically, see our companion guide on small bathroom design ideas, or read our take on the bathtub vs walk-in shower question.

What about pipework, can I change the layout completely?

Yes, but you need to know what you’re signing up for. Moving the basin, bath, or shower a metre or two is straightforward, most floor cavities can accept new branches off the existing waste pipe. Moving the toilet is the expensive change, because the soil pipe has a much larger diameter and needs proper fall.

If you’re considering moving the toilet to a new position, expect to involve an architect or a designer to produce drainage drawings, and budget for Auckland Council consent. Building consent timeframes are set by statute, and you can check current processing times directly with Auckland Council (Building and consents) before you plan a start date.

Important note: Replacing fixtures in the same positions is generally a Schedule 1 exemption under the Building Act, no consent required. Moving plumbing, removing walls, or adding electrical circuits beyond standard replacements typically requires consent. We assess this at the first consultation and handle all council applications in-house.


Bathroom Design Trends 2026, What Auckland Homeowners Are Actually Installing

Most trend lists are wishful thinking written by someone selling tile. This is what’s actually being specified and installed across our active 2026 projects, ranked by how often we’re seeing them.

1. Terrazzo (the real comeback, finally)
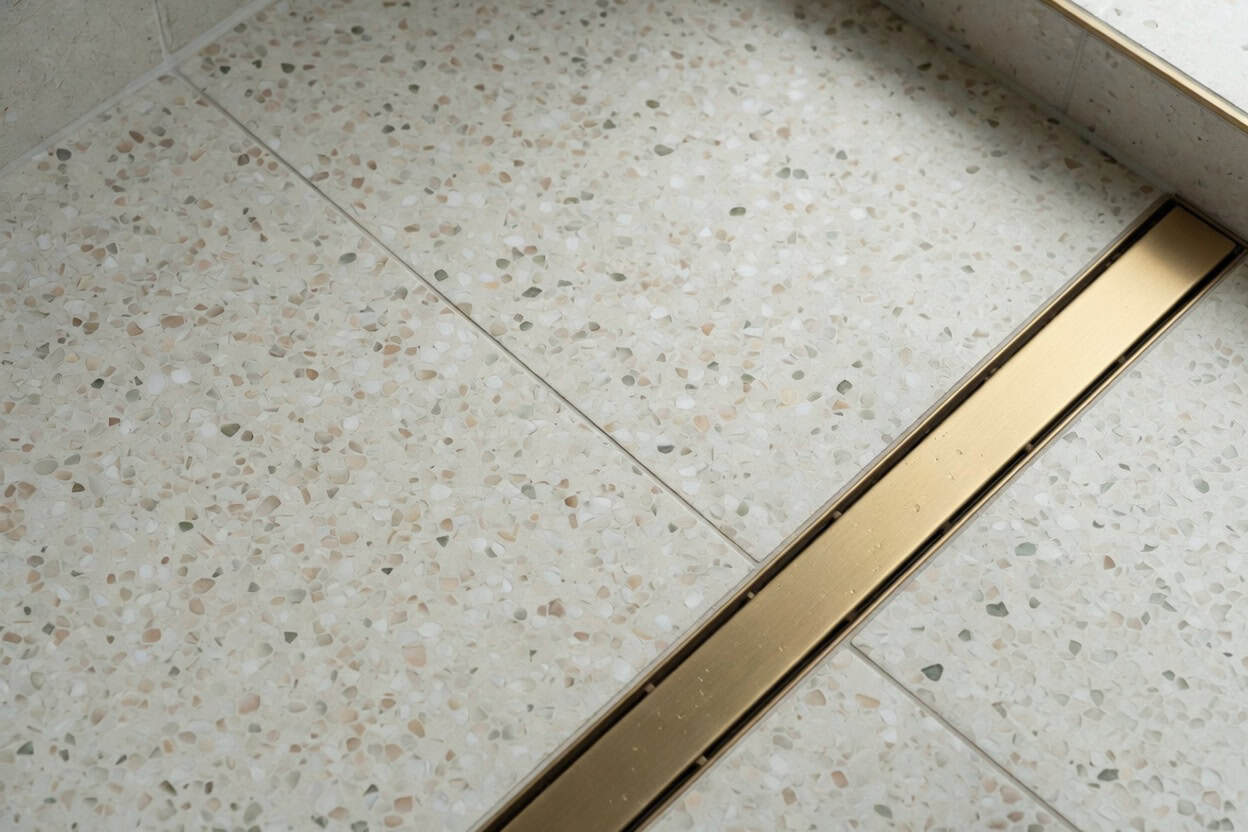
 

Terrazzo bathroom design Auckland, recycled-content composite tile

Bathroom Designs

Terrazzo had a false start a few years back, a lot of homeowners liked the look but balked at the cost. In 2026 it’s back properly, driven by recycled-content composite terrazzo tiles that cost a fraction of the poured version. We’re using it on floors, in shower zones, and on vanity tops in roughly one in three projects.

Why it works in Auckland: Terrazzo handles damp winters without the grout-line mould issues you get with small-format tile. Large-format terrazzo (600x600mm or bigger) has fewer joints and less cleaning, and we’d expect it to outlast most other floor finishes in a bathroom.

“Our clients in St Heliers and Milford are choosing terrazzo because it solves three problems at once, it looks current, it lasts, and the recycled content ticks the sustainability box that more buyers now ask about. We’re sourcing most of ours through The Tile Depot and a couple of specialty importers.”
— Eunice Qin, Designer, Superior Renovations

2. Large-format porcelain (still the workhorse)

Large-format porcelain tile bathroom, Auckland North Shore renovation

If terrazzo isn’t to your taste, the next-best option is large-format porcelain. 600x1200mm tiles are now standard, and 1200x2400mm slabs are being used in shower zones to give a near-continuous wall, almost no grout, easier to clean, and visually it stretches the room.

We spec porcelain over ceramic for any wet area because it’s far less porous and won’t craze under the temperature swings you get in an unheated Auckland bathroom in winter.

3. Backlit and integrated mirrors
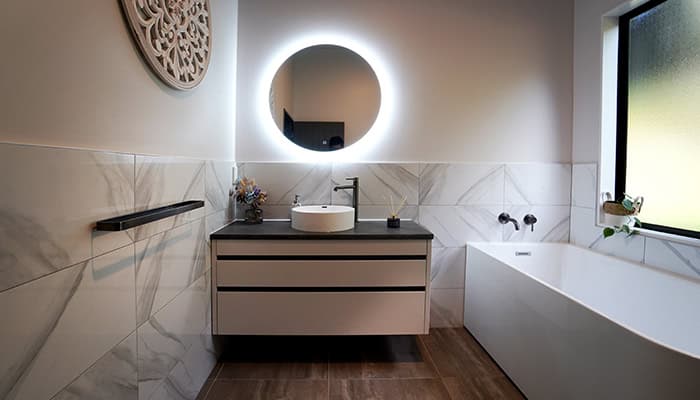
 

Backlit mirror bathroom West Auckland, Superior Renovations


Backlit mirrors have moved from a luxury feature to a near-standard inclusion. They throw light forward onto your face (no shadows from an overhead downlight) and most have anti-fog heating that clears the mirror after a hot shower. Energy use is negligible compared with overhead lighting.

The variation we’re seeing more of in 2026 is the vanity-mounted mirror, set forward of the wall on slim brass or chrome stems. It works particularly well over a stone vanity in larger ensuites.


See backlit mirrors in our Parnell luxury renovation → · Redvale luxury renovation →

4. Earthy and warm-neutral colour palettes

The hard greys and stark whites of a few years ago have aged badly. 2026 palettes are warmer, bone, oat, clay, soft terracotta, sage, paired with timber-look vanities and brushed brass or nickel tapware. It reads calmer, photographs better, and ages slower.

The exception is the bold dark bathroom: matte black or deep charcoal walls, paired with one or two warm metal accents. This works in a windowless guest powder room but rarely in a main bathroom, natural light matters more than drama.
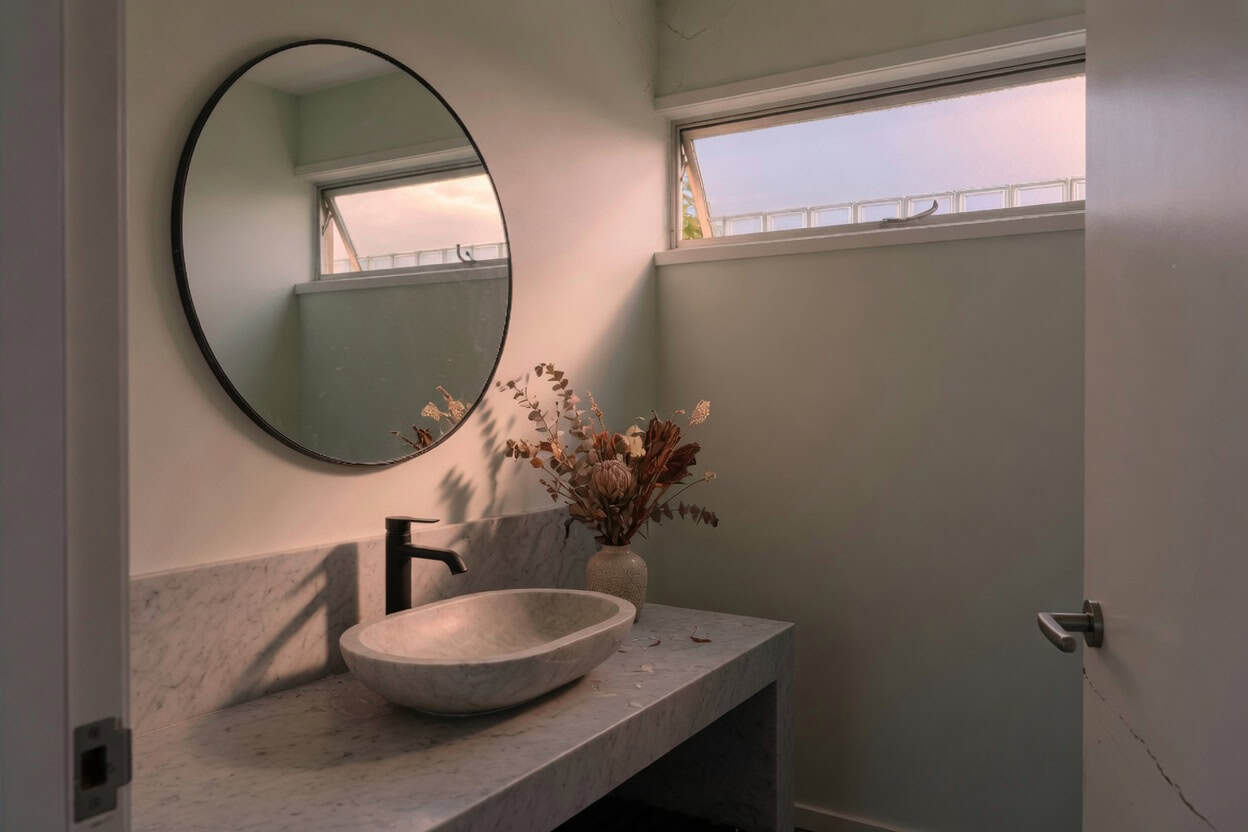
 

Warm-neutral bathroom colour palette Auckland, oat and clay tones

Bathroom Designs


5. Geometric and patterned feature walls

Geometric tile creates a focal wall without overcomplicating the rest of the room. We’re using it most often behind a freestanding bath, on a single shower wall, or as a splashback strip behind a vanity. The trick is to commit to one geometric feature per room, two competing patterns flatten each other.
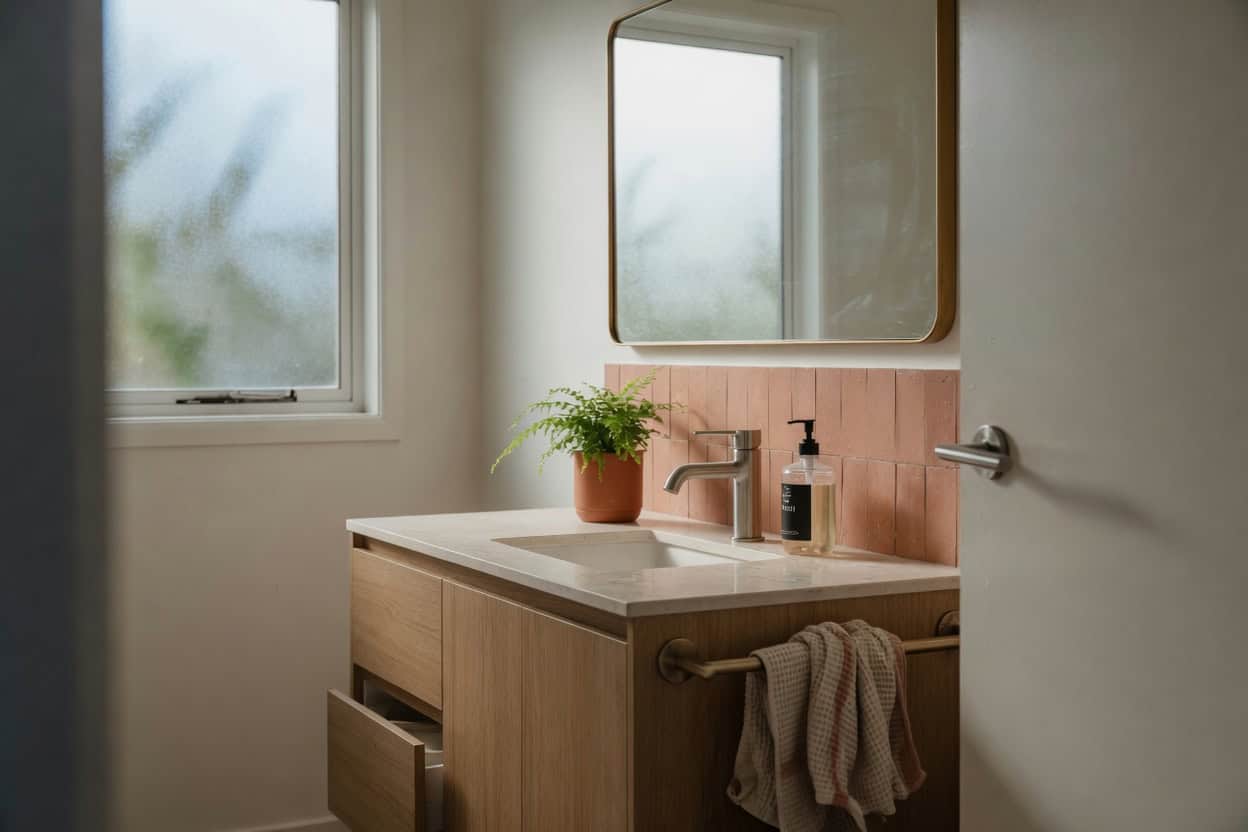
Geometric feature wall bathroom Auckland, patterned tile behind freestanding bath

Bathroom Designs

6. Wall-hung vanities and floating storage

Floating wall-hung vanity with under-cabinet lighting Titirangi bathroom

Wall-hung (floating) vanities are now the default for any bathroom under 7m². They show more floor, which makes small rooms read larger, and they make cleaning the floor underneath possible. Pair with an under-cabinet LED strip for a soft ambient wash that doubles as a night light.

For larger ensuites and family bathrooms, we still spec floor-mounted joinery, usually NZ-made cabinetry with melamine or laminate fronts from Laminex, finished with stone or composite tops.

See the Titirangi floating vanity project →

7. Brushed nickel tapware (the new neutral)

Matte black was the dominant tapware finish for years. In 2026 it’s tipped over, brushed nickel and warm brushed brass are now the more common spec, particularly in warm-neutral colour schemes. Both are softer, both age more gracefully, and both don’t show water spots the way matte black does in Auckland’s hard-ish water.

We source most of our tapware through Reece, with a few specialty brands when a client wants something specific. PVD-coated finishes are now standard at the mid-range and up, in our experience they hold their colour for years longer than the older powder-coated versions. There’s more detail in our full guide to bathroom tapware in NZ.

8. Bathroom niches over add-on shelving

The recessed niche, built into the shower wall or above the basin, has replaced the add-on shower caddy and the floating glass shelf. It’s grout-free, it doesn’t trap soap scum, and it disappears visually when not in use. Plan one shoulder-height niche per shower minimum, ideally tiled in a contrast strip to anchor it as a deliberate feature.

9. Sliding cavity doors

A standard hinged door swings 800mm into the room. A sliding cavity door takes zero. In small bathrooms under 5m², swapping a hinged door for a cavity slider frees up enough space for a slightly larger vanity or a wider shower. We use cavity sliders on roughly half our small-bathroom and ensuite projects now.

10. Smart and layered lighting controls

Wall-keypad scene controls, a single keypad with pre-programmed “morning”, “evening”, and “night” scenes, are filtering down from luxury projects into mid-range bathrooms. We spec these through PDL by Schneider Electric on most projects over $35,000.

The full lighting principle is covered properly further down, this is just a flag that the hardware is now affordable.

11. Universal-access and future-proof features

This is the trend most renovation guides ignore, and it’s the one that matters most for Auckland’s ageing housing stock. NZ Building Code Clause G1 Personal Hygiene governs how sanitary fixtures are provided, and its accessibility provisions apply to certain buildings (per building.govt.nz). In a private home, these aren’t a code mandate, but designing them in now is the smartest future-proofing you can do. The practical 2026 inclusions:

  • A level-access shower (no tray, no step) with a generous clear zone, we work to a minimum of about 900x900mm
  • Vertical grab rails near the toilet and in the shower (specced now, installed later if you’d rather)
  • A wider doorway, Auckland villas often have 760mm doors that won’t fit a walking frame, so we widen these where the framing allows
  • A vanity height around 850–870mm, slightly higher than the old standard, easier on knees and backs

“We design every family ensuite with future use in mind now. A wider doorway and a level-access shower don’t add cost at the planning stage, but adding them later is a far bigger retrofit. It’s the most overlooked decision in bathroom design and the one clients thank us for ten years later.”
— Dorothy Li, Design Manager, Superior Renovations

If you’re renovating specifically for an older family member, we’ve written a dedicated guide to accessible bathroom renovations that goes deeper than this section can.


Designing for Who Actually Lives There

A bathroom built for a young family is a different room from a bathroom built for empty nesters or a guest ensuite. We tier every project to who uses it, when, and at what age. Below is how each type breaks down.

Family Bathroom Design, Built for Volume

Family bathroom design Auckland, double basin layout with porcelain tiles

The family bathroom is usually the busiest, hardest-worked room in the house. Two adults, two kids, a six-day-a-week routine. The design priorities are different to a guest bathroom or an ensuite, durability, simultaneous use, and storage come before aesthetics.

What we always spec for a family bathroom:

  • Double basins. Two people brushing teeth at the same time is not a luxury, it’s a normal 7am.
  • Porcelain floor and walls. Soap, shampoo, sunscreen, kids dropping things. Porcelain shrugs it all off and cleans with a wet cloth.
  • A separate toilet zone where space allows. A toilet behind its own door (a “three-way bathroom” layout) means one kid can be on the toilet while another is in the shower without crisis.
  • Closed storage. Toiletries, spare toilet rolls, towels. Open shelving looks great in a magazine and a mess in a real family bathroom.
  • An over-bath shower or a separate bath and shower, bathing small kids in a walk-in shower is exhausting.

💡 Quick tip: If you have teenagers or are planning to, install a heated towel rail on its own timer. Wet towels on the floor are a renovation killer for the bathroom you just spent good money on.

Master Ensuite Design, A Room for Two Adults

Master ensuite bathroom design Auckland, freestanding bath separate shower

The master ensuite is where the budget gets stretched, and rightly so. It’s a daily-use room for the people who paid for the renovation. We use ensuites to spec the products we wouldn’t put in a family bathroom, stone tops, large-format slabs, a freestanding bath, a generous walk-in shower with a fixed rain head and a separate handset.

What sets a good ensuite apart:

  • A walk-in shower over an over-bath shower. Adults take showers, not baths. Build the shower zone properly.
  • A separation between the bath zone and the rest of the room. If the bath is in the same room as the toilet, it’s not a retreat, it’s a bathroom with a bath in it.
  • Privacy from the bedroom. A direct sightline from the bed to the toilet ruins both rooms. We always add a short passage, a half-wall, or a pocket door.
  • Considered lighting. Two scenes minimum, bright for grooming, low for unwinding.

“A well-positioned ensuite adds genuine luxury without needing extra floor area. The first thing we check on every plan is the sightline, what do you see when you walk through the bedroom door, and what do you see from the bed. If either of those is the toilet, the plan changes.”
— Cici Zuo, Head of Sales (NZ Dip. Interior Design), Superior Renovations

Guest Bathroom and Powder Room Design

The guest bathroom is the underrated room. It gets used less, so it’s the place to take a small design risk, a dark feature wall, an unusual basin, a statement light fitting. Most guest powder rooms are small (under 3m²), which means tile budgets go further and you can spec a higher-end finish for less money.

The two non-negotiables:

  • Adequate ventilation, guest bathrooms often sit in the middle of the home with no external window. Where there’s no openable window, a mechanical extract vented to the outside is required under NZ Building Code Clause G4 Ventilation (per building.govt.nz).
  • A solid soft-close toilet seat. Guests will not be gentle.

Wet Room and Shower Room Design

Wet room shower design Auckland, anti-slip matte tile glass panel

We covered the wet room layout earlier. The design details specific to wet rooms:

  • Anti-slip matte tile floor. Gloss tile in a wet room is a slip-and-fall waiting to happen. We spec matte porcelain with a slip rating appropriate for a wet floor as the baseline.
  • A linear drain over a point drain. Linear drains are cleaner-looking, easier to clean, and the fall is simpler to set out.
  • Heated floor where budget allows. A wet room floor stays wet for longer between uses. Underfloor heating dries it faster and the room feels warmer in winter.
  • A single fixed glass panel, not a full enclosure. The whole point of a wet room is that it doesn’t read as a shower box.


Important note: Wet rooms rely on a continuous waterproof membrane installed to Acceptable Solution E3/AS1 and the wet-area membrane standard AS/NZS 4858, with the membrane carried up the shower walls above the shower rose and turned up at the floor perimeter. Always ask your renovator to supply a Producer Statement (PS3 or PS4) from the waterproofing contractor, this protects you at resale. See building.govt.nz E3 Internal Moisture for the current requirements.


Bathroom Lighting That Does Three Jobs at Once

Bathroom lighting design Auckland, layered LED scheme small bathroom

Lighting is the single most underspent line item in most bathroom renovations. People will pay $4,000 for a vanity and a fraction of that on the lights above it. Then they wonder why the room feels flat.

Good bathroom lighting has three jobs: task lighting at the mirror (for grooming), ambient lighting overhead (to fill the room evenly), and accent lighting (to add warmth and depth). A well-lit bathroom has all three, on separate switches, ideally with dimming.

The four-circuit rule

For any bathroom over 4m², we plan a minimum of four lighting circuits:

  1. Vanity task lighting, backlit mirror or vertical LED strips either side of the mirror
  2. Overhead ambient, warm-white recessed downlights, ideally on a dimmer
  3. Shower zone, a single IP-rated downlight directly over the shower, often on the same circuit as the extract fan
  4. Accent / mood, under-vanity LED strip, niche lighting, or a single feature pendant over the bath

Place the mirror light beside the mirror, not above it

This is the single most common bathroom lighting mistake. An overhead downlight casts your face into shadow, the very effect a bathroom mirror needs to avoid. Vertical lights on either side of the mirror, or a backlit mirror, throw light onto your face instead. The difference is dramatic and the cost is the same.

IP ratings, what they mean and which one goes where

Light fittings in bathrooms have to be rated for moisture exposure, and the fitting’s IP rating has to match the zone it sits in. As a rule of thumb, fittings directly over a bath or inside a shower zone need a higher ingress-protection rating than fittings in the general bathroom area away from spray. Your electrician will confirm the exact rating for each position against the wiring rules, get this wrong and the fitting’s warranty is void. We always check the rating on any fitting a client supplies before it goes anywhere near a wet zone.

“The IP rating is the first thing we check on any light fitting a client picks themselves. A beautiful pendant from an overseas catalogue is useless if it isn’t rated for a humid Auckland bathroom, and the warranty is voided the moment you install it in a wet zone without the right rating.”
— Alison Yu, Designer, Superior Renovations

Layer warm light over cool

Cool-white light (5000K and up) makes a bathroom feel like a hospital. Warm-white (2700–3000K) makes it feel like a hotel. For a daily-use bathroom we spec warm-white at the vanity, slightly cooler overhead for grooming clarity, and warm dim-to-warm strips for the mood circuit. The contrast is what makes the room feel layered.

Hide the source, show the light

Hidden LED bathroom lighting Redvale, luxe layered scheme

The most expensive-looking bathroom lighting is the lighting you can’t see. LED strips under floating vanities, behind niche shelves, above pelmet returns. The eye sees the glow but not the source, and the room feels deeper as a result. Plan these strips at the design stage; retrofitting them is awkward and the joinery rarely accommodates.

The bathroom skylight question

If you have a single-storey home or a top-floor bathroom, a skylight is one of the cheapest dramatic upgrades you can make. Diffused daylight does what no electric light can, it makes the room feel airy, the tile look its true colour, and it cuts the lights-on hours during the day. We add skylights to roughly one in five bathroom renovations, particularly in Auckland villas and bungalows where the bathroom is in the centre of the floor plan with no external wall. If you’re weighing it up, our skylight cost guide breaks down the numbers.

What to do in a small bathroom

Small bathroom lighting design Auckland, vertical mirror strips

Small bathrooms benefit most from layered lighting because the room has nowhere to hide. The compressed plan:

  • Vertical LED strips or a backlit mirror at the vanity
  • A single warm-white downlight overhead, on a dimmer
  • A small under-vanity LED strip
  • One IP-rated downlight in the shower zone

That’s four sources from a single 5m² room. The cost difference compared with a single ceiling light is, in our experience, a few hundred dollars, well below 2% of a typical bathroom budget.


Flooring, Fixtures and Storage, The Choices That Matter

Bathroom flooring options for Auckland conditions

Bathroom flooring Auckland, porcelain large-format tile

For Auckland bathrooms in 2026 we spec one of three floor types, in order of how often. The cost ranges below are indicative supply-and-lay rates based on what we’re seeing across our current Auckland projects, your actual figure depends on tile choice, floor area, and substrate prep.

Floor type Indicative cost (supplied + laid) Best for
Large-format porcelain (600x1200mm or bigger) $140–$220 per m² Most bathrooms, durable, low maintenance, fewer grout lines
Composite terrazzo tile $180–$280 per m² Statement floors, recycled-content spec, mid-range and up
Natural stone (marble, travertine, slate) $220–$450 per m² High-end master ensuites, character renovations

Three materials we don’t recommend for bathroom floors: timber (warps and stains), low-grade ceramic (chips and crazes under temperature change), and vinyl plank (cheap-looking after 18 months in a wet area, even the “waterproof” versions). We’ve gone deeper on the trade-offs in our bathroom flooring guide.

Want a price for your bathroom renovation?
Open the calculator →

Vanities and stone tops

The vanity is the joinery centrepiece of any bathroom and the place a designer’s eye matters most. We design and build most of our vanities in-house using NZ-made cabinetry with melamine, laminate, or veneer fronts. The tops are usually engineered stone, composite, or solid surface, natural stone is reserved for ensuites where the client asks for it.

The right basin for the layout

  • Undermount basin, clean lines, easy to wipe down. Pair with stone or solid-surface tops only.
  • Vessel (above-counter) basin, statement piece, raises the height of the vanity, suits a powder room.
  • Inset basin, practical, budget-friendly, suits a family bathroom.
  • Wall-hung basin, frees up floor space in compact ensuites and powder rooms.

Tapware and brassware

Brushed brass bathroom tapware, Stanmore Bay renovation

Brassware is the wear-and-tear part of a bathroom. It’s used every day, it has water flowing through it, and replacing wall-mounted tapware is expensive once the wall is tiled. Spend more here than you think you should, the difference between a budget mixer and a mid-range one is felt every time you use it.

The current spec we’re using most across mid-range projects:

  • Thermostatic shower mixer (capped temperature, anti-scald)
  • Tall basin mixer for above-counter basins, low-flow standard mixer for inset basins
  • Concealed wall mixer for the bath (the bath spout sits on its own)
  • Soft-close toilet, ideally wall-faced (easier to clean behind)

Most of our tapware is specified from Reece, with finishes in brushed nickel, brushed brass, chrome, or matte black depending on the colour scheme.

Storage that disappears when not in use

Bathroom storage design Auckland, closed cabinet with mirror

Bathroom storage is predictable. Small things near the basin (toothbrush, contacts, daily skincare). Medium things behind doors (shampoo back-ups, medicines). Bulky things in a taller cabinet or linen cupboard (toilet rolls, towels).

Our default storage spec for a mid-range Auckland bathroom:

  • Vanity with two drawers, top drawer for daily items, bottom drawer for back-stock
  • Mirror cabinet above the vanity for daily-access toiletries (face-height, behind a mirrored door)
  • A recessed shower niche at shoulder height
  • One floor-to-ceiling cupboard near the bathroom for towels and bulk storage (in family bathrooms; ensuites usually borrow from a walk-in robe)

💡 Quick tip: If your vanity is wall-hung, use the cavity above the floor for a shallow toe-kick drawer, around 60mm tall, full width. It’s the perfect place to store cleaning supplies and a hair dryer, and it doesn’t read as a drawer at all.

Mixing materials and finishes

Mixed material bathroom design Auckland, timber tile stone

The cleanest bathrooms use three materials maximum. One floor finish, one wall finish, one accent. Add a fourth and it starts to feel busy. We usually run porcelain on the floor, a paint or large-format porcelain on the walls, and a single timber-look or stone accent on the vanity or feature wall.

Glass shower screens

Frameless glass shower door bathroom Auckland, Superior Renovations

Frameless 10mm toughened glass is the standard now. Framed screens look dated and the frames trap soap scum. A single fixed glass panel is the cleanest visual, and it’s compatible with both walk-in showers and wet rooms. Treat the glass with a one-off hydrophobic coating at install and you’ll cut the cleaning time roughly in half over the life of the screen. There’s more on the options in our shower glass guide.


Bathroom Renovation Costs in Auckland, 2026 Reality

The single most common question we’re asked: how much does a bathroom renovation cost? The honest answer depends on size, spec, and whether you’re moving plumbing, but here are the current Auckland 2026 figures we’re quoting against. These are indicative ranges based on our own project pricing, not a published market index.

Tier Indicative cost range What’s included
Budget refresh $9,000–$16,000 New paint, fittings, minor tiling, replace vanity in same spot
Mid-range full renovation $26,000–$35,000 Design, supply, all trades, full tile, new fixtures, project management
Luxury / custom $45,000+ Wet room, premium fixtures, stone tops, underfloor heating, custom joinery
Most Auckland projects land here $26,000–$35,000 Mid-range, a full proper renovation, not a refresh

Across 2026 we’ve seen pricing tick up on materials and labour compared with the year before, which is why the mid-range floor now sits a little higher than it did. The figures above reflect what we’re quoting right now and are consistent with the published cost ranges on our FAQ.

Want a project-specific estimate in two minutes? Use our bathroom renovation cost calculator, it asks the right questions and gives you a realistic indicative range before you ever talk to us.

What drives the variation between $26,000 and $45,000+

  1. Whether plumbing moves. Same-position fixtures: cheaper. Moving the toilet or relocating the shower: adds $5,000–$10,000 in plumbing alone, in our experience.
  2. Tile choice and area. Floor-to-ceiling porcelain in a 6m² bathroom is roughly 30m² of tile. Doubling the tile price-per-m² adds well over $1,500 to that line alone.
  3. Joinery (the vanity). An off-the-shelf vanity is $800–$2,000. A custom NZ-made vanity with a stone top is $4,500–$8,000+.
  4. Tapware grade. Entry-level vs. mid-range vs. premium adds up across mixer, shower, basin, and bath, easily a $2,000–$4,000 swing.
  5. Consent. Standard like-for-like: no consent, no delay. Structural or plumbing changes add council and engineering fees plus several weeks to the start date.

How long a bathroom renovation actually takes

A full bathroom renovation with Superior Renovations takes 3 to 4 weeks on site from the day demolition starts. That assumes design is locked, all materials are on hand, and no consent is required. If consent is needed, add several weeks at the front for Auckland Council processing before any work begins. We’ve laid out the full sequence in our guide to how to renovate a bathroom in NZ.

The week-by-week breakdown for a typical mid-range project:

  • Week 1: Strip-out, demolition, plumbing rough-in, electrical rough-in, waterproofing inspection
  • Week 2: Waterproof membrane application, GIB Aqualine to walls, tile preparation
  • Week 3: Tiling (floor and walls), shower screen template, vanity install
  • Week 4: Tapware fit-off, mirrors, accessories, final clean, handover

Important note: Watch out for renovators who quote 2 weeks for a full bathroom, they’re either skipping waterproofing dry time (which voids your insurance) or they’re using small-format tile that takes less time to lay. Both are red flags.


Bathroom Ventilation and Heating, The Two Things Most Renovations Get Wrong

Ventilation and heating are the two systems that quietly decide whether your bathroom stays looking new or starts mouldering at the corners within three years. They’re also the two systems most easily underspent during a renovation.

Ventilation done properly

NZ Building Code Clause G4 Ventilation requires that moisture and contaminants are removed from bathrooms, and where there’s no openable window a mechanical extract fan venting to the outside is required. Under the current rules, a bathroom extract fan installed in NZ must have a duct of at least 120mm diameter or an extraction capacity of at least 25 litres per second, and it must vent outside, not into the roof space (per Tenancy Services, Ventilation standard and building.govt.nz G4 Ventilation).

That 25 L/s is the legal floor. It’s not what we spec. A fan sitting right on the minimum struggles to clear a steamy Auckland bathroom fast enough in winter, so on our jobs we go well above it. What we spec on every renovation:

  • A purpose-built bathroom extract fan sized above the code minimum, we typically run a higher-capacity fan for a standard bathroom and a larger one again for a bigger room, ducted to the outside through the soffit or roof. Never into the ceiling cavity (that’s the most common shortcut and the cause of most ceiling mould problems).
  • A humidity-sensing run-on timer, the fan keeps running for 10–15 minutes after you leave the bathroom, clearing the residual moisture rather than trapping it.
  • Insulated ducting through any unheated cavity to prevent condensation inside the duct itself.
  • An external grille, fitted with a backdraught flap so cold air doesn’t blow back through the system in winter.

The cost difference between a builder-grade extract fan and a properly specified one is small, and it’s recovered the first winter you don’t have to repaint the ceiling.

Important note: A bathroom extract fan that vents into the ceiling cavity rather than to the outside is a fail point on a LIM check, a fail point on weathertightness reviews, and the single biggest cause of secondary moisture damage we see in older Auckland homes. If your current fan vents into the cavity, fix it during the renovation, not before, not after.

Heated towel rails, get the size right

A heated towel rail is the most cost-effective heating upgrade in any bathroom renovation. It dries towels, warms the room as a secondary effect, and runs on a few cents of power per day if specced and timed correctly.

The mistake most people make is going too small. A towel rail rated for a single bath sheet won’t dry two towels from a family bathroom, the rail can only put out so many watts, and damp towels block air flow to the bars they cover. Spec one bar wider than you think you need, and put it on its own timer so it runs in the hour before peak use rather than 24 hours a day.

Underfloor heating, when it’s worth it

Electric underfloor heating is a luxury upgrade with a real practical benefit: a warm tile floor in winter, and a much shorter time-to-dry for a wet floor after a shower. We install it most often in master ensuites and wet rooms, particularly in homes without ducted central heating. We’ve broken down install and running costs in detail in our underfloor heating NZ guide.

The economics, based on our own installs:

  • Install cost, typically $1,500–$3,500 for a standard bathroom, layered under the tile bed
  • Running cost, a modest daily cost if used on a short morning/evening timer through winter only
  • Best paired with, porcelain or stone floor finishes (not vinyl or timber, which insulate the heat away from the surface)

If you’ve got a slab-on-grade bathroom on a south-facing wall, the case for underfloor heating is much stronger than on a suspended timber floor with a heated room above and below.

Panel heaters and infrared

For larger bathrooms with vaulted ceilings or compromised insulation, a small wall-mounted panel heater on a timer is a sensible backup. We rarely fit them as primary heating, but in older Auckland villas with high ceilings and minimal wall insulation, they can take the edge off a winter morning.

Infrared panel heaters are gaining traction in 2026 for compact ensuites, they heat people and surfaces rather than the air, which is more efficient in a room that empties out a few minutes after use. The technology is improving each year, and the running costs are competitive with electric underfloor heating.


Combining the Bathroom and Laundry, A Smarter Auckland Renovation

Most older Auckland homes were built with a separate laundry, a small room with a washing machine, a tub, and somewhere to hang clothes. In 2026, that layout is increasingly being rethought. Combining the bathroom and laundry into a single larger wet zone solves three problems at once: it frees up the old laundry footprint for storage or living, it concentrates plumbing into one wall, and it usually reduces total renovation cost compared with renovating two rooms separately.

Why combining works

  • Shared wet wall, laundry, basin, and (often) shower all draw from the same hot/cold supply and waste runs, reducing pipework
  • One waterproof envelope, instead of waterproofing two rooms, you waterproof one
  • Cabinetry economies, a single run of joinery covering the washing machine, dryer, basin, and storage costs less than two separate joinery runs
  • Recovered floor space, the old laundry footprint becomes a walk-in linen cupboard, a pantry extension, or an entry mudroom

What we plan for in a combined room

  1. Sound separation. A washing machine on a spin cycle is loud. We mount machines on rubber anti-vibration pads and isolate the wall behind them with acoustic GIB.
  2. A dedicated drying solution. Either a heat-pump dryer stacked above the washer, or a retractable drying line over the bath, or both. Hanging wet clothes on the towel rail is what wrecks the towel rail.
  3. Storage that’s actually accessible. Laundry detergent, fabric softener, stain removers, at adult eye level, not buried under the sink. A pull-out laundry hamper is a quiet upgrade that gets used every day.
  4. A laundry sink (optional). Most modern households don’t need a separate laundry tub, a larger basin in the bathroom serves both functions. But if you do a lot of hand-washing or have specific stain-treating needs, a small dedicated tub still earns its place.

“The combined bathroom-laundry is one of the most underrated renovations we do. A West Auckland family last year saved a meaningful chunk by combining instead of renovating both rooms separately, and they got a bigger, better-laid-out wet zone and a new walk-in linen cupboard out of the old laundry footprint.”
— Dorothy Li, Design Manager, Superior Renovations

Where it doesn’t work

If your bathroom is already tight (under 4m²) and the laundry is on the other side of the house, combining isn’t worth the plumbing cost. Combining works best when the existing rooms share a wall, are both small-to-medium in size, and a meaningful floor-plan improvement is possible by merging them.

If you’re considering a larger reshuffle, moving a kitchen, opening up living space, or adding a bathroom, see our guide to renovating your whole home for how the wet-zone planning fits into a bigger scope.


Consent, Code, and the Small Stuff Most People Miss

This is the section every other bathroom guide skips. It’s also the section that most often costs people money when they renovate without it.

What needs consent in Auckland

Standard bathroom renovations, replacing tiles, vanity, toilet, and shower in the same positions, are typically a Schedule 1 exemption under the Building Act and don’t need consent. Per building.govt.nz (check if you need consents):

  • No consent typically required: Like-for-like replacement of fixtures, retiling, painting, replacing a vanity in the same footprint, replacing a shower screen.
  • Consent typically required: Relocating the toilet, removing or adding walls, adding new electrical circuits (beyond standard replacements), changing the position of a window, any work that affects weathertightness.

Our team assesses this at the first free in-home consultation and manages any consent applications with Auckland Council on your behalf.

NZ Building Code clauses that affect your bathroom

  • Clause E3 Internal Moisture, waterproofing requirements behind tiles, around baths, and in shower zones, with E3/AS1 and AS/NZS 4858 as the means of compliance. Producer Statements (PS3 or PS4) from the waterproofing contractor should be retained for resale.
  • Clause G1 Personal Hygiene, provision of sanitary fixtures, and accessibility provisions for applicable buildings.
  • Clause G4 Ventilation, extract ventilation requirements (mechanical extract to outside, not into the ceiling cavity).
  • Clause H1 Energy Efficiency, insulation requirements where walls or ceilings are opened up.
  • Clause B2 Durability, minimum durability requirements for plumbing, waterproofing, and structural elements.

You can read any of these in full at building.govt.nz Building Code compliance.

Why your renovator should be a Licensed Building Practitioner (LBP)

Bathroom renovations that involve structural work, weathertightness, or moisture management classify as Restricted Building Work under the Building Act. That work has to be carried out or supervised by a Licensed Building Practitioner. You can check any builder’s LBP status at lbp.govt.nz.

Hiring a non-LBP for restricted work is a fast way to void your insurance and create a future resale problem when a LIM check reveals undocumented work.

Group your wet zones

Grouping the bathroom, laundry, and kitchen together is one of the most cost-effective decisions you can make. Shared wet walls reduce plumbing runs, cut consent risk, and contain noise. When relocating fixtures, many simple swaps (replacing a bath with a shower in the same footprint) are Schedule 1 exempt, provided no structural changes occur.

If you’re considering a full house renovation rather than a standalone bathroom, take a look at our full home renovation service in Auckland, combining works almost always reduces total cost.


Want a price for your bathroom renovation?
Open the calculator →

Will a Bathroom Renovation Add Value to Your Auckland Home?
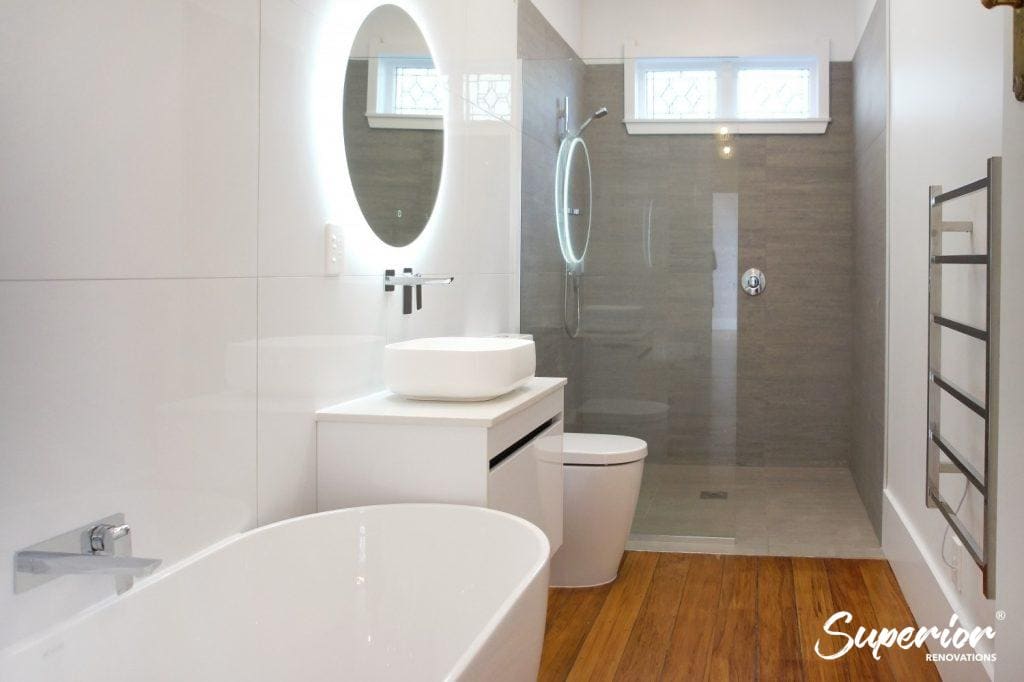
Bathroom renovation Auckland value, renovated bathroom Superior Renovations

Short answer: yes, more reliably than almost any other room in the house. Bathrooms and kitchens are the two rooms buyers scrutinise hardest, and a dated bathroom is the single most common reason a property gets discounted on offer.

The longer answer is: it depends on what kind of bathroom you currently have, what kind of home you live in, and how the local market values the renovation.

When bathroom renovations return strong ROI

  • An outdated 1980s or 1990s family bathroom in a sought-after Auckland suburb, Mt Eden, Grey Lynn, Ponsonby, Remuera, Takapuna. Renovating a tired bathroom in this kind of home almost always pays back at sale, particularly if the rest of the home is presentable.
  • Adding a second bathroom or ensuite to a single-bathroom home. Most three-plus-bedroom Auckland buyers expect at least two bathrooms. A home with one is structurally undersold.
  • Removing a clearly cosmetic problem, yellowed grout, cracked tile, a 1990s burgundy palette. Visual fixes punch above their weight at sale.

When bathroom renovations don’t return their cost

  • Over-specifying for the property. A $60,000 ensuite in an $850,000 home in Manurewa is unlikely to recoup. Match the spec to the property.
  • Renovating one bathroom while leaving the rest of the house dated. Buyers compare like with like, a new bathroom and a 1995 kitchen sends a mixed message.
  • Bathrooms with structural compromises. Removing a load-bearing wall to fit a bath where one shouldn’t go can lose value rather than add it.

Adding a second bathroom, what we’d consider

Some practical ways to add a second bathroom to an Auckland home without a major extension:

  • Convert a small adjacent room (box room, old laundry, study) into an ensuite
  • Use an upstairs landing or wide hallway space for a guest bathroom (single-storey to two-storey conversions especially)
  • Add a powder room to an underutilised corner near the entry or living area
  • Combine the laundry into the existing bathroom and convert the freed-up laundry space

The cheapest option is always the one closest to existing plumbing, adding a bathroom directly above or beside an existing wet zone (kitchen, laundry, bathroom) means short pipe runs and no need to chase walls or floors extensively.

If you’re considering an extension to add a bathroom (or a master suite), our partner firm Sonder Architecture handles the architectural and consent side, and we handle the build, see our page on building an extension in Auckland for the combined process.

💡 Quick tip: If resale within five years is a real possibility, get a property valuation done before finalising your bathroom spec. A registered valuer will give you a realistic ceiling for what the suburb supports, which informs how far to push the budget.


What Makes a Good Bathroom, The Honest Answer

Spa-like bathroom design Auckland, atmospheric lighting freestanding bath

After more than 1,000 bathrooms, the answer is simpler than most design publications make it. A good bathroom does three things at once:

  1. It works at 7am. Two people can use it without bumping into each other, the light is right for grooming, the storage absorbs the daily clutter, the shower runs hot fast.
  2. It works at 9pm. The same room dims down, feels like a retreat rather than a service space, and gives you a moment of separation from the rest of the house.
  3. It stays looking good for ten years. Materials chosen for durability over fashion, fixtures specced one tier above where you think you need to, and a layout that suits your stage of life now and in 2036.

Get those three right and the tile colour barely matters.

The biggest single mistake we see

Underspending on the parts you’ll touch every day. The mixer you use thousands of times a year. The shower head that hits your back every morning. The drawer runners that slam or glide. People will pay an extra $5,000 for nicer tiles and save $300 by buying budget tapware, that’s the wrong way round. Tile is a one-time visual decision; tapware is a daily-use experience.

If you take one thing from this guide

Spend the planning time. A bathroom that’s been properly designed before construction starts will cost less, get built faster, and look better than a bathroom designed on the fly. We’ve never had a client regret spending too long at the design stage, we’ve had plenty regret the opposite.

If you want to see what a proper design process looks like, the Design Studio page walks through ours, from the first sketch to the final 3D render to the locked specification. The Bathroom Design Gallery shows the outcome. The case studies show the journey.

A note on interior styling

Bathroom design ends when the build finishes. Bathroom styling starts the day after. If you want help with the soft layer, towels, plants, art, accessories, the soft furnishings that pull the room together, our sister brand Little Giant Interiors handles the interior styling and furniture side independently of the build.


Ready to Plan Your 2026 Bathroom Renovation?

If you’ve got this far, you’re past the inspiration stage and somewhere on the planning side. The next sensible step is a conversation, at your home, in your bathroom, with someone who’s drawn and built hundreds of them.

Our free in-home consultation runs about 60–90 minutes. Our designer will look at your existing bathroom, measure the space, ask what you’re trying to achieve, and tell you honestly what’s realistic for your budget and your home. There’s no obligation and no upsell, about half our consultations lead to a second meeting, the other half lead to homeowners going away with a clearer head and a better brief for whoever they eventually hire.

From there, if we’re a good fit, we’ll move through our Design-to-Build Action Plan: scope, layout, 3D render, fixed specification, fixed-price quote. By the time we start work, every decision has been made on paper.

Book your free in-home consultation with Superior Renovations
Get an Auckland bathroom renovation cost estimate in 2 minutes
➡ More information on our bathroom renovations in North Shore
Request a free feasibility report for your project


Frequently Asked Questions, Bathroom Design NZ 2026

How much does a bathroom renovation cost in Auckland in 2026?

In Auckland in 2026, a mid-range full bathroom renovation costs $26,000–$35,000, covering design, supply, all trades, and project management. Budget refreshes (paint, fittings, minor tile work) start from $9,000–$16,000, and luxury or custom bathrooms with wet rooms, stone tops, and premium fixtures start from $45,000 and up. Most Auckland projects land in the $26,000–$35,000 range. These are indicative figures based on our own current project pricing, material and labour costs have risen across 2026.

How long does a bathroom renovation take in Auckland?

A standard full bathroom renovation takes 3 to 4 weeks on site from the day demolition starts, assuming design is locked and materials are on hand. If Auckland Council consent is required (moving plumbing or structural changes), add several weeks for council processing before work begins. We give every client a week-by-week schedule before construction starts so you know exactly what's happening when.

Do I need a building consent for my bathroom renovation?

Most bathroom renovations don't require Auckland Council consent, replacing tiles, vanity, toilet, and shower in the same positions is generally a Schedule 1 exemption under the Building Act. Consent is typically required when you're moving plumbing to a new location, removing or adding walls, adding new electrical circuits, or working on a heritage-overlay property. Our team assesses this during the free consultation and manages all consent applications with Auckland Council on your behalf. You can check the rules at building.govt.nz.

What is the best bathroom layout for a small space?

For bathrooms under 5m², the wet room layout, a fully waterproofed room with a single glass panel, anti-slip matte tile, and a linear drain, gives the most usable space. A wall-hung vanity, sliding cavity door, and large-format porcelain tile (600x1200mm or larger) all make a small bathroom read larger. Avoid acrylic shower boxes and over-bath shower curtains; both make small bathrooms feel smaller and date quickly.

What are the bathroom design trends for 2026 in NZ?

The 2026 trends Auckland homeowners are actually installing: terrazzo and large-format porcelain flooring, backlit and vanity-mounted mirrors, warm-neutral and earthy colour palettes, wet-room layouts with linear drains, wall-hung floating vanities, brushed nickel tapware (replacing matte black), recessed shower niches, sliding cavity doors, layered smart lighting controls, and future-proof universal-access features. Terrazzo is the strongest single trend we're seeing in mid-range and above projects.

Should I have a bath or a walk-in shower?

If you have children under 10, a bath is still worth keeping, bathing kids in a walk-in shower is awkward and exhausting. For households without small children, a generous walk-in shower will get more use than a bath ever will. The best of both worlds is the bath-plus-separate-shower layout if your bathroom is over 8m². For master ensuites, we usually recommend a freestanding bath only if there's a separate family bathroom in the home.

How long should bathroom tile and tapware last?

Quality porcelain or terrazzo flooring should last for decades with minimal maintenance. Mid-range tapware with a PVD finish (brushed nickel, brushed brass) holds its appearance for years before showing wear. Budget tapware with powder-coated finishes can start chipping and flaking within 12–18 months in a humid Auckland bathroom, this is the most common reason we get called back to do early replacements. Spend more on tapware than you think you should.

What is the best lighting for a bathroom?

The four-circuit rule: vanity task lighting (backlit mirror or vertical LED strips beside the mirror, not above), overhead ambient downlights on a dimmer, a single moisture-rated downlight in the shower zone, and a mood/accent circuit (under-vanity LED strip or feature pendant over the bath). Warm-white (2700–3000K) for evening atmosphere, slightly cooler at the vanity for grooming. Avoid placing the main light source above the mirror, it casts your face into shadow.

What's the difference between a wet room and a regular bathroom?

A wet room is a fully waterproofed bathroom where the shower zone has no tray, no step, and no full enclosure, just a tiled floor with a linear drain and usually a single fixed glass panel. The whole room is treated as a waterproof envelope to E3/AS1. Wet rooms suit small bathrooms (the open floor makes them feel larger), accessible bathrooms (no trip hazards), and contemporary designs. They cost slightly more to build because the waterproofing scope is larger, but they're easier to clean and last longer than a traditional shower box setup.

Can I keep my existing bathroom layout to save money?

Yes, keeping the toilet, basin, bath, and shower in their existing positions is the single biggest cost saver in a bathroom renovation. Moving the toilet is the most expensive change (it requires new soil pipe drainage), so if the existing layout works, leave it. We can usually rework storage, lighting, finishes, and fixture quality dramatically while keeping the wet plumbing in place, and that combination of major visual change with minimal plumbing work is the sweet spot for value.

Does an extra bathroom add value to my Auckland home?

In most Auckland suburbs, yes, particularly for three-plus-bedroom homes that currently only have one bathroom. Buyers expect a minimum of two bathrooms in a family home, and a single-bathroom property is structurally undersold in the market. Adding an ensuite to a master bedroom, converting a small adjacent room into a guest bathroom, or adding a powder room near the entry are all reliable value-add renovations. Match the spec to the property, over-specifying in a budget suburb won't return the cost.

Should I use a designer or just a builder for my bathroom?

For a budget refresh under $15,000, a builder alone is usually enough. For anything above that, a designer (or a design-and-build company with an in-house design team) saves you money in the long run. Designers spot layout improvements builders won't, specify materials that age well, coordinate trades efficiently, and produce 3D renders so you can see the result before you commit. The cost of design is typically a small percentage of the project budget and almost always recovered through avoided change orders and better product specification.


Further Resources for your bathroom renovation

  1. Featured projects and client stories to see specifications on some of the projects.
  2. Real client stories from Auckland

Need more information?

Take advantage of our FREE Complete Home Renovation Guide (48 pages), whether you’re already renovating or in the process of deciding to renovate, it’s not an easy process, this guide which includes a free 100+ point check list – will help you avoid costly mistakes.

Download Free Renovation Guide (PDF)


18 months 0 percent interest long term finance badge

Have you been putting off getting renovations done?

We have partnered with Q Mastercard ® to provide you an 18 Month Interest-Free Payment Option, you can enjoy your new home now and stress less.

Learn More about Interest-Free Payment Options*

*Lending criteria, fees, terms and conditions apply. Mastercard is a registered trademark and the circles design is a trademark of Mastercard International Incorporated.


Still have questions unanswered?

Book a no-obligation consultation with the team at Superior Renovations, we’d love to meet you to discuss your renovation ideas!

    Services

    Home RenovationKitchen RenovationBathroom RenovationOutdoor RenovationHouse ExtensionCommercialDesign ServicesOther

    By submitting this form, you agree to receive communications from us via email or text regarding our services, you can unsubscribe at any time.

    This site is protected by reCAPTCHA and the Google

    Privacy Policy and Terms of Service apply.


    References

    1. Building Performance (MBIE), E3 Internal Moisture
    2. Building Performance (MBIE), G4 Ventilation
    3. Building Performance (MBIE), G1 Personal Hygiene
    4. Building Performance (MBIE), Check if you need consents
    5. Tenancy Services, Healthy Homes ventilation standard
    6. Auckland Council, Assess building consent application
    7. Licensed Building Practitioners, lbp.govt.nz
    bathroom renovations auckland - Superior Renovations
    Bathroom Renovation

    How to Choose the Right Bathroom Tiles for Your Auckland Renovation

    The tiles you pick will set the mood, the maintenance schedule, and the budget for your entire bathroom renovation. For an average Auckland bathroom (around 5–8 m²), you’re looking at anywhere from $2,500 to $8,000+ on tiles and installation — so getting the material, size, colour, and layout right the first time matters more than most homeowners realise. Here’s what we’ve learnt after completing hundreds of bathroom renovations across Auckland.

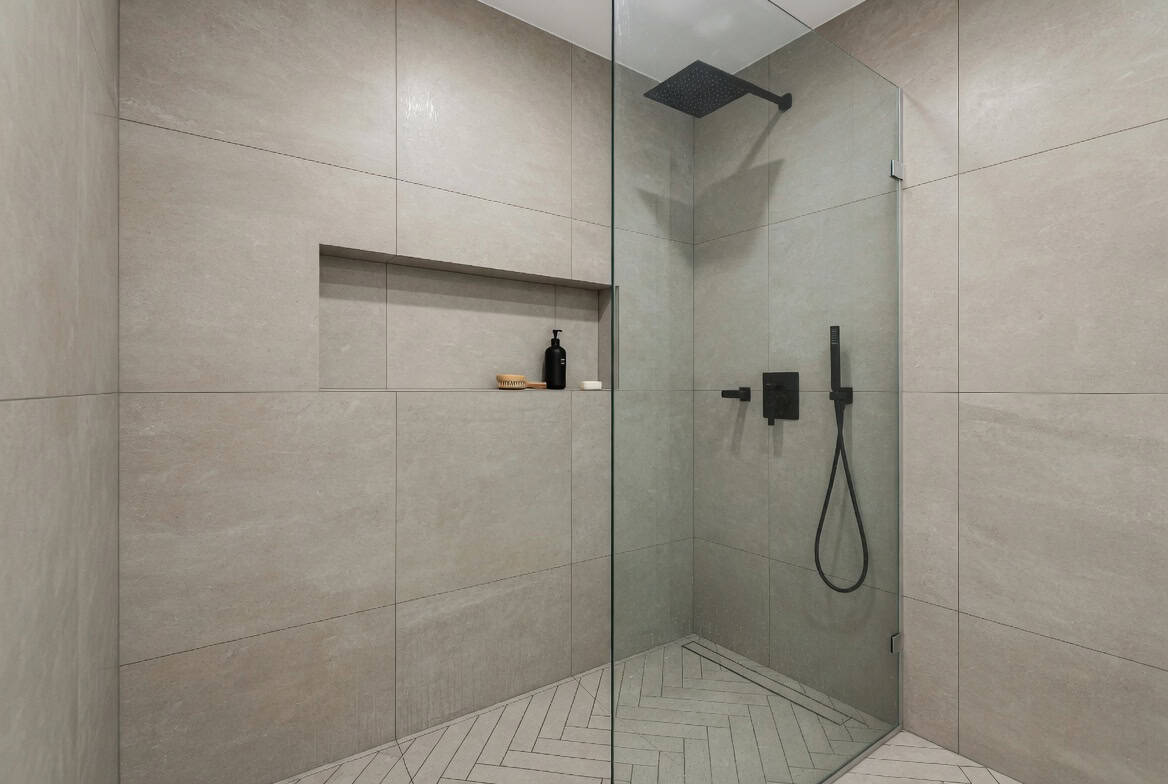
    walk-in shower with large-format grey tiles black tapware and a herringbone-tiled floor


    Tile Materials — What Actually Works in a NZ Bathroom

    Free cost calculator

    How much will your bathroom renovation cost?

    Get an instant Auckland price range for your project — no details required to see it.

    Open the Bathroom Cost Calculator →

    Not all tiles handle moisture the same way. In a humid Auckland bathroom, the single most important property of any tile is its water absorption rate — and porcelain wins that fight.

    Here’s how the main options stack up for the NZ market:

    Porcelain tiles ($60–$150 per m²) are the workhorse of Auckland bathrooms. They’re fired at higher temperatures than ceramic, which makes them denser and far less porous — typically under 0.5% water absorption. That matters in a city where humidity sits high for most of the year. Porcelain works on both floors and walls, handles underfloor heating well, and comes in everything from stone-look finishes to polished concrete effects. Most of the bathrooms we complete across the North Shore and central Auckland use porcelain as the base.

    Ceramic tiles ($35–$80 per m²) are the budget-friendly option. They’re lighter, easier to cut, and perfectly fine for walls. But ceramic absorbs more water than porcelain, so we generally don’t recommend ceramic for bathroom floors in wet zones — particularly in shower areas. If you’re watching costs, a common approach is ceramic on the walls with porcelain on the floor.

    Natural stone tiles ($120–$250+ per m²) — marble, travertine, limestone — bring a premium feel that’s hard to replicate with porcelain look-alikes. The trade-off? Stone is porous and needs regular sealing, typically every 12–18 months. A marble shower wall in a Remuera ensuite looks stunning, but it demands more upkeep than most families want to deal with in a main bathroom.

    Mosaic tiles ($40–$150 per m²) are small-format tiles (usually 20–50 mm) that come pre-mounted on mesh sheets. They’re ideal for shower niches, feature strips, and curved surfaces. The catch is labour cost — mosaics take significantly longer to install, and the grout lines add up fast. Budget an extra 20–40% on installation for any mosaic work.

    💡 Quick tip: Ask your tiler or renovation company for the tile’s water absorption rating before buying. Anything above 3% absorption shouldn’t go on a bathroom floor. The NZ Building Code doesn’t specify an absorption limit directly, but compliance with Clause E3 (Internal Moisture) effectively demands low-porosity materials in wet areas.

    Size and Layout — How Tile Format Changes Your Bathroom

    Tile size does more heavy lifting than most people expect. Large-format tiles (600×600 mm or bigger) are dominating Auckland bathroom renovations right now — and for good reason. Fewer grout lines mean less visual clutter, easier cleaning, and a sense of space that smaller tiles can’t match in a compact room.

    That said, large tiles aren’t always straightforward. They need a perfectly level substrate, which can mean additional floor preparation — especially in older Auckland homes where timber subfloors have settled over decades. A 1960s bungalow in Mt Eden with an uneven bathroom floor will need screeding before any 600×1200 tile goes down. That’s an extra cost, but skipping it leads to lippage (uneven tile edges) that looks amateur and creates trip hazards.

    Smaller tiles (300×300 or smaller) still make sense in certain situations. They’re easier to grade toward a floor waste in a walk-in shower, they handle curved walls better, and they give you more design flexibility. A herringbone pattern in a small-format subway tile can add real character to a compact powder room without making the space feel smaller.

    Common layout patterns we see across our Auckland projects:

    Stacked (grid): Clean, modern, minimal grout visibility. Works well with large format.
    Brick bond (offset): The classic subway tile layout. Softens the grid and hides slight size variations between tiles.
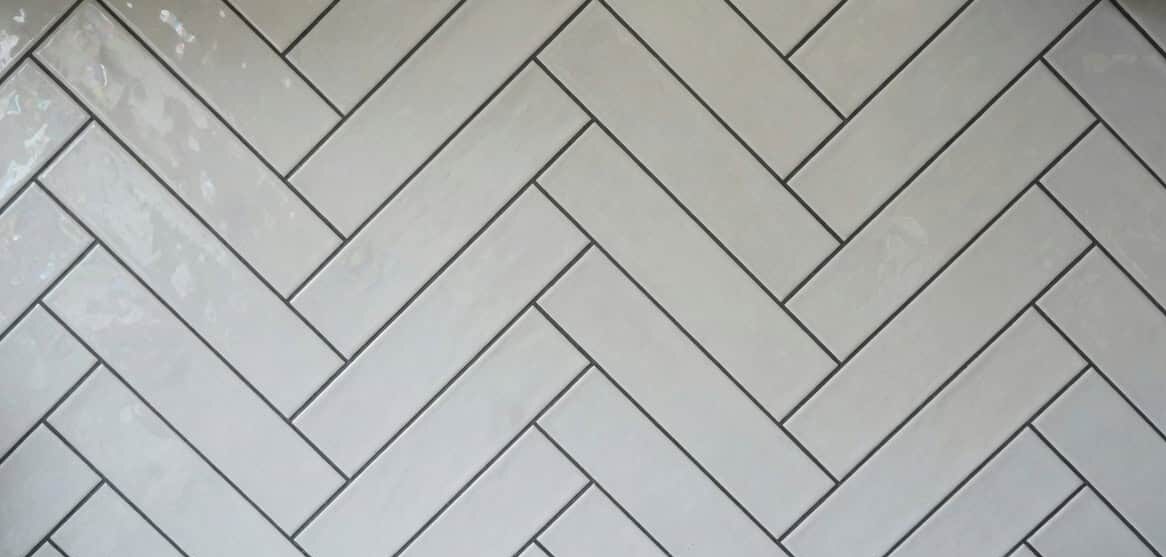
    Herringbone: High visual impact, premium feel — but expect 20–30% more labour time and 10–15% more tile waste from all the angled cuts.
    Vertical stack: Increasingly popular in 2026. Stacking rectangular tiles vertically draws the eye up and makes low ceilings feel taller.

    close-up of glossy grey herringbone pattern wall tiles


    Colour and Tone — What’s Working in NZ Bathrooms Right Now

    Warm neutrals have taken over from the cool grey palette that dominated Auckland bathrooms for the past five years. We’re seeing soft whites, sand tones, warm beige, and greige (grey-beige) across the majority of our 2025 and 2026 projects. These tones work well with the timber vanities, brushed brass tapware, and natural light that Kiwi homeowners are gravitating toward.

    Dark tiles aren’t dead — a charcoal or deep green feature wall still makes a strong statement in a well-lit space. But going full dark in a small bathroom without good natural light is a risky move. It can make the room feel smaller and every water spot, soap residue mark, and dust particle becomes visible. If you want drama without the maintenance headache, keep dark tiles to a single feature wall or the shower niche and let lighter tones carry the rest of the room.

    One trend that’s sticking around: tonal variation within a single colour family. Rather than uniform flat colour, tiles with subtle veining, texture shifts, or matte-to-satin variation add depth without competing with your fixtures. It’s the difference between a bathroom that photographs well and one that actually feels good to stand in. To see these tones and finishes in finished rooms, browse our bathroom designs.


    Waterproofing Comes Before Tiles — And It’s Non-Negotiable

    This is the section most tiling guides skip. Under NZ Building Code Clause E3, every bathroom wet area must be waterproofed with an approved membrane system before any tile goes on. That’s not optional — it’s a legal requirement, and getting it wrong is one of the most expensive mistakes you can make in a renovation.

    The waterproofing membrane goes over the substrate (the surface behind your tiles — typically gib or cement board) and must extend:

    — At least 1,800 mm above the finished floor level in shower areas (or to the ceiling if the shower rose is mounted high)
    — A minimum of 150 mm above the finished floor level around the rest of the bathroom
    — Across the entire floor area with sealed junctions at every wall-floor corner

    The membrane must meet AS/NZS 4858 (Wet Area Membranes) standards, and the WMAI Code of Practice for Internal Wet-Area Membrane Systems sets out exactly how it should be applied. Corners need reinforcement tape. Pipe penetrations need specific detailing. None of this is DIY territory.

    Why does this matter for your tile choice? Because the tile and adhesive system has to be compatible with the membrane underneath. Some natural stone tiles require specific adhesives that may not bond well with certain membrane products. Your renovation company or tiler should be specifying the full system — membrane, adhesive, tile, and grout — as a compatible package, not mixing and matching from different suppliers.

    💡 Quick tip: Waterproofing failures are one of the most common building claims in New Zealand. If your renovation company can’t explain their waterproofing process and supply a Producer Statement (PS3) on completion, that’s a red flag. At Superior Renovations, waterproofing sign-off happens before a single tile is laid.

    Floor Tiles vs Wall Tiles — They’re Not Interchangeable

    You can use floor tiles on walls, but you should never use wall-only tiles on a bathroom floor. The difference comes down to three things: slip resistance, thickness, and load tolerance.

    Floor tiles need a slip-resistant surface. In NZ, this is measured by the P-rating (pendulum test) system. For a residential bathroom floor, you want a minimum P3 rating — ideally P4 if anyone in the household has mobility concerns. Matte and textured finishes naturally offer better grip than polished or gloss tiles. That’s one reason textured stone-look porcelain is so popular right now — it looks premium and performs well underfoot when wet.

    Falls in the bathroom are a serious issue in New Zealand. ACC data shows 236,923 new claims for fall-related injuries from people aged 60 and over in 2023 alone, and bathrooms are one of the highest-risk areas in the home. Tile choice plays a direct role in reducing that risk.

    Wall tiles can be thinner, lighter, and glossier because they don’t bear weight or get walked on wet. This is actually an advantage — lighter tiles are easier to adhere to vertical surfaces and less likely to slump during installation. If you find a gorgeous polished marble-look tile, it’s probably better suited to your walls than your floor.


    What Bathroom Tiling Actually Costs in Auckland

    For a standard Auckland bathroom (around 5–8 m² of floor and 15–25 m² of wall tiling), total tiling costs typically land between $4,000 and $12,000+ including tiles, waterproofing, adhesive, grout, and labour. That’s a wide range, so here’s what drives it up or down:

    Tile cost: The biggest variable. Budget ceramic at $35/m² vs premium natural stone at $250+/m² creates a massive gap before labour even enters the picture.

    Layout complexity: A straight stacked grid is the fastest to install. Herringbone, diagonal, or mixed-format layouts add 20–40% to labour time.

    Substrate condition: Older Auckland homes — your character villas, 1970s brick and tile places, anything from the leaky building era — often need significant floor levelling or wall preparation before tiling can start. Budget $500–$1,500 for prep work in an older home.

    Waterproofing: A certified membrane system typically adds $1,000–$2,500 depending on bathroom size and the number of wet zones. This isn’t optional — it’s a Building Code requirement.

    Walk-in showers: Tiled walk-in showers (replacing a shower box or over-bath setup) are one of the most popular upgrades we do. They also require the most waterproofing, precise floor grading to the drain, and careful tile selection for slip resistance. Expect the shower area alone to account for 30–40% of your total tiling budget.

    All figures above are GST-inclusive estimates based on Auckland market rates. Your actual costs will depend on the specific tiles you choose and the condition of your existing bathroom.

    Want a clearer picture of what your specific bathroom would cost? Book a free in-home consultation and we’ll walk through the numbers with you — including tile, waterproofing, and installation for your exact space.

    💡 Quick tip: Don’t buy tiles based on the per-m² sticker price alone. A $40/m² tile with a complex herringbone layout might cost more to install than a $90/m² tile in a simple grid. Always factor in installation cost when comparing options.

    Want a price for your bathroom renovation?
    Open the calculator →

    Grout — The Detail Most People Forget Until It’s Too Late

    Grout colour can make or break your tile design, and it’s one of the last decisions homeowners make — usually in a rush. That’s a mistake.

    A contrasting grout (white tiles with dark grout, or vice versa) emphasises the tile pattern and each individual tile shape. It’s bold, it makes a statement, and it’s trending in 2026 — but it also shows every imperfection in tile alignment. Your tiler needs to be precise.

    A matching grout (same tone as the tile) creates a seamless, monolithic look. It’s more forgiving of minor installation variances and makes the room feel larger. For most Auckland bathroom renovations, we recommend a tone-matched grout as the safer long-term choice — especially in family bathrooms that take daily punishment.

    Whatever colour you choose, make sure you’re using an epoxy-based grout in wet areas. Standard cement grout is porous, absorbs moisture, and will stain or grow mould over time — no matter how well you seal it. Epoxy grout costs more upfront but saves years of scrubbing and regrouting. In a shower recess, it’s the only sensible option.


    2026 Tile Trends We’re Actually Seeing in Auckland

    Trends come and go, but some of what we’re seeing in our current Auckland projects has real staying power:

    Stone-look porcelain: Travertine and limestone effects remain the most requested tile finish across our bathroom projects. The technology has improved dramatically — you’d struggle to tell the difference from real stone at arm’s length, and maintenance is a fraction of the effort.

    Textured matte finishes: Gloss tiles are fading. Matte and textured surfaces feel more natural, hide water spots better, and offer improved slip resistance. They also photograph better — which matters if you’re ever selling.

    Warm whites over cool whites: The blue-toned bright white bathroom is giving way to warmer off-whites, creams, and bone tones. These warmer palettes work particularly well in Auckland homes with timber floors and natural light — they feel connected to the rest of the house rather than clinical.

    Feature walls with texture, not colour: Instead of a loud coloured accent wall, the move is toward textured tile in the same colour family as the rest of the bathroom. Think a fluted or ribbed tile behind the vanity in the same warm white as the surrounding walls. Subtle, but it gives the room depth.

    Larger formats, fewer grout lines: 600×1200 mm wall tiles and 600×600 mm floor tiles are now standard in mid-range Auckland renovations. The visual impact of fewer grout joints is significant, especially in smaller bathrooms.


    How to Get Your Tile Selection Right — The Short Version

    After working across hundreds of Auckland bathrooms — from compact Ponsonby villas to large Howick family homes — here’s the process that consistently produces results homeowners are happy with years later:

    Start with the floor. Your floor tile choice drives everything else. Pick a floor tile with the right slip rating, the right format for your room size, and a colour you can live with long term. Then select wall tiles that complement it.

    Choose materials before colours. Decide porcelain vs ceramic vs stone first. Each material has its own maintenance profile, price band, and installation requirements. Colour comes second.

    Get physical samples. Online images lie. Screens distort colour. Always view tile samples in your actual bathroom under the actual lighting conditions — natural daylight and whatever artificial lighting you use at night. A tile that looks warm beige under showroom LEDs might read pink under your bathroom’s fluorescent light.

    Think about resale. If you’re planning to sell within five years, stick to neutral tones and timeless formats. Bold trends date quickly. A well-executed neutral bathroom adds value; a dated trend statement subtracts it.

    Brief your renovation company on the full picture. Your tile selection isn’t isolated — it connects to waterproofing, adhesive systems, grout, underfloor heating, and fixture placement. A good renovation team manages all of this as one system. That’s the approach we take at Superior Renovations — our design team works with you on tile selection as part of the full bathroom design, not as an afterthought.


    What's the best tile material for a bathroom floor in NZ?

    Porcelain is the strongest option for bathroom floors in New Zealand. It has very low water absorption (under 0.5%), handles humidity well, and comes in a huge range of finishes including stone-look, concrete, and timber effects. Ceramic works for walls but absorbs more moisture — not ideal for floors in wet zones.

    How much does it cost to tile a bathroom in Auckland?

    For a standard Auckland bathroom (5–8 m² floor, 15–25 m² walls), expect to pay between $4,000 and $12,000+ GST-inclusive for tiles, waterproofing, adhesive, grout, and labour. The biggest cost variables are tile material, layout complexity, and the condition of your existing substrate.

    Do I need waterproofing before tiling my bathroom?

    Yes — it's a legal requirement under NZ Building Code Clause E3. All bathroom wet areas must have an approved waterproof membrane system installed before tiling. The membrane must meet AS/NZS 4858 standards and be applied by a qualified professional.

    Can I use the same tiles on my bathroom walls and floor?

    You can use floor-rated tiles on walls, but not the other way around. Floor tiles need adequate slip resistance (minimum P3 rating for residential bathrooms) and the strength to handle foot traffic. Wall tiles are typically thinner and lighter, which makes them easier to install vertically but unsuitable for floors.

    What tile size makes a small bathroom look bigger?

    Large-format tiles (600×600 mm or bigger) with minimal grout lines create the most spacious feel. Fewer joints mean less visual interruption. Pair large tiles with a colour-matched grout for a seamless, expansive look — it's one of the most effective tricks in small bathroom design.

    Should I choose porcelain or ceramic tiles for my Auckland bathroom?

    Porcelain for floors, ceramic for walls (if you're watching the budget). Porcelain's lower water absorption rate makes it the better performer in Auckland's humid conditions. Ceramic is fine for splash zones on walls where water contact is less sustained.

    What grout should I use in a bathroom shower?

    Epoxy grout is the best option for showers and wet areas. Unlike standard cement grout, epoxy is non-porous, stain-resistant, and won't harbour mould. It costs more to buy and install, but it saves years of maintenance and regrouting.

    Are large format tiles harder to install?

    They require more surface preparation — the substrate needs to be perfectly level, or you'll get lippage (uneven edges between tiles). In older Auckland homes with settled timber floors, this often means screeding before tiling. The installation itself also requires specialist large-format tools and suction-cup handling equipment.

    What bathroom tile colours are trending in NZ in 2026?

    Warm neutrals are leading — soft whites, sand, warm beige, and greige. These tones pair well with the timber vanities and brushed brass fixtures popular in Auckland bathrooms. Stone-look porcelain in travertine and limestone effects remains the most requested finish.

    How long does bathroom tiling take?

    For a standard bathroom, tiling typically takes 3–5 days including waterproofing application, curing time, tile installation, and grouting. Complex layouts, large-format tiles, or extensive substrate preparation can extend this to 7+ days. The waterproofing membrane alone needs at least 24 hours to cure before tiling can begin.

    Do I need a building consent for bathroom tiling in Auckland?

    Tiling alone doesn't require a building consent. However, if your renovation involves changes to plumbing, drainage, or structural elements — which most full bathroom renovations do — then you'll likely need consent from Auckland Council. Your renovation company should advise on this as part of the project scoping.


    18 months 0 percent interest long term finance badge

    Want a price for your bathroom renovation?
    Open the calculator →

    Have you been putting off getting renovations done?

    We have partnered with Q Mastercard ® to provide you an 18 Month Interest-Free Payment Option, you can enjoy your new home now and stress less.

    Learn More about Interest-Free Payment Options*

    *Lending criteria, fees, terms and conditions apply. Mastercard is a registered trademark and the circles design is a trademark of Mastercard International Incorporated.


    Still have questions unanswered?

    Book a no-obligation consultation with the team at Superior Renovations,
    we’d love to meet you to discuss your renovation ideas!

      Services

      Home RenovationKitchen RenovationBathroom RenovationOutdoor RenovationHouse ExtensionCommercialDesign ServicesOther

      By submitting this form, you agree to receive communications from us via email or text regarding our services, you can unsubscribe at any time.

      This site is protected by reCAPTCHA and the Google

      Privacy Policy and Terms of Service apply.


      References

      1. Building Performance (MBIE)
      2. Building Performance (MBIE)
      3. BRANZ
      house extensions auckland
      House Renovation

      Top 10 Emerging Trends in Home Renovation for 2024 in NZ

      Hey Kiwis, if you’re eyeing up a home reno in Auckland or beyond and want to tap into what’s hot heading into the end of 2025 (even if this guide’s from 2024 vibes), these top 10 emerging trends are still banging on—focusing on nature, sustainability, and that proper Kiwi indoor-outdoor flow we crave. It’s all about creating spaces that feel calming, eco-smart, and ready for real life, from biophilic greens to clever extensions that suit our damp winters and sunny summers.

      Free cost calculator

      How much will your renovation cost?

      Get an instant Auckland price range for your project — no details required to see it.

      Try our free cost calculators →

      What’s Driving Home Reno Trends in NZ Right Now?

      We’re leaning hard into well-being and the environment, eh? Trends like bringing the outdoors in with plants and skylights cut stress and boost vibes (backed by studies), while eco upgrades like solar panels or recycled materials cut running costs — though Warmer Kiwi Homes funds ceiling and underfloor insulation and heat pumps only, not solar or recycled materials. Multifunctional spaces are gold for tight Auckland sections, and smart tech makes everything effortless. We’ve seen heaps of folks in spots like Remuera or Takapuna blending these for homes that feel personal and future-proof—think upcycled treasures adding soul without the waste.

      Which Top Trends Are Standing Out for Kiwi Homes in 2025?

      A few biggies from the pack: Biophilic designs with native ferns and natural light are everywhere for that calming connection to our landscapes. Outdoor living’s massive—decks with firepits or pizza ovens turning backyards into entertaining hubs in coastal North Shore pads. Sustainability’s non-negotiable, with local timber cladding or energy-efficient appliances supporting NZ businesses and slashing footprints. Smart home symphony (voice lights, thermostats) and wellness spots like home gyms or yoga nooks nail daily comfort, while extensions or granny flats add space harmoniously without moving.

      How Can You Make These Trends Work Without Overdoing It in Auckland?

      Keep it local and practical—source reclaimed stuff for uniqueness, go multifunctional in urban Grey Lynn spots to maximise room, and prioritise community vibes with shared gardens if you’re in denser areas. Upcycling vintage bits saves cash and tells a story, perfect for heritage villas in Ponsonby. Bundle eco tweaks for grants, and you’re not just renovating—you’re investing in a sanctuary that fits our lifestyles spot-on.

      Fancy weaving some of these trends into your own reno for a home that feels fresh and truly Kiwi? Give us a yell at Superior Renovations for a free consult—what trend’s catching your eye most?

      As the sun dips below the Southern Alps and paints the New Zealand sky in fiery hues, a spirit of transformation whispers through the air. It’s 2024, and the kiwi’s inherent love for innovation, sustainability, and well-being is manifesting in a vibrant tapestry of home renovation trends. From blurring the lines between indoors and nature’s embrace to carving out personal sanctuaries that reflect unique souls, these trends offer a tantalizing glimpse into the future of NZ homes.

      open-plan living area with black armchairs opening onto a covered outdoor lounge

      1. Biophilic Bliss

      Forget sterile walls and stark minimalism. Biophilic design is a tidal wave crashing onto the NZ renovation scene, urging us to embrace nature’s restorative power. Imagine sprawling indoor jungles of cascading ferns and vibrant philodendrons, where sunlight streams through skylights, painting dappled patterns on the rich hues of reclaimed wood floors. Pocket courtyards burst with fragrant herbs and colorful blooms, transforming your home into a verdant oasis. Studies have shown that incorporating natural elements into our living spaces reduces stress, promotes creativity, and boosts overall well-being (1). So, step outside, breathe in the crisp air, and let nature inspire you to weave its calming magic into your home.

      outdoor deck at dusk with sun loungers dining table and covered pergola area

      2. Eco Warriors of Renovation

      Kiwis are fiercely proud of their pristine landscapes, and this love for the land transcends into the realm of home renovations. Sustainability is no longer a buzzword, but a battle cry, leading the charge towards eco-conscious transformations. Imagine kitchens adorned with sleek, energy-efficient appliances that hum quietly, powered by rooftop solar panels basking in the sun’s bounty. Walls breathe with the help of recycled insulation, while reclaimed timber finds new life as countertops and shelves, whispering tales of past forests. The EECA Warmer Kiwi Homes programme funds ceiling and underfloor insulation and heat pumps for eligible owner-occupiers of homes built before 2008 — it does not fund recycled insulation, reclaimed timber or solar (3). Remember, sustainable renovations aren’t just a fad; they’re an investment in the future of your home and the planet.

      covered outdoor deck with sofa built-in BBQ and sage green cabinetry

      3. Outdoor Living Symphony

      New Zealand’s breathtaking landscapes beg to be savored, and outdoor living spaces are evolving into integral extensions of our homes. Picture expansive decks seamlessly blending with living areas, their warm timber floors echoing the embrace of the surrounding forests. Imagine plush outdoor furniture inviting you to sink into comfort, while a rustic pizza oven beckons with the promise of wood-fired feasts under the starlit sky. Cozy firepits crackle, casting warm glows on laughter-filled evenings with loved ones. Don’t just exist within your walls; extend your living space, embrace the symphony of nature, and let your home become a canvas for alfresco memories (4).

      house extensions auckland

      4. Multifunction Maestro

      Space in NZ homes is precious, and multifunctional rooms are the maestros conducting a harmonious orchestra of utility. Living areas morph into dining spaces with the flick of a dining table, while cleverly concealed workstations tucked away in cabinetry transform kitchens into home offices. Bedrooms become havens for both slumber and productivity, with built-in desks and storage solutions maximizing every square foot. This isn’t about cramming furniture; it’s about orchestrating a seamless flow of function, where each space effortlessly adapts to your evolving needs (5).

      close-up of a smart speaker beside a smartphone showing a device setup screen

      5. Smart Home Symphony

      Technology is no longer a distant echo; it’s an intricate melody woven into the fabric of our homes. Imagine smart lighting systems that adjust to your mood, casting warm hues for cozy evenings or cool blues for focused mornings. Thermostats whisper to your comfort, maintaining the perfect temperature without a moment’s thought. Security systems become invisible guardians, while appliances dance to your voice commands, freeing you to focus on the truly meaningful moments. Embrace the smart home symphony; let technology be your silent conductor, harmonizing your routines and elevating your comfort to new heights (6).

      white bathroom renovation with freestanding bath subway tile and glass walk-in shower

      6. Upcycling and Repurposing Renaissance

      Sustainability meets creativity in the upcycling and repurposing renaissance. Vintage furniture, once relegated to dusty attics, is reborn as statement pieces, its weathered patina whispering tales of bygone eras. Old doors transform into rustic coffee tables, while discarded pallets find new life as garden planters bursting with vibrant blooms. This trend isn’t just about saving resources; it’s about injecting your home with a unique soul, where every object breathes a story of your individuality and resourcefulness (7).

      pink-toned main bedroom with upholstered bedhead timber furniture and glass doors to a deck

      7. Wellness Whispers

      Homes are our sanctuaries, and prioritizing well-being through design is no longer a whisper, but a booming chorus. Natural light floods spaces, banishing shadows and infusing them with life-giving energy. Calming color palettes, inspired by the soft hues of New Zealand’s native flora, soothe the senses and evoke tranquility. Dedicated relaxation areas, bathed in the gentle murmur of water features, beckon you to unwind. Yoga studios nestle in hidden corners, and home gyms equipped with state-of-the-art equipment empower you to sculpt your body and mind. Remember, wellness isn’t just about physical health; it’s a holistic symphony of physical, mental, and emotional well-being. Let your home be the conductor, orchestrating a space that nurtures your soul and guides you towards a flourishing life.

      Outdoor decking for this outdoor renovation in Auckland

      Want a ballpark for your renovation?
      See the calculators →

      8. Community Crescendo

      With the rhythm of remote work and flexible living arrangements becoming ever stronger, fostering a sense of community within the home becomes a vital melody. Imagine shared spaces buzzing with activity, co-working areas where professionals collaborate and ideas spark, and communal gardens where neighbors gather, tending to the earth and cultivating connections. Rooftop terraces transform into social hubs, offering panoramic views and a stage for laughter-filled evenings under the stars. This trend isn’t just about bricks and mortar; it’s about weaving threads of connection, creating a home that resonates with the spirit of collaboration and shared joy (9).

      dark bathroom renovation with backlit round mirror and black stone vessel basin
      view of Piha coastline and native bush through large aluminium windows

      9. Local Love’s Embrace

      Supporting local businesses and minimizing carbon footprints are the driving forces behind the trend of using locally sourced materials in renovations. Imagine walls adorned with handcrafted timber cladding from sustainably managed NZ forests, their grains whispering tales of ancient trees. Floors gleam with recycled stone sourced from nearby quarries, while bespoke furniture fashioned by local artisans reflects the unique aesthetic of your community. This isn’t just about choosing materials; it’s about investing in the fabric of your community, supporting the skilled hands that shape your environment, and minimizing the environmental footprint of your renovation (10).

      10. House Extension Harmony

      Sometimes, your heart beats for more than your existing walls can hold. House extensions become a melodic solution, adding extra space to amplify your life’s symphony. Imagine second-floor additions bathed in light, offering panoramic views or becoming dedicated havens for creativity and work. Granny flats bloom alongside the main house, providing space for aging parents or welcoming the rhythm of intergenerational living. Sunrooms burst with sunlight, inviting nature’s embrace and extending your living space beyond the traditional walls. Remember, an extension isn’t just about square footage; it’s about expanding the possibilities of your home, creating a space that adapts to your evolving needs and dreams (11).

      weatherboard house exterior with deck spa pool and tropical garden landscaping

      11. Outdoor Renovation Rhapsody

      Don’t let your backyard remain an unsung verse in the symphony of your home. Landscape transformations paint a vibrant melody, where pathways winding through lush greenery guide you to hidden corners of tranquility. Water features add their gentle murmur, while pergolas draped in bougainvillea create pockets of shade and romance. Decks become stages for alfresco dining and stargazing, their timber echoing the warmth of crackling firepits that cast a glow on laughter-filled evenings. Outdoor renovations aren’t just about aesthetics; they’re about extending your living space, weaving nature’s beauty into your daily life, and creating a canvas for unforgettable memories (12).

      outdoor pergola with retractable screen under construction over an outdoor lounge

      12. Pergola & Deck Duets

      Pergolas and decks are the instrumentalists in the outdoor living orchestra, offering shade, shelter, and an additional stage for life’s performance. Imagine timber pergolas adorned with climbing vines, their leafy canopies filtering sunlight into dappled patterns. Choose from sleek minimalist designs or rustic timber structures, each echoing the melody of your home’s architectural style. Decks become extensions of your living space, their warm timber floors blending seamlessly with indoor areas. Consider decking materials like sustainably sourced composite or locally-grown hardwoods, ensuring beauty and longevity. Pergolas and decks aren’t just structures; they’re invitations to slow down, soak up the sun, and create memories that resonate with laughter and the sweet melody of birdsong (13).

      corner sunroom with timber deck and harbour view through floor-to-ceiling windows

      13. Double Glazing Symphony

      Forget the cacophony of traffic or the biting wind that chills your bones. Double glazing windows become the soundproof maestros in your home’s symphony, insulating you from the outside world and weaving a cocoon of comfort. Imagine windows that not only reduce energy bills by keeping you warm in winter and cool in summer but also create a haven of tranquility, where the only music is the whisper of the wind through the trees and the gentle strum of raindrops on glass. Double glazing isn’t just about practicality; it’s about investing in your peace of mind, creating a sanctuary where you can truly unwind and savor the quiet moments (14).

      kitchen renovations

      14. Bespoke Kitchens – Culinary Crescendo

      The kitchen is the heart of the home, where culinary symphonies are composed and shared. Bespoke designs become the personalized melody, reflecting your unique culinary passions and seamlessly blending with your overall style. Imagine handcrafted cabinetry in rich timber tones, their smooth surfaces whispering tales of skilled craftsmanship. High-quality appliances, chosen for both function and form, become your trusted instruments in the kitchen, their sleek lines and intuitive interfaces echoing the rhythm of your cooking style. Consider smart technologies that seamlessly integrate, transforming mundane tasks into effortless experiences. A bespoke kitchen isn’t just about aesthetics; it’s about creating a space that ignites your culinary passion, fosters connection with loved ones, and becomes the heart of your home’s joyful symphony (15).

      15. Personalized Sanctuary – Final Chorus

      Cookie-cutter homes are a distant melody in today’s symphony of individuality. Embrace your unique spirit and let your home be the final, triumphant chorus of your personality. Bold design choices become the vibrant flourishes, adding splashes of color and unexpected textures that reflect your inner spark. Statement pieces, curated with love and care, become the focal points, singing tales of your travels, passions, and cherished memories. DIY projects, infused with your creativity and dedication, add a personal touch, weaving a thread of your soul into the very fabric of your home. Remember, a personalized sanctuary isn’t about following trends; it’s about creating a space that speaks your truth, resonates with your spirit, and allows you to live your life’s unique and beautiful melody to the fullest.

      The trends we’ve explored are just the opening notes in the ever-evolving symphony of home renovation in New Zealand. Stay informed, listen to the whispers of inspiration in your surroundings, and embrace the rhythm of change. Remember, your home is your instrument, your canvas, your sanctuary. Play your own unique melody, let your creativity dance with innovation, and above all, create a space that reflects the beautiful symphony of your life.

      To Summarise

      What are the key themes shaping home renovations in NZ in 2024?

      The main themes are sustainability, well-being, connection, and personalization. Kiwis are embracing natural elements, eco-friendly practices, spaces that promote relaxation and community, and unique designs that reflect their individual styles.

      Why should I consider incorporating these trends into my renovation?

      These trends not only improve your home's aesthetics and comfort but also contribute to sustainability, enhance your well-being, foster connections with loved ones and neighbors, and ultimately create a space that truly reflects your personality.

      How can I make my renovation more sustainable?

      Use recycled or reclaimed materials, opt for energy-efficient appliances and fixtures, incorporate renewable energy sources like solar panels, and prioritize locally sourced materials.

      Is double glazing worth the investment?

      Yes, double glazing can significantly improve thermal insulation, reducing energy bills and creating a more comfortable living environment. It also reduces noise pollution and creates a quieter haven.

      How can I make my home reflect my unique personality?

      Embrace bold design choices, incorporate statement pieces you love, showcase your hobbies and passions through curated objects, and don't be afraid to DIY and add your own creative touch.

      Where can I find more information about these trends and renovation inspiration?

      Check out local design blogs, architecture magazines, and social media platforms. You can also talk to reputable contractors, architects, and interior designers for expert advice. Additionally, organizations like EECA and local environmental groups offer resources and grants for sustainable renovation projects.

      Remember, your home renovation is a journey, not a destination. Enjoy the process, embrace the possibilities, and most importantly, create a space you love and feel comfortable calling your own.


      18 months 0 percent interest long term finance badge

      Have you been putting off getting renovations done?

      We have partnered with Q Mastercard ® to provide you an 18 Month Interest-Free Payment Option, you can enjoy your new home now and stress less.

      Learn More about Interest-Free Payment Options*

      *Lending criteria, fees, terms and conditions apply. Mastercard is a registered trademark and the circles design is a trademark of Mastercard International Incorporated.


      Still have questions unanswered?

      Book a no-obligation consultation with the team at Superior Renovations,
      we’d love to meet you to discuss your renovation ideas!

        Services

        Home RenovationKitchen RenovationBathroom RenovationOutdoor RenovationHouse ExtensionCommercialDesign ServicesOther

        By submitting this form, you agree to receive communications from us via email or text regarding our services, you can unsubscribe at any time.

        This site is protected by reCAPTCHA and the Google

        Privacy Policy and Terms of Service apply.

        Key elements that make for a contemporary kitchen design - This kitchen was renovated in West Harbour, West Auckland
        Kitchen Renovation

        A Guide on designing 6 different Kitchen designs and styles in Auckland

        Kitchens today have a multi faceted role in our lives and are not merely a place where the cooking is done. As we evolve more towards an open style living, our kitchens have become a focal point of how families interact on an everyday basis. It is a place where everyone gets together to cook, it is also a place where family and friends come over and hang around on bar stools while others cook.

        Free cost calculator

        How much will your kitchen renovation cost?

        Get an instant Auckland price range for your project — no details required to see it.

        Open the Kitchen Cost Calculator →

        This open style living has made it even more important for our kitchens to be functional, have a good kitchen layout and be aesthetically attractive. Having an open plan kitchen means that the aesthetics of the rest of your home is often extended to the kitchen in order to have some continuity.

        This guide will discuss elements that go into creating 6 distinct types of kitchens that are popular today. Read this guide if you are thinking of renovating your kitchen or planning an upgrade.

        Key Elements to design:

        Need ideas? Check out our Kitchen Design Gallery or dive into our Bathroom Design Gallery for inspiration!


        Key Elements of Classic Kitchen Designs

        Classic kitchens are supposed to reflect a timeless kitchen design that does not go out of style. They should not however be confused for traditional kitchen designs. Classic kitchens have a neutral palette that gives it a fresh new feel.

        As classic kitchens mostly have a neutral palette, they might not be for everyone. They might feel too bland for people who love colours and perhaps too ornate for people who like sleek modern lines for their interiors.

        Due to their neutral palette they will easily complement the rest of your home’s interior. If the rest of your home is modern, then a few small changes in your classic kitchen can modernise it.

        Colour Schemes in Classic Kitchen Designs

        As mentioned above, classic kitchens are meant to have a simple and light design with minor ornate detailing. They are not too dark, traditional, or complicated in their kitchen design. Classic Kitchen designs have a neutral overall colour palette for their walls and cabinets. This however does not have to mean that they need to look bland.

        A great way to add some interest and colour is to add a dark countertop/benchtop. Create contrast by adding dark light fixtures, benchtops, flooring, or minor detailing to the neutral colour scheme.

        classic kitchen designs - renovation done in Epsom Auckland

        Classic Kitchen we renovated in Epsom


        The above kitchen was renovated in a Historic home in Epsom. The previous kitchen was in a traditional style but the new owners wanted a more timeless look for their kitchen. We demolished the previous fixtures and custom built the kitchen in a classic style. See full project specifications: Classic Kitchen renovation in Epsom

        Cabinets in Classic Kitchen Designs

        Always remember your design brief when choosing fixtures and materials for your classic kitchen design. A classic kitchen needs to be timeless which means that the cabinetry should be chosen keeping simplicity in mind. Too many ornate features on the cabinets will make the kitchen design look too traditional. Instead, opt for shaker style cabinet doors which feature clean lines with a recessed centre in the middle. If you do want to add more details on the cabinets then you can add some bead moulding on the edges.

        When renovating classic kitchens, we use Dezignatek Thermoform that is wrapped around the cabinets with minor detailing. Thermoformed doors are of a high quality and are highly durable which makes them a great choice for cabinets in a classic kitchen.

        Handles and Doorknobs

        A no-handle set up which is often featured in modern kitchens, does not work well for classic kitchens. This style is too modern for a timeless look which means that you should opt for cabinet door handles in your classic kitchen design.

        classic kitchen designs - renovation done in Epsom Auckland classic kitchen designs - renovation done in Epsom Auckland

        You can also create contrast to an otherwise neutral kitchen with door handles. Try using matte black door handles to add elegance and interest in your classic kitchen design. Shiny handles can make your kitchen look more contemporary.

        Benchtops

        Although it is quite high-maintenance, marble is one of the essential elements in a traditional kitchen. Granite or Caesar stones can work too, as long as you opt for a monochrome color scheme.

        A black marble bench top would provide a great contrast to an overpowering all-white kitchen.

        Marble countertops are an essential for classic kitchens. However marble is very hard to maintain and can prove to be very expensive. Alternatives to marble can be stone engineered countertops that can be given a marble or granite look. Stone engineered countertops can be made to look like marble with a design on them and can be made in any colour.

        If you want some contrast in your kitchen then you can opt for darker shades for your countertop.

        Fixtures and Hardware

        A great thing about classic kitchens is that they can be transformed into any other style by mixing elements of different styles within the design.

        Sinks and Faucets

        Sinks in classic kitchens are usually not chrome or stainless steel. A white butler’s sink works great for classic kitchen designs. If you do not want to butler’s sink, then opt for a Silgranit sink which comes in various colours and textures. More of our clients are going with classic Silgranit sinks as they are more durable and can make your kitchen look more contemporary.

        classic kitchen designs - renovation done Rosedale North shore

        Black Silgranit sink used in a Kitchen renovation in Rosedale, Albany

        classic kitchen designs - renovation done in Papatoetoe, South Auckland

        Textured double grey Silgranit Sink used in a Kitchen renovation in Papatoetoe

        Antique looking taps with a high spout works in matte brass colours can be within a classic kitchen design to add something of the past and present. If you are not fond of brass looking taps then you can also opt for taps in chrome or other colours as long as they do not look too sleek or ornate.

        Astra Walker range from Kitchen Hub has several designs in their classic and contemporary range to choose from for any type of classic kitchen design.

        classic kitchen taps

        Kitchen Hub’s classic kitchen tapware

        classic kitchen designs - renovation done in Epsom - Central Auckland

        Long sprouted curved tap in a kitchen renovation in Epsom

        If you are looking for a purely classic theme, then you can use the Astra Walker classic range to add some history and drama to the design. Use matte black fixtures to create contrast or you can use shinier chrome for a more neutral design.

        Cooking Range and Splashback

        A cooking standalone cooking range which slides in between your cabinets makes for a great focal point in a classic kitchen. A dark grey rangehood with iron grates and upward knobs should be used instead of induction cooktops as they look too modern for a classic kitchen.

        classic kitchen designs - renovation done in Epsom - Central Auckland

        A grey cooking range was used with white subway tiles as a backsplash for a timeless classic design – Kitchen renovation in Epsom

        The size of your tiles is not important when choosing a splashback for your kitchen design. As mentioned above, it is more the colour palette that is important in a classic kitchens. You can add textured tiles or even marble in neutral colours as your splashback. If you want to add some interest then you can use dark grey grouting between tiles.

        Light fixtures

        A great way of introducing focal points and interest in your classic kitchen design can be through pendant lighting. A long antique looking pendant lightings which hangs above your island can really lift your kitchen design. Their height can be adjusted to suit the length that you prefer.

        classic kitchen designs - renovation done in Epsom - Central Auckland

        This long multi-bulb pendant light was installed above the dining table

        classic kitchen designs - renovation done in Epsom - Central Auckland

        Two separate long pendant lights installed above the breakfast Island

        We do however suggest only getting a couple of pendant lights for your kitchen as too many of them can give your kitchen a cluttered feel. If you have a large kitchen then you can install wall mounted lighting which do not look to sleek.

        Back to the top


        Key Elements of Traditional Kitchen Designs

        Traditional kitchens are all about intricate features in cabinets, ceilings, and countertops. They put an emphasis on details and most traditional kitchens work well in larger spaces. This is because most traditional kitchen designs feature a darker colour palette and a furniture-like pieces that can feel bulky if you have a small area to work in. More modern traditional kitchen designs feature a lighter palette which have dainty and delicate crown mouldings etc which are often seen in old villas and cottages of Auckland.

        Colour scheme in Traditional Kitchens

        Classic and contemporary kitchens often feature cool colours in their kitchens but the colour scheme in traditional kitchens mostly feature warm colours. Light beige, yellows and shades of brown are often popular in traditional kitchen designs which mimic the kitchens of the past. Having a traditional kitchen does not mean that your kitchen must look dingy, dark or outdates.

        Understanding the different shades of brown and yellows and how well they work together can make all the difference in designing a beautiful kitchen that almost mimics Villas in Tuscany and Spain. If you are going with dark cabinets then choose a lighter beige countertop with orange or yellow undertones.


        Traditional kitchen designs - renovation done in Stanmore Bay - Northshore

        We renovated this Spanish Style Traditional Kitchen in Stanmore Bay, Auckland


        The above renovation was done in Stanmore Bay for our client who hailed from the US. She wanted to renovate her closed off kitchen into an open plan kitchen in a traditional style. Her brief was that she wanted her kitchen to feel like a rustic style Spanish Villa. The use of brows, yellows, brass, wood and mosaic are reminiscent of Spanish Villas. See full project specifications – Mary Stuart’s Kitchen Renovation


        Traditional kitchen designs - renovation done in Stanmore Bay - Northshore

        Mary Stuart’s Rustic Style Traditional Kitchen in Stanmore Bay, Auckland


        Since there is a lot of dark colour used in cabinets in a traditional kitchen, we often suggest our clients to go for lighter walls as this will make the rest of your kitchen stand out more. You can also opt for lighter white cabinets if you have a small space, but this is usually seen in cottage style kitchens. We will discuss cottage style kitchen designs later in this article.

        Some traditional kitchens also include features and cabinets that are a darker blue and are mostly popular in the UK. These kitchens could also be categorised as country kitchens or cottage style kitchens.

        Cabinets in Traditional Kitchen Designs

        Cabinets are the star of a traditional kitchen as they are full of character through rich warm colours, details and ornate handles. Unlike contemporary or modern style kitchens which focus on simplicity, traditional cabinets focus on embellished designs for their cabinets. If you want a traditional kitchen design, then stay away from shaker style cabinets or plain smooth ones.

        Instead, opt for a more vintage raised panel or a classic raised panel for the cabinet doors. Also stay away from a shiny finish and choose matte materials for your kitchen cabinets. Another great way to incorporate a traditional feel for your kitchen would be to use glass display doors for one side of the wall mounted cabinets. Traditional kitchen designs often feature a mix of open shelves, closed bottom cabinets and a few cabinets that have a glass front door. This will also make you kitchen appear more spacious.

        Traditional kitchen designs - renovation done in Stanmore Bay - Northshore Traditional kitchen designs - renovation done in Stanmore Bay - Northshore

        Mary wanted her cabinets to look like they had been made by real wood like Oak or Timber. Oak and Timber are however very expensive especially in New Zealand. We custom built all cabinets with MDF boards and the front panels were made with textured woodgrain ‘Jarrad Legend’ Melteca. This is a highly durable material that does not require much maintenance. We also used rustic looking dull cupboard handles for all cabinetry.


        Handles and Doorknobs

        Cabinet handles should exude a sense of old-world charm in traditional kitchens. Think brass ornate handles or even drop-down handles for your kitchen cabinet and drawers. If you feel that drop down handles are too bulky or too traditional looking then choose small, rounded knobs for a cleaner look.

        You can also look for cabinet handles which are decorative to bring out a more Spanish feel to your kitchen design. If you want a more unified look then use the same doorknobs as the handles for your kitchen cabinets.

        Benchtops

        As discussed above traditional kitchens are usually found in larger spaces which means that they have an island. Benchtops in traditional kitchens often add a sense of luxury to the overall design. This is because they are often the only shiny element in a traditional kitchen design. The cabinets and other elements of a traditional kitchen are often found in matte finishes so shiny finish benchtop is a great way to add another dimension and depth to the design.

        Granite, Quartz and Marble are popular materials for a benchtop in traditional designs. These materials however can prove to be expensive and are hard to maintain. If you have a busy household and do not want to spend time cleaning your benchtop then we would recommend you use a custom-built stone engineered stone for your benchtop.

        Most of our clients opt for stone engineered countertops as they are easy to maintain and highly durable. They are also very versatile when it comes to design features as they can be custom built in any colour or texture. We often recommend our clients to use light beige with inbuilt patters for benchtops in traditional kitchens as they complement the darker cabinets well.


        Traditional kitchen designs - renovation done in Stanmore Bay - Northshore

        Custom built stone engineered countertop used for Mary’s kitchen. We made this engineered stone look like pattered granite with a shiny sheen. The pattern chosen above is called Autumn leaf and like its name has yellow and mustard undertones which complements the dark cabinets well.


        Fixtures and Hardware for Traditional Kitchens

        You can choose your fixtures based on how traditional you want your kitchen design to be. If you are going for a very traditional design, then keep your appliances ornate and follow our guide below. If you want to include elements of a contemporary or classic design, then simply include fixtures from contemporary or classic designs. Classic and contemporary kitchens complement traditional designs so you will still be able to achieve a symbiotic design. Modern design fixtures however do not go well with traditional styles and hence should not be incorporated into a traditional kitchen design.

        Sinks and Faucets

        The things that make a traditional kitchen are its details. If you are going for a more Tuscan style or Spanish style traditional kitchen then use brass sinks and long arched brass faucets. If you are however going for more English style kitchen then use chrome taps with ornate details and a separate hot and cold tap.

        Traditional kitchen designs - renovation done in Stanmore Bay - Northshore

        Brass sink and dull brass tap used to make the kitchen look rustic yet traditional

        Cooking Range and Splashback

        Traditionally cooking ranges were not mounted on a benchtop with screws which has become a growing trend now for contemporary and modern kitchens. Traditional kitchens mostly feature a standalone cooking top with canopy style rangehood. They are usually gas burning and are slid in between two countertops.

        Traditional kitchen designs - renovation done in Stanmore Bay - Northshore

        Fixed Gas Hob


        If you do not want the slide in type of cooktop then you can also get a gas hob with grills which can be screwed on top of the countertop. The canopy style rangehood however can still be attached over the gas hob to bring out a more traditional feel.

        Splashbacks in traditional kitchens should be kept simple in design. This is so that your countertops and cabinets remain the star of the show. You can use either tiled splashbacks in light beige or neutral colours. Keep the finish of your splashbacks on the duller and matte side and do not go for an overly shiny finish.


        KITCHEN LAYOUT GUIDE TO CREATE A FUNCTIONAL KITCHEN DESIGN – 2021 EDITION


        Light Fixtures

        Light fixtures in any kitchen should be installed in a way that they highlight all the working areas in the kitchen. This is important as a lot of kitchen designs end up looking dingy if they are not properly lit. Traditional kitchens often have a chandelier that is installed above the island and ornate wall mounted lighting on the walls. If you feel like a chandelier is making your kitchen look too bulky and busy then you can also opt for pendant lighting which have a more antique feel to them. If you have cabinets on the top half of your kitchen then you will be unable to install wall mounted lighting. In such cases you can also install lights lamps that hang closer to the ceiling. A great way to create interest is to add some stained-glass lamps on the ceiling.

        Back to the top


        Contemporary Vs Modern Kitchen Designs

        The term modern kitchens and contemporary kitchens are often used interchangeably these days. This however is not entirely correct. While some elements do overlap for these two designs, they are fundamentally different. While the term ‘modern design’ refers to a design movement that begun in the 1940’s, which completely broke from the traditional kitchen designs.

        It is important to understand the difference between contemporary and modern kitchens before you finalise your kitchen design. Contemporary kitchens reflect the trends of today and often feature various patterns and colours in their design. Saying this, contemporary designs usually borrow elements from other styles as old trends are always coming back in fashion. They also use renovation materials that are of the current era for example stone engineered benchtops. One of the biggest differences of modern and contemporary kitchens is that modern kitchens lack ornamentation. Contemporary kitchen designs on the other hand are a marriage of various styles and patterns which can also be ornamental depending on the trends of today.


        Modern kitchen designs - renovation done Blockhouse Bay - West Auckland

        Modern Kitchen renovated in Blockhouse Bay, Auckland


        Modern Kitchens feature a clean uncluttered look and were revolutionary for their time as they broke free from traditional kitchens. See full project details – Full Kitchen renovation in Blockhouse Bay, Auckland.


        Contemporary kitchen designs - renovation done in Massey - West Auckland

        Contemporary Kitchen renovation in Massey, Auckland


        The contemporary Kitchen is very different from modern kitchens as it is constantly evolving to include trends of the day in their kitchen designs. See full project details – Guru and Neeta’s Kitchen renovation in Massey, Auckland


        In this section we will discuss the differences and similarities between modern and contemporary kitchens and the design elements that make each design possible.

        Similarities of Contemporary and Modern Kitchen designs


        Contemporary and modern styles favour a seamless and uncluttered overall look for their kitchens. They feature clean lines smooth spaces that exude a comfortable and calm vibe in the room. The features seen in contemporary and modern kitchens are not cumbersome, bulky, or ornate.

        Both types of designs often integrate shiny surfaces and materials such as stainless steel, other metals or glass. Contemporary designs also feature lots of wooden elements such as countertops or a feature wall. This should not be confused with all wooden cabinets found in traditional kitchens. The wood used in contemporary kitchens is usually raw and without any ornate details. While modern kitchens have a ‘no fuss’ design, contemporary kitchens often borrow elements from other styles and can incorporate elements from traditional, modern, classic, or industrial kitchens depending on the trend of the day.

        In short, the similarities of both styles are as follows:

        • Both have a minimalistic look to them
        • They both exude an open space feel which is calming
        • Clean architectural line is the hallmark of both these designs.

        What makes a Contemporary kitchen design?

        Contemporary kitchens are ever evolving, and their design changes every decade or so to reflect the new trends of the decade. Contemporary kitchen designs borrow elements from various styles like art deco, traditional, industrial, and modern designs.

        Contemporary kitchens are simple and minimalistic but have a layered look which comes from using several materials, patterns, and textures.


        Contemporary kitchen designs - renovation done in Parnell - Central Auckland

        Contemporary Kitchen renovation in Parnell, Auckland

        The above renovation has a contemporary design with a no-handle set up, soft close cabinets, marble look-alike benchtop, hexagonal tiled backsplash, silgranit sink with a hot water tap, and concrete floors. This is a great example of how current trends are incorporated within the overall kitchen design. See full project details – Luxury Kitchen renovation in Parnell, Auckland

        Cabinets

        The cabinets in contemporary kitchen have clean lines, are sleek and lack ornamentation. They are built in a simple rectangle or square and are constructed as a full overlay. Little to no cabinet frame can be seen which gives it a seamless look. The cabinet fronts do not have any ornamentation and are completely smooth. The cabinets usually feature a no-handle set up with LED lights that give it a more futuristic look. As contemporary designs are all about latest conveniences and trends, they have creative storage solutions like ‘magic corners’, pull out drawer pantries and hidden bins.


        Contemporary kitchen designs - renovation done in Massey- West Auckland

        Yellow LED lights installed below the countertop which provides a great contrast to black cabinets

        Contemporary kitchen designs - renovation done in Parnell - Central Auckland

        White LED lights installed below the top cabinets to highlight the backsplash and cooking range


        Technology

        Technology plays a vital role in a contemporary kitchen design. The electronics are sleek and high functioning. Induction cooktops built in coffee machines and commercial grade appliances are often seen in contemporary kitchens.


        Contemporary kitchen designs - renovation done in Parnell- Central Auckland

        All LED lights in this kitchen can be made dimmer or brighter with this central remote

        Contemporary kitchen designs - renovation done in Massey- West Auckland

        The above plug points can be pushed back into the countertop when not needed


        Colour scheme

        While lots of contemporary kitchens stick to a grey, black, or white, there is ample ways that colours ca be infused into their kitchen design. If colour is added then it is often pure saturated tones. Contemporary kitchens often feature bold colours and have a larger colour palette. You will often see an accent wall with a bold colour or patterns. They also include splashbacks that come in various shapes and textures. Some contemporary kitchen designs make a bold impact with coloured countertops or cabinets.


        20 TOP KITCHEN DESIGN TRENDS FOR 2021 & 10 TRENDS TO AVOID


        Other Materials

        As mentioned above, contemporary kitchens have a layered look about them which is achieved through various textures, colours, and shapes. This is a huge difference between modern and contemporary kitchens. Concrete, wood, concrete, stainless steel, and glass are great examples of materials that are used in combination to give a layered look. Stainless steel is especially popular in contemporary kitchens as it makes a kitchen look more commercial which has been a prominent trend of today.

        Concrete is also often featured in contemporary design as it is a material used in industrial designs. Industrial designs have become increasingly popular in the last few years and will be growing stronger in the next decade. Today’s contemporary design borrows several elements from industrial kitchens. The most popular is the use of concrete for flooring and benchtops. Other elements include tapware and pendant lighting. Glass tiles are also featured in contemporary kitchens. They can be used as a backsplash or cabinet doors.


        Contemporary kitchen designs - renovation done in Parnell- Central Auckland

        Poured concrete floor was chosen for this kitchen in Parnell

        Contemporary kitchen designs - renovation done in Bucklands Beach- East Auckland

        Hexagonal textured tiled used as a backsplash


        More Contemporary Kitchen Renovations in Auckland:

        Lynette and Henry’s contemporary kitchen in Bucklands Beach
        Guru and Neeta’s Contemporary Kitchen in Massey
        Urban Luxury Kitchen in Parnell
        Kitchen renovation in West Harbour


        What makes a Modern Kitchen design?

        Modern kitchens first emerged in 1940s as a break from traditional kitchens. They were suddenly an extension of the living and dining room as opposed to a separate room. This made it necessary for the kitchen to look good along with being functional. The key features of modern kitchens is clean sleek lines and no embellishments or ornamentation.


        Modern kitchen designs - renovation done in Papatoetoe- South Auckland

        Modern Kitchen renovation in Papatoetoe, Auckland


        The above Kitchen was renovated with a modern design in mind. It shows how simple modern kitchens actually are. They look clean and have no embellishments. See full project details – Modern Kitchen renovation in Papatoetoe for a family with young children

        Cabinets

        Like contemporary cabinets, a modern kitchen design has a full overlay over the cabinets which means that you cannot see the frame of the cabinets. They also feature slab door and cabinet fronts without any design on them. This gives it a smooth and sleek look which the hallmark of modern design. These cabinets also have sleek door cabinet handles and do not have a no-handle set up.


        Modern kitchen designs - renovation done in blockhouse bay- West Auckland

        Simple slab door fronts with long handles – Modern kitchen in Blockhouse Bay

        Modern kitchen designs - renovation done in Avondale- West Auckland

        Another example of plain slabs used for cabinets – Modern kitchen in Avondale


        In both the pictures seen above, white has been used as a dominant colour for the kitchen with flooring the only contrasting feature colour wise. The picture on the left has handles as seen in most modern kicthens while there are no handles in the kitchen seen on the right.

        See full project details (picture on the left) – Modern Kitchen in Blockhouse Bay
        See full project details (picture on the right) – Modern Kitchen in Avondale


        No ornamentation

        Modern kitchen designs do not have pattered tiles, multiple shapes, textures, and colours in their design. The countertops, benchtops, cabinet fronts and backsplash have a smooth surface without any veining or texture.


        Highlighting natural materials

        Highlighting the natural materials is key in creating a beautiful modern kitchen. Use horizontal grain of Oak or manufactured Oak for your cupboards. For benchtops think marble or stone engineered stone without any veins. Always remember to keep the elements as simple as possible. Let the quality of materials shine through.

        Horizontal Lines

        Modern kitchen designs often emphasise on horizontal lines in their kitchen design. The look could include long wide lines of stacked cabinets that are stacked in a row. This could also be done by installing a splashback or an accent wall which has wide horizontal panels stacked together on top of each other.

        Choose elements that are of a similar colour and design.

        All elements in a modern kitchen are chosen in a similar design and colour with no ornamentation. Think of pendant lights, dining chairs, bar stoons and tables. They should all be simple and in similar shades of colours of each other. This creates a clean and sleek look which is what a modern design is about.


        9 DESIGN IDEAS FOR SMALL KITCHEN DESIGN NZ GUIDELINE

        Benchtops

        Modern kitchens are all about highlighting good quality materials in their design. Think about quality when choosing a benchtop for your modern kitchen. Quartz is a great choice for modern kitchens are they need no design or ornamentation to look and feel good.

        Quartz can prove to be a very expensive material in New Zealand so you can try and find alternatives to fit your budget. Today’s technology allows us to engineer materials to emulate the look and feel of quartz at a lower cost.

        Back to the top


        Want a price for your kitchen renovation?
        Open the calculator →

        Key Elements of Cottage Style Kitchen Designs

        Cottage style kitchen designs are supposed to exude a sense of warmth, comfort, and cosiness. Their design is inspired from old English cottage kitchens which are inviting, homely and a place for the family to get together. They often feature a small dining area within the kitchen space and is supposed to have a casual feel.

        Many people are reverting to a cottage styled kitchen for their villas, bungalows or baches in rural areas as they complement the rest of the exterior architecture of such homes.


        Cottage style kitchen designs - renovation done in Mangere Bridge - South Auckland

        Cottage Style Kitchen Renovation in Mangere Bridge, Auckland


        The above kitchen was renovated to reflect the abundant nature around the house. Our client wanted a cottage style kitchen which was inviting. It features tiled wooden lookin floors, real wood which was treated in order to preserve it, white recessed cabinets with cup style pulls, open floating shelves and a butler’s sink. See full project details – Cottage Style Kitchen renovation in Mangere Bridge, Auckland


        Colour Palette

        If you think about cottages, you always think of a light palette. Neutral whites, beige, light pinks, and pale blues work best in cottage style kitchens. Pale pink and blue can however make your kitchen look a bit dated, so we mostly recommend our clients from using shades of white or light beige for their kitchens. Buttercup yellow is also a nice way to infuse some colour in cottage style kitchens. You can however incorporate colour within the kitchen by choosing natural wooden looking benchtops or cabinet handles.

        Cabinets and Handles

        We recommend using shaker style cabinets with minor detailing for an overall vintage look. Choose a light colour for your cabinets and create contrast by adding matte black handle. You could also incorporate a free-standing cabinet with a sliding glass door to display crockery. Add some corbels under your upper cabinets which is a very common feature for cottage kitchens.


        Cottage style kitchen designs - renovation done in Mangere Bridge - South Auckland Cottage style kitchen designs - renovation done in Mangere Bridge - South Auckland


        For handles think about brass, or matte black simple knobs or cup-style drawer pulls. Cup style drawer pulls complement a white shaker style cabinet very well and add to the cottage style.


        Open Shelving

        Open shelving was very popular in older cottages as they allowed cooks to easily retrieve cooking utensils. They were often found in place of today’s upper cabinetry and were also installed as building additional upper cabinets was expensive. Open shelves today are mostly used for decorative purposes. You can also use them to store your cups, plates, and other crockery to create some interest.

        Cottage style kitchen designs - renovation done in Mangere Bridge - South Auckland

        Floating Shelves built from real wood to store cups as well as a decorative feature


        Sinks and Tap-ware

        We recommend installing a butler style sink for your cottage style kitchen. These sinks are large, rectangular and very deep which means that they also have a practical advantage over other types of sinks. Butler’s sinks are usually made of ceramic and you will be able to wash your biggest pot comfortably in it.

        Cottage style kitchen designs - renovation done in Mangere Bridge - South Auckland

        A classic butler’s sink installed which is one of the hallmarks of a cottage style kitchen


        You can pair your sink with old English looking taps with a separate handle for hot and cold water. Kitchen Hub’s Astra walker collection has an ‘olde English’ range which works great with a Butler style sink. You can either use a brass toned colour or go for a classic chrome.

        Benchtop

        Having a benchtop in a brown shade or using real treated wood is a great way to add some contrast and colour to your country style kitchen. Most country kitchens feature wooden benchtops, but they are not always very practical. One of our clients in Mangere Bridge, Auckland wanted a wooden benchtop for her country style kitchen, so we treated it in a way that it would avoid future wear and tear.


        Cottage style kitchen designs - renovation done in Mangere Bridge - South Auckland

        American Ashwood was stained to walnut for the desired colour. Steps were then taken to treat it in a way that it would last for a long time


        We used American Ashwood as a countertop for the above renovation. It was then stained to a walnut colour which was a perfect shade to for this design. After staining, we applied Epoxy Urethin Vinyl on the benchtop as well as the floating shelves. This was done to prevent the wood from rotting and to avoid wear and tear. This would have to be re-applied every 15 years. After the coating we finally applied varnish to give it some lustre. The varnish will have to be re-applied every couple of years in order to maintain the shine. See full project specifications – Cottage style kitchen renovation in Mangere Bridge, Auckland

        Wall Panelling

        Wall panelling was a big part of interior design in the past. Homes designed in the traditional style featured dark panelled walls in most rooms. Cottages on the other hand had white panelled walls with vertical grooves. They were usually found in whites or creams or the same colour as the cabinets. This however might feel dated today so instead install dull subway tiles between the countertops for a similar but more contemporary feel.


        Q & A WITH HOLLY (THE KITCHEN HUB) – CHOOSING THE RIGHT TAPWARE FOR YOUR BATHROOM DESIGN


        Hardwood Floors

        Cottage style kitchens mostly feature hardwood floors to give them a nice warm homely feel. This also creates a contrast with cabinets that are often found in light colours. Hardwood floors however are not very practical as they require high maintenance and are also expensive.

        An alternative to hardwood floors would be to use tiles that emulate hardwood floors in texture, design, and aesthetics. These tiles are easy to source, install and are very easy to maintain.

        Lighting

        Olden day cottages did not have recessed lighting and had to depend on pendant style lighting for their kitchens. Low hanging pendant lighting also makes a space feel homely and inviting. You can either choose vintage inspired lighting or have a stained-glass pendant lighting to add further interest.


        Key Elements of Industrial Kitchen Designs

        Industrial styled homes and kitchens depend on their materials for the overall look of their design. Materials such as iron, concrete and cement are often highlighted in industrial styled kitchens. They also feature high ceilings, large windows, and exposed brick. The style first originated from the USA and is sometimes also referred to as New York style apartment design. This design first started in homes that looked like loft style or warehouse style apartments. If designed well, this style can be replicated within normal homes designs in Auckland. Following are some key features that will help you design an industrial styled kitchen for your home.

        Open Space and a minimalistic look

        One of the most obvious traits of an industrial kitchen is open space and high ceilings. The rough look has become increasingly popular because of its ‘airy’ nature. Typically, you’ll find brick walls, rustic furniture and exposed pipes and beams in an industrial style kitchen, with appliances often dressed in stainless steel. The rough textures blend perfectly with the smooth steel surfaces to form a harmony.


        Examples of industrial kitchen designs

        Industrial Kitchen


        This Industrial Kitchen is a great example of how this design works best in a high ceiling room. You will an exposed air duct at the top of the kitchen which gives the kitchen a raw rustic look. The design includes a large polished concrete island which doubles as a dining area with metal stools. The materials used in this design are the real stars of the show with an overall minimalistic look.


        Think of a rough and not overly processed look for your industrial kitchen design. One of the most obvious features of this design is an open plan space with a minimalistic look. The ceilings are high, and all the pipes and beams are exposed. The overall look of this style is however minimalistic without any frills or details on their cabinets or walls. The combination of different materials, their rough texture and raw feel are the highlights of this design.

        Materials used in an Industrial Kitchen Design

        Cement

        Cement is often featured in this design due to its versatility. It can be used wither as a waterfall edged benchtop, as a floor or a splashback. If you are using it as a splashback then we would recommend you use it as a smooth texture so that cleaning is easier.

        Brick

        Rough looking brick walls can make your space instantly look like an industrial kitchen. If your home is not made of brick then you can also create a false brick wall or you can even use textured brick look alike vinyl.

        Iron

        Another key element of an industrial kitchen design is iron. Use iron bar stools, furniture, lamps, light fixtures, and shelves for an overall industrial look.

        Wood

        Using wood in the design will add some warmth to your kitchen design. However, do not use overprocessed or over-polished wood and let is have unpolished and rough edges. You can use wood for the front of your cabinets or even as a countertop.


        Examples of industrial kitchen designs

        Exposed Brick on opposite walls give this relatively classic kitchen an industrial feel

        Stainless Steel

        As most of the elements in an industrial kitchen have a matte finish. This can make the design however look a bit dull. Shiny stainless-steel appliances and a big professional looking gas hob can add some depth in the design.


        Examples of industrial kitchen designs

        The tapware used in this kitchen gives the kitchen a raw feel. The tapware in this picture is from Kitchen Hub’s Watermark collection which makes tapware for industrial styled kitchens

        Colour Palette

        Most Urban industrial kitchens have a colour palette between grey, brown, and black. You can also add some bold saturated hues as red or mustard. You can use this for your backsplash or even as your benchtop. Another great way of incorporating colours is through furniture like bar stools and lighting accents.

        Lighting

        Low hanging pendant lighting over countertops and islands in steel or iron is great for industrial themed kitchens. You could even use high hanging exposed bulbs without a screen which is becoming increasingly popular.

        Statement Art Pieces

        The industrial style was conceived to give a platform to artists which means that they often have iconic pictures of people or movements within their design. They do not have traditional painting but gravitate towards modern and abstract art.

        Back to the top


        Want a price for your kitchen renovation?
        Open the calculator →

        Our Featured projects

        Contemporary Kitchen Renovations

        Urban Luxury in Parnell, Central Auckland

        We renovated this entire townhouse in Parnell in a contemporary style.
        See Full Project specifications + Before and After pictures

        small kitchen design nz small kitchen design nz small kitchen design nz
        kitchen renovation with timber overhead cabinets textured splashback and integrated oven small kitchen design nz


        Entertainer’s Dream Kitchen and Bar in Massey, West Auckland

        Guru and Neeta had a closed off kitchen which was completely demolished to create an open plan space for the entire family to enjoy.
        See Full project specifications + Before and After pictures

        black and white marble kitchen island with twin sinks and mirrored splashback open-plan kitchen dining and living area with pendant lighting and a wall-mounted TV black kitchen island with timber overhead cabinets pendant lights and a feature globe ornament
        three bronze perforated pendant lights hanging above a kitchen island round hammered mirror above a black and timber sideboard beneath a staircase black kitchen island with timber overhead cabinets knife block and globe ornaments


        Modern Kitchen Renovations

        Modern Kitchen Renovation in Papatoetoe, South Auckland

        This renovation was done keeping convenience and low maintenance in mind as it was for a family with young children.
        See Full Project specifications + Before and After pictures

        white L-shaped kitchen with turquoise glass splashback and gas cooktop white kitchen renovation with turquoise glass splashback and glass-front display cabinets open pantry cupboard with pull-out shelves storing food containers and pantry items


        Modern Kitchen Renovation in Hillsborough

        This kitchen was renovated in a modern style for a family whose kitchen had started leaking. They needed a complete renovation as the old kitchen had become very shabby.
        See full project specifications + Before and After pictures

        white L-shaped kitchen with grey stone benchtop and black tapware white kitchen renovation with black cage pendant lights and subway tile splashback white kitchen island with black tapware subway tile splashback and integrated oven

        Cottage Style Kitchen Renovation

        Cottage Style Kitchen in Mangere Bridge, South Auckland

        BOHOO

        This cottage style kitchen was one of the first kitchens we renovated of this style.
        See Full project specifications + More Pictures

        house interior design kitchens in auckland house interior design kitchens in auckland house interior design kitchens in auckland

        Full kitchen renovation in Mangere Bridge, Auckland

        BOHOO


        Classic Kitchen Renovations

        Open Plan Classic Galley Kitchen in Epsom, Auckland

        This historic Villa in Epsom was renovated from an old traditional kitchen to a classic kitchen style.
        See Full project specifications + Before and After pictures

        white kitchen island with black cage pendant lights and subway tile splashback white kitchen island with black cage pendant lights and stainless steel fridge freezer white kitchen renovation with subway tile splashback and integrated gas range

        Classic Kitchen renovation for an old Bungalow in Greenhith, Auckland

        This old bungalow in Greenhithe was renovated to include a classic kitchen while preserving the existing hardwood fixtures.
        See Full project specifications + Before and After pictures

        white kitchen renovation with pendant lights display shelf and shutters white kitchen renovation with pendant lights display shelf and dishwasher white kitchen with double wall ovens and stainless steel fridge freezer

        Further Resources for your house interior design

        1. Ideas for Bathroom renovations in our bathroom renovation gallery of bathrooms we have renovated in Auckland
        2. Ideas for Kitchen renovations in our kitchen renovation gallery for kitchens we have renovated in Auckland
        3. Featured projects and Client stories to see specifications on some of the projects.
        4. Real client stories from Auckland.
        5. Kitchen Renovation Photos for renovations we have completed in Auckland

        Do you have a In-house Kitchen designer?

        Yes, we do have an In-house Kitchen designer who will help you create a Kitchen design for your kitchen renovation. We provide all our clients with 3D drawings when we create a proposal for you.

        What kind of Kitchen layout is best for me?

        This will depend on various factors. Read our article on Planning your layout for a functional and practical kitchen design here to understand more about the layout that is right for you : https://superiorrenovations.co.nz/kitchen-layout-planning-guide-to-achieving-a-good-kitchen-design

        Do I have to get my own plumbers and electricians?

        We provide a full renovation service for any given area. This means that our service will include design, demolition, sourcing of all renovation materials from local supplier showrooms, custom built cabinetry, installation of all cabinets, flooring, fixtures, project management and all trades like electricians, plumbers, grouters, builders, tilers, and any other trades.


        18 months 0 percent interest long term finance badge

        Have you been putting off getting renovations done?

        We have partnered with Q Mastercard ® to provide you an 18 Month Interest-Free Payment Option, you can enjoy your new home now and stress less.

        Learn More about Interest-Free Payment Options*

        *Lending criteria, fees, terms and conditions apply. Mastercard is a registered trademark and the circles design is a trademark of Mastercard International Incorporated.


        Still have questions unanswered?

        Book a no-obligation consultation with the team at Superior Renovations,
        we’d love to meet you to discuss your renovation ideas!

          Services

          Home RenovationKitchen RenovationBathroom RenovationOutdoor RenovationHouse ExtensionCommercialDesign ServicesOther

          By submitting this form, you agree to receive communications from us via email or text regarding our services, you can unsubscribe at any time.

          This site is protected by reCAPTCHA and the Google

          Privacy Policy and Terms of Service apply.

          We have always loved working with Superior renovations and in particular Kevin. We felt like we were getting special one-on-one treatment at all hours of the day. They always produce their work super quick and to a good standard.
          We added a new bathroom and upgraded the rumpus.
          Superior Renovations offered a reasonable price and delivered professional services and work.
          We recommend Superior Renovations for the house renovation.
          This is our final and exceptionally positive review for Superior Renovations. First and foremost, we must emphasize that they are outstanding!

          Superior Renovations has completed a comprehensive renovation of our entire house, both externally and internally, including the kitchen, bathroom, painting, carpeting, electronic gate, and more. Throughout the various projects over the past few months, we have been thoroughly impressed by their work and are delighted with the results. Their expertise and service continue to amaze us; they truly listen to our needs and engage in discussions whenever they believe improvements can be made.

          We extend our gratitude to Cici, who not only served as the sales manager but also as the designer, transforming our kitchen from an early 2000s style to a modern and stylish new one. Neil, our project manager, worked with us daily, attending to every detail and going the extra mile to help us achieve an excellent result.

          From the very first day of collaboration, we encountered no issues whatsoever, whether in communication, design discussions, or the execution by the on-site teams. We highly recommend Superior Renovations to anyone considering home renovation. Contacting them will reveal why we are so pleased with their work on our home.

          David and Emily
          SUPERIOR RENOVATIONS
          Renovations on one full bathroom and one small ensuite at my home in Sunnynook, Auckland, were completed on 26th June 2026.
          I am fully satisfied with the work done at my home by all workers and contractors and delighted with the results that I am now enjoying. All work is of a very high standard and attention to care leading to excellent results.
          All staff of Superior Renovations and associated contractors were at all times helpful and happy to explain all aspects of their work and respectful in listening to any of my concerns or questions, with any changes where necessary being quickly and effectively carried out.
          I have no hesitation in recommending Superior Renovations as your choice for any bathroom renovation.

          Valerie Hepburn
          4 Stoneleigh Court, Auckland
          In early June, I hired Superior Renovation company to thoroughly renovate our two bathrooms. The project has now been completed and we are very satisfied. Thank you sincerely, and we highly recommend it.
          Despite some delays, Eunice, Neil and the team at Little Giants have done a really good job on out kitchen renovation. Great finishing and very responsive to fixing up any little thing we weren't happy with.

          Good work team!
          ​From the very first consultation, our experience with this team has been nothing short of stellar.

          ​Working with Eunice, our sales consultant, set a high bar for the rest of the project.
          Eunice is truly exceptional at what she does. When we first began our kitchen project, we went through several versions of our floor plan, and she was with us every step of the way—from the initial planning stages right through to the final concept. Her patience and dedication during the design process were remarkable.
          Throughout the project, Eunice provided:
          * **Invaluable Suggestions:** She has a keen eye for both aesthetics and functionality, pointing out details we never would have considered on our own.
          * **Seamless Adjustments:** No matter how many tweaks we requested, she handled every change with professionalism and a "can-do" attitude.
          * **Expert Guidance:** She transformed our vague ideas into a cohesive, stunning reality.

          ​Once the planning was complete, Neil, our project manager, took the reins and truly blew us away. Neil is a consummate professional who balances technical expertise with fantastic communication.
          ​ He kept us informed at every stage, ensuring we knew exactly what to expect and when.
          Whenever a minor pivot was needed, Neil handled it with grace and efficiency, keeping the timeline on track.
          His standards for the renovation work were incredibly high, ensuring the final result was polished and beautiful.

          ​The transition from Eunice’s initial planning to Neil’s execution was flawless. If you are looking for a team that combines design expertise with top-tier project management, look no further. We are absolutely thrilled with our new kitchen and new flooring !
          Superior Renovations has just finished a complete remodel of my bathroom. I can see, why the company has such a high reputation. At every stage, from sales, design, project management, and execution, the company excelled at every point. I am just so happy with the work that they have done and they have exceeded my expectations at every point.
          Used Superior for a kitchen and bathroom renovation last year. They did an excellent job updating both rooms, communication was excellent ongoing tjrough the project, they coordinated all the tradies, synchronized so there was little downtime, and it all worked exactly as planned and on budget. Was really glad we chose Superior Renovations and plan to use again for our entrance way at some stage.
          As I said to my work colleagues ‘I have just had the most pleasant experience’. When they realised it was with renovations at home they were shocked - ‘unheard of’ I was told.
          Everything went to plan - timing, project management, costs, etc, etc. Neil communicated with me daily and made my whole bathroom renovation a pleasure.
          The best decision I made was choosing Superior Renovations.
          Thank you Kevin for our initial connection and for passing me on to Neil to manage the whole process.
          We just finished a bathroom renovation and couldn’t be happier with the results. The craftsmanship is top-notch, and the attention to detail in the tiling and finishing is impressive. The team was professional, kept the workspace clean, and delivered exactly what we envisioned. Highly recommend them for anyone looking for a high-quality transformation.
          Superior did an excellent job of renovating our ensuite. Project manager Jacob was easy to work with and communications were good.
          This is our second review for Superior Renovations. They have done two projects earlier this year and we were so impressed by the work they have finished. After discussing and very careful consideration, we decided to go with more projects with them. So far, they have now completed stage 1 renovation of our house. We still amazed for their knowledge and services; they really listen to us and discuss anything with us if they feel/think could be better…
          From the first day we work with them, we have no issue with them at all, from communication, discussing, designing to the teams working on the site.
          Especially we are highly recommended to those who are considering doing the house renovation, please contact them and you will know why we are so pleased to have them to do our house renovation.
          We are thanking Cici, Neil and the teams so much….
          We are looking forward to seeing what the outcome will be.

          David and Emily
          We recently had our bathroom renovated by Superior Renovations and couldn’t be happier with the experience. Dorothy and Neil were an absolute pleasure to work with. They guided us through every step of the process, making what can be a stressful experience feel smooth and straightforward.
          The quoting process was transparent and detailed, with no hidden fees or surprises. Neil was incredibly responsive and always available whenever we had questions or requests, which gave us real peace of mind throughout the project. We really love the end result and enjoy our new bathroom!
          We’ll definitely be returning to the Superior Reno team for our next project. Highly recommended!
          Our bathroom reno has just been completed & I am so happy. The whole process was easy & hassle free. Alison designed our bathroom & was very patient with our changes/then changes back again. Jacob our project manager was a delight to deal with. He always kept us informed of the scheduling & any other information we may have needed. All the tradies worked hard & the job was completed & signed off within 3 weeks. That's demo, full tiling, installation of new everything & delivery & pick up of the skip down a very tricky driveway. We absolutely love the new bathroom & would recommend Superior Renovations everyday. Future jobs I will definitely be contacting them again. Thank so much for your excellent work
          Having explored our reno options, it was an easy decision to select Superior Renovations for our work. As first timers at anything like this we had to trust the system with grand old 100year old bungalow. We were so pleased to have Cici, Sonny and Kai working with us the whole way through. Be shout out to all the team, builders, plumbers, electricians, tilers and painters. A superb job delivered on budget and ahead of time. The communication from Cici and Sonny was first class. Would highly recommend working with Superior Renovations in fact, we already have more worked booked in. Thanks Superior you made Millie and Monty's parents very happy. 🐾
          I am very happy with the recent renovation for my new kitchen.
          The team worked really hard to get it done within the time frame.
          The manager, Jacob, was very helpful and communicated well and always sorts out any issue immediately.
          Thank you Irene
          We couldn’t be happier with our new pergola! From start to finish, the team was professional, punctual, and easy to work with. They took the time to listen to what we wanted and offered great suggestions to make the design even better. The quality of the materials and workmanship is outstanding — everything feels solid, well-built, and beautifully finished. Kudos to Sinan Sun as she has been an amazing contact with the company.
          We are very pleased with our bathroom reno by Superior Renovations! Jacob, Cici and the team always kept us up to date, were always friendly to deal with and finished ahead of schedule. Most importantly we are very happy with the quality of the work.
          We have been working with Superior Renovations as a supplier now for over three years. In that time we have found the team to be very professional and well organised. Which is a welcome relief in this industry! Just recently we have become their sole supplier for portaloos, which recognises the collaboration we have forged over these three years.

          In particular, Leanne and Elaine set a very high standard of communication and flexibility. This is of vital importance when scheduling deliveries and pickups with us, however, they understand not everything can be done at once and are willing to work with us for the best (supplier/contractor/client) outcome.

          I would imagine this ethos would flow directly through to all their contracted renovation work. A pleasure to work with!
          A very reliable supplier – we’ve been working with them for three years now, and they have never let us down. Well done to the team.
          We have been working with these guys for the past 4 years and find them an awesome company to work with, very efficient and organised. I highly recommend!
          Finding someone reliable for renovations has always been the most stressful thing for us. In the past, we had several painful renovation experiences—money was spent but the problems were never truly solved, and things often ended up worse than before. We really didn’t know where to find a trustworthy renovation company.

          For more than ten years, our wish had been to renovate our bathroom, laundry, and toilet, so that we could finally enjoy a comfortable and functional living environment. Just when we were about to give up, we came across Superior Renovations online. We quickly made an appointment with Cici, who designed and provided us with a quote.

          Throughout the whole process, I was deeply impressed by the professionalism of Superior Renovations. What stood out most was that they always delivered on their promises—everything agreed upon was completed on time. This built a relationship of trust and reliability. Up until completion, I was completely satisfied with their dedication and the quality of their workmanship.

          During the renovation, we encountered some of the challenges that often come with older houses, but Cici and her team helped us resolve the discomforts we had been living with for years. We are truly grateful to the construction team.

          Some say renovations are easy if you just have money, but I believe the most important thing is finding a trustworthy team that keeps their word, values quality, and cares about the customer’s experience.

          Because of this renovation experience, we can now confidently plan our next project—the kitchen—and Superior Renovations will definitely be our first choice. We strongly recommend them.

          Finally, I want to thank Cici and the team for helping us fulfill our dream.

          Mark & Kate
          Sinan is a very good consultant. She helps a lot during renovation. Very satisfied with their job.
          It was great to have Alison's recommendations and input on how & what would look best for our kitchen and bathroom reno. Jacob, our project manager, has been a star too; ensuring that the project was delivered as planned, AND giving us great ideas & suggestions along the way.

          We will definitely be calling on you guys again for our next home reno. Thanks team!