Hey Aucklanders, if you’re eyeing a reno in 2025—whether it’s sprucing up a dated Grey Lynn villa or adding functionality to a family spot in Albany—these costs can vary heaps, but mid-range full-home jobs often land $80,000–$160,000 (or $2,000–$4,500 per m²), covering kitchens, bathrooms, painting, and more to boost comfort, efficiency, and value in our hot market.
What’s a Realistic Budget for Different Reno Types in Auckland?
It depends on the scope, eh? Basic updates for investment flips (kitchen refresh, bathroom tweak, rewiring, painting, flooring) run $75,000–$100,000 for a 120m² home—think $28k–$32k kitchens with MDF cabinets and laminate benches, $25k–$30k bathrooms with acrylic showers. Mid-range for better living (layout changes, custom storage, insulation, double-glazing) hits $120,000–$180,000, like $35k–$45k kitchens with engineered stone or $32k–$36k per bathroom. Full strip-outs with structural tweaks and luxe finishes? $250,000–$500,000+, including extensions at $100k–$250k for 50m² ground-floor. We’ve seen West Harbour overhauls with new roofs, driveways, and multiple rooms transform places beautifully.
What Knocks Reno Costs Up (or Down) in Our Tricky Market?
Loads, mate—materials swing big (laminate vs. premium stone benches, mid-range tiles vs. large-format porcelain), plus layout shifts needing consents ($5k–$15k architect fees), rewiring ($5k–$15k), or replumbing. Suburbs like Ponsonby or Remuera add premiums for heritage matches or access issues. Cheaper hacks: Stick to existing plumbing/electrics, mid-range neutrals for flips, or bundle eco upgrades like insulation ($40–$160/m²) and double-glazing ($15k–$35k retrofit) for grants and bill cuts. Add 10-20% contingency for surprises like rot in older villas—labour’s $50–$150/hour here, and GST bumps it 15%.
How Do You Get the Most Value Without Overcapitalizing Your Kiwi Home?
Focus on high-ROI spots like kitchens and bathrooms for that open-plan flow we love, plus energy tweaks to beat damp winters. Trends like sustainable materials, smart tech, and outdoor decks ($350–$700/m²) pay off huge. Get multiple quotes, plan detailed (feasibility study first), and rope in pros for consents—saves drama. A St Heliers cosmetic refresh or Avondale full job shows how mid-range can add serious appeal.
Fancy a reno that fits your budget and boosts your place proper? Reach out to Superior Renovations for a free consult—what’s your project scope looking like?
Note: This article has been updated to include additional house renovations content to reflect the home renovation costs and home renovation trends for the year 2024.
People try to do some kind of renovations to their homes almost every season depending upon the changes and choices they decide to make. Renovations are done to make your home look more attractive and beautiful from inside and outside. It is also often done to increase functionality and make your home more convenient.
Home renovation is an exciting venture for many homeowners, especially in Auckland, New Zealand, where the real estate market is continuously booming. As we move into 2024, the latest trends in home renovations in Auckland are focused on creating functional and sustainable living spaces that offer modern comfort and style.
If you’re looking for “specific” cost estimates, try our Renovation Cost Calculator Tools
One of the most significant renovation trends for 2023 and 2024 is the use of eco-friendly materials and energy-efficient fixtures. With the increasing focus on sustainability, more homeowners are turning to environmentally friendly solutions for their homes. These include installing solar panels, using recycled materials for construction, and incorporating smart home technology that minimizes energy consumption.
Another trend that is gaining popularity for quite some time is the open-plan living concept. This involves creating an open floor plan that seamlessly integrates the kitchen, living, and dining areas to create a large, multifunctional living space. This design concept has become popular due to its versatility, providing homeowners with ample space to entertain guests or relax with family and friends.
In addition to open-plan living, smart technology has also become an essential component of home renovations in 2023 and 2024. Smart home technology allows homeowners to automate various aspects of their homes, including lighting, heating, security, and entertainment. This technology makes it easy to control and monitor different aspects of the home from a single device, such as a smartphone or tablet.
Other popular home renovation trends in Auckland for 2023 and 2024 continue to include the use of natural and earthy tones, statement lighting fixtures, and the incorporation of outdoor living spaces. These trends help to create a welcoming and relaxing environment, making the home a haven for its occupants.
We can expect these renovation trends to continue in Auckland, New Zealand. With the real estate market continuing to boom, homeowners and investors alike are looking for ways to increase the value of their properties.
In addition to the rise of DIY projects, we can expect to see an increase in the use of online tools and apps to help homeowners plan and execute their renovations. These tools can help homeowners visualize their renovation ideas, estimate costs, and even connect with local contractors.
For rental properties, we can expect to see more investors renovating to increase the rental value of their properties. This could include upgrading the kitchen or bathroom, installing new flooring, or adding smart home technology to attract tenants.
Overall, home renovations in Auckland, New Zealand, are expected to continue to be a popular trend in 2023. With a focus on sustainability, functionality, and modern style, homeowners can create beautiful and comfortable living spaces that increase the value of their properties. If you’re considering a home renovation in Auckland, be sure to explore the latest trends and financing options to make the most of your investment.
Financing your Home renovation in Auckland
For more information on Financing your renovation…
People think that the proper cost of renovation depends upon the size of the room or the place, but it’s not true. Costs for renovation in Auckland varies according to the different styles, adjustments, fixtures and the material that is used to renovate your place.
-

- Before – Full House Renovation in West Harbour, Auckland
-

- After – Full House Renovation in West Harbour, Auckland
Painted brick house before and after (NZ) – Example of a renovated exterior of a house in West Harbour which included: Roof painting, new concrete driveway, painting of bricks, new gutters, replacing all windows/frames to double glazing, new electronic front door, full exterior repair and painting of weatherboards.
In this article we will discuss the following:
- How Renovations have been affected in the year 2023 ↓
- Ease of determining costs for full home renovations in Auckland ↓
- Cost of home extensions in Auckland ↓
- Renovation costs per square metres ↓
- A table of average home renovation costs (cost to renovate kitchens, bathrooms, decks etc) ↓
- Factors to keep in mind before you begin your home renovation ↓
- Home Renovation – Type 1 Updating a dated property or Investment property
- Home Renovation – Type 2 Improving Quality of Life and Increasing functionality
- Home Renovation – Type 3 Extensive Interior and Exterior renovation with major structural changes
- Budget Friendly Home Renovation Ideas
- How to choose the right renovation company for your renovation
- House renovations before and after (NZ) by Superior Renovations
1. House Renovations in the year of 2024 ↑
It doesn’t seem that the renovation industry will slow down because a lot of renovation work is available. As mentioned above, we’ve actually seen an increase and we speculate that it’s due to to the following reasons:
Our services and interaction with the customers has always been our advantage and has made us the best amongst all other companies in Auckland. If you are currently living in Auckland you might have noticed that the number of renovation cranes has increased in significant numbers and it’s still not enough.
While the renovation builder industry (Auckland) is continually increasing, the construction and House renovation Auckland work has increased to a significant level as well, especially in the residential sector despite consumer confidence. If you are also looking to purchase some property in Auckland and the upcoming areas, let us tell you that this has now also become very challenging.
Having your own home is a blessing. The mood of people changes with time. People want to renovate their homes whenever they feel for a change or see something new in the market and they want that at their place. You do not need to wander and ponder on the internet to look for renovation services as we are always there for you to provide the best and quality renovation Auckland services.
Top 8 reasons why Aucklanders renovate is as follows:
- Updating outdated features: Many homes in Auckland have outdated features that may not be functional or aesthetically pleasing. Renovating the entire home allows homeowners to update these features and bring their home into the modern era. This can include updating old appliances and fixtures, installing energy-efficient options, and modernizing the overall design to better fit the homeowner’s preferences.
- Increasing home value: Renovating the entire home can significantly increase its value. This is especially important for homeowners who plan to sell their home in the future. A full renovation can include adding modern and desirable features, such as open-plan living areas, outdoor living spaces, and updated kitchens and bathrooms, all of which can increase the home’s appeal to potential buyers and ultimately its value.
- Creating more space: A full home renovation can involve adding more square footage to the home, which can be useful for families that are expanding or simply need more living space. This can include adding an extension to the home or converting an unused space, such as a basement or attic, into a functional living space.
- Personalizing the home: Renovating the entire home can give homeowners the opportunity to customize their living space to their specific tastes and needs. This can include selecting finishes and colors that reflect the homeowner’s personality, creating functional living spaces that suit their lifestyle, and incorporating unique design elements that set their home apart.
- Improving energy efficiency: A full home renovation can also include upgrading appliances, insulation, and other features that can improve the home’s energy efficiency and save homeowners money on energy bills in the long run. This can include installing energy-efficient windows, adding insulation to walls and ceilings, and upgrading heating and cooling systems to more efficient models.
- Repairing structural damage: If a home has suffered structural damage, a full renovation may be necessary to repair and reinforce the home’s structure. This can include fixing foundation issues, repairing damaged walls or roofing, and reinforcing weakened structures to ensure the home is safe and structurally sound.
- Enhancing curb appeal: A full home renovation can also include exterior updates, such as repainting the home, adding new siding, or installing new windows, which can enhance the home’s curb appeal. This can make the home more attractive to potential buyers and increase its overall value, while also giving the homeowner a sense of pride and satisfaction in their home’s appearance.
- Improving indoor and outdoor living: Home renovations in Auckland often focus on improving indoor and outdoor living spaces. Auckland’s mild climate and stunning natural surroundings make it an ideal place to enjoy indoor-outdoor living. Renovating your home can provide the perfect opportunity to create a seamless transition between your indoor and outdoor spaces, maximizing your enjoyment of the beautiful Auckland environment. This can include adding outdoor living spaces such as patios or decks, creating an open-plan layout that integrates indoor and outdoor living areas, and installing large windows or doors that offer unobstructed views of the outdoors. Upgrading your indoor and outdoor living spaces not only enhances your quality of life but also increases your home’s value, making it a smart investment for house renovations in Auckland. If you’re looking to renovate your home, consider a reputable company like Home Renovations Auckland to help you achieve your goals.

Superior Renovations – Kitchen Renovation
If you have considered renovating, then it might be of the following types:
- Extending your home.
- Add another level to your home.
- Make aesthetic changes on the inner side of the home as per your mood and ideas.
- Upgrading the kitchen or bathroom
- Subdivide or extend different areas of the home.
- Improving your lifestyle
- Increase the value of your home
- Improving indoor and outdoor living
Read more…
2021 Guide for renovations for return on investment and to add comfort for a family home
We renovate and adequately design the place according to the budget and lifestyle of our client. We try our level best to make your place look more attractive and beautiful but also making sure it’s within the clients scope.
If your property is one of your biggest assets, then renovation should be your second priority in order to maintain/increase it’s value. People are spending billions of dollars for the renovation of their properties. The renovation costs NZ per square meter in the Auckland house renovations building industry has been quite stable in recent years and we haven’t seen significant spikes.

Superior Renovations
Where to look?
As you know, Auckland is well known for its property and location, there is a lot of room available for renovation particularly in the older regions such as Ponsonby, Mt Eden, Sandringham, Glenfield, Howick etc. Almost in every area of Auckland, there are house renovations happening. The critical role to renovate a property if you’re looking to see is to increase its perceived value and equity in the market to attract the right buyers at your target selling price, which isn’t easy considering the demographics in every suburb is different.
Subdividing also seems to be quite popular in recent years and this is due to the large land available for older homes.
2. How much does it cost to renovate in Auckland in 2024? ↑
Confirming the renovation costs is a bit tricky and complicated
It depends on requirements and ideas of the client and the range can be quite large. If you’re considering on buying a place to renovate, try to get a ball park figure for the renovation to avoid not having enough budget after the purchase. If you’re renovating for your own home, focus on the necessities first and then the wants later if the budget allows.
When it comes to house renovation costs in Auckland, the price can vary greatly depending on the scope and complexity of the project. According to the New Zealand Building Industry Federation, the average cost of home renovations in Auckland can range from $2,000 to $5,000 per square meter. This means that for a 100 square meter home, the cost of a renovation could range from $200,000 to $500,000 or more. It’s important to note that these are just averages and the actual cost of a renovation can vary based on factors such as the quality of materials used, the size of the home, and the contractor’s fees. If you’re looking for reliable and affordable home renovations in Auckland, it’s important to do your research and find a reputable company that can work with your budget and needs.
There are some renovation costs/rates that can be calculated in advance if you know the size of the area you want done (but keep in mind this would be an average). You should have a 10% contingency budget should you start any renovation, there are also unforeseen costs once a renovation starts – perhaps you want to get extra things, or there was rotten timber that needs replacing.
Example of a complete full house renovations
The word home renovation can mean many different things to different people. The scope of work for
St Heliers in Auckland
This renovation was more cosmetic that structural. All internal areas were renovated without any structural changes.
West Harbour in West Auckland
This renovation was an extensive indoor and outdoor renovation. 4 bathrooms, 5 bedrooms, kitchen and living room was renovated. There were also many structural changes in the home which included renovating a staircase, breaking load bearing walls, installing double glazing windows, renovating the roof etc. Outdoor renovation included landscaping, re-paving, installing an electric gate and creating a deck.
See the full renovation + Pictures + Before specifications
3. Cost of home extensions Auckland ↑
Why consider a house extension when you could sell your Auckland house and move to a larger home? Here are four good reasons to consider adding a house extension:
- If you like the area you’re living in, you don’t have to move
- Make the changes you want to make and not settle for something that’s just okay
- A home extension may be more affordable than moving to a larger home
- You may be attached to your current home or location and not want to leave
The cost of a renovation to extend a ground floor home by 50 square meters in New Zealand can vary greatly depending on various factors such as location, the complexity of the project, materials used, and labor costs. Additionally, building permits and fees may also add to the overall renovation costs.
As a rough estimate, the renovation costs for a house extension in Auckland of a 50 square meter ground floor extension in New Zealand could range from NZD 100,000 to NZD 250,000 or more. That works out to $2,000m2 – $5,000m2. The difference is in the type of construction and the quality of the inclusions. This estimate is based on industry averages and may not reflect the actual renovation costs of your specific project. It’s recommended to consult with a professional builder or architect to get a more accurate estimate based on your specific needs and location.
You won’t know the exact cost of a home extension until you’ve made plans and know how large the extension is going to be and what will be included in the extension. You may be wondering about the cost of hiring an architect to create the necessary drawings. The cost of hiring an architect for a ground floor extension in New Zealand can vary depending on factors such as the project size and complexity, level of detail required, and the experience of the architect. On average, the cost of hiring an architect in New Zealand for a ground floor extension can range from NZD 5,000 to NZD 15,000 or more.
Architectural drawings are essential for any home extension project as they provide detailed plans for the construction team to follow and ensure compliance with building codes and regulations.
Want to figure out a custom price for your own extension project? Check out this free to use House Extensions Cost Calculator (NZ) developed by Superior Renovations.
Cost of Two storey House Extensions in Auckland
What about two-story extensions?
If both storeys are the same size, a generally-accepted rule is to add 50% extra to the build cost of a single storey house extension. So if you ground floor extension’s renovation cost is $250,000 then your 2 storey home will be $2500,000 + 50% = $375,000
Add 20% for professional fees and GST (15%).
Don’t forget about windows, finishings and fixtures when you’re pricing your house extension, Make sure you include these in your planning and cost estimates. If you don’t, you could be in for a surprise when the final invoice comes.
Planning a house extension is a big job that can seem daunting, especially with so many things to think about. It’s best to start with figuring out the cost. Once you’ve got a rough idea of how much your extension will cost, you can move forward with everything else.
There are other places to start, of course. But the best place to start will always be with a general cost calculation.
General Process for House Extensions NZ
- Initial enquiry to a construction/renovation company
- Feasibility study to be carried out by an architect
- Pre-construction costs are proposed
- Client agrees to initial costs
- On-site meeting with client along with architect and builder
- Draft architectural plans are drafted and briefed to client
- Final architectural plans are submitted for consent
- Consent approved
- Quote/proposal/specs are generated by builder based on approved plans
- Awaiting client approval
- Building contract signing process
- Initial deposit received
- Construction start date (as estimated finish date) is confirmed
Read more…
Renovations that need building consent in Auckland
-

- Interior Renovation
-

- Interior Renovation
Example of a full interior renovation which included: New gib board, redesign of the staircase, installation of glass balustrades, new chandelier, new carpet installation and replacing all lights to LED
4. Renovations Costs NZ per Square Meter ↑
Different types of renovation costs NZ per square meter made in different areas of Auckland have ranged from $2,000 to $4,000 for home renovations in the mid range categories in terms of fixtures, finishes etc while more complex renovations with high-end finishes could cost upwards of $6,000 NZD per square meter.
The interior part takes can range between $90,000 to $180,000 depending upon the client’s requirements and if there is no structural change required but only minor consent related work. The scope of work required, the size of the house and the finishes/fixtures you choose will greatly determine the cost of your full home renovation in Auckland.
The cost of a house renovation can vary significantly depending on the scope of work and specific details of the project. For instance, if you’re planning to renovate a standard 3 bedroom home with mid-range fixtures, including painting the interior, renovating 1 bathroom and 1 kitchen, and changing the flooring in all bedrooms and living areas, you can expect to spend between $90,000 to $105,000 in renovation costs. However, if consent-related work is required in the bathroom, kitchen, or living areas, such as obtaining council approval, the cost could increase by up to $20,000, including the architect’s fee, architectural drawings, and Auckland council fee. Keep in mind that these are just estimated house renovation costs and the actual renovation costs may vary depending on various factors such as the location and quality of materials used. To get a better idea of the expected renovation costs for your specific project.
It is not possible however, to give an estimate on a full home renovation without visiting the home and measuring if the complexity of the home renovation is high. An example of this would be renovating a house with extensive structural changes, installing double glazed windows, insulating the home further etc.
House Renovation costs in Auckland as per Square Meter
If you are having a thought of the cost of renovating your place as per square meter, you can follow the guide mentioned above. Although the figures mentioned above for house renovations costs NZ per square meter are not exact. They are just an estimate for you to consider your renovation area according to your budget. In the beginning, $2,000 square meter is the cheapest renovating cost. The average cost is 2,500 per square meter. Anything that is over $ 3,000-meter square is undoubtedly a prohibitive renovating price.

Superior Renovations
5. Average House Renovation Costs Guide ↑
See below on the break-down of house renovation costs:
| TYPE OF HOUSE RENOVATION COSTS | COST RANGE |
| Renovation Architect Cost | $5,000 – $15,000 (5-15%. In this case considering the renovation to be worth $100,000) |
| Surveyor / Engineer | $150 – $500 per hour |
| Heat pump | $2,000 -$5,000 (based on the number of heat pumps and the brand) |
| Renovation Management | $50 to $150 per hour or $5000 to $20,000 for the entire project. |
| Electrical | $5,000 to $8,000 if it is extensive electrical work but between $1,000 to $3,000 for minor electrical work like changing electric outlets etc. |
| Plumbing | $2,700 – $5000 |
| Builder | $50 to $150 per hour or $10,000 to $50,000 for the entire project. |
| Joinery (windows) | $5,000 to $15,000 |
| Insulation | $2,000 to $5,000 |
| Roof | $10,000 to $20,000 depending on the type of roof and complexity of the shape of the roof (also including scaffolding). |
| Interior Renovation costs | $41,000 to well over $100,000 |
| Renovation Costs Bathroom | Starting at only $20,000 for a basic upgrade with an average spend of $25,000-40,000 and well over $45,000 for a full redesign. |
| Renovations Costs for Kitchen | Ranging from $18,0000 for average size, $30,000 mid-$35,000 size and $40,000 + for high end designer kitchens. |
| House Extension cost | $100,000 + |
| Recladding cost | $150,000 + |
How Much Does it Cost To Replumb a House (NZ)?
Replumbing a house in New Zealand involves various factors including the size of the house, the type of pipes used, and the complexity of the job. On average, the cost to replumb a house can range from $6,000 to $15,000. For a standard 100-square-meter house, the cost is typically around $7,000 to $10,000. Larger houses or those with more complex plumbing systems can see costs upwards of $15,000 or more.
Here is a table illustrating the estimated costs based on different house sizes:
| House Size | Average Cost ($) |
| 100 sqm | $6,000 – $10,000 |
| 150 sqm | $8,000 – $12,000 |
| 200 sqm | $10,000 – $15,000 |
| 250 sqm | $12,000 – $18,000 |
| 300 sqm | $15,000 – $20,000+ |
These estimates take into account the use of common materials like PEX or copper pipes, which are preferred for their durability and ease of installation. Additional costs can arise from labor, permits, and any necessary repairs to walls or floors during the installation process.
How Much Does it Cost To Rewire a House (NZ)?
Rewiring a house in New Zealand can be a substantial but necessary investment to ensure safety and functionality. The cost varies significantly depending on the size of the house and the complexity of the job. Here’s a table to give you an idea of the average costs based on different house sizes:
| House Size | Cost Range (NZD) |
| Small House (2-3 bedrooms) | $4,000 – $7,000 |
| Standard House (3-4 bedrooms) | $6,000 – $10,000 |
| Large House (4+ bedrooms) | $10,000+ |
These prices can vary based on factors such as the age of the house, the condition of the existing wiring, and the level of access available to the electricians.
Common Upgrades/Add-ons During Rewiring
- LED Lighting: Replacing traditional lighting with energy-efficient LED lights not only reduces energy consumption but also has a longer lifespan.
- Smart Switches: Incorporating smart switches can enhance convenience, allowing you to control lighting and other electrical devices remotely via smartphone or voice commands.
- Upgraded Power Board: Modern switchboards with Residual Current Devices (RCDs) improve safety by preventing electric shocks and fires.
- Additional Power Outlets: Adding more power outlets can reduce the need for extension cords, making your home more organized and safer.
- Home Sound System: Installing an integrated home sound system can improve your audio experience for entertainment purposes.
- Security Systems: Upgrading or adding security features such as CCTV cameras, alarm systems, and smart doorbells can enhance home security.
- Home Automation: Implementing home automation features like smart thermostats, automated blinds, and smart plugs can make your home more efficient and easier to manage.
Rewiring your house not only addresses potential safety issues but also allows you to modernize your home’s electrical system to meet current and future needs. For a precise estimate tailored to your specific requirements, it’s best to consult with a professional electrician who can provide a detailed quote based on an inspection of your property.
Double Glazing Cost per square metre (NZ)
When considering house renovations in Auckland, New Zealand, it’s important to factor in renovation costs. Double glazing is a significant aspect of home renovations that can impact costs. While it may be an additional expense, double glazed windows can improve the energy efficiency of a home, resulting in lower energy bills and potentially reducing long-term renovation costs. Additionally, double glazing can add value to a home and make it more appealing to potential buyers, which may offset the initial cost of installation. Therefore, when planning a home renovation project in Auckland, homeowners should consider the long-term benefits and cost savings of investing in double glazing.
Retrofitting double glazing costs, a lot lesser than getting entirely new double glazing with new frames. You can expect to pay about $15,000 to $18,000 for a 100m2 home. An insulated glass unit and drainage system is installed in your current window frames. While this is a cheaper option, it is not possible to install the insulated glass unit in your current frames for most homes in Auckland.
It is only possible for new homes where the window frames are in great condition. Older home in Auckland do not have frames that are in good condition as they are often damaged or skewed. If you have a newly built home with single glazing, then opt for retrofitting your double glazing as it is a more cost effective option with similar insulation levels as new double glazing with new frames. Hence, while double glazing windows is more expensive than retrofitting, it is not mostly possible for older homes and especially for people renovating their homes as they do not usually do so for new builds.
View full article here on cost of Double Glazing your home: https://superiorrenovations.co.nz/what-is-double-glazing/
Cost of Re-roofing Your House in Auckland
Looking to re-roof your home in Auckland, New Zealand? Re-roofing can offer numerous benefits, including improved weather protection, energy efficiency, and compliance with building codes. But how much does it cost to re-roof in Auckland?
The cost of re-roofing in Auckland can vary depending on factors such as the size of your roof, the roofing material used, and the complexity of your roof design. For example, re-roofing with asphalt shingles may cost between $8,000 to $16,000, while re-roofing with long-run iron roofing may cost between $18,000 and $36,000 for a standard-sized home with a pitched roof in Auckland.
To get an accurate estimate for re-roofing your home in Auckland, it’s important to get quotes from reputable professionals who specialize in re-roofing Auckland homes. Make sure to factor in additional costs such as roof insulation, removal and disposal of the old roof, and any necessary repairs to your roof structure.
Home renovation costs in Auckland can also be significant, and it’s important to factor in all potential expenses before embarking on a renovation project. Re-roofing a house is one aspect of home renovation that can impact costs, but it can provide long-term cost savings by improving energy efficiency and weather protection. Other home renovation costs in Auckland may include interior and exterior remodeling, kitchen and bathroom renovations, and recladding. It’s essential to work with reputable professionals in Auckland to ensure the work is done to a high standard and meets all necessary building codes and regulations. Overall, homeowners in Auckland should consider the long-term benefits and cost savings of home renovations and factor in all potential expenses to ensure a successful project.
The cost of reroofing in Auckland in 2024 can vary depending on a number of factors such as the size of the roof, the materials used, and the complexity of the installation. On average, homeowners can expect to pay anywhere between $14,000 and $25,000 for a complete reroofing job.
Here are some key points on the cost factors of reroofing:
- The size and shape of the roof: The larger and more complex the roof, the higher the cost of reroofing.
- The type of material used: Different roofing materials have different costs, with some options being more expensive than others. For example, asphalt shingles are generally cheaper than metal or tile.
- The quality and thickness of the roofing material: Higher quality and thicker materials will generally cost more than lower quality and thinner options.
- The condition of the existing roof: If the existing roof is in poor condition, additional work may be required to remove and dispose of it, which can increase the overall cost.
- The accessibility of the roof: If the roof is difficult to access, such as being high or steep, this can increase the cost of reroofing due to the additional safety equipment and labor required.
- Additional features: Features such as chimneys, skylights, and ventilation systems can add to the cost of reroofing due to the additional labor and materials required.
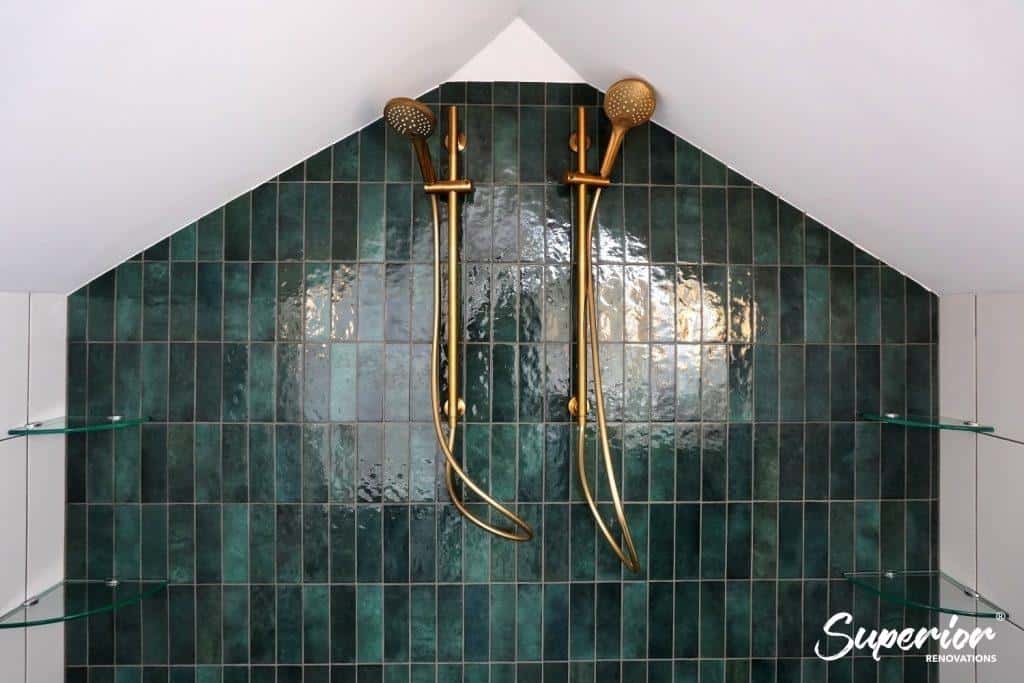
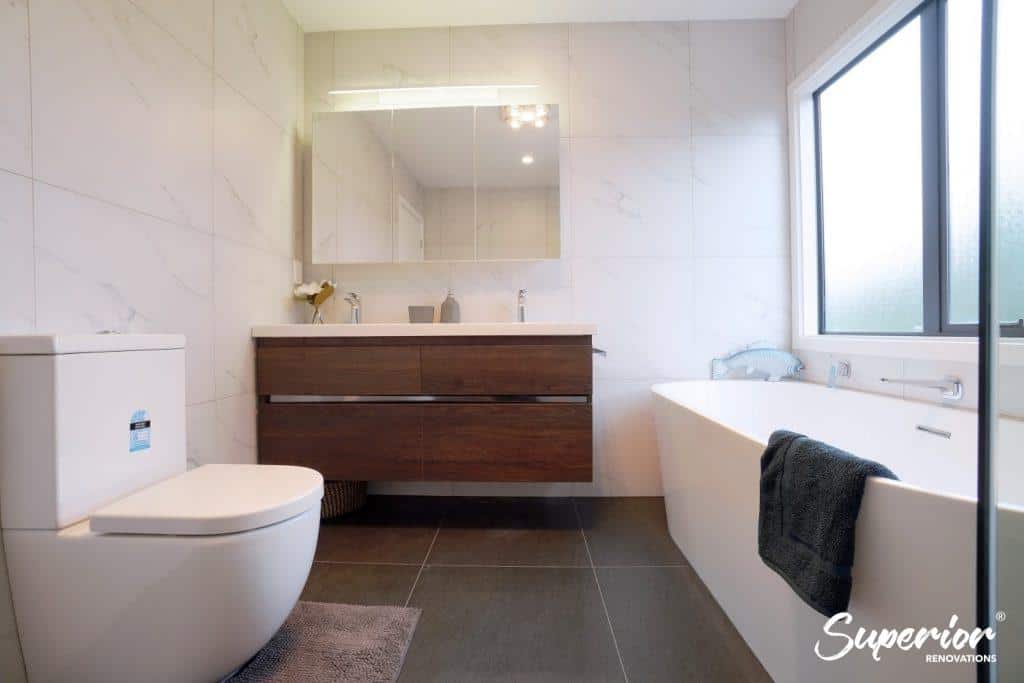
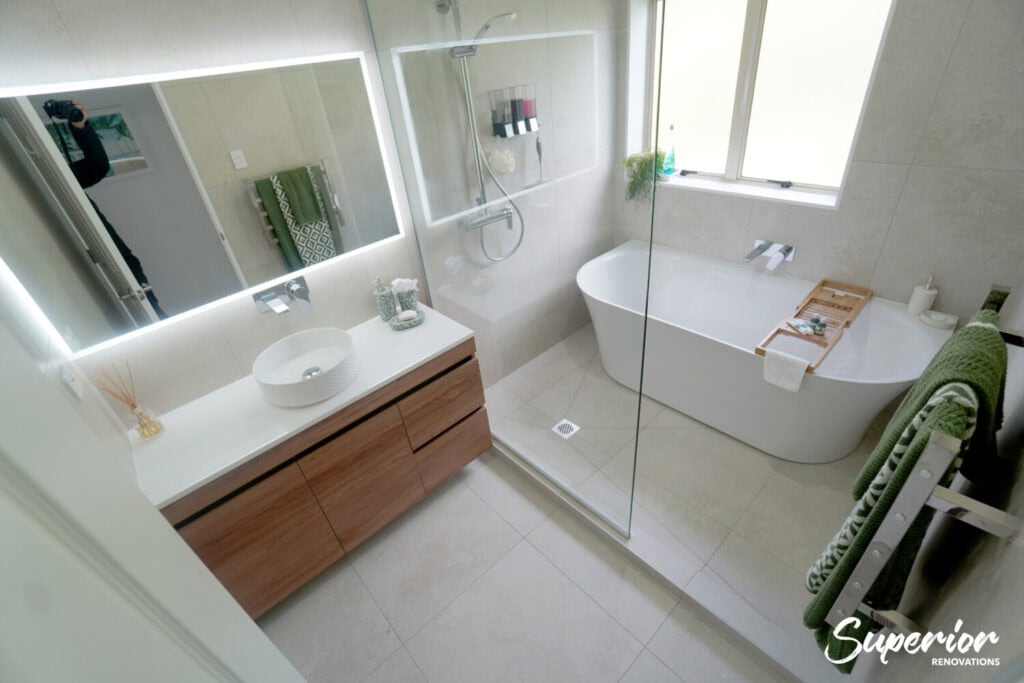
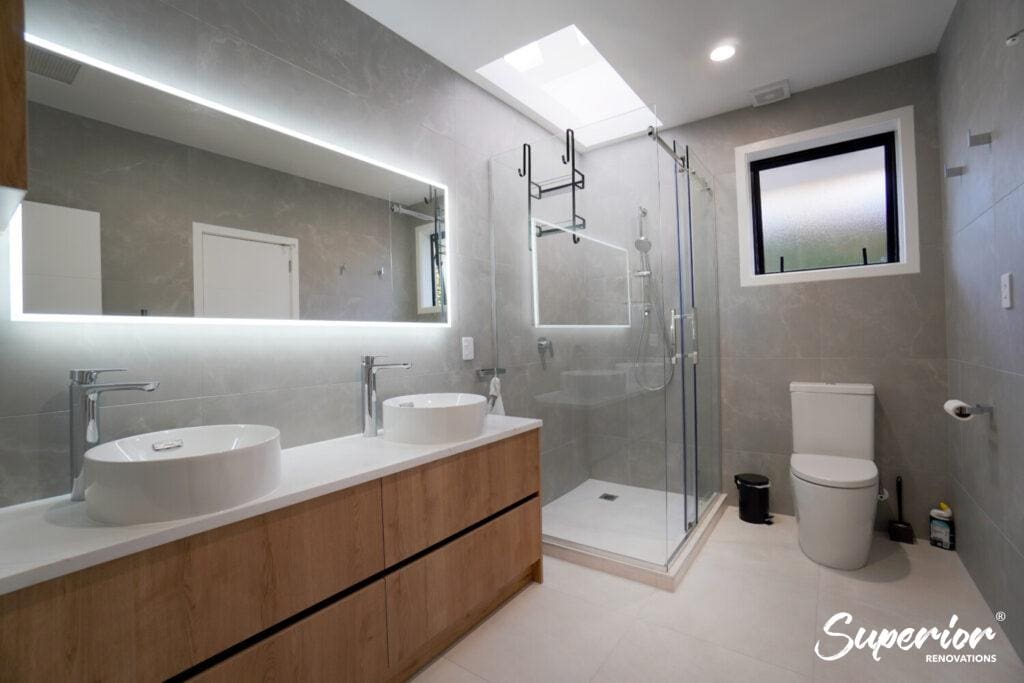
Renovated Bathroom

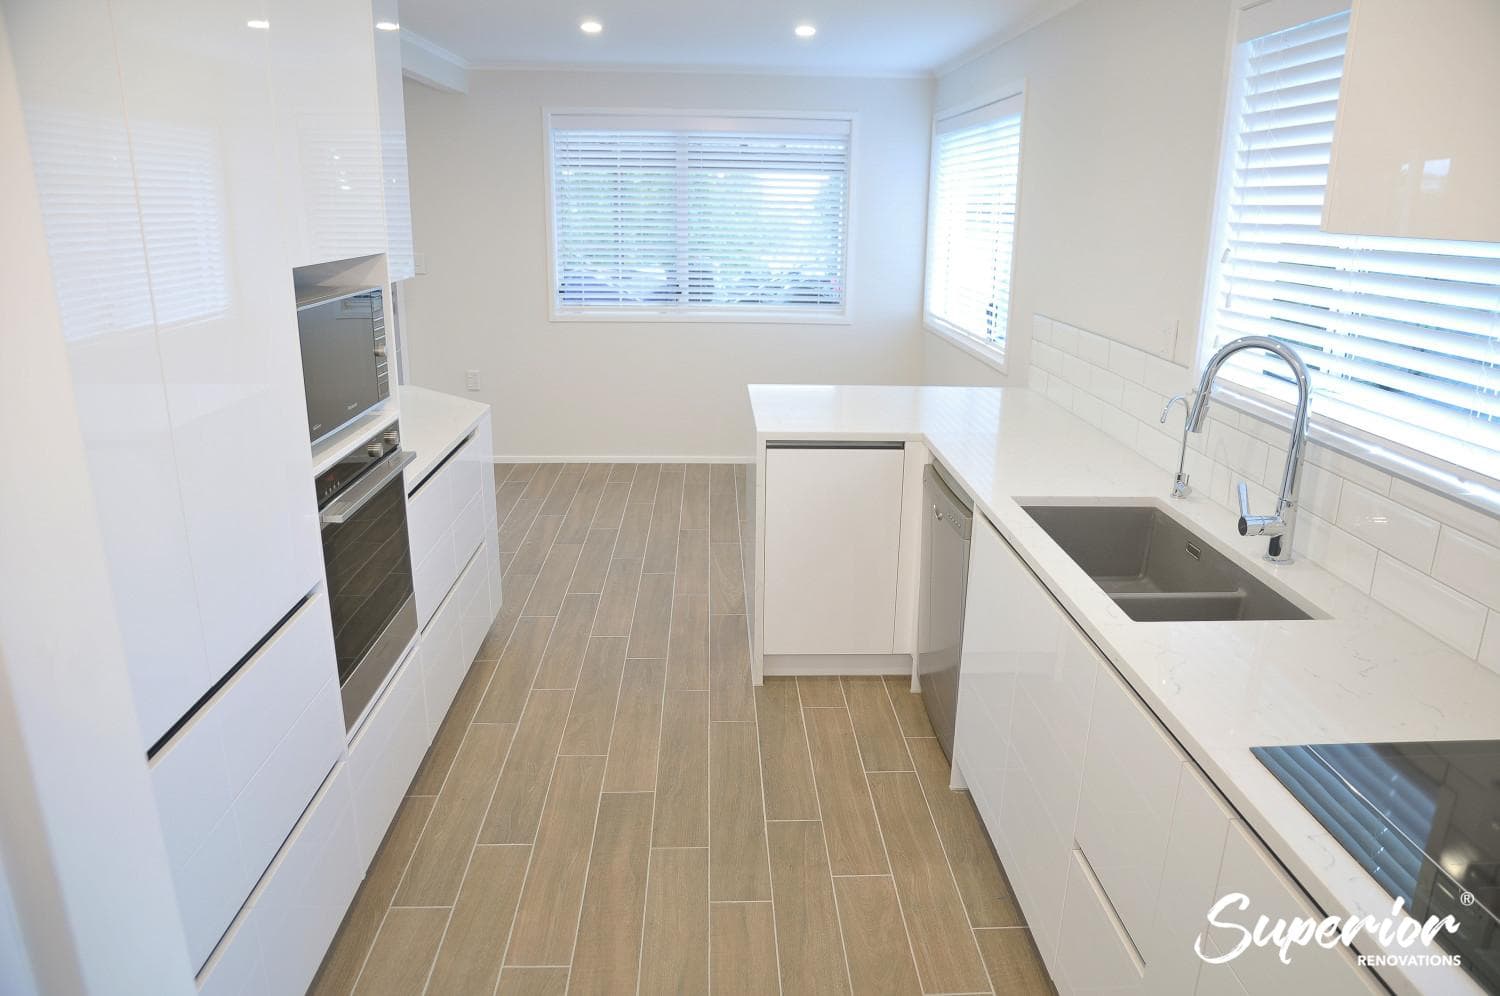
Kitchen and House Renovation
Is a home renovation worth it?
People are confused if renovating their property will increase its value or not. Let us assure you that if you are a resident of Auckland, then renovation is the best way to increase your property’s value and beauty.
This is the reason that the knowledge regarding Home renovation Auckland is very essential. The best way to pursue is that you should overestimate the budget for renovation and set the sale priceless. This will let you make a proper price and profit analysis.
Whether you intend to modernise an old kitchen or enhance your outdoor space by adding a deck to your home, your first step when planning a renovation will be figuring out the cost, work and time involved in the project.
6. So here are a few tips to help you get off to a good start for your house renovations. ↑
- Do you research, figure out what you want
You should have a clear idea of what you want before you start getting quotes and choosing materials. If you know you want to redo your bathroom, but aren’t sure what style you want, you can get inspiration from home improvement and design magazines or use Pinterest to find creative ideas and bookmark them for later.
Creating a detailed renovation plan is essential to the success of your renovation project, and while your renovation company can certainly help with this, there are some things you’ll need to decide on beforehand, including your budget and preferred materials and finishes.
- Allow plenty of time for your renovation
Home Renovation projects in Auckland can often end up taking a lot longer than anticipated, so you should allow plenty of time for unexpected delays. Planning in more time than you think you’ll need to prevent unnecessary stress when things move more slowly than anticipated.
- Make sure you have considered all your options
It’s best to get advice and proposals from a few different renovation companies in Auckland before making a final decision so you can compare them and make sure you are making an informed decision. Of course, high-quality materials cost more and skilled contractors often charge more than less experienced ones, so check the contractor’s reputation, ask plenty of questions and look for hidden fees.
The key to renovating your Auckland Home beautifully yet inexpensively is to devise a goal for yourself, and paint an entire picture of what you want and then step by step renovate each part of your house with the guide of a trusted renovation company – they’ll be able to guide you through the process by giving you sound advice to avoid costly mistakes.
As mentioned above, the term ‘house renovation’ can mean different things to different people. To determine what the scope of work is in different types of home renovations greatly depends on your intention to renovate your home. You need to ask yourself what you are actually trying to achieve with your renovation, in short what is your reason to renovate?
In this blog we will explore different types of home renovations, their scope of work and what does it cost to renovate your full home for different needs.
7. Type 1: Updating a dated Property or an Investment Property – What does is the cost of renovating a full home?
Scope of Work: Kitchen renovation + Bathroom renovation + Re-wiring + Interior Painting + Flooring and Lighting
This type of renovation is ideal for those who want to upgrade or modernize a dated property, and it’s often done on older homes as well as investment properties. Using mid-range supplies, materials, and fixtures, a full house renovation can give your home a fresh new look and add value to your property.
Whether you’re looking to modernize your home, increase its value, or simply create a more comfortable living space, a full house renovation is an investment that can pay off for years to come.
It is important to note that since type of home renovation is to just upgrade or rent out your property, you should use materials that are not too personal to your choice and are budget friendly.
While the cost of labour and project management will remain the same for most types of full home renovations, the cost of the materials you choose will determine the final cost of your full home renovation. We advice our clients to choose neutral colours and to use materials that are from the mid-range category to renovate their homes.
The aim is just to upgrade the areas, give it a clean look and include basic modern features and styles.
Cost of Kitchen renovation
The cost of renovating your kitchen will make a substantial part of the full cost of your home renovation. This type of renovation project involves restoring and painting the existing cabinet doors, and modernizing the kitchen with new laminated floorings, a laminated benchtop, and modern countertops. If the kitchen is small or mid-range materials are used, new cabinets are a possibility. You could use MDF or basic range of acrylic panels for your cabinetry as this is a easy to clean and budget friendly material. Additionally, lights will be repaired as needed. The objective of this renovation is to update the kitchen without changing its layout and while keeping the renovation cost low by utilizing cost-effective materials that have modern conveniences.
An example of this type of kitchen renovation can be seen below. This kitchen features high gloss acrylic panels for cabinetry, laminate floors and freshly painted walls.
This renovation features simple basic high gloss acrylic panels, 30mm benchtop and laminate flooring. The cost for this type of a kitchen will be between $28,000 to $32,000.
Kitchen Cabinetry and Benchtop – What you can expect it to contribute to the cost of renovation your full home
As mentioned, the most cost effective yet budget friendly material for such full home renovations is MDF and mid range acrylic boards. MDF panels remain one of the most popular materials due to it being cost effective and being easy to maintain. MDF stands for Medium-Density Fiberboard. It is a type of engineered wood product that is made by breaking down hardwood or softwood residuals into wood fibers and combining them with wax and resin binders under high temperature and pressure. The resulting material is then formed into panels that can be used for various applications such as furniture, cabinetry, flooring, and decorative molding. MDF is known for its uniformity, stability, and smooth surface, making it a popular choice for projects that require a consistent finish. It is also an affordable alternative to solid wood and is often used as a substitute for materials like plywood or particleboard.
MDF Vs Solid Wood for Kitchen Cabinetry – Pros and Cons explained
Mid range high gloss acrylic panels from Ultraglaze is another cost effective and popular material for kitchens. You will have to take care to maintain these cabinets as you may have to wipe them down for fingerprints and food splashes so they do not stain. These acrylic panels from ULTRAglaze are a range of mid range acrylic panels that are attached the the carcass, they however are prone to getting scratched easily unlike their premium counterpart which we will discuss later in the article.
Our renovation showroom at Wairau valley, Auckland showcases such a budget friendly kitchen which features a combination of MDF and mid range acrylic panels for its cabinetry. As seen below, some of the cabinets have a matte finish black MDF panels while the others have high gloss ULTRAglaze acrylic panels.
Dorothy used cost-effective yet trendy materials for the kitchen design. To achieve the matte black look, she utilized Acrylic boards for half of the cabinets. To keep the expenses down, she opted for mid-range Acrylic panels instead of premium ones. For contrast, she used MDF Melteca black boards for other cabinets, which is also a popular material in the renovation industry. The benchtops and wall splashback were made of engineered stone for consistency and the illusion of a larger space. To keep up with current trends, floating shelves were added, and unique features such as a stainless steel open shelf, floating breakfast bar, and wine fridge were incorporated. Overall, the kitchen design is both stylish and affordable.
This kitchen showcases how different materials and colours come together to create a beautiful yet budget friendly kitchen design.
See full details of our Kitchen Displays in our Showroom + Kitchen Design Process
One of the most popular benchtops for basic full home renovations in Auckland is stone engineered benchtop. There is a large range when it comes to the cost as well as design. For a basic kitchen renovation, use a stone engineered countertop from the mid range. A basic kitchen renovation with a renovation company will include flooring, cabinetry, benchtop, all labour and project management. This type of a kitchen renovation will cost between 28K to 30K.
There are however, ways to bring the cost a new kitchen by taking the following steps:
- Use a manufacturer and not a renovation company: A manufacturing company will design, manufacture and install the cabinetry. This means that you will have to arrange your own trades like plumbers, electricians, flooring, painters etc. This type of a kitchen renovation will bring the cost of your house renovation and will be about 10K to 15K.
- Use laminate benchtop: While laminate benchtops have become a dated choice, there are still some brands that have a range in laminate benchtops which has a modern look to it.
- Minimal in built storage: Most people who renovate their kitchens often opt to build custom storage within their cabinetry instead of standard shelving. These include pull out pantries, magic corners to access items from corner L shaped cabinets, pull out condiment drawers etc. Buildings such custom storage solutions will increase the cost of your kitchen in turn increasing the overall cost of your house renovation.
Read more…
How much is a New Kitchen Remodel Cost in NZ? Basic, Mid-range, and Luxury Kitchens in 2023
Full Kitchen renovation costs – Itemised costs for cabinets, flooring, appliances, Labour etc for 2023
Cost of Bathroom Renovation for a Basic full home renovation in Auckland
If you’re looking to reduce renovation costs for your bathroom, there are some options available to you. One cost-saving method is to leave the existing layout of the sink, bathtub, shower, and toilet as is, and instead focus on replacing outdated fixtures with new, updated models. This can be a more affordable alternative to a full bathroom renovation, which can cost an average of NZD $10,000 to NZD $20,000 in Auckland. However this would mean that you are not using a renovation company but just getting a plumber to swap fittings.
If you are however, wanting to renovate the entire bathroom including re-tiling, painting etc then you may need to use a renovation company. In order to keep the renovation costs down, you can choose tiles that are from the mid range, neutral colours, use an acrylic shower, and use mid range fixtures.
This would cost you between $25,000 and $30,000 which would include cost of all labour, fixtures, project management and products.
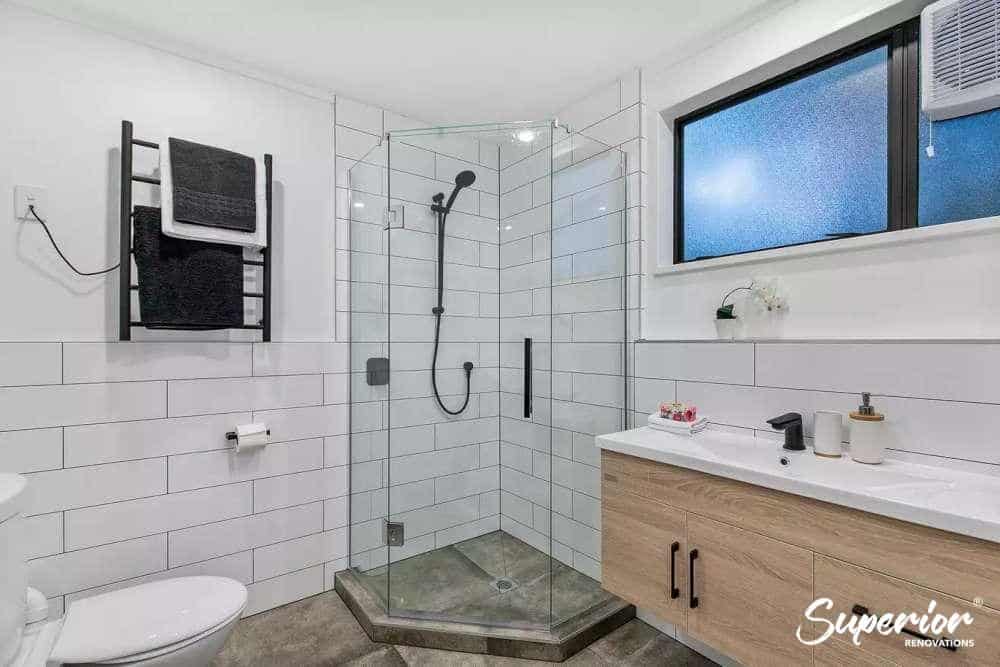
The bathroom below shows a standard wall hanging vanity. drop in shower and laminate floors with painted walls. This renovation that we carried out in West Harbour, Auckland is a simple yet fully renovated bathroom. See full project specifications + Pictures for the below project.
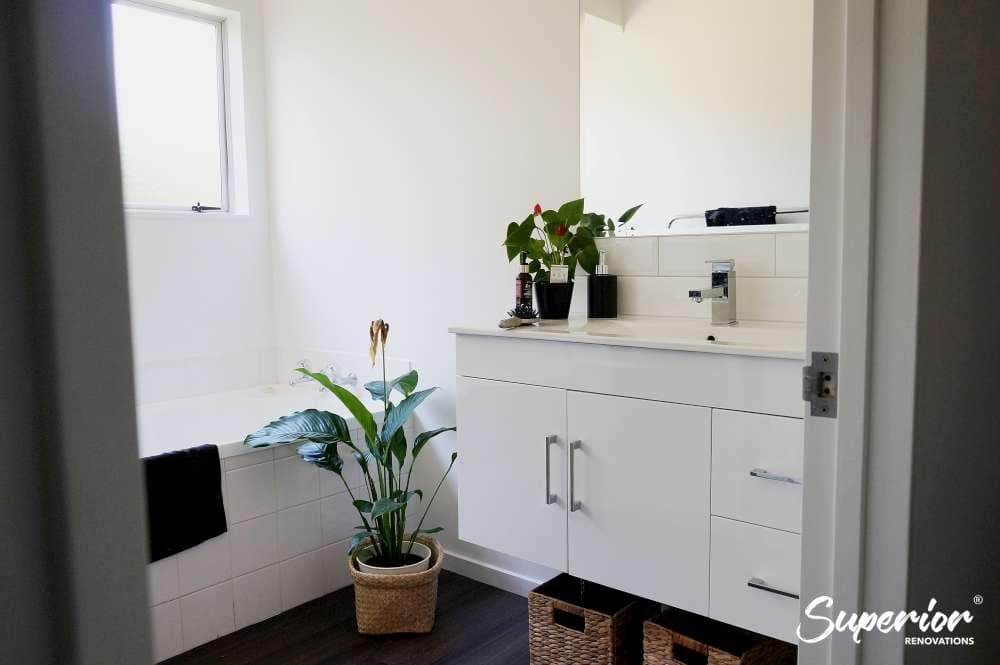
This bathroom features simple wall hung vanity, a drop in bathtub, painted walls and dark laminate flooring. This bathroom in West Harbour, Auckland will cost between $28,000 to $30,000.
Another example of a investment property bathroom renovation can be seen below. Our client renovated her entire home using materials in the basic range and her renovation costs remained on the lower side.
The bathroom renovation features a custom built glass shower, a basic toilet and vanity as well as tiled walls and floors from the basic range in Tile Depot.
See full project specifications + before and After photos in Hillsborough

This rental property we renovated in Hillsborough, Auckland features large tiles, new toilet, vanity and a custom tiled shower. This type of a bathroom renovation will cost between $27,000 to $30,000.
More Basic Bathroom renovations done by us:
Bathroom Renovation in Papatoetoe – South Auckland
Joanne and Steve’s renovation in Greenlane
Cost of Re-wiring the house for a full house renovation in Auckland
For the purpose of this article we will be discussing the cost of rewiring the house for a standard 120 meter square home.
When it comes to full house renovations in Auckland, the cost of rewiring a 120 square meter home can vary depending on a number of factors, including the age and condition of the existing wiring, the complexity of the job, and any special electrical needs of the home. On average, you can expect to pay between NZD $5,000 and NZD $15,000 for a complete rewiring of a home of this size.
Rewiring is often important in older homes where the electric wires have been affected due to wear and tear, age or been damaged to an extend due to other factors.
Cost of Painting the interior of a home
Painting the interior of a home or room is a common part of many renovation projects, and it’s important to factor in the cost of painting when planning your renovation budget.
On average, the cost of painting a home interior or room is between $35 and $55 per square meter, with an average cost of $45 per square meter. A painting project can cost anywhere from $5,000 to $10,000, with the national average being $7,500. For a 150 square meter home, the painting cost can range from $5,250 to $8,250, not including GST. If you’re only painting a single room, the cost can vary from $675 to $825. By considering these costs ahead of time, you can better plan and budget for your renovation project.
Tools for Research:
Cost calculator for Interior Painting
Cost Calculator for Exterior Painting
Cost of Painting your Roof
Cost of Flooring for a Basic Home Renovations in Auckland
Renovating a house can be an exciting but expensive venture, and one of the most significant expenses can be the cost of flooring. In Auckland, the cost of flooring a home can vary widely depending on the type of flooring chosen.
Laminate flooring is a popular and cost-effective option, with prices ranging from $25 to $75 per square meter. This type of flooring is durable, easy to clean, and can mimic the look of other materials like wood or stone. The cost of installation is also relatively low, making it a budget-friendly choice for many homeowners.
Carpet is another popular choice, with prices ranging from $50 to $150 per square meter. This type of flooring is comfortable, warm, and comes in a variety of styles and colors. The cost of installation can be higher than laminate flooring, but it can be a good choice for bedrooms or living areas where comfort is a priority.
If you’re looking for a more luxurious option, tiles can be a good choice. However, they tend to be more expensive, with prices ranging from $75 to $200 per square meter. Tiles are durable, moisture-resistant, and can add value to your home. However, the cost of installation is also higher, and it’s important to work with a reputable and experienced installer to ensure the tiles are properly installed.
There are further affordable options available, including vinyl flooring, concrete flooring, and cork flooring.
Vinyl flooring is known for its durability and affordability, with basic vinyl costing as little as $25 per square meter and luxury vinyl up to $60 per square meter. This can be a great option for homeowners looking to update their flooring without breaking the bank.
Concrete flooring has become increasingly popular in recent years, thanks to its modern and industrial look. While the cost can vary depending on the complexity of the job, it generally ranges from $60 to $120 per square meter. This can be a great option for homeowners looking to create a unique and contemporary space.
Cork flooring is another eco-friendly and budget-friendly option, with a cost ranging from $50 to $80 per square meter. It’s known for its durability and soundproofing qualities, making it a great option for families or those who value a quiet and peaceful home.
Most of our clients choose laminate flooring for their rental properties as opposed to any others as they are aesthetically pleasing, durable, easy to maintain and budget friendly.
Verdict – How much does it cost for a Basic Full home renovation in Auckland?
The answer to this may be varied but if you renovate your kitchen, and bathroom using basic materials then you can expect to pay $28,000 for a bathroom renovation and $32,000 for a kitchen renovation. For a standard 120 meter square home you can expect to pay between $6,000 to $10,000 for interior painting. Re-wiring should be between $5,000 to 10,000 depending on the complexity of the work and about $5,000 if you choose basic laminate flooring. This kind of a full home renovation in Auckland would cost you between $75,000 to $100,000 depending on the materials you choose, repair work required and complexity of work required.
Type 2: Improving Quality of Living and Increasing functionality – How much does it cost to renovate a house in NZ?
Example of Scope of Work: Kitchen + Bathrooms + Rewiring + Interior Painting + Flooring + Smart Video Alarm Systems installed + Hot water cylinder installed + Insulation + existing windows replaced with double glazing windows + Aircon system installed + Fixing past leaks and damage.
Home renovations in Auckland can dramatically improve the quality of your life, whether you’re buying a house to renovate before moving in or simply want to upgrade your current living space. One of the most common types of home renovations involves improving insulation and adding energy-efficient features such as double glazing windows, air conditioning, and alarm systems. Not only do these upgrades improve your comfort and security, but they can also save you money on energy bills in the long run.
Of course, home renovations can also be costly, especially if you’re using custom fixtures and high-end materials. Mid to high-range suppliers are often the go-to for these types of projects, as they offer more customised options and better quality products. When planning your renovation budget, it’s important to consider all the costs involved, including materials, labour, permits, and any unexpected expenses that may arise.
The three main goals of this type of a house renovation is to increase comfort, be aesthetically pleasing and increasing the functionality of the home. The intention of renovating the home is to make it a personal space for the family and hence, it is important to have a designer on board that can help with achieving these goals.
Importance of having a Renovation Designer for your house renovation
Designers play a vital role in achieving a functional space while achieving an aesthetic look that you are after. Renovation designers like the designers we have within our team at Superior Renovations are different from interior designers. Our renovation designers work closely with all our trades very closely to maximise space, plan zones, and advice our clients on different renovation materials to suit their family’s needs.
Read more…
Full home renovation trends for 2023 by our Renovation designers
Some of the Top 10 things that our renovation designers can help you with are as follows:
- Expertise and experience: A kitchen designer with experience in Auckland home renovations can bring valuable insights and recommendations to your project. They can provide guidance on kitchen design Auckland and kitchen design NZ, helping you make informed decisions on layout, space planning, color schemes, and finishes.
- Budgeting and cost management: A kitchen designer in Auckland can help you create a budget for your renovation and work with you to manage costs throughout the project. They can provide guidance on sourcing materials and finishes that fit within your budget, helping you prioritize where to spend and where to save.
- Creative problem-solving: A kitchen designer in Auckland can help you solve design challenges that arise during the renovation process. They can come up with creative solutions to problems such as awkward layouts, limited space, and challenging structural issues, ensuring that your kitchen design NZ is both functional and attractive.
- Increased resale value: A well-designed kitchen renovation can add significant value to your home. A kitchen designer in Auckland can help you create a cohesive and attractive design that will appeal to potential buyers, increasing your home’s resale value.
- Space planning: An experienced kitchen designer in Auckland can help you optimize the flow of your kitchen by reconfiguring furniture layouts, removing walls, or adding new ones. They can suggest changes to the overall floor plan to create a more open, functional, and efficient space, ensuring that your kitchen design Auckland is tailored to your needs.
- Storage solutions: A kitchen designer in Auckland can create custom storage solutions that meet your specific needs, helping you maximize existing storage space or design new built-in storage solutions that are both practical and aesthetically pleasing.
- Lighting: Good lighting is essential for creating a functional and comfortable kitchen. A kitchen designer in Auckland can help you choose the right lighting fixtures and placement to ensure that the space is well-lit and functional.
- Material selection: An experienced kitchen designer in Auckland can suggest materials that are both durable and functional, such as low-maintenance flooring that is easy to clean and resistant to wear and tear.
- Traffic flow: A kitchen designer in Auckland can help you identify the main traffic patterns in your kitchen and ensure that they are unobstructed. They can suggest moving furniture or adding rugs to create a more open flow.
- Zones: A kitchen designer in Auckland can help you create distinct zones within your kitchen, each with its own function and purpose. For example, they might suggest a cooking zone, a food preparation zone, and a dining zone, ensuring that your kitchen design NZ is both practical and stylish.
By focusing on these key areas, a designer can help you create a space that is functional, comfortable, and aesthetically pleasing. They can take into account your personal preferences and lifestyle, as well as any specific needs or challenges posed by the space itself.
Cost of Kitchen renovation which is functional and Beautiful – How does it contribute to the overall renovation costs of a full house renovation in Auckland?
Consider the layout of your kitchen
When it comes to changing the layout of a mid-range kitchen in Auckland, renovation costs will vary based on several factors, including plumbing and electrical changes. If you’re keeping the current layout, the cost will likely be around $32, 000. However, if you want to add an island or change the existing layout, renovation costs can increase to over $35,000. It’s important to consider that changing the layout will impact the overall renovation costs. In cases where the current layout isn’t functional, replacing the stove, sink, or cabinetry may be necessary. The most popular kitchen designs for mid-range kitchens in Auckland include Galley, U-shaped, L-shaped, Island, Peninsular, and Two Island kitchens.
Read more…
Kitchen Layout Guide for a Functional Kitchen design – 2023 edition
Work Flow of your Kitchen – Making a functional kitchen
When planning house renovations in Auckland, it’s important to consider kitchen ergonomics for a great kitchen design. Ergonomics is the study of designing an environment that fits people rather than the other way around. A work triangle was initially devised to ensure efficiency in the kitchen, with a clear pathway from the stove, cleaning area (sink), and refrigerator. Traffic flow and designated storage areas are also crucial, with a primary pathway throughout the kitchen and clear designated areas for big appliances, cutlery, utensils, washing area, and cooking area.
Distance between fixtures is another key consideration, with enough space between the cooking area and sink, fridge and stove, and island and cooktop. Cooktop placement is especially important for ventilation, and exterior walls are recommended for easier installation of ventilation systems and splashbacks. Vertical storage can help make up for a lack of storage space, and 3D plans are a great way to visualize your kitchen before renovation costs start adding up. Your designer will consider these mind these principles for your kitchen design NZ.
Kitchen Cabinetry for a mid-range kitchen renovation
A mid-range kitchen remodel cost in NZ can offer a lot of flexibility in terms of materials and designs for your cabinets and door handles. For example, one popular option for cabinets is MDF Melteca, a surface that is affordable, easy to clean, and highly durable. Melteca has various ranges of materials, making it a versatile choice for homeowners looking for a mid-range kitchen renovation.
One option to customize your MDF cabinets is to wrap them with Dezignatek Thermoform, which allows you to add any pattern you like to create a traditional, vintage, classic or modern look. For example, a Rhonda pattern can give the cabinets a vintage look. Custom-built cabinets made of real wood are also an option, but they can be more difficult to maintain and are typically more expensive.
Another popular option for cabinets is premium acrylic panels by Laminex. Laminex’s premium acrylic decorative boards are pressed on locally made FSC certified MDF, which makes them both beautiful and durable. These panels have a great depth of color with a matte finish that is made smooth to almost feel like velvet. They are also fingerprint-resistant, easy to clean, scratch-resistant, and stain-resistant. This makes them a great option for busy kitchens where spills and messes are common.
The use of soft close cabinets and durable hinges from Blum and Hafele is a common feature in modern kitchen designs. No-handle setups with LED lights provide a seamless and uncluttered look, while brass handles can give a vintage feel to a traditional style kitchen. Matte knobs against white cabinets can create a classic and clean look.
Countertop: A spotlight on a mid range kitchen renovation – Display in our Renovation showroom in Wairau Valley
The benchtop used in this kitchen design in NZ is made of engineered stone with a concrete look and a matte finish, sourced from supplier UniQuartz. This material is soft to the touch and has a leather finish, making it stain-resistant and durable. It can withstand high temperatures without cracking and is easy to clean.
Read more…
3 Kitchen Displays explained – Materials and Kitchen design in our Kitchen renovation in Auckland

The cabinet and drawer fronts are made of high-quality acrylic panels mounted on MDF boards. The countertop is made of engineered stone, and there is a recessed veneer underneath it, creating a floating effect.
Choosing materials like engineered stone for a mid-range kitchen remodel can help keep renovation costs down while still achieving a modern and stylish look. The shark nose top edge of the benchtop also adds a unique and visually appealing floating quality to the design.
Kitchen design in NZ can be optimised for storage with several features that maximise space and organisation. Magic corners are a popular solution for hard-to-reach corner cabinets. Cutlery drawers and spice racks are custom-built options that keep utensils and spices within easy reach. Custom-built condiment drawers and pantry pull-out drawers also maximise storage space while maintaining organisation. Pull-out bins can be installed for hygienic waste disposal, and a kitchen island can double as storage, depending on your kitchen layout. Kitchen renovations can come with a high price tag, with the cost of renovating a kitchen island alone ranging from $4,000 to $6,000.
Recommended Flooring
One of the more popular flooring options for kitchens in Auckland is SPC Laminate flooring from Tile Depot. he benefits of using Neptune SPC (stone based laminate) flooring from Tile Depot for kitchen renovations, which is waterproof, easy to apply, free of harmful substances, and comes with anti-bacterial and sound-absorbing technology. The article explains that traditional options such as tiles are hard on the feet and can get cold in winter, while Neptune SPC flooring is durable, easy to maintain, and has a wood-like appearance. The article also mentions that most clients prefer using Neptune SPC flooring for kitchen renovations due to its durability and easy maintenance.
Examples of Splashbacks used in mid-range kitchen renovations: Tiles and Glass splashbacks
The picture below shows a kitchen that we renovated in Henderson Valley. The splashback features strips of large tiles that have smaller tiles that are arranged in a herringbone fashion. See full project specifications + Before and After pictures.
Art Stone Painting grey Chevron 300 by 800 for splashback from Tile depot – They are popular art deco tiles which give a 3D effect creating a great dimension in design.
25 Top Kitchen design trends in NZ for 2023 by our designers
The Kitchen splashback below shows a black mirror glass splashback for a kitchen renovation in West Auckland – Massey. This is another example splashback for a mid-range kitchen renovation that is suited for this type of a home renovation in Auckland.
See full project specifications for the renovation below + Before and After pictures.
Custom made reflector black finish glass splashback behind the sink wall and the wall behind the stove to make cleaning easier.
So how much does a kitchen renovation contribute towards the overall renovation cost of a full house renovation? The answer to this is subjective depending on how much you are changing the layout, what materials you choose and the size of the kitchen. On an average there is a decent level of customisation for this type of a kitchen and clients often prefer incorporating custom storage solutions within the cabinetry.
Overall a kitchen renovation for this type of a home renovation will cost between $35,000 to about $45,000.
Bathroom Renovation for your mid-range Home renovations in Auckland
Just like kitchen renovations, the cost of a bathroom renovation will depend on the fixtures you choose, the flooring options and most importantly if there is a change in layout. Changing the layout of your toilet means that you will have to go through a council process. This will include the architect drawing waste pipes beneath the home and submit it to the council. This adds about $6,000 to $8,000 to the overall cost of the bathroom renovation.
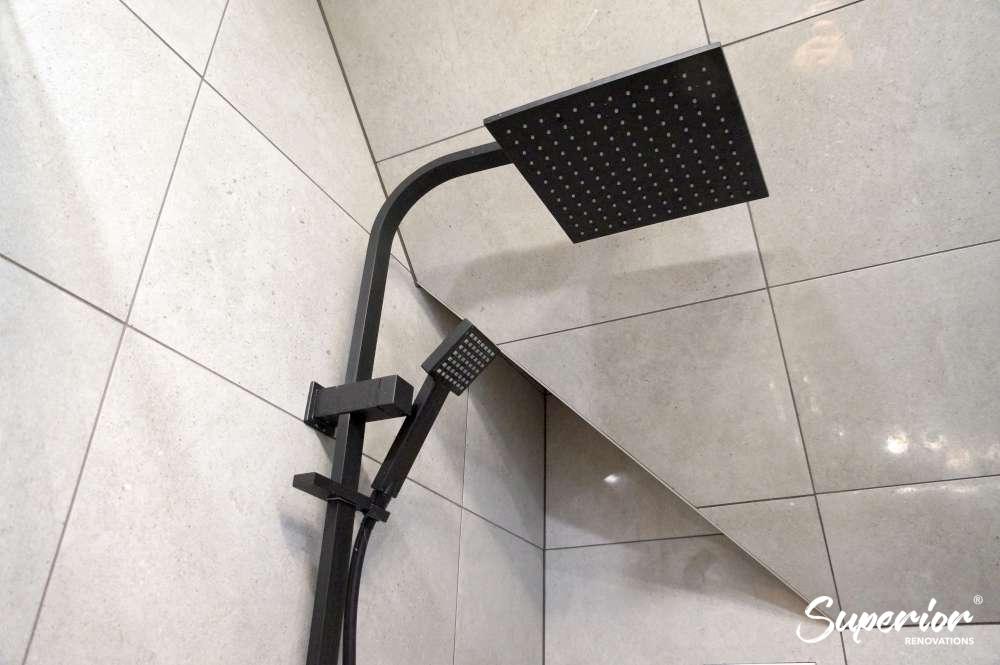
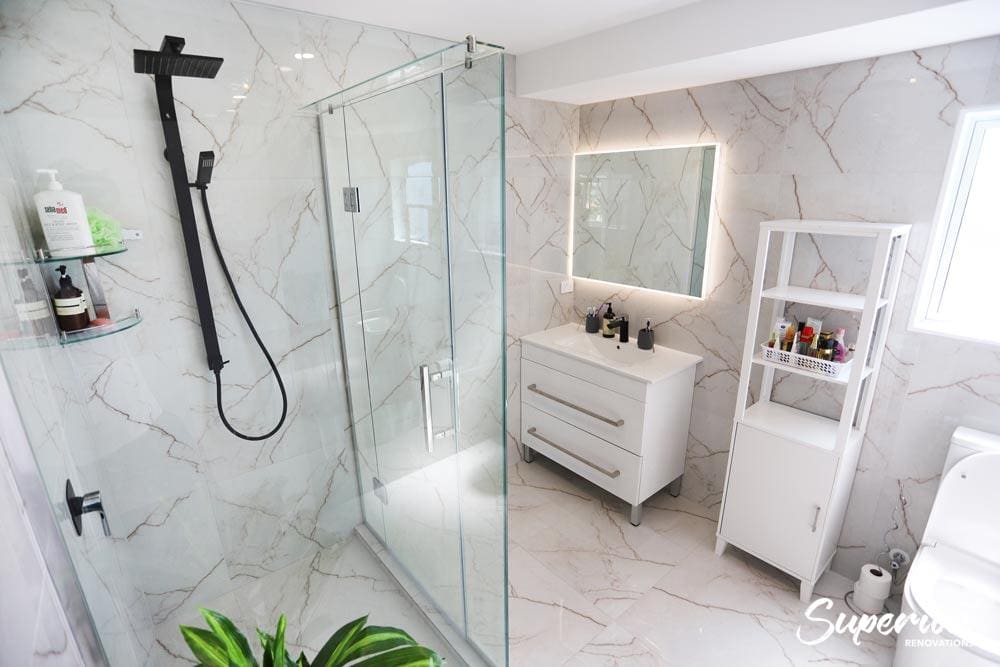
Most clients that are renovating their bathroom in this type of a home renovation often get rid of dated acrylic showers in favour of either wet areas and switch their drop in wall baths for free standing baths. A popular trend has also been to include large 600 by 600/ 600 by 900 tiles for floors and walls. This creates continuity for the bathroom and gives it a clean contemporary look to the bathroom.
The choice in tiles and fixtures greatly determine the cost of the bathroom renovation. The most popular brands that clients use for this type of a bathroom renovation is Englefield, Kohler, Milli, Kado and Mizu. Reece is our preferred bathroom supplier for our clients and carries all the brands mentioned. Tile Depot is our preferred flooring supplier as they carry a range of tiles suited for most tastes and budgets.
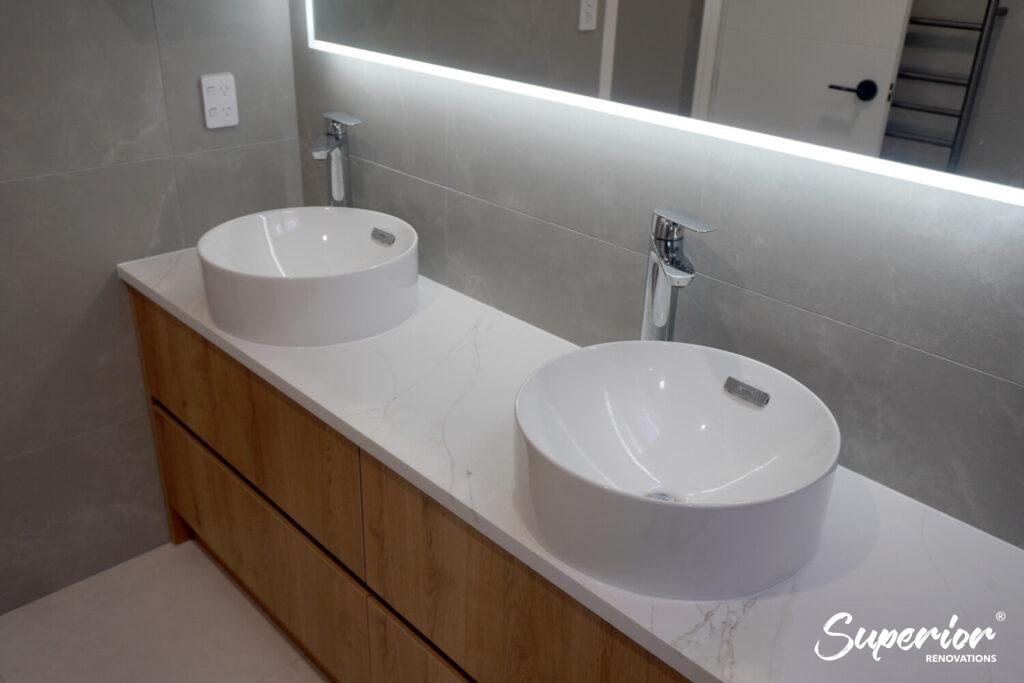
An example of a bathroom renovation from the mid-range can be seen below. This bathroom renovation from Henderson valley features a contemporary bathroom with a custom built vanity, free standing bath, brushed brass finish tapware, custom shower, toilet (cannot be seen in the picture) and large tiles. There was no change in layout for this bathroom and this type of bathroom renovation will cost between $32,000 and $35,000. See project specifications for the bathroom renovation below + Before and After pictures.

The bathroom was remodeled in a contemporary design that blended a classic and enduring style. It features a stand-alone bathtub, a tiled shower, a floating vanity, and matte tiles. The bathroom’s design includes three different types of tiles: a lighter neutral grey for the walls, a medium grey for the floors, and a darker grey for the shower. This layering of tile colors creates an elegant and subtle look for the bathroom.

The bathroom’s design has a modern and contemporary aesthetic that blends seamlessly with the rest of the house. The floor is made up of large 600 by 600 dark tiles, which creates a striking contrast against the off-white 600 by 600 wall tiles. The floating vanity, with an oak finish, adds a touch of warmth to the bathroom.
Read more…
Bathroom Design ideas for Classic, Vintage, Modern and Contemporary Bathroom renovations
Bathroom design ideas in NZ – Guide to Guest and Master bathrooms
How much does it cost to Insulate your home?
It’s important to consider the cost of insulation during a full home renovation in Auckland. Insulation costs can vary depending on several factors, including the size of your home, the type of insulation material used, and the complexity of the installation.
When it comes to renovating in NZ, it’s important to keep in mind that proper insulation can improve the energy efficiency of your home, resulting in lower utility bills and a more comfortable living space. In fact, according to the EECA (Energy Efficiency and Conservation Authority), insulating your home can save you up to $600 per year on heating costs.
The cost of insulation in Auckland typically ranges from $40 to $160 per square meter, depending on the type of insulation material used and the complexity of the installation. For example, installing spray foam insulation can be more expensive than installing fiberglass batts. Additionally, if your home has difficult-to-reach areas that require special attention, this can add to the overall cost.
SPOTLIGHT BELOW: In progress Insulation of an entire 5 bedroom home during a full home renovation in West Harbour, Auckland.

We extensively renovated this home by stripping it down to its main structure and beams in order to insulate the entire home.
See full Home renovation details + Before and After pictures for this home renovation
All the walls, ceilings and floors were insulated during this home renovation in West Harbour, Auckland.
Overall, the cost of insulation is a worthwhile investment for any homeowner in Auckland planning to renovate their home. Not only can it save you money in the long run, but it can also increase the value of your home and make it a more comfortable living space. So when you’re planning your next renovation project in Auckland, be sure to factor in the cost of insulation.
How much does it cost to double glaze your windows?
the cost of double glazing for windows is a significant factor to consider when budgeting for house renovations. The cost may be influenced by several factors such as window size and quantity, frame material, glass type, insulation level, installation complexity, and contractor expertise and location. All these factors may impact the overall renovation costs. I
it’s important to take these factors into account when planning and budgeting for house renovations that include double glazing to ensure that renovation costs stay within budget.
Read more…
What is Double Glazing Vs Retrofit Double Glazing? Which one is right for your home?
Most New Zealand homes are either made of plaster, weatherboard, brick or cement. Installing a double glazing unit in a plaster home is a lot more complicated than other materials and you will need a renovation company that specialised in plaster homes to double glaze your windows. For other materials it is easier to carry out double glazing. On an average it will cost you between $3000 – $3500 to double glaze each window for your full home renovation in Auckland. To double glaze a standard 2 bedroom home it will cost you around $35,000 + GST while a standard 3 bedroom home will cost you around $40,000. The cost of double glazing will make a significant portion of your full home renovation costs.
How much does it cost to build a deck? How much does it contribute to the overall renovation costs?
The cost of building a new deck can impact renovation costs, and the price may vary depending on several factors.
“Cost of Building a Deck in Auckland for 2023,” the estimated price ranges for building a new deck in Auckland, New Zealand, are as follows:
- Basic deck: $350 to $550 per square metre
- Mid-range deck: $550 to $700 per square metre
- High-end deck: $700+ per square metre
These price ranges can impact the overall cost of full home renovations, and they are based on factors such as the materials used, the size and complexity of the deck, the type of foundation required, and the level of finishes and detailing. It’s important to consider additional costs such as council permits, site preparation, and landscaping.
It’s worth noting that these price ranges are estimates only, and the actual cost of building a new deck may vary depending on the specific requirements and circumstances of the project.
Cost of Building a Deck in Auckland for 2023 – Full Guide
How much does it cost to install an alarm or security system for your home?
he cost of installing an alarm system in an Auckland home can impact renovation costs, and the price may vary depending on several factors such as the type of system, the size of the home, and the level of security required.
Cost of Installing a Security System in Auckland for 2023,” the estimated price ranges for installing an alarm system in an Auckland home in 2023 are as follows:
- Basic system: $800 to $1,500
- Mid-range system: $1,500 to $3,000
- High-end system: $3,000 to $6,000+
These price ranges can impact the overall cost of full house renovations, and they are based on factors such as the number of sensors, cameras, and other components required, as well as the complexity of the installation. It’s important to consider additional costs such as ongoing maintenance and monitoring fees, as well as any necessary upgrades to existing systems.
Guide on Creating a SMART Home in Auckland
How much does it cost to change a water cylinder? – What does it contribute towards the overall renovation costs?
When considering the cost of installation for house renovations, it’s important to note that there may be additional expenses beyond the cost of the cylinder itself. For example, if the new cylinder requires plumbing or electrical work, this may increase the overall cost of the installation. Additionally, there may be expenses related to any necessary upgrades to the existing system, such as new pipes or valves.
The cost of a hot water cylinder can also vary depending on the type of cylinder. For example, an electric hot water cylinder may be less expensive than a gas or solar-powered cylinder. Similarly, larger cylinders will generally cost more than smaller ones.
If you are planning full home renovations in Auckland that include installing a hot water cylinder, it’s important to get an accurate cost estimate from a professional plumber. The estimated price ranges for installing a hot water cylinder in Auckland in 2023 are:
- Basic cylinder: $1,200 to $2,000
- Mid-range cylinder: $2,000 to $3,500
- High-end cylinder: $3,500 to $6,000+
The cost of changing your cylinder is not substantial compared to other aspects of renovations but it is important to consider all the small and big parts of your renovation so you have a realistic idea on what your budget should be.
So how much does it cost to renovate your home for this type of a full home renovation in Auckland?
The answer to this is not simple, as it really depends on the number of areas you are renovating, materials you choose. However as an idea, if you are renovating a standard 3 bedroom home with 2 bathrooms then your overall renovation costs for your full home renovation could look something like this:
- Kitchen renovation: If you are using a mix of mid-range and premium range materials for a standard kitchen could start from about $40,000.
- Bathroom renovation: Each bathroom could range between $34,000 to 36,000. If you are getting consent related work done then it will add $3,000 to $5000 more depending on the complexity.
- Adding or renovating a deck would amount to be about $8,000 or so depending on the size and material used
- Double glazing would be around $35,000 or more depending on the number of windows.
If you are getting this type of a renovation for a 3 bedroom standard home then you can expect to pay between $120,000 to $180,000.
Type 3 – Extensive Interior and Exterior renovation with major structural work – How much does a full home renovation cost?
Scope of Work: This type of renovation includes stripping down the house to its main structure and re-doing the entire interior. This would also include exterior renovation which could include re-cladding, renovating the roof, and landscaping, and installing an electronic gate.
Home renovations of this type can be very extensive and require the family to move out of the house for the duration of the project. This type of renovation is typically done for clients who have an old family home but love their location and community. Instead of moving to a new house, they would rather renovate the entire home to something modern and that caters to the needs of all members of the family. Home renovations can involve major changes such as knocking down walls, adding rooms or floors, installing new plumbing and electrical systems, and updating the kitchen and bathrooms. The goal of home renovations is to create a comfortable, functional, and aesthetically pleasing living space that meets the needs of the family and adds value to the property.
This type of home renovations in Auckland are done to also add convenience, modernise an old home, and add a sense of luxury to the home as it would be used as a future comfortable family home.
Kitchen renovation – How does it contribute to the overall renovation costs?
Renovating your kitchen can make a great first impression on your guests, especially in open-plan kitchens. In Auckland, the cost of a luxury kitchen renovation ranges from $50,000 to $100,000 However, it is important to spend your money wisely as the cost of a custom-built luxury kitchen can be limitless. A luxury kitchen typically includes a new layout, custom storage, cabinets, high-quality countertops, marble or designer flooring, and brand-new appliances.
The main difference between mid-range and luxury kitchens is that the latter allows for the incorporation of high-end and premium materials. If you’re looking to renovate your kitchen, be sure to consider the cost and benefits of each option carefully.
Open Kitchen Design Vs Closed Kitchen Design – A Kitchen Designer’s Perspective
Kitchen Cabinetry
In a kitchen renovation, the cabinetry makes up the bulk of the overall renovation cost. For this type of a kitchen renovation, clients often prefer using mid to high end kitchen cabinetry material with ample in-built storage and modern technology.
Handcrafted Kitchen cabinetry
As an example we are showcasing the luxury kitchen display in our renovation showroom. This kitchen displayed in our showroom aims to demonstrate the option of having custom cabinet fronts that are handcrafted to include the design seen in the front of the cabinets.. Crafting this particular kitchen requires a higher level of skill compared to our other kitchen models, as all the cabinets are handmade instead of being produced in a factory. The design of this kitchen was conceptualized by our senior kitchen designer, Cici.
Why are these cabinet fronts so special compared to the others in our kitchen showroom? The actual cabinet fronts are made from MDF which are then cut by hand to make the paneling around the cabinet fronts. This requires quite a high skill set compared to manufacturing the cabinet fronts in a machine.

Our Auckland kitchen showroom offers an opportunity to see a classic kitchen made with luxurious materials that are crafted by hand.
The style of the kitchen also plays a vital role in the design of such a kitchen. Our clients often work closely with our kitchen designers to create a certain style that suits the overall design of the home whether it may be traditional, classic, modern, contemporary, cottage style of industrial style. Each element is selected with a purpose to bring create a particular theme for the kitchen design.
How much does it cost to renovate a Kitchen in NZ – 2023 edition
What makes these cabinet fronts unique in comparison to the others showcased in our kitchen showroom? The cabinet fronts are crafted from MDF and cut by hand to create the paneling around them, which requires a higher level of skill than using a machine. All the cabinet fronts are spray-painted with ‘half black white’ matte finish lacquer paint, except for the island cabinets, which are painted with ‘Madison blue’ matte finish lacquer paint.
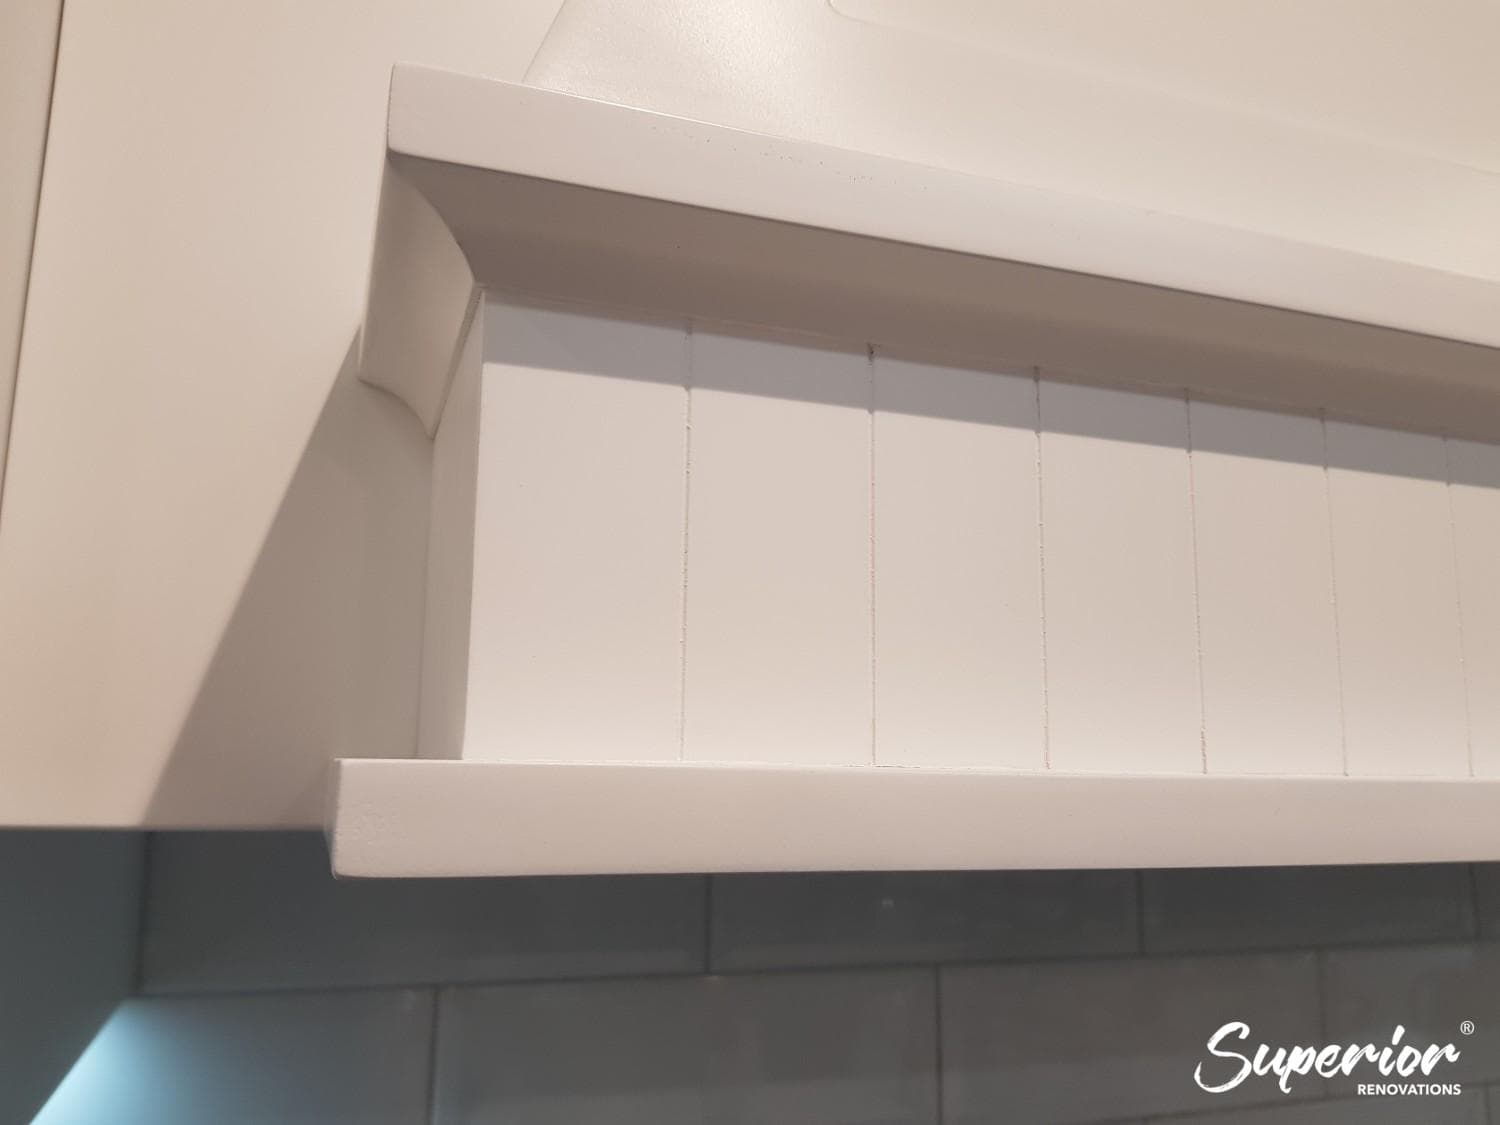
Handcrafted detailing in our hooded rangehood in our kitchen showroom in Auckland
Guide on Designing 6 Different styles of Kitchens – Classic, Traditional, Modern, Contemporary, Cottage and Industrial Kitchen designs

To produce an attractive contrast with the white cabinets, all cabinet fronts in the classic kitchen were painted using the color ‘Madison blue’.
Typically, classic kitchens feature a neutral palette for the cabinets, as neutrals are timeless and always in fashion. Color is usually added to the design through the use of colorful tiles or brass tapware. However, in this case, Cici, our lead kitchen designer, opted for blue cabinets for the island to give it a more classic cottage-style look. Blues have always been a popular choice in classic country kitchens, and she wanted to create a contrast that would make the kitchen a showstopper. With most kitchens being open-plan, it’s important to pay close attention to the aesthetics of the kitchen design. Cici believes that a kitchen should enhance the beauty of the living space, rather than just being a functional area for cooking.
In Built Appliances
Another feature of this type of a kitchen renovation is to have your larger appliances like dishwashers, bins, fridges etc within the cabinetry for a seamless look. Some examples of this can be seen below:

Benchtops that are 60mm thick are not very typical, as the most commonly used types of benchtops have a thickness of 30mm. The engineered stone benchtop in this case has veined lines designed to imitate the natural lines seen in marble.
Concealing your dishwasher and refrigerator behind your cabinets can give your kitchen a smooth and elegant appearance, which is particularly beneficial for open-plan kitchens where appearance is more important. To achieve this, the dishwasher and fridge are fitted with cabinet fronts that make them look like regular cabinets from the outside. We have installed such hidden appliances in our kitchen showroom to demonstrate their appearance and functionality to our clients.

Hidden dishwasher in our matte black kitchen display in our renovation showroom in Auckland. This gives the overall kitchen a seamless look from the outside and is perfect for open plan living kitchens.

Double bins that go back into the cabinetry for a large scale home renovation in West Harbour, Auckland. This is another feature that adds to the seamless feel of a kitchen.
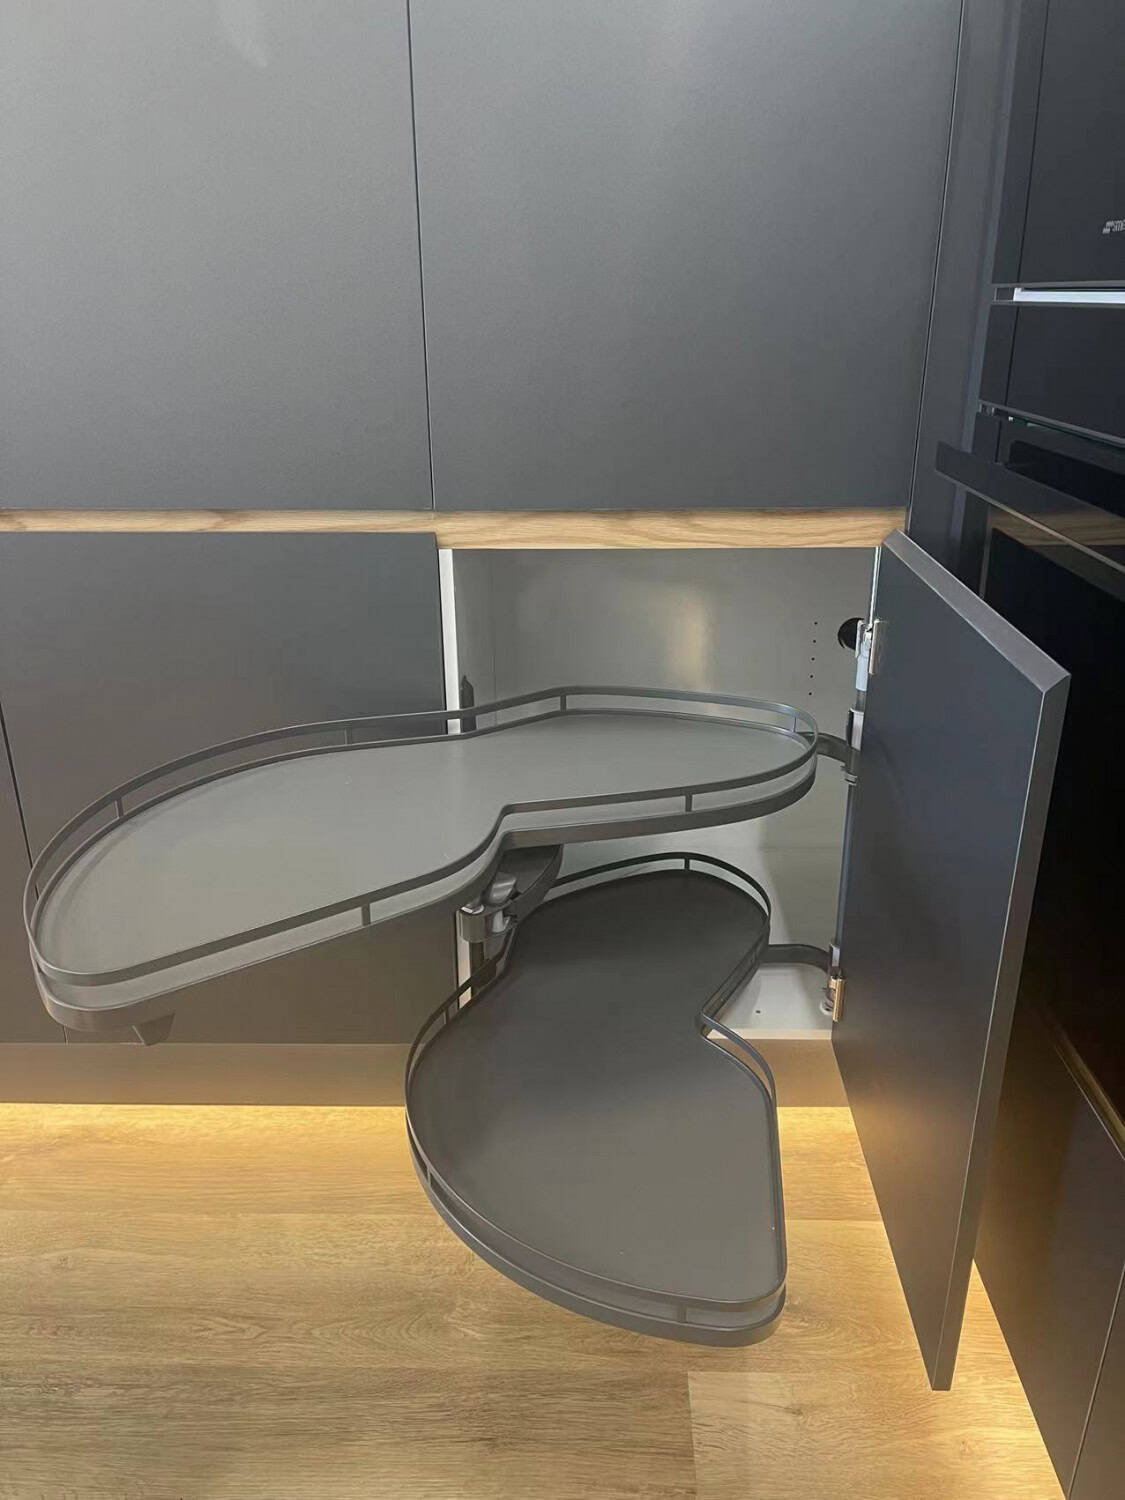
This magic corner can be seen in our kitchen renovation display in our renovation showroom. This is usually built within the corner L-shaped cabinets as this makes retrieving items in the corner easier and makes for a more organised storage solution.
Read more…
Creating an Impact with Feature walls
Most kitchens now are incorporated within a larger living space which promotes an open-plan living. This means that your kitchen design needs to look uncluttered (hence in built storage and hidden appliances) and is aesthetically pleasing which complements the rest of the open space. This means that there is an added emphasis on how the kitchen actually looks.
The feature walls seen below show 2 different kind of splashbacks within the kitchen design. This kitchen has two feature walls, each with its own unique function.
The first feature wall visible below serves to add depth to the kitchen and give it a luxurious appearance. The wall is adorned with 3-dimensional tiles in a sheet format, sized at 256 x 297 x 8mm. These tiles combine marble and gold metal mosaic, and were sourced from Tile Depot, specifically known as ‘Mosaix Lux Gold Herringbone White 275 x 303’.
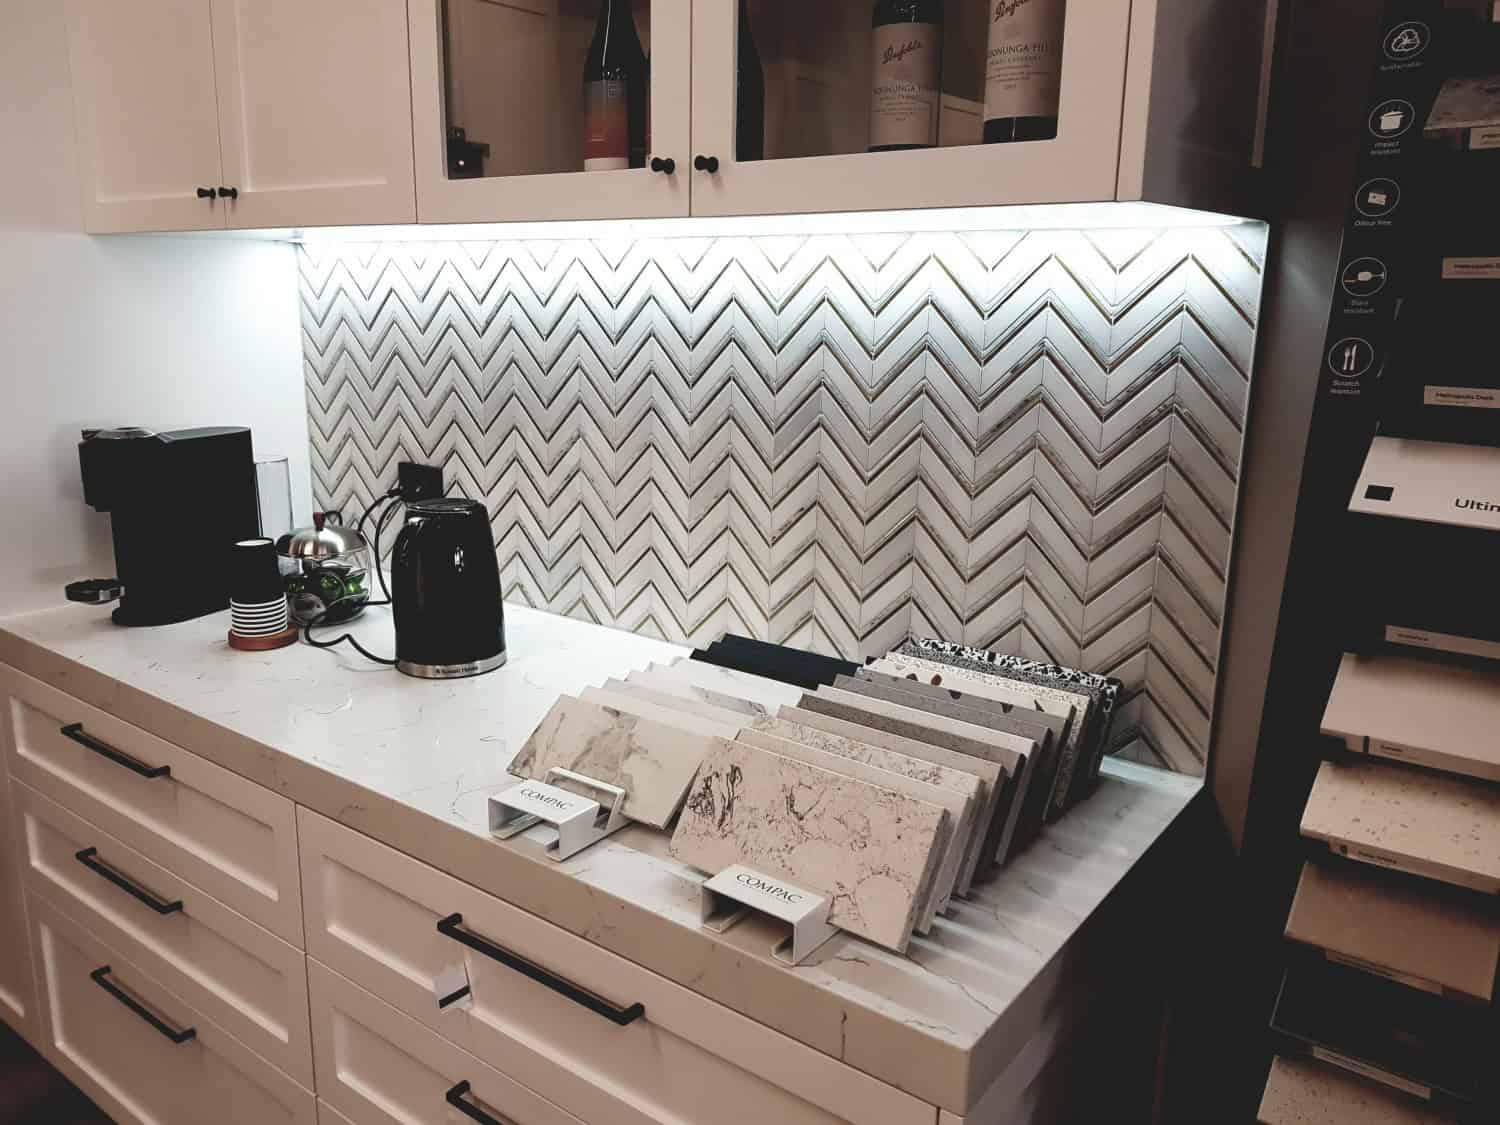
The Tile Depot’s exquisite tile sheets were utilized to enhance the elegance of this highlighted wall by installing them in a Herringbone pattern. These sheets comprise a blend of stone engineered to resemble marble and gold metal. This display can be viewed at our Auckland (Wairau Valley) kitchen showroom.
These exquisite tile sheets obtained from Tile Depot were utilized to infuse a hint of opulence to the feature wall. The tiles are arranged in a Herringbone pattern, consisting of a blend of stone that mimics the appearance of marble and gold metal. You can view this design in person at our Auckland-based kitchen showroom located in Wairau Valley.
Read more..
How to Choose your Kitchen Tiles, and Splashbacks by Tile Depot Consultants
For the area above the cooktop we chose white subway tiles from tile depot. White subway tiles are a defining aspect of classic kitchen designs, and we aimed to integrate them into this particular design. The tiles’ polished finish makes them easy to maintain and suitable as a cooking splashback. Additionally, utilizing two distinct types of splashback tiles in the kitchen contributes to the overall visual appeal and depth of this kitchen design.
Feature wall as a Splashback – Lynette and Henry’s retro style Kitchen renovation
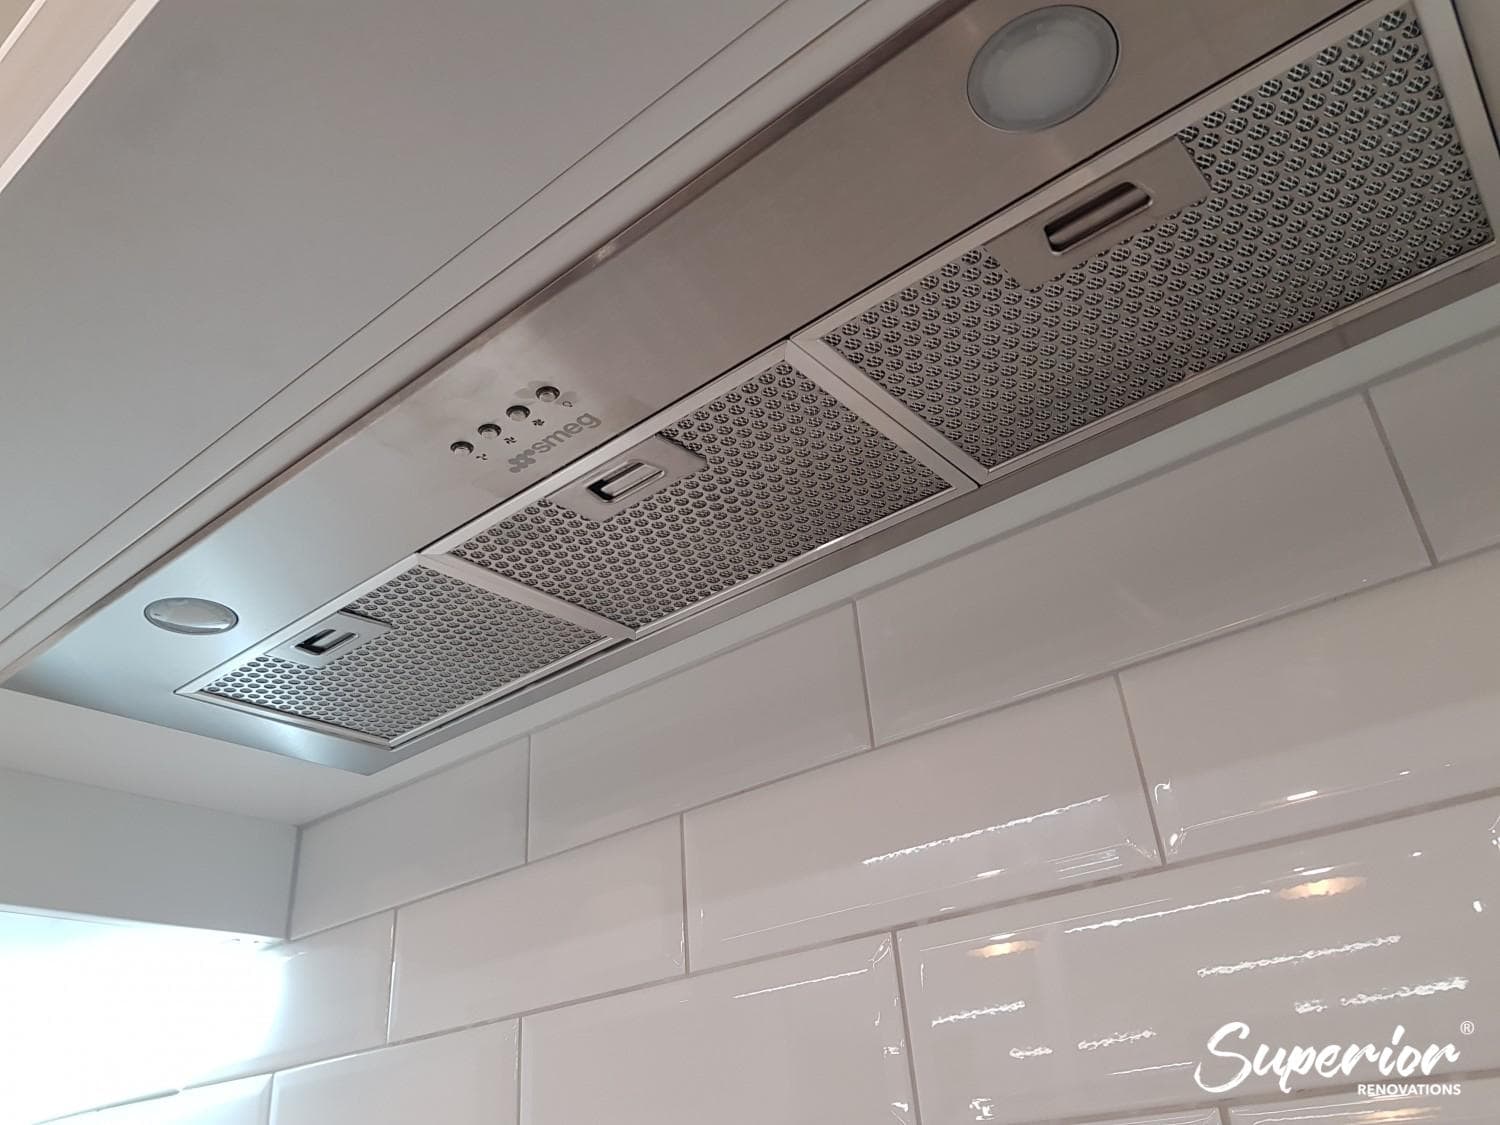
The modern rangehood from SMEG has a custom built classic style cabinetry on top of it to mimic the more classic and bygone look of range hoods. This is complemented by white glossy subway tiles for easy cleaning while cooking.
If you are looking at renovating your kitchen with this level of customisation and space then you are looking at spending between $50,000 to $65,000. There are however kitchens in this type of a home renovation that can cost lesser if the space is smaller or if premium acrylic panels are used in place of the hand crafted cabinetry.
Here is an example of a kitchen renovation that will cost you lesser as the cabinet fronts are manufactured using a machine. This kitchen renovation we carried out in Herne Bay, Auckland showcases a kitchen which might look simple but actually featured premium acrylic panels from Laminex.
The kitchen seen below would be in the range of $50,000 to $55,000 owing to the materials used.
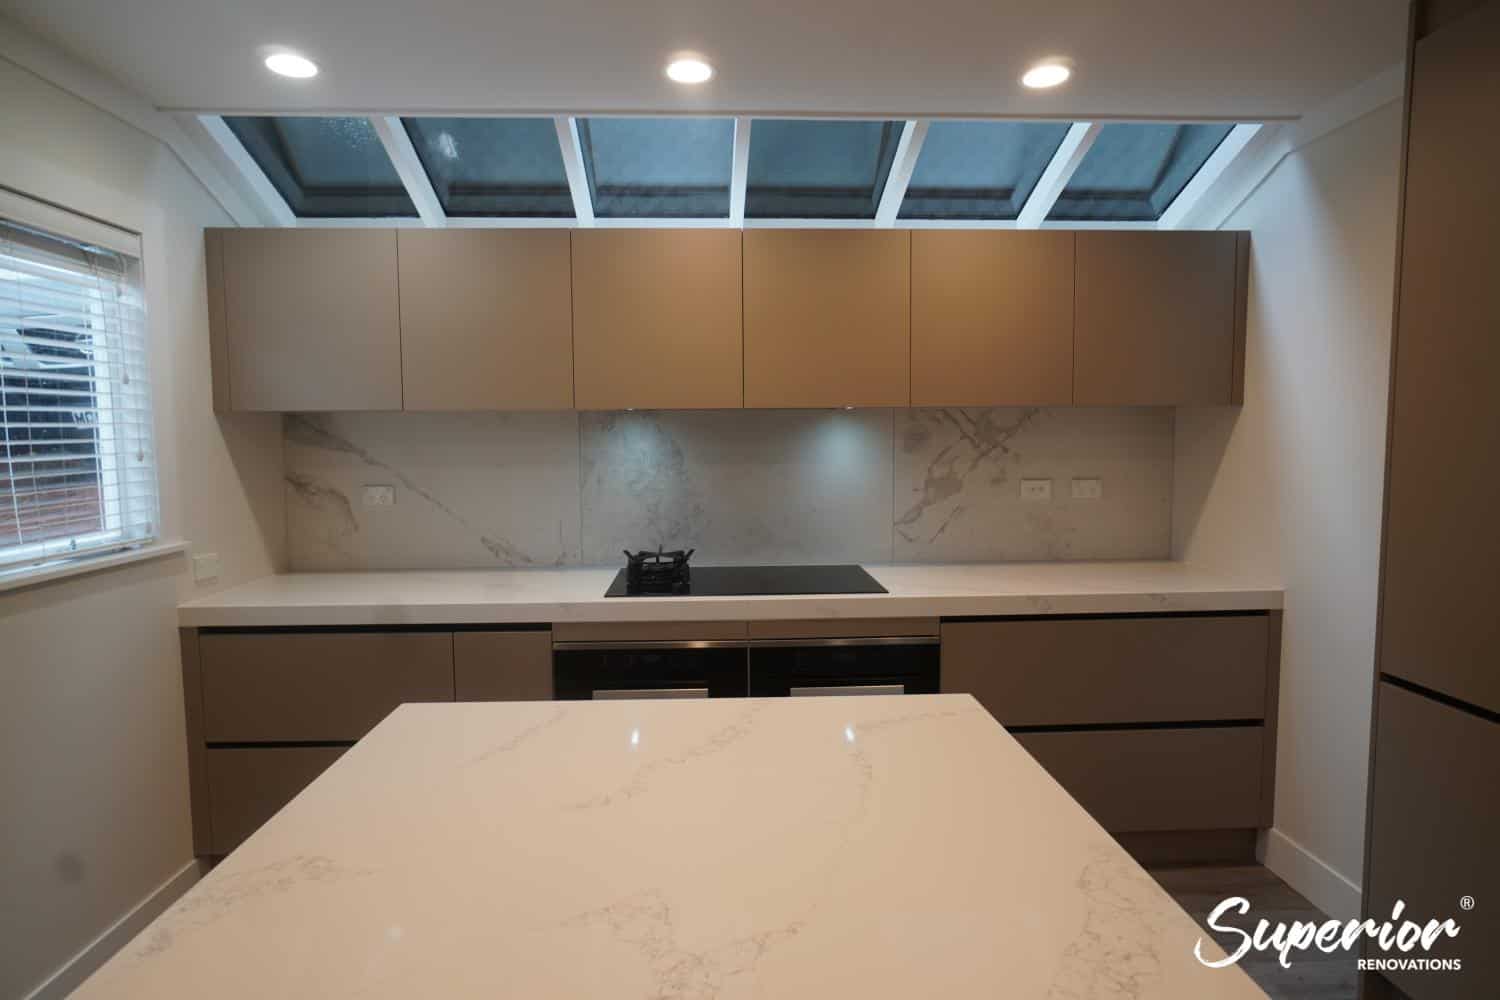
This kitchen was renovated using beige matte satin finish laminate from Laminex. They have a satin finish, are stain resistant, have high heat endurance, and fingerprint resistant.
The cabinets are scratch resistant, finger print resistant, stain resistant and have a satin finish. This kitchen also has all its appliances hidden within the cabinetry and also has ample inbuilt storage.
The waterfall countertop is also 60mm thick which is made by joining two pieces of countertop at a 45 degree angle.
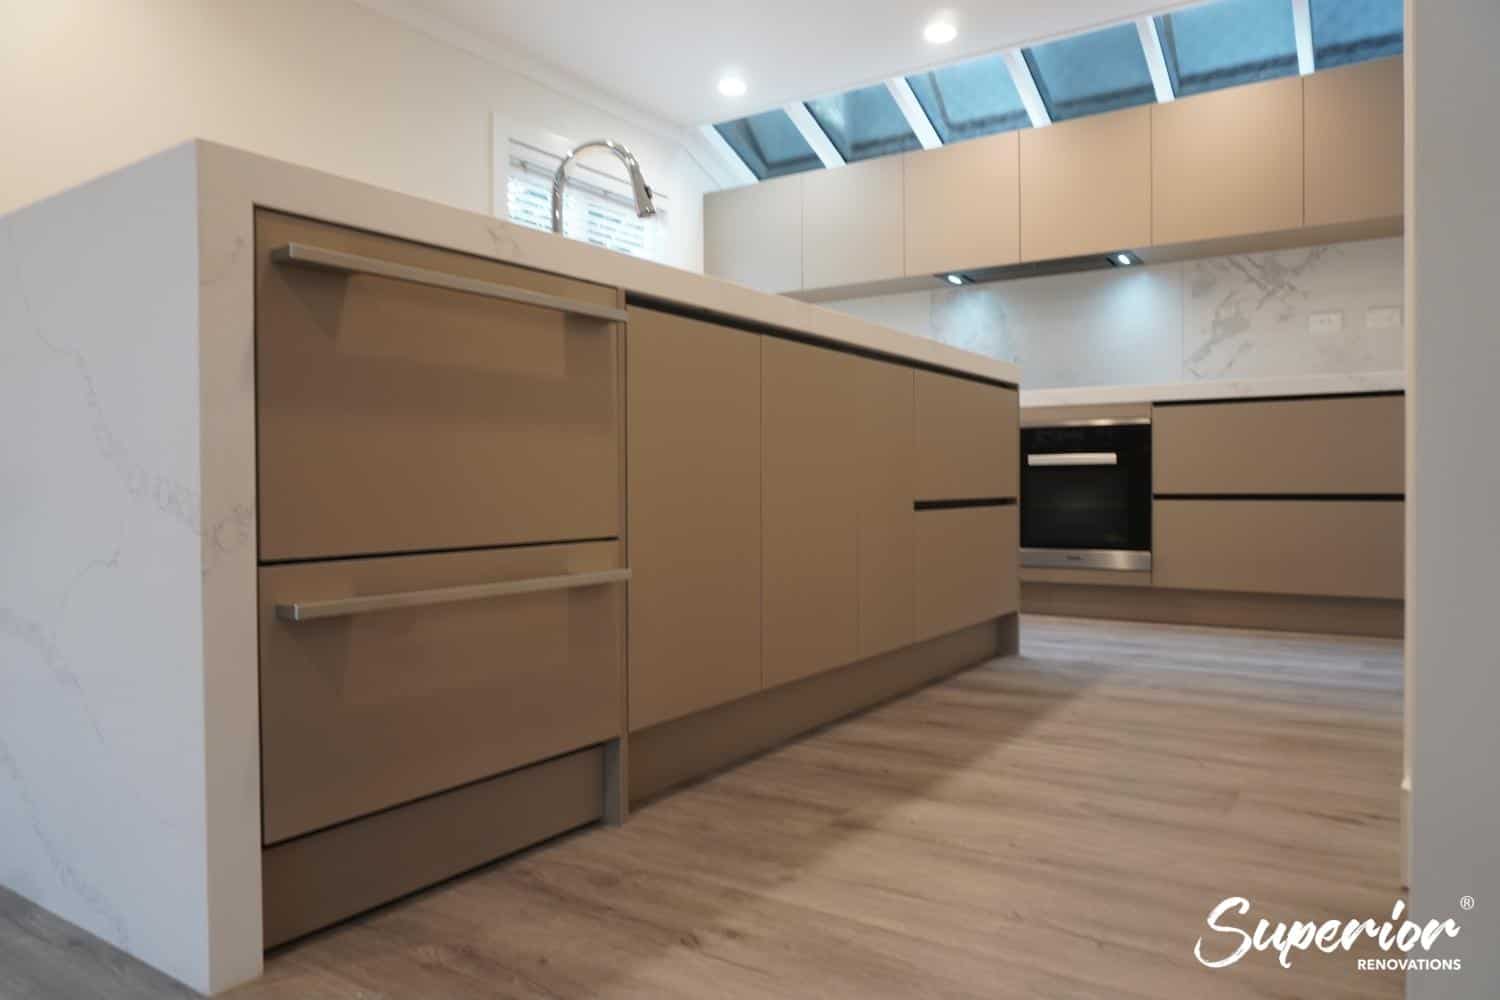
A waterfall edge for the 60mm benchtop
Another example of a kitchen renovation in an extensive home renovation is the kitchen seen below. This kitchen was renovated in West Harbour and due to its large size it will cost between $40,000 to $45,000. This kitchen also features premium acrylic panels from Laminex.
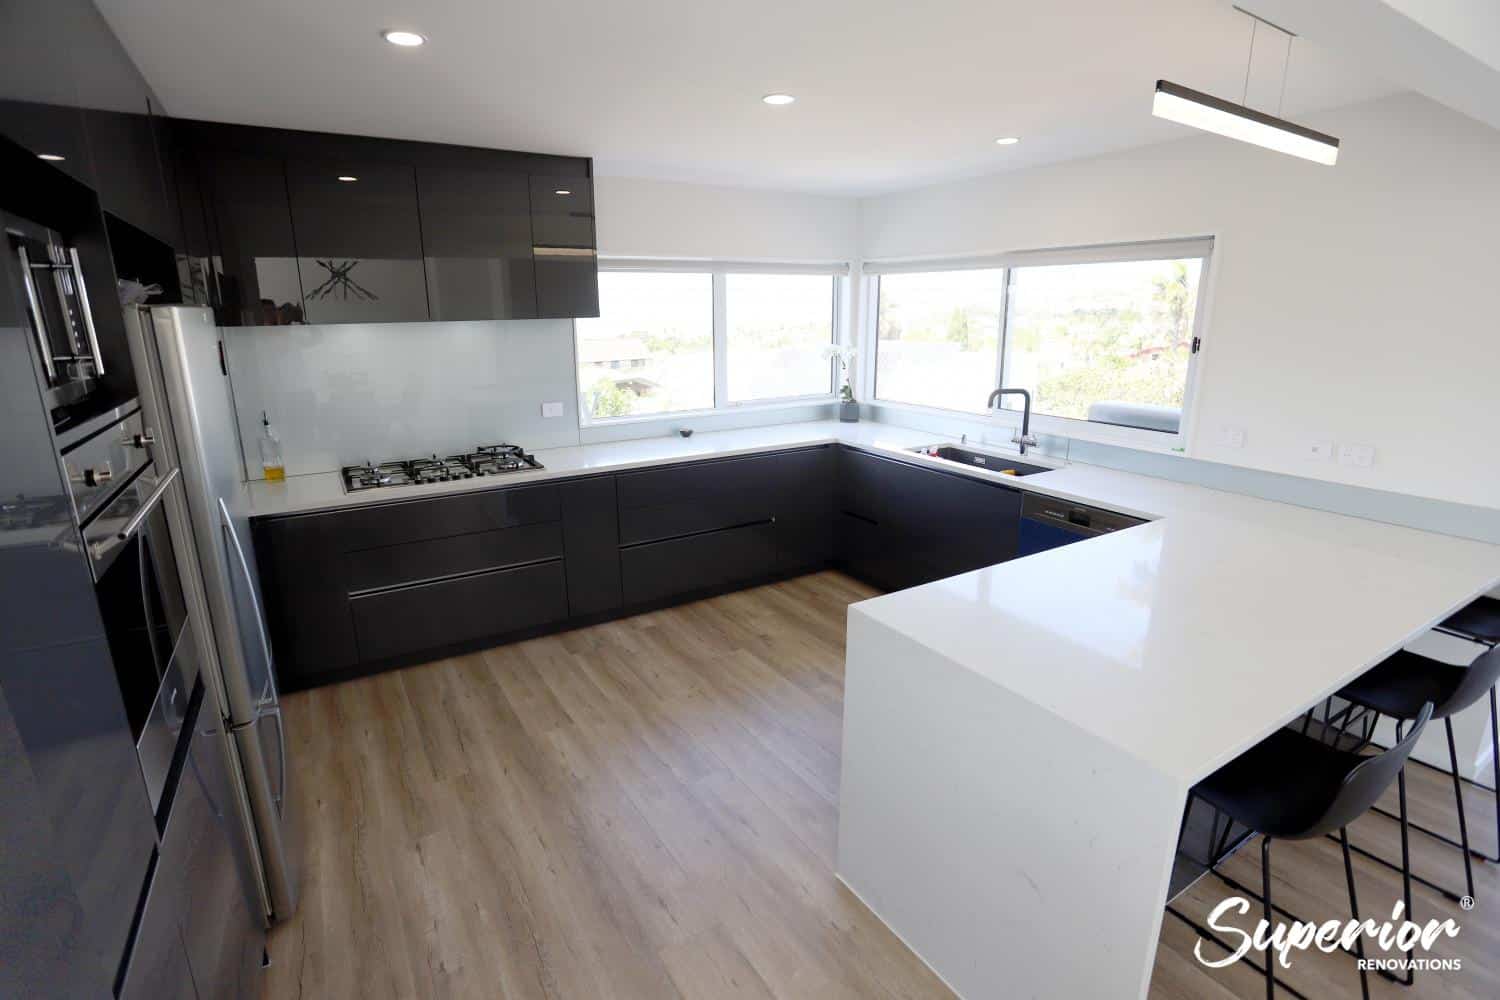
This large kitchen features premium laminate panels in high gloss black with a matte finish 30mm waterfall edge benchtop.
Custom Bathroom Renovations – What does it contribute to the overall renovation costs?
Renovation costs for a high-end bathroom renovation in Auckland, New Zealand can vary widely based on several factors. According to industry estimates, the cost of a luxury bathroom renovation can range from $30,000 to $60,000 or more. The actual cost will depend on various factors such as the scope of the project, materials used, and level of customization required.
Many of our clients which want a more luxurious bathroom renovation end up paying about $6,000 to $10,000 on fittings alone as they are renovating to add luxury and comfort in their lives. Others are renovating to upgrade their bathroom from an old and dated space to a bathroom with minor structural change to enlarge a space into something more up to date and modern. This minor structural change could include incorporating a toilet which will require drawings by the architect and constructing additional waste pipes.
Some clients who are looking at luxurious fittings may include a free standing bathtub from Kado (a hotel luxury brand from Reece) that comes upto $3000. Or they may be going for a particular theme in terms of design whether it is a spa inspired bathroom or a contemporary bathroom with feature walls.
Spotlight on some of our luxury bathroom renovations
Vintage Bathroom renovation of a 1920’s bungalow in Auckland:
This bathroom renovation while not a very expensive bathroom, features some premium fixtures such as its free standing bathtub and Edwardian looking vanity. We also faced the challenges of working within a fairly tight space with fittings that were relatively on the larger side. See full project specifications for the bathroom below + Pictures.
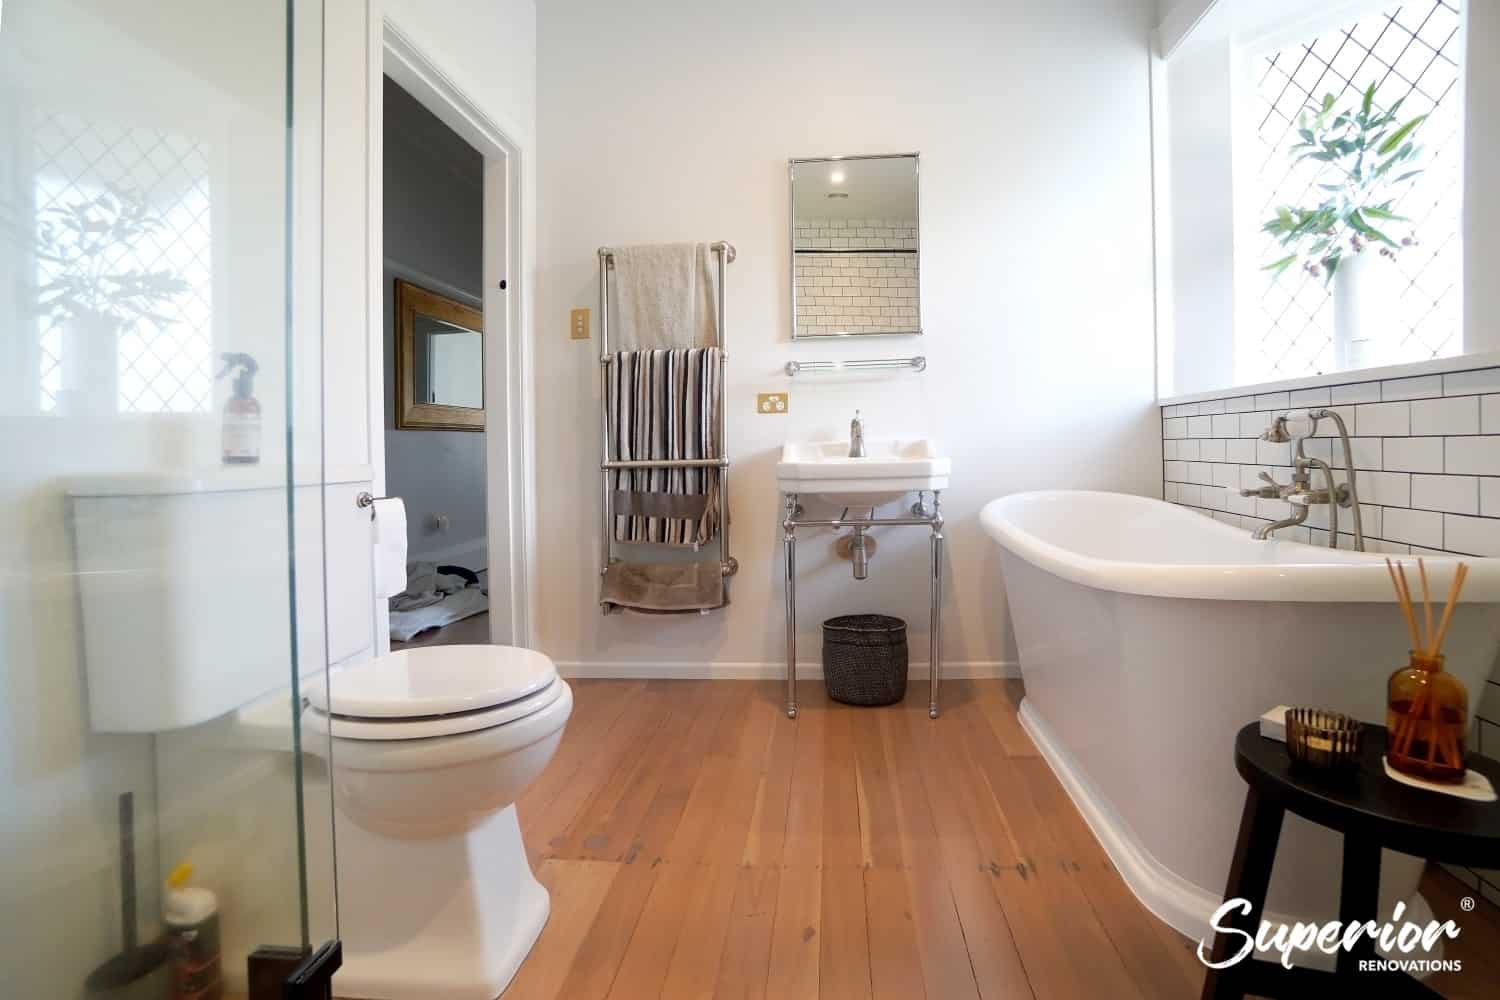
This bathroom features a vintage bath, Edwardian basin, vintage subway tiles, and antique looking brass tapware.
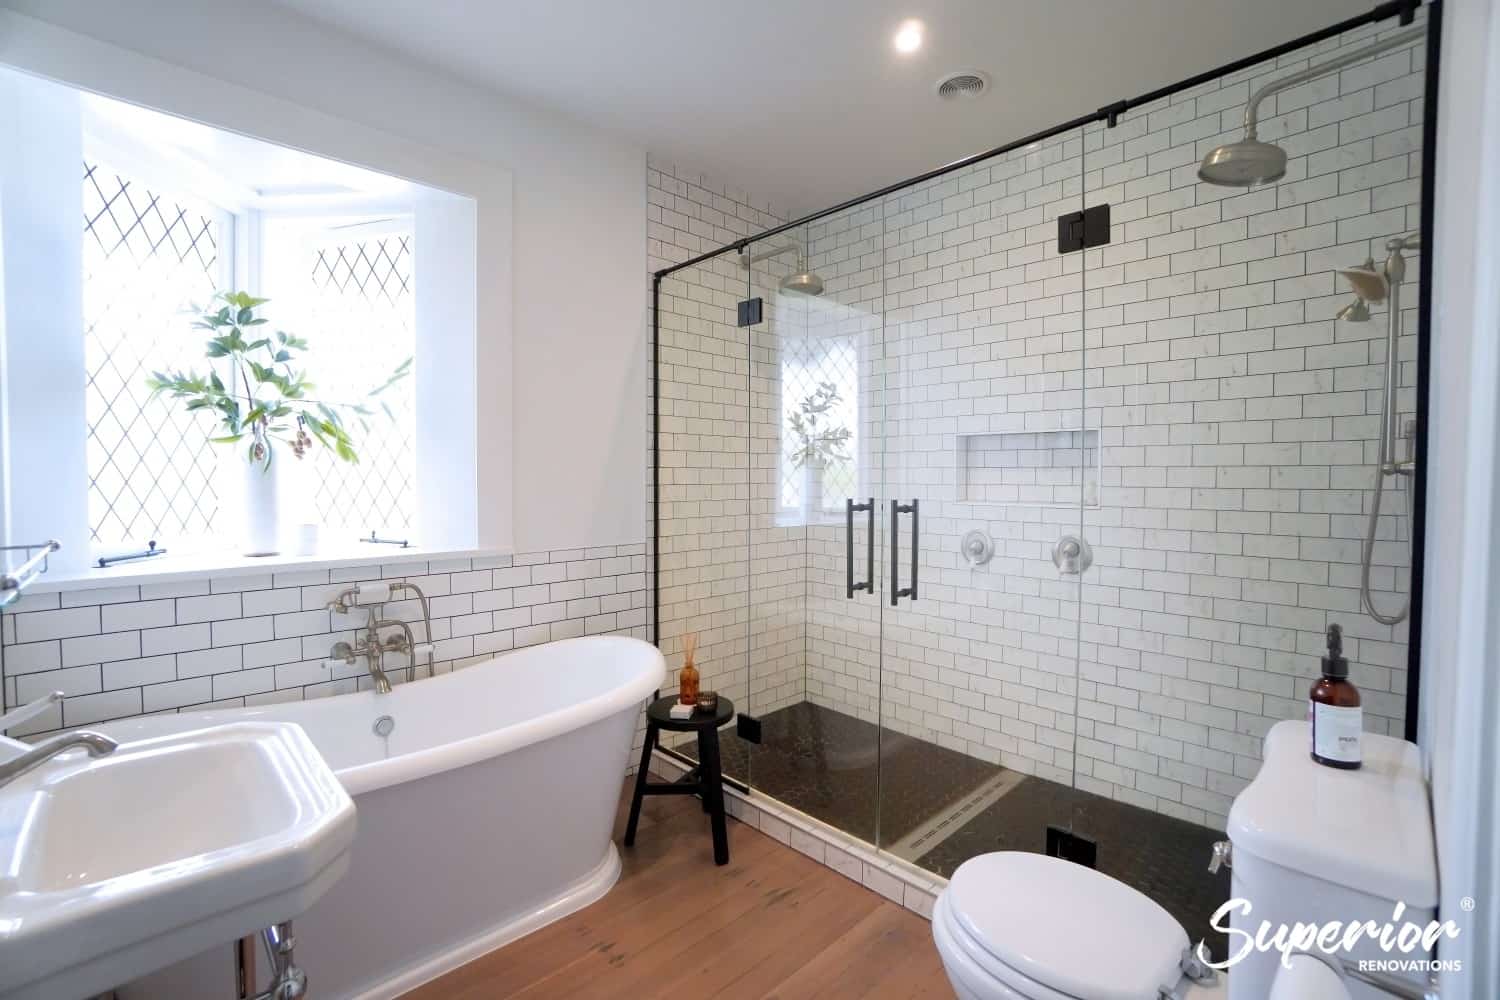
Vintage bathroom with a large double wet area.
Bathroom Renovation in West Harbour
4 bathrooms were renovated in the full home renovation in Auckland as this was a large scale and extensive home renovation. The older bathrooms were dated and were renovated to include large tiles, spacious bathrooms, mid-range vanity and bathtub as well as a custom built glass shower. This type of a bathroom does not feature luxury fixtures but instead is a mid range bathroom within a large scale home renovation. See full project specifications for project below + Before and After pictures.
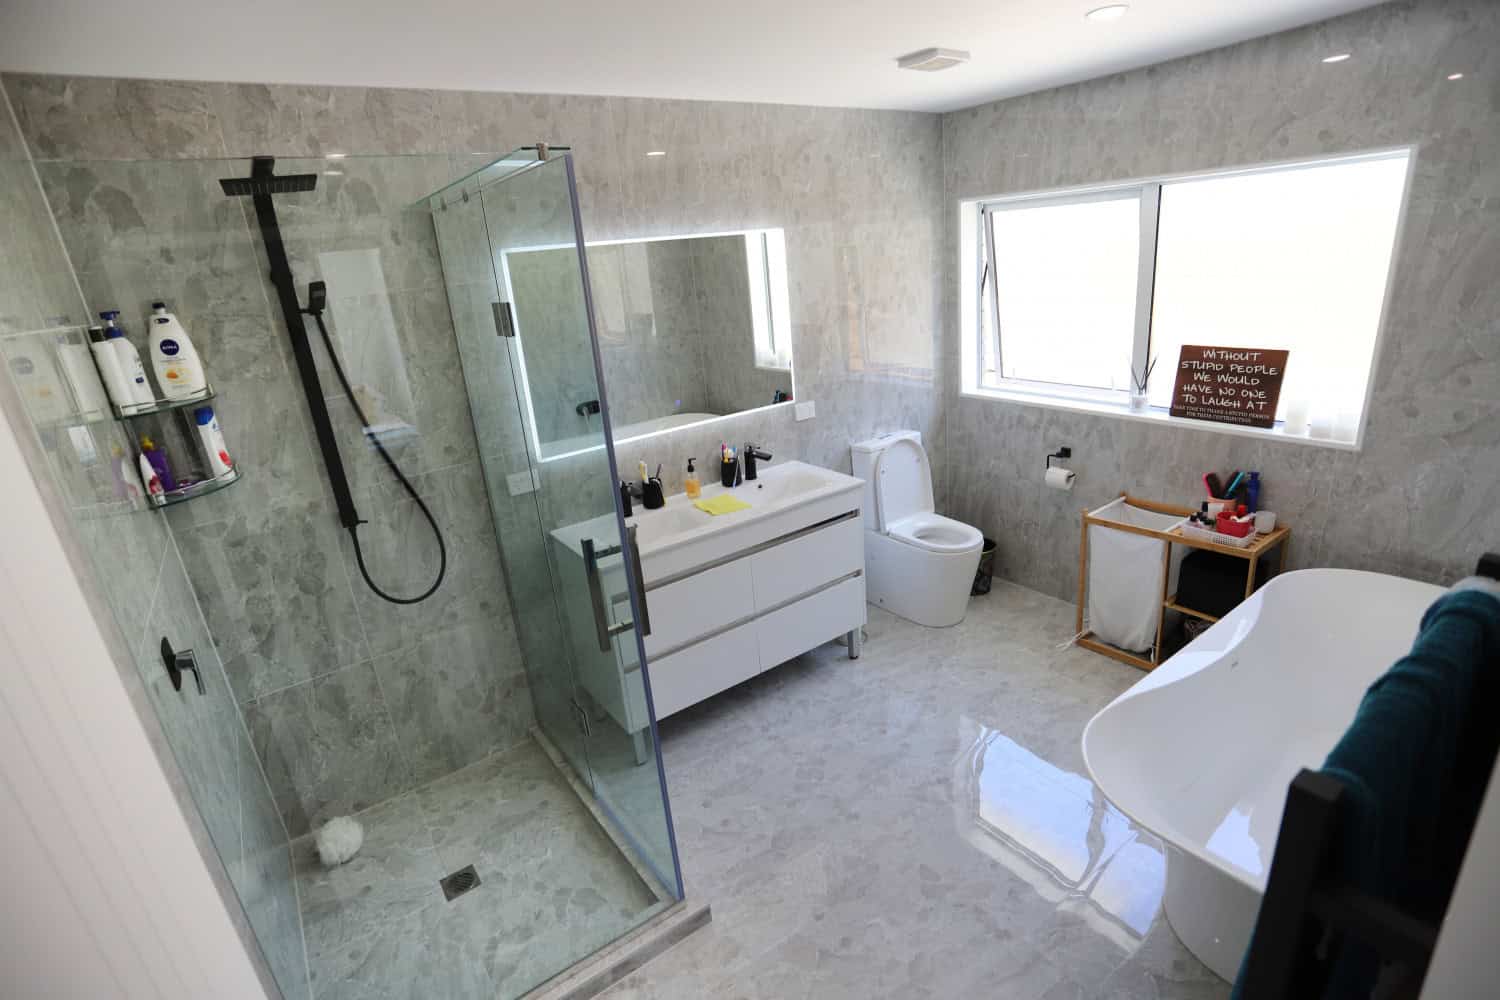
Bathroom renovated in West Harbour as part of an extensive full home renovation in Auckland.
Bathroom Renovation in Redvale
This bathroom was renovated in a contemporary style with matte greyish hued tiles for the floors and walls, free standing bathtub, custom vanity and benchtop, and a tiled shower. See full project specifications + Pictures.
In conclusion a bathroom renovation will make a significant amount towards the overall renovation costs depending on the number of bathrooms, the premium fittings you choose as well as any structural changes that you might be doing. Not all clients that are getting an extensive full renovation get luxurious bathrooms, sometimes they are just upgrading the bathroom to include modern conveniences.
Outdoor home renovations to include Indoor outdoor living – How much does landscaping contribute to the overall renovation cost in a home renovation?
What does landscaping for a full home renovation look like? This type of landscaping usually includes the following:
- Outdoor deck and Pergola
- Outdoor cooking areas to include a BBQ, or a Pizza oven
- Pathways and Paving
- Electric gates and Fencing
- Standard green lawn
What does it cost to create an outdoor deck?
This will depend on the size of the deck, the material used and the complexity of the design. Some of the more premium choices for deck for this scale of a home renovation is Kwilla. According to industry estimates, the cost of building a Kwila deck in New Zealand can range from $350 to $550 per square meter.
In addition to the cost of building the Kwila deck, you should also consider ongoing maintenance costs. Kwila is a hardwood that requires regular oiling to maintain its appearance and prolong its lifespan. Therefore, you should factor in the cost of regular maintenance when budgeting for a Kwila deck.
Spotlight: This home that we renovated includes a Kwilla deck with steps that go towards the fencing of the home. This deck provides ample space for entertaining and gives spectacular views of the seaside in front of it.
The steps leading up the fence of the house. If you are adding additional features like seating then the cost of the deck will increase.
If you are not creating your deck with Kwilla, then there are other options like basic timber which will on an average cost between $1000 to $2000 per square meter. A composite deck will cost between $1500 and $2,500, and hardwood would be between $2000 and $4000 per square meter.
How much does it cost to build a pergola in Auckland?
The cost to build a pergola will also depend on the material used, size, and complexity of design. The average cost to build a standard pergola will be between $3,000 and $5,000. Pergolas are a great addition to enhance the design of your outdoor space.
How much does it cost to incorporate an outdoor cooking area?
Renovation costs for an outdoor cooking area in Auckland can vary depending on factors such as size, materials, appliances, labor, and additional features. The cost of outdoor cooking appliances such as grills, pizza ovens, and smokers can range from a few hundred dollars to several thousand dollars each. The materials used for the outdoor cooking area, such as stone, brick, or wood, can also impact the cost. Labor costs for installation and any additional features like seating and dining areas can add to the overall cost. As a general guideline, a fully-equipped outdoor cooking area can cost several thousand dollars to tens of thousands of dollars.
How much does it cost to create pathways and pavements? How much does it contribute to the overall renovation costs?
As a rough estimate, you can expect to pay between NZD $50 and $150 per square meter for a basic concrete or gravel pathway, while more expensive materials like pavers or natural stone can cost between NZD $100 and $200 per square meter.
Other factors that can impact the cost of building outdoor pathways include the amount of site preparation required, any necessary grading or excavation work, and the cost of any additional features such as lighting or landscaping.
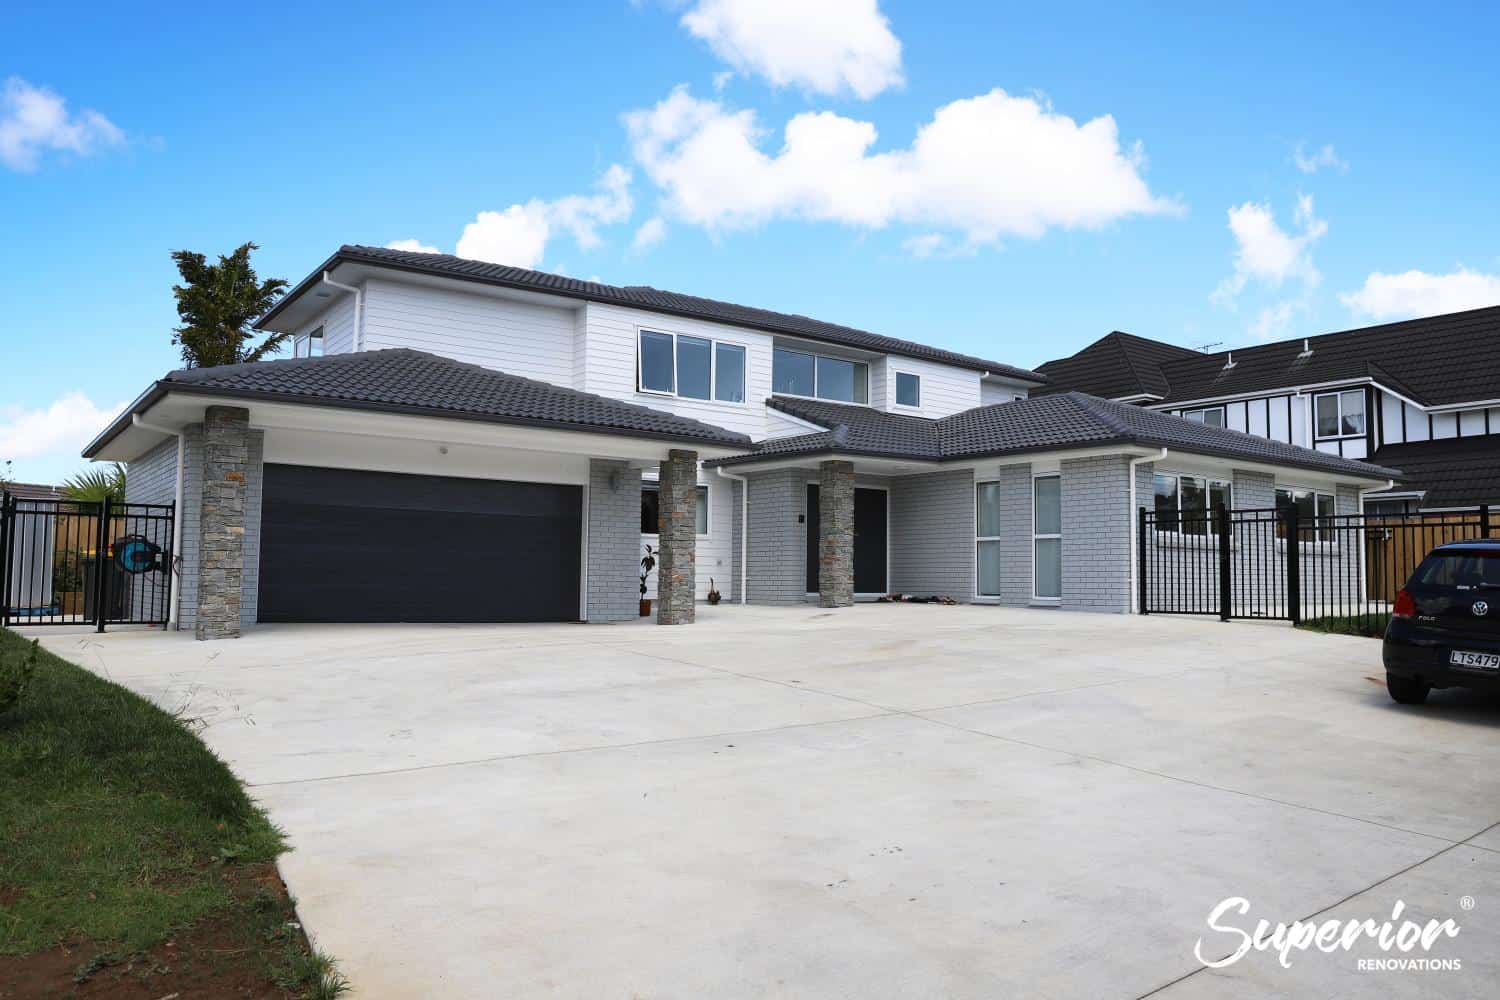
This home renovation in Auckland features a driveway by pouring concrete that was matched in shades with the exterior of the home.
See full details of this project with Before and After Pictures
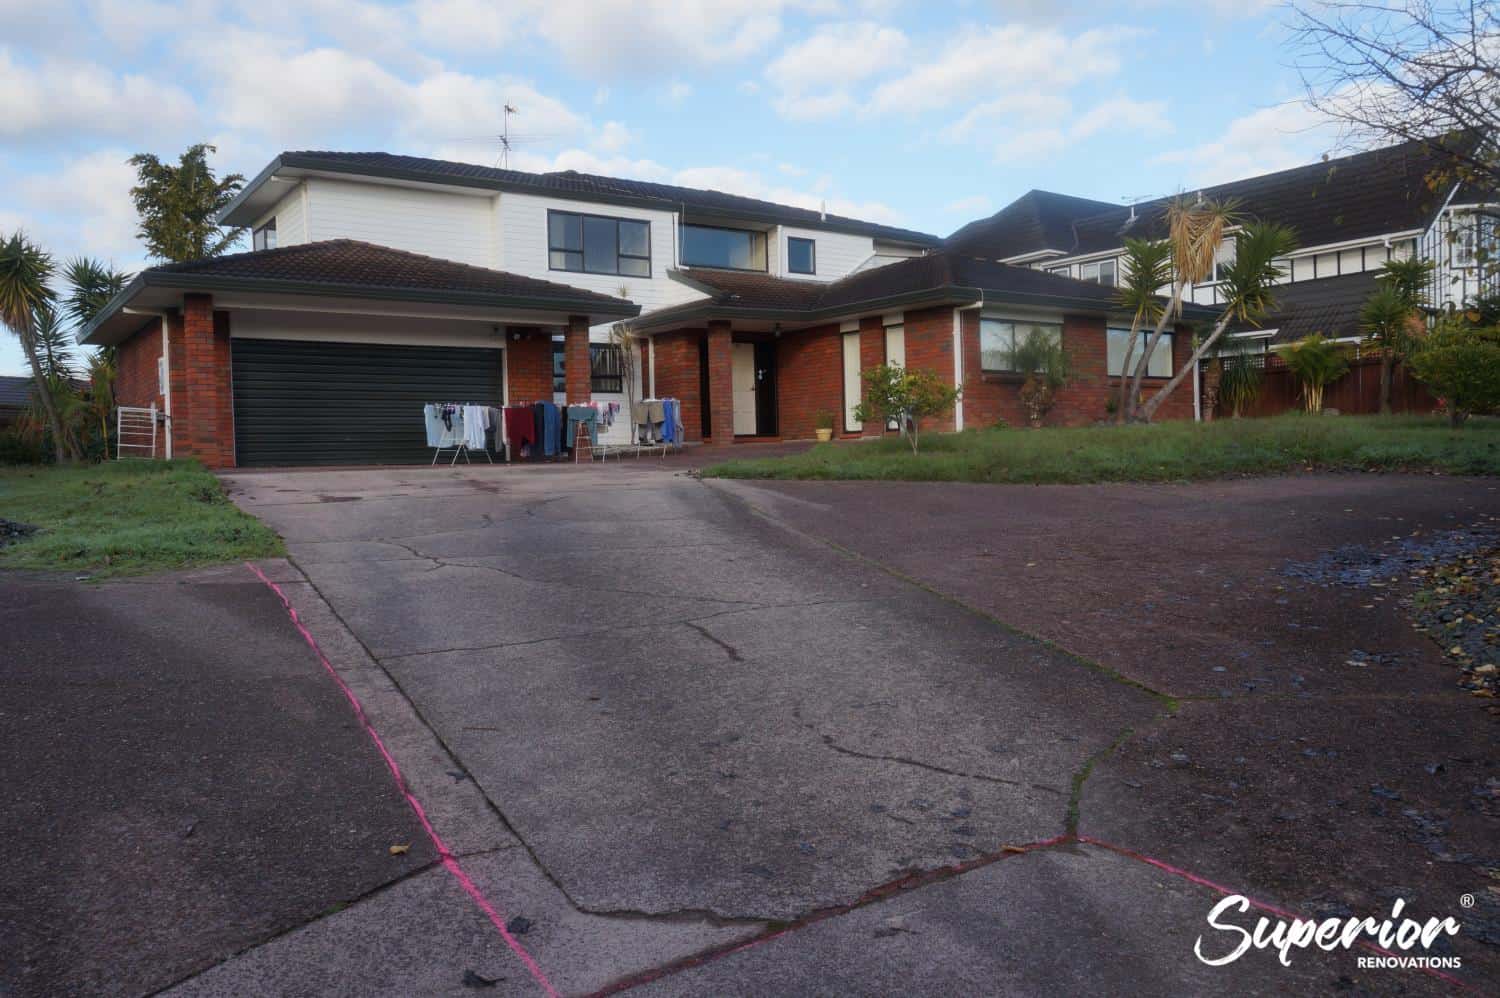 Before the Renovation | 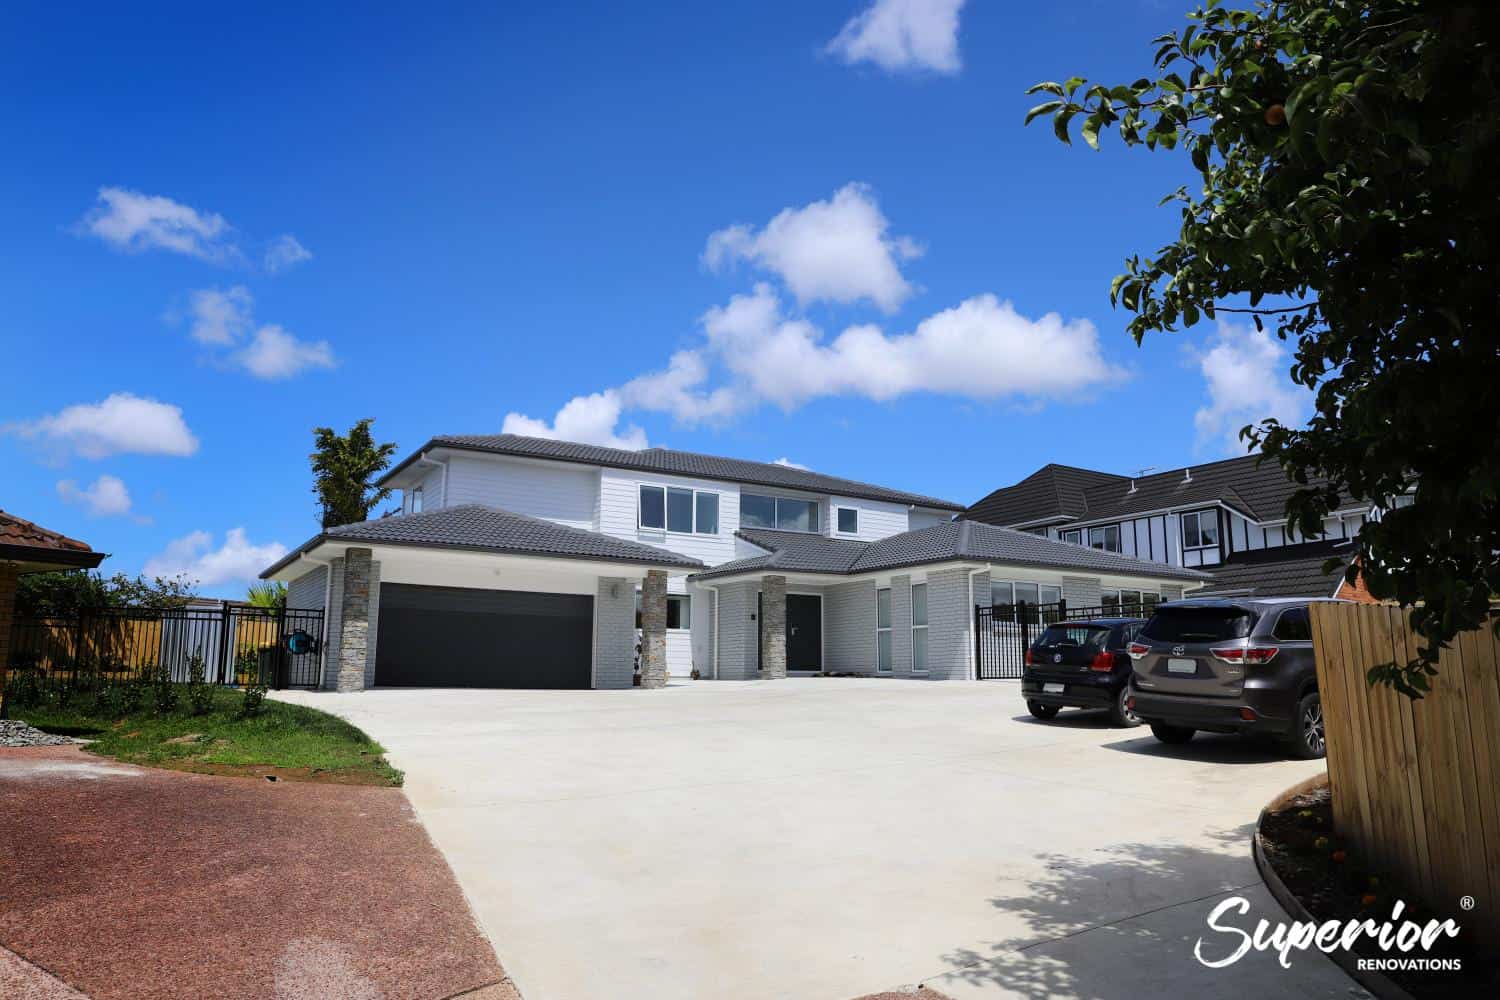 After the Renovation |
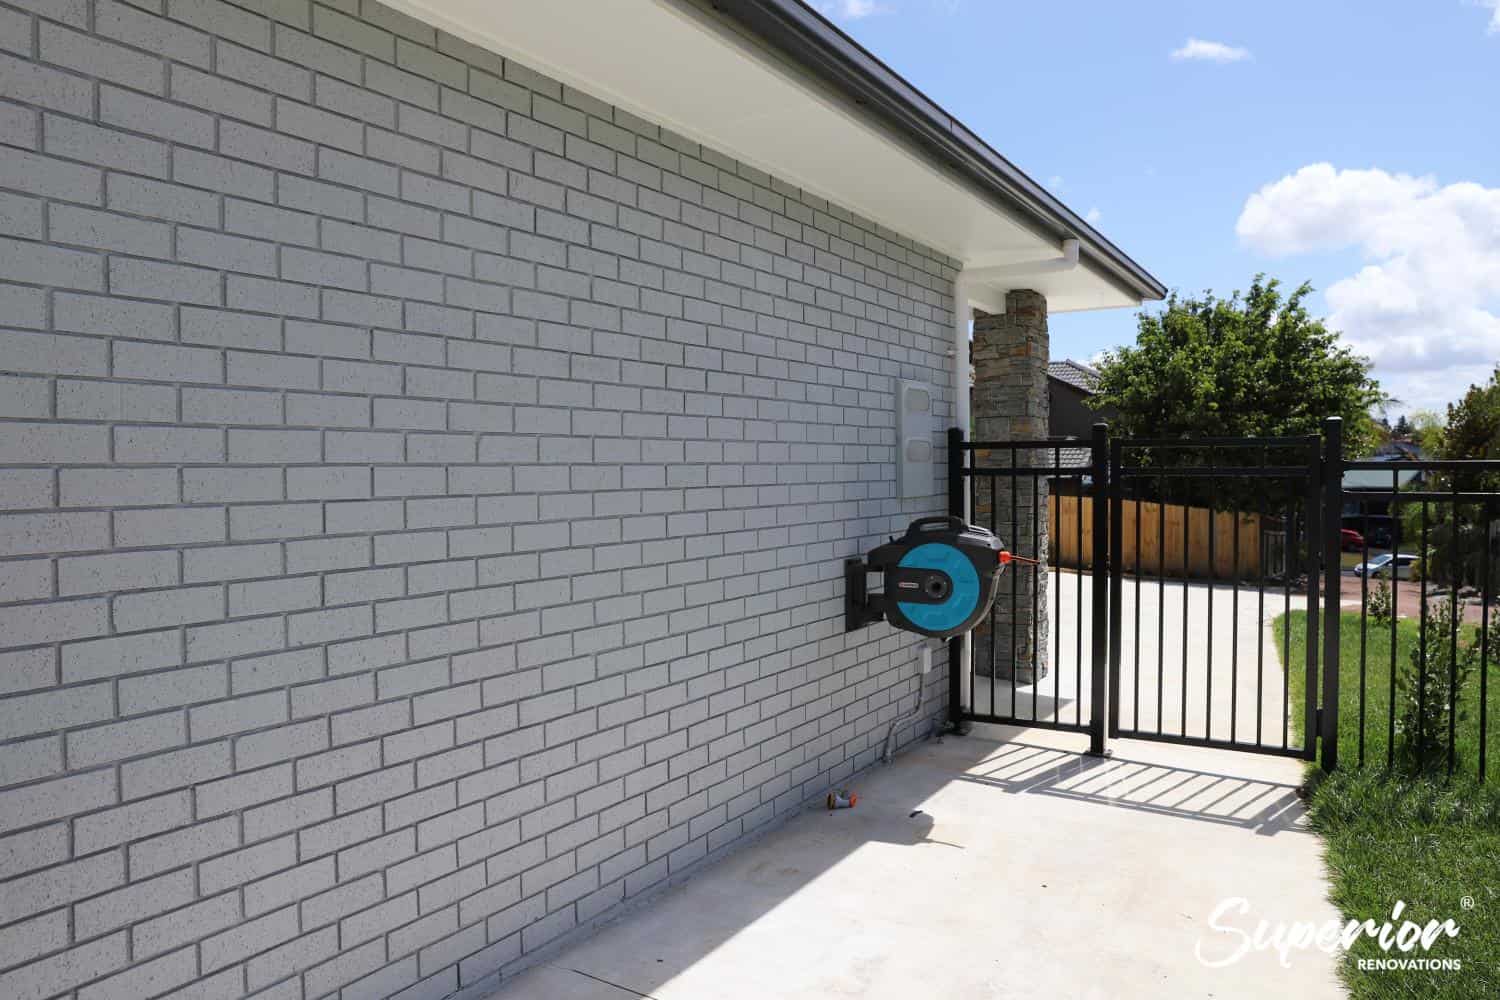
The outdoor renovation part of the project included painting the walls from red brick to a more subtle grey, creating pathways and small gates between areas of the large property.

Pathways were created throughout the property for easily accessing different areas of the outdoor spaces. You can see that blocked pavement was created with pebbles to elevate the overall design of the outdoor area.
How much do electric gates in NZ cost?
lectric gates are a popular choice for homeowners in New Zealand looking for added security and convenience. If you’re considering installing electric gates on your property, it’s important to understand the costs involved.
The cost of building electric gates in New Zealand can vary depending on several factors, such as the type of gate, the materials used, the complexity of the installation, and the cost of labor in your area. In Auckland, the most populous city in New Zealand, electric gates are commonly installed to provide enhanced security and convenience.
As a rough estimate, you can expect to pay between NZD $4,000 and $15,000 or more for electric gates in New Zealand. The cost of materials can vary widely depending on the type of gate you choose, with aluminum or vinyl gates being less expensive than those made from wood or steel.
How much are electric sliding gates?
The type of gate, such as sliding or swing gates, can impact the cost. For a sliding gate, you can expect to pay between NZD $6,000 and $12,000, while a swing gate can cost between NZD $4,000 and $8,000.
How much is the installation of electric gates in Auckland?
The complexity of the installation can also impact the cost. If additional features such as remote control, intercoms, or sensors are required, this can add to the overall cost. A basic electric gate system without any additional features can cost between NZD $4,000 and $6,000, while a more complex system can cost between NZD $8,000 and $15,000 or more.
Labor costs can also vary depending on the contractor or company you choose. The level of experience and expertise required for the installation can also impact the cost. For a basic electric gate system, you can expect to pay between NZD $1,000 and $3,000 for installation, while a more complex system can cost between NZD $3,000 and $5,000 or more.
How much do electric gates cost to run?
Generally, the cost of maintenance for electric gates can range from NZD $100 to NZD $500 per year. This includes routine services such as cleaning, lubrication of moving parts, and testing of safety features.
If the gate requires repairs or replacement of parts, the cost can increase significantly. For example, replacing a damaged gate opener or a malfunctioning sensor can cost between NZD $500 and NZD $1500 or more, depending on the complexity of the repair.
Fencing Cost Per Meter Square
As a rough estimate, you can expect to pay between NZD $100 and NZD $450 per linear meter for a standard timber fence in New Zealand. The cost can increase to NZD $600 to NZD $1000 per linear meter for a high-end timber fence or a fence made from materials like Colorbond steel, aluminum, or PVC. For a concrete fence, the cost can range from NZD $350 to NZD $800 per linear meter.
Cost of fencing in nz
In addition to the materials, the height and length of the fence can also impact the cost. A higher or longer fence will require more materials and labor, resulting in a higher cost. For example, a standard 1.8-meter timber fence can cost between NZD $180 and NZD $810 per meter, while a 2.4-meter fence can cost between NZD $220 and NZD $1000 per meter.
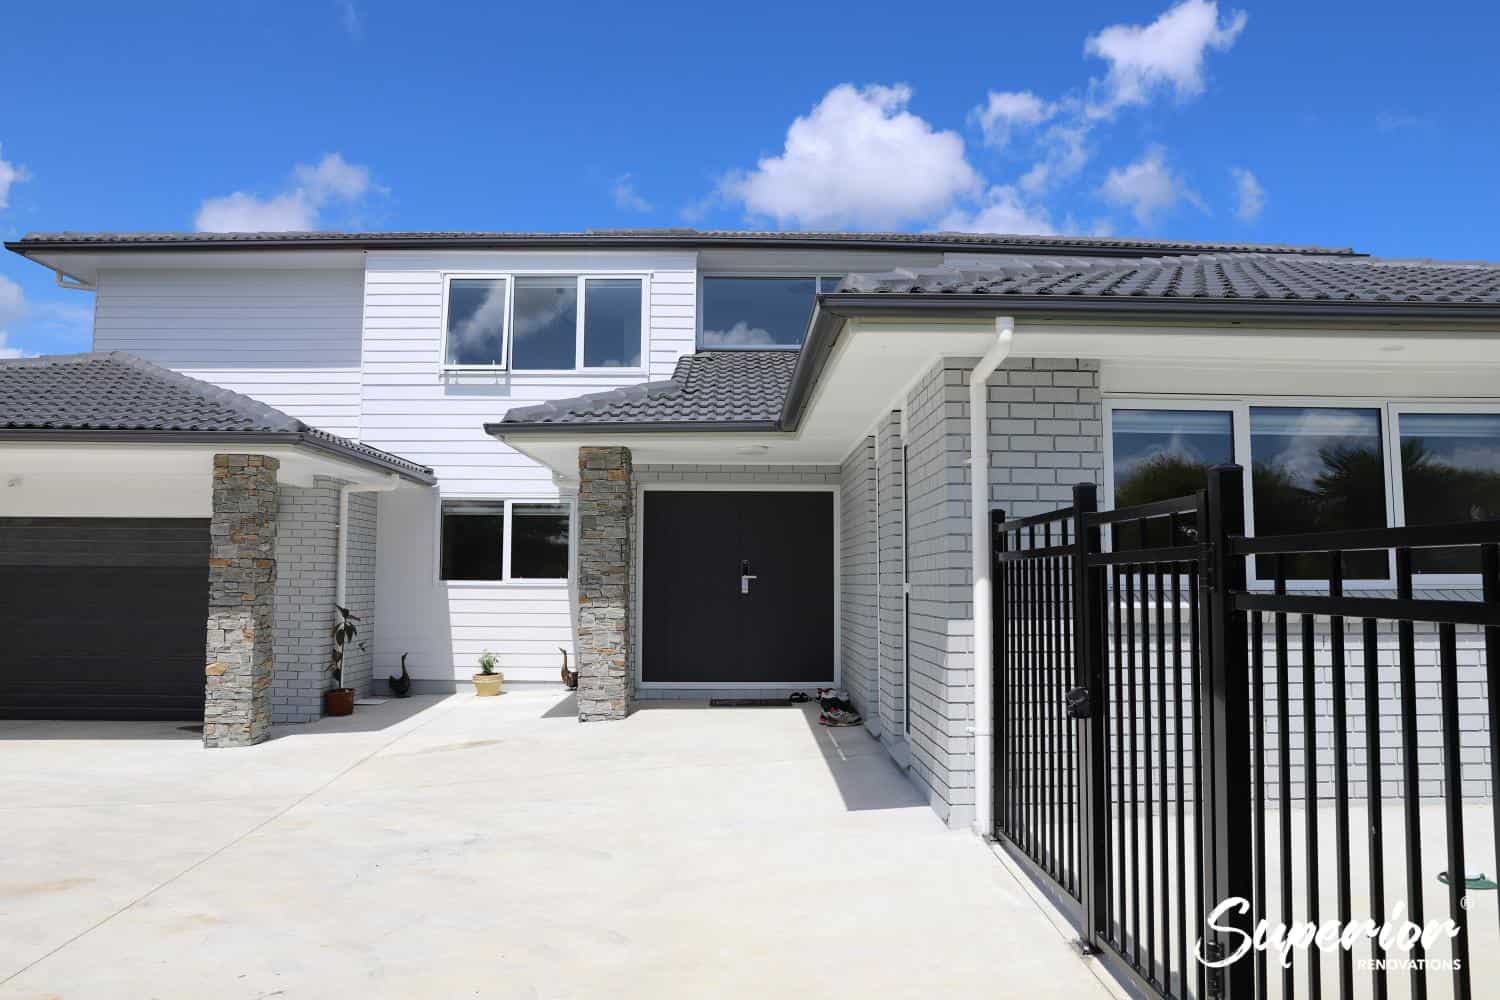
The front door of the home is password protected for added security.
The cost of labour can also vary depending on the contractor or company you choose. The level of experience and expertise required for the installation can impact the cost as well. The average cost of installation in New Zealand is around NZD $50 to NZD $70 per hour. However, the cost can be higher if additional work is required, such as leveling the ground or removing an old fence.
Cost of a New Lawn in NZ – how much does garden landscaping cost?
As a rough estimate, the cost of a new lawn can range from NZD $25 to NZD $55 per square meter, depending on the type of grass used and the preparation work required. The cost of a new garden can range from NZD $150 to NZD $350 per square meter, depending on the materials used and the complexity of the design. The cost of retaining walls can range from NZD $300 to NZD $700 per square meter, depending on the materials used and the height of the wall.
The cost of labour can also vary depending on the contractor or company you choose. The average cost of installation in New Zealand is around NZD $50 to NZD $70 per hour. However, the cost can be higher if additional work is required, such as extensive site preparation or the installation of complex features.

We created designated areas for our clients to grow vegetables in their back courtyard.
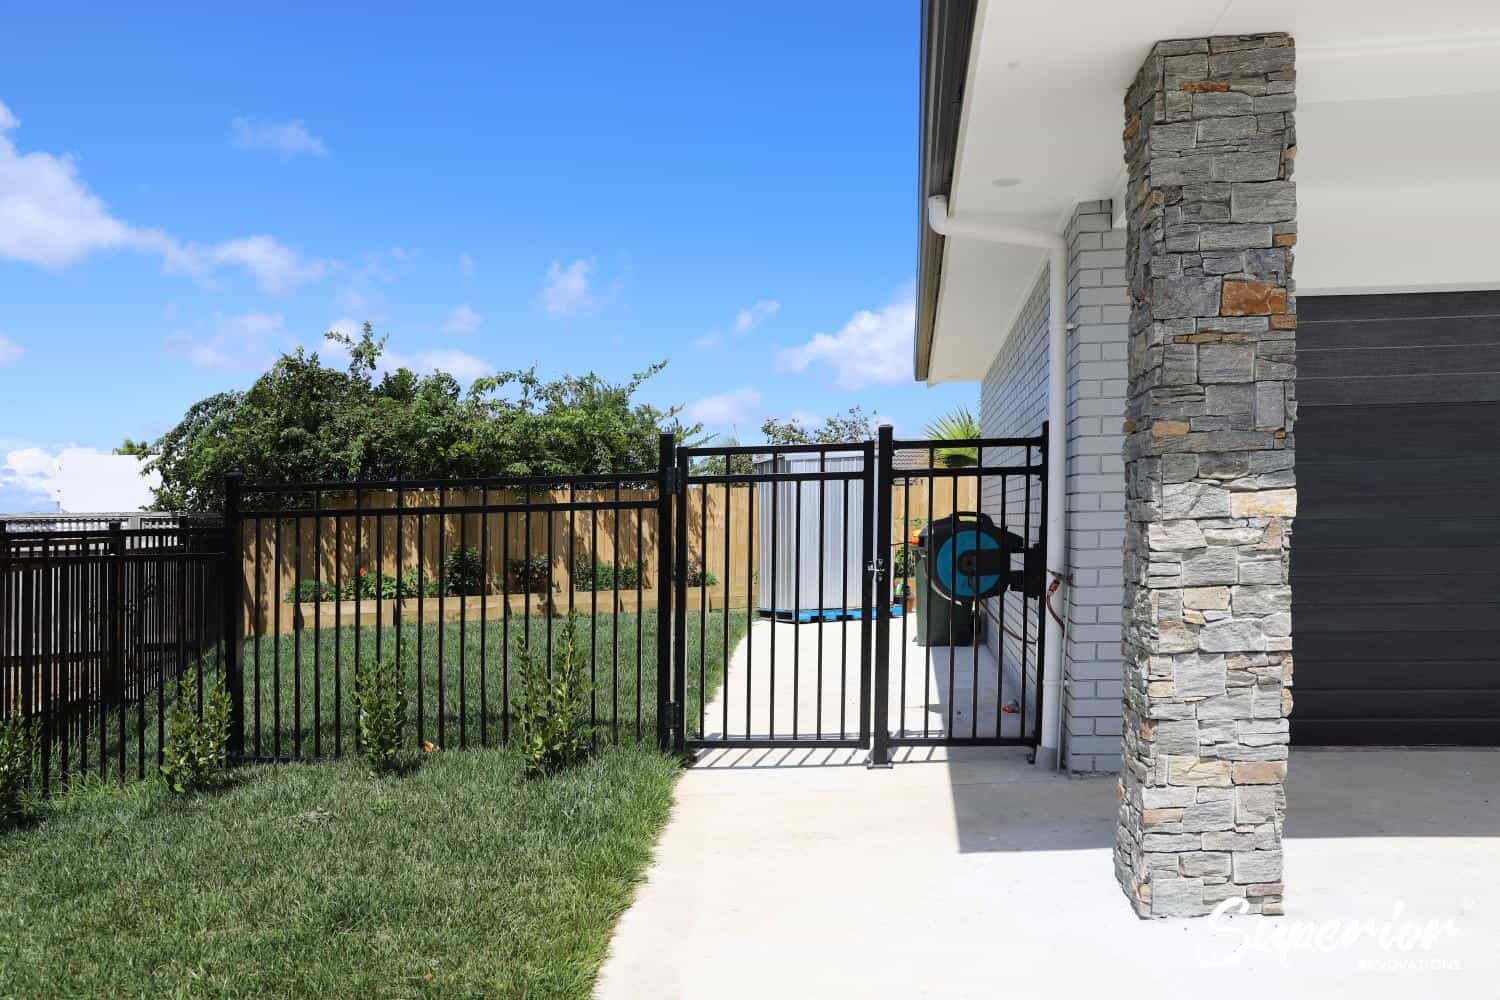
All areas were divided by small gates for designated areas such as lawn, the front driveway, the vegetable garden and back courtyard.
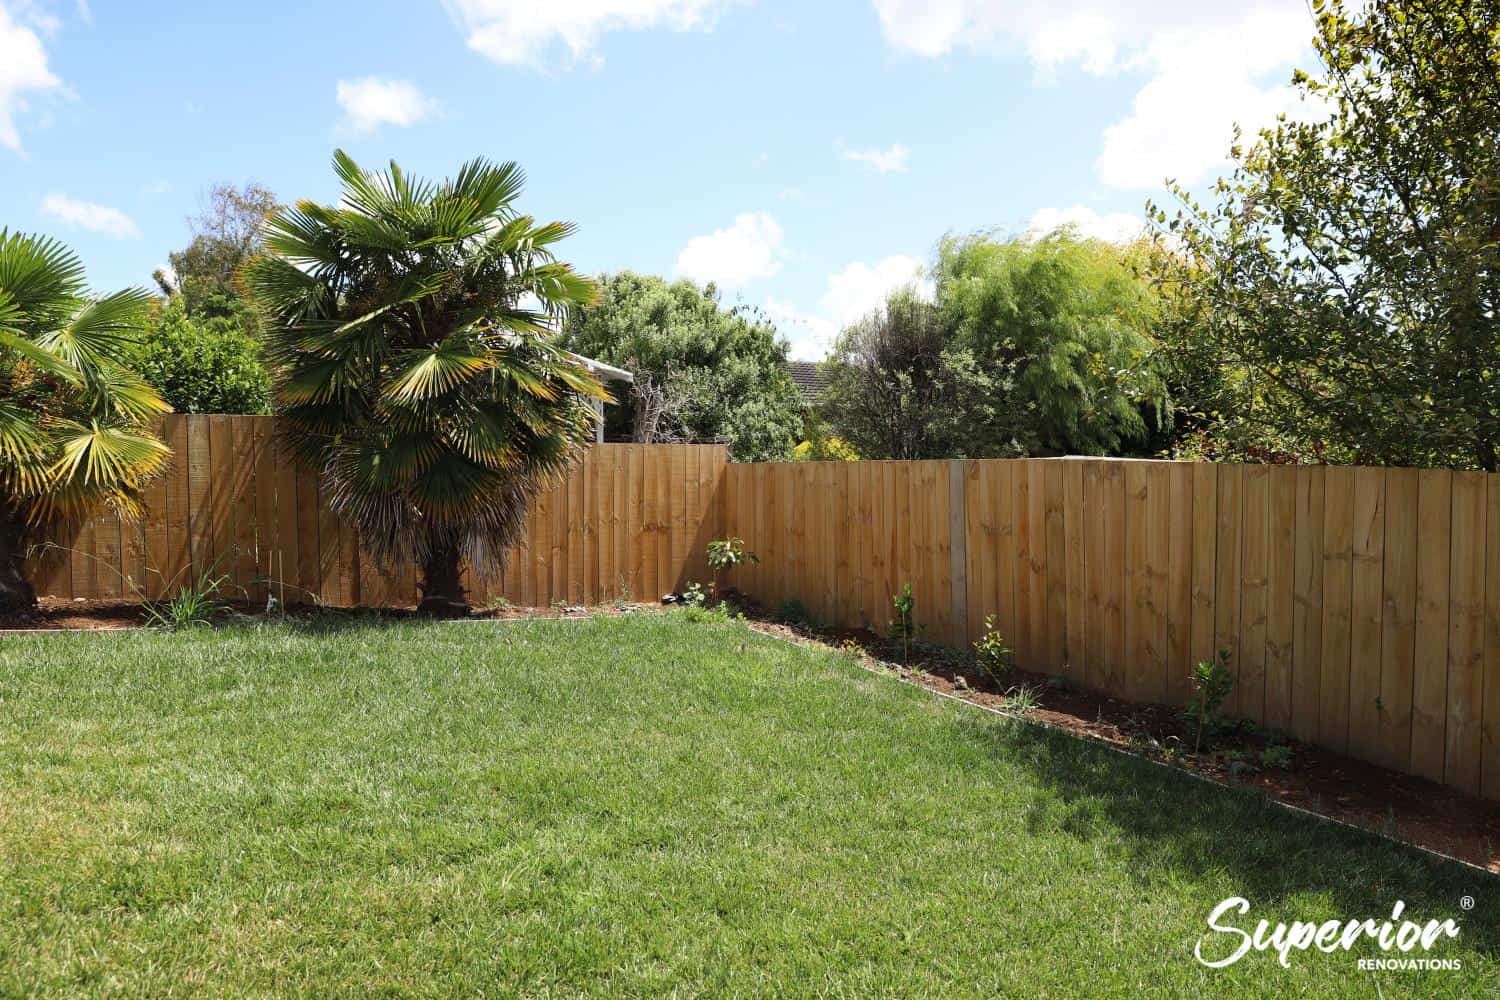
We lay a medium sized lawn with fencing for outdoor entertainment.
So How much does it cost to renovate a house for this scale of a home renovation?
This kind of a home renovation like all others will depend on the scope of work as well as the size of the home. A kitchen renovation will cost you anything between $45,000 to $80,000 depending entirely on the size and the materials you choose. Bathroom renovations on the other hand will atleast average around $35,000 and more depending on the fitting you choose. The number of bathrooms that you have will also contribute towards the overall renovation costs.
You also have to keep into account all the painting work, landscaping, double glazing and any security systems you are putting in place. On an average home renovations of this extent for a large home will be between $250,000 to $500,000.
Budget Friendly Home Renovation Ideas
Renovating your home doesn’t have to be expensive. With a little bit of creativity and effort, there are many budget friendly home renovation ideas that can make a big impact. Some of these ideas include repainting walls or furniture, updating light fixtures or refinishing kitchen cabinets. DIY projects are another fun and creative project to do is upcycling old furniture as that provides another affordable way to update your home. We have provides some budget friendly renovation ideas below to help you transform your space without breaking the bank.
Kitchen
1. New Countertops
A five digit kitchen renovation can include cabinets, worktops, and fixtures. Yet, if your cabinets are in reasonable condition, you can improve one of your home’s most used surfaces with brand new worktops. You may also be able to afford a more expensive material if you only need to cover a smaller amount of square footage.
2. Change the Splashback
Replace a worn out splashback with one that brightens your kitchen and provides visual intrigue to offer a punch of design. Tile, stone, glass, ceramic, and beaded board are just a few of the alternatives available, giving you a wide range of options to pick a material that fits your budget. Another cost-effective choice is to only put in a splashback where it will offer the greatest level of protection, such as behind a range or close to a sink.

Splashback in kitchen
3. Add a Faux Island
Having standalone cabinets or tables in a kitchen without an island can save money. All you need to do is move the component at will by installing rolling caster. It will cost you more to relocate if you include if you include more frills, such as cabinets with drawers. In your home renovations, start with a basic table if you want to stay inside your budget.

Kitchen island with cabinets and storage space
4. Upgrade Cabinets or Cabinet Doors
Wallpaper, paint, and peel and stick wood goods. All are fantastic choices for giving antique cabinets a fresh look in your home renovations. Without having to add extra shelves, you may create easily accessible open storage in your house renovation Auckland by taking the doors off some top cabinets. In addition to fitting your budget, look for ways to update your home that will also improve how you use the area on a regular basis.
Living Room
1. Update Flooring
Many peel and stick flooring solutions are thin enough that you can change the flooring in tour room without removing the old one. Even if you must remove the floor because you are no longer able to take it. A new floor can be an affordable, long-lasting job on its own in your house renovations.

New flooring in full house renovation
2. Change Window Treatments
The addition of new fabric, window treatments, or a mix of the two can give a living room a lovely makeover. Older windows can be effectively concealed using a variety of do it yourself choice. In your budget friendly home renovations try to reuse the curtain rods and rings that are already there to save a little additional money.
3. Install Dimmers
Finding the ideal balance of light may be difficult if your home lacks adequate overhead lighting. In older homes with fewer outlets accessible for floor and side lighting, this may be why your home lacks lighting. In your house renovations Auckland, we recommend installing dimmer switch as this can be a quick and simple solution to get better overhead lighting. When working, keep the lights bright. When relaxing, turn it down for softer ambient lighting.
Bathroom
1. Add a Medicine Cabinet
A straightforward, cost-effective adjustment may give your bathroom both flair and storage. To add storage and a fresh aesthetic, swap out a plain wall mount mirror. Add a cork board or blackboard to the inside of the door if you’re feeling crafty for daily reminders and affirmations.
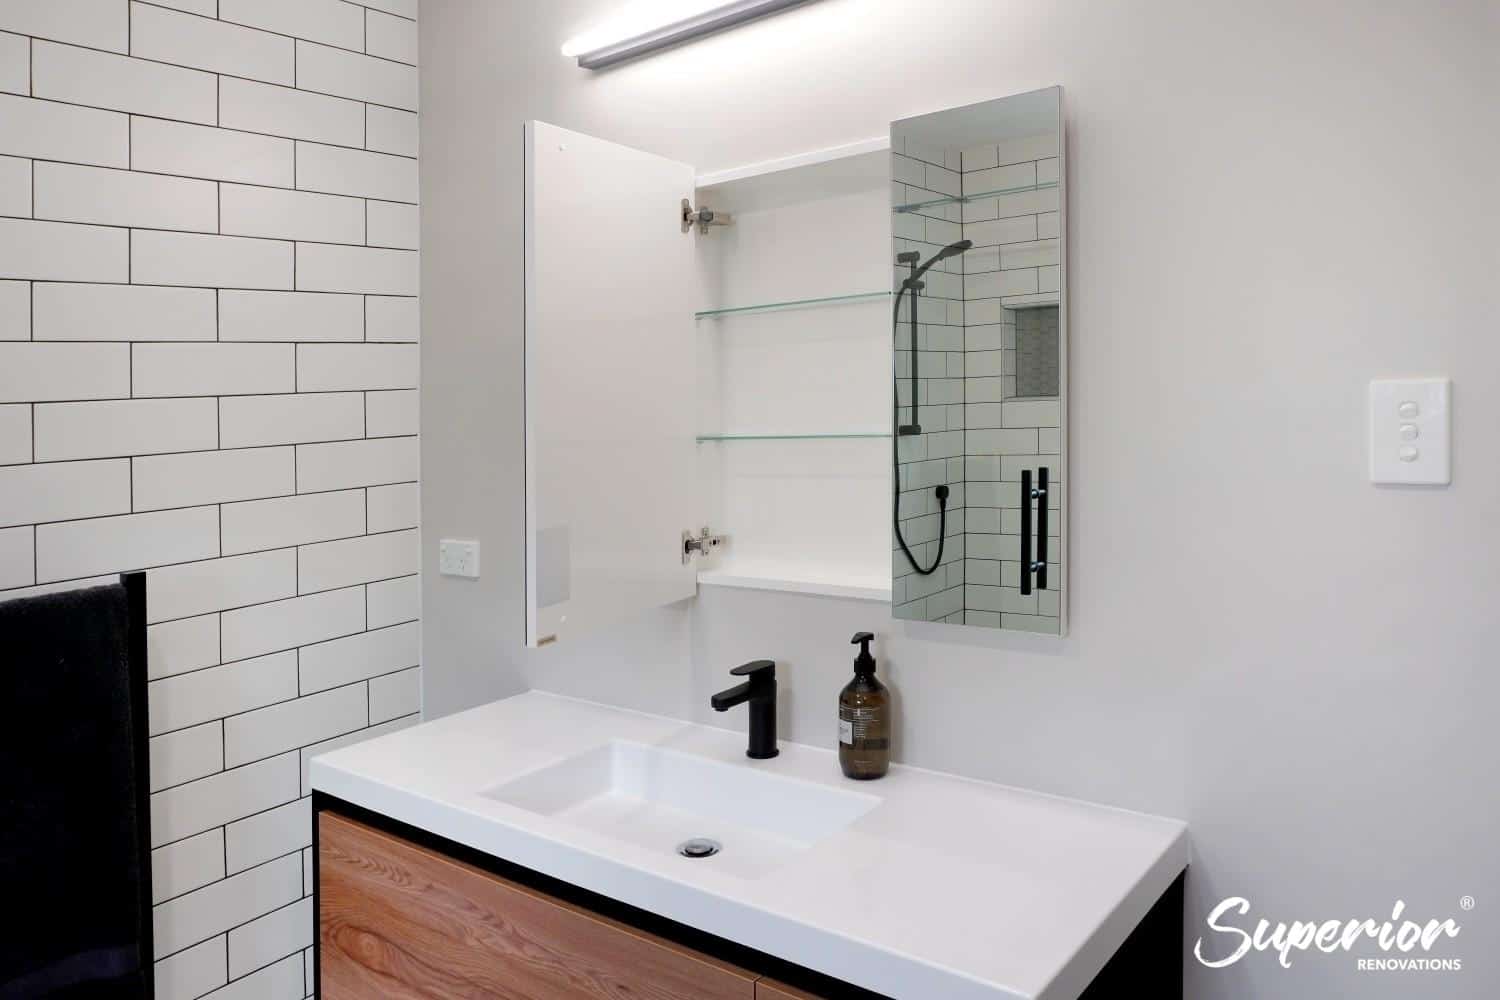
Medicine Cabinet for Extra Storage Space
2. Wallpaper an Accent Wall
Wallpaper is an excellent project for a home makeover on a budget because it has gotten easier to complete, even for beginner DIYer. Wallpaper is a quick and easy way to add pattern and colour, and it’s entirely fine to use it only on one accent wall. However, if you’re not quite ready to take on proper wallpapering. Try the transient peel and stick variety. You don’t have to worry about trying out a current design trend because you can remove it easily if your décor style changes.

Accent Wall in Bathroom
3. Add Storage
A purchased cabinet or open shelves might make all the difference if you lack built in storage. Look for pre-made storage solutions that are designed to maximise vertical space, such as tiered carts, leaning ladders and apothecary cabinets. They provide a lovely and useful storage alternative, and you can use them in place of ornamental elements like baskets.
4. Swap Out Hardware
With new hardware, bathroom cabinets can be given a contemporary makeover. Choose various designs from the same family or combine various treatments for a more eclectic appearance. If your existing knobs lend themselves to a more sculptural flair, consider adding backplates.
5. Safety Updates
Although towel bars and toilet paper rack are typically not particularly attractive fixtures, they offer a chance for you to increase the safety of your bathroom. It’s a wise investment at any moment, whether you’re thinking of someone else or yourself in the future.
Bedroom
1. Add Interest to Walls or Ceilings
If your bedroom walls or ceilings are plain, you can simply add wainscoting or trim even without a supply of power tools. Even better, you can create the appearance of wainscoting by outlining a section of the wall with trim or timber, then using paint to connect the wall and trim to replicate the real thing. Without the expensive price, it appears high end. Select prefinished millwork to reduce labour costs. Alternative you can finish it yourself to reduce your home renovation budget.

Plants and paintings added to bedroom | Photo Credit – Unsplash
2. Add a Headboard
Add a headboard to your bedroom for a reliable way to modernise it. Whether it’s small and elegant or large and striking. They can be quite pricey when brought brand new. But DIY headboards offer many opportunities to maximise both your design and your spending power in your house renovations Auckland.
3. Inset Display Shelves
Kid’s bedroom present a constantly changing home renovation challenge. They rapidly transition from toys and books to collectibles and beyond, and it can be challenging to find a place to store all of that stuff. Adding narrow, wall-to-wall shelves is a straightforward home improvement change that is inexpensive. They suit in a range of bedroom sizes, are affordable, and don’t take up a lot of space.
Dining Room
1. Install a New Light Fixture
Dining areas frequently live in a time warp cause by their lighting. However, for a few hundred dollars and a little electrical DIY, you can give your room a focal point that completely changes the atmosphere. Choose a convention chandelier or several pendants for a more modern look.
2. Reinvigorate a Built In
Obscured spaces, such as the wall or back panel behind shelves, don’t get much attention. But those are great stops to add pops of colour with paint or wallpapers. Another idea – swap out the door inserts for glass or apply coloured film to existing glass. These little touches can go a long way to making a room feel renewed.
The wall of back panel that is hidden behind shelves, for example, receives little attention. However, those are excellent places to add splashes of colour using paint or wallpaper. Another option is to replace the door panels with glass or cover existing glass with coloured film. These small adjustments can have a big impact on how refreshed a space feels.
Entry
1. Create a Mini Mudroom
Even in a small area, all you really need to construct a life-changing, cost-effective mudroom is a seat, a shelf, and some hooks. You can either combine used and repurpose pieces with less expensive newer items that function as a whole solution or you can purchase expensive organisers made specifically for this reason. If you have the room, it helps to have a cubby for each person of the family to simplify daily tasks.
7. What should I look for when choosing a renovation company? ↑
Don’t get distracted by flashy websites, and nicely designed vehicles – the right renovation company only needs to have experience, resources, organizational skills and a genuine interest in helping you renovate your dream home, see below on what you should look for.
Here are the top 5 things Aucklanders should be looking for in a potential renovator:
- An impressive portfolio of past projects – Check for case studies and details of the renovation (specifications) and ask a lot of questions. Another reason why you want to choose a company with an impressive portfolio of past projects is that a company that has done a lot of renovations, would have also been through a lot lessons/mistakes along the way that you can avoid.
- A proven track record with projects of similar scale and detail – Make sure you choose company that has done work that is similiar if not the same as what you’re looking for. The mistake most people make is choosing a company that does everything, but an expert in nothing.
- Great communication – Clues are in their online reviews (unsolicited) and video testimonials (if any, not all companies have this and it’s not easy to get raving clients). Ask for details of past clients who are happy to be called and interview them, if a company can’t provide you a list of at least 5 – there may be red flags.
- Excellent organisational skills – This may be a bit difficult to judge, but it’s in the details such as:
- What was their sales process like? was it systemised?
- How was their follow up and their initiative?
- How well did the booking go with the office team?
- Was there a clear indication of next steps?
- How accurate was their proposal based on your requirements?
- Great real customer testimonials, and not from their website: Google them, visit other pages besides their website, and check out their Facebook reviews/posts ( are there any negative comments?)
- Make sure they are affiliated with reputable suppliers: Make sure you know where they are getting their supply from to ensure you’re getting good quality fittings installed, and you’re also backed by independent product warranties.
8. House renovations before and after (NZ) by Superior Renovations
-

- Before Kitchen Renovation
-

- After Kitchen Renovation
-

-

- After Bathroom Renovation
-

- Before Kitchen Renovation
-

-

- Before Kitchen Renovation
-

- After Kitchen Renovation
-

- Before – Kitchen and House Renovation
-

- After – Kitchen and House Renovation
-
-

- After Kitchen Renovation
If you’re looking for “specific” cost estimates, try our Renovation Cost Calculator Tools
Further Resources for your home renovation
- Ideas for Kitchen renovations in our kitchen renovation gallery for kitchens we have renovated in Auckland
- Ideas for Bathroom renovations in our bathroom renovation gallery for bathrooms we have renovated in Auckland
- Featured projects and Client stories to see specifications on some of the projects.
- Real client stories from Auckland
Frequently Asked Questions
Will I have a choice of fixtures and fittings and can I supply them myself?
Absolutely – if you would like to purchase anything directly and provide it for installation at the appropriate time then we have no objections to this but we always suggest clients to choose our suppliers for a number of reasons, we’re confident of the quality, we can manage the logistics, trade prices, and any troubleshooting during the renovation is easier since we can direct contact.
Do I need to employ any other trades for the renovation?
Generally an established renovation company will have all their trades setup and a network of suppliers they use and trust. It just makes the renovation a lot less stressful and cost-effective. A house renovation will typically require 8 – 10 different trades and if any of which are unreliable they will affect all other trades involved. For this reason we are reluctant to carry out a renovation if a customer wishes to employ trades separately.
All the builders I’ve spoken to say they can do my Job. What makes Superior Renovations different?
Yes, there are many builders out there today, but Superior Renovations are not just builders. We specialise in Home Renovations, and that is important when transforming existing properties into modern contemporary homes – our service isn’t limited to renovation but we also take care of the design process, consultation process with architects, consents and supplier communication/logistics.
How long does a kitchen renovation take?
Generally a kitchen renovation will be between 5-6 weeks from date of demolition and this assumes design is finalised and parts have been manufactured (not including splash back which takes additional time for manufacturing)
How long does bathroom renovation take?
Generally a bathroom renovation will between 3-4 week from date of demolition, however will be longer if it involves consent.
How to plan house renovation?
Work out exactly what you’re getting done first and receive a detailed scope of works from your renovation company. Once this is received, then you know what you need to consider – check lists are very helpful to simply the process otherwise it does become overwhelming. You’ll find plenty of check lists online (eg how to choosing a builder), also check out Superior Renovations E-book (plenty in there for you to use).
How long does house renovation take?
Normally full house renovations would take between 3-6 months dependant on the scope of the renovation, complexity and size of the renovation.
How much to spend on full house renovation?
The average spend for a full house renovation in Auckland (including bathrooms and kitchen) is between $80,000 - $160,000 dependant on the size of home, building requirements, choice of products/fittings and a number of factors.
Do I need a building consent for my renovation?
If you are carrying out building work you may need to apply for a building consent. Here are some examples of work that requires consent: Any structural building including new buildings, additions, alterations, accessory buildings (sheds), and re-piling Changes to original plumbing and drainage Site works for a building Retaining walls higher than 1.5 metres, or retaining walls with a building or driveway near the top Fences higher than 2.5 metres and any swimming pool fence Swimming pools Decks more than 1.5 metres from ground level If in doubt we recommend you ring your local council and discuss your project with them.
Need more information?
Take advantage of our FREE Complete Home Renovation Guide (48 pages), whether you’re already renovating or in the process of deciding to renovate, it’s not an easy process, this guide which includes a free 100+ point check list – will help you avoid costly mistakes.
Download Free Renovation Guide (PDF)
Related queries:
How much does it cost to renovate a house NZ?
How much should I spend on renovations?
How much do renovations add to house value?
What does it cost to renovate a house?
How much does it cost to renovate in Auckland?
How much does it cost to completely renovate a house?
Renovation costs nz per square metre
Still have questions unanswered?
Book a no-obligation consultation with the team at Superior Renovations,
we’d love to meet you to discuss your renovation ideas!
WRITTEN BY SUPERIOR RENOVATIONS
Superior Renovations is quickly becoming one of the most recommended Kitchen Renovation & Bathroom Renovation company in Auckland and it all comes down to our friendly approach, straightforward pricing, and transparency. When your Auckland home needs renovation/ remodeling services – Superior Renovation is the team you can count on for high-quality workmanship, efficient progress, and cost-effective solutions.
Get started now by booking a free in-home consultation.
Request Your In-home Consultation
Or call us on 0800 199 888
www.superiorrenovations.co.nz
Have you been putting off getting renovations done?
We have partnered with Q Mastercard ® to provide you an 18 Month Interest-Free Payment Option, you can enjoy your new home now and stress less.
Learn More about Interest-Free Payment Options*
*Lending criteria, fees, terms and conditions apply. Mastercard is a registered trademark and the circles design is a trademark of Mastercard International Incorporated.


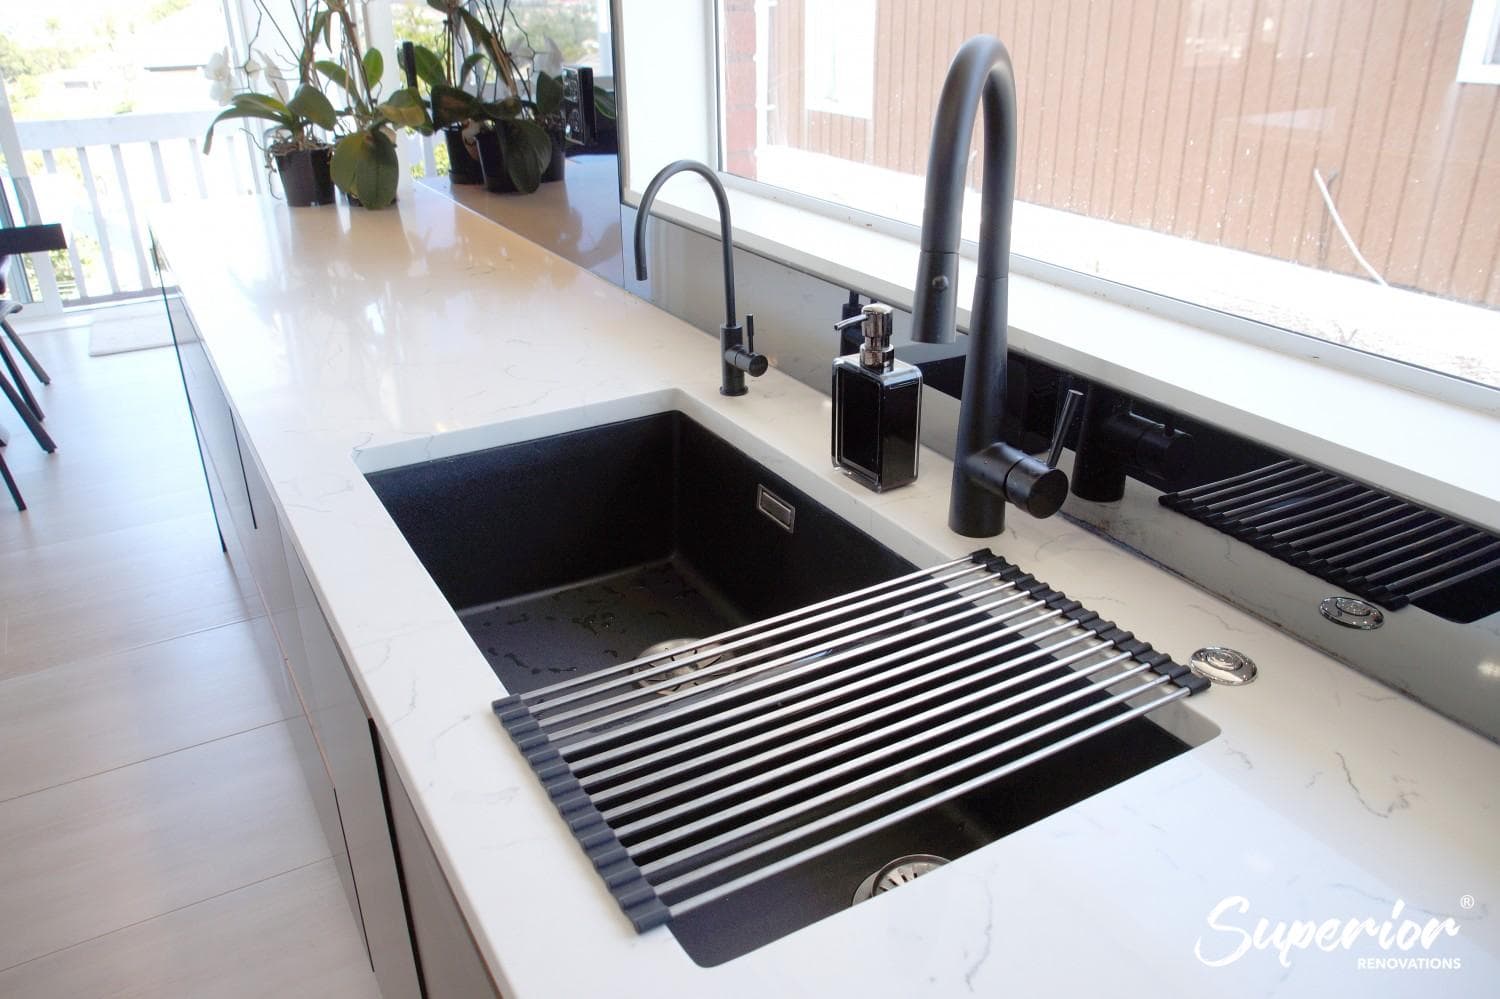

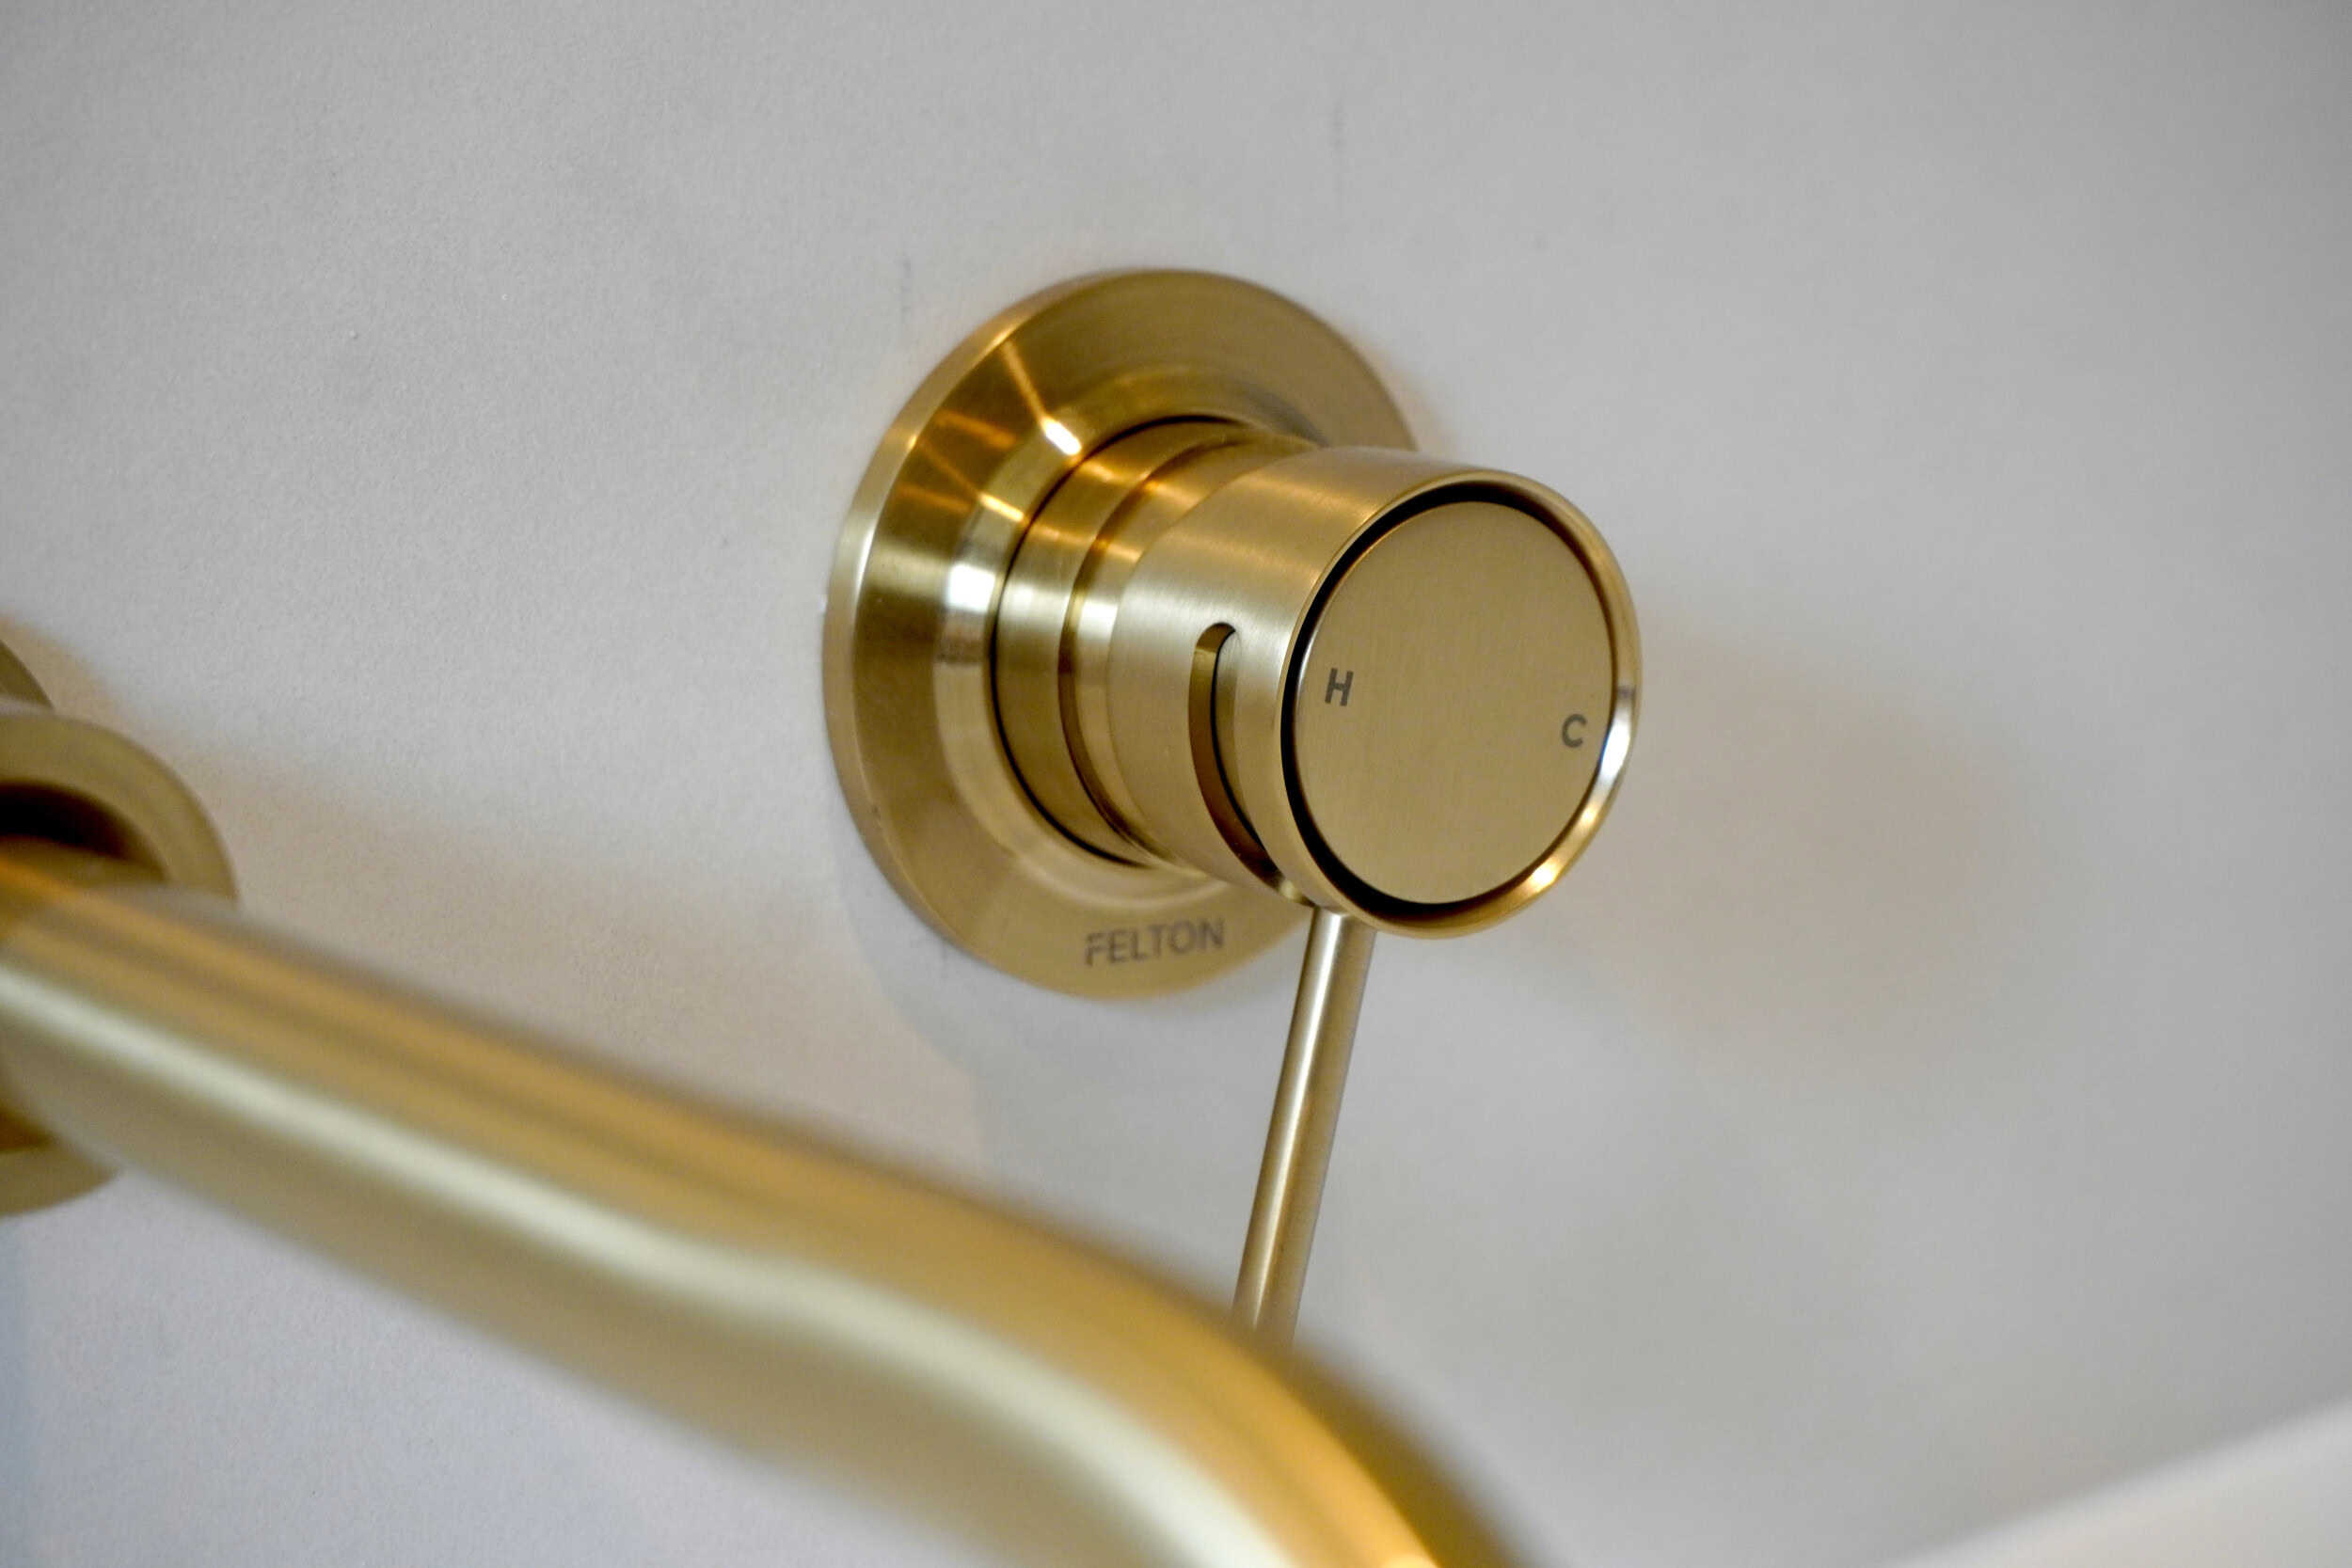

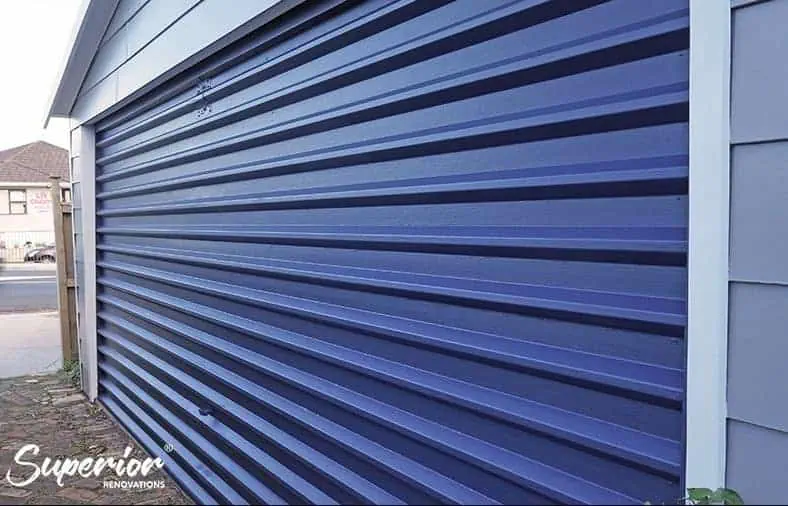


 18")


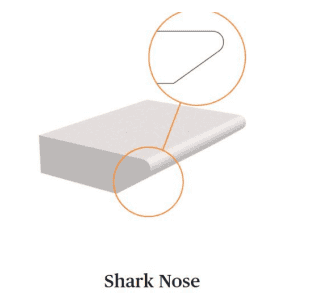


 by Superior Renovations® 95")
 96")