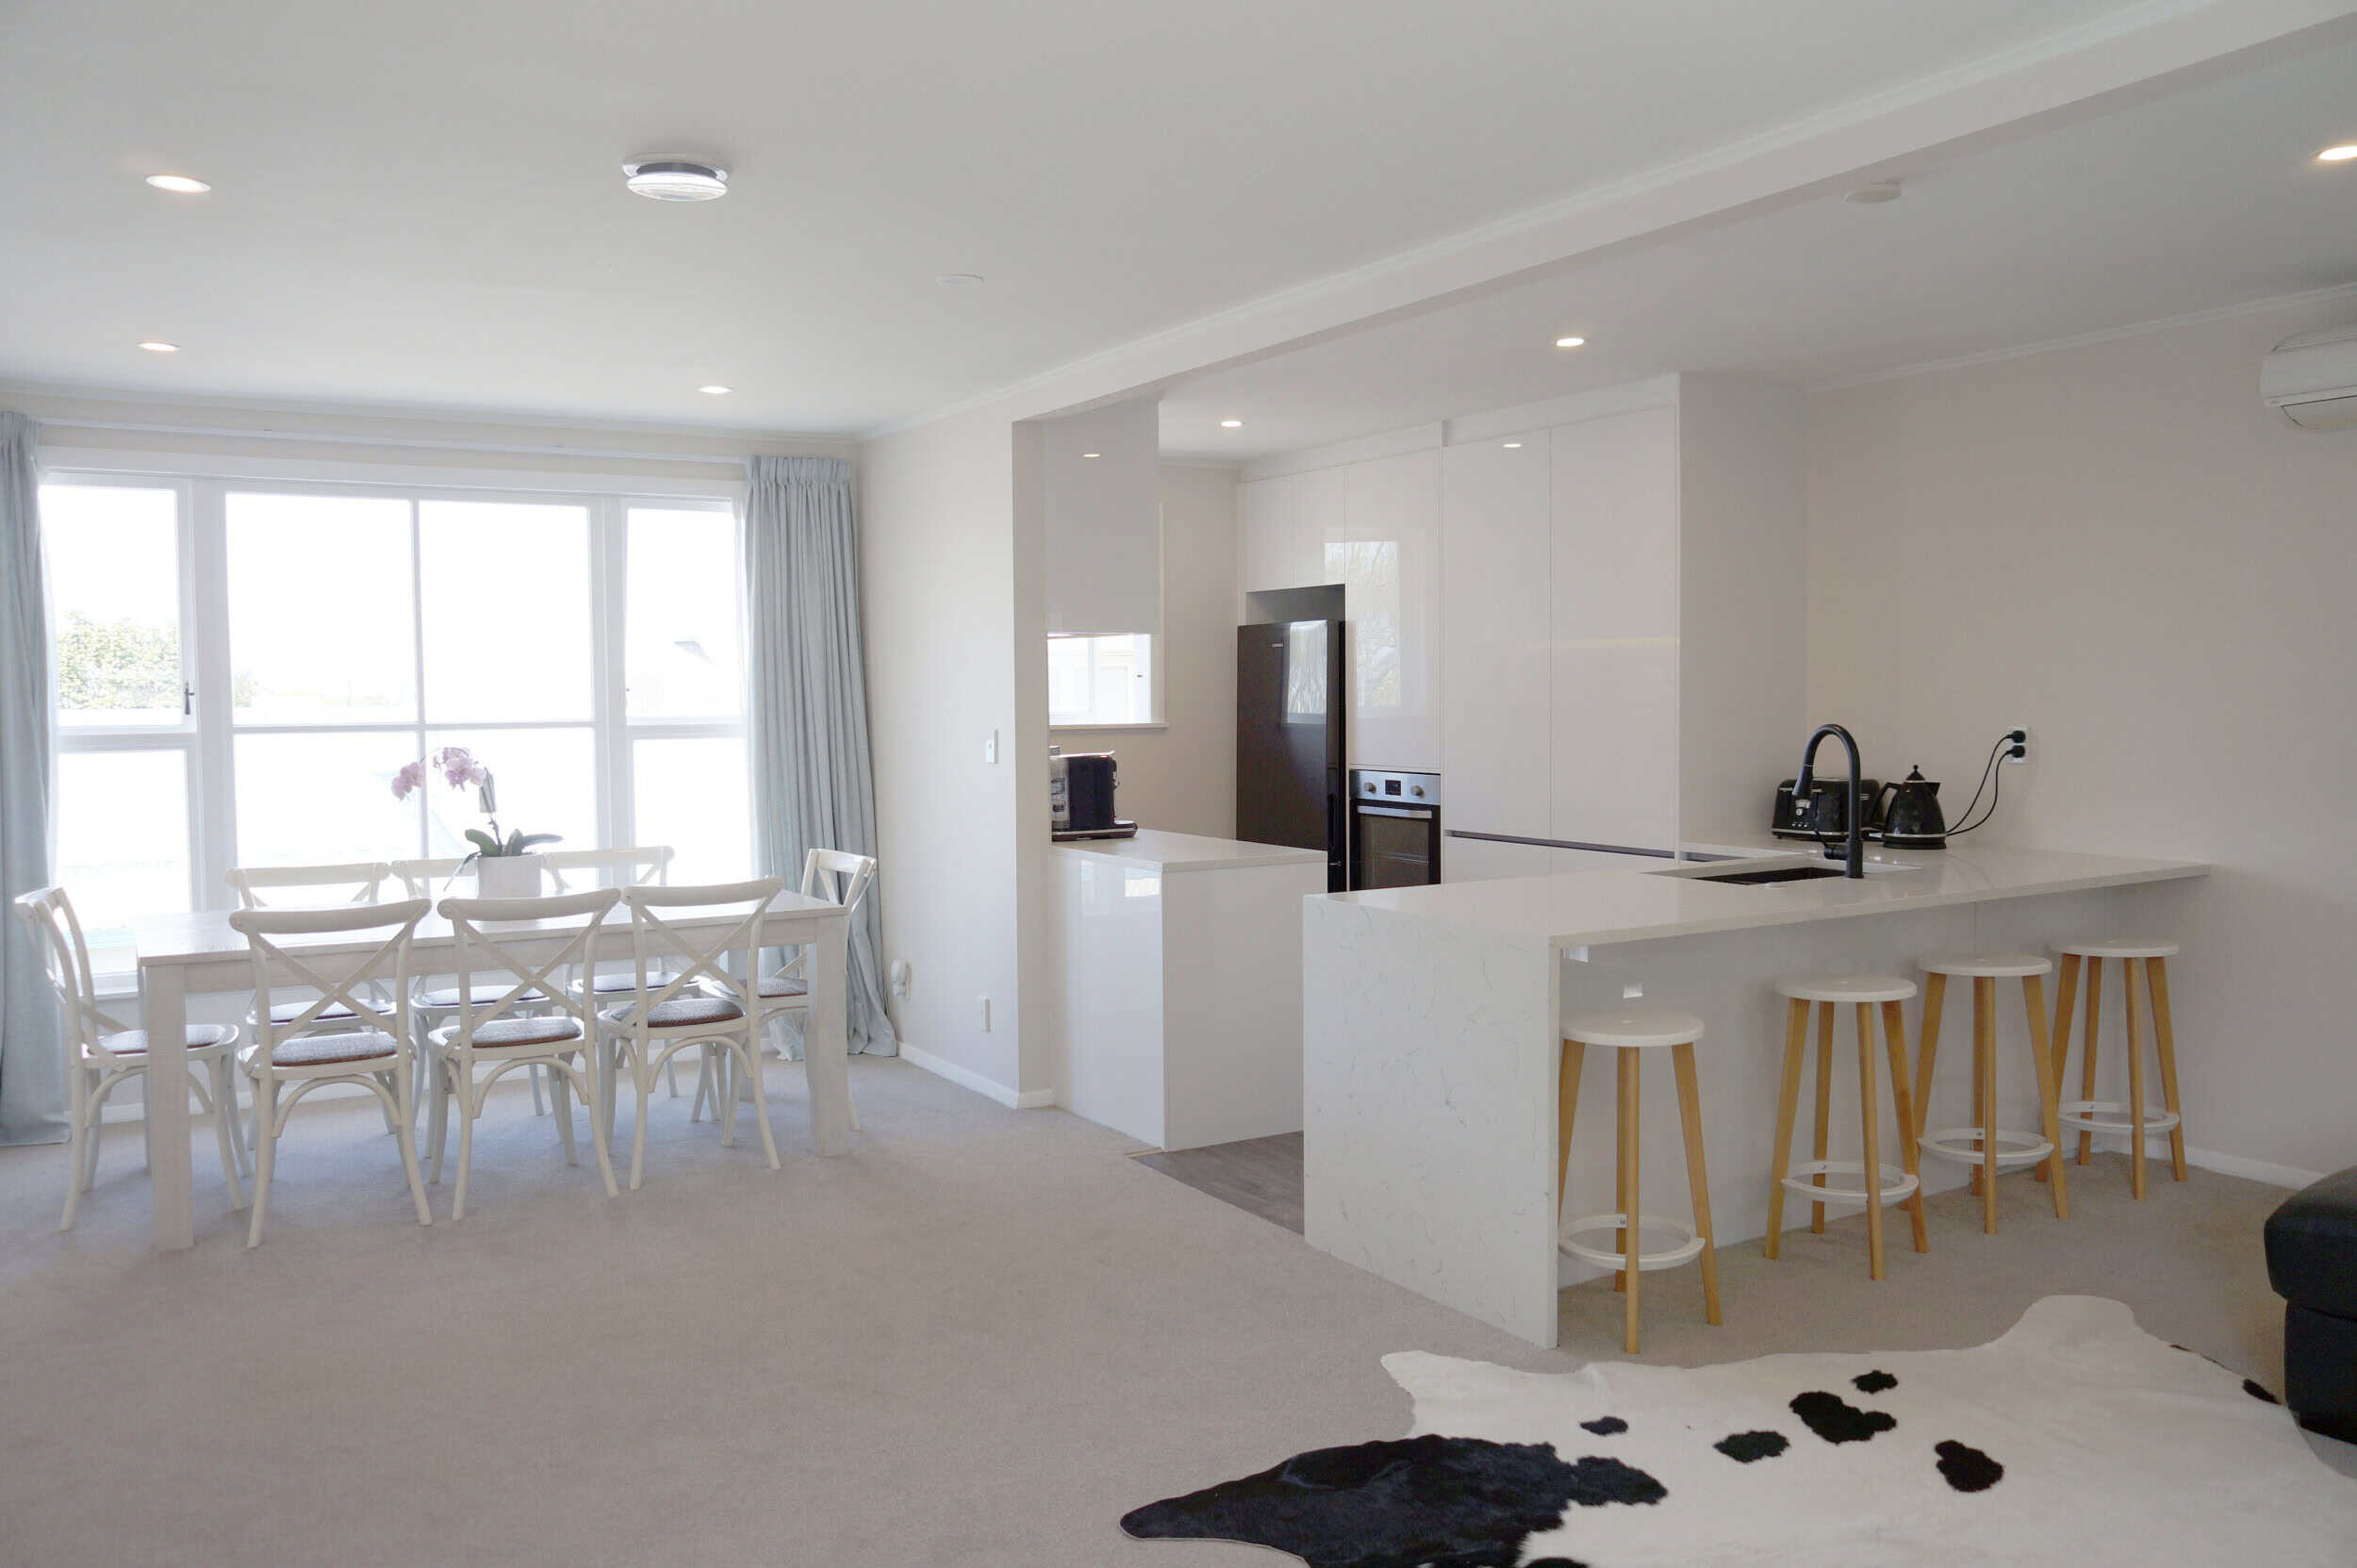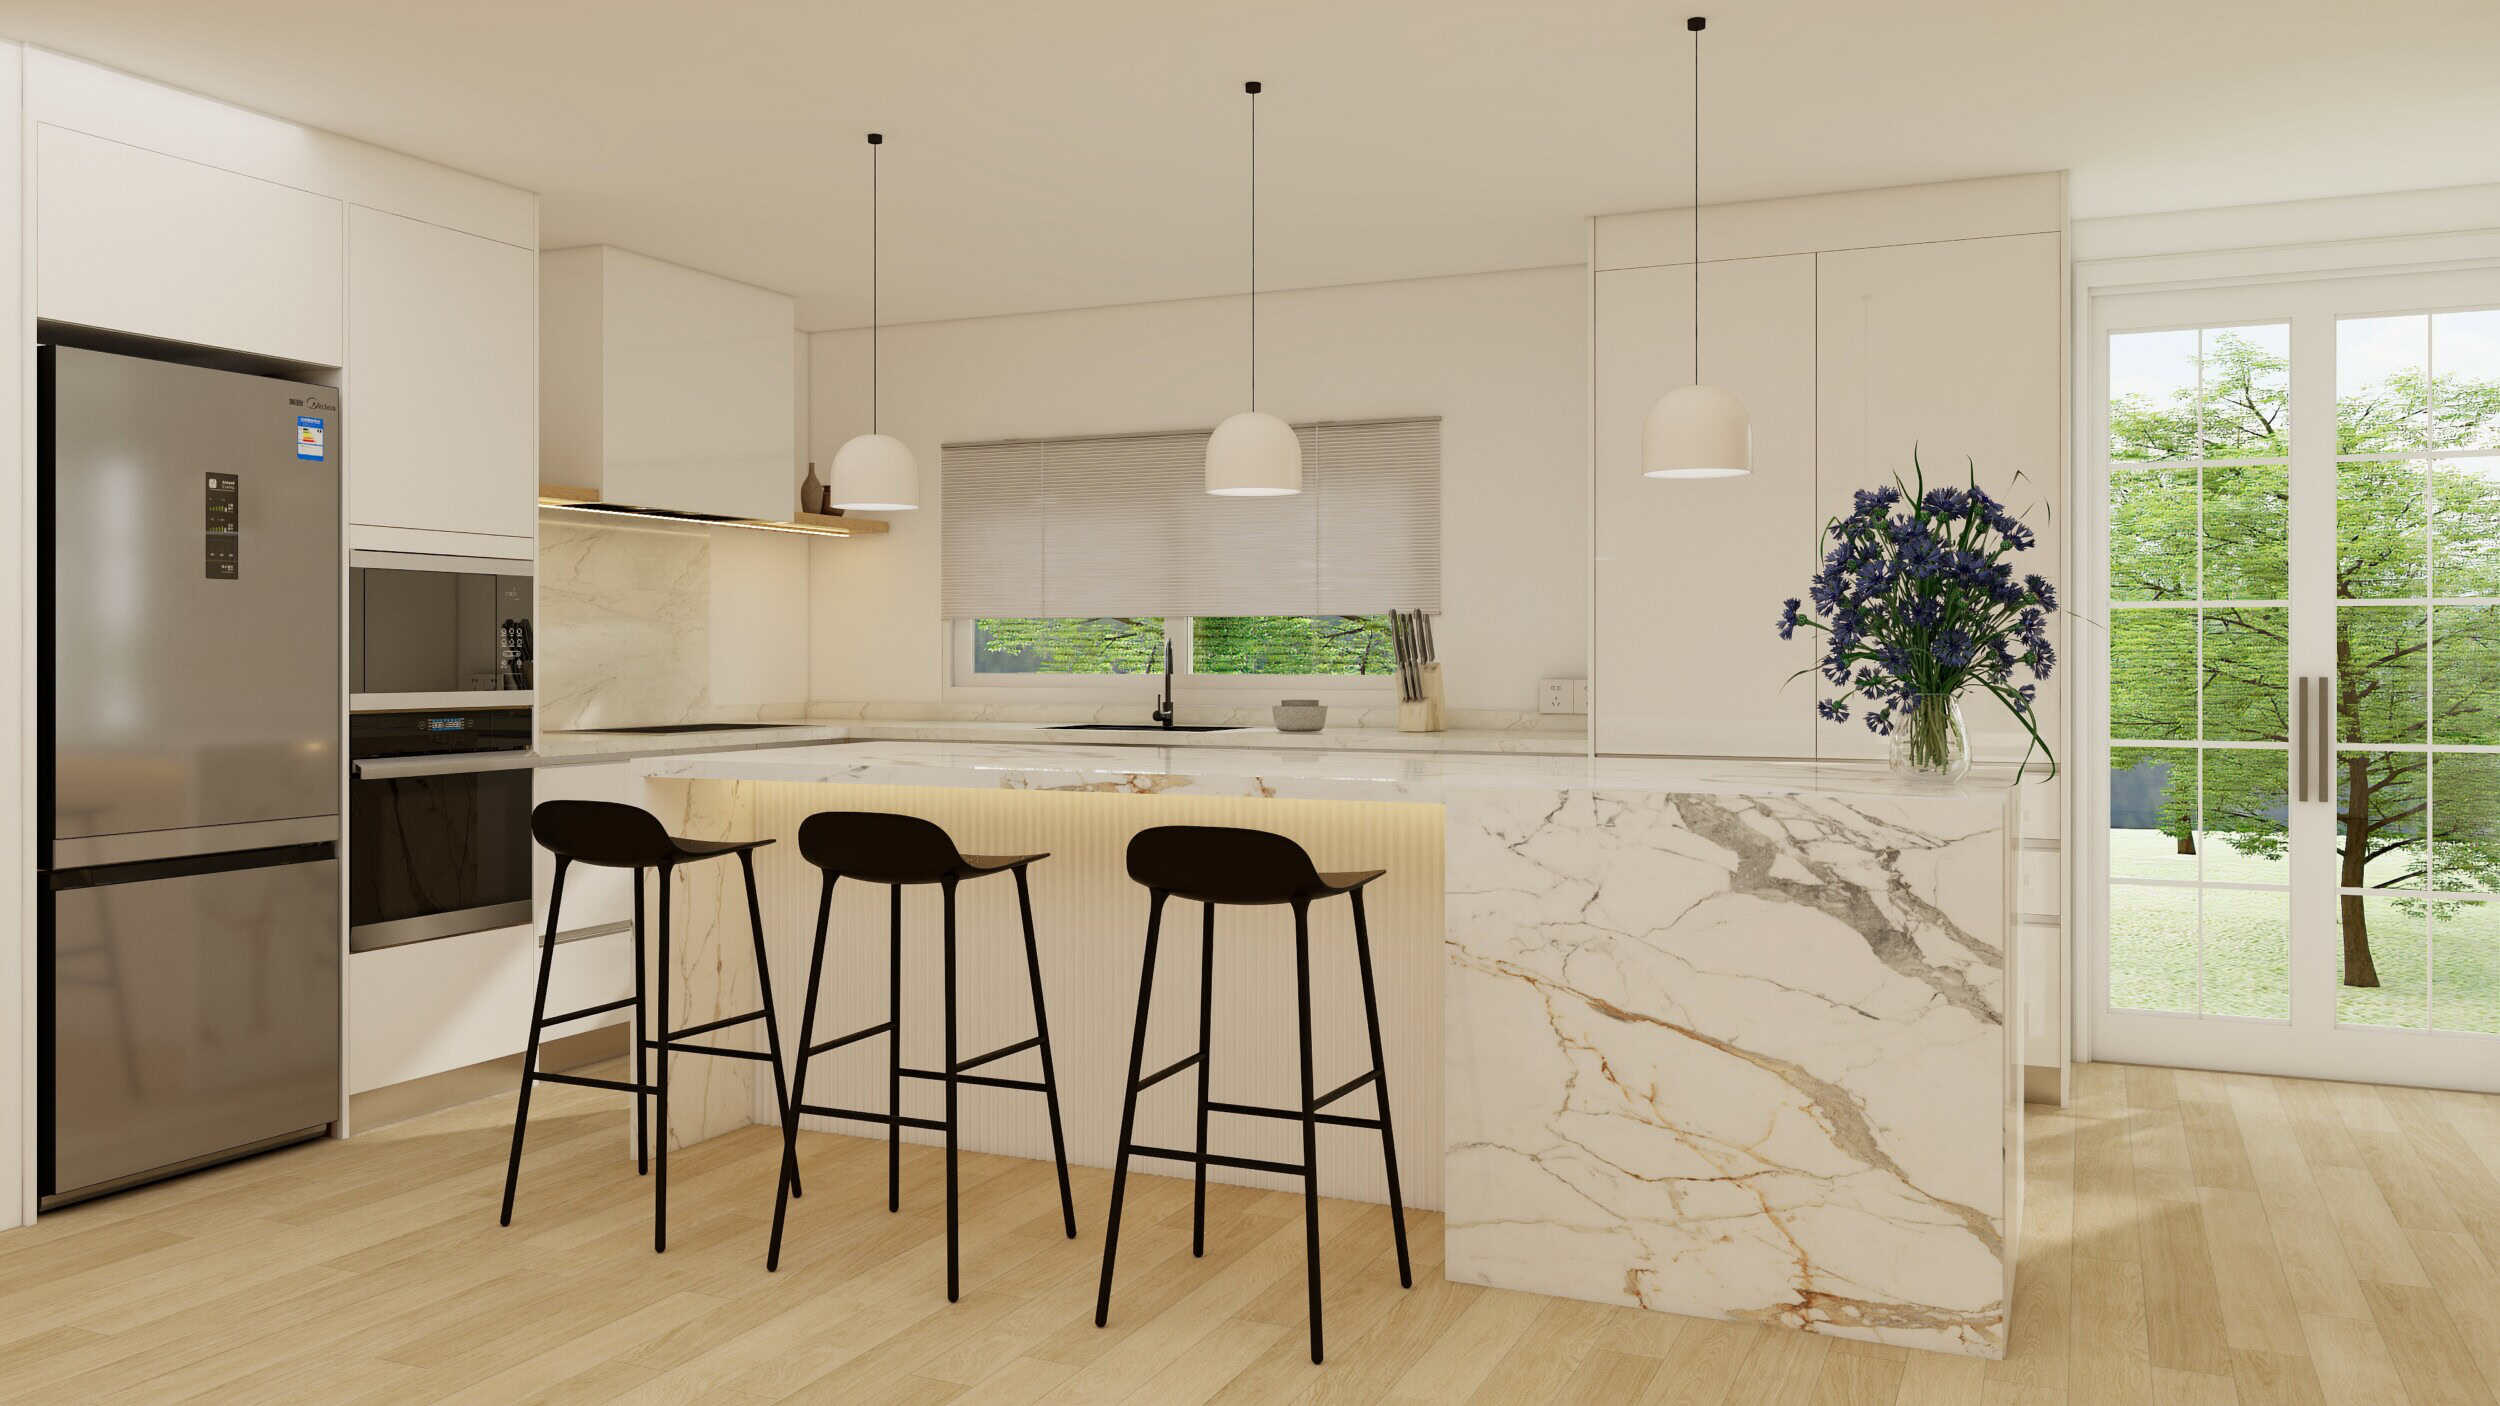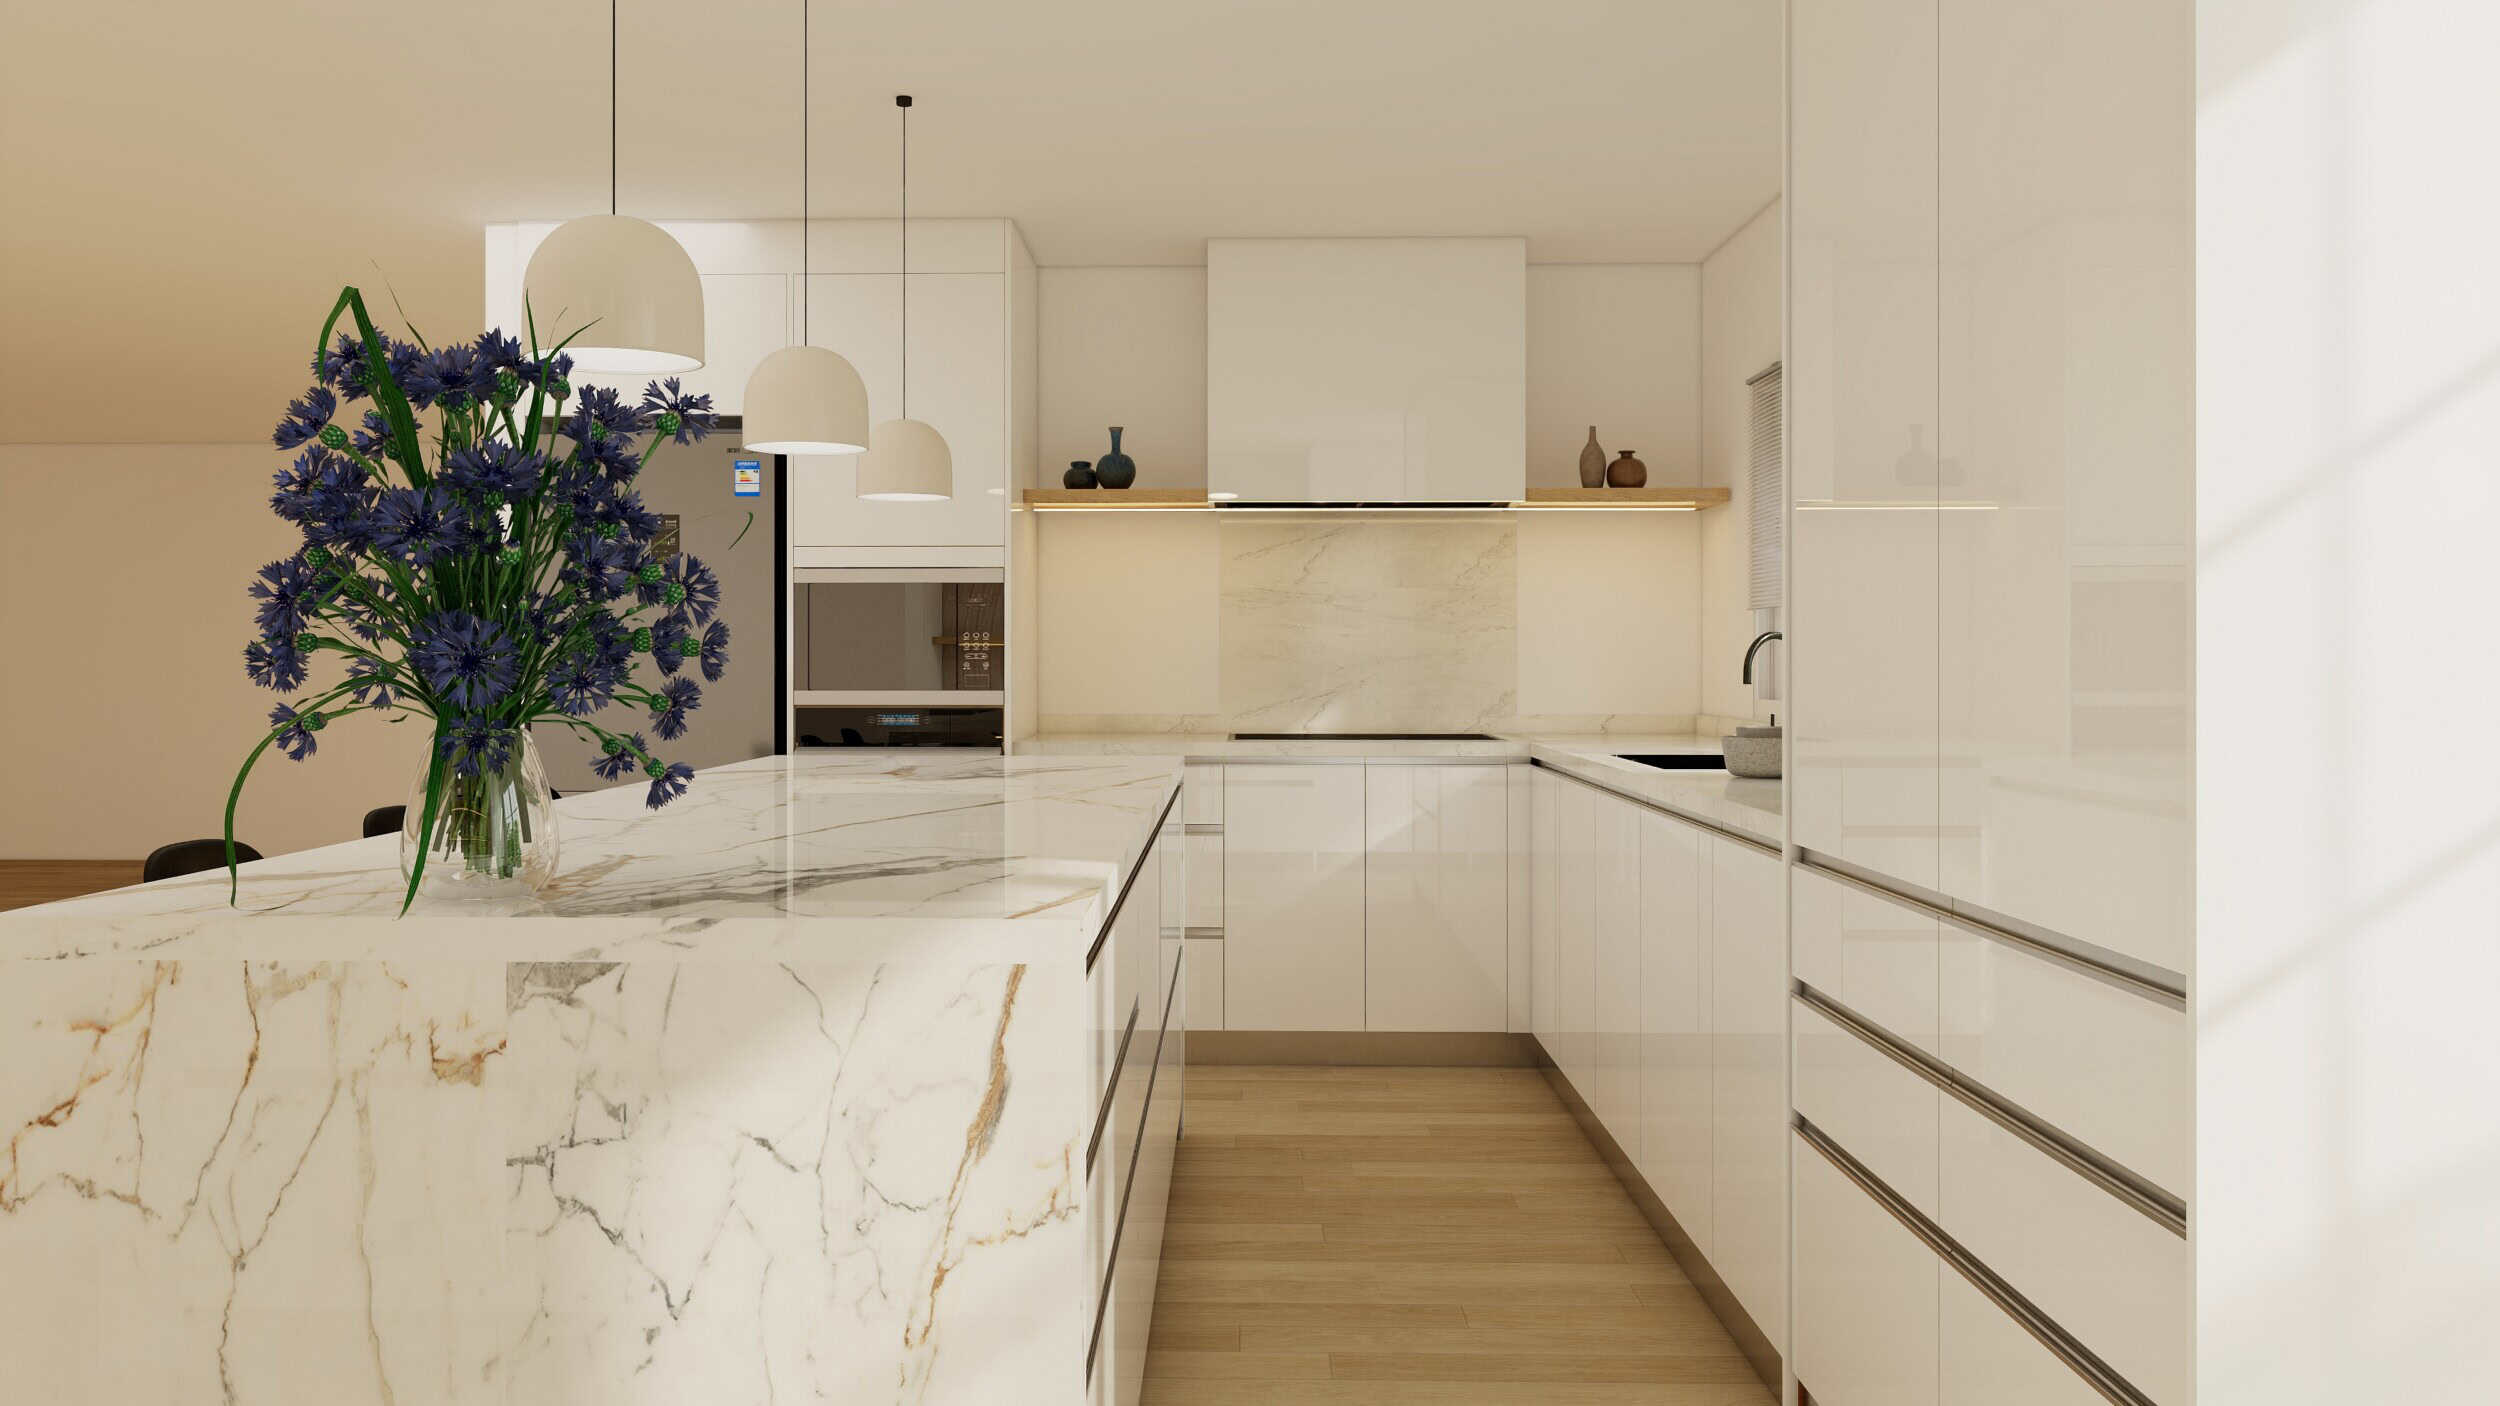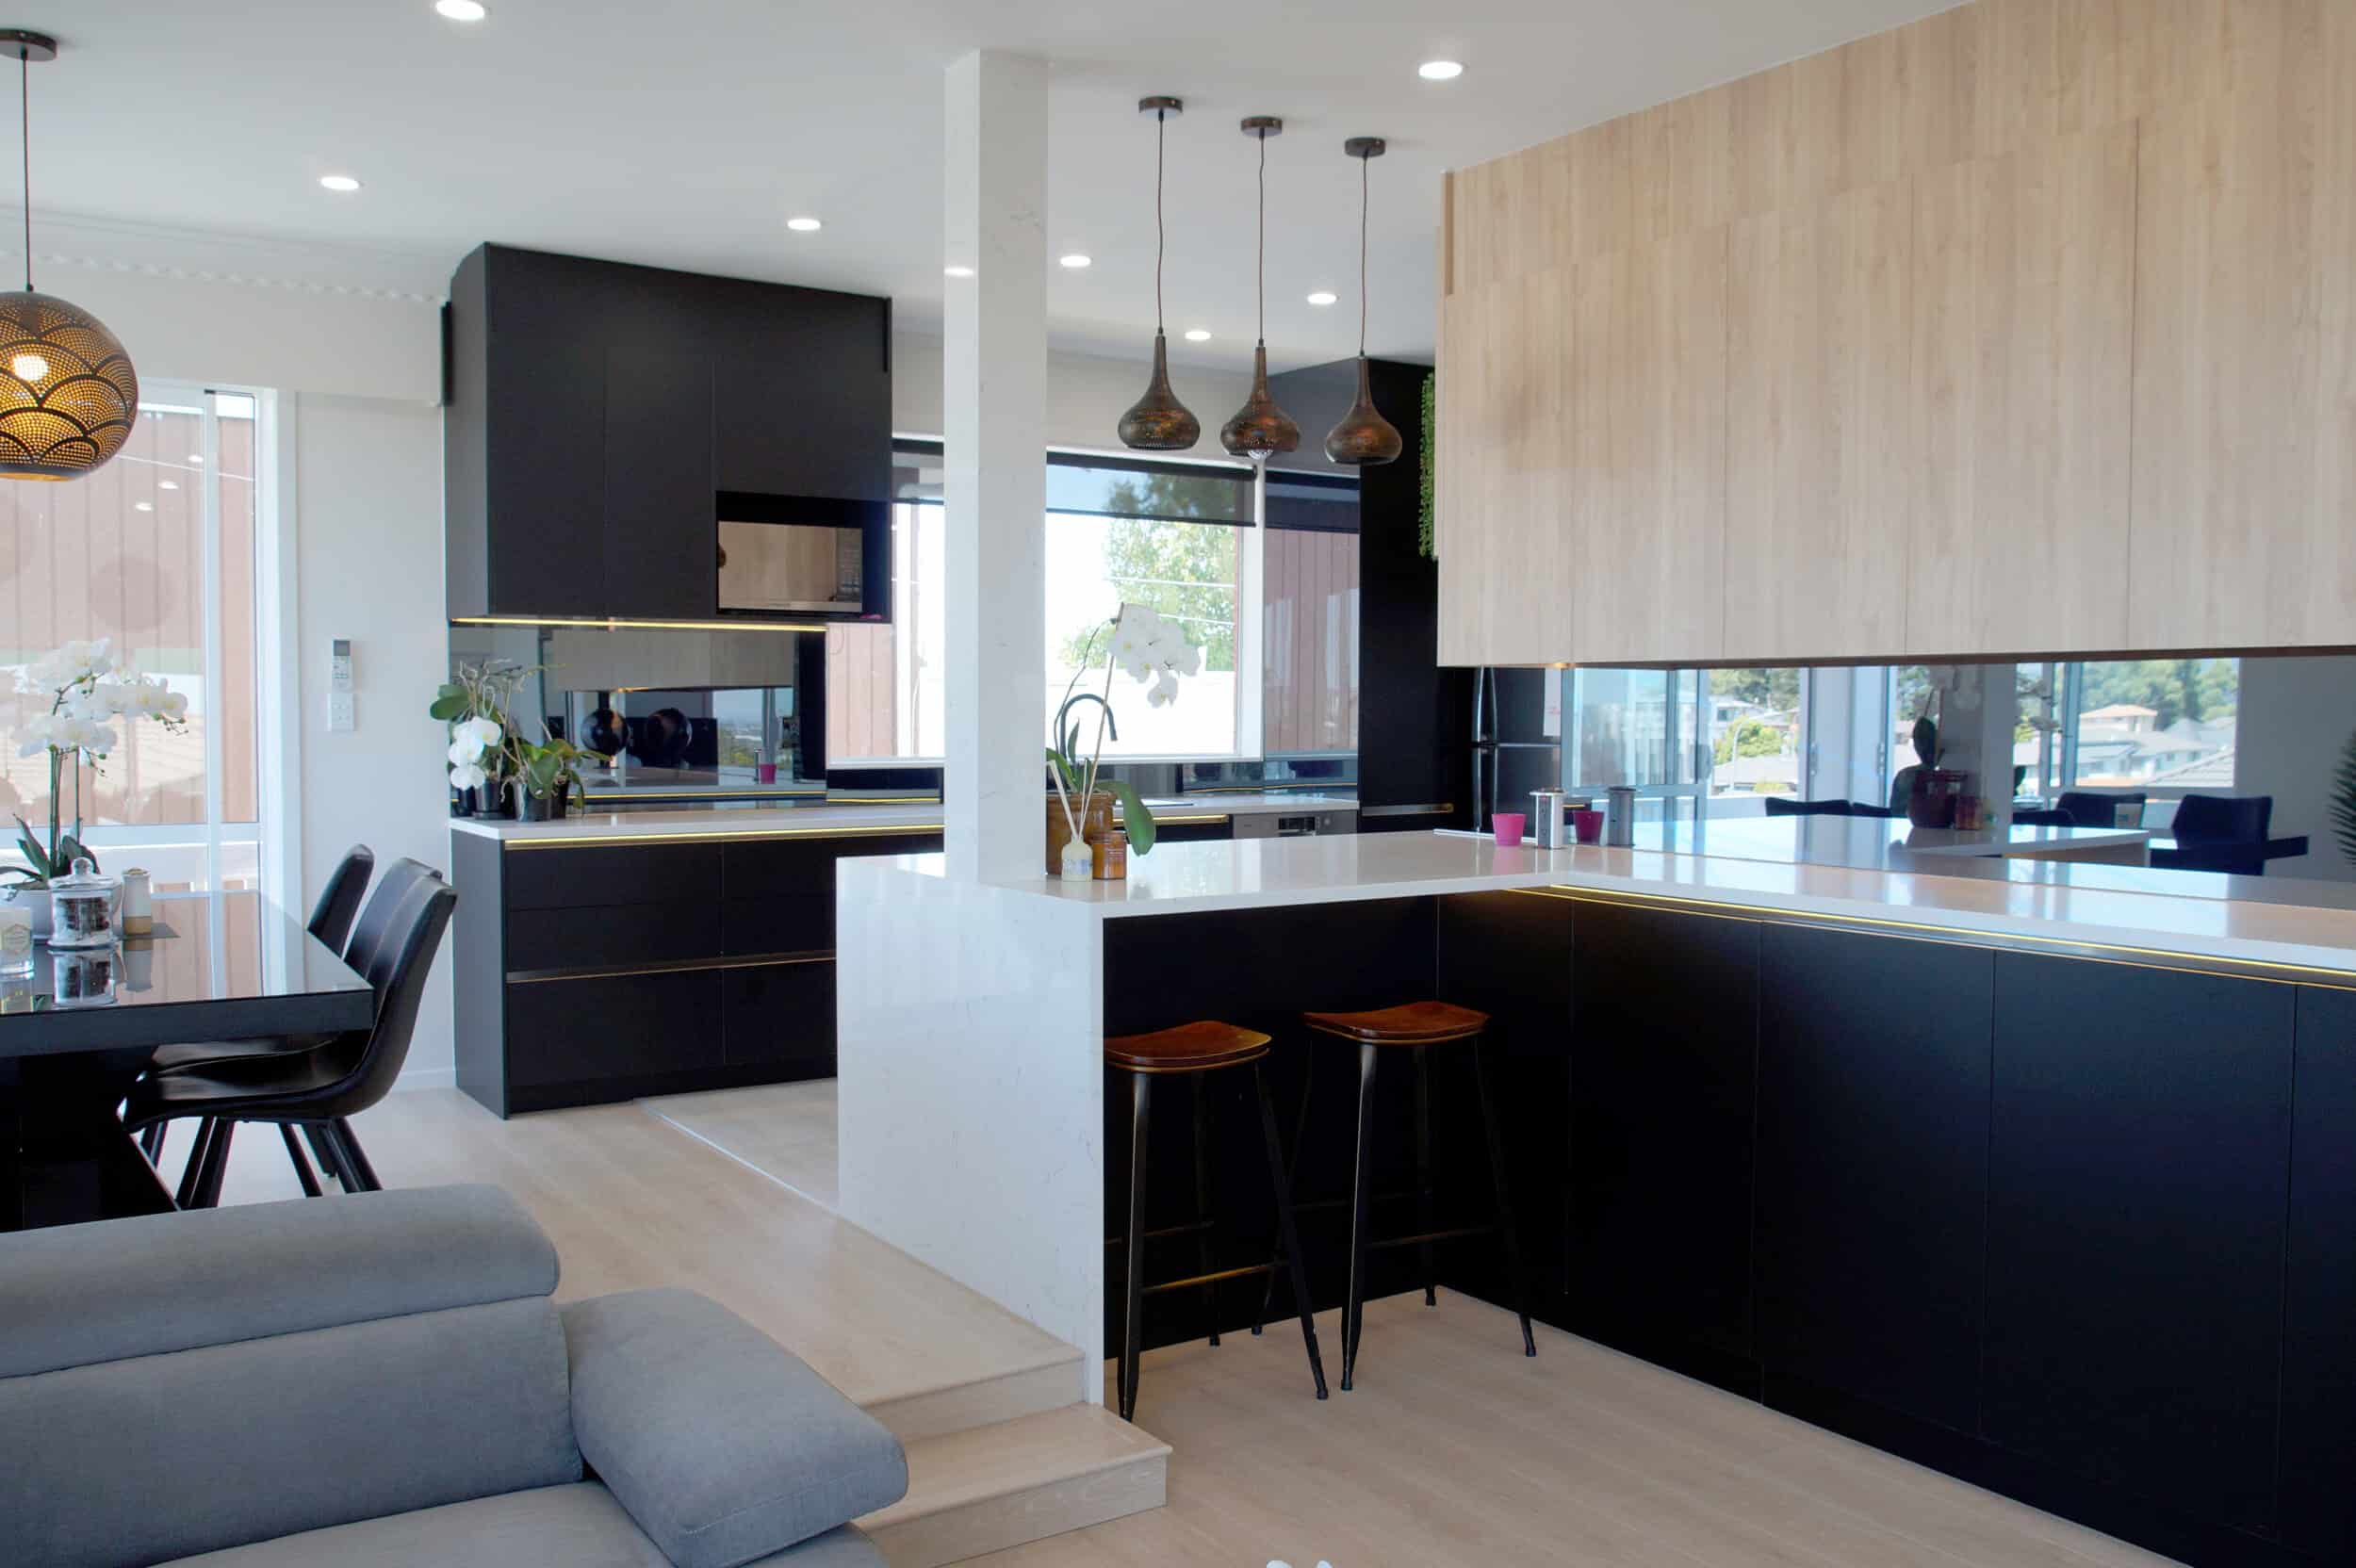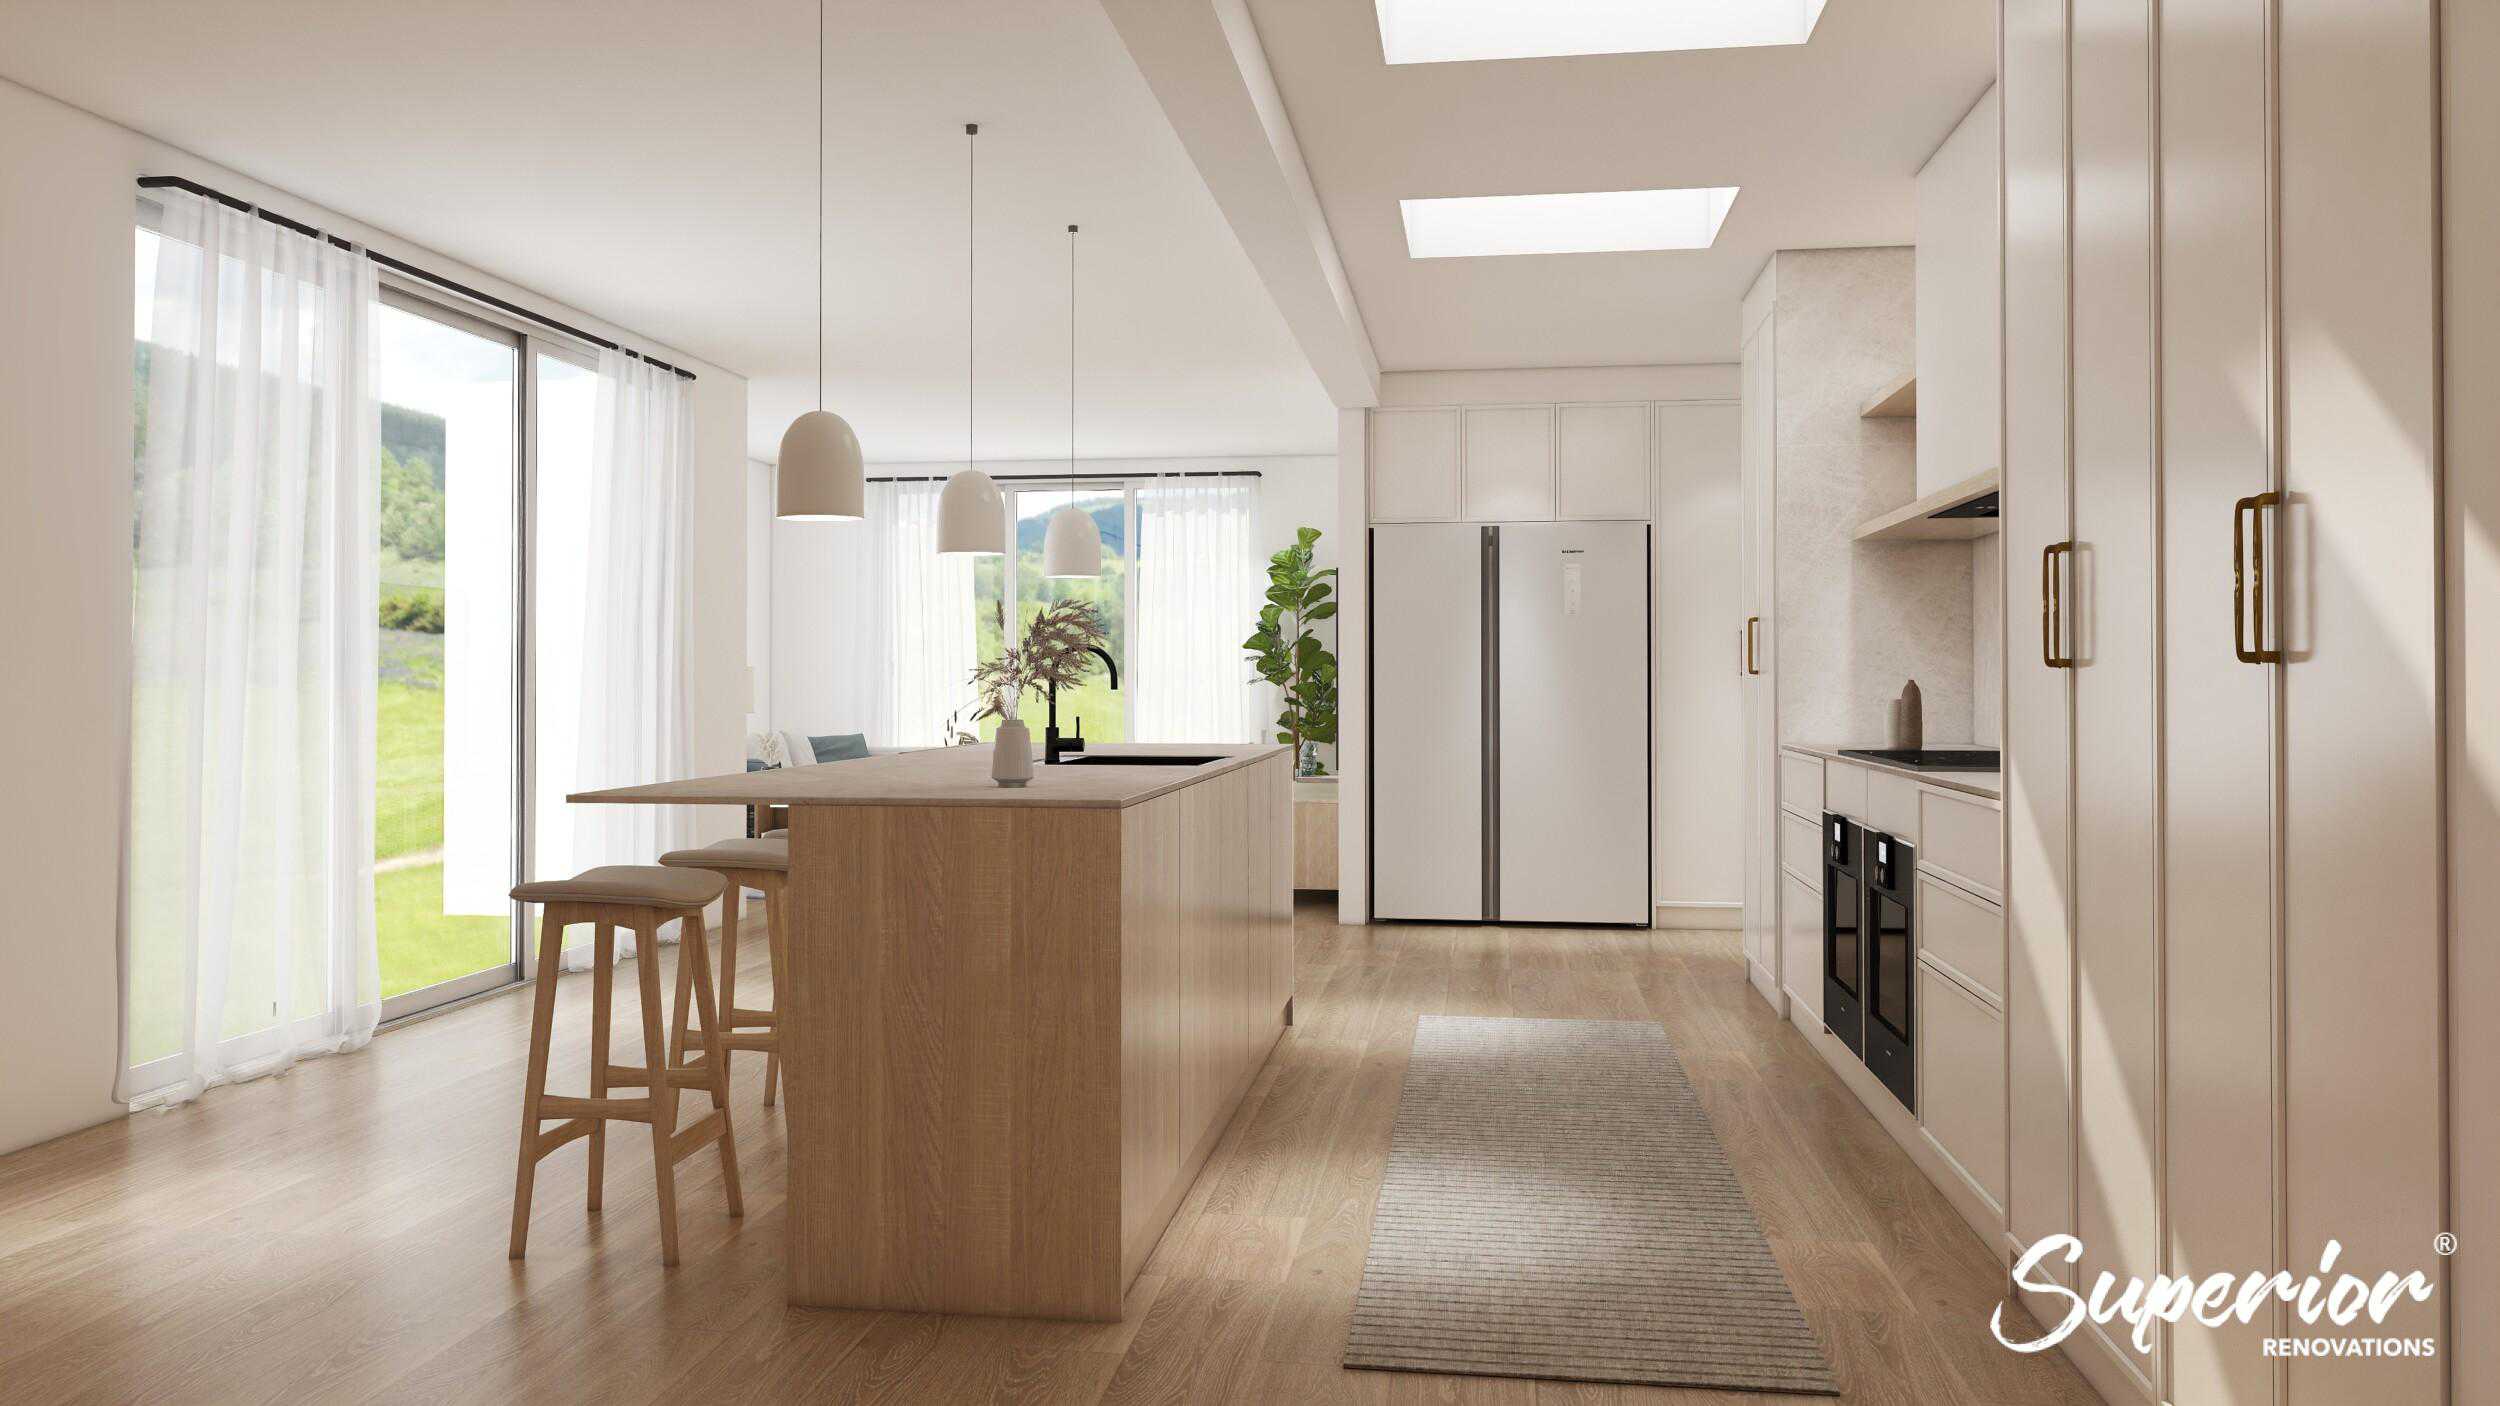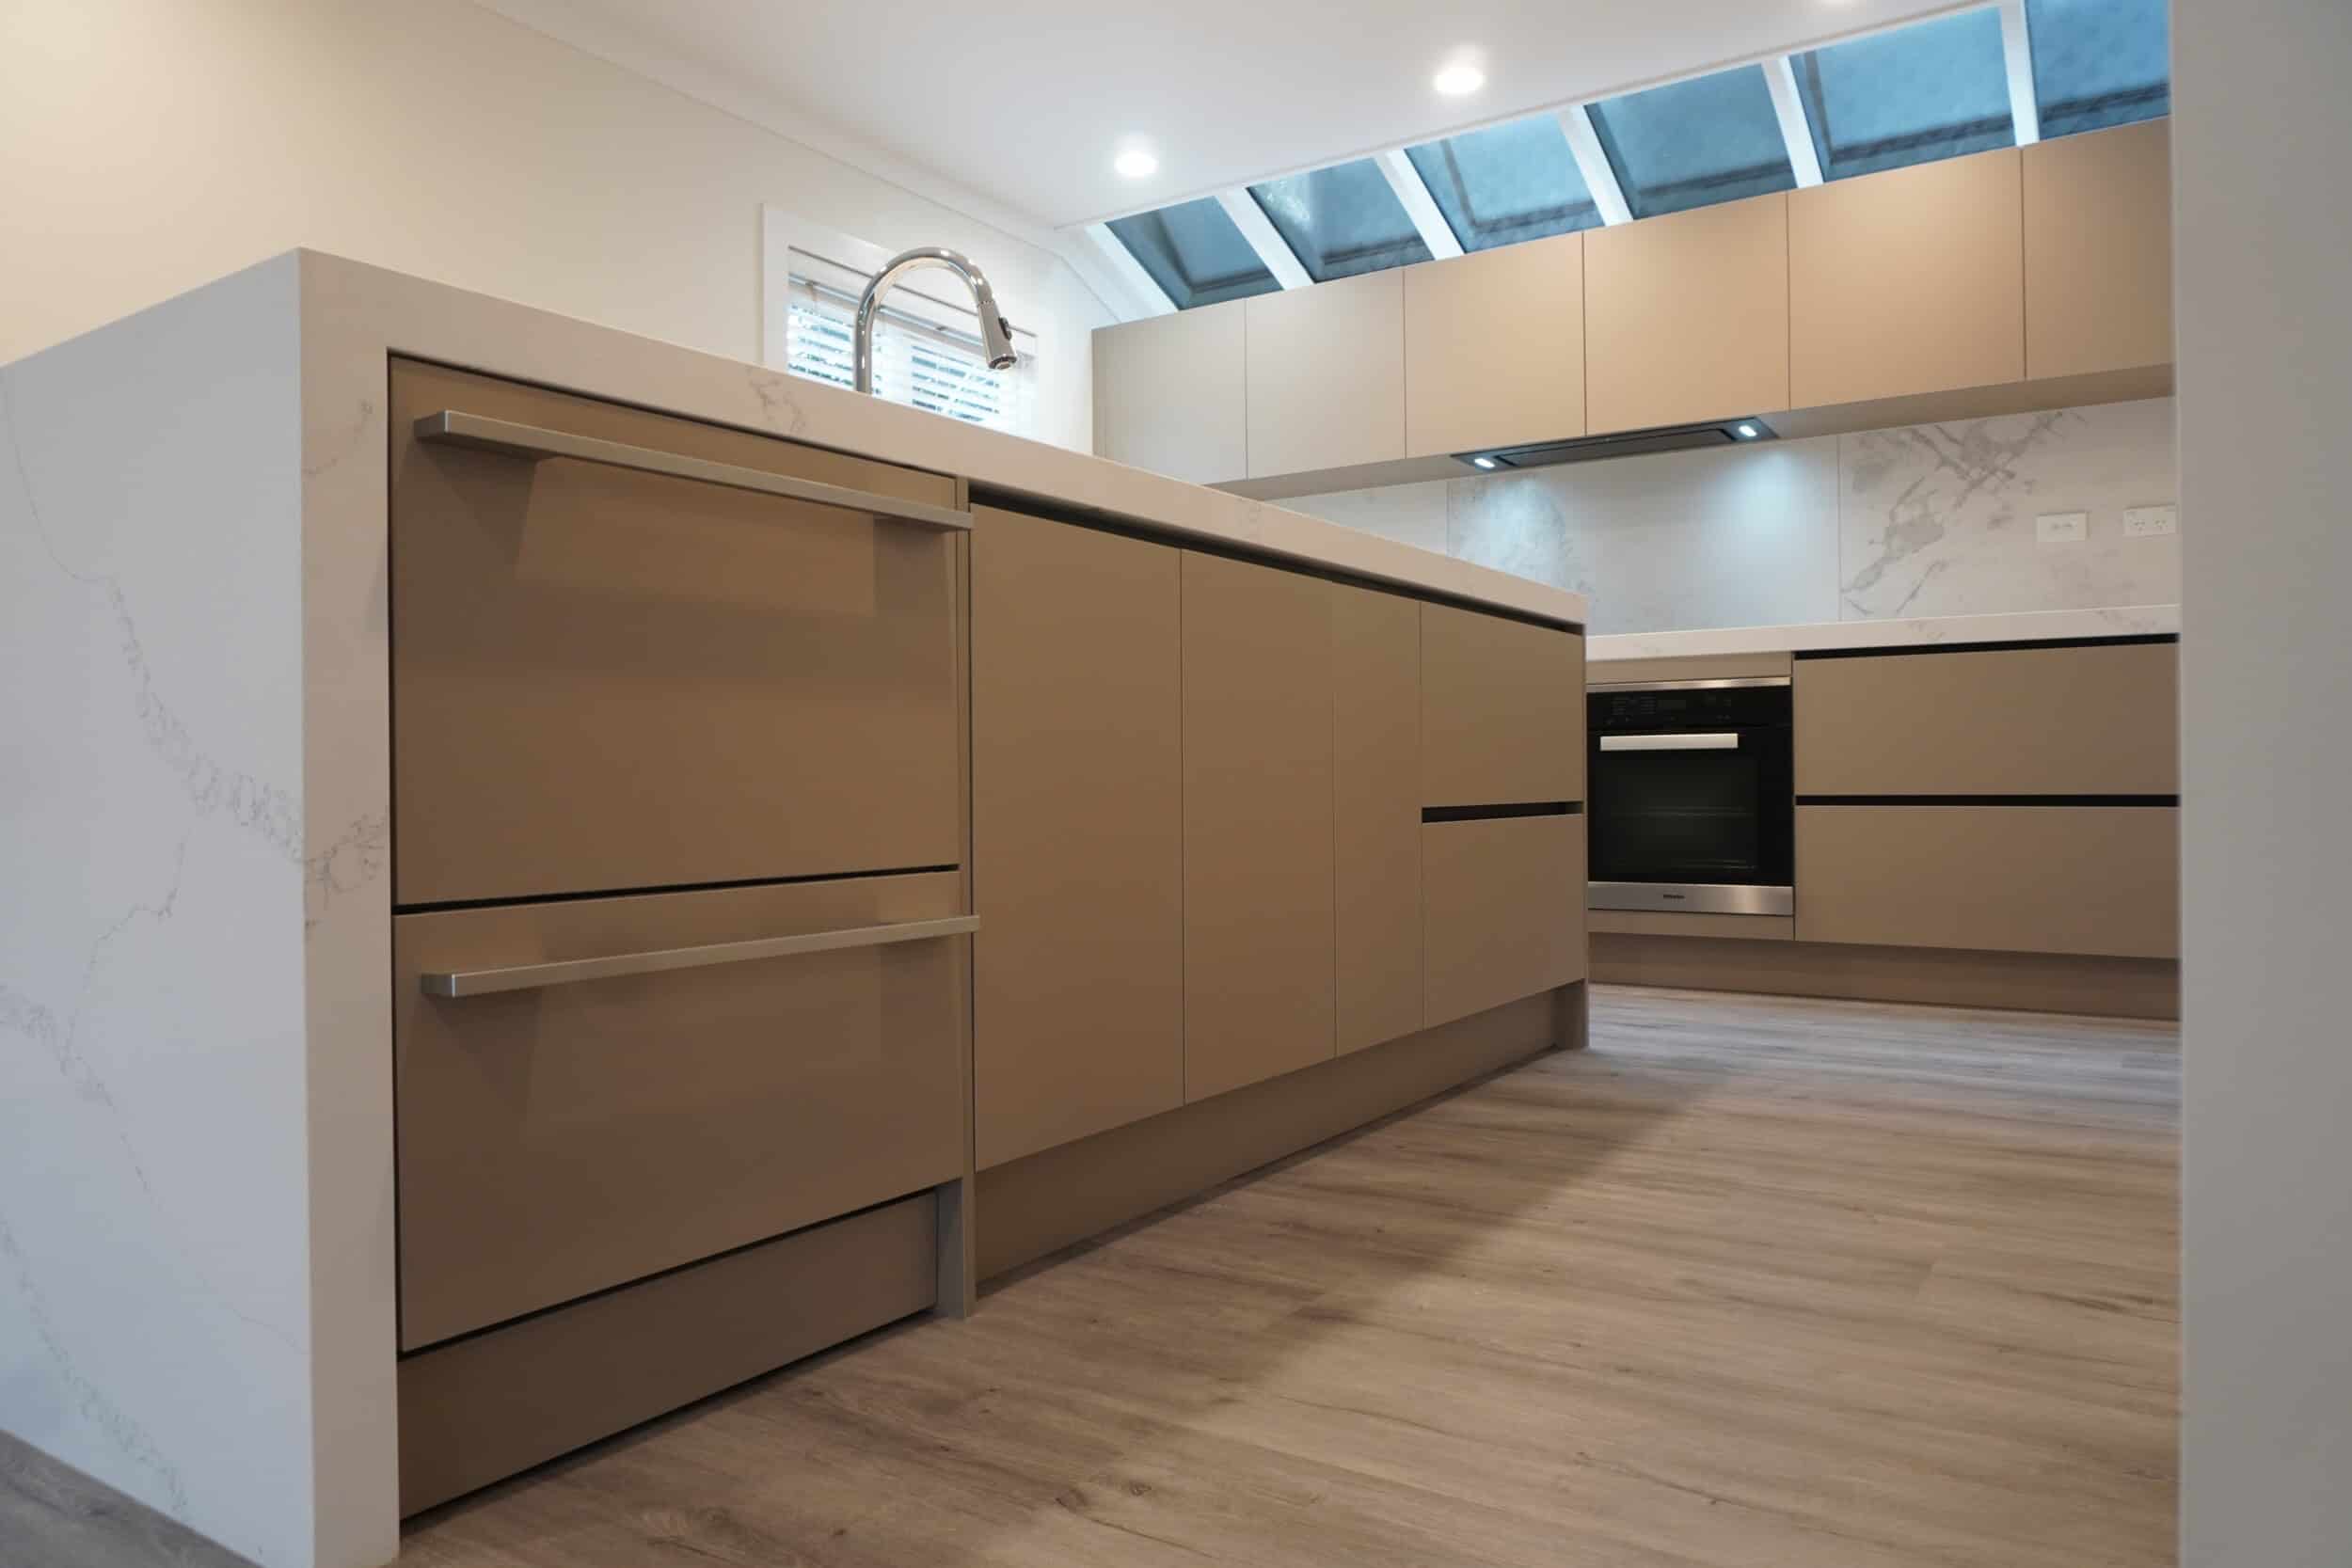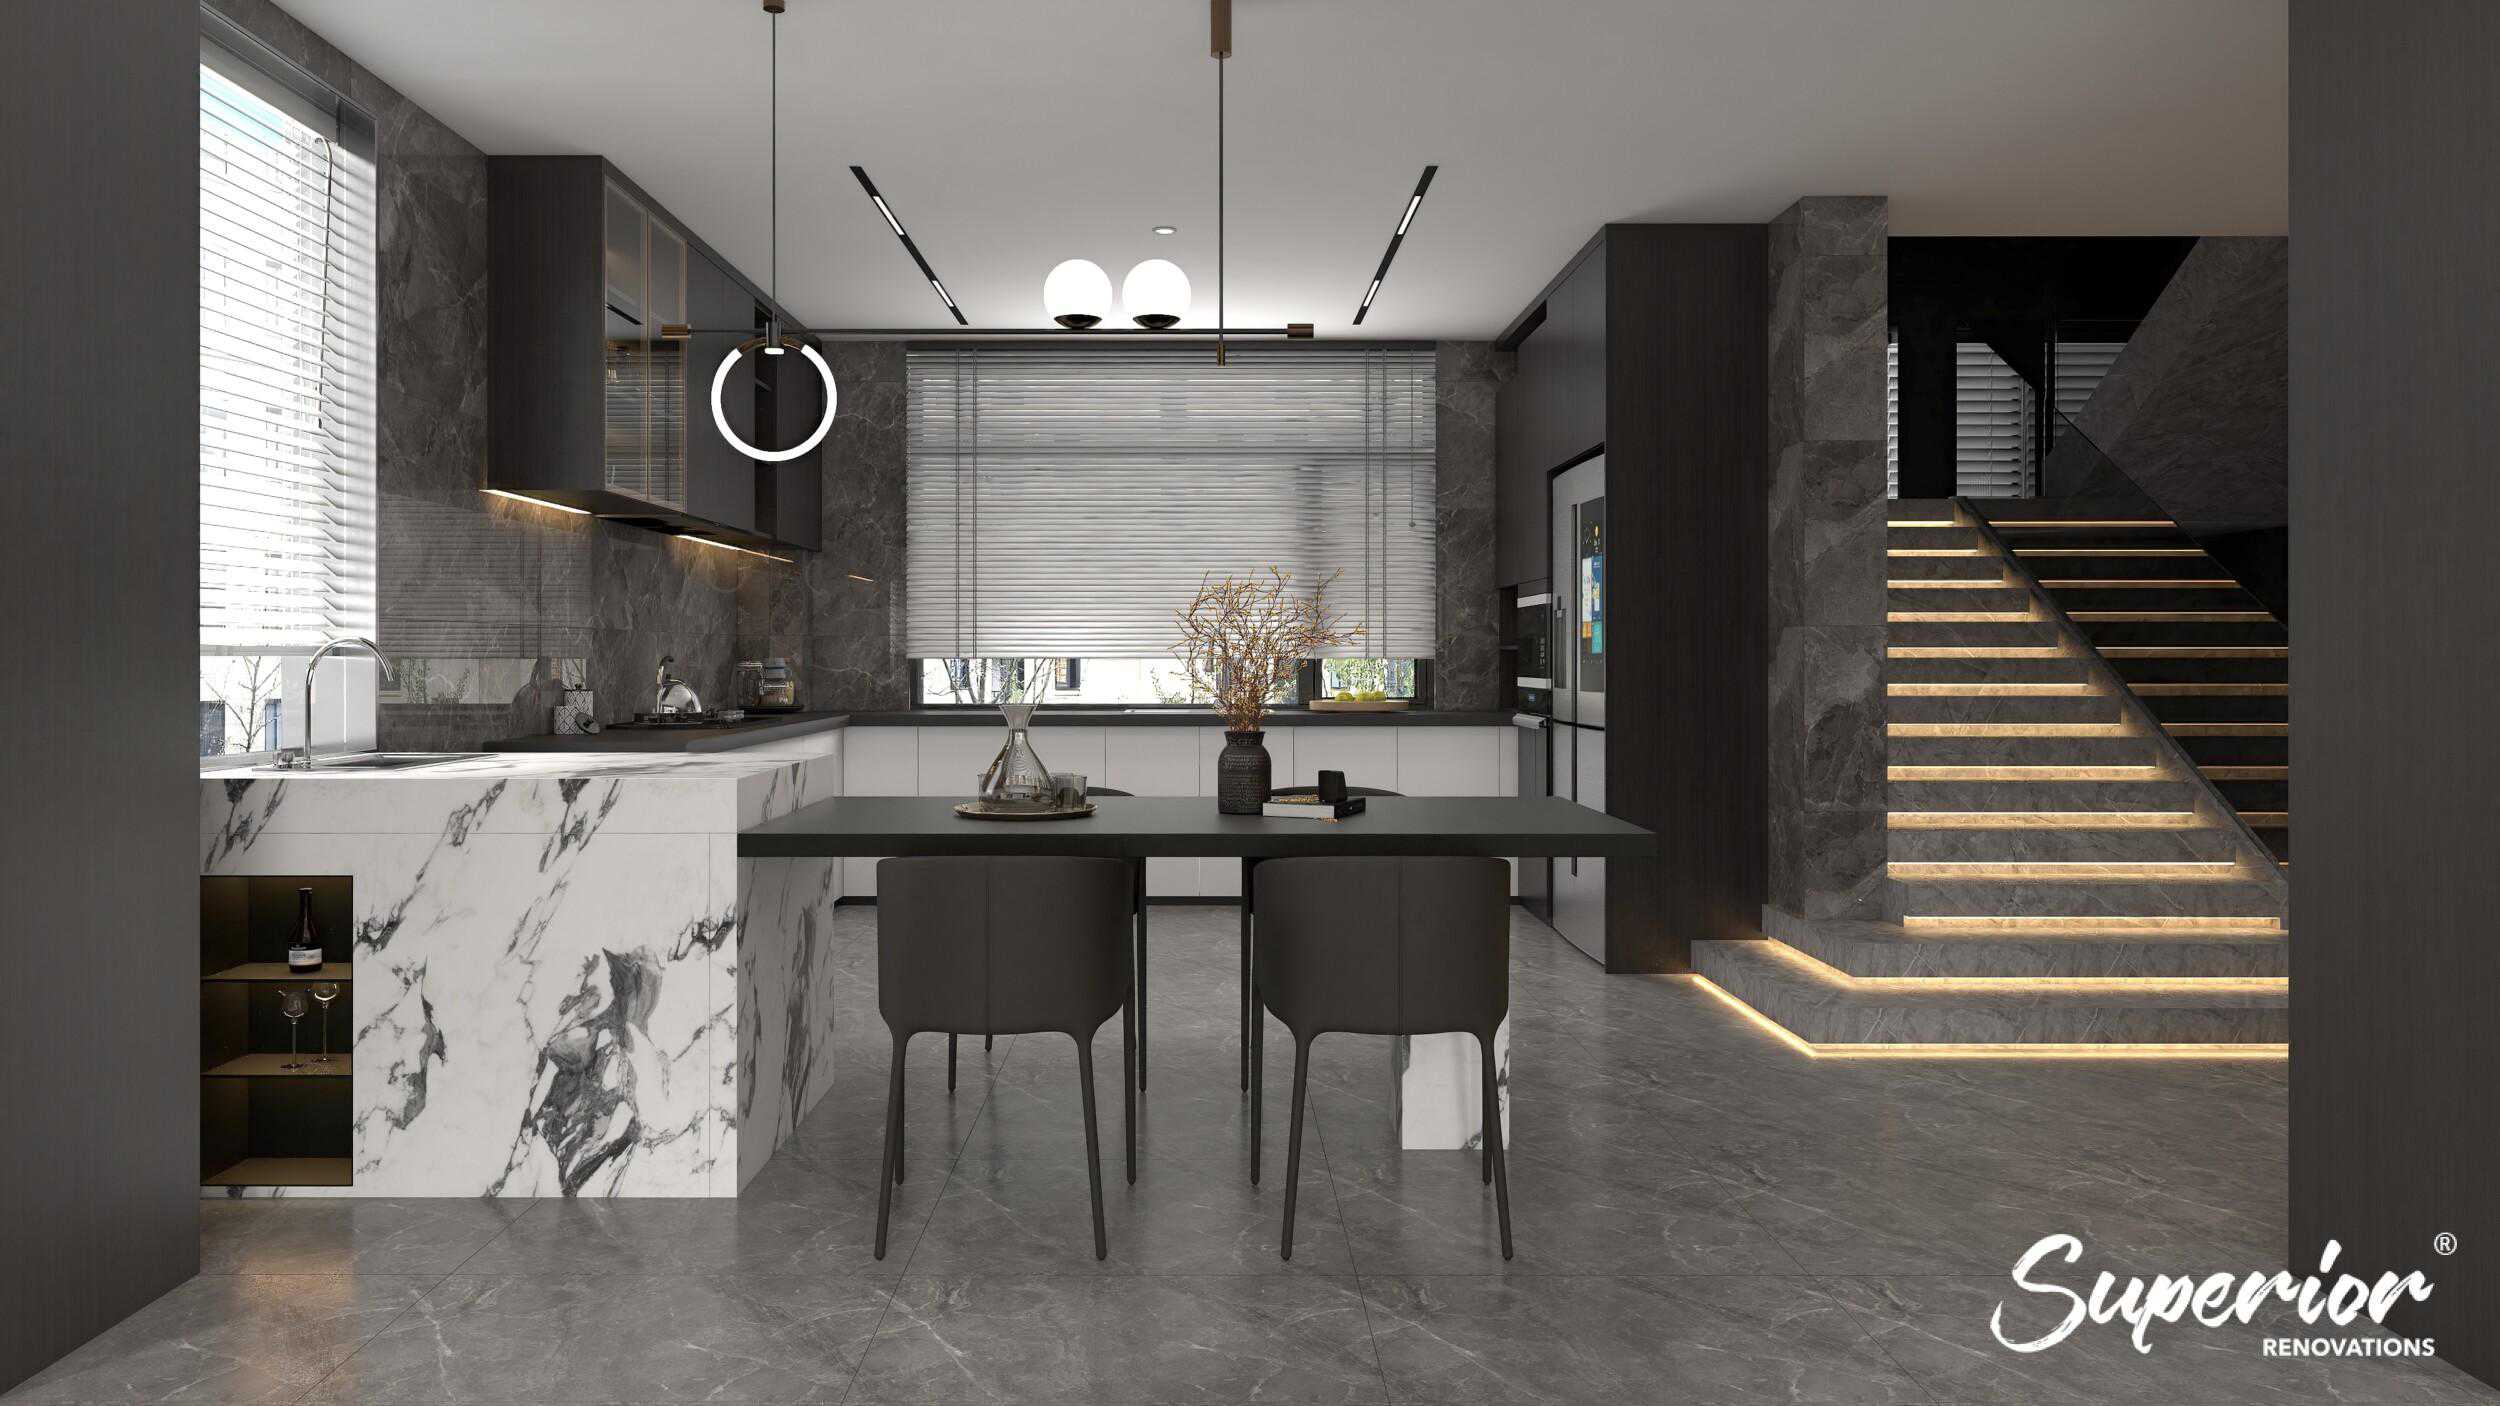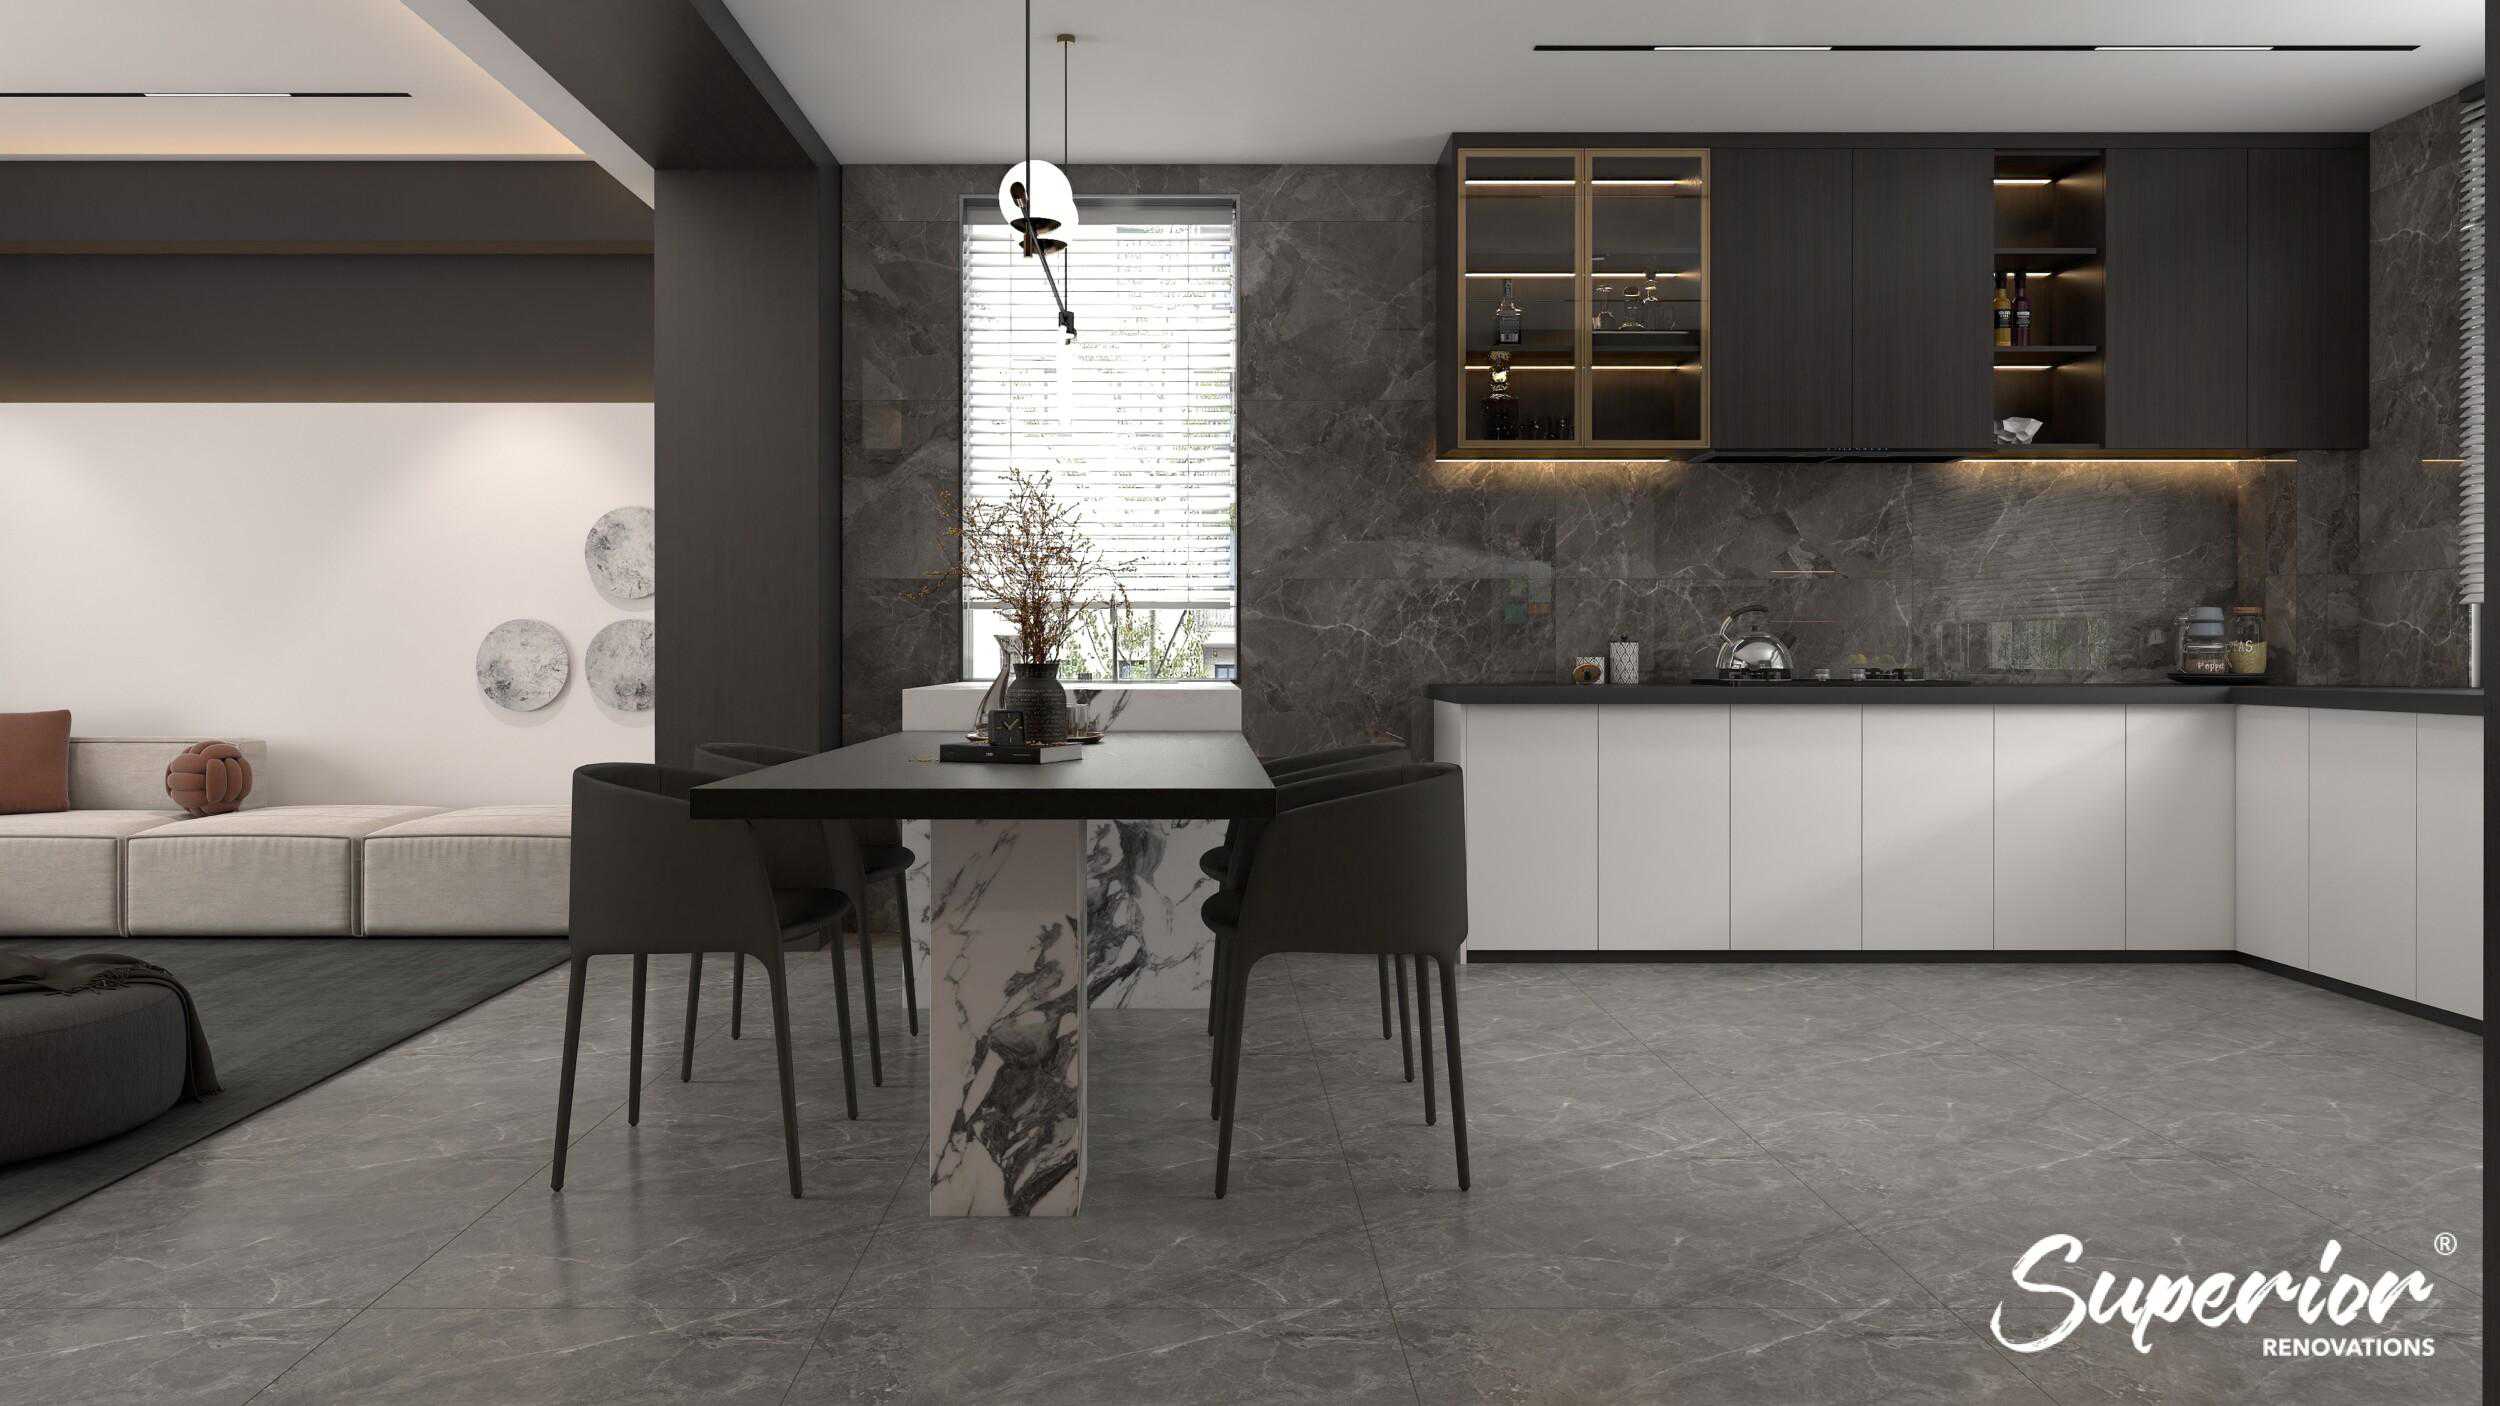

Kitchen Renovation

KIT 06 02 - Superior Renovations
Kitchen Renovation

Kitchen Layout Guide NZ: 6 Layouts & the Work Triangle

Kitchen Layout Guide NZ: 6 Layouts & the Work Triangle

Quick answer: The best kitchen layout is the one that keeps your sink, stove and fridge close enough to move between easily — the “work triangle” — while leaving clear walkways and enough bench space for how your household actually cooks. For most Auckland homes that’s an L-shaped or galley layout in tighter spaces, and a U-shaped or island layout where there’s room to spread out.

Planning a kitchen layout is the part of a renovation that quietly decides everything else. Get it right and the room works for fifteen years without you thinking about it. Get it wrong and you spend every dinner walking around an island that’s 200mm too close to the oven. Whether you’re reworking a tight galley in a Ponsonby villa or opening up a family kitchen in Albany, the layout is the foundation — so this guide covers the six main kitchen layouts, the work triangle, the measurements that matter, and the design moves our team uses to make Auckland kitchens flow.


What Is the Best Kitchen Layout? The Six Main Types

Free cost calculator

How much will your kitchen renovation cost?

Get an instant Auckland price range for your project — no details required to see it.

Open the Kitchen Cost Calculator →

There’s no single best kitchen layout — there’s the right one for your space and how you cook. The six layouts below cover almost every Auckland kitchen, from a single-wall apartment to a double-island entertainer.

  • Galley — two parallel runs of cabinetry with a walkway between. Best for narrow rooms and one main cook.
  • L-shaped — cabinetry along two adjoining walls. The most versatile layout; suits small-to-medium kitchens and open-plan corners.
  • U-shaped — cabinetry on three walls. Maximum bench and storage; needs a larger room.
  • Island — a freestanding bench in the centre, added to an L, U or open-plan layout for prep, storage and seating.
  • Peninsula — an island connected at one end, giving the same benefit where there isn’t room for a standalone island.
  • Single-wall — everything on one wall. The footprint-saver for apartments and very small spaces.

At the centre of all six is the work triangle: the path between your sink, stove and fridge. Keep the three legs adding up to roughly 4–8 metres with no through-traffic crossing the middle, and the kitchen will feel efficient no matter which layout you choose. Everything else — storage, lighting, finishes — is built on top of getting that triangle right.


Kitchen Ergonomics and the Work Triangle

Ergonomics is the study of designing a space around the people using it, rather than making people adapt to the space. In a kitchen, that mostly comes down to the work triangle — and it’s the single most useful planning idea we give clients.

The work triangle connects the three spots where the actual work happens: the stove (cooking), the sink (cleaning and prep), and the fridge (storage). The rule is simple. Those three points should sit close enough to move between in a few steps, and nothing — no island, no dining table, no walkway — should cut through the middle of the triangle.

“The work triangle is old, but it still holds. What’s changed is that modern open-plan kitchens run on zones as much as the triangle — a prep zone, a cooking zone, a cleaning zone, a storage zone. In a busy Auckland family kitchen with two people cooking, zoning is what stops everyone colliding at the same bench.”
— Dorothy Li, Design Manager, Superior Renovations

💡 Quick tip: if two people cook in your house regularly, plan for it. Allow 90–120cm of walkway so two people can pass, and give the second cook their own bit of bench away from the main triangle.


7 Essentials to Plan Before You Choose a Kitchen Layout

Whatever shape your kitchen ends up, it has to be livable first. You need to move around it without bumping into things, and open every cabinet and appliance door without it hitting something else. That’s why space planning comes before shape. Here are the seven things our designers work through before locking in any layout.

1. Foot Traffic and Designated Storage Zones

Your first job is a clear primary pathway through the kitchen that doesn’t get blocked when the oven or dishwasher door is open. Kitchens are high-traffic — usually the busiest room in the house. Map where everything lives before you design: big appliances, cutlery, everyday utensils, the washing zone, the cooking zone. For inspiration on the finished look, browse our kitchen designs from Auckland projects. Give each a designated home. The drawing below shows how the zones should fall.

Kitchen layout zones for circulation, preparation and cooking

Clear zones for circulation, meal prep and cooking (Image courtesy RoomSketcher)

2. Distance Between Your Fixtures

A cramped kitchen looks fine on a plan and fails in real life. Think about the gap between your cooking zone and your sink, and don’t let the fridge sit so far from the stove that you’re walking laps mid-cook. Your dishwasher wants to be right by the sink so you can rinse and load in one move. The plan can hide these problems; the daily cooking won’t.

3. Distance Between Your Island and the Cooking Area

If you’ve got an island, the gap between it and the cooktop matters more than almost anything else. Too far and your prep-to-cook flow falls apart. Too close and only one person can work in the space, and the island’s own cabinet doors start colliding with the run behind them. Aim for 100–120cm of clearance around an island.

L-shaped kitchen island, Blockhouse Bay renovation

This island from our Blockhouse Bay renovation sits a clear distance from the counters

L-shaped kitchen with large island and bar stools, Stanmore Bay

L-shaped kitchen from our Stanmore Bay renovation — large island with bar stools and a hob

4. Place the Sink and Cooktop First

A good rule: figure out where the sink, cooktop and dishwasher go before anything else. That’s where most of the action happens, so designers lock those in before designating prep and storage zones. Leave plenty of room around both the sink and cooktop. If you’ve got a large island with surface area to spare, putting the sink on it can give you a generous work zone.

5. Be Smart About the Cooktop

Ventilation matters more in Auckland than people think — our humid summers and the steam off a good fry-up will leave moisture sitting in the room, and over time that means mould on the walls and ruined cabinetry, especially in an open-plan setting. It’s not just a comfort issue: Building Performance (MBIE) notes that a rangehood over the cooktop is the mechanical extraction that clears cooking moisture before it settles on cold surfaces — and that very airtight homes may need a window cracked on the opposite side of the house for the extractor to actually pull air. You can put a cooktop on an island, but a proper island extraction system is expensive and you lose the splashback that catches the splatters. We usually steer clients toward a cooktop on an exterior wall, where ventilation is simpler to run and you get a splashback for free.

6. Keep Vertical Storage in Mind

Storage makes or breaks a kitchen. A beautiful kitchen with nowhere to put things is a bad kitchen. Not everyone has a big footprint to work with — but a small kitchen doesn’t have to mean no storage. Go up. Wall-mounted vertical storage reached by a kitchen ladder, tall cabinetry, hooks and open shelves all claw back space the floor plan can’t give you. For more on squeezing storage out of a tight footprint, our small kitchen design ideas guide goes deeper.

7. Create a Floor Plan and Visualise It in 3D

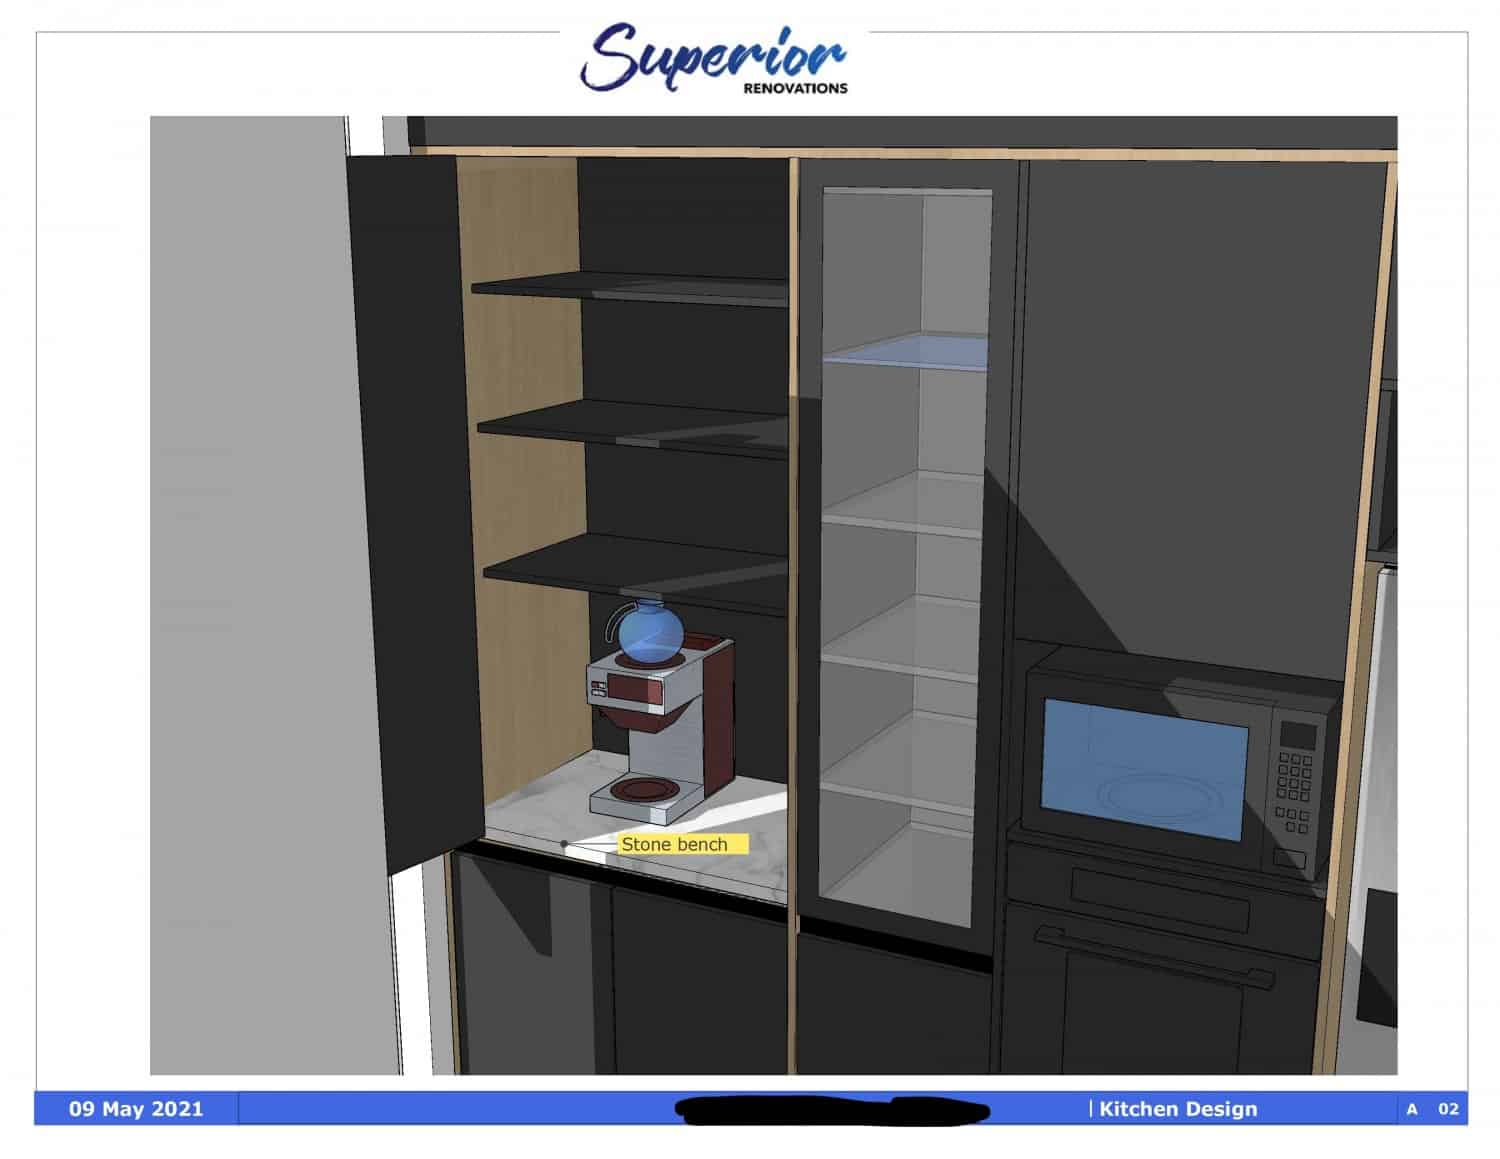
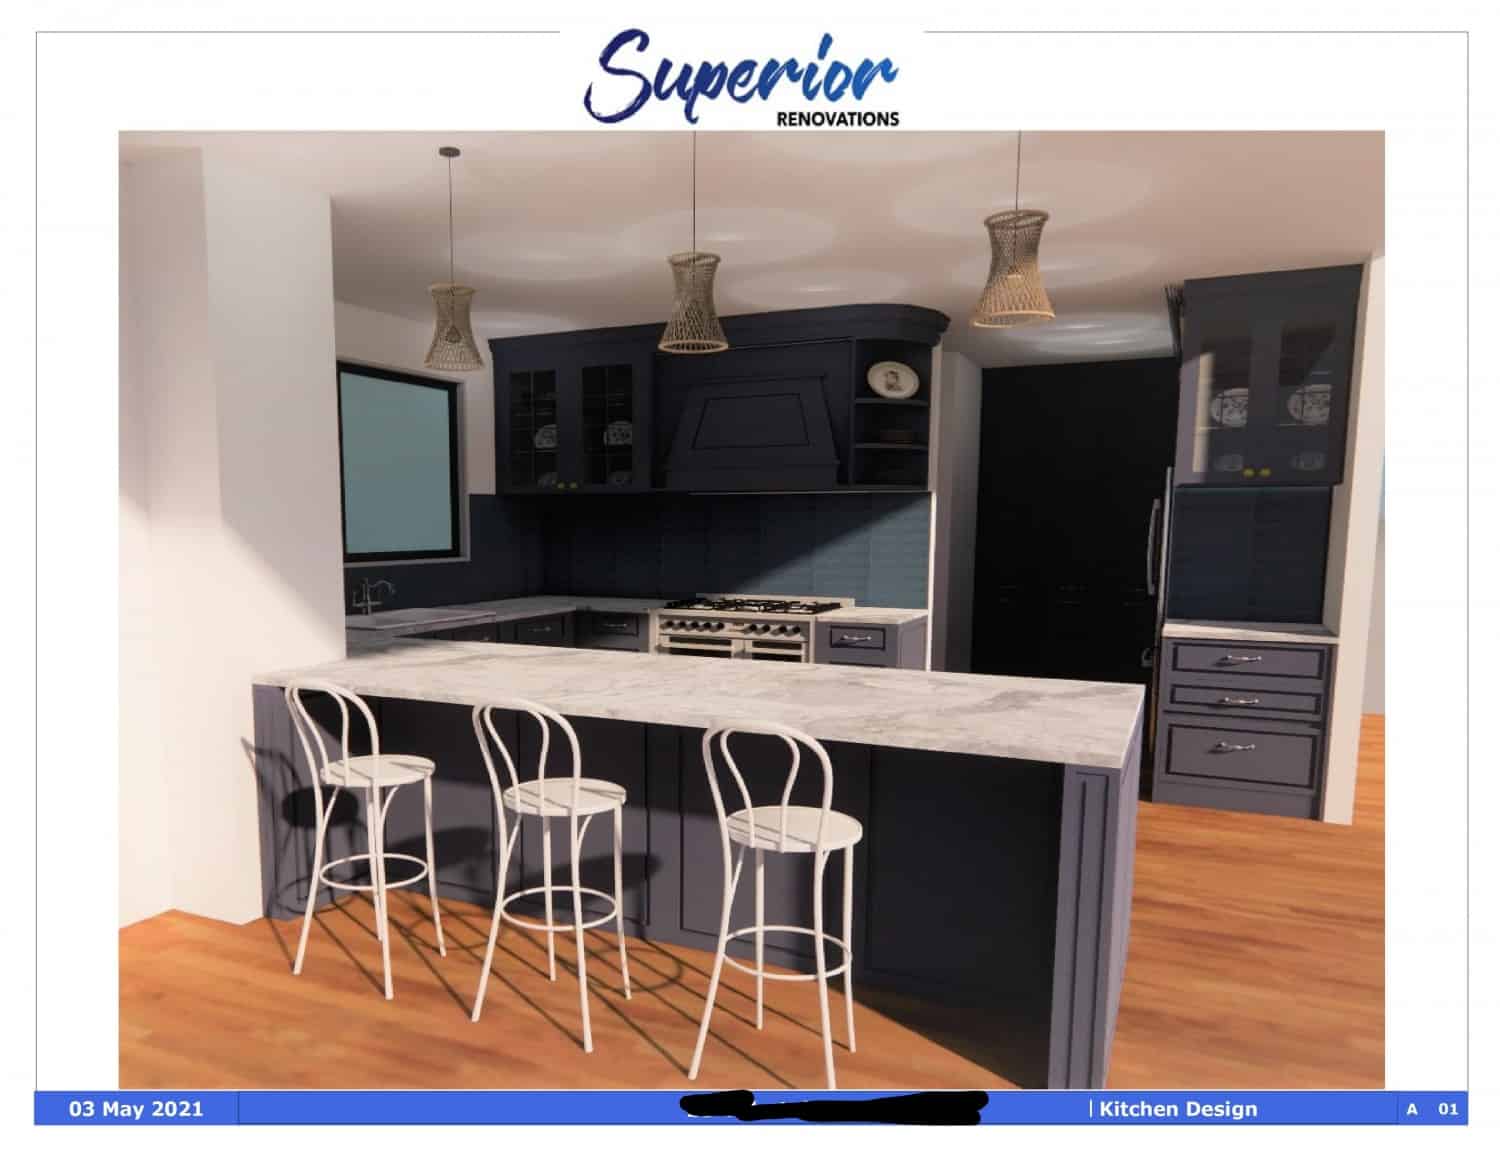
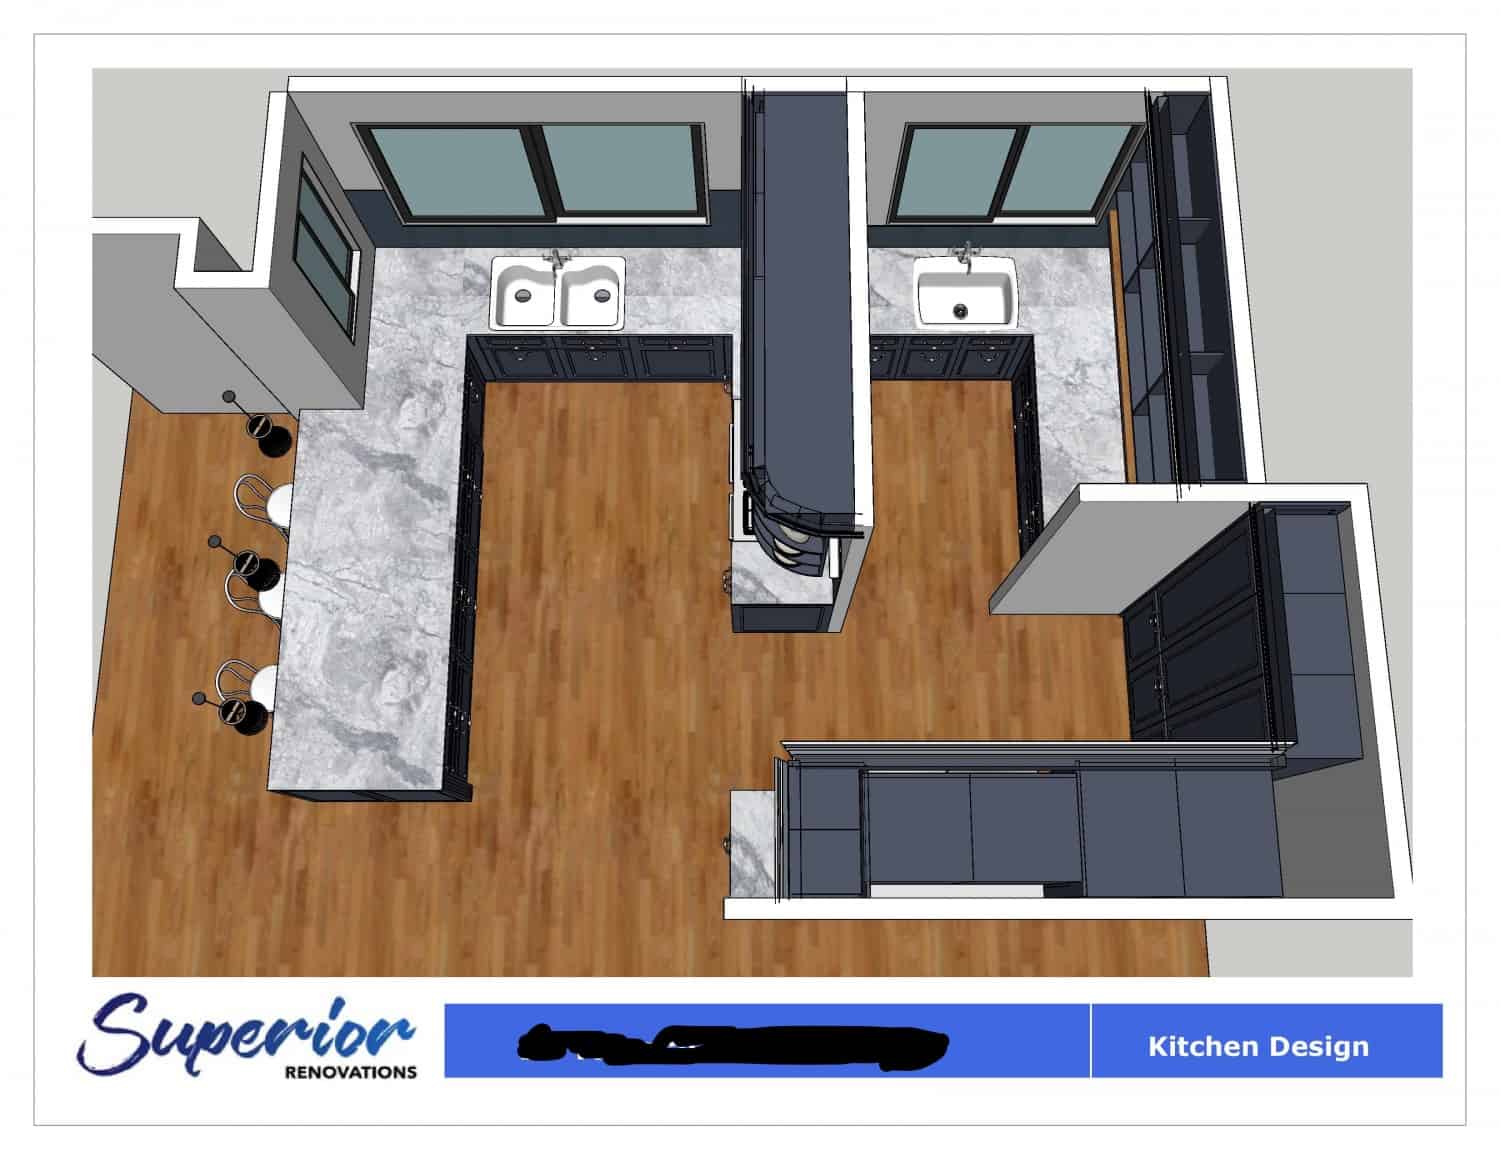
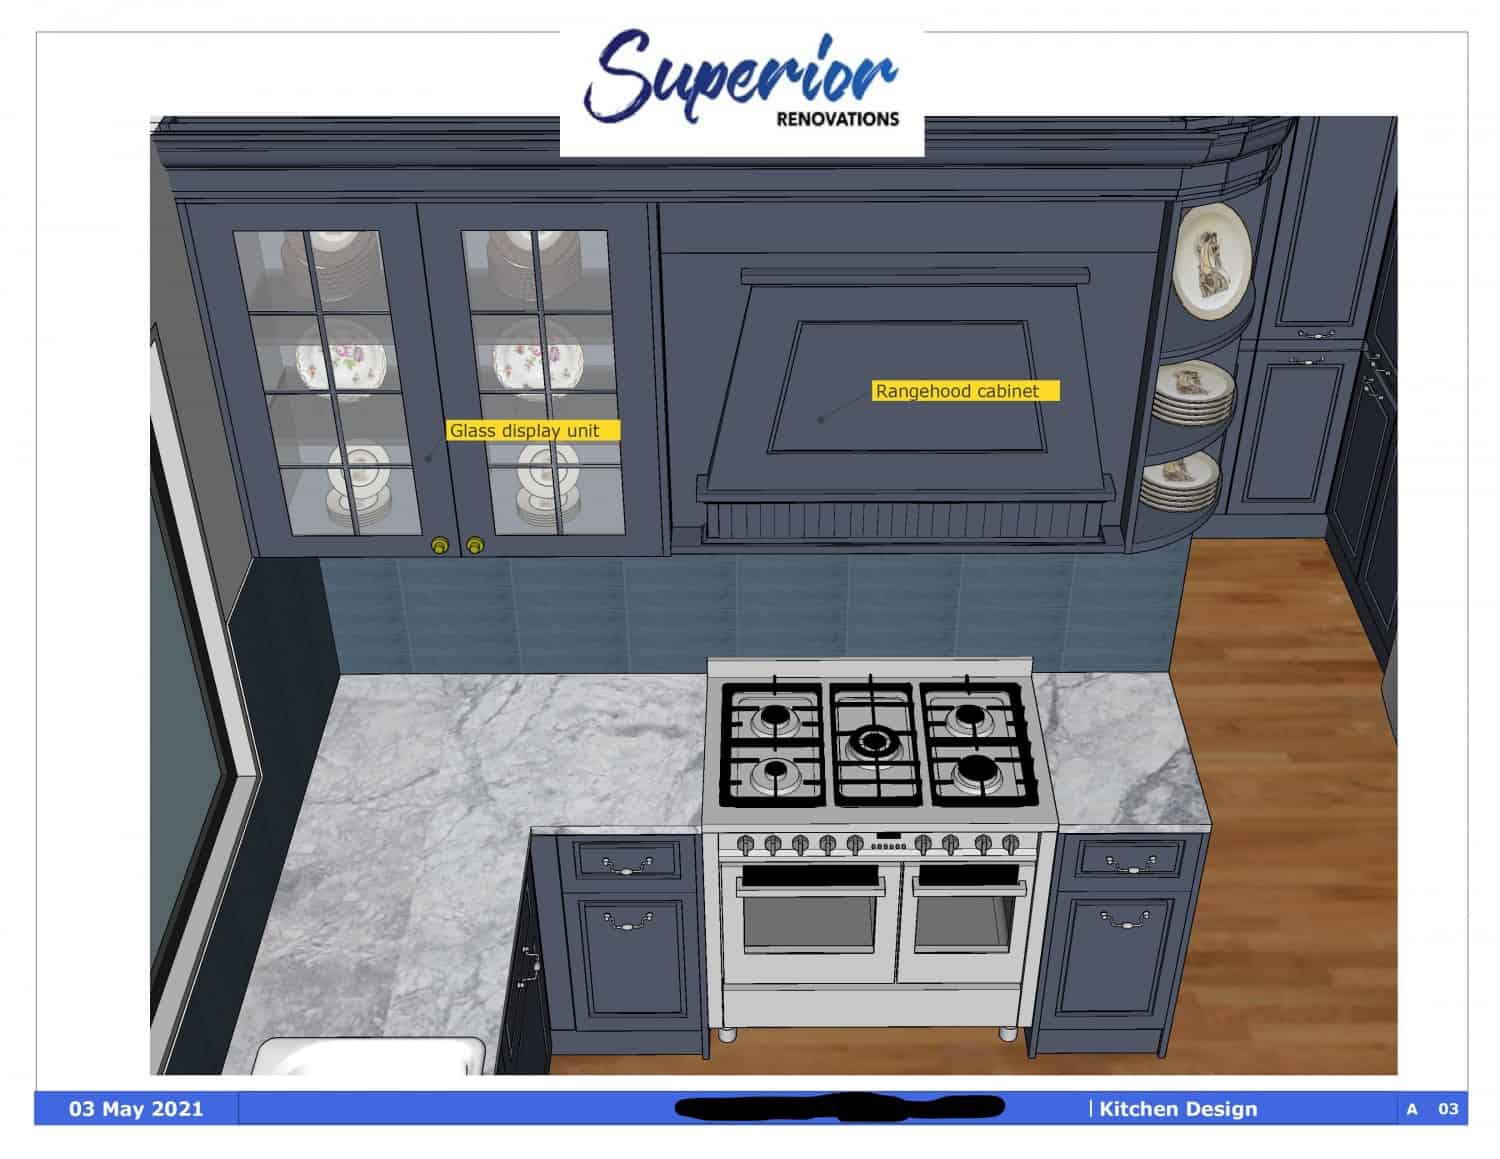
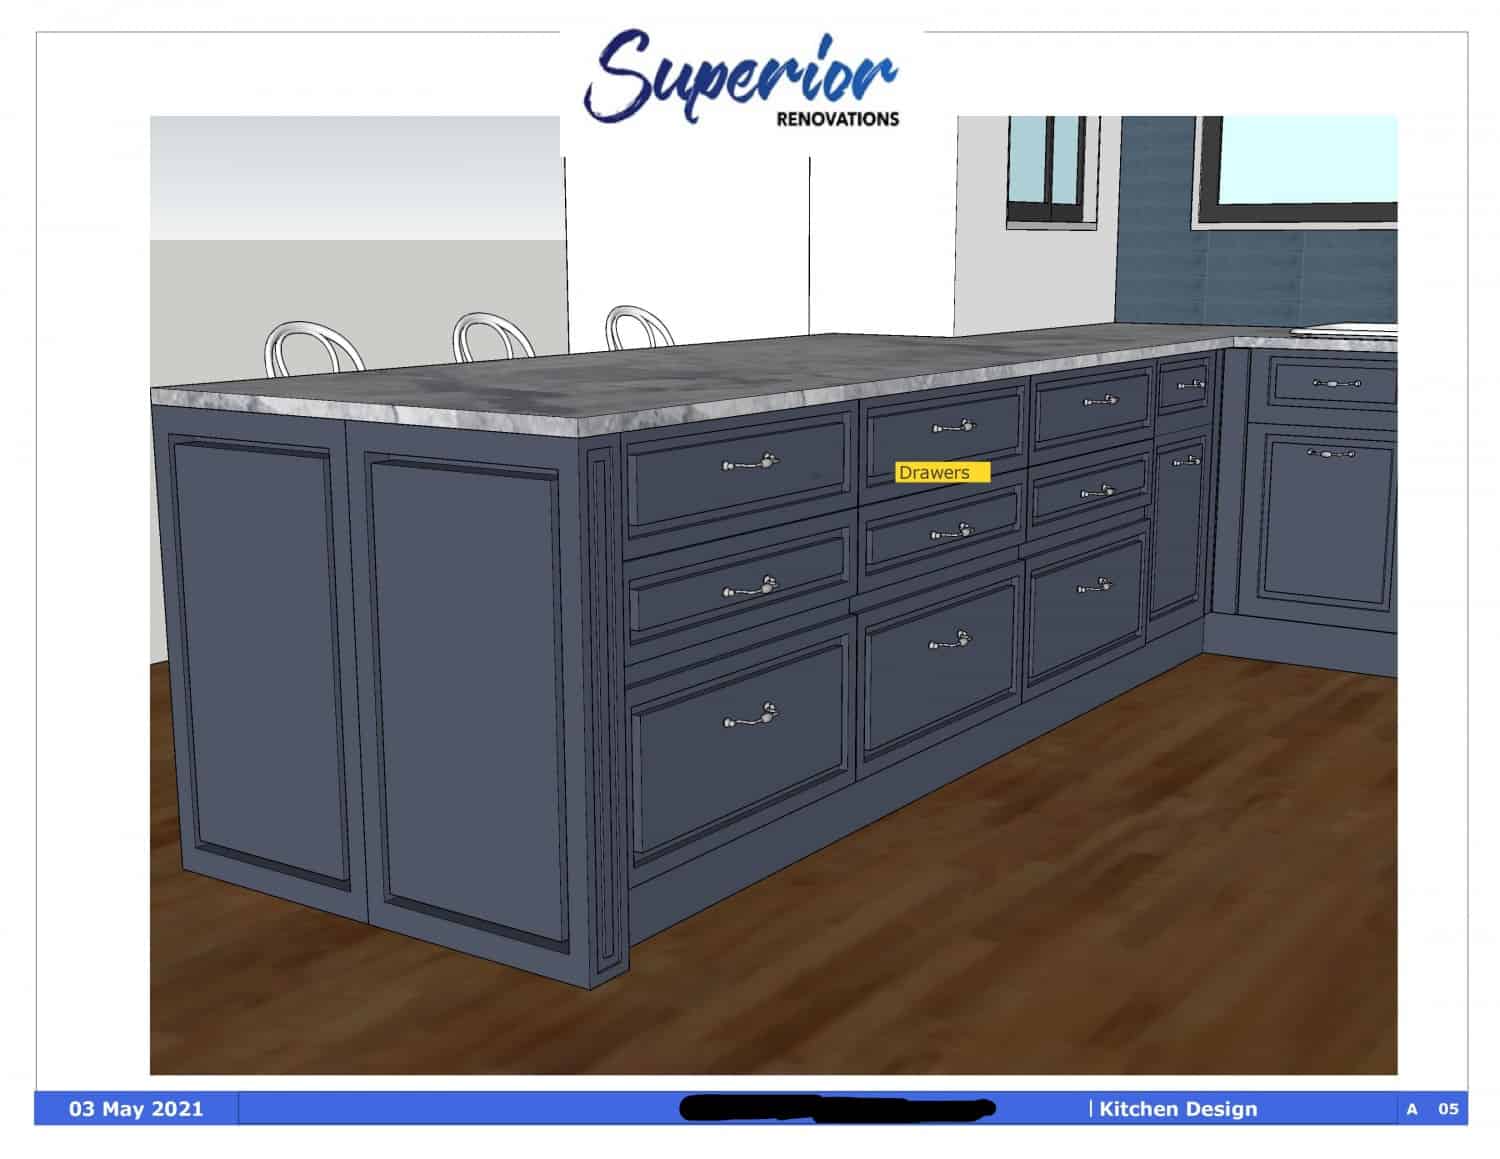
Once materials, dimensions and the look are settled, get the kitchen drawn in 3D before anything is built. Most renovation companies — us included — give clients 3D drawings so they can see the kitchen before manufacturing and installation start. Even on a DIY project, a 3D drawing from an app or a designer is worth the effort. It’s far cheaper to move a cabinet on screen than after it’s installed.


Key Kitchen Measurements That Make a Layout Work

The difference between a kitchen that feels right and one that fights you is usually a few centimetres. These are the numbers our designers plan to.

  • Bench height: 900mm standard, 600mm deep.
  • Clearance in front of appliances: at least 120cm for easy loading and unloading.
  • Island clearance: 100–120cm all the way around for traffic flow.
  • Seating overhang: 30–45cm of bench overhang for comfortable bar-stool seating.
  • Two-cook walkway: 90–120cm so two people can pass without a shuffle.

Then layer your lighting — pendants over an island, LED strips under the cabinets for the bench — and choose a benchtop that shrugs off spills and Auckland humidity. Quartz and quality laminate both hold up well.

💡 Quick tip: if anyone in the house is left-handed, plan their landing space on the right of the stove, not the left. Small thing, noticed every single day.

If you’re working out what your project will cost alongside the layout, our kitchen renovation cost calculator gives you a ballpark by scope before you commit.


7 Kitchen Layout Ideas to Keep It Functional

Once the layout’s locked, these are the moves that keep it working day to day — small kitchen layout ideas and full-size ones alike.

1. Vertical Wall Storage

Storage is the backbone of a functional kitchen. Build organisation into the walls — magnetic strips, hooks, rails. Vertical wall storage works in any size kitchen and comes in endless configurations, so it’s the first place to look when bench and cabinet space runs short.

2. Make Room for an Island

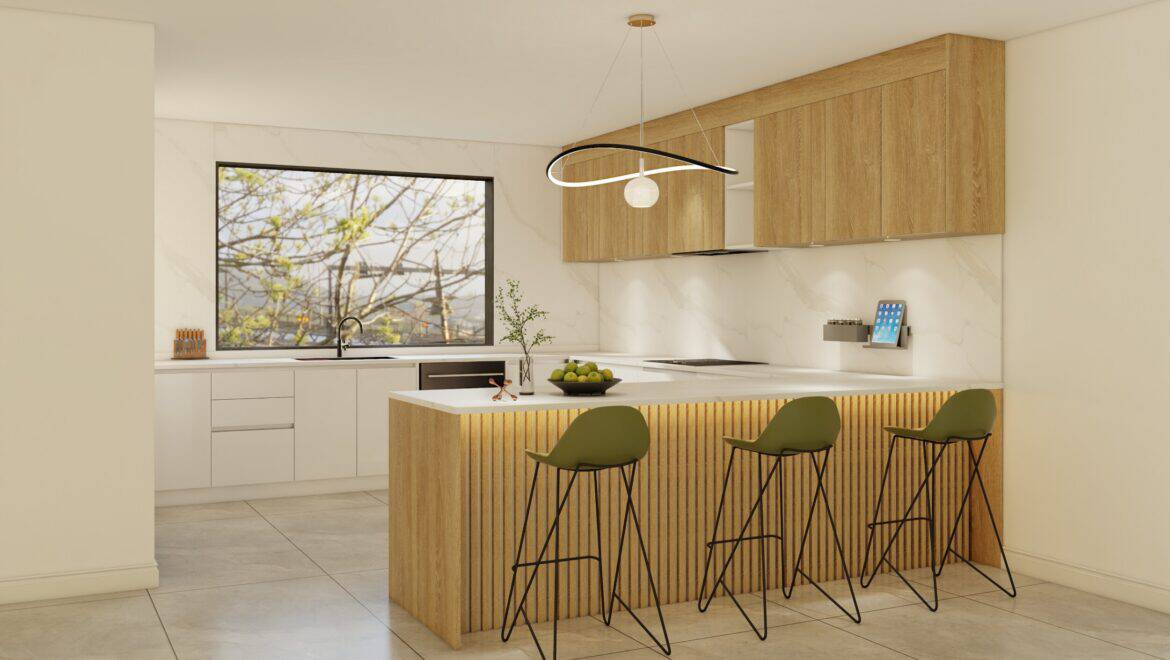
Where there’s space, plan for an island. It’s where everyone gathers, it adds storage, and it makes the whole kitchen more usable. Even a compact island earns its footprint as prep space and casual seating.

Kitchen island in an Auckland renovation

3. Hide It in the Corner

Dead corner cabinets are wasted space. A two-tiered carousel or a magic-corner pull-out turns that black hole into proper storage you can actually reach — somewhere to stash both the everyday gear and the things you use twice a year.

Two-tiered carousel corner storage in a kitchen layout

Magic-corner pull-out

4. Clean-Lined Cooktop

If counter space is tight, a flat glass ceramic cooktop keeps the bench reading as one continuous surface. It suits any kitchen style and doesn’t break up the line of the bench the way a raised cooktop can.

5. Sort the Spices

A functional kitchen is won in the details. A dedicated spice drawer with small containers — rather than a cupboard where everything migrates to the back — is the kind of small organisational win you notice every time you cook.

Organised pull-out kitchen drawers

Pantry with pull-out drawers

6. Keep Continuity

You don’t need a big budget for a resolved look. Integrated appliance doors that match your cabinetry give a unified, finished kitchen without the cost of a full custom fit-out — the eye reads one clean run instead of a row of different appliance fronts.

7. Light the Dark Spots

Nobody enjoys hunting through a dark drawer. Plug-in LED strips with motion sensors inside drawers and cabinets are cheap and genuinely useful, and good task lighting over the bench is non-negotiable in a working kitchen.

Kitchen splashback lighting in a functional kitchen layout

Lighting on the splashback


Want a price for your kitchen renovation?
Open the calculator →

The 6 Most Popular Kitchen Layouts — Which Suits Your Space?

Now the dimensions are sorted, here are the six layouts in detail. The right one comes down to your room’s shape and how your household actually uses the kitchen.

1. U-Shaped Kitchen

U-shaped kitchens run cabinetry along three walls, forming a U. They give you ample room to cook, store and entertain, and a larger U can take an island in the middle for extra bench space. You’ll usually find them in a standalone room or the corner of a large open space. The modern version has evolved — an L-shaped run plus a disconnected island that completes the U — which fits the open-plan living most Auckland homeowners want now.

Project specs + photosGuru and Neeta’s modern U-shaped kitchen

Got a small kitchen but love the U? Go for the modern take — an L-shaped run with a narrow island that doubles as a breakfast bar.

Project specs + photosAmber and Craig’s U-shaped kitchen in Hillsborough

5 Ideas for a U-Shaped Kitchen

Central dining table: if there’s room, an island adds storage and a gathering point — but in a genuinely large kitchen, a dining table can be more comfortable than crowding around an island.
Add depth with paint: a U-shape can read boxy. A single dark feature wall, or dark paint on the base of an island, creates a focal point and adds depth.
Pendant lighting: a large kitchen needs to be well lit. Pendants over the middle of the room or a dining area define the space and make it more welcoming.
Open shelving: swapping some upper cabinets for floating shelves opens the room up. Style them simply and keep them tidy.
An entertaining space: if you host, leave room to talk with guests while you cook — the kitchen has always been where everyone ends up anyway.

2. L-Shaped Kitchen

An L-shaped kitchen suits smaller spaces — apartments, units, kitchens for couples or singles. It has one less wall of cabinetry than a U, so less storage and bench, but it’s a cleaner fit for a compact room. Build storage vertically to make up the difference. It’s also the layout of choice for an unused corner, and in an open-plan living/dining space you can add a small island that doubles as a dining spot, freeing you from a separate table you never use.

Project specs + photosL-shaped kitchen with large island, Blockhouse Bay

5 Ideas to Maximise an L-Shaped Kitchen

Link with materials: matching the surface, cabinetry colour and hardware across both runs gives a cohesive look and makes the room feel larger.
Balance your storage: paint upper cabinets the same colour as the walls so they recede, and go a touch lighter on the lowers. You keep the storage without the bulk.
Create a practical workspace: keep the work triangle tight so everything flows.
Balance the L with a window: position one run under a window where you can — it balances the layout and floods the room with light.
Store vertically: floor-to-ceiling cabinetry on one wall uses the full height, and a magnetic rail keeps knives off the bench.

3. Galley Kitchen

Galley kitchens run two parallel walls with a walkway between, often in a room of their own. They’re common in older Auckland homes, and increasingly people knock out one wall to fold the galley into an open-plan living space. If you’re removing a wall with cabinetry against it, turn that run into a long island so you keep the storage and bench. Another option is a large open servery window in the wall instead of demolishing it entirely. If you’re weighing up opening the room right up, our open plan kitchen guide covers what’s involved.

Open-style galley kitchen with island, Auckland renovation

This client wanted her galley kitchen folded into the living space but kept the storage — so we added a servery window and extended the counter into an island for casual dining.

Photos and project specsOpen-style galley kitchen in Epsom

5 Galley Kitchen Ideas

Add lighting: natural light is ideal, but where you can’t get it, worktop spots and well-placed pendants do the job. Shiny tile, metal and glass bounce light and make the room feel bigger.
Keep it simple: handle-free doors, a monochromatic light-neutral palette, and one statement piece — a rug or a high-end tap — keep a galley feeling airy.
Open it up: the easiest way to add function is an island for prep, storage and casual seating.
Hanging storage: rails for pots and pans, or floating shelves, free up cabinet and counter space.
Clear the bench: a microwave drawer and tall storage keep the countertops clear, which makes a narrow galley feel calmer.

4. Island Kitchen

Islands have come and gone over the decades. Today’s island isn’t just a prep bench — it’s storage on every side, extra surface, and a casual breakfast spot. It won’t fit every room, but there are sleeker, smaller versions now, and you can add one to an L, U or galley as long as there’s clearance to move around it. For more design direction on islands and finishes, see our kitchen ideas guide.

5 Island Kitchen Ideas

Squeeze in a moveable island: tight on space? A portable island gives you extra surface and seating you can roll out of the way.
A splash of colour: in a neutral kitchen, painting the island a contrast colour is a quick lift without a full renovation.
Extra storage at one end: shelves on the end of the island beat blank panels — a 10cm-deep gap makes a handy spot for oils and condiments.
Position appliances away from the entertaining side: face the cooking onto the social area but keep the working appliances on the inside of the island.
Light it well: the island becomes the focal point and a prep zone, so it needs proper lighting overhead.

5. Peninsula Kitchen

A peninsula is an island connected at one end. It gives you the extra bench or dining area an island would, in a room that can’t take a standalone one. It works especially well with an L-shaped kitchen. Lynette’s family wanted a breakfast nook but didn’t have room for a central island — so we built a peninsula that gave them the nook without crowding the space.

Peninsula kitchen with breakfast nook, Bucklands Beach renovation

A custom peninsula in this Bucklands Beach renovation added bench space and a breakfast nook.

Project specs for the kitchen above

3 Peninsula Kitchen Ideas

Banquette seating on the back: if there’s room, built-in banquette seating fits more people around the table and turns the peninsula into a social spot.
Open shelving: open shelves keep everyday gear within reach and let more light into the room.
Light fixtures: pendants over the peninsula brighten the workspace and add visual appeal.

6. Two-Island Kitchen

Only an option in a genuinely large kitchen — two islands in the middle with a walkway between. Use one for prep and put a cooktop in the other to make it your cooking zone. Two smaller islands beat one enormous one: more accessible, easier to walk around, better flow overall.


Featured Kitchen Renovation Projects

Urban Luxury Kitchen, Parnell — Open-Plan U-Shaped

This Parnell townhouse had a tiny kitchen with no counter space. We changed the whole layout, moving the kitchen from the left of the room to the right, then added cabinetry in the dining area as extended storage — shelves with internal lights that open when needed. See the before and afters.

Open-plan U-shaped kitchen renovation, Parnell Parnell kitchen renovation Parnell kitchen renovation

Entertainer’s Dream, Massey — Modern U-Shaped Open-Plan

Guru and Neeta had a closed-off kitchen that shut them out of open-plan living. They wanted luxury and an entertaining space. We opened it up and extended the counter toward the lounge to work as a bar. See more.

Modern U-shaped open-plan kitchen, Massey Massey kitchen renovation Massey kitchen renovation

Cottage Kitchen, Mangere Bridge — Peninsula

This one was about natural elements that reflected the client’s country surroundings. A dated kitchen became a chic country-style space — treated real-wood benchtops, a butler’s sink, floating shelves, and cabinetry wrapped in Dezignatek Thermoform with a ‘Ronda’ pattern for a vintage look. See more.

Cottage-style peninsula kitchen, Mangere Bridge Mangere Bridge kitchen renovation Mangere Bridge kitchen renovation
Want a price for your kitchen renovation?
Open the calculator →

Open-Plan Galley, Epsom

We renovated this historic Epsom bungalow for a young family — durable, easy-clean materials and an open-style galley that lets everyone share one space. See the full project.

Open-plan galley kitchen, Epsom bungalow Epsom kitchen renovation Epsom kitchen renovation

Ready to Plan Your Kitchen Layout?

The layout is the foundation of the whole renovation — worth getting right before a single cabinet is ordered. If you’d like our designers to work through your space, your work triangle and the right layout for how your household cooks, we’d love to help.

Book your free in-home consultation with Superior Renovations
Use our kitchen renovation cost calculator to estimate your project
Request a free feasibility report for your project


Kitchen Layout FAQ

What is the best kitchen layout?

There's no single best kitchen layout — it depends on your room and how you cook. The key is the work triangle: keep your sink, stove and fridge close enough to move between in a few steps, with no through-traffic crossing the middle. For tighter Auckland spaces an L-shaped or galley layout works best; where there's more room, a U-shaped or island layout gives more bench and storage. Plan the layout around your work triangle first, then choose the shape that fits your space.

What is the kitchen work triangle?

The work triangle is the path between the three busiest points in a kitchen — the sink, the stove and the fridge. The three legs should total roughly 4 to 8 metres, and nothing (no island, table or main walkway) should cut through the middle. It's the oldest kitchen-planning rule and still the most useful. In modern open-plan kitchens it's often paired with zoning — separate prep, cooking, cleaning and storage areas — to handle more than one cook at once.

Which kitchen layout is best for a small kitchen?

For a small Auckland kitchen — an apartment, a unit, or a tight villa space — a galley or L-shaped layout usually works best. A galley uses two parallel walls efficiently for one main cook; an L-shape frees up a corner and pairs well with a small island or peninsula that doubles as dining. Single-wall layouts suit the very smallest footprints. In all of them, build storage vertically with tall cabinetry and wall storage to make up for the smaller footprint.

What are the standard kitchen measurements?

Standard bench height is 900mm with a 600mm depth. Allow at least 120cm of clearance in front of appliances for loading, and 100 to 120cm around an island for traffic. Bar-stool seating needs a 30 to 45cm bench overhang, and a kitchen used by two cooks wants 90 to 120cm walkways so people can pass. Getting these few numbers right is usually the difference between a kitchen that flows and one that feels cramped.

How many kitchen layouts are there?

There are six main kitchen layouts: galley (two parallel runs), L-shaped (two adjoining walls), U-shaped (three walls), island (a freestanding central bench), peninsula (an island connected at one end), and single-wall (everything on one wall). Most Auckland kitchens are a version of one of these, often combined — for example an L-shaped run with an island, which is the modern take on the U-shaped kitchen.

Should I put my cooktop on the island?

You can, but we usually advise against it. A cooktop on an island needs an expensive extraction system to handle steam and smoke, and you lose the splashback that catches splatters — which matters in humid Auckland kitchens where poor ventilation leads to mould. Putting the cooktop on an exterior wall makes ventilation simpler to run and gives you a splashback for free. If you do want it on the island, budget properly for the extraction.

How much space do you need around a kitchen island?

Allow 100 to 120cm of clearance on all sides of a kitchen island. Less than that and only one person can work comfortably, and the island's own cabinet doors start colliding with the run behind them. More than 120cm and you're walking too far between zones. If your room can't give you at least a metre around a standalone island, a peninsula — connected at one end — is usually the better call.

Do you provide a kitchen designer and 3D plans?

Yes. We have in-house kitchen designers who develop your layout and provide 3D drawings as part of the proposal, so you can see the kitchen before anything is manufactured or installed. We provide a full renovation service — design, demolition, sourcing materials from local supplier showrooms, custom cabinetry, installation, project management, and all trades including electricians, plumbers, tilers, builders and grouters. You don't need to arrange your own tradespeople.

What's the most popular kitchen layout in NZ?

The L-shaped kitchen is the most versatile and widely used in New Zealand homes, because it suits small-to-medium spaces and adapts easily to open-plan living when paired with an island. In larger Auckland homes the U-shape and island layouts are popular for the bench space and storage they offer. The strongest current trend is an L-shaped run plus a disconnected island — a modern version of the U-shape that fits the open-plan living most homeowners now want.


Further Resources for your kitchen renovation

  1. Featured projects and Client stories to see specifications on some of the projects.
  2. Real client stories from Auckland.

Need more information?

Take advantage of our FREE Complete Home Renovation Guide (48 pages), whether you’re already renovating or in the process of deciding to renovate, it’s not an easy process, this guide which includes a free 100+ point check list – will help you avoid costly mistakes.

Download Free Renovation Guide (PDF)


18 months 0 percent interest long term finance badge

Have you been putting off getting renovations done?

We have partnered with Q Mastercard ® to provide you an 18 Month Interest-Free Payment Option, you can enjoy your new home now and stress less.

Learn More about Interest-Free Payment Options*

*Lending criteria, fees, terms and conditions apply. Mastercard is a registered trademark and the circles design is a trademark of Mastercard International Incorporated.


Still have questions unanswered?

Book a no-obligation consultation with the team at Superior Renovations, we’d love to meet you to discuss your renovation ideas!
    Services

    Home RenovationKitchen RenovationBathroom RenovationOutdoor RenovationHouse ExtensionCommercialDesign ServicesOther

    By submitting this form, you agree to receive communications from us via email or text regarding our services, you can unsubscribe at any time.

    This site is protected by reCAPTCHA and the Google

    Privacy Policy and Terms of Service apply.


    References

    1. Building Performance (MBIE) — Active ventilation
    kitchen cupboard doors
    Kitchen Renovation

    Cost of Replacing Kitchen Cupboard Doors NZ (2026)

    Cost of Replacing Kitchen Cupboard Doors in NZ (2026 Auckland Guide)

    Free cost calculator

    How much will your kitchen renovation cost?

    Get an instant Auckland price range for your project — no details required to see it.

    Open the Kitchen Cost Calculator →

    Quick answer: Replacing kitchen cupboard doors in NZ starts at about $300 if you repaint the existing doors yourself, and supply-and-fit of new fronts on your existing carcasses starts from around $1,600 +GST. Beyond that, refacing and full cabinet replacement are priced per door and per metre of cabinetry rather than as a single figure, so the size of your kitchen decides the number. If your carcasses are sound, new cupboard doors are a fraction of the price of a full kitchen renovation.

    Your kitchen layout works fine. The cabinets are solid. It’s the doors that are letting the room down — chipped edges, dated melamine, handles you’ve hated for years. Replacing the cupboard doors fixes the thing you actually look at every day, without the cost and upheaval of a full kitchen rebuild.

    We’ve fitted doors, refaced cabinets, and built kitchens from scratch across more than 1,000 Auckland projects, so we’ve got no reason to push you toward the bigger job. Sometimes new doors are the smartest money you’ll spend. Sometimes they’re a waste, and you’re better off doing the lot. This guide tells you which is which, and what each option costs in Auckland right now.


    Your Five Options, From Cheapest to Full Rebuild

    Before you get a single quote, work out which of these five jobs you’re actually asking for — because “replacing the doors” can mean five different things at five very different prices. Most confusion (and most dodgy quotes) comes from a homeowner asking for one thing and a company pricing another.

    Here’s the ladder, cheapest to dearest, with 2026 Auckland figures.

    Option What it involves Typical Auckland cost
    DIY repaint Sand, prime and paint the existing doors yourself $300–$1,000
    Professional refinish Doors removed, stripped, sprayed and rehung by a pro Priced per door, plus a spray booth day rate
    Replace doors & drawer fronts New fronts on your existing carcasses, supply and fit Doors ~$60–$200 each; supply & fit from ~$1,600 +GST
    Full reface New doors, drawer fronts and matching end panels in a custom finish Priced per door and per metre of end panel
    Full cabinet replacement New carcasses, doors, drawers, everything but the layout Priced per linear metre of cabinetry
    Full kitchen renovation New layout, benchtops, appliances, splashback, the lot $26,000–$35,000 + GST (mid-range)

    💡 Quick tip: If a company quotes you $8,000+ and tells you “you can’t just change the doors, you’ll need new cabinets,” get a second opinion before you agree. Plenty of 1990s and 2000s Auckland kitchens have carcasses that are perfectly sound — the doors are the only tired part.

    These figures cover the cabinetry only. They don’t include benchtops, splashbacks, flooring or appliances — those sit in the full renovation column. If you’re weighing up the bigger job, our breakdown of what a full kitchen renovation costs in Auckland walks through every tier, and our stage-by-stage guide to a kitchen renovation covers what the bigger job actually involves week by week. If the layout is the thing bothering you rather than the finish, start with our kitchen layout guide instead of new doors.

    How to Read These Numbers

    The jump from “replace the doors” (from ~$1,600 +GST) to a full reface catches a lot of people out. The difference is scope. A door swap puts new fronts on what you’ve got. A reface replaces the doors, the drawer fronts and the visible cabinet ends, usually in a custom-cut finish so the whole run looks like new cabinetry. One’s a tidy-up. The other’s a near-new kitchen for a fraction of a rebuild.

    “The first question I ask isn’t what colour you want — it’s whether your carcasses are square and solid. If the boxes are good, new doors and fronts will look like a brand-new kitchen. If the boxes are sagging or water-damaged, you’re putting lipstick on a problem that’ll come back.”
    — Alison Yu, Designer, Superior Renovations


    When New Cupboard Doors Are Worth It (And When They’re Not)

    Replacing the doors only makes sense if three things are true: your carcasses are structurally sound, your layout already works, and the look is the only thing letting the kitchen down. Miss any one of those and you’re spending money to delay a job you’ll end up doing anyway.

    We see this play out across Auckland’s housing stock in a fairly predictable way.

    The Kitchens Where Door Replacement Shines

    Think of the brick-and-tile homes through Manurewa, Pakuranga and Henderson, or the early 2000s builds out in Flat Bush and Albany. The cabinetry in these is often standard-sized melamine on solid carcasses — the boxes are fine, the doors just look like 2003. A door swap or reface here is the highest-value update you can make. New fronts, new handles, maybe a fresh splashback, and the kitchen reads ten years younger. To picture the end result, browse kitchen designs we’ve built across Auckland.

    The same goes for a tidy rental refresh, or staging a home for sale. You’re not chasing perfection. You’re lifting the look fast and cheap.

    💡 Quick tip: Pull a door off and check the carcass edges and the back panel before you commit. Swollen chipboard, soft spots near the sink, or hinges that won’t hold a screw are signs the boxes have had it, and that’s a replacement job, not a door job.

    When You Should Skip It and Renovate Properly

    If your layout fights you every time you cook — the fridge blocks a drawer, there’s no bench beside the hob, the corner cupboard is a black hole, new doors won’t fix any of that. You’ll have spent $5,000 making a bad kitchen look nicer.

    The same is true for those Grey Lynn and Mt Eden villas with original kitchens shoehorned into a back room. Half the time the real win is opening the space up, not refacing what’s there. That’s a different conversation, and it’s where our Auckland kitchen renovation team earns its keep. Honestly? If your layout’s wrong, refacing is false economy.

    “New doors fix how a kitchen looks. They can’t fix how it works. If a client’s struggling with the layout — not enough bench, a dead corner, an awkward work triangle, I’ll tell them straight that refacing is the wrong spend. Better to put that money toward sorting the layout once.”
    — Dorothy Li, Design Manager, Superior Renovations

    Not sure which camp you’re in? That’s exactly what a free in-home consultation sorts out — we’ll tell you honestly whether doors will do the job or whether you’re better off going further.


    Repair or Replace? Fix These Before You Price New Doors

    A surprising number of the kitchens we look at do not need new doors at all. They need the doors they already have put back into working order. Before you price a replacement, work through this list, because four of these five faults are cheap fixes and only one of them genuinely calls for new fronts.

    • Doors that no longer sit flush or line up. Almost always hinge adjustment, not door failure. European concealed hinges adjust on three axes: in and out, up and down, and side to side. Twenty minutes with a screwdriver realigns a whole run.
    • Doors that slam. Soft-close can be retrofitted to most existing concealed hinges with a clip-on damper, or by swapping the hinge for a soft-close version using the same cup and baseplate. This is the single cheapest upgrade in a tired kitchen.
    • A hinge that has torn out of the door. In melamine-faced board the cup hole loses its grip over time. A repair is possible, but if it has happened to more than one or two doors the board has reached the end of its life and replacement is the honest answer.
    • Swollen, soft or bubbled bottom edges, usually under the sink. This is water that has got into the MDF core through an unsealed edge. The door is finished, and so is anything else in that cabinet with the same exposure. Fix the leak first or the new door goes the same way.
    • Peeling or lifting laminate at the edges. Edge banding can be re-glued once. If it is lifting in several places the adhesive has failed across the door and re-gluing just moves the problem along.

    The rule of thumb: faults in the hardware are worth repairing, faults in the board are not. Hinges, runners and dampers are consumable parts designed to be replaced. A swollen MDF core is not repairable, whatever it is coated in.

    Keeping the carcasses is also the low-waste option

    There is a second argument for keeping sound cabinet boxes, and it is not sentimental. Construction and demolition waste makes up 40 to 50 per cent of New Zealand’s total waste going to landfill, according to BRANZ’s Level guidance on minimising waste, and an Auckland study it cites found an average of 4.5 tonnes of preventable waste per new-build house, adding about $31,000 to the cost of the building.

    That waste is not free to get rid of. The waste disposal levy rises on 1 July 2026 to $70 per tonne at municipal landfills and $40 per tonne for construction and demolition fill. A full kitchen strip-out sends carcasses, benchtop and lining to one of those, and you pay for the skip, the cartage and the levy on top of the new cabinetry. Replacing only the fronts avoids that line entirely.

    It is also what the Building Act 2004 asks of everyone involved. Level notes that under the Act, designers, builders, local authorities and building owners must consider minimising waste during construction, using sustainable materials and the durability of what they specify. Reusing a sound carcass is the most straightforward version of that there is.

    Cupboard Door Styles and Materials for NZ Kitchens

    The style you choose changes both the look and the price — a flat slab door is far cheaper to make than a routed Shaker or a louvred door, and the material underneath matters more than most homeowners realise. Here’s how the common door styles stack up for a New Zealand kitchen.

    The Eight Door Styles You’ll Be Choosing Between

    1. Shaker. Five-piece flat-panel door — a square frame around a recessed centre. The default choice in NZ kitchens right now because it suits both villas and new builds. Mid-priced.

    2. Flat-panel (slab). A single clean face, no detail. The cheapest to make and the easiest to keep clean. Reads modern, works in almost any contemporary Auckland kitchen.

    3. Louvred. Horizontal timber slats, like a shutter. Distinctive, but the slats trap kitchen grease and they carry a hefty price tag. More of a feature than a whole-kitchen choice.

    4. Inset. The door sits inside the cabinet frame rather than over it. Beautiful, but it needs precise measurements and costs more, every door has to be built to fit its opening exactly.

    5. Distressed. Deliberately aged, with rubbed-back edges, for a farmhouse or character feel. Suits an older bungalow; looks out of place in a sharp modern home.

    6. Beadboard. Vertical grooved planks across the door face. Adds texture and a cottage-y warmth, a good fit for a Titirangi character home or a coastal bach feel.

    7. Thermofoil. An MDF door wrapped in a heat-sealed vinyl film. Budget-friendly and easy to wipe down, but it comes in solid colours only and the film can lift near heat over time.

    8. High-gloss acrylic. A bold, reflective, hardwearing finish that’s grown popular for modern kitchens. Moisture-resistant and easy to clean, with satin or gloss options.

    The Material Under the Finish

    For most Auckland kitchens we use moisture-resistant MDF for the doors and fronts — it handles the humidity of a working kitchen and takes a sprayed or laminate finish well. A common, sensible choice is a melamine-faced board like Melteca by Laminex, which gives you durable colour and texture at a reasonable price.

    Solid timber and lacquered finishes cost more but last and feel premium. The right call depends on your budget and how the door needs to wear, which is the sort of thing you’d sort out when you choose door materials and colours with our design team at the Wairau Valley showroom.

    💡 Quick tip: Order your replacement doors blank, no pre-drilled hinge or handle holes. Cabinet makers mount hinges at different heights, so pre-drilled doors limit which boxes they’ll fit. Blank doors let you place hinges and handles exactly where you want them.


    What It Actually Costs in Auckland in 2026

    For a regular-sized Auckland kitchen, expect to pay from around $1,600 +GST to supply and fit new cupboard doors and drawer fronts. A full reface with custom finishes and matching end panels is quoted per door and per metre of end panel, so a galley kitchen with 12 fronts and a large U-shaped kitchen with 28 land a long way apart. Let’s break down where the money goes.

    Labour

    Fitting is the variable that swings the quote. A local cabinet fitter will typically charge from around $1,600 +GST to supply and fit doors, drawer fronts, handles and kickboards on a standard kitchen — including removing and disposing of the old fronts. Auckland trade labour runs $120–$150 an hour in 2026, and a straightforward door swap is usually one to two days’ work. Professional refinishing (spray work) sits at roughly $80–$150 an hour, with most jobs taking 15–25 hours.

    Watch the gap between a local fitter and a big national outfit. We’ve seen the same door-replacement job quoted at $1,600 by one and $2,500+ by another, with the dearer quote insisting you need new carcasses you don’t.

    💡 Quick tip: When you compare quotes, make sure they’re all GST-inclusive or all GST-exclusive, and that “supply and fit” means the same scope in each. A cheap-looking number is often a fit-only price with the doors left off.

    Want a price for your kitchen renovation?
    Open the calculator →

    The Doors and Hardware

    Replacement doors themselves run roughly $60–$200 each depending on size, material and finish. Drawer fronts land in a similar band. Handles and knobs are easy to underestimate — they range from a couple of dollars to around $27 a piece, and a typical kitchen needs a dozen or more. Multiply that out before you fall in love with the brushed brass ones.

    Job type Description Indicative cost
    Fit only 10 doors, 4 drawer fronts, 14 handles & kickboards From ~$1,600 +GST
    Supply & fit 10 doors, 4 drawer fronts, 14 handles & kickboards ~$2,500–$3,500 +GST
    Professional refinish Strip, sand and spray existing doors Priced per door, plus a spray booth day rate
    Full reface New doors, fronts, end panels, custom finish Priced per door and per metre of end panel

    Want a quick sense of where you’d land before you talk to anyone? Little Giant Interiors (our group interiors brand) has a handy kitchen cabinetry cost calculator for cabinet and door work. And if you’re starting to think the whole kitchen needs doing, our kitchen renovation cost calculator will scope the bigger job.

    Is It Cheaper Than a New Kitchen?

    Heaps cheaper. A mid-range Auckland kitchen renovation runs $26,000–$35,000 + GST, and even a full reface of a large kitchen lands well under half of that. A straight door swap is a fraction again. If your bones are good, that’s the whole appeal. You’re paying for the part you see, not the part that already works. For more ways to stretch a tight budget, our smart tips for renovating a kitchen on a budget put door work in context.


    DIY, Off-the-Shelf or Custom: Which Route Fits You

    If your kitchen runs to standard cabinet sizes and you’ve got decent DIY skills, you can buy doors off the shelf and fit them in a weekend — but anything irregular, and custom-made doors will save you grief. Three routes, three trade-offs.

    DIY With Off-the-Shelf Doors

    This is the cheapest path. Retailers like Mitre 10 and Bunnings carry standard-size doors, fronts and hardware suited to quick swaps. If your cabinets were built to standard sizes — and most NZ kitchens were, you can measure up, order, and fit them yourself with a screwdriver and a bit of patience.

    The catch is repair work. If a hinge plate’s pulled out or a carcass edge is chipped, that’s on you to sort before the new door goes on. Take your time, and it’s a genuinely satisfying job. Rush it, and the misalignment shows.

    Custom-Made Doors

    Got an odd-shaped kitchen, non-standard openings, or a finish you can’t find on a shelf? Custom doors are made to your exact measurements, so every gap is even and the run looks deliberate. They cost more and take longer to arrive, but for a kitchen that’s anything other than standard, they’re worth it. You also get the full range of materials, colours and finishes rather than whatever’s in stock.

    💡 Quick tip: Mixing routes works too. Spend on a quality finish for the doors people actually see, and keep it simple on the inside of the pantry. Same trick applies to handles — splurge on the run that faces the living area, save on the rest.

    Let a Team Handle the Lot

    The third option is the one we run: measure, supply, and fit as a single job, so there’s one point of contact and one warranty covering the work. For most homeowners the value isn’t the doors — it’s not having to project-manage a fitter, chase a supplier, and fix the gaps yourself. One of our recent clients out west had us reface a tired 2000s kitchen rather than rip it out; the boxes were sound, so the spend went on doors, fronts and handles, and the room looked new in under a week.


    Book your free in-home consultation with Superior Renovations
    Estimate your kitchen costs with our cost calculator
    Request a free feasibility report for your project


    How much does it cost to replace kitchen cupboard doors in NZ?

    In 2026, replacing kitchen cupboard doors in NZ ranges from about $300–$1,000 for a DIY repaint, or from around $1,600 +GST for supply-and-fit of new fronts on your existing carcasses. A professional refinish and a full reface are both quoted per door rather than as a flat price, so the number of doors and drawer fronts in your kitchen decides the total. The doors themselves cost roughly $60–$200 each. Auckland labour sits at $120–$150 an hour, and a standard door swap is usually one to two days' work.

    Is it cheaper to replace kitchen doors or the whole kitchen?

    Far cheaper to replace the doors, if your cabinet carcasses are sound. A mid-range Auckland kitchen renovation costs $26,000–$35,000 + GST, while a full reface is a fraction of that +GST and a straight door swap starts near $1,600 +GST. You're paying only for the part you see and use daily, not the boxes that already work. The catch: if your layout is wrong or the carcasses are water-damaged, new doors are a false economy and a full renovation makes more sense.

    What is the difference between refinishing, refacing and replacing kitchen cabinets?

    Refinishing keeps your existing doors and re-sprays or repaints them, priced per door. Refacing keeps the cabinet boxes but replaces the doors, drawer fronts and visible end panels in a new finish, priced per door and per metre of end panel. Full replacement swaps the carcasses too and is priced per linear metre of cabinetry. Refinishing is the cheapest cosmetic lift; refacing gives a near-new look at a fraction of replacement cost; full replacement is for kitchens where the boxes themselves have failed.

    Can I replace just the cupboard doors and keep my existing cabinets?

    Usually yes. Most NZ kitchens, especially 1990s and 2000s builds across Auckland, use standard-sized carcasses, so you can fit new doors and drawer fronts without touching the boxes. The deciding factor is carcass condition. Pull a door off and check for swollen chipboard, soft spots near the sink, and hinges that still hold a screw. If the boxes are square and solid, a door swap or reface will look like a new kitchen. If they're sagging or water-damaged, you'll need replacement.

    How long does it take to replace kitchen cupboard doors?

    A straightforward supply-and-fit door replacement on a standard Auckland kitchen is usually one to two days' work for a professional fitter. A DIY job over a weekend is realistic if your cabinets are standard-sized and in good order. Professional refinishing (strip, sand and spray) takes longer at around 15–25 hours of labour. Unlike a full kitchen renovation, you don't need to empty the house or live without a kitchen for weeks, which is a big part of the appeal.

    Can I buy replacement kitchen doors from Mitre 10 or Bunnings?

    Yes. Mitre 10 and Bunnings both stock standard-size replacement doors, drawer fronts and hardware suited to quick swaps, and it's the cheapest route if your cabinets run to standard sizes. Order doors blank, with no pre-drilled hinge or handle holes, because cabinet makers mount hinges at different heights and pre-drilled doors limit which boxes they'll fit. For odd-shaped kitchens or non-standard openings, custom-made doors are the better option even though they cost more and take longer.

    Is refacing kitchen cabinets worth it in an older Auckland home?

    It depends on the era. Brick-and-tile homes and early 2000s builds in suburbs like Manurewa, Pakuranga, Henderson, Flat Bush and Albany often have sound standard carcasses with only dated doors, so refacing is excellent value. Older villas in Grey Lynn or Mt Eden with original kitchens shoehorned into back rooms are a different story, the real win there is usually opening up the layout, not refacing what's there. Check the carcass condition and whether the layout works before deciding.

    Do I need building consent to replace kitchen cupboard doors?

    No. Replacing cupboard doors, drawer fronts and handles is cosmetic work that doesn't touch plumbing, electrical or structure, so it doesn't require Auckland Council building consent. The same applies to refinishing or refacing existing cabinets in the same layout. Consent only comes into play if your kitchen project later expands to moving plumbing, relocating appliances that need new wiring, or removing walls. For a simple door update, you're free to get started.

    What door style is best for a small or budget kitchen?

    Flat-panel (slab) doors are the cheapest to make and the easiest to keep clean, and their simple lines make a small kitchen feel less busy. Shaker doors are the most popular all-rounder in NZ and suit both character homes and new builds at a mid-range price. For the tightest budgets, a thermofoil door (vinyl-wrapped MDF) keeps costs down, though it comes in solid colours only. Lighter colours and minimal handles also help a compact Auckland kitchen feel more open.


    References

    1. BRANZ Level – Minimising waste when building level.org.nz/material-use/minimising-waste/ (construction and demolition waste share, preventable-waste study and waste disposal levy rates; page updated 30 January 2026)
    2. BRANZ Level – Material use and the Building Act 2004 sustainability principles level.org.nz/material-use/
    3. Superior Renovations – published Auckland renovation cost ranges superiorrenovations.co.nz/faq/

    Further Resources for your kitchen renovation

    1. Featured projects and Client stories to see specifications on some of the projects.
    2. Real client stories from Auckland

    Need more information?

    Take advantage of our FREE Complete Home Renovation Guide (48 pages), whether you’re already renovating or in the process of deciding to renovate, it’s not an easy process, this guide which includes a free 100+ point check list – will help you avoid costly mistakes.

    Download Free Renovation Guide (PDF)


    18 months 0 percent interest long term finance badge

    Have you been putting off getting renovations done?

    We have partnered with Q Mastercard ® to provide you an 18 Month Interest-Free Payment Option, you can enjoy your new home now and stress less.

    Learn More about Interest-Free Payment Options*

    *Lending criteria, fees, terms and conditions apply. Mastercard is a registered trademark and the circles design is a trademark of Mastercard International Incorporated.


    Still have questions unanswered?

    Book a no-obligation consultation with the team at Superior Renovations, we’d love to meet you to discuss your renovation ideas!

      Services

      Home RenovationKitchen RenovationBathroom RenovationOutdoor RenovationHouse ExtensionCommercialDesign ServicesOther

      By submitting this form, you agree to receive communications from us via email or text regarding our services, you can unsubscribe at any time.

      This site is protected by reCAPTCHA and the Google

      Privacy Policy and Terms of Service apply.

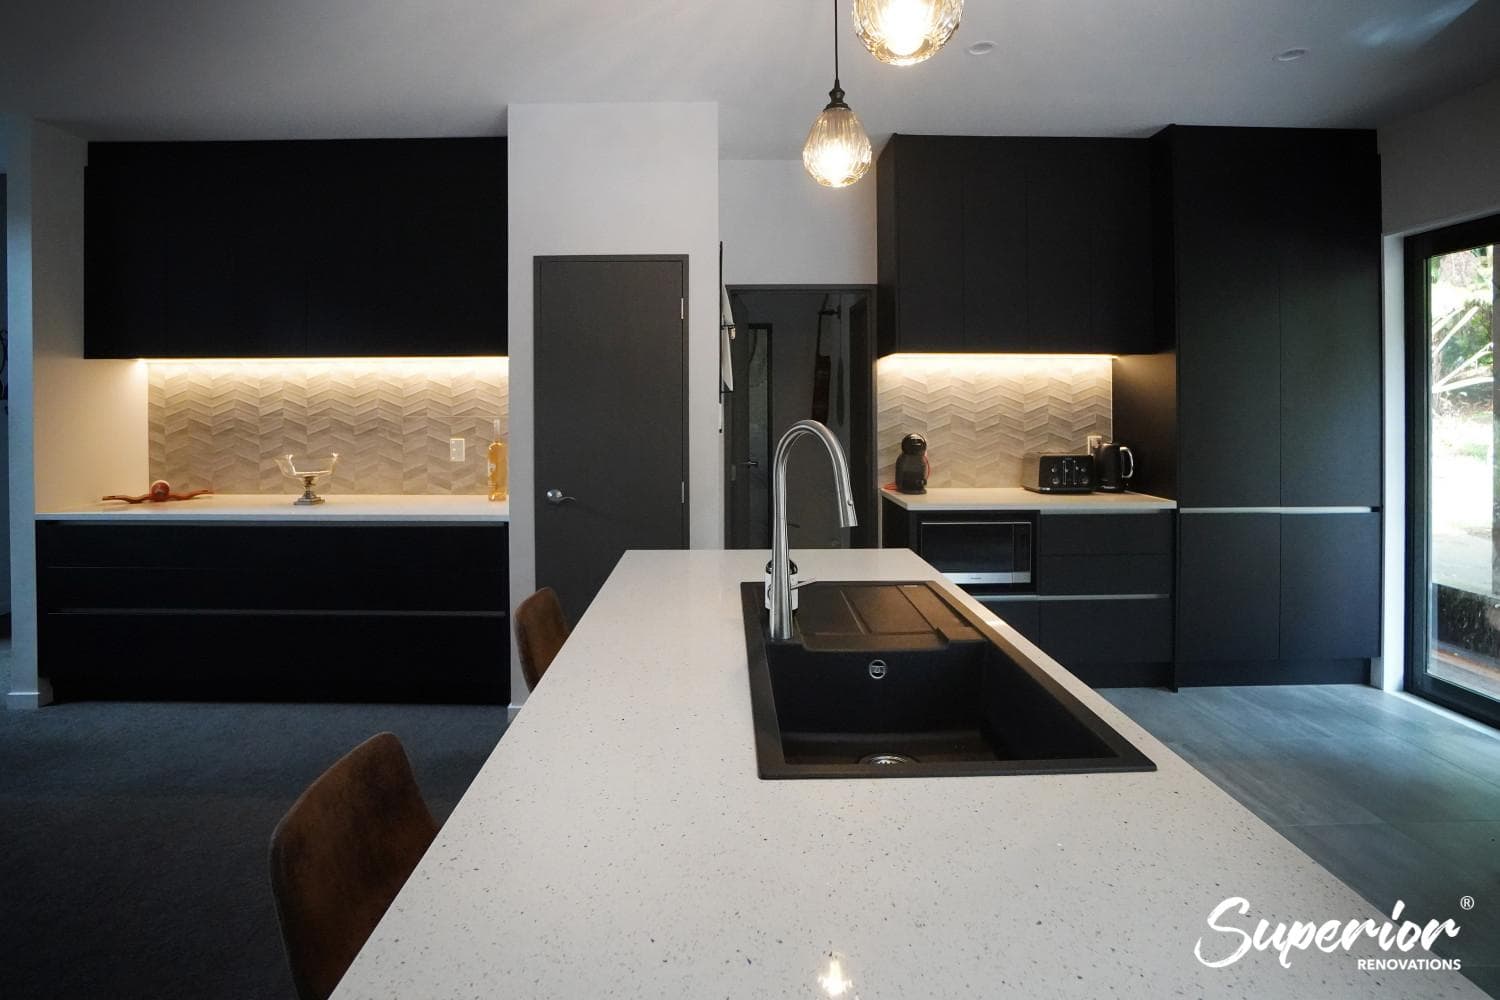
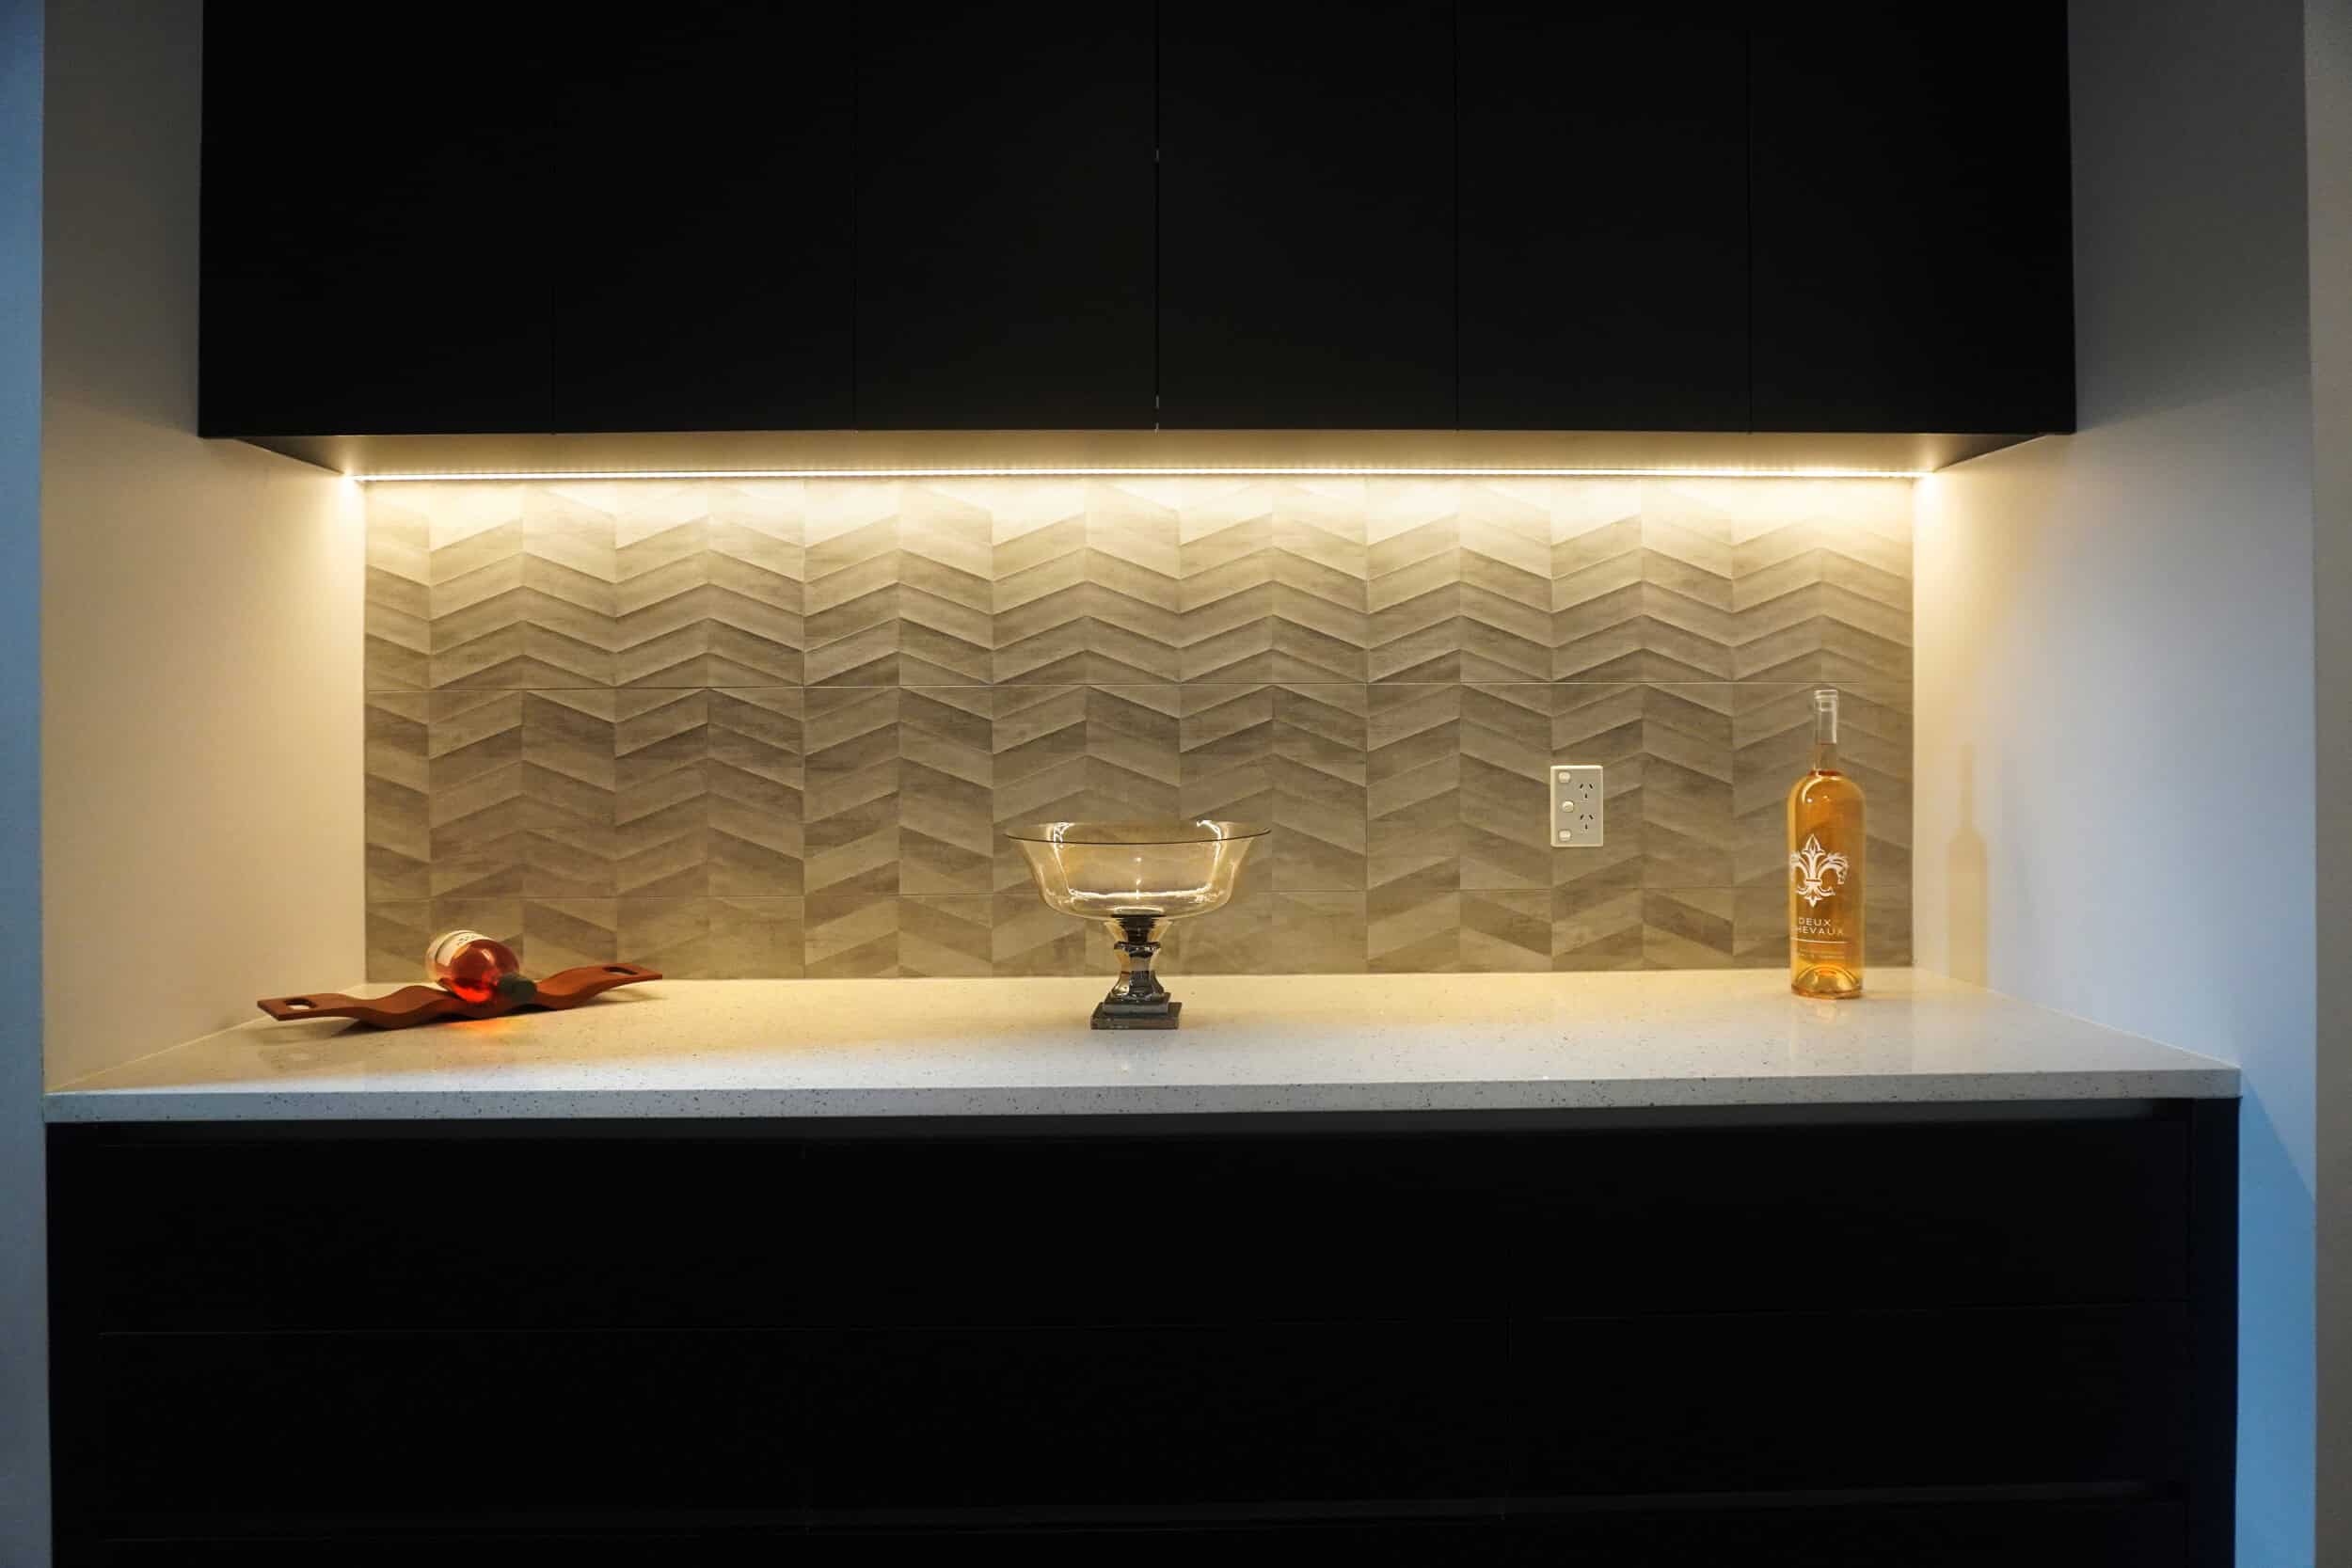
      Matte black kitchen with a grey chevron tile splashback, stainless fridge and grey tiled floor
      Kitchen Renovation

      Open Plan Kitchen NZ: Design, Consent & Cost Guide

      Open Plan Kitchen Ideas, Costs & Consent: The Auckland Guide

      Free cost calculator

      How much will your kitchen renovation cost?

      Get an instant Auckland price range for your project — no details required to see it.

      Open the Kitchen Cost Calculator →

      Quick answer: An open plan kitchen joins the kitchen, dining and living into one space. Opening up a closed Auckland kitchen usually means removing a wall, and if it’s load-bearing that triggers a building consent, an engineer’s design and LBP-supervised work, which is where most of the cost and timeline sits.

      The most requested kitchen change we get in Auckland isn’t a fancy benchtop or a smart tap. It’s “can we get rid of this wall?” People want the light in, the cook back in the room, and the boxed-off kitchen gone.

      Fair enough. But here’s the part most open plan kitchen articles skip entirely: whether that wall comes out cleanly or turns into a structural job with an engineer, a consent and a steel beam. That single question decides your cost, your timeline, and whether the project even gets off the ground. So this guide leans into it harder than a lifestyle piece would, alongside the design side, the open-versus-closed comparison, and what it all costs in 2026. It’s put together with our in-house kitchen designers, Cici Zuo and Dorothy Li, working from our Design Studio at 16B Link Drive, Wairau Valley.

      open plan kitchen design render Auckland

      Design render by Sachi Amarasekara – Open Kitchen


      What is an Open Plan Kitchen?

      An open plan kitchen combines the kitchen, dining and lounge into one connected space, with no full-height walls dividing the cooking zone from the rest of the room. It’s the layout most new Auckland builds use by default, and the one most renovation clients ask us to create out of an older, closed-off kitchen.

      The appeal is simple. Knock out the wall and a dim back-of-house kitchen borrows light and space from the rooms around it. A villa kitchen in Grey Lynn that felt like a corridor becomes part of the living area. A 1970s brick-and-tile in Manurewa with a separate dining room suddenly reads as one generous space. And because it’s what buyers now expect, the layout tends to support resale value rather than work against it.

      Why the Island Does So Much Heavy Lifting

      Open up a kitchen and you create a problem at the same time: where does the storage and bench that used to live on the missing wall now go? The answer is almost always an island.

      An island claws back the counter and cabinetry you lose when the wall comes out, and it does it in the middle of the room where it’s most reachable. It can carry a sink or a cooktop, double as a breakfast bar, and act as the natural gathering point when people drift into the kitchen. The one rule our designers hold firm on: leave enough clearance around all sides so the island doesn’t choke the traffic between the stove, sink and fridge.

      💡 Quick tip: Keep at least 1000–1100mm of walkway around a single-cook island, and 1200mm if two people cook at once. Tight clearances are the most common regret we hear after the fact. For the full set of numbers, see our kitchen planning measurements guide.

      “When a wall comes out, people fixate on the open space and forget where the storage went. The island has to earn its keep, so I design it to carry the drawers and the prep zone the old wall used to hold, not just look good in the middle of the room.”
      — Dorothy Li, Design Manager, Superior Renovations


      How to Convert a Closed Kitchen into an Open Plan One

      This is where open plan kitchen projects are won or lost. When someone asks us to open up their kitchen, the very first thing we work out is whether the change is cosmetic or structural, because the two are worlds apart on cost, consent and timeline.

      • Kitchen is already open plan: No structural work. It’s a cabinetry-and-finishes renovation, same as any other kitchen.
      • Kitchen is currently closed off: A wall has to go, which is where engineering, consent and trade coordination come in.

      If a wall is coming out, we ask for the whole-house floor plan first. That tells us which of two very different walls we’re dealing with.

      Partial Walls (Non-Load-Bearing)

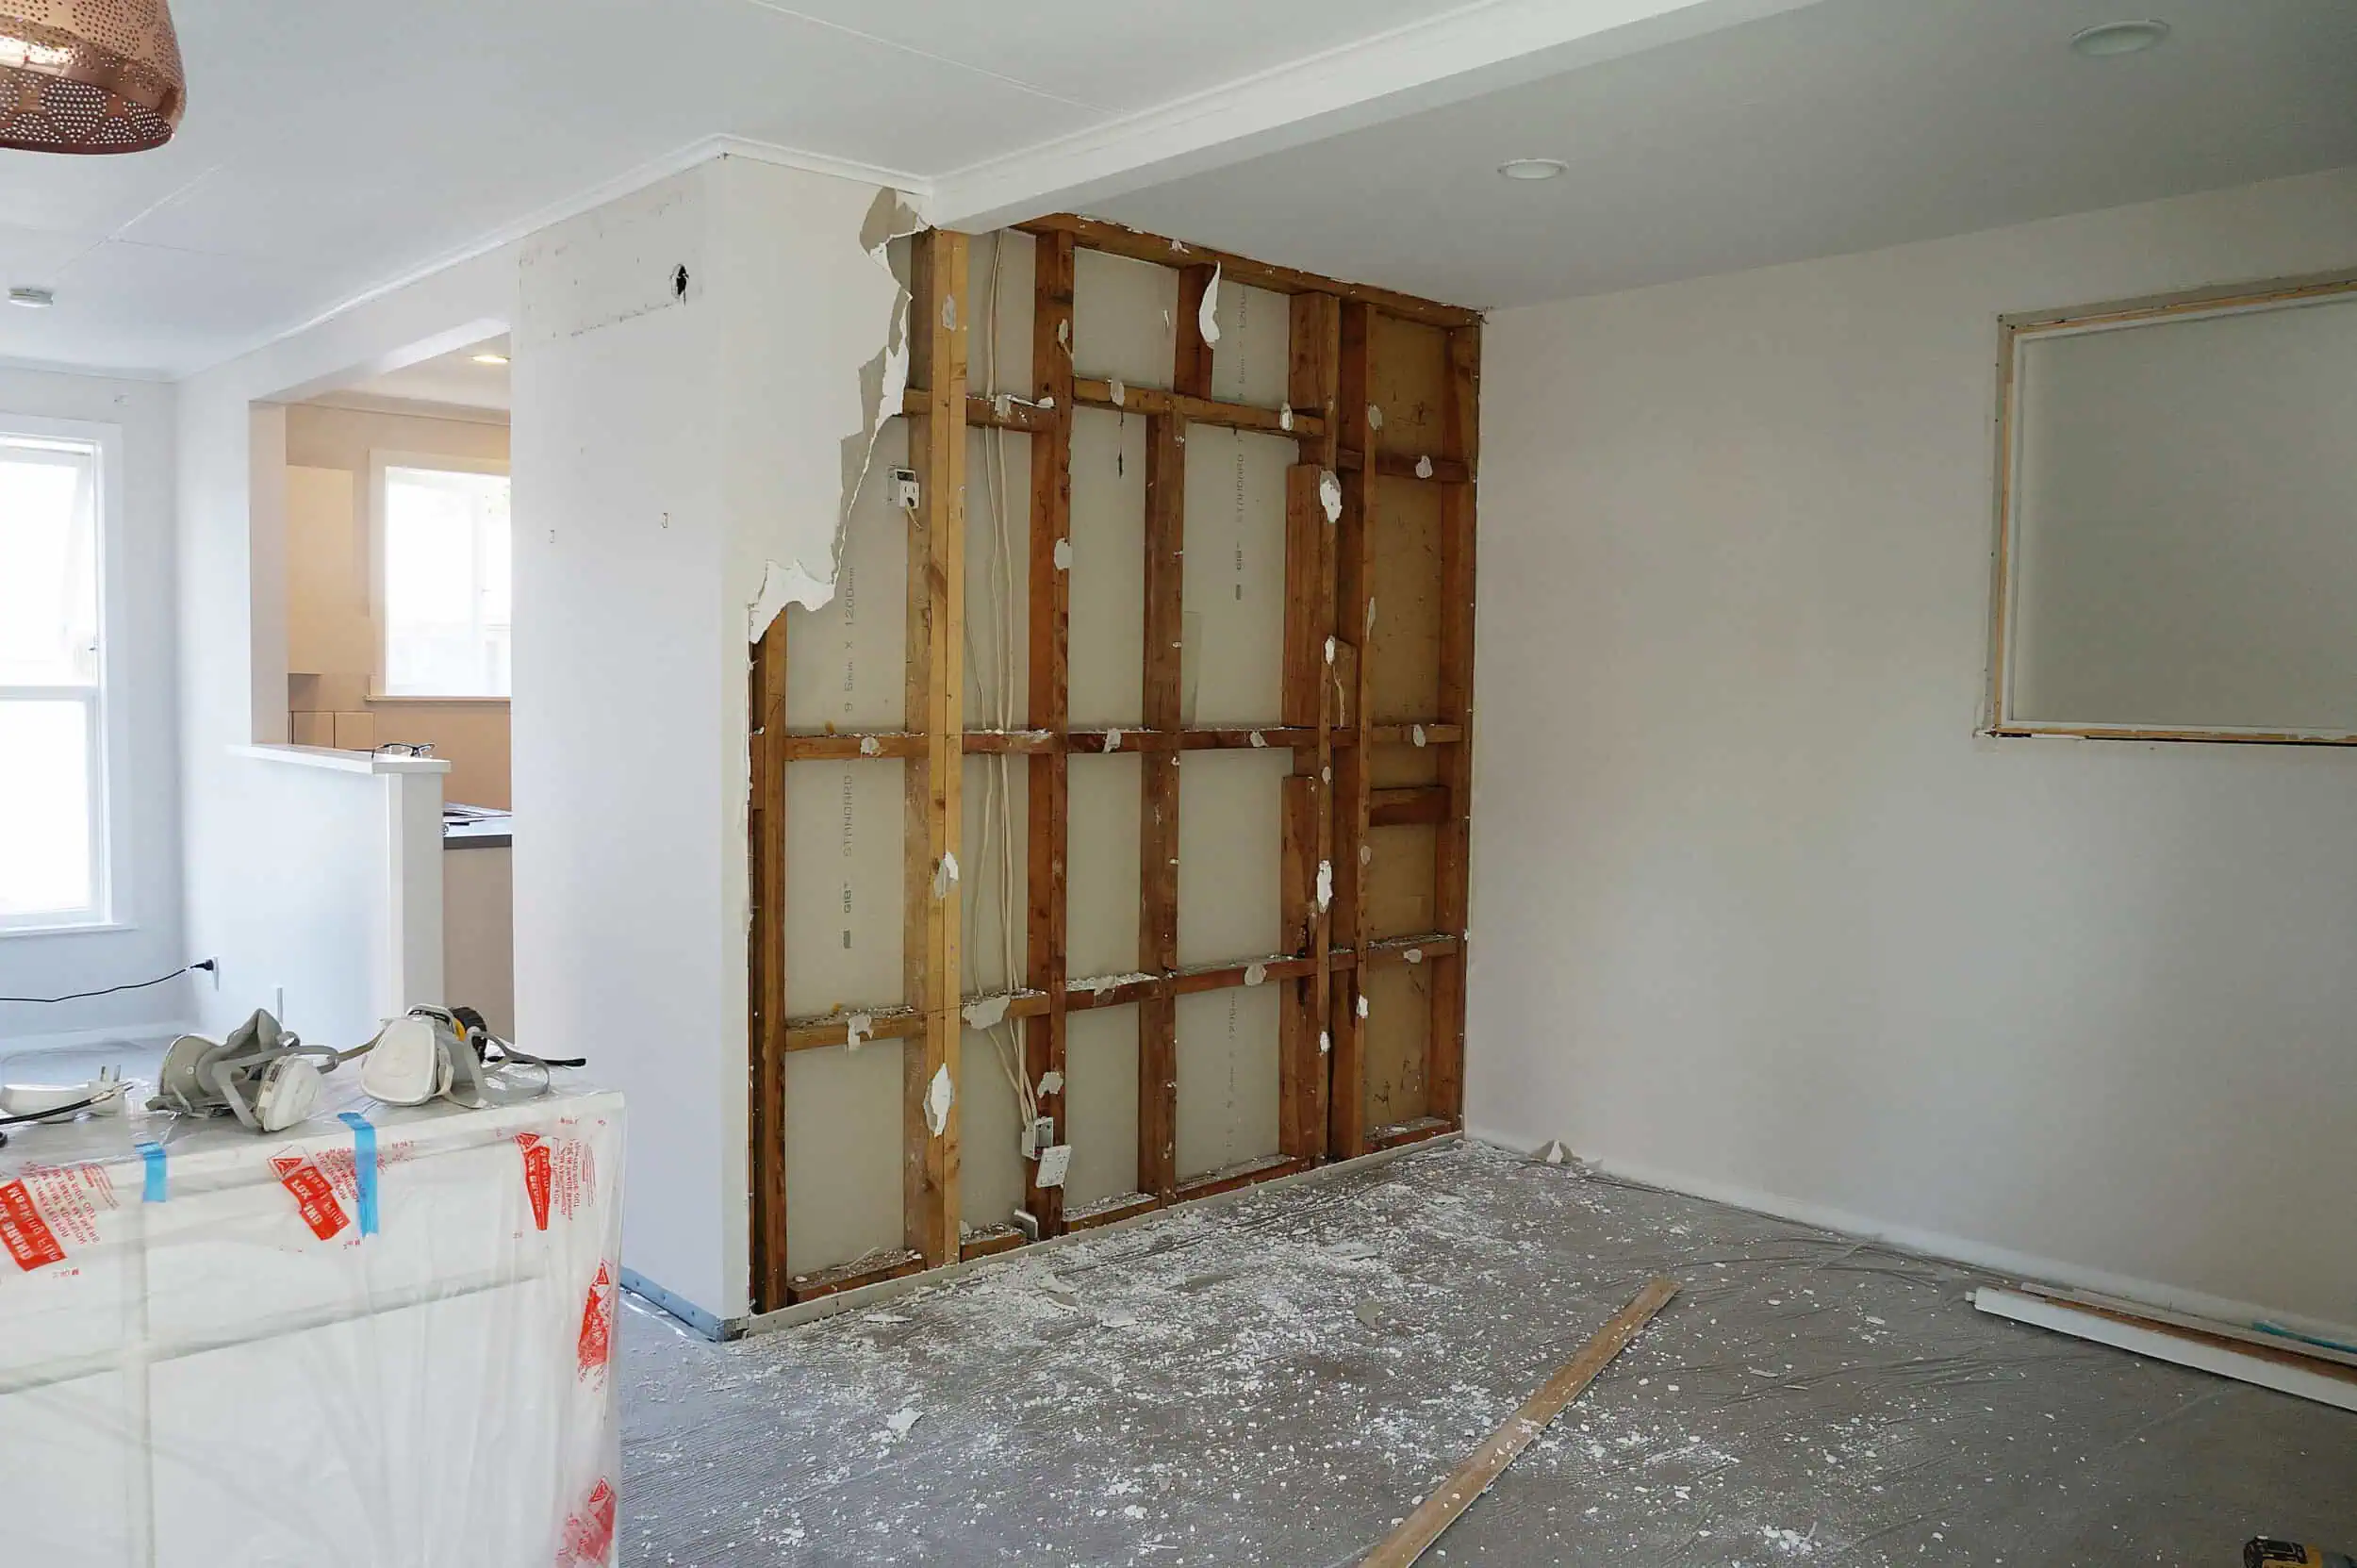
      A partial wall carries no structural load. It’s there as a divider, or to frame a doorway. These come out fairly cleanly: the builders remove the wall, then make good the GIB, plaster and paint where it met the floor, ceiling and adjoining walls.

      Because it carries no structural load, a non-load-bearing wall can usually come out without a building consent — it isn’t altering the primary structure that triggers Restricted Building Work. The exception worth knowing: consent is still needed if removing it affects fire separation or weathertightness, which can happen in some attached or multi-level homes.

      Structural Walls (Load-Bearing)

      A load-bearing wall carries weight from the structure above, the roof, a second storey, or both. You can’t just take it out. The load has to be picked up by a beam, typically steel or engineered timber, sized by an engineer for the span and the weight above it.

      Removing a load-bearing wall is Restricted Building Work under the Building Act 2004. Before anyone swings a hammer, the job needs a structural engineer’s design, a building consent from Auckland Council, and Licensed Building Practitioner supervision. Building Performance (MBIE) is clear that any work altering a home’s primary structure is restricted building work that must be carried out or supervised by a Licensed Building Practitioner. And Auckland Council lists removing a load-bearing wall between a kitchen and dining room as exactly the kind of structural alteration that needs a building consent.

      Here’s the quick check we run to tell whether a wall is load-bearing:

      1. Check the whole-house floor plan.
      2. Look for extra support, doubled studs, posts or a thickened section.
      3. See whether the wall runs through more than one level.
      4. Check the joists and beams in the subfloor and roof space, and which way they run.

      None of this is guesswork you should be doing yourself, especially in an older home with no original plans, where the framing is anyone’s guess until the GIB comes off. We talk through trial GIB removal and inspections with clients before committing to a structural approach.

      Important note: If your home has no floor plan on record, budget time and a small cost for investigation before the design is locked. What’s behind the lining changes the engineering, and it’s better found in week one than mid-build.

      Who Carries the Consent Risk

      This is the real difference between hiring a cabinetmaker and hiring a full renovation company to open up your kitchen. We run the consent process for you: our LBP designer produces the consent drawings, we lodge the building consent with Auckland Council, the engineer’s producer statement goes in, and the Records of Work are filed at sign-off. A cabinetmaker isn’t taking on any of that structural or compliance risk, and they’re not meant to. That’s the work behind a clean open plan conversion, and it’s why a closed-to-open job sits in a different bracket to a like-for-like kitchen swap. You can see how we handle the whole sequence on our design-and-build kitchen renovation service.

      “The honest version most people don’t hear: removing a load-bearing wall isn’t the expensive bit, the beam and the engineering are manageable. It’s the consent and the coordination that catch people out when they try to project-manage it themselves. That’s the part we take off your plate.”
      — Cici Zuo, Head of Sales (NZ Dip. Interior Design), Superior Renovations


      What Does It Cost to Open Up a Kitchen in Auckland?

      The cabinetry and finishes of an open plan kitchen sit in the same bands as any kitchen renovation. In Auckland in 2026, a mid-range kitchen renovation runs $26,000–$35,000, a full mid-range build with custom cabinetry and stone tops typically $30,000–$50,000, and luxury or custom kitchens with islands and premium materials $90,000–$138,000+. Auckland labour sits around $120–$150 per hour, which is why prices here run 10–20% above the national average. These are the bands we quote across Auckland — our Auckland kitchen renovation cost guide breaks them down tier by tier.

      The line that varies most is the wall. As a rough Auckland guide for 2026:

      Wall type What’s involved Typical added cost
      Non-load-bearing (partial) Remove wall, make good GIB, plaster and paint. Usually no consent. $2,000–$6,000
      Load-bearing (structural) Engineer’s design, steel or engineered timber beam, building consent, LBP-supervised install. $8,000–$25,000

      The load-bearing range is wide on purpose. It swings on the span of the opening, the weight sitting above it, and whether you’re under a single storey or a two-storey home, which needs a bigger beam and more temporary propping during the build. To see where your overall project lands, run the numbers through our kitchen renovation cost calculator.

      💡 Quick tip: On timeline, a like-for-like kitchen runs 5–6 weeks, but an open-plan conversion with structural work typically pushes to 6–12 weeks, and if consent is needed, add 4–8 weeks of Auckland Council processing before the build even starts. Factor that into your move-out or living-around-it plan.


      Before and After: A Blockhouse Bay Wall Removal

      One simple move, removing a wall, can completely change a kitchen. A good example is a full kitchen transformation we did in Blockhouse Bay, West Auckland.

      Before

      closed-off kitchen before open plan renovation Blockhouse Bay Auckland

      After

      renovated open plan kitchen space Blockhouse Bay Auckland

      Before the work, the kitchen was congested, dim and short on storage. The core of the renovation was breaking the two partial walls dividing the kitchen from the living space, and removing the counter that had acted as a divider, which freed up room for a proper island. Opening it up changed how the whole space felt. Read the full Blockhouse Bay kitchen project.


      Want a price for your kitchen renovation?
      Open the calculator →

      Open Plan vs Closed Plan Kitchen: How They Compare

      open plan kitchen layout design Auckland

      Design render by Sachi Amarasekara – Open Kitchen

      open plan kitchen and living design Auckland

      Design render by Sachi Amarasekara – Open Kitchen


      Not every Auckland home suits an open plan kitchen, and not every homeowner wants one. A closed plan kitchen is shut off from the rest of the house by a wall or a doorway or two. It’s the traditional layout, most common in older properties, though plenty of newer homes still use it.

      Closed plan suits people who want cooking mess and clean-up out of sight, who like privacy while they cook, or who cook daily and elaborately and want a focused, contained space. It’s also the cheaper renovation, because it skips the structural work that opening up a kitchen demands.

      Factor Open plan Closed plan
      Light & sense of space More natural light, feels larger Can feel darker and smaller
      Family & entertaining Cook stays connected to the room Isolated from the action
      Storage Less wall, fewer cabinets More cabinetry and pantry wall
      Noise & cooking smells Travel through the home Contained
      Resale appeal What most buyers now expect Less in demand, suits some buyers
      Renovation cost Higher (wall removal) Lower (no structural work)

      If you’re leaning closed plan but want it lighter, our designers suggest glass-panelled doors to keep light moving between rooms, two-toned cabinetry so the space doesn’t read flat, and a banquette in a corner for a breakfast nook. You don’t have to knock out a wall to make a closed kitchen feel good. For ideas on making a compact closed kitchen work harder, our small kitchen design ideas are worth a read.

      “Closed plan gets written off too quickly. For a busy family that cooks every night and hates a kitchen on permanent display, it’s the better call, and it costs less to renovate. The trick is light: glass doors and a lighter palette stop it feeling boxed in.”
      — Eunice Qin, Designer, Superior Renovations


      The Verdict: Which Layout Do Our Designers Recommend?

      finished open plan kitchen with island Auckland renovation


      There’s no universally right answer, and this guide isn’t built to make the choice for you. But for most Auckland homeowners renovating today, the open plan kitchen is what they’re after, and for good reason: light, space, connection, and the layout buyers expect. For a feel of how these layouts turn out, our kitchen design ideas gallery shows finished Auckland kitchens.

      We asked Cici and Dorothy which they’d choose for themselves.

      Cici: “Open plan, for me. I cook a lot and I want to be talking to family while I do it. When I design my own space I think about the future, friends over, kids around, conversations flowing. A big island in an open room does all of that.”

      Dorothy: “Open plan, from a design point of view. It gives you far more to work with, the finishes carry through from the living area, and you get that one big connected space that feels like the heart of the home.”

      If you’re weighing it up for your own home, the fastest way to get clarity is to have a designer look at your actual floor plan and walls. Our team does that in a free in-home consultation, and we’ll tell you straight whether your wall is load-bearing before you fall in love with a layout you can’t easily afford. You can also browse our in-house Design Studio to see how the design-to-build process works.

      Book your free in-home consultation with Superior Renovations
      Estimate your kitchen renovation cost
      Request a free feasibility report for your project


      Is an open plan kitchen worth it in NZ?

      For most Auckland homeowners renovating today, yes. An open plan kitchen brings in natural light, makes a small home feel larger, keeps the cook connected to family and guests, and supports resale value because it's what buyers expect in a modern home. The trade-offs are less storage wall, more visible mess, and the cost of removing a wall, especially if it's load-bearing. It's worth it when you value light and connection and your home suits the change. A closed plan kitchen can be the smarter call if you cook elaborately, want privacy, or are on a tighter budget.

      Do I need building consent to open up my kitchen in Auckland?

      It depends on the wall. Removing a non-load-bearing (partial) wall usually doesn't need consent, though consent is still required if the removal affects fire separation or weathertightness. Removing a load-bearing wall always needs a building consent from Auckland Council, a structural engineer's design, and Licensed Building Practitioner supervision, because it's Restricted Building Work under the Building Act 2004. At Superior Renovations we manage the engineer, the consent application and the LBP sign-off as part of the project, so you don't lodge anything yourself.

      How much does it cost to remove a wall for an open plan kitchen?

      As a rough 2026 Auckland guide, removing a non-load-bearing wall and making good (plaster and paint) typically adds $2,000 to $6,000 to a kitchen renovation. Removing a load-bearing wall, including the structural engineer, a steel or engineered timber beam, the building consent, and LBP-supervised installation, typically adds $8,000 to $25,000 depending on the span, the load carried above, and whether the home is single or double storey. This is on top of the cabinetry, benchtop, appliance and finishing cost of the kitchen itself.

      How much does an open plan kitchen renovation cost in Auckland?

      In Auckland in 2026, a mid-range kitchen renovation runs $26,000 to $35,000. A full mid-range build with custom cabinetry and stone benchtops typically runs $30,000 to $50,000, and luxury or custom kitchens with islands and premium materials range from $90,000 to $138,000 and up. An open plan conversion adds the cost of removing the wall on top of these figures. Auckland labour sits around $120 to $150 per hour, which is why local pricing runs 10 to 20% above the national average.

      Open plan vs closed plan kitchen, which is better?

      Neither is universally better; it depends on your lifestyle. Open plan wins on natural light, sense of space, family connection and resale value, and gives more freedom for islands and seating, but offers less storage wall, less privacy, and costs more because it usually involves removing a wall. Closed plan wins on privacy, cabinetry and storage, contained noise and cooking smells, and a lower renovation cost, but can feel darker and more isolated. Open plan suits entertainers and connected families; closed plan suits keen cooks who want a private space or are renovating on a budget.

      How long does an open plan kitchen conversion take in Auckland?

      A like-for-like kitchen renovation takes about 5 to 6 weeks from the start of demolition. An open plan conversion with structural changes typically runs 6 to 12 weeks, because the beam, propping and engineer-supervised work add stages. If the job needs Auckland Council consent, for example removing a load-bearing wall, add 4 to 8 weeks of consent processing before the build can start. Splashbacks also need separate manufacturing lead time and are installed as a later visit.

      Do you need an extractor fan in an open plan kitchen?

      Yes, we strongly recommend one. With no walls to contain them, cooking smells and steam travel straight into your living and dining areas and linger. A good rangehood or ventilation system, ducted externally where possible rather than recirculating, makes a real difference to how the whole space feels and smells. It's a small line item that clients are always glad they didn't skip.

      Can I put an island in a closed or small kitchen?

      Sometimes, but not always. An island needs clear walkways on all sides, at least 1000 to 1100mm for a single cook, so a narrow closed kitchen usually can't take one without feeling cramped. In a larger closed kitchen it can work well. If the room is too tight, a peninsula attached to one run of cabinetry often gives you the bench and storage benefits of an island without the clearance problem. Our designers can tell you quickly from your floor plan.

      How do I know if my kitchen wall is load-bearing?

      The reliable signs are: the wall runs through more than one level, it sits at right angles to the floor or ceiling joists, or it has extra support like doubled studs or a thickened section. Walls running parallel to the joists are more often non-load-bearing, but this isn't a safe DIY call, especially in older Auckland homes with no original plans. The only certain way is an assessment by a builder or engineer, sometimes after a small section of GIB is removed to see the framing. We check this for clients before any design is locked in.


      Further Resources for your kitchen renovation

      1. Featured projects and Client stories to see specifications on some of the projects.
      2. Real client stories from Auckland

      Need more information?

      Take advantage of our FREE Complete Home Renovation Guide (48 pages), whether you’re already renovating or in the process of deciding to renovate, it’s not an easy process, this guide which includes a free 100+ point check list – will help you avoid costly mistakes.

      Download Free Renovation Guide (PDF)


      18 months 0 percent interest long term finance badge

      Have you been putting off getting renovations done?

      We have partnered with Q Mastercard ® to provide you an 18 Month Interest-Free Payment Option, you can enjoy your new home now and stress less.

      Learn More about Interest-Free Payment Options*

      *Lending criteria, fees, terms and conditions apply. Mastercard is a registered trademark and the circles design is a trademark of Mastercard International Incorporated.


      Still have questions unanswered?

      Book a no-obligation consultation with the team at Superior Renovations, we’d love to meet you to discuss your renovation ideas!

        Services

        Home RenovationKitchen RenovationBathroom RenovationOutdoor RenovationHouse ExtensionCommercialDesign ServicesOther

        By submitting this form, you agree to receive communications from us via email or text regarding our services, you can unsubscribe at any time.

        This site is protected by reCAPTCHA and the Google

        Privacy Policy and Terms of Service apply.


        References

        1. Auckland Council — Apply for a consent for minor structural alterations
        2. Building Performance (MBIE) — Restricted building work
        kitchen renovation design auckland
        Kitchen Renovation

        Stages of a Kitchen Renovation in Auckland (2026)

        Stages of a Kitchen Renovation: What Actually Happens From Start to Finish

        Free cost calculator

        How much will your kitchen renovation cost?

        Get an instant Auckland price range for your project — no details required to see it.

        Open the Kitchen Cost Calculator →

        Quick answer: A kitchen renovation in Auckland runs through six stages — consultation, design, pre-construction (including consent if needed), demolition, construction and installation, and handover. The build itself takes 5–6 weeks on site. Add 2–4 weeks of design and 4–6 weeks of cabinetry manufacturing beforehand, and the full process from first consultation to handover is about 12–16 weeks.

        Most Auckland homeowners who contact us about a kitchen reno have the same question: “What’s the actual process?” Not the pretty Instagram version. The real one — the part where your house smells like plaster dust, there’s no running water at the sink for three days, and you’re cooking dinner on a camp stove in the garage.

        We’ve renovated hundreds of kitchens across Auckland since 2017, from villas in Grey Lynn with original 1920s sculleries to 1990s brick-and-tile places in Pakuranga where the melamine cabinets have finally given up. Every kitchen project is different in scope, but the stages are remarkably consistent. Knowing what happens at each one — and roughly when — takes most of the stress out of the experience.

        This is the process we follow for every kitchen we take on. We’ll walk through each stage in order: what happens, how long it takes, what it costs, and what you should be doing at each point. No fluff. Just the stuff you’ll wish you’d known before demo day.

        One thing worth flagging upfront: we focus on full kitchen renovations — gut-and-rebuild jobs, open-plan conversions, complete layout redesigns. If you’re just swapping a benchtop or putting in a new rangehood, this guide will still be useful for understanding the broader process, but that’s not what our team does day to day.

        Completed kitchen renovation in an Auckland home by Superior Renovations


        Stage 1 — Consultation and Scope: Getting Clear on What You Want

        This is where everything starts, and it’s the stage most people underestimate. You might think the consultation is just a meet-and-greet. It’s not. A good initial consultation sets the scope, budget range, and feasibility for the entire project — get it wrong here and you’ll pay for it later.

        What Happens During the In-Home Consultation

        At Superior Renovations, the first step is a free in-home consultation. One of our team visits your property, walks through the existing kitchen with you, and talks about what you’re after. We’re looking at a few things:

        The current layout — where’s the sink, the cooktop, the fridge? Is the workflow functional, or are you walking 4 metres every time you need to drain pasta? We’re also reading the structural clues. Older Auckland homes — particularly pre-1960s villas and bungalows in areas like Mt Eden, Kingsland, or Devonport — often have kitchens tucked away at the back of the house with a load-bearing wall between the kitchen and living area. That matters, because removing a load-bearing wall adds structural engineering, consent, and a steel beam to the project.

        We’ll talk about your wish list, your must-haves, and your budget. Being upfront about budget is the single most useful thing you can do at this stage. If you’ve got $30,000 to spend, we can design a great kitchen. If you’ve got $90,000, we can design a different great kitchen. But we need to know the number to make it work properly.

        💡 Quick tip: Before your consultation, take ten minutes to photograph your current kitchen from each corner. Note down what frustrates you most — it might be a lack of bench space, poor lighting, or a layout that blocks traffic flow. These details save time for your designer.

        Setting a Realistic Kitchen Renovation Budget in Auckland

        Based on the kitchens we’ve completed across Auckland, here’s where the numbers sit in 2026:

        Renovation Level Typical Cost (NZD + GST) What’s Included
        Budget refresh $15,000–$25,000 Pre-made cabinets, laminate benchtops, no layout changes
        Mid-range full renovation $30,000–$50,000 Custom cabinets, stone benchtops, appliance upgrade, minor layout tweaks
        Luxury / custom $90,000–$138,000+ Premium materials, island bench, smart features, full layout redesign

        Auckland prices typically run 10–20% above the national average, driven by higher labour rates ($120–$150/hour) and compliance costs. Always factor in a 10–15% contingency — especially if your home was built before 1980. You’d be surprised how often we open up a wall in a Pt Chevalier bungalow and find something that wasn’t in the plans.

        Want the figures broken down tier by tier? We’ve set them all out in our Auckland kitchen renovation cost guide. For a number specific to your kitchen, run it through our kitchen renovation cost calculator — it takes less than 60 seconds.

        “The biggest mistake I see is homeowners locking their heart on a specific look before they understand their budget. If we know the number early, we can steer the material choices so the design actually delivers — instead of stripping things back halfway through.”
        — Alison Yu, Designer, Superior Renovations

        What to Prepare Before Your First Meeting

        Come with a rough budget range, a few photos of kitchens you like (Pinterest, Houzz, Instagram — wherever), and a list of what isn’t working in your current kitchen. If you’ve had any previous building work done on the property, dig out the plans or LIM report. That information speeds up the scoping process.

        After the consultation, we’ll follow up with a written project brief and an indicative cost range. This isn’t a binding quote — it’s a realistic picture of what your project will cost, so you can decide whether to move forward into the design stage. No surprises.


        Kitchen renovation proposal and design brief from Superior Renovations


        Stage 2 — Kitchen Design and Material Selection

        This is where your kitchen starts to exist — on screen, at least. The design stage is where every decision gets made that affects how your kitchen looks, functions, and costs. Changes here are free. Changes once the builders are on site are not.

        Working With a Designer at the Showroom

        Once you’ve committed to moving forward, you’ll work with one of our designers at the Superior Renovations showroom in Wairau Valley (16B Link Drive). This is a hands-on session — you’re looking at actual materials, touching benchtop samples, opening cabinet drawers, and feeling how different handle profiles sit in your hand.

        The designer develops a full kitchen layout from your consultation brief: cabinet placement, appliance positions, electrical and plumbing points, lighting, storage, and workflow. We generate 3D renders so you can see exactly what the finished kitchen will look like — not a rough sketch, but a realistic visualisation with your chosen colours, materials, and fittings.

        Why does this matter? Because every decision is cheap to change on screen and expensive to change on site. Moving a sink 600mm during the design phase costs nothing. Moving it after the plumber has roughed-in the pipes costs real money — and adds days to the build.

        💡 Quick tip: Ask your designer to walk you through the “work triangle” — the path between your sink, cooktop, and fridge. If that triangle is too stretched or too cramped, you’ll feel it every time you cook. A well-designed kitchen makes the 6pm dinner rush manageable, not chaotic.

        Choosing Materials That Work for Auckland Conditions

        Material selection sounds straightforward until you’re standing in front of 40 benchtop samples. Here’s the shortcut: think about how your family actually uses the kitchen.

        Benchtops — Engineered stone (brands like Caesarstone or Smartstone) is the most popular choice for mid-range Auckland kitchens. It handles heat, stains, and daily abuse. Laminate (Laminex or Melteca) is the budget-friendly option, and it looks far better than it did ten years ago.

        Kitchen benchtop and cabinetry samples at the Superior Renovations Wairau Valley showroomKitchen material and finish displays at the Superior Renovations showroomCabinetry finishes and tapware on display at the Superior Renovations showroom

        Cabinetry — Across the kitchens we’ve built, this is consistently the single largest line item — usually around 35–45% of the budget. Custom cabinets give you control over dimensions, internal fittings, and finish. Pre-made flat-pack options from Mitre 10 or Bunnings work for budget projects, but they won’t fit irregular wall lines — common in older Auckland homes.

        Splashbacks — Tiled, glass, or acrylic. Tiled splashbacks from suppliers like The Tile Depot offer the widest range of looks. Glass and acrylic need manufacturing lead time (usually 2–3 weeks) and are installed after the main build.

        Appliances and fixtures — Sink, tap, rangehood, oven, cooktop, dishwasher. These need to be selected and ordered during the design stage because their exact dimensions drive the cabinet design. A 900mm rangehood needs a different cabinet opening than a 600mm one. Get this wrong and you’re re-manufacturing cabinetry.

        How Long Does the Design Stage Take?

        Allow 2–4 weeks for design and material selection. Faster if you’re decisive about finishes. Slower if you want to explore several layout options, or if your project involves structural changes that need architectural input — in which case we bring in Sonder Architecture for the structural design and consent drawings.

        At the end of this stage, you’ll have a finalised design, a full materials list, and a detailed fixed-price quote with a payment schedule and construction timeline. This is the point where you sign the contract.

        “I always tell clients — spend the time here. Every hour in the design stage saves three on site. Once we’ve got the 3D render locked in and the materials ordered, the build phase runs like clockwork.”
        — Dorothy Li, Design Manager, Superior Renovations


        Stage 3 — Pre-Construction: Consent, Manufacturing, and Preparation

        This is the behind-the-scenes stage. You won’t see tradies on site yet, but a lot is happening. The pre-construction phase is where your design gets turned into physical components — and where any council consent gets processed.

        Do You Need a Building Consent for a Kitchen Renovation in Auckland?

        Short answer: probably not — but it depends on your scope.

        Most kitchen renovations that keep the existing layout don’t require Auckland Council building consent. Replacing cabinetry, benchtops, appliances, flooring, and finishes in the same positions falls under exempt work. You’re free to go ahead without a consent application.

        Consent is required if your project involves:

        Removing or altering a load-bearing wall — the most common consent trigger in Auckland kitchen renovations, especially open-plan conversions where the kitchen wall comes down to connect with the living and dining area. Relocating plumbing to a new position — moving the sink to an island bench, for example, usually requires consent because it alters the drainage layout. Adding new electrical circuits beyond standard replacements — extra wiring for an induction cooktop or dedicated appliance circuits may trigger consent depending on scope.

        According to Auckland Council’s guidance on kitchen and bathroom renovations, you can remodel an existing kitchen within the same space without consent — provided you keep the sink in the same position and use authorised tradespeople for the plumbing and electrical work.

        If consent is required, our team handles the full application — drawings, structural engineering (via Sonder Architecture), council submission, and follow-up. Auckland Council has a statutory 20 working days to process a building consent, but the clock stops every time the council requests more information — and through 2025–26 Auckland has been averaging closer to 30 working days. Complex projects take longer again, so build the consent window into your planning.

        💡 Quick tip: If your project needs consent, don’t wait until it’s granted to start ordering materials. Your designer can run the material ordering and the consent application in parallel — so by the time consent comes through, your cabinetry is already in the manufacturing queue. That saves weeks.

        Cabinet Manufacturing and Material Ordering

        Once the design is signed off and the contract is in place, the project moves to manufacturing. Your cabinetry is booked into the manufacturing schedule, and all materials, hardware, fixtures, and fittings are ordered.

        Cabinet manufacturing typically takes 4–6 weeks, depending on complexity and the manufacturer’s schedule. Stone benchtops are templated after the cabinets are installed — they’re cut to fit the actual installed dimensions, not the design drawings — so they arrive separately, usually 1–2 weeks after cabinet installation.

        During this period, your project manager confirms the construction start date, finalises the build sequence, and coordinates every trade — plumber, electrician, tiler, builder, painter, installer. Everything gets scheduled so each trade arrives at the right time, in the right order.

        Preparing Your Home for the Kitchen Build

        A week or two before demolition, you’ll need to set up a temporary kitchen. This sounds minor, but it makes a real difference to how tolerable the next 5–6 weeks are. Most of our Auckland clients set up a trestle table with a microwave, electric jug, and a portable induction cooktop in the garage, spare room, or dining area.

        Clear the existing kitchen completely before demo day. Everything out of the cabinets, off the shelves, out of the drawers. Appliances disconnected. The demo team works fast — they don’t want to be carefully packing away your grandmother’s china while they’re pulling out cabinetry.


        Stage 4 — Demolition and Site Preparation

        Demo day. This is when the old kitchen comes out. It’s loud, it’s dusty, and it happens fast.

        What Gets Removed During Kitchen Demolition

        Old cabinets, benchtops, splashback, flooring, and appliances are stripped out completely. In a full kitchen renovation, we’re taking everything back to bare walls and floor — sometimes further. If we’re opening up into an adjacent room, the dividing wall comes down at this stage too (with structural support already in place if it’s load-bearing).

        Demolition for a standard kitchen takes 1–2 days. If there’s structural work — steel beams, header installation, foundation adjustments — add another 2–3 days. The demo crew protects adjacent rooms with dust barriers and floor protection, but fair warning: renovation dust finds its way everywhere. Close bedroom doors and cover furniture in adjacent rooms.

        What Happens After the Old Kitchen is Out

        This is the stage most homeowners don’t think about, and it’s where hidden issues surface. Once the old kitchen is gone, the walls and floor are exposed. In older Auckland homes — particularly anything built before 1970 — we commonly find water damage behind the sink, inadequate electrical wiring, outdated plumbing, or framing that doesn’t meet current code.

        A client in Hillsborough had us renovate their 1960s kitchen last year. Behind the old wall-mounted cabinets, the GIB had been nailed straight to the framing with no moisture barrier — the bottom plate was damp and soft. That framing needed replacing before the new kitchen could go in. It added $3,500 and four days to the project. That’s exactly what your contingency budget is for.

        Once the space is cleared and any remedial work is done:

        Rough-in plumbing — the plumber installs pipework for the new sink position, dishwasher, and any other water connections. Sanitary plumbing and drainage work must be done by an authorised tradesperson; you can check what’s exempt and what needs consent on Building Performance’s guidance on building consents. Rough-in electrical — the electrician wires new circuits, power points, and lighting positions to the design plan. If you’re upgrading to an induction cooktop, you’ll need a dedicated circuit. Wall and floor preparation — GIB repair or replacement, plastering, levelling, and waterproofing where required.

        💡 Quick tip: If you’re living in the house during the renovation, arrange to be out on demo day and the day after. The noise, dust, and disruption are at their worst during this stage. After that, it settles into a steady build rhythm.


        Want a price for your kitchen renovation?
        Open the calculator →

        Stage 5 — Construction, Installation, and Finishing

        This is the main event. The stage where your kitchen gets built.

        Cabinet Installation

        Once the site is prepped and all rough-in work is signed off, cabinet installation begins. Delivery is timed to line up with the installation date — we don’t want cabinetry sitting in your hallway for two weeks getting scratched.

        Installation takes 2–3 days for a standard kitchen. The cabinets go in first — base units, wall units, pantry, island bench carcass. Everything is levelled, shimmed, and secured. This has to be precise, because the benchtop, splashback, and appliances all reference off the cabinet positions. A cabinet that’s 5mm out will show once the stone benchtop goes on.

        Benchtop Templating and Installation

        If you’ve chosen engineered or natural stone, the benchtop supplier comes in after cabinet installation to template. They laser-measure the exact dimensions of your installed cabinets — including sink cutout, cooktop cutout, and any joins. The stone is then cut and polished off-site, which takes 5–10 working days.

        Laminate benchtops are manufactured before installation and delivered ready to fit. They go in faster — usually the same day as the cabinet install, or the day after.

        Plumbing, Electrical, and Appliance Fit-Off

        Once the benchtop is in, the final connections happen. The plumber fits the sink and tap, connects the dishwasher, and tests all water connections. The electrician connects the oven, cooktop, rangehood, and any under-cabinet or pendant lighting. This fit-off stage takes 1–2 days.

        Appliances need to be on site before the fit-off date. If you’re supplying your own, make sure they’re delivered at least a week before the scheduled fit-off — don’t assume courier timelines will cooperate. We’ve had jobs delayed because a client’s oven was sitting in a warehouse in Hamilton waiting for a delivery slot.

        Splashback, Tiling, Flooring, and Paint

        Splashbacks go in after the benchtop — they sit on the bench surface and run up to the wall cabinets. Glass and acrylic splashbacks (ordered earlier in the process) are installed as a single panel. Tiled splashbacks are laid on site by a tiler — that takes 1–2 days including grouting and drying time.

        Flooring is typically laid after cabinet installation — it runs up to the cabinet bases, and kickboards are fitted last to cover the join. Luxury vinyl plank (LVP) is the most popular flooring choice in Auckland kitchen renovations right now — warm underfoot, water-resistant, and it handles heavy traffic. Tiles are the other common option, especially for open-plan spaces where the kitchen floor continues into the living area.

        Painting is the last step inside the kitchen — walls and ceiling get their final coat after every other trade has finished. Your painter works around the installed cabinetry, benchtop, and splashback.

        “The order of trades matters more than most people realise. Plumber before cabinets. Cabinets before benchtop. Benchtop before splashback. Painter last. When that sequence gets disrupted — materials turn up late, or a trade doesn’t show on the right day — the whole schedule shifts. That’s why we run a dedicated project manager on every kitchen.”
        — Cici Zuo, Head of Sales (NZ Dip. Interior Design), Superior Renovations

        💡 Quick tip: Don’t choose paint colours until the benchtop and cabinetry are installed. Colours look different against real surfaces than they do on a screen. Grab a few Resene test pots and paint A4-sized swatches on the wall next to your new cabinets — check them in morning light and evening light before committing.


        Stage 6 — Handover, Inspection, and Aftercare

        The finish line. But not quite the way most people picture it.

        The Final Walk-Through

        Before we hand over the kitchen, your project manager walks through the completed space with you. Every element is checked — cabinet doors and drawers (do they open, close, and align properly?), benchtop finish, appliance operation, plumbing (run every tap, flush every connection), electrical (every power point and light switch), splashback joins, flooring, paint.

        This is a detailed inspection, not a casual look. If anything needs attention — a drawer runner that’s slightly stiff, a paint touch-up behind the oven, a silicone bead that isn’t clean — it goes on a snag list and gets sorted before final sign-off.

        What a Typical Kitchen Renovation Timeline Looks Like

        Here’s the full timeline from first contact to handover, based on a mid-range Auckland kitchen renovation without consent:

        Stage Duration Notes
        Consultation 1–2 weeks In-home visit, project brief, indicative cost range
        Design and material selection 2–4 weeks Showroom sessions, 3D renders, final quote
        Manufacturing and ordering 4–6 weeks Cabinetry manufacture, materials ordered
        Demolition and site prep 3–5 days Strip-out, rough-in plumbing and electrical
        Construction and installation 3–4 weeks Cabinets, benchtop, splashback, flooring, paint
        Handover and inspection 1–2 days Walk-through, snag list, sign-off
        Total (no consent) ~12–16 weeks Add 4–8 weeks if consent is required

        Warranties and Aftercare

        Your kitchen renovation is covered by a workmanship guarantee from Superior Renovations, a 12-month maintenance agreement, plus individual manufacturer warranties on products, appliances, and fixtures. The cabinetry, benchtop, and splashback each carry their own manufacturer warranty — your project manager hands these over at completion along with care and maintenance instructions.

        If anything comes up after handover — a soft-close hinge that needs adjusting six months later, a question about cleaning stone benchtops — our aftercare team is there for it. That’s part of the service. We’ve built kitchens across Auckland for years, and we want them to stay in great condition.

        For how we run the full renovation experience — from design through to aftercare — see our promise to every client, or read what Auckland homeowners say in their own words.


        Want a price for your kitchen renovation?
        Open the calculator →

        How to Get Through a Kitchen Renovation Without Losing Your Mind

        We’ve watched hundreds of Auckland families go through this. The ones who have the best experience tend to do a few things the same way.

        Accept that the first week is the worst. Demo day is loud and messy. The house feels chaotic. Your temporary kitchen setup is annoying. That’s normal. By week two, the build has a rhythm and you’ll barely notice the crew is there.

        Stay in regular contact with your project manager — not with the tradies directly. The project manager is your single point of communication for a reason: they coordinate everyone, track the schedule, and flag issues before they turn into problems. Your PM keeps you updated throughout, so you always know what’s happening and what’s next.

        Don’t make design changes once construction starts. Seriously. Moving a power point after the electrician has wired it adds cost and delay. The design stage exists for exactly this reason — make every decision there, and the build runs smoothly.

        And finally — it’s worth it. Just about every client says the same thing three weeks after handover: “I should have done this years ago.”

        Book your free in-home consultation with Superior Renovations
        Try our free kitchen renovation cost calculator
        Request a free feasibility report for your project


        What are the main stages of a kitchen renovation?

        A kitchen renovation follows six main stages: consultation and scoping, design and material selection, pre-construction (consent, manufacturing, ordering), demolition and site preparation, construction and installation, and final handover and inspection. The full process takes approximately 12–16 weeks from first consultation to completion for a standard Auckland kitchen renovation without consent.

        How long does a kitchen renovation take in Auckland?

        A standard kitchen renovation takes 5–6 weeks from demolition day, assuming the design is finalised and cabinetry has been manufactured beforehand. Including the design stage (2–4 weeks) and manufacturing lead time (4–6 weeks), the total process from first consultation to handover is typically 12–16 weeks. If consent is required, add 4–8 weeks for Auckland Council processing before the build can begin.

        How much does a kitchen renovation cost in Auckland in 2026?

        In Auckland in 2026, a budget kitchen refresh starts from $15,000–$25,000. A mid-range full renovation with custom cabinets and stone benchtops runs $30,000–$50,000. Luxury and custom kitchens with premium materials and full layout redesigns range from $90,000 to $138,000+. Auckland prices run 10–20% above the national average due to higher labour rates ($120–$150/hour) and compliance costs.

        Do I need a building consent for a kitchen renovation in NZ?

        Most kitchen renovations that keep the existing layout do not require Auckland Council building consent. Consent is required if you are removing a load-bearing wall, relocating plumbing to a new position, or making significant electrical changes. According to Auckland Council, you can remodel a kitchen within the same space without consent if the sink stays in the same position and authorised tradespeople do the plumbing and electrical work.

        What is the most expensive part of a kitchen renovation?

        Cabinetry is typically the most expensive component, accounting for around 35–45% of the total budget. In a mid-range Auckland kitchen, expect to spend $10,000–$20,000 on cabinetry alone. Other significant costs include stone benchtops ($3,000–$8,000), appliances ($3,000–$10,000+), and labour for the plumbing, electrical, and installation trades.

        Can I live in my house during a kitchen renovation?

        Yes — most Auckland homeowners stay in their home during a kitchen renovation. Set up a temporary kitchen with a microwave, electric jug, and portable induction cooktop in the garage, spare room, or dining area. The main disruption is during the first week (demolition). After that, the construction phase is quieter and follows a predictable daily rhythm.

        How do I prepare my kitchen for renovation?

        Empty all cabinets, drawers, and shelves completely before demolition day. Disconnect and remove portable appliances. Set up a temporary kitchen in another room. Close doors to adjacent rooms to limit dust spread. If you have a LIM report or previous building plans for the property, have these available for your project manager — they speed up scoping and help avoid surprises.

        What happens if you find problems during demolition?

        It is common to discover hidden issues in older Auckland homes once walls and floors are exposed — water damage, outdated wiring, substandard framing, or asbestos-containing materials. Your renovation company should assess and quote any remedial work before proceeding. This is exactly why a 10–15% contingency budget is recommended for every kitchen renovation, particularly on homes built before 1980.

        Should I use a designer for my kitchen renovation?

        For a mid-range to luxury renovation ($30,000+), working with a designer is worth it. A designer optimises your layout and storage, produces 3D renders so you can see the result before anything is built, and recommends materials suited to NZ conditions — which avoids costly mistakes on site. At Superior Renovations, design is built into our renovation service from your first consultation, rather than charged as a separate fee.

        How are kitchen renovation payments structured in NZ?

        Most NZ renovation companies use a staged payment schedule — a deposit on contract signing, progress payments at key milestones (for example, after demolition and after cabinet install), and a final payment on handover. At Superior Renovations, your written, fixed-price quote includes the payment schedule and construction timeline, so you know exactly what is due and when. Be cautious of any company asking for a large amount upfront.

        What is the best time of year to renovate a kitchen in Auckland?

        Kitchen renovations can be done year-round in Auckland since most work is indoors. The first half of the year — particularly February to June — tends to have better trade availability and shorter manufacturing lead times. The second half of the year is busier. If you want to start in summer, book your consultation 3–4 months ahead to secure your preferred dates.


        Further Resources for your kitchen renovation

        1. Featured projects and Client stories to see specifications on some of the projects.
        2. Real client stories from Auckland
        3. Browse our kitchen design gallery for completed Auckland projects
        4. Work out your numbers with our kitchen renovation cost calculator

        Need more information?

        Take advantage of our FREE Complete Home Renovation Guide (48 pages), whether you’re already renovating or in the process of deciding to renovate, it’s not an easy process, this guide which includes a free 100+ point check list – will help you avoid costly mistakes.

        Download Free Renovation Guide (PDF)


        18 months 0 percent interest long term finance badge

        Have you been putting off getting renovations done?

        We have partnered with Q Mastercard ® to provide you an 18 Month Interest-Free Payment Option, you can enjoy your new home now and stress less.

        Learn More about Interest-Free Payment Options*

        *Lending criteria, fees, terms and conditions apply. Mastercard is a registered trademark and the circles design is a trademark of Mastercard International Incorporated.


        Still have questions unanswered?

        Book a no-obligation consultation with the team at Superior Renovations,
        we’d love to meet you to discuss your renovation ideas!

          Services

          Home RenovationKitchen RenovationBathroom RenovationOutdoor RenovationHouse ExtensionCommercialDesign ServicesOther

          By submitting this form, you agree to receive communications from us via email or text regarding our services, you can unsubscribe at any time.

          This site is protected by reCAPTCHA and the Google

          Privacy Policy and Terms of Service apply.


          References

          1. Auckland Council — Kitchen and bathroom home renovations
          2. Auckland Council — Building consent process (10-step guide)
          3. Building Performance (MBIE) — Check if you need consents
          DSC07267 - Superior Renovations
          Kitchen Renovation

          Is $10,000 Enough to Renovate a Kitchen in NZ?

          Is $10,000 Enough to Renovate a Kitchen in NZ? (What About $20,000?)

          Free cost calculator

          How much will your kitchen renovation cost?

          Get an instant Auckland price range for your project — no details required to see it.

          Open the Kitchen Cost Calculator →

          Quick answer: $10,000 won’t cover a full kitchen renovation in New Zealand — but it can fund a surprisingly effective cosmetic refresh. For a proper renovation with new cabinets, benchtops, and appliances, you’ll need at least $15,000–$25,000. In Auckland, most mid-range kitchen renovations land between $26,000 and $35,000.

          It’s one of the most Googled renovation questions in New Zealand, and the answer isn’t what most people want to hear.

          Ten grand sounds like real money. And it is. But in the world of kitchen renovations — where cabinets alone can eat $5,000–$15,000 and a plumber charges $120–$150 an hour in Auckland — it doesn’t stretch as far as you’d think. A cosmetic kitchen refresh (new paint, handles, tap, and maybe a splashback) can come in under $10,000. A full renovation? That’s a different story.

          We’ve had this conversation with hundreds of Auckland homeowners at our Wairau Valley showroom. Someone walks in with a $10,000 budget, expecting new cabinets and stone benchtops. We’d rather be upfront about what’s realistic than let you burn through your savings on half a job.

          This guide breaks down three budget tiers — $10,000, $20,000, and $30,000+ — so you can see exactly what each one delivers. No fluff. Just real numbers from real Auckland projects.


          black kitchen with timber overhead cabinetry copper pendant lights and marble island


          What $10,000 Actually Gets You in a Kitchen Renovation

          Let’s be direct. $10,000 is not enough for a full kitchen renovation in New Zealand. New cabinets, benchtop, appliances, flooring, a plumber, an electrician, and a builder? That runs $15,000 minimum for a small kitchen on basic materials with zero layout changes. In Auckland, $20,000 is more realistic.

          But $10,000 can do a lot if you know where to spend it.

          The $10,000 Cosmetic Refresh — Item by Item

          A cosmetic refresh keeps the existing layout, keeps the existing cabinets (or most of them), and focuses on the surfaces and finishes that make the biggest visual impact. Here’s a realistic Auckland breakdown:

          Item DIY / Budget Option Estimated Cost
          Cabinet painting (professionally sprayed) Spray-coat existing doors $2,000–$4,000
          New handles and hardware Modern pulls from Mitre 10 or Bunnings $150–$500
          New laminate benchtop Laminex range, standard L-shape $1,500–$3,000
          Tile splashback Subway or metro tiles, professionally laid $800–$2,000
          New mixer tap and sink Mid-range from Reece or Bunnings $400–$1,000
          Plumber (tap and sink swap, same position) Licensed plumber, 2–3 hours $300–$500
          New light fixture Under-cabinet LED strip + pendant $300–$800
          Wall paint DIY with Resene or Dulux $150–$400
          Total $5,600–$12,200

          On the lean end — painting cabinets yourself, fitting your own handles, and keeping the splashback simple — you can land under $6,000. Get a professional spray-coat and a decent laminate benchtop from Laminex, and you’re closer to $8,000–$10,000.


          white kitchen with timber-panelled island stainless fridge and dining table beyond

          Designer Kitchen By Superior Renovations

          💡 Quick tip: The single biggest visual change you can make under $10,000 is professionally painting or spray-coating your existing cabinets. A dated pine or melamine kitchen from the 1990s can look genuinely modern with a matte charcoal or white spray finish — and it costs a fraction of new cabinetry.

          What a $10,000 Budget Cannot Do

          There are hard limits at this price point. $10,000 won’t cover new cabinetry, new appliances, or any layout changes. Specifically:

          You won’t be replacing cabinets. Even flat-pack cabinets from Mitre 10 for a standard kitchen run $3,000–$7,000 — and that’s before installation, benchtop, and trades. Add a plumber, electrician, and builder, and you’ve already blown past $10,000 before buying a single appliance.

          You won’t be moving the sink, the oven, or the dishwasher. Relocating plumbing in an Auckland home adds $2,000–$10,000 to the job. Moving electrical adds more. At this budget, everything stays where it is.

          You also won’t be replacing appliances — not as part of the renovation, anyway. If your oven is on its last legs, that’s a separate purchase. A decent oven and cooktop package runs $2,000–$5,000 from brands like Fisher & Paykel, Bosch, or Westinghouse.

          “A $10,000 refresh works best when the bones of the kitchen are still solid — structurally sound cabinets, decent layout, no plumbing issues. We’re changing the skin, not the skeleton. That’s where the value sits at this price.”
          — Alison Yu, Designer, Superior Renovations

          When a $10,000 Refresh Makes Sense

          This budget suits a few specific scenarios. If you’re preparing a house for sale and the kitchen is dated but functional, a cosmetic refresh offers the best return without overcapitalising. A $10,000 refresh on a $700,000 home in Hillsborough or Henderson is smart money — a $40,000 renovation on the same property probably isn’t.

          It also works if you’re renovating a rental property, doing a quick pre-tenancy spruce-up, or staging a phase-one upgrade before a larger renovation down the line.

          Where it doesn’t make sense: if the cabinets are water-damaged, the layout is genuinely broken, or you’re dealing with an older Auckland home where the plumbing needs replacing anyway. In that case, spending $10,000 on cosmetics is putting lipstick on a problem.


          What $20,000 Gets You — The Entry Point for a Real Kitchen Renovation

          $20,000 is the realistic starting point for a genuine kitchen renovation in New Zealand — new cabinets, new benchtop, and basic new appliances, provided you keep the existing layout. In Auckland, you’ll need to be disciplined about materials and smart about where you save.

          At this budget, you’re no longer just refreshing surfaces. You’re stripping out the old kitchen and installing something new. But the rules are strict: no layout changes, no structural work, no premium materials.

          The $20,000 Kitchen — What’s Included

          Item Specification Estimated Cost
          Flat-pack or pre-made cabinets Standard sizes, MDF or acrylic panel doors $4,000–$8,000
          Laminate benchtop 30mm laminate, standard L-shape or galley $1,500–$3,000
          Entry-level appliances Oven, cooktop, rangehood (Westinghouse/Bosch) $2,000–$4,000
          Sink and tapware Stainless steel sink, mid-range mixer tap $400–$800
          Tile splashback Ceramic or subway tiles from The Tile Depot $800–$2,000
          Vinyl plank or laminate flooring Budget-friendly, durable for kitchens $500–$1,500
          Plumber Disconnect and reconnect (same positions) $800–$1,500
          Electrician Disconnect, reconnect, new under-cabinet lighting $800–$1,500
          Builder / installer labour Demo, install cabinets, benchtop, finishing $2,000–$4,000
          Paint and finishing Walls and ceiling $300–$600
          Total $13,100–$26,900

          Notice the range. At the lean end — a small galley kitchen in a Papakura townhouse, flat-pack cabinets, basic appliances — you might squeeze in under $15,000. A standard kitchen in a three-bedroom Massey home with better materials? Closer to $22,000–$25,000. In Auckland specifically, $20,000 is the entry point for a basic full renovation — not a generous one.

          built-in coffee station with espresso machine kettle and spirits display on a marble benchtopHigh End Kitchen Design

          We completed a small kitchen renovation in Greenlane for around $22,000 — smart storage, neutral tones, laminate benchtop, and a tight layout that didn’t need any plumbing changes. It came up well. But the homeowner was realistic about what that budget delivered: clean, modern, and functional — not magazine-feature material.

          💡 Quick tip: The single biggest cost-saver at this budget level is keeping the existing layout. The moment you move a sink or oven, you’re adding $2,000–$10,000 in plumbing and electrical work — and that’s budget you can’t afford to lose when you’re working with $20,000.

          Where to Save (and Where Not To)

          Save on cabinets. Flat-pack from Mitre 10 or Bunnings is genuinely good now — melamine or acrylic panel doors in white or neutral tones look sharp and hold up well. The difference between a $5,000 flat-pack kitchen and a $15,000 custom job is quality and longevity, but at this budget, flat-pack is the right call.

          Save on benchtops. Laminate has come a long way. The Laminex range includes stone-look and timber-look finishes that are genuinely convincing. At $170–$300 per square metre, it’s a fraction of engineered stone ($500–$800/m²).

          Don’t save on trades. In New Zealand, all plumbing and electrical work must be done by licensed professionals — that’s the law, per building.govt.nz. Cutting corners here to save $1,000 can cost you $5,000+ in rework, plus your insurance may not cover unlicensed work. Auckland Council is strict on this.

          Don’t save on the rangehood. It sounds minor, but a cheap recirculating rangehood in an Auckland kitchen — where humidity is already an issue — leads to moisture damage, peeling paint, and mould behind cabinets. Spend the extra $200–$400 on a ducted model if at all possible.

          “I always tell clients at the $20,000 mark — pick two things to do really well and accept basic everywhere else. If the benchtop and handles are beautiful, the whole kitchen lifts. If you try to upgrade everything, you end up with a kitchen where nothing quite feels right.”
          — Cici Zuo, Head of Sales (NZ Dip. Interior Design), Superior Renovations

          The $20,000 Trap: When It’s Not Enough

          Here’s where homeowners get caught. They budget $20,000, start the renovation, and discover the framing behind the old cabinets is damp. Or the electrician finds wiring that doesn’t meet current standards. Or the floor underneath is uneven and needs levelling before new vinyl goes down.

          Older Auckland homes — especially 1970s–80s brick-and-tile in suburbs like Mt Roskill, Mangere, and Manurewa — are particularly prone to hidden surprises. Pre-1940s villas in Grey Lynn or Ponsonby can throw up issues too: outdated plumbing, single-skin walls, asbestos in textured ceilings.

          The standard advice is to add a 10–15% contingency to your budget. On $20,000, that’s $2,000–$3,000 set aside for the unexpected. If nothing goes wrong, you keep it. If something does, you’re not scrambling for a personal loan mid-build.

          Important note: If your Auckland home was built before 2000, consider budgeting for a pre-renovation inspection ($500–$1,000). It can flag asbestos, outdated wiring, or hidden moisture before you commit to a build — and potentially save you thousands.

          Want to see how your specific kitchen stacks up? Try our free kitchen renovation cost calculator — it gives you a tailored estimate based on your kitchen size, materials, and scope.


          The Real Cost of a Mid-Range Kitchen Renovation in Auckland

          So if $10,000 gets you a refresh and $20,000 gets you a basic renovation, what does a proper mid-range kitchen renovation actually cost?

          In Auckland in 2026, a mid-range kitchen renovation — custom cabinets, stone or engineered benchtops, good appliances, minor layout tweaks — runs between $30,000 and $50,000 + GST. The national average sits lower, around $28,000–$35,000, but Auckland’s labour rates ($120–$150/hour) and material demand push costs 10–20% higher than the rest of the country.

          That figure comes from completed projects, not guesswork. We’ve renovated kitchens across Auckland from Avondale ($95,000 for a large modern build) to Greenlane ($22,000 for a compact refresh) — and the most common spend for a standard three-bedroom home lands between $30,000 and $45,000.

          What You Get at $30,000–$50,000

          This is the budget where a kitchen starts to feel designed, not just assembled. At this level, you’re typically getting:

          Component Mid-Range Specification
          Cabinets Custom-made to fit your space, soft-close hinges, quality MDF or acrylic panel doors
          Benchtop Engineered stone (e.g., caesarstone or equivalent) — $3,000–$6,000
          Appliances Mid-tier brands — Fisher & Paykel, SMEG, Bosch — $4,000–$8,000
          Splashback Porcelain tiles or glass — from The Tile Depot or similar
          Flooring Quality vinyl plank or porcelain tiles ($100–$200/m²)
          Layout changes Minor — repositioning an appliance or adding a breakfast bar
          Design Professional 3D design, material selection, project management
          All trades Builder, plumber, electrician, tiler — all licensed and managed

          This is the sweet spot for most Auckland homeowners. You’re getting a kitchen that looks and functions well, uses materials that’ll last 15–20 years, and is built by professionals who handle everything from design to handover. It’s also the tier where renovation companies like us add the most value — managing the build, coordinating trades, and catching problems before they become expensive.

          west harbour kitchen design


          For inspiration on what this budget delivers in practice, have a look at our kitchen design gallery — it includes projects at various price points from across Auckland.

          Why the Jump from $20,000 to $30,000 Is Worth It

          The gap between a $20,000 kitchen and a $30,000 kitchen is bigger than the numbers suggest.

          At $20,000, you’re typically assembling flat-pack cabinets, accepting laminate surfaces, and coordinating trades yourself. At $30,000+, you’re getting custom cabinetry built to your exact dimensions, professional design input, a project manager keeping everything on track, and materials that genuinely last.

          A well-renovated kitchen can recoup 50–80% of its cost in added property value — and mid-range renovations tend to deliver the best return without overcapitalising. For a $1 million home in a suburb like Meadowbank or Westmere, a $35,000–$45,000 kitchen renovation is well within the 5–10% of property value guideline that most property experts recommend.

          We work with our in-house design team to make sure every dollar in a mid-range budget pulls its weight. Dorothy Li, our Design Manager, will tell you that 80% of the impact in a kitchen comes from the cabinets and benchtop — get those right, and the rest follows.

          💡 Quick tip: If you’re torn between a $20,000 DIY-managed renovation and a $30,000 professionally managed one, consider the time cost. Managing trades, ordering materials, and troubleshooting problems yourself can take 40–80 hours of your time. If you value your time at even $50/hour, the “saving” disappears fast.

          Want a price for your kitchen renovation?
          Open the calculator →

          How to Decide Which Budget Is Right for You

          Here’s a simple framework we use with our clients:

          Your Situation Recommended Budget Approach
          Selling soon, kitchen is dated but functional $5,000–$10,000 Cosmetic refresh — paint, handles, benchtop, splashback
          Rental property spruce-up $8,000–$15,000 Basic renovation with durable, low-maintenance materials
          First home, tight budget, kitchen is unusable $18,000–$25,000 Full basic renovation, same layout, pre-made cabinets
          Family home, want it done properly $30,000–$50,000 Mid-range renovation with professional design and build
          Forever home, premium result $50,000–$100,000+ Custom design, premium materials, layout changes

          The honest answer? Most Auckland homeowners who come to us end up in the $30,000–$45,000 range. That’s where the balance between cost, quality, and longevity sits. If you’ve only got $10,000–$20,000 right now, a cosmetic refresh or phased approach might make more sense than trying to stretch a tight budget across a full renovation.


          Smart Strategies for Stretching a Tight Kitchen Budget

          If you’re working with $10,000 or $20,000 and determined to make the most of it, here are the strategies that actually work — not the generic “shop around” advice you’ll find everywhere else.

          Phase Your Renovation

          The smartest move for a tight budget is staging the work over two phases. Phase one (now): cosmetic refresh for $8,000–$10,000 — spray-coat the cabinets, new benchtop, new handles, fresh splashback. Phase two (12–18 months later): replace appliances, upgrade lighting, add better storage solutions.

          This way, you get an immediate visual transformation and spread the cost over time. We’ve seen homeowners in Takapuna and Albany do this effectively — phase one makes the kitchen liveable and attractive, phase two finishes the job when the budget allows.

          Do the Right Things Yourself (and Nothing Else)

          DIY saves money only on the tasks where your mistakes won’t cost more to fix than the professional would have charged. Safe DIY territory: painting walls, installing handles, removing old splashback tiles (carefully), and laying vinyl plank flooring if you’ve done it before.

          Leave the plumbing, electrical, and cabinet installation to licensed professionals. In New Zealand, unlicensed plumbing and electrical work is illegal — and in Auckland, the council takes compliance seriously. A botched plumbing job can void your insurance and create moisture problems that cost far more than the $800 you saved.

          Buy Smart, Not Cheap

          There’s a difference. Cheap is a $1,200 rangehood that breaks in 18 months. Smart is buying a mid-range Fisher & Paykel model during a seasonal sale at Bunnings or Noel Leeming and saving 20–30% without sacrificing quality.

          Watch for end-of-line appliance sales, ex-display kitchen packages from Mitre 10, and clearance benchtop offcuts from suppliers. The Tile Depot often has run-out stock at significant discounts — perfect for a splashback when you’re not fussy about having this season’s trend tile.


          modern kitchen design

          Consider Finance to Bridge the Gap

          If you’ve got $20,000 saved but the kitchen really needs a $30,000 renovation, stretching the budget with finance can make sense — provided the terms work for you. We’ve partnered with Q Mastercard to offer 18 months interest-free on renovation projects. That means the difference between a $20,000 basic job and a $30,000 mid-range result could be as little as $550 a month interest-free.

          Not everyone wants to take on debt for a kitchen, and that’s fair. But if the alternative is spending $20,000 on a kitchen you’re not happy with — and then spending another $20,000 to redo it in five years — the maths works out better doing it once, properly.

          💡 Quick tip: Before committing to any budget, get a free quote from a renovation company. The number in your head and the number on the quote are often different — sometimes higher, sometimes lower. We offer free in-home consultations specifically so you can make decisions based on real figures, not guesswork.


          Want a price for your kitchen renovation?
          Open the calculator →

          The Bottom Line on Budget Kitchen Renovations in New Zealand

          $10,000 is not enough for a kitchen renovation. It is enough for a kitchen transformation — if you focus on the right things and accept the limits of a cosmetic refresh.

          $20,000 gets you into genuine renovation territory: new cabinets, benchtop, and appliances in a small-to-medium kitchen with no layout changes. It’s tight in Auckland, but doable.

          $30,000–$50,000 is where most Auckland homeowners end up — and where the value proposition is strongest. You get professional design, quality materials, managed trades, and a result that lasts 15–20 years.

          The worst thing you can do is start a renovation you can’t finish. If $10,000 is your budget right now, do a smart cosmetic refresh and plan phase two for later. If $20,000 is your ceiling, be disciplined about keeping the layout and choosing materials wisely. And if you can stretch to $30,000+, you’ll get a kitchen that genuinely changes how you live in your home.

          Whatever your budget, we’re happy to talk it through. No pressure, no obligation — just straight answers about what your money will deliver.

          Book your free in-home consultation with Superior Renovations
          Get an instant kitchen renovation cost estimate with our free calculator
          Request a free feasibility report for your project


          Is $10,000 enough to renovate a kitchen in New Zealand?

          Not for a full renovation — but it's enough for a cosmetic refresh. For $10,000 you can professionally paint or spray-coat existing cabinets, replace the benchtop with laminate, install new handles, add a tile splashback, and update the mixer tap. You'll need to keep the existing layout and cabinets. A full kitchen renovation with new cabinets and appliances starts from $15,000–$25,000 in NZ.

          Can I renovate my kitchen for $20,000 in Auckland?

          Yes, but it's the entry-level for a genuine renovation. $20,000 covers new flat-pack cabinets, a laminate benchtop, entry-level appliances, basic flooring, and trade labour — provided you keep the existing layout. In Auckland, labour costs run $120–$150/hour, so this budget is tighter than in regional NZ. Add 10–15% contingency for unexpected issues, especially in older homes.

          What is the cheapest way to update a kitchen in NZ?

          The cheapest effective update is a cosmetic refresh for $5,000–$10,000: spray-paint existing cabinets ($2,000–$4,000), install new handles ($150–$500), replace the benchtop with laminate ($1,500–$3,000), and add a fresh splashback ($800–$2,000). Painting walls yourself saves another $300–$500 in labour. Keep everything in the same position to avoid plumbing and electrical costs.

          How much does a mid-range kitchen renovation cost in Auckland?

          In Auckland in 2026, a mid-range kitchen renovation costs between $30,000 and $50,000 + GST. This includes custom cabinets, engineered stone benchtops, mid-tier appliances (Fisher & Paykel, SMEG, Bosch), professional design, and all trades managed. Auckland averages 10–20% higher than the national average of $28,000–$35,000 due to higher labour rates and material demand.

          Do I need a building consent for a kitchen renovation in Auckland?

          Most kitchen renovations don't require consent — replacing cabinets, benchtop, appliances, and finishes in the same layout is typically exempt. Consent is required if you're removing load-bearing walls, relocating plumbing to a new position, or making structural changes. If you're unsure, Auckland Council or your renovation company can assess your specific situation during a consultation.

          How long does a kitchen renovation take in Auckland?

          A standard kitchen renovation takes 5–6 weeks from demolition to handover, assuming the design is finalised and materials are on-site before work starts. A basic cosmetic refresh can be done in 1–2 weeks. More complex projects with structural changes or open-plan conversions take 6–12 weeks. If consent is required, add 4–8 weeks for Auckland Council processing.

          Should I renovate my kitchen before selling my house?

          It depends on the scope. A cosmetic refresh ($5,000–$10,000) almost always pays for itself in buyer appeal — a dated kitchen is one of the top reasons Auckland homes sell below expectations. A full renovation makes sense only if the kitchen is genuinely broken or the property value supports it. As a rule, keep renovation spend under 10–15% of your property's value to avoid overcapitalising.

          Can I do a kitchen renovation in stages to save money?

          Yes — phasing is one of the smartest strategies for tight budgets. Phase one ($8,000–$10,000): cosmetic refresh with painted cabinets, new benchtop and splashback. Phase two (12–18 months later): new appliances, lighting, and storage upgrades. This gives you an immediate visual improvement while spreading costs. Many Auckland homeowners use this approach successfully.

          What are the hidden costs of a kitchen renovation in NZ?

          Common hidden costs include: asbestos removal ($1,000–$5,000 in pre-2000 homes), outdated plumbing or wiring that needs upgrading ($1,000–$3,000), floor levelling before new flooring ($500–$1,500), and Auckland Council consent fees if structural work is involved ($500–$2,000). Budget a 10–15% contingency to cover surprises — especially in older Auckland villas and brick-and-tile homes.

          Is it cheaper to renovate or replace a kitchen in NZ?

          A cosmetic renovation (repainting cabinets, new benchtop, new handles) costs $5,000–$10,000 versus $15,000–$25,000+ for a full replacement with new cabinets. Renovation makes sense if cabinets are structurally sound. Replacement is better if cabinets are water-damaged, warped, or the layout genuinely doesn't work. A renovation company can assess which approach gives you the best value.

          How much does it cost to paint kitchen cabinets in NZ?

          Professional spray-coating of existing kitchen cabinet doors in NZ costs between $2,000 and $4,000 for a standard kitchen, depending on the number of doors and finish quality. DIY painting is cheaper ($200–$500 in materials) but rarely achieves the same factory-smooth finish. Spray-coating is one of the highest-impact, lowest-cost kitchen upgrades available.

          What is the average kitchen renovation cost per square metre in NZ?

          Kitchen renovation costs in NZ range from approximately $1,500 to $4,200 per square metre depending on materials and scope. In Auckland specifically, expect $2,500–$4,000/m² for a mid-range renovation. A standard 10–12m² kitchen at mid-range specification would cost $30,000–$50,000. Smaller kitchens (8–9m²) can come in at $20,000–$30,000 with basic materials.


          Further Resources for your kitchen renovation

          1. Featured projects and Client stories to see specifications on some of the projects.
          2. Real client stories from Auckland

          Need more information?

          Take advantage of our FREE Complete Home Renovation Guide (48 pages), whether you’re already renovating or in the process of deciding to renovate, it’s not an easy process, this guide which includes a free 100+ point check list – will help you avoid costly mistakes.

          Download Free Renovation Guide (PDF)


          18 months 0 percent interest long term finance badge

          Have you been putting off getting renovations done?

          We have partnered with Q Mastercard ® to provide you an 18 Month Interest-Free Payment Option, you can enjoy your new home now and stress less.

          Learn More about Interest-Free Payment Options*

          *Lending criteria, fees, terms and conditions apply. Mastercard is a registered trademark and the circles design is a trademark of Mastercard International Incorporated.


          Still have questions unanswered?

          Book a no-obligation consultation with the team at Superior Renovations,
          we’d love to meet you to discuss your renovation ideas!
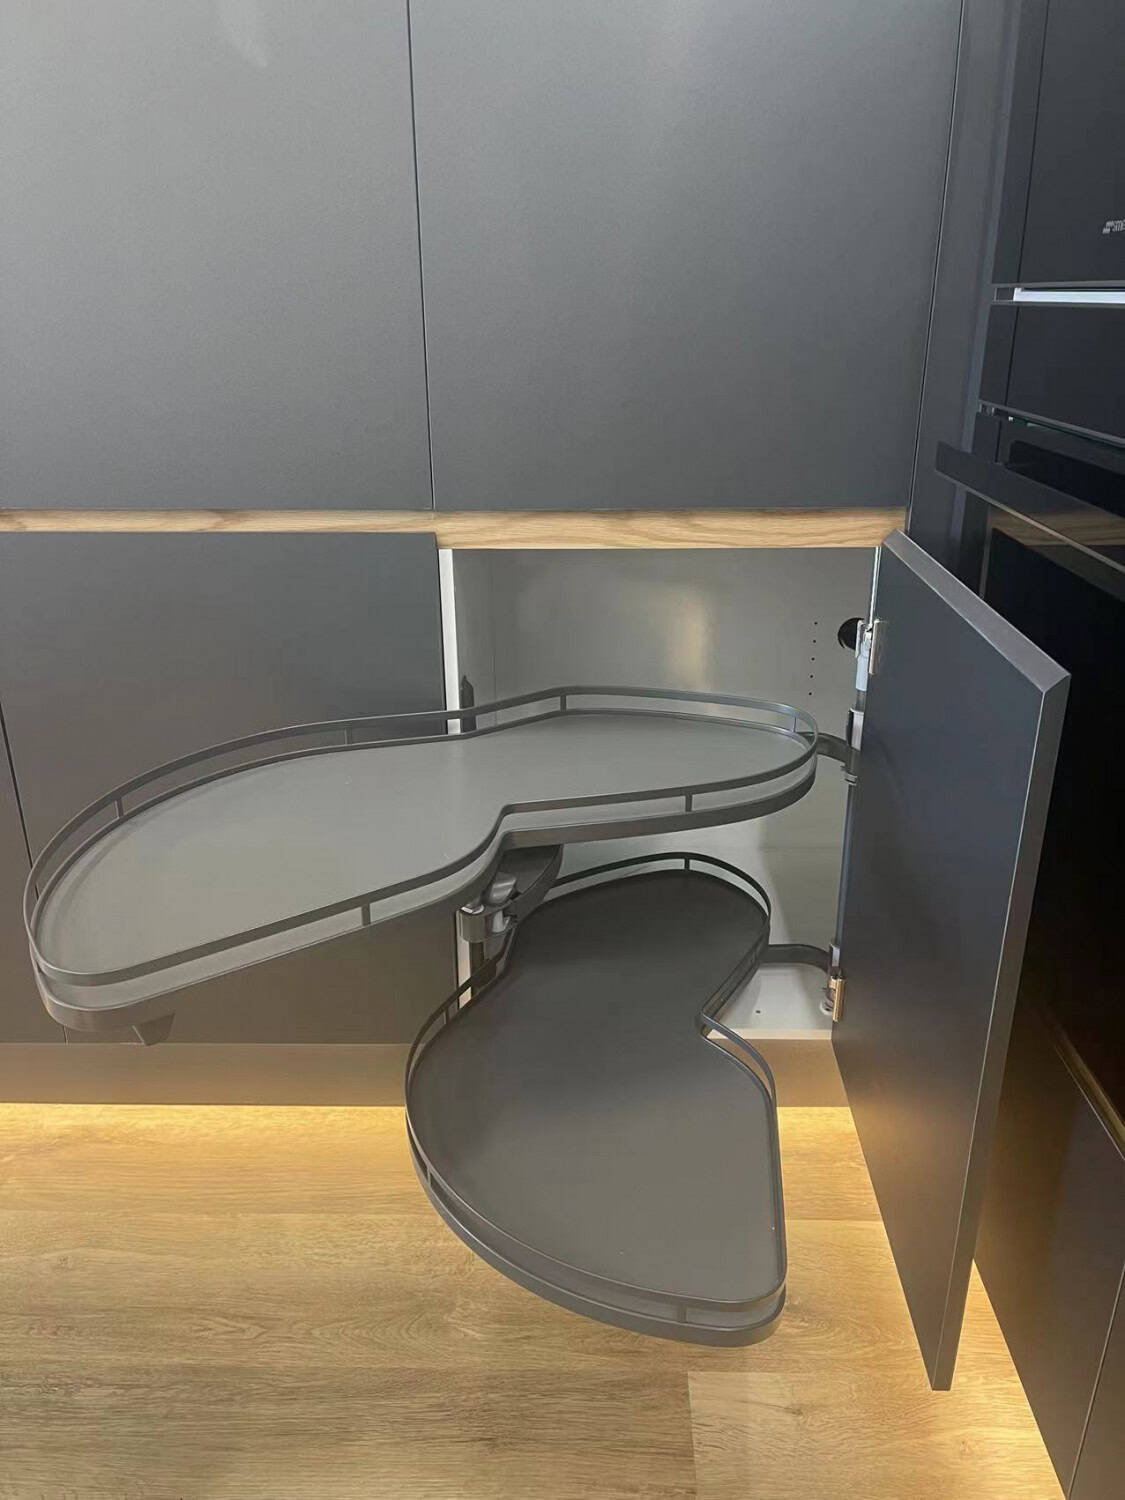
            Services

            Home RenovationKitchen RenovationBathroom RenovationOutdoor RenovationHouse ExtensionCommercialDesign ServicesOther

            By submitting this form, you agree to receive communications from us via email or text regarding our services, you can unsubscribe at any time.

            This site is protected by reCAPTCHA and the Google

            Privacy Policy and Terms of Service apply.

            kitchen cost
            Kitchen Renovation

            厨房装修计算器(新西兰)- Superior Renovations

            奥克兰厨房翻新完工实景 — Superior Renovations

            厨房是全屋使用频率最高的空间之一,也是翻新时最值得投入的区域。一次专业的厨房翻新最多可为房屋增值约 10%——不过我们大多数客户翻新厨房的首要原因,并不是为了卖房,而是想让厨房更好用、更舒适,更贴合自家的生活方式。

            在奥克兰,一次标准的整体厨房翻新(含材料、设计、项目管理、人工、水电)平均费用为 19,000 至 29,000 纽币,不含电器。实际花费取决于您的布局、橱柜与台面的材质选择,以及是否涉及结构改动。这篇指南会带您了解完整的装修流程、最容易被低估的几项费用,以及如何制定切合实际的预算。

            👉 直接跳转至厨房装修费用计算器——输入您的具体需求,估算结果将在几秒钟内发送到您的电子邮箱。


            整体厨房装修包括哪些步骤?

            一个完整的厨房翻新项目通常按以下八个阶段推进,整体工期从几周到数月不等,具体取决于项目范围和施工中是否出现意外情况。

            1. 规划与设计:装修的第一步是规划新厨房的布局。这一阶段需要平衡您的需求、使用习惯和现有空间的限制。在 Superior Renovations,我们的设计师会为您制作新厨房的 3D 效果图,让您在动工前就能直观看到最终效果。
            2. 拆除:拆除旧橱柜、台面和电器。视情况可能涉及拆墙、起除地板,以及断开原有的水管和电路。
            3. 结构改造:如果方案中包含结构性改动——比如拆除隔墙、打通开放式空间或新增窗户——通常在这一阶段完成。
            4. 水管与电路改造:旧厨房拆除后,按新布局调整或移位水管和电路系统,包括安装新的给排水管件、重新布线,以及增加插座和开关。
            5. 地板与墙面:水电工程完成后铺设新地板(瓷砖、实木或复合地板)并处理墙面——粉刷或铺贴新墙纸。
            6. 橱柜与台面:安装按新布局定制的橱柜,以及您选定的台面材料——花岗岩、石英石或大理石等。橱柜往往是整个预算中占比最大的单项。
            7. 电器安装:橱柜和台面就位后安装电器——冰箱、灶台、烤箱、洗碗机以及设计方案中的其他设备。
            8. 收尾修饰:安装照明灯具、橱柜五金件和装饰元素,让整个厨房呈现完整、精致的最终效果。

            选择一家信誉良好、流程透明的装修公司,是控制工期和预算最关键的一步。专业的项目管理可以在意外出现时及时调整方案,确保最终结果符合您的预期。您可以先浏览我们的厨房设计案例库,了解我们在奥克兰完成的真实项目。


            厨房装修中最容易被低估的五项费用

            翻新厨房让人兴奋,但在精美的样板图背后,往往藏着让预算失控的意外开支。以下五项费用是我们在奥克兰数百个厨房项目中,最常见到业主低估的地方。

            1. 结构改动——沉默的预算杀手

            很多业主梦想拥有开放式厨房,却没有意识到拆墙意味着结构改动。涉及承重墙的改建需要工程评估、建筑许可(Building Consent)和电路改线,费用会显著高于普通翻新。如果预算有限,沿用现有布局是控制成本最有效的方式。

            2. 藏在表面之下的隐患

            拆除开始后,老化的水管、不合规的电路或结构缺陷都可能浮出水面——这在奥克兰的老房子中尤其常见。根据我们的项目经验,这类意外问题平均会让翻新费用增加 1,000 至 3,000 纽币。动工前做一次全面检查,并预留应急预算,是避免预算飙升的最好办法。

            3. 橱柜——质量与成本的平衡

            橱柜决定了厨房的颜值和实用性,但优质橱柜的成本经常被低估。低价橱柜看似省钱,却往往经不起日常使用的考验。定制橱柜的价格通常在 5,000 至 25,000 纽币之间,材质和五金配置不同,差距可以非常大。

            4. 电器升级的真实代价

            一整套高端电器很容易让预算增加数千纽币。我们建议预留总预算的 10–15% 用于电器,并把配送和安装费用一并计入。

            5. 专业费用与建筑许可

            设计师、工程师的费用以及结构改动所需的建筑许可,是初期预算中最常被遗漏的项目——许可费用可能从数百到数千纽币不等。在做预算时务必把这部分计入,而不是等到中途才发现。更多常见问题可以查看我们的装修常见问题解答


            扫描二维码,在小红书上找到我们

            Superior Renovations 小红书二维码

            体验家居改造的艺术,选择 Superior Renovations!我们是奥克兰首屈一指的浴室、厨房及全屋装修专家。从概念设计到完工,我们的团队确保每个细节都完美无缺。扫描二维码,在小红书上关注我们,获取最新项目、装修技巧和灵感。

            扫描二维码,通过微信联系我们

            Superior Renovations 微信二维码

            想开始您的装修之旅吗?通过微信与 Superior Renovations 联系,享受便捷、个性化的中文服务。立即扫描,提问、获取专家建议,踏出家居改造的第一步!


            翻新前 — 奥克兰厨房装修对比
            翻新前 — Kitchen Renovation
            翻新后 — 奥克兰厨房装修对比
            翻新后 — Kitchen Renovation

            如何制定厨房装修预算?

            陈旧的装饰、不顺手的布局、时好时坏的电器——这些往往是业主萌生翻新念头的起点。但很多人因为不知道从哪里开始,把项目一拖再拖。制定预算其实只需要三步:

            第一步:评估您当前的厨房

            退一步审视您的厨房:让日常使用变得不便的,究竟是空间不够、布局不顺,还是过时的台面和橱柜?接下来思考全家人的使用习惯——如果您经常招待客人,岛台可能是值得的投资;如果您不常下厨,也许只需升级部分设备即可。装修方案应该围绕家人实际使用厨房的方式来定,而不是单纯追求样板间效果。

            第二步:确定预算范围

            您的预算最终决定装修的范围。移动水管和电源插座的费用可能很高——如果预算有限,优先考虑沿用现有布局。下方的费用计算器可以帮您了解,在奥克兰,厨房翻新的各个部分大致需要多少钱。

            第三步:研究并选对装修公司

            每家公司的服务方式不同,并不是每一家都适合您的项目。建议在网上做足功课,并与多家公司当面沟通,感受他们的专业程度和沟通方式。会面时一定要询问:过往的完整案例、老客户的评价,以及他们提供的保修和质量保证。您也可以直接预约一次免费上门咨询,让我们的设计师到您家中实地评估。


            关于厨房费用计算器(新西兰)

            在比较厨房装修报价时——尤其在奥克兰——最重要的是搞清楚报价里到底包含了什么。我们的计算器估算涵盖:橱柜及储物柜、拆除、水管工程、地板铺设、电气工程、燃气安装,以及全部安装费用。估算不包含电器费用(烤箱、冰箱、抽油烟机、洗碗机等)。

            估算价格基于我们完成的全套定制厨房翻新项目的平均值,而非局部改造。由于每个项目情况不同,请在估算结果基础上预留 10–15% 的浮动空间。填写您的详细信息后,结果将直接发送到您的电子邮箱(请记得检查垃圾邮件文件夹)。

            免费工具
            获取奥克兰厨房装修费用的即时估算

            打开厨房装修费用计算器 →


            常见问题

            厨房翻新成本计算器(新西兰)是免费使用的吗?

            是的。该计算器由 Superior Renovations 开发,免费向所有访客开放,用于为奥克兰住宅的厨房翻新项目生成成本估算,部分是应客户的普遍要求而开发的。

            标准厨房翻新的平均费用是多少?

            在奥克兰,标准整体厨房翻新的平均费用为 19,000 至 29,000 纽币,包含材料、设计、项目管理、人工、水管和电气工程,具体取决于材料和配件的选择。该费用不包含电器。

            翻新厨房是否需要建筑许可(Building Consent)?

            一般的厨房翻新不需要建筑许可,除非涉及建筑结构的改动,例如拆除墙壁。涉及结构改动时,许可费用可能从数百到数千纽币不等。

            计算器的估算包含哪些费用?

            估算涵盖橱柜及储物柜、拆除、水管工程、地板铺设、电气工程、燃气安装以及安装费用。估算不包含电器,如烤箱、冰箱、抽油烟机和洗碗机。

            厨房翻新需要多长时间?

            一个完整的厨房翻新项目通常需要几周到数月时间,具体取决于项目范围、是否涉及结构改动,以及施工过程中是否出现意外情况。

            电器预算应该预留多少?

            建议预留总预算的 10% 至 15% 用于厨房电器,并将配送和安装费用一并计入。一整套高端电器很容易增加数千纽币的开支。

            计算器的估算结果有多准确?

            估算基于 Superior Renovations 完成的全套定制厨房翻新项目的平均成本,仅供参考。由于每个项目的实际情况不同,请在估算结果基础上预留 10% 至 15% 的浮动空间。

            Superior Renovations 提供奥克兰以外地区的服务吗?

            目前我们的服务范围仅限大奥克兰地区,包括中部、东部、南部、北部、西部奥克兰及斯坦莫湾区域,暂不提供奥克兰以外地区的服务。

            请注意:尽管所有信息在发布之日均被认为真实、准确,但发布后情况的变化可能影响信息的准确性。信息如有变更,恕不另行通知。Superior Renovations 对打印或存储的任何信息的准确性,以及用户以任何方式解读和使用信息所产生的后果,不承担任何责任。

            Couple and a Superior Renovations designer reviewing material samples on a coffee table
            Kitchen Renovation

            The Importance of Lighting in Achieving a Beautiful Kitchen Design

            Hey Aucklanders, if you’re planning a kitchen reno in your Grey Lynn villa or a modern Albany hub and want it to look stunning while actually working for busy mornings and evening gatherings, nailing the lighting is an absolute game-changer. This guide shows how layered lighting—mixing ambient, task, accent, and decorative—boosts functionality, highlights your flash features like backsplashes or islands, and creates that warm, inviting vibe we Kiwis love, all while dodging common pitfalls in our variable 2025 climate.

            Free cost calculator

            How much will your kitchen renovation cost?

            Get an instant Auckland price range for your project — no details required to see it.

            Open the Kitchen Cost Calculator →

            Why’s Lighting So Crucial for a Beautiful and Practical Kitchen in NZ Homes?

            It’s not just about seeing what you’re chopping, eh? Good lighting sets the mood, makes tasks safer (no more shadows on the bench during veg prep), and turns your kitchen into a proper heart-of-the-home spot for barbies prep or family dinners. Designers like Dorothy and Sachi from Superior Renovations reckon planning it early complements your layout perfectly—think highlighting a herringbone tile splashback from Tile Depot in a Wairau Valley setup, or using skylights in Herne Bay renos for natural boost. Poor lighting leaves it flat and sterile; layered approaches make it versatile, energy-efficient with LEDs, and even smart-controlled for our busy lives.

            What’s the Deal with the Four Main Types of Kitchen Lighting?

            Break it down like this:

            • Ambient — Gives that overall soft glow from recessed ceiling lights or sconces—dimmable ones are gold for welcoming vibes in Remuera kitchens.
            • Task — Focused beams where you need ’em, like under-cabinet strips for bench work or pendants over sinks and stovetops—cuts eye strain in humid Auckland evenings.
            • Accent — Spotlights or uplighters to showcase features, such as inside glass cabinets or on 3D tiles in Henderson Valley bars—adds depth and elegance.
            • Decorative — Statement pieces like chandeliers or big pendants that double as art, perfect focal points over islands in modern Parnell designs.

            Layer ’em up—combine with natural light from windows or skylights, chuck in dimmers, and you’re sorted for everything from bright cooking to cosy dinners.

            How Can You Avoid Common Lighting Stuff-Ups in Your Auckland Reno?

            Don’t rely on one harsh overhead fluoro—creates shadows and that cold feel. Skip insufficient task lights (accidents waiting to happen), overly bright or coloured bulbs that overwhelm, mismatched fixtures clashing with your style, or forgetting dimmers/smart controls. We’ve seen heaps of transformations, like matte acrylic cabinets in Remuera glowing with accent lights, or showroom displays with everything dimmable—gets it right and your kitchen feels epic year-round.

            Fancy lighting that makes your kitchen pop and work brilliantly for your whānau? Reach out to Superior Renovations for a free consult—what’s your current lighting gripe?

            Lighting is one of the most crucial elements in kitchen design. It does more than just illuminate the space; it sets the tone, enhances functionality, and contributes significantly to the overall aesthetic of the kitchen. As kitchen designers and interior designers know, the right lighting can transform a kitchen from ordinary to extraordinary. In this comprehensive guide, we’ll explore why lighting is so essential in kitchen design and how it can be effectively used to achieve a beautiful and functional kitchen space.

            See more…

            Our Newly Launched Design Department (Exclusive Design Studio)

            Design Studio

            Design Process

            Design Packages

            3 Main Role of Lighting in Kitchen Design used by designers

            Enhancing Aesthetics

            Lighting plays a significant role in defining the aesthetics of a kitchen. Whether your kitchen has a contemporary, traditional, or transitional style, the type of lighting you choose will enhance these design elements. For instance, pendant lights over a kitchen island can serve as both a focal point and a design statement, reflecting your kitchen’s style and character.

            Moreover, lighting can highlight specific features in your kitchen, such as a backsplash, countertops, or cabinetry. By directing light toward these elements, you can draw attention to them, making them stand out and adding depth to the overall design.

            Showcase: If you look at the lighting beneath the cabinets, in the picture below, you will see how our designer Dorothy installed these lights to showcase the beautiful splash back as a design feature. This also acts as a task light to make coffee or drinks. This classic kitchen design can be seen in our showroom at Wairau valley, Auckland.

            Our Kitchen designers designed this beautiful classic kitchen

            The beautiful tile sheets from Tile depot were used to add a touch of luxury to this feature wall. They are installed in a Herringbone style and are a combination of stone engineered to look like marble as well as gold metal. This can be seen in our kitchen showroom in Auckland (Wairau Valley).

            See more: Details on all our renovation displays in our Auckland showroom

            Superior renovations showroom – Walk in today

            Improving Functionality

            While aesthetics are important, functionality is paramount in kitchen design. The kitchen is a space where various tasks are performed, from cooking to cleaning to socializing. Proper lighting ensures that each of these tasks can be carried out efficiently and safely.

            For example, task lighting under cabinets can provide direct illumination on countertops, making food preparation easier and reducing the risk of accidents. Similarly, well-placed overhead lighting can ensure that the entire kitchen is adequately lit, eliminating shadows and making the space more comfortable to work in.

            Creating Ambiance

            The kitchen is often the heart of the home, where families gather and guests are entertained. The right lighting can create a warm and inviting atmosphere, making the kitchen a more pleasant space to spend time in. Dimmers and layered lighting schemes can allow you to adjust the lighting to suit different occasions, from a bright, well-lit environment for cooking to a softer, more relaxed ambiance for dining or entertaining.

            4 Types of Lighting in Kitchen Design

            To achieve a well-lit and beautifully designed kitchen, it’s essential to incorporate different types of lighting. Kitchen designers typically use a combination of ambient, task, accent, and decorative lighting to create a balanced and functional lighting scheme.

            Ambient Lighting

            Ambient lighting sets the overall tone of your kitchen, transforming it from a purely functional space into a warm, welcoming environment. This type of lighting fills the room with a soft, even glow, making it comfortable for activities beyond cooking, such as dining and socializing. Options like recessed ceiling lights, track lighting, and strategically placed wall sconces create a well-lit space that feels open and inviting.

            Showcase: This kitchen rendering designed by our Kitchen designer Sachi includes soft ambient lights at the ceiling, task lighting above the stove top and accent lighting in the cabinets to create a simple yet soft and warm kitchen. Below is a Kitchen rendering which our clients get after going through a comprehensive design process in our designer.

            Kitchen designed by our kitchen designer Sachi to include a warm space with clever use of three types of lighting.

            A soft kitchen design uses simple yet clever use of lighting for a warm kitchen design.

            See more: Our Design Department Design Packages (Design Studio)

            To enhance the versatility of ambient lighting, kitchen designers often recommend installing dimmer switches, allowing you to adjust the brightness according to the time of day or the mood you wish to create. By layering different light sources, such as over-cabinet lighting or toe kick lights, you can define various zones within your kitchen, making it a multifunctional space that caters to all your needs.

            Task Lighting

            ask lighting is crucial for creating a functional kitchen, as it provides focused illumination for essential work areas. Whether you’re chopping vegetables, reading recipes, or cleaning up, task lighting ensures you can perform these tasks safely and efficiently. Popular options include under-cabinet lighting, which eliminates shadows on countertops, and pendant lights over kitchen islands for direct, bright light.

            Recessed lights can also be strategically placed above work zones like the sink, stove, and dishwasher, ensuring every area is well-lit. Integrating natural light sources, such as large windows or skylights, can further enhance task lighting by providing bright, even illumination throughout the day. By carefully planning and placing task lighting, kitchen designers ensure that every corner of your kitchen is practical and user-friendly.

            Showcase: This Kitchen renovation that we designed for Henderson Valley boasts accent lights above below the cabinets in the bar area to enhance its aesthetic and showcase the beautiful 3D tiles. It also creates a beautiful ambience when paired with the recessed lights and pendant lighting. This simple use of different lighting creates a stunning design.

            Lighting used to enhance the aesthetics of this kitchen design in West Auckland

            Kitchen renovation designed by our designers in Henderson Valley.

            See more: Full Case study + Before and After pictures for the above project.

            Accent Lighting

            Accent lighting plays a significant role in highlighting the design elements that make your kitchen unique. It draws attention to specific features, such as a stunning backsplash, open shelving, or an art piece, turning them into focal points within the room. Options like spotlights, uplighters, and directional sconces are ideal for showcasing these elements, adding depth and character to your kitchen. For example, if you have a feature wall with a beautiful tile design, accent lighting can emphasize its texture and color, making it a standout aspect of your kitchen.

            Showcase: This Kitchen renovation in Remuera was designed by Dorothy. She used matte acrylic boards for the cabinets, contrasted by glossy benchtop and splash back with upper cabinets with glass door. She takes the kitchen design further by adding accent lights inside the glass cabinets and task lighting below it.

            Modern and Sleek kitchen design with clever use of lighting.

            Clever use of lighting to elevate the over all design of this kitchen design

            Additionally, accent lighting can be used inside glass-front cabinets to illuminate decorative glassware or collectibles, adding a touch of elegance and sophistication to the space. Kitchen designers often use accent lighting to enhance the overall aesthetic appeal of the kitchen, ensuring that every design choice is highlighted to its fullest potential.

            Designer Kitchen in Epsom

            A closer look at the accent lighting and task lighting in the drinks/Coffee corner.

            Showcase: This Kitchen Display in our renovation showroom in Auckland shows the various uses of lighting in this kitchen design. Accent lighting was used in the Veneer Open Cabinets, LED task lighting during the sink area, Accent lighting below the bottom cabinets to showcase the flooring, Pendant Lighting above the benchtop and recessed lighting on the ceilings. All these lights can be dimmed to create a cozy atmosphere and a warm atmosphere within the space. This design showcases that lights are not an after thought during the renovation. They can really add beautiful touches within the space, take the kitchen design to another level as well as add warms within the space and create a more functional space.

            Modern sleek kitchen with accent lighting, task lighting, recessed lighting and decorative lighting

            A look at one of our displays in our kitchen display in our showroom display in Auckland.

            Below is a closer look a Kitchen renovation in Henderson Valley, Auckland with Accent lights.

            Designer Kitchen in Auckland

            A kitchen renovation in Henderson Valley

            Decorative Lighting

            Decorative lighting combines style with functionality, acting as both an illumination source and a design statement. In the kitchen, decorative lighting fixtures like chandeliers, large pendants, or unique light sculptures can serve as stunning focal points, elevating the overall aesthetic of the space. These fixtures not only provide essential lighting but also contribute to the kitchen’s design theme, whether it’s modern, rustic, or traditional.

            Showcase: This Kitchen display in our Renovation showroom in Auckland show cases the use decorative chandelier lighting to add to the kitchen design. This shows how lighting is not necessarily for light but also as a design element.

            Decorative lighting in our renovation showroom in Auckland.

            This Kitchen design shows how different materials, textures, lighting and finishes can be harmoniously to create a cohesive Kitchen design.

            Showcase: This Kitchen renovation we did uses pendant lighting as decorative lighting to elevate the kitchen design.

            Simple modern kitchen design with decorative and pendant lighting

            Simple modern Kitchen renovation uses decorative lighting within the kitchen design. See full video transformation below.

            See below the full transformation of the above Kitchen renovation.

            For example, a chandelier over the dining table can add a touch of luxury and sophistication, while pendant lights with natural materials can give your kitchen an organic, earthy feel. Kitchen designers carefully select decorative lighting to complement the overall design scheme, ensuring that each fixture enhances the space both visually and functionally. By incorporating decorative lighting, you can personalize your kitchen, making it a true reflection of your style and taste.

            Want a price for your kitchen renovation?
            Open the calculator →

            How Kitchen Designers Incorporate Lighting into Their Designs

            Professional kitchen designers understand that lighting is an integral part of the kitchen design process. They consider lighting from the very beginning, ensuring that it complements the layout, enhances functionality, and aligns with the overall design vision. Here’s how they do it:

            Planning the Layout

            The first step in incorporating lighting into kitchen design is planning the layout. Kitchen designers assess the natural light available and decide where additional lighting is needed. They consider the kitchen’s workflow, identifying key areas that require task lighting, such as the stove, sink, and preparation areas.

            Designers also think about the placement of electrical outlets and how lighting fixtures will be installed. For example, if pendant lights are planned for an island, they ensure that the wiring is in place to accommodate them.

            See more: Top 16 Kitchen design ideas for Small Kitchens

            Showcase: Below you can see a Kitchen render done by our designer Sachi (from our design studio) and showcases the use of natural lighting in the kitchen. She created two sky lights to bring in more light into the kitchen adding to the pendant lighting above the island, recessed lighting around the fridge and accent lighting near island.

            Simple Kitchen design with skylights for added natural light

            Beautiful Kitchen renders done by Sachi from our Design Studio

            3D render of a light timber kitchen with pendant lights skylights and sliding doors to a garden

            Elevation 2 of Render done by Sachi from our Design Studio

            Showcase: This Kitchen that we renovated in Herne Bay shows the skylights within the Kitchen design.

            Kitchen renovation in Grey Lynn with Sky lights for added natural light in the KItchen

            Kitchen renovation in Herne Bay with Sky lights for added natural light in the Kitchen

            See full Design Transformation for Above Project

            Layering the Lighting

            A well-designed kitchen typically features layered lighting, which combines different types of lighting to create a balanced and versatile lighting scheme. Kitchen designers layer ambient, task, accent, and decorative lighting to ensure that the kitchen is well-lit and functional.

            By layering the lighting, designers can create different zones within the kitchen, each with its own lighting needs. For example, the cooking area may have bright task lighting, while the dining area may feature softer ambient lighting for a more relaxed atmosphere.

            Kitchen Rendering from Our Kitchen Studio

            This Kitchen renders by our designer Sachi from the design studio showcases the clever use of layered lighting, and a harmony of various textures and materials creating a cohesive design.

            Choosing the Right Fixtures

            The choice of lighting fixtures is crucial in kitchen design. Designers select fixtures that complement the kitchen’s style and meet the functional requirements of the space. For instance, sleek, modern kitchens may benefit from minimalist recessed lights, while traditional kitchens may feature ornate chandeliers or lantern-style pendant lights.

            In addition to aesthetics, designers consider the quality of light each fixture provides. They opt for energy-efficient LED lights that offer bright, clear illumination and have a long lifespan. They also ensure that the color temperature of the lights matches the kitchen’s mood, whether it’s warm and inviting or cool and contemporary.

            3D render of a dark marble kitchen and dining area with gold-trimmed display cabinets and pendant light

            Elevation 2 of Kitchen renders by our Design studio

            Integrating Smart Lighting Solutions

            With the rise of smart home technology, many kitchen designers now incorporate smart lighting solutions into their designs. Smart lighting allows homeowners to control the brightness, color, and timing of their lights through a smartphone app or voice commands.

            This technology offers convenience and flexibility, enabling homeowners to create different lighting scenes for various activities, such as cooking, dining, or entertaining. Smart lighting systems can also be integrated with other smart home devices, such as voice-activated assistants or motion sensors, for a fully automated and customizable kitchen experience.

            What Kind of Lighting Not to Include in a Kitchen Design

            While the right lighting can enhance the beauty and functionality of a kitchen, the wrong lighting choices can have the opposite effect. Here’s what to avoid when designing a kitchen:

            1. Harsh, Overhead Lighting

            Harsh, overhead lighting, especially when used as the sole source of illumination, can create an unwelcoming and clinical atmosphere in the kitchen. Fluorescent lights are a common culprit, as they often emit a cold, harsh light that can make the space feel sterile and uncomfortable.

            Instead of relying solely on overhead lighting, it’s better to incorporate a mix of lighting types, including task and ambient lighting, to create a more balanced and inviting atmosphere. If overhead lighting is necessary, opt for fixtures with dimmable options and warm color temperatures.

            1. Insufficient Task Lighting

            A common mistake in kitchen design is neglecting task lighting. Without adequate task lighting, work areas can be poorly lit, making it difficult to perform tasks like chopping, cooking, and cleaning. Relying solely on ambient lighting can result in shadows and uneven light distribution, which can lead to accidents and eye strain.

            To avoid this, ensure that all work areas in the kitchen are well-lit with appropriate task lighting. Under-cabinet lights, pendant lights, and recessed spotlights are all effective options for providing direct illumination where it’s needed most.

            1. Overly Bright or Colorful Lighting

            While bold, colorful lighting might seem like a fun way to add personality to the kitchen, it can quickly become overwhelming and distracting. Bright, neon-colored lights or overly bright LEDs can create an unsettling atmosphere, making the kitchen less enjoyable to spend time in.

            It’s important to choose lighting that complements the kitchen’s overall design and color scheme. Subtle, neutral lighting with adjustable brightness is usually a better choice, as it can create a calm and cohesive environment.

            See more: 10 Mistakes to avoid when designing your Kitchen

            1. Mismatched Fixtures

            Mismatched lighting fixtures can disrupt the visual harmony of the kitchen, making it look disjointed and chaotic. While it’s possible to mix different styles of lighting, such as combining modern and traditional elements, it’s essential to do so with care and intention.

            When choosing lighting fixtures, consider how they will work together as a cohesive whole. Ensure that the fixtures complement each other in terms of style, finish, and scale. If you’re unsure, sticking to a consistent design theme or seeking the advice of a kitchen designer can help you achieve a harmonious look.

            See more: A guide to Kitchen Layouts (understanding ergonomics)

            1. Neglecting Dimmers and Controls

            One of the most common mistakes in kitchen lighting is failing to incorporate dimmers and lighting controls. Without these, you’re left with a single level of brightness that may not be suitable for all tasks or occasions.

            Dimmers allow you to adjust the brightness of your lights, creating different moods and atmospheres depending on the time of day or activity. For example, you can have bright lighting for cooking and softer, dimmer lighting for dining or entertaining. Incorporating smart controls can also provide convenience, allowing you to adjust the lighting with ease.

            In conclusion, thoughtful lighting design can transform your kitchen into a space that is not only beautiful but also highly functional. By carefully selecting and positioning different types of lighting, you can create a kitchen that truly feels like the heart of your home. For more insights, consider exploring further information on kitchen lighting design.

            Our Design Studio Experience

            Meet our designers to transform your home with our exclusive design studio experience.


            If you’re looking for “specific” cost estimates, try our Renovation Cost Calculator Tools

            Need ideas? Check out our Kitchen Design Gallery or dive into our Bathroom Design Gallery for inspiration!


            Want a price for your kitchen renovation?
            Open the calculator →

            Need more information?

            Take advantage of our FREE Complete Home Renovation Guide (48 pages), whether you’re already renovating or in the process of deciding to renovate, it’s not an easy process, this guide which includes a free 100+ point check list – will help you avoid costly mistakes.

            Download Free Renovation Guide (PDF)


            18 months 0 percent interest long term finance badge

            Have you been putting off getting renovations done?

            We have partnered with Q Mastercard ® to provide you an 18 Month Interest-Free Payment Option, you can enjoy your new home now and stress less.

            Learn More about Interest-Free Payment Options*

            *Lending criteria, fees, terms and conditions apply. Mastercard is a registered trademark and the circles design is a trademark of Mastercard International Incorporated.


            Still have questions unanswered?

            Book a no-obligation consultation with the team at Superior Renovations,
            we’d love to meet you to discuss your renovation ideas!
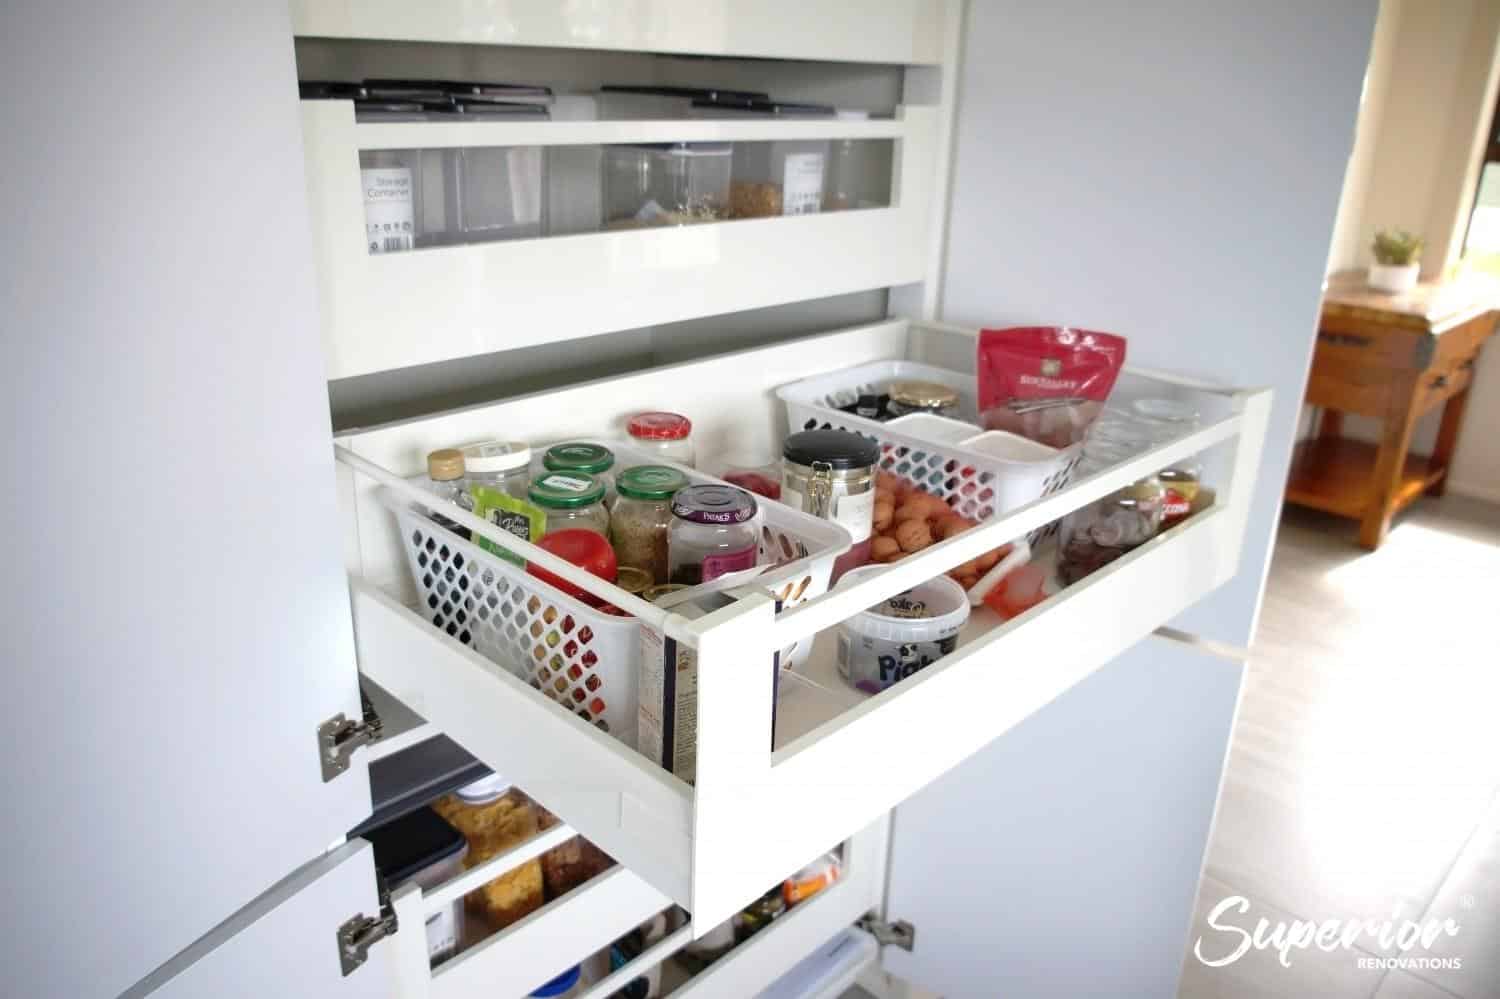
              Services

              Home RenovationKitchen RenovationBathroom RenovationOutdoor RenovationHouse ExtensionCommercialDesign ServicesOther

              By submitting this form, you agree to receive communications from us via email or text regarding our services, you can unsubscribe at any time.

              This site is protected by reCAPTCHA and the Google

              Privacy Policy and Terms of Service apply.

              Video testimonial by Mark Norris (Glenfield, Auckland) Full Kitchen Design + Renovation, and removal of walls to open up space completed by Superior Renovations. See more kitchen design ideas from projects like this one.

              Free cost calculator

              How much will your kitchen renovation cost?

              Get an instant Auckland price range for your project — no details required to see it.

              Open the Kitchen Cost Calculator →

              “For me personally, I thought the process from start to finish was actually pretty seamless. We both worked from home three days a week, living in a renovation and essentially working in a renovation to some degree. Obviously, we could hear the renovation happening; you can’t take that away. We weren’t really disturbed by anything else from the renovation unless a question needed to be asked, such as having the power or water turned off. But in terms of day-to-day operations, it was absolutely great, with no problems at all”

              The renovation included:

              ☑️ Kitchen Design

              ☑️ New Kitchen Cabinetry + Benchtop

              ☑️ Plumbing, Electrical and Installation

              ☑️ Removal of walls

              ☑️ Plastering and Painting

              ☑️ New SPC Flooring – Kitchen and Dining Area

              ☑️ New Aluminium Joinery

              ☑️ Upgrade Power Board


              Still have questions unanswered?

              Book a no-obligation consultation with the team at Superior Renovations,
              we’d love to meet you to discuss your renovation ideas!

                Services

                Home RenovationKitchen RenovationBathroom RenovationOutdoor RenovationHouse ExtensionCommercialDesign ServicesOther

                By submitting this form, you agree to receive communications from us via email or text regarding our services, you can unsubscribe at any time.

                This site is protected by reCAPTCHA and the Google

                Privacy Policy and Terms of Service apply.


                Mark Norris – Kitchen Design + Renovation by Superior Renovations

                Renovated Mangere kitchen with white matte cabinets, engineered-stone benchtop, black gloss splashback and gas cooktop
                Kitchen Renovation

                New Kitchen Remodel Cost in NZ: Basic, Mid-Range & Luxury (2023)

                Hey Aucklanders, if you’re eyeing up a kitchen remodel in your Grey Lynn villa or a busy family spot in Papatoetoe and wondering what it’ll actually cost in late 2025, you’re looking at $18,000–$120,000+ overall in NZ, with most folks landing $22,000–$45,000 for a solid upgrade that adds real value and flow. Auckland prices sit higher thanks to labour and materials, but sticking to smart choices—like keeping the layout or mid-range finishes—keeps it realistic without skimping on that Kiwi entertaining vibe.

                Free cost calculator

                How much will your kitchen renovation cost?

                Get an instant Auckland price range for your project — no details required to see it.

                Open the Kitchen Cost Calculator →

                What’s a Ballpark for Basic, Mid-Range, or Luxury Kitchen Remodels in Auckland?

                Basic refreshes (same layout, refacing cabinets, laminate counters) run $16,000–$29,000—great for quick flips in spots like Papatoetoe or Bucklands Beach, using MDF Melteca cabinets and basic appliances. Mid-range is the sweet spot at $32,000–$45,000, adding islands ($4k–$6k extra), custom storage like magic corners, engineered stone benches ($520–$1,200/m²), and brands like SMEG or Bosch—think layout tweaks in West Harbour or Massey for better flow. Luxury? $50,000–$170,000+, with full custom (natural granite/marble $4k–$15k), butler’s pantries, smart lighting, and porcelain splashbacks from Tile Depot—spot-on for upscale Parnell or Remuera pads.

                What Knocks the Price Up (or Keeps It Down) for Your Kiwi Kitchen?

                Loads, mate—keeping the existing layout saves thousands on plumbing/electrical shifts, while changing it for an island or open-plan bumps costs heaps. Materials make a big diff: Budget laminate tops ($150/m²) vs. premium stone; MDF cabinets for easy clean vs. timber veneers like Melteca Oak. Appliances swing $2k–$30k (go energy-star for bill cuts), and extras like Blum soft-close hinges or LED under-cabinet lights add functionality without breaking the bank. Auckland’s pricier than regional spots, plus permits and trades (4–7 weeks timeline). Dorothy Li, our designer, reckons investing in durable storage pays off long-term, like pull-outs in Hillsborough projects.

                How Do You Get Bang for Buck and Decent ROI Without Regrets?

                Prioritise what your whānau needs—durable counters for daily chaos, smart storage to ditch clutter, and timeless neutrals that boost resale in our hot market (often 50–80% ROI). Reuse working appliances, shop mid-range like Bestwood veneers or Neptune hybrid flooring, and bundle for deals. We’ve seen transformations in Standmore Bay with warm oak finishes or Parnell with remote LEDs—feels brand new without overcapitalizing.

                Most people in Auckland want to renovate their kitchen because their old kitchen does not suit their family’s lifestyle. Some kitchens are too old and shabby while others are just not functional. New Kitchen cost in NZ can range from $18,000 to $120,000 depending on many factors.

                However, not everyone has a $100,000 budget to renovate a new kitchen. Most people want a simple upgrade and are only willing to spend between $18,000 to $30,000 for a new kitchen.

                For the purpose of this article, we will explore kitchen cost options if you are renovating with a renovation company in Auckland and not DIY kitchens. When renovating with a renovation company your quotes will most include the cost for all fixtures, renovation materials, project management, council permits if any, all trades like plumbers, electricians, tilers, builders, installers, carpenters etc and project management. This section of our article will explore how to renovate a new kitchen on a budget. This is possible if the kitchen renovation is planned well and if your kitchen designer has a good knowledge of the renovation materials available today.


                If you’re looking for “specific” cost estimates, try our Renovation Cost Calculator Tools

                Need ideas? Check out our Kitchen Design Gallery or dive into our Bathroom Design Gallery for inspiration!


                Table of Content

                1. How much does it cost to renovate a basic kitchen in Auckland? ⇓

                – Layout for basic kitchens
                – Cabinets and storage for basic kitchens
                – Countertop for basic kitchens
                – Appliances for basic kitchens
                – Flooring for basic kitchens
                – Lighting for basic Kitchens

                2. How much does it cost to renovate a Mid-range kitchen in Auckland? ⇓

                – Kitchen layout for mid-range kitchens
                – Cabinets and storage for mid-range kitchens
                – 6 Ways to maximise storage for mid-range kitchens
                – Countertop for mid-range kitchens
                – Appliances for mid-range kitchens
                – Flooring for mid-range kitchens
                – Lighting for mid-range kitchens
                – SMART kitchens

                3. How much does it cost to renovate a luxury designer kitchen in Auckland? ⇓

                – Hiring a kitchen designer for your kitchen design
                – Custom cabinets and materials for cabinet fronts
                – Joinery for your cabinets
                – Butler’s pantry or walk in Pantry
                – Natural stone Countertops
                – Luxury designer splashbacks
                – Feature walls for open plan kitchen
                – Designer appliances to suit your kitchen design
                – Luxury natural stone tiles and kitchen flooring
                – Planning the lighting of your kitchen
                – Electric work and SMART kitchens


                Cost comparison for New Kitchen remodelling in New Zealand


                Basic Level

                Mid-range Level

                Luxury Level

                $16,560 –$28,990

                $32,000

                $45,000

                Up to

                $173,880

                Same Layout-

                • Refacing cabinets
                • Refinish paints, stain etc.

                Kitchen Storage-

                • Pull out bins, spick racks, condimental drawers.
                • Cabinet handles included.

                Basic Materials-

                • Stone Engineered marble/granite/wood or Laminate countertops.
                • Laminated/ Linoleum & Luxury vinyl kitchen flooring.
                • Ceramic tiles option for flooring
                • White tile Splashback
                • Using MDF Meleta materials for cabinets & Bestwood

                Electric Work-

                • Installing LED light bulbs.
                • Upgrading essential appliances
                Choice to change layout-

                • Install a kitchen Island- waterfall or an overhang countertop.
                • High-quality MDF Melteca cabinet doors with painting included.

                Customise your kitchen storage –

                • Better quality built-in bins, spice rack, magic corners
                • existing pantry with pull out drawers.
                • Installing Hefelle hinges & Blumotion (Soft Close) on your cabinets
                • Designer handles for cabinets optional

                Mid-range materials-

                • High-quality Stone Engineered countertops.
                • Tiled or Neptune stone-based flooring.
                • Designer tiled, glass, mosaic Splashback.
                • Making your appliances, dishwasher, fridge, invisible by adding your cabinet material on top.

                Smart Kitchen/lights features-

                • LED lights under cabinets, invisible ports.
                • Energy-star rated appliances.
                • Designer kitchen pendent lights.
                Hiring a Kitchen Designer-

                • Customize your kitchen layout.
                • Plumbing
                • Advice on materials – Mix different textures, materials, and finishes
                • Spacing/Storage planning
                • appliances

                Customise your kitchen storage-

                • A Butler’s kitchen
                • Walk in Pantry.

                Designer materials- Flooring, cabinets, countertops, splashbacks

                • Granite, Marble and Concrete countertop .
                • Tribeca collection from Tile depot for splashbacks
                • Stone based composite polymer, porcelain tiles – include the tile depot range of Urban cement collection and natural stone tiles
                • Natural wood, Porcelain tiles on MDF (neolith), Lacquer on MDF, Timber Veneer, MDF Vs Plywood Vs Particle board for your carcass for cabinets

                Custom build Cabinetry-

                • TIP-ON- open and closing cabinet doors when you press.
                • Soft close cabinets and drawers, pull out systems ,blum Legra box.
                • pull out pantry drawer system
                • details on cabinets
                • Designer handles
                • Joinery
                • Hinges

                Smart Kitchen/Light features-

                • Style options for kitchen appliances
                • Task, Ambient lighting and Accent lighting
                • Invisible appliance with cabinet door covering on top.
                • Sensor lights in pantry or cabinets
                • Voice or remote controller for lights
                • Luxury crystal chandler as a pendent light

                Already have all your own trades and you’re comfortable managing them for your kitchen renovation?

                Although we don’t recommend if you haven’t renovated a kitchen before and/or you don’t have trades people you can trust, most renovations if not all comes with it’s own surprises because not all homes are the same – this is where experience/project management plays an important role in minimises risks to maintain costs/delays giving you higher certainty of outcome/quality backed by associated guarantees and warranties.

                However, if you do intend to manage the kitchen renovation yourself, it does work out more cost effective to contact a kitchen cabinetry manufacturer directly to get the kitchen cabinets designed, manufactured and installed – leaving you to manage the other trades such as flooring, demolition, painting, plastering, splashback/tiling, electrician, plumber, and sometimes a carpenter/builder.

                Try Little Giant Interiors cost calculator below to see what you can expect to pay for cabinetry.

                Find out more about-

                how much it costs averagely to renovate a kitchen in NZ (2021).


                How much does a New Kitchen remodel cost in NZ? – Basic Kitchen

                Firstly, you might want to think about the kitchen layout. For instance, how big do you want your kitchen to be? Are you going to keep your kitchen layout the same, or are you going to make some changes? What style do you want your kitchen to be? Do you want modern, traditional, or contemporary features? These are some good questions to ask yourself before you contact a renovation company.


                1. Kitchen Layout for a New Kitchen remodel on a budget

                Most of the time a change in layout is not possible in a basic kitchen renovation. Changing the layout or moving your island, sink or plumbing will increase the cost of your kitchen renovation especially if you are on a budget.

                Before Basic Kitchen

                Before Basic Kitchen in Papatoetoe


                After basic kitchen

                After Basic makeover in Papatoetoe

                Check out this basic kitchen’s case study: Papatoetoe


                If you are more likely to stay with your original kitchen layout, then in that case your cost will decrease, so you might want to consider staying with your existing layout of your kitchen. It is however possible to create a budget friendly kitchen if you choose your renovation materials carefully. We will now discuss the different elements of your new kitchen when on a budget.


                2. Cabinetry and Storage for basic kitchen remodel

                The biggest expense in a new kitchen is cabinets. Do some research and get an idea of the kind of look you want for your kitchen cabinets. If you have an overly large kitchen then you might want to think about just changing its doors or changing cabinets that are damaged. This is where we use your standard cabinets and we remove old paint, stain, sanding and repairing the same boxes, and re-apply paint to the same wood of choice.


                Building entirely new cabinets is also possible but you will have to use mid-range materials like MDF. Melteca and Goodwood are two of the most popular MDF brands in Auckland. MDF in simple terms is manufactured wood from a factory. It is easier to clean than natural wood and has a better finish compared to acrylic. Melteca and Goodwood carry a budget friendly range for their products which come in various textures and designs.


                Cabinets in Epsom

                Waterproof Plywood boards

                melteca cabinets in stanmore bay

                Mary Stuart’s Melteca Oak wood finish in Standmore Bay


                See Case Studies:

                Historic Melteca finish in Epsom

                Melteca Oak Wood Finish look in Standmore Bay


                Storage is the second most important aspect of a well planned kitchen. Most kitchens in Auckland feature an open plan setting which means that they must have good storage, so the kitchen does not look cluttered.


                To create an uncluttered look, think about installing a cutlery drawer, spice racks, pull out bins, magic corners etc. We recommend allocating a substantial part of your budget on your cabinets and storage because you want them to last a long time.


                3.What kind of countertop is right for my basic kitchen?

                Countertops are another important feature for your kitchen. It is vital to choose a countertop that will be resistant to water, is durable and hard-wearing. There are many options available for budget friendly kitchens and our recommendations are as follows:


                • Laminate countertopsLaminated Countertops is a material that has a lot of different colours and styles. This material is long lasting, stain resistance and has natural heat. Laminate countertops remains one of the top materials in New Zealand when renovating a kitchen. So, why is it one of the top materials? Laminate is a great material for people who wish to renovate their kitchen on a budget as it is $150 per square meter. Laminate does however have its drawbacks as it can be easily stained.
                • Stone EngineeredEngineered Stone is the most popular and common countertop used in Auckland for new kitchens. So what is a stone engineered countertop? A stone engineered countertop simply means that the stone is manufactured in a factory instead of natural stone. The benefits of stone engineered stone is that through technology, manufacturers can manipulate the stone for added benefits like higher durability, better designs and is cost effective. Stone engineered countertops are often made of 90 percent Quartz. This material is a great option for first kitchen renovators as Quarts is affordable and available with a range of variety of textures in New Zealand. Stone engineered is not just durable but comes with 10 years of warranty and is scratch resistant.


                Standard Stone Engineered Countertop in Rosedale

                Stone Engineered Countertop in Papatoetoe


                Houzz states that stone engineered countertops can range between $520 to $1200 per square meter.

                Read: Different Kitchen styles and elements that make each style (Traditional kitchens, classic kitchens, contemporary kitchens, cottage style and modern kitchens)


                4. What appliances can I get for a basic kitchen?

                The first step is to see what appliances you want to upgrade. This can be from stovetop to dishwasher. Here is a tip! However, if your budget does not include high maintenance appliances then do not worry. We have got your back and just think about the existing appliances are working and the other appliances that need more attention. This could help you save a huge amount, and you can use that with other upgrades in your kitchen remodeling.


                Appliances are another major factor when thinking about kitchen renovation as they are needed for cooking, baking, warming up, and refrigeration. To stay within your budget, only buy appliances that your really need. If some of your appliances are working well then there is no need to buy new ones.


                When picking appliances, see what models have great reviews and only buy good-quality appliances that will last a long time. Having good quality appliances will also increase your house valuation if you do plan to sell your home in the future.


                5. Flooring

                Choosing the right type of kitchen flooring is important as kitchens are usually a high traffic area and are prone to food and water spillage. You might want to think about the texture of the material you choose as a good kitchen flooring should be easy to clean, hard-wearing, and water-resistant, (hard for water to get through). There are four great options for a basic new kitchen in NZ:


                • Linoleum FloorsLinoleum flooring is a natural eco-friendly material. It does however need regular maintenance and might not be suitable for families with young children. For instance, Linoleum flooring is likely to get damage because of the moisture in the water and, will wear off with time. Linoleum can also make a home look dated so it might not be a great option for everyone.
                • Luxury VinylAs technology has developed, the properties of vinyl have also improved. Luxury Vinyl is a type of vinyl that is more durable than regular vinyl. There are also a lot more options available in terms of textures and designs. It is a budget friendly option for kitchens as it is quite inexpensive compared but need more maintenance compared to tiles.
                • Laminate FloorsLaminate flooring is more durable and water resistant compared to Linoleum and vinyl flooring. The Flooring is a laminated wood face floor that looks and feels like wooden floors. Laminate flooring comes in various textures and designs which means that it looks great in open plan kitchens due to their aesthetic element. They can be made to look and feel like wood which is great for people who want a wooden floor look. Laminated floors are a cheaper alternative compared to wood floors. They are also easier to maintain compared to wooden floors as they can be made to be 100% waterproof.
                • Ceramic and Porcelain TilesCeramic and porcelain tiles are also a good cost effective tiles for basic kitchens. They are easy to clean, are durable and water resistant. You will also have a great variety of textures to choose from which means that you will be a able to create a beautiful kitchen for the fraction of the cost. They can however be cold on your feet in winter and can cause foot fatigue if stood on for too long. To combat this you can put soft rugs which are warmer and more comfortable for your feet.


                Kitchen Renovation in Bucklands Beach: Cost of Tile flooring included

                Tiled Flooring kitchen Renovation in Bucklands Beach


                6. Lighting

                Natural lighting is important for a kitchen to showcase its beauty as well as for cooking, preparing, cleaning, and hosting parties. Upgrading your current light fixtures with new ones will not cost you a lot.

                You can also completely do away with wall lights and opt for LED lights on the ceiling. You can install energy saving LED lights which will also help you keep your energy bill low. To add to the aesthetics of your kitchen, you can also use pendent lighting above the island if you have one.

                Back to the Top


                How much does a new kitchen remodel cost in NZ – Mid Range Kitchens

                As discussed above a basic new kitchen would cost between $16,560 to $28,990. A mid-range kitchen renovation cost in NZ costs between 32,000 to $45,000. In a mid-range kitchen, you have more flexibility and options in terms of change in layout and materials.

                A mid-range kitchen would include a change in layout, custom-made cabinetry, stone engineered countertops/marble countertops, kitchen appliances, tiled flooring etc. This new kitchen makeover guideline shows an estimate to renovate for a mid-range level kitchen.

                If you are looking for glamorous, budget-friendly, small, and large kitchen renovation cost, do check out the link below as it shows a range of cost for different renovations.


                1. How much does it cost to change the layout for a mid-range level kitchen in NZ?

                Changing the layout of your kitchen means that you might want to change the plumbing as well as electric wiring in the kitchen. Changing the layout of the kitchen adds up to your overall kitchen renovation cost. If you wish to keep the kitchen layout the same, then it will cost you somewhere around $29,000. However, you want to add an island or change your current layout then you expect to pay more than $32,000. For instance, if your existing layout is not functional then you might want to consider changing your stove, sink or cabinetry around.

                The most popular layouts that are possible for a mid-range kitchen are as follows:

                • Galley kitchen
                • U shaped kitchen
                • L-shaped kitchen
                • Island Kitchen
                • Peninsular kitchen
                • Two island kitchens

                For more layout ideas and tips, check if you need more help.


                Before Kitchen renovation in West Harbour in NZ

                Before Kitchen layout in West Harbour

                Kitchen renovation cost in West harbour, Auckland

                After Kitchen layout renovation


                2. Cabinets, Doors, and handles

                When renovating a mid-range new kitchen remodel cost in NZ , you will have a lot more choice in materials, textures and designs for your cabinets and door handles.

                The material that you would be using at this level would be MDF Melteca. MDF Melteca is surface that most kitchen remodels use in New Zealand. Melteca has various ranges of materials and it is highly popular in NZ as it is affordable, easy to clean and highly durable.

                You could choose a more premium range of MDF for your cabinets. We work with Melteca and Goodwood brands to custom built all cabinets. You can use Melteca’s high gloss premium range for your mid-range kitchen.

                You can also customise your MDF cabinets by wrapping it with Dezignatek Thermoform with any pattern you like to create a traditional, vintage, classic or modern look. For example the cabinets below were wrapped with a Rhonda pattern to give them a vintage look.

                • The front of the drawers and cabinets were wrapped in Dezignatek Thermoform with a ‘Ronda’ pattern to give the cabinets a vintage look.

                kitchen cabinets in Mangere bridge

                Check out ourcountry cottage style kitchenrenovation in NZ

                If your budget allows then you can also custom-build cabinets made of real wood but they are often very hard to maintain and hence MDF remains a popular choice for kitchen cabinets.


                3. Door handles and Blumotion

                Our mid-range kitchens often feature soft close cabinets and hinges from Blum and Hafelle. Soft close cabinets are drawers from BLUM allow your cabinets to close softly and without any effort even if they are slammed shut. This feature is great for homes with young children or when you have a busy day in the kitchen.

                Hinges from Hefelle and Blum will also last you longer as they are very durable due to their superior technology and will not rust.

                If you are going for a modern or contemporary look then you can also opt for a no-handle set up with LED lights above them. This will give you a seamless and uncluttered look especially if you have a small open plan kitchen.

                If you want a cottage style or traditional style kitchen then you can also install brass handles to give it a more vintage feel. To give it a cleaner and more classic look you can also install matte knobs against white cabinets for contrast.

                For more :

                types of kitchen styles like traditional, modern, cottage, contemporary, industrial and classic


                4. Storage for a kitchen makeover NZ

                When taking about cabinetry, we talked about the way your cabinet looks and how it feels but now let us talk about the storage inside your kitchen. Having good kitchen storage is an important feature of a functional kitchen.

                Kitchen storage can be useful to store dry foods, small appliances, cutlery, pots, pans, plates etc. Most homeowners like to store their things in places like in the panty, drawers, shelves, or their kitchen island. Check out this link for more comprehensive ways to organise your cabinets


                6 ways to maximise storage for your mid-range kitchen

                1.Magic corners
                magic corners can be created for cabinets that are in the corner of your kitchen. They allow you to reach the corner space inside your cabinets which are often hard to reach. Most of our clients prefer using magic corners from BLUM.

                2.Cutlery drawers and spice racks
                due to our busy lifestyles, it is important that our kitchen is always well organised. You can get custom built drawers with compartments for your cutlery and spice racks. Also remember to put your cutlery drawer next to your crockery drawer and as a top drawer. Also ensure that your spice rack is next to the stove, so it is easy to access them when you are cooking.

                3.Custom build condiment drawer
                You can also make a custom built condiment drawer which pulls out. For example, if you see the condiments drawer below, it does not have any cabinet planks on either side which makes it easy to view your condiments when cooking. This saves time and energy when looking for what you have in your shelves.


                Kitchen Renovation cost for storage in cabinets in NZ

                Spice Rack storage in Hillsborough

                Kitchen Renovation Cost for Magic corners in Hillsborough

                Magic Corners storage in Hillsborough

                4.Pantry with pull out drawers

                it might not be possible to make a walk in pantry for a mid-range kitchen but that does not mean that you cannot have a well organised pantry. This a great feature for homeowners who seek extra storage for their dry foods, carbs, sauces etc. The pull out drawers is located inside the pantry and this feature is very useful when customising your drawers as it helps you to be organised and it helps you find what you are looking easily.

                Kitchen Renovation cost for built in drawers in Papatoetoe

                Kitchen Renovation cost for Pull out drawers in Papatoetoe

                Kitchen renovation cost for custom-built pantry with pull out drawers in Papatoetoe

                To see more on custom built-

                See case study onkitchen renovation in Papatoetoe


                5.Pull out bins

                Pull out rubbish and recycling bins cab be installed within a cabinet which makes your space more hygienic as there are no extra bins on the floor. It also helps the area look uncluttered and cumbersome. Remember to install your pull out bins near your sink area because, it will be easier for you to throw extra waste or recycle their empty products.


                6.Island which doubles as storage

                Another option for a mid-range kitchen is to add a kitchen island. A kitchen island can be incorporated within layouts like U-shape, L-shape or even a galley, depending, on the space you have left for family entertainment or preparing food. An island can also be used in multiple ways in your kitchen, for instance, you can have extra storage underneath your island with drawers, you can have a stovetop or even a sink in the middle of your island. Another way to customise your kitchen island is to have a waterfall edge for your countertop or have your exposed countertop hanging off the edge, so that can leave space for your bar chairs. In fact, to renovate a kitchen island is going to cost you between $4,000 to $6,000.

                kitchen renovation storage ideas for mid range


                5.Kitchen Countertops

                In New Zealand, renovation companies recommend homeowners to invest in Engineered stone countertop as they are affordable, durable, resistant to water, anti-bacterial and hard-wearing.

                For a mid-range kitchen, you will be able to afford a stone engineered countertop of a more superior quality and design.

                Luxury Engineered stone countertops are made from crushed marble and granite as it is a popular choice. You can choose a countertop with either sparkles ingrained within it or with ingrained designs or an overhang island for a luxurious look. You also choose to have a thicker countertop with waterfall edges for a contemporary look. If you have a thicker countertop then it will cost, you more than if you choose a less thick countertop.


                Stone engineered countertop cost in NZ

                Mary Stuart’s countertop in NZ

                Stonebased enginnered countertop in Bucklands beach

                Lynette and henry’s countertop remodel in Bucklands beach

                Stone Engineered countertops options for kitchen renovation in NZ


                If your budget allows then you can choose a natural granite countertop which is more expensive than engineered stone. You can also install a real timber countertop, but this will have to be treated before installation. We would not recommend this countertop for people who have busy lives as a timber countertop needs to be maintained regularly.

                Insert cottage kitchen photos

                Splashbacks

                Splashbacks are important as they catch any splatters made while cooking and also prevents from damaging the paint of your walls. Splashbacks are often installed above the stove top and sink area.

                Tiles, mosaic tiles and glass tiles are three great material options when choosing a backsplash for your kitchen. Ruth from Tile Depot recommends using the Tribecca collection of tiles for splashbacks as it instantly elevates the look of your kitchen. Tribecca tiles look like handmade tiles which look textured but are actually very easy to clean.

                Tribeca Splashback for a mid-range kitchen renovation in NZ

                Tribeca Splashback for a kitchen renovation in NZ

                Photo Credit: Tile Depo


                Cost for a Tribeca Splashbacks for a mid-range kitchen renovation in NZ


                6. Essential Kitchen appliances cost for a mid-range level kitchen renovation in NZ.

                When choosing your kitchen appliances, make sure your appliances are position in a way that is most convenient to you when preparing food or cleaning up. For instance, install your dishwasher next to your sink so your cleaning process will be easy. Another example is having your fridge between your stove and sink as you will be able to grab things much faster. Positioning your oven underneath your stove or place it at a closer distance to your cooktop. This is because when cooking or cleaning, the oven bar can come in your way and it will make it harder for you to move around, cleaning can also be a challenge if the oven is above or below eye level. Instead place your oven at eye-level to make cleaning easier and it can also be convenient when taking things in and out of the oven.

                Choose your appliances well and check their energy star rating before making the purchase. Choose energy star rated products because it helps reduce your energy bill, they have a longer lifespan and come with an extended warranty. Unlike in a basic kitchen renovation, you will be able to change all your appliances to new ones.

                Our mid-range kitchen renovation clients often use SMEG, Samsung, and Bosch for their appliances as this fit in easily with their budget. A freestanding mid-range oven from SMEG will cost you between $25000 – $4,000 if you are buying through a renovation company. This free standing oven often has a gas top, a warmer and single oven.


                New kitchen remodel cost nz for mid-range kitchens

                  SMEG dishwasher used in a West harbour for a Mid-range kitchen renovation
                • Bosch is another great brand for stovetops, ovens dishwashers, waste disposal, and rangehoods. Bosch is a more cost effective brand compared to SMEG and is very durable. You can expect to spend around $414 for microwaves, $1150 for modern ovens, and $1500 stain steel fridges.
                • SMEG has an extensive range when it comes to price and makes appliances for mid to high range kitchen renovations. SMEG appliances are more suited for people who want a designer element in their kitchen. They come in various designs and styles to suit most tastes.


                If you want a seamless and clean look then you can hide your appliances by building cabinet doors on top of them. This can be done by building cabinet doors on top of the appliances. However, only certain brands and appliances will be compatible enough to build cabinet doors on. We will not recommend you build hideaway ovens and microwaves as they can be a health and safety hazard.


                7. Kitchen Flooring

                Your kitchen should ideally be staining free, waterproof, and easy to clean, comfortable and, most importantly, hard-wearing. You will have a lot more options to choose from for a mid range kitchen as compared to basic kitchens.

                • Tilesare often a popular choice for Kitchen flooring as they are easy to maintain and durable. Ceramic and Porcelain tiles remain popular for kitchen floors as they are versatile and come in various designs and textures.
                • Porcelain tiles are better recommended for kitchens as they are more durable and harder to damage. They are more expensive than ceramic tiles, but you will get a lot more design options for porcelain tiles. Porcelain can be made to mimic stone and wood which can elevate your kitchen design.

                Tiles can however be cold in winter or hard on your feet when you are cooking for long periods of time. To combat this, you can either install underfloor heating or put some soft rugs on your kitchen.

                • Luxury Laminate Flooring is also another option for kitchen flooring. They are warmer than tiles but are not water resistant which could be an issue with maintenance. If you are installing laminate flooring, then make sure that you wipe away any water spills immediately.
                • Hybrid Neptunehas a new range of kitchen flooring called the stone polymer composite. This hybrid flooring is great for mid-range kitchens as it has all the best properties of stone and laminate. The stone used in Limestone and the Neptune SPC is water resistant, warm, soft on the feet, and muffles the sound of your footstep.


                kitchen flooring in nz

                Hybrid Neptune Rustic Oak flooring(Tile Depot, 2021)

                Neptune flooring at a mid-range level in NZ

                Hybrid Neptune kitchen flooring best features (Tile Depot, 2021)

                Tile Depo's Neptune Flooring at a mid-range level renovation in NZ

                Hybrid Neptune mountain flooring (Tile Depot, 2021)

                Neptune kitchen flooring NZ

                Hybrid Neptune Soho Smoke flooring (Tile Depot, 2021)

                Hybird Neptune Picture credit to Tile depot

                Ruth from Tile depot says that this is a much better alternative compared to tiles or laminate and does not require any underfloor heating. It is also very durable and comes in many finishes. It will also not get damages due to sun or extreme cold weather.


                Want a price for your kitchen renovation?
                Open the calculator →

                8. Smart Kitchen features and Lighting

                Good lighting is necessary in a kitchen as it needs to be a bright space as most of the cooking and entertaining happens here. You can use recessed lighting on the ceilings as well as LED lights above splashback, underneath cabinets and door handles which can be dimmed or made brighter in accordance with the mood you want to create.

                You want lights that are low heat emission and longer lifespan. LED lights gives your new kitchen a nice medium tone of light. It is recommended that we should not get lights that are not so bright or dim, just in the middle as the lights have a large impact on us and our guest.

                You can also add sensor lighting and blue tooth lighting which can be switched on and off through the command of your voice. You can also change the colour of these lights with the help of your phone, remote or voice. You can also add pendent lighting above your islands or dining area to create further depth in your kitchen design.


                LED under cabinets in Massey


                LED Lighting under cabinets in Massey

                LED Remote control in a kitchen renovation in NZ


                Change lighting settings with a remote controller in Parnell

                You can also install USB ports on the wall so you can charge your phone while cooking. also install push down electric ports on your countertop which can be pushed down inside the countertop when you do not need them, and you can bring it up when plugging in any appliance.

                Smart Kitchen electric work in countertop in massey

                Guru and Netta’s modern style invisible plugs that hid away in the countertop

                Back to the Top


                How much does a New Kitchen remodel cost in NZ – Luxury kitchens

                The kitchen is a best way to give an overall impression for your guests especially in open planned kitchens. To renovate a brand-new luxury kitchen in New Zealand is between $50,000 and up to $173,880. A luxury kitchen has no limitation to cost, and we recommend you still spend your money wisely as you will be spending a lot for a custom-build kitchen.

                In a luxury kitchen you will be spending on a new kitchen layout, custom built kitchen storage, cabinets, high-quality countertops, marble flooring, designer flooring and brand-new appliance.

                The biggest difference in mid-range and luxury kitchens is that in luxury kitchens your budget allows you to incorporate high end and premium materials.

                Do check our table above to see what other things include in a high-end kitchen and, read our pervious article on how much does it cost to renovate a kitchen in NZ in 2021?


                1. Hiring a kitchen designer for your layout

                When you are building a high-end kitchen, you have the freedom to customise your kitchen from start to end. This is where you will hire a kitchen designer and they will advise you on what materials, colours and what your style will look like by creating 3D models and renderings.


                Kitchen design by Superior renovations 3D render of a timber kitchen with marble-look splashback and gas cooktop
                Kitchen design by Superior renovations 3D render of a white shaker-style kitchen island with marble-look benchtop

                Above are a few elevations of 3D rendered drawings that our designer Dorothy created for a client who needed a kitchen renovation.


                Kitchen design by Superior renovations Kitchen design by Superior renovations
                Kitchen design by Superior renovations Kitchen design by Superior renovations

                The kitchen above is an example of 3D renderings and designs that our designer Cici created for a client that needed a kitchen renovation in Parnell


                Layout is very important when it comes to interior designer because they need design accordingly to the plumbing points and electric wiring for cooktops. However, when renovating a luxury kitchen, you have the flexibility or changing your plumbing and rewiring to suit the layout you want.

                Storage and countertop benches are the most essential things when renovating a new kitchen.

                Check out some top 5 crucial tips that Dorothy (our in-house kitchen designer) has recommended:

                1. Plumbing and Electrical Ports If you are trying to keep your kitchen renovation cost at a lower end of your budget then do not move your wiring and plumbing as this will significantly increase costs. Keep your stove and sink in the same position that it is currently in.
                2. Advice on materials– A kitchen designer will also help you understand more about the renovation materials that you can incorporate in your kitchen design. They will help your combine different materials, textures and colours to create a beautiful kitchen. Due to their industry experience they will have knowledge about the innovation in materials and what is more suited for your family’s needs.
                3. Space planning and work triangle – When designing your kitchen layout from scratch, you might want to think about the foot space in your kitchen. Your kitchen designer will design your kitchen layout in accordance to the work triangle.

                Superior article about layouts: https://superiorrenovations.co.nz/kitchen-layout-planning-guide-to-achieving-a-good-kitchen-design/

                A work triangle measures how effectively your kitchen is planned. It makes sure that there is a clear pathway from your stove to the cleaning area and your refrigerator. This triangle should have no other foot traffic in its pathway. You want to be able to comfortably work in your kitchen.

                Weizter-The_work_triangle-Reference: https://weizter.co.za/magazine/the-work-triangle


                1. Appliances should be close by when moving around the kitchen like your sink should be opposite your stove or oven, microwave, or dishwasher.
                2. Storage planningYour kitchen design should include designated areas for storing all your cookware, spices, large appliances, and crockery. This will determine how you built your cabinets throughout your kitchen. For example, if you are storing your large appliance like a bread maker or a mixer in the left side of your kitchen then you have to make sure that the cabinet has the space and height to fit them. If you do not plan your designated storage areas then you might have a kitchen that can either not fit your appliances or have space that is wasted.
                3. Kitchen islands Luxury kitchens often feature kitchen islands in their kitchen designs. If you do not have space for a kitchen island, then you can explore the option of knocking some walls down to expand the space of your kitchen.

                kitchen islands are a great addition for your kitchen as they give you extra counter space for food preparation and are a great entertainment area. You can also add two islands if you have a large kitchen area. Just like mid-range kitchens you can add extra cabinets, put a stove top, and add bar stools.

                To hire a kitchen designer, you will be spending around $6,900 or between $138 to $276 per hour in New Zealand.

                Customised Cabinets, Cabinet features and Joinery


                2. Customised Cabinets, Cabinet features and Joinery

                Cabinets

                Luxury kitchen cabinet doors are made from high-end quality materials which start from $2,070 per linear foot. When you are planning to renovate a high-end kitchen renovation, then think about getting materials that will last longer and have design features.

                Depending on what type of style you want for your kitchen, you have the freedom to customise your cabinetry options to either modern, traditional, contemporary, classic, cottage style or industrial.

                • Natural wood like Timber is a great option for your cabinet doors and drawers. You will have to make sure that it is treated so that it is not easily damaged. They have a natural beauty that gives it a will make your kitchen timeless. Depending on the wood you choose, you will be able to incorporate various hues like oak, maple, pine etc.


                Pro tip: If you are using natural wood for your cabinets then make sure that they are treated and polished every 1-2 years to ensure longevity.


                • Porcelain tiles on MDF (neolith) can be installed on your MDF cabinet boards to create a feel of luxury on your cabinet and drawer doors. Neolith is one of our preferred suppliers for porcelain tiles as they have an extensive range in textures and colours. Attaching porcelain tiles on MDF boards allows us to create designer kitchens in various styles. For example, you can use porcelain tiles that look and feel of cement to create an industrial style kitchen. Cabinets with Porcelain tiles require very good quality joinery and hinges to support the heavy weight of the porcelain tiles. We will discuss more about joinery a bit later in the article.


                Pro tip: Cabinets with porcelain tiles attached on them will last you a long time. They will not be worn out easily and are great for families with kids. They can be heavy so you will have to choose your joinery and hinges carefully.


                • Lacquer on MDF

                  has been a popular choice for luxury kitchen cabinets because of its extensive range in colours and styles. Lacquer cabinets have 2 coats of paint applied to your cabinets with a high gloss finish. They are an expensive choice because you need a specialised skill set to create these cabinets. While they are waterproof to an extent, they should be regularly maintained as prolonged contact with water can warp them. They are also prone to fading if they are in contact with direct sunlight too often. They might have to be repainted every 5-10 years depending on its wear and tear.


                Pro tip: If you have children in your household then we would recommend not using lacquered cabinets as they are prone to superficial scratches which will compound over time.


                • Timber Veneer

                  is basically manufactured wooden veneers which are attached on your MDF carcass. We often work with Bestwood and Melteca for wooden veneers as our clients can choose from an extensive range in colours, textures, and patterns for their kitchen cabinets. Luxury timber veneers like the woodgrain range from Melteca are a great alternative compared to natural wood as they are made to be more durable and require less maintenance. They emulate wood in how they feel and look but can also be manipulated to the exact look that you require which is often hard with natural wood.


                • MDF Vs Plywood Vs Particle board for your carcass

                Plywood and MDF are a better choice compared to particle board for the carcass of your cabinets as they are more water resistant and are much sturdier. We recommend using Plywood for your carcass when creating cabinets under your cleaning or sink area. This is because plywood is more water resistant compared to MDF. You can however use MDF for the rest of the cabinets in your kitchen. MDF and plywood have similar qualities when it comes to aesthetics and durability.

                Details on your cabinets

                You can also add crown moulding on your cabinets if you are going for classic or traditional kitchen design. You can also adorn your panels with wainscoting if you want a classic or cottage style kitchen. We often wrap Dezignatek Thermoform on cabinets to create patterns and designs on kitchen and drawer drawers.

                For more traditional kitchen designs you can also create corbels and crown moulding on your cabinets to give a more furniture like look.
                itchen cabinets in Mangere bridge

                Country cottage style kitchen in Mangere Bridge, Auckland

                 
                Kitchen cabinets in Epsom

                Modern Kitchen cabinetry renovation in NZ

                Joinery

                We use BLUM for all our joinery and hinges because they are one of the best in terms of quality and innovation. Blum also has hinges and joinery in darker and lighter shades so a seamless design can be achieved whether you have dark or lighter shade cabinets.

                Types of joinery we recommend:

                1. Soft close cabinets and drawers: Soft close cabinets are great as no matter how hard you bang your cabinet doors; they will close softly without any sound. This also prevents wear and tear to your cabinets, and this will prolong their lifespan.
                2. Tip on Blumotion: These drawers will open automatically when you press them. In order to close them you just have to push them hard, and they will close softly. No matter the style of kitchen your kitchen, this technology will improve the way you use your kitchen.
                3. Pull out systems: Pull out systems allow you to open your cabinet upwards as opposed to traditionally opening on the sides.
                4. BLUM Legrabox: This type of drawer system is designed so your runners are not visible and gives a sleek look to your drawers which works very well for contemporary, industrial, and modern kitchen designs.
                5. Pull out pantry drawer system: This custom built pantry system boasts a pantry with pull out drawers with clear sides so it is easy to organise your pantry and your pantry items are easily visible.


                Touch blumotion for kitchen cabinets joinery

                Photo credit to Blum (2021)

                Hinges that can support more weight:

                If your kitchen cabinets have porcelain tiles attached on their MDF board then your cabinet doors and drawers will be heavy. To support these heavy doors and drawers, you will have to make sure that the hinges can support them. BLUM makes hinges that can support up to 70kgs which is suitable for heavy cabinetry.

                As discussed above, planning your storage is important before even building your kitchen cabinets. This is because certain cabinets might need runners that can support more weight compared to others. For example, drawers and cabinets with heavy appliances and crockery will need runners that can support more weight compared to ones that will have your cutlery.


                3. What are my options to organise my kitchen storage?

                You can get your standard storage like magic corners, cutlery drawers and pull out condiment drawers. However, with a luxury kitchen you have the flexibility to change the layout of your kitchen in a way that you can create a butler’s pantry.

                • Butler’s pantry/ kitchen

                A butler’s pantry is especially good for homes that have an open plan kitchen and for people who love entertaining guests. The butler’s pantry usually is a small room that is connected to the kitchen where you can either prepare your food or make mess in private without making your main kitchen dirty. You can also store your big appliances and dry food or install a sink to wash your dishes at a later stage.

                Cici's butler's kitchen for storage

                • Walk in pantry or pull out drawer pantry

                If you do not have a very large kitchen then opt for a small walk in pantry instead. A walk in pantry is just another form of a walk in wardrobe. You can create a large cupboard with shelving where you can install a sensor light to easily view your dry food items. If this is not an option, then you can custom built a pantry with pull out drawers.


                4. Natural stone Countertops and Designer Splashbacks

                Countertops:

                1. Granite and Marble

                • Natural stones like marble or granite are two popular high-quality materials that designers recommend using on your countertop or kitchen island. Granite will cost you around $4000 to $7000. Marble on the other hand with cost rom $10,000 to $15,000 if you are using it for an island as well as all your countertops.
                • Natural stones are popular because they exude a natural beauty which surpass the beauty of any stone engineered countertops. They have natural patterns that are unique to each slab and hard to engineer.

                2. Concrete

                • Concrete is also an option for islands, but it is a lot harder to work with. As concrete countertops can be very heavy, they pose a set of technical challenges which means that they should be manufactured and installed by renovation companies that have experience working with concrete.
                • If you do want a concrete countertop for your island or countertops your countertops must be supported by steal beams as other materials will not be able to support the weight of concrete. Concrete is usually used in contemporary or industrial style kitchens.


                3. Mix different textures, materials, and finishes

                • Dorothy from our design department suggests using a combination of different stones, glass, and other materials with various textures and colours to create some depth in your kitchen design. You can also combine different finishes for different materials to give a truly luxurious feel.


                Splashbacks and Feature Walls

                Splashbacks are essential for your cooking and cleaning area. Our designers recommend our clients to not get textured splashbacks as they can be very hard to clean. The good news however is that there is an extensive range for easy to clean splashbacks to choose for a luxury kitchen.

                1. Use a single slab of tile or marble- Cici, our in house designer recommends using one single slab of marble as a splashback for a clean look. Using a custom cut one piece of tile also means that you will have no grout lines which means that clean up will be easy.

                Designer glam splashback for a kitchen renovation in NZ from tile depo

                Glam wall designer tiles at tile depo

                2. Tribeca collection from Tile depot- Ruth from Tile depot said that bright tiles or handmade looking tiles are very popular as splashbacks and feature walls. The 2021 Tribeca collection features premium tiles that look textured and handmade but are in fact manufactured in a way that they have a smooth surface which is easy to clean, making it a perfect choice for splashbacks.


                TIP: You can also opt at choosing a glass splashback or any other form of tiles. It is better to choose


                Feature walls

                Feature walls are great to add a different dimension and create more interest to your kitchen. There are several ways that you can create a feature wall in your kitchen. You can add a feature wall by painting a wall in a bold contrasting colour, adding tiles or a wall with plant creepers.

                If you are using tiles then you can install either woodgrain tiles, mosaics, or textured tiles on the wall to create more depth to your kitchen. If you do not want a whole wall of tiles then you can also create accents with mosaics like a horizontal strip of mosaics on a plain wall.


                Cube collection

                Tile Depo’s glam cube collection for a splashback wall


                5. Designer appliances to complement your designer kitchen

                As we talked above, getting energy star appliances are better for the environment, they will use less electricity, have a longer warranty and are more durable.

                When purchasing your appliances, think about the overall style of your kitchen and get appliances that complement your overall kitchen design. You can also opt for hiding your appliances inside your cabinetry which is done by attaching the material of your cabinet on the surface of your appliances. This is great if you are going for a clean and sleek look for your kitchen.

                For a modern and contemporary feel, opt for stainless steel rangehood with 6 or 8 gas hobs and stylish hood. You can also buy a smart steel fridge with double doors, a separate freezer, water dispenser and an ice maker. You can also either purchase a wine fridge or custom built a wine storage area.

                1. Style options for kitchen appliances

                SMEG and Bosch are two brands that are often used in designer kitchens because not only are they of superior quality, but you also have a lot of design options to choose from.

                2. Traditional kitchen appliance ideas

                If the overall design of your kitchen is traditional or cottage style, then try and purchase appliances that complement this style. Buy a large standalone gas cooktop with an oven and complement this with a matching hood. If you are going for a retro theme, then you can also use the retro appliances range designed by SMEG

                SMEG 50's Retro Style Kitchen appliances for a kitchen renovation in NZ SMEG's 1950's vintage look for kitchen renovation in NZ

                SMEG appliances for a 1950’s retro style kitchen.

                Smeg's Classica products for a new modern kitchen renovation in NZ Smeg's classica appliances for a new kitchen in nz

                SMEG’s Classica style kitchen for a modern kitchen renovation in nz


                6. Luxury Flooring options for designer kitchens in New Zealand

                You want a flooring that is soft on your feet, durable, low in maintenance, beautiful and does not echo when you walk on it. The two best type of flooring for your kitchen are tiles and Stone based composite polymer.

                • Stone based composite polymer is a new hybrid flooring option in New Zealand which is 100% waterproof which makes it a great option for kitchen floors. It is also softer and warmer on the feet as compared to porcelain tiles. They are also a great option for second floor kitchens as they do not echo as much as tiles. They are not as expensive as natural stone tiles and can also be used for mid-range kitchens as well as for designer kitchens.
                • Porcelain Tiles are more durable and waterproof than ceramic tiles but can feel cold in winter. If you are installing porcelain tiles in your kitchen then we do recommend clients to either install underfloor heating or put kitchen rugs during winter. The advantage of porcelain tiles is that they are easy to clean, are durable and have an extensive design range. We recommend using large format tiles 1200 by 900 or 600 by 900 for your kitchen floors for a more continuous and seamless design.

                Porcelain tiles can also be made to look like cement, wood or any other natural stone which makes them a versatile choice for most people.

                Urban Cerment kitchen flooring for a high-end kitchen renovation in NZ

                Tile depot range of Urban cement collection (2021)


                • Natural stone Tiles are one of the best and expensive options for kitchen flooring. Natural stone tiles have a natural beauty that really elevates a kitchen design. You can install the same tiles in your living and dining area if you have an open plan kitchen.

                Macchia Vecchia Floor tiles

                Macchia Vecchia Floor Tiles from Tile Depo


                7. What is the best lighting for my Luxury Kitchen?

                A brightly lit kitchen is a must as it is the centre of most of our activities in a home. We prepare our food, have our coffee, and often entertain guests/family in the area. Adding good lighting to your kitchen is not as simple as adding a few light bulbs on the walls or ceilings. Lighting goes beyond just having visibility in the kitchen. A well lit kitchen should make it easier for you to do your prep work with precision, it should be easy for you to stow and retrieve items in shelf and should make your kitchen look welcoming and spacious.

                Incorrect installation of lights can in fact make your affect the appearance of your kitchen negatively.


                Plan your kitchen lighting based on 3 distinct layers which serve a separate function.

                1. Lighting to carry out tasks

                • This is the general lighting which is needed to make your overall kitchen visible. This light should make cooking, cleaning, preparing food and navigating easy. One of the aims for this lighting is to make it easier to carry out your tasks.
                • So, think about the areas that you need to carry out these tasks. Install lights above your kitchen island to make preparation work easier. Install LED lights below your top cabinets so it illuminates your countertop, at the top end of your splashback and near the handles of all cabinets and drawers.
                • You should also add either LED ceiling lights or ceiling bulbs, so your entire kitchen is illuminated.


                Tips of installing your Task lights

                Tasks lights should be positioned directly above your sink, island, countertop, or other space where you carry out cooking tasks. Install the LED light strips under your upper cabinets and above the handles of your lower cabinets.

                2. Ambience lighting

                • This type of lighting creates a soft mood in your kitchen. This could either be lighting that can be made dimmer, or it could be in the form of pendant lighting on top of your kitchen island.
                • There are several design options available for pendant lighting so you will have plenty of options to choose from depending on the style of your kitchen. If your space allows then you can also install a chandelier. Recessed lighting can be installed on your ceiling or any opening like seen in vaulted ceilings.


                Tips on installing ambient lighting

                Ambient lighting should have a direct path to the floor of your kitchen. If you do not have an island, then install a chandelier directly above your floor or directly on top of your island. If you are installing recessed lights, then position them at half the distance of the distance of your floors and ceilings. Also avoid creating shadows on your countertops by installing the recessed lighting above the countertop and not at the edge of it. The same concept would apply to semi flushed and flushed lighting.


                1. Want a price for your kitchen renovation?
                  Open the calculator →

                  Accent Lighting

                • This type of light usually highlights a design feature in your kitchen. This could either be a feature wall or architectural feature in your kitchen. This is great especially in open planned kitchens where your kitchen is visible for the living and dining area. You could also but accent lights in glass cabinets with fine China or crockery.

                If you have a vaulted ceiling or any other ceiling feature that you want to highting then you can install cove lighting which basically means that they light is built into your ceiling. You can also install soft low profile lighting inside your cabinets.

                Tips on installing Accent lighting

                Think art galleries when installing accent lights especially if you are trying to highlight a feature wall. You can also put lights inside your cabinets with the light installed above the crockery or decorative items in the glass cabinets.


                8. Electric work and SMART Kitchen features

                If you are renovating your entire kitchen then chances are that you will be rewiring your kitchen. This is especially true if you are changing the layout of your kitchen because then you will have to switch all the plug points around. You can also add smart features to your kitchen that will improve the way you use your kitchen.

                Ideas to incorporate SMART features in your kitchen design

                • SMART appliances like a refrigerator that dispense water of any temperature that you like
                • A hot water tap so you do not have to boil water every time you need boiling water while cooking.
                • SMART home systems can be integrated within the design so you can control the light or the dimness of lights with your phone.
                • SMART lighting controlled by Bluetooth where you can set a time that you come home and it will automatically switch the lights on for the time that you get home.
                • SMART fridge that has cameras inside the fridge which can be connected to your phone. This way you can check what items you have run out of and get them on the way from work.
                • Sensor ovens which can sense that the food or meat is cooked and it will automatically switch off or set off an alarm so you will never burn or overcook a meal.
                • Plug points with a USB port so you can charge your phone while cooking
                • Sensor lighting that will switch the lights on automatically when you enter the kitchen
                • Range hoods that will automatically switch on at a certain fan speed suited to the type of cooking that is taking place.

                Back to the Top

                To Summarise,

                The cost for a new kitchen remodel in NZ depends on what type of style you want your kitchen to be. Whether it is a vintage, cottage, classical, modern or a traditional kitchen style, also depends on the special kitchen features that you have upgraded from your previous kitchen like,

                • Better quality materials for countertops, cabinets, splashbacks
                • Energy star rated appliances.
                • Change in Layout- adding a kitchen island or walk in pantry.
                • Customise your kitchen cabinets doors and storage.
                • Designer faucet, kitchen lights, cabinet handles
                • Waterproof flooring
                • Plumbing and electric work.

                Frequently asked question

                On an average, how much will I spending to renovate my kitchen in New Zealand?

                To renovate a kitchen in New Zealand, you will be spending about $22,000 - $30,000 on an average. This includes, project management, permits, labour works, kitchen designers etc. To know more, click on the link below, https://superiorrenovations.co.nz/kitchen-renovation-cost-nz/

                How much does it cost for a kitchen renovation (mid-range) in NZ ?

                At a budget level, you will be expect to spend under 29,000 with not change in layout. In contrast, for a mid-range level you will be spending $32,000 to $45,000. This includes, adding a kitchen island, better quality materials, upgrade your appliances, customize your cabinets and etc.

                How long will it take to renovate a kitchen ?

                To renovate a full kitchen renovation, it can take up to 4-7 weeks (depending on permits delay). However, it may take a bit longer as it includes changing in layout, plumbing, electric work or even getting a consent from Auckland council. A tip to consider is to start early to get a permit and start the project earlier.

                Do I need to hire a kitchen designer ?

                No, our consent process includes in-house designers who will help up along with the process during your time with us like 3D rendering, colour choices, picking materials etc.

                What steps do I have to take before renovating my kitchen ?

                1. Set your budget 2. Book a consent with a Kitchen Designer 3. Establish you kitchen needs than personal desires 4. Pick a renovation company that fits your desires 5. Grant permits from Auckland Council 6. Set project goals 7. Note: Remodelling a kitchen will take 3 to 4-7 weeks . Go shopping for suppliers 9. reassess your budget with project management 10. Ask for warranties for your appliances, materials, and workmanship once your renovation is complete. 11. Cleaning service should include too


                If you’re looking for “specific” cost estimates, try our Renovation Cost Calculator Tools

                Need ideas? Check out our Kitchen Design Gallery or dive into our Bathroom Design Gallery for inspiration!


                Further Resources for your house renovation

                1. Featured projects and Client stories to see specifications on some of the projects.
                2. Real client stories from Auckland

                Need more information?

                Take advantage of our FREE Complete Home Renovation Guide (48 pages), whether you’re already renovating or in the process of deciding to renovate, it’s not an easy process, this guide which includes a free 100+ point check list – will help you avoid costly mistakes.

                Download Free Renovation Guide (PDF)


                18 months 0 percent interest long term finance badge

                Have you been putting off getting renovations done?

                We have partnered with Q Mastercard ® to provide you an 18 Month Interest-Free Payment Option, you can enjoy your new home now and stress less.

                Learn More about Interest-Free Payment Options*

                *Lending criteria, fees, terms and conditions apply. Mastercard is a registered trademark and the circles design is a trademark of Mastercard International Incorporated.


                Still have questions unanswered?

                Book a no-obligation consultation with the team at Superior Renovations,
                we’d love to meet you to discuss your renovation ideas!
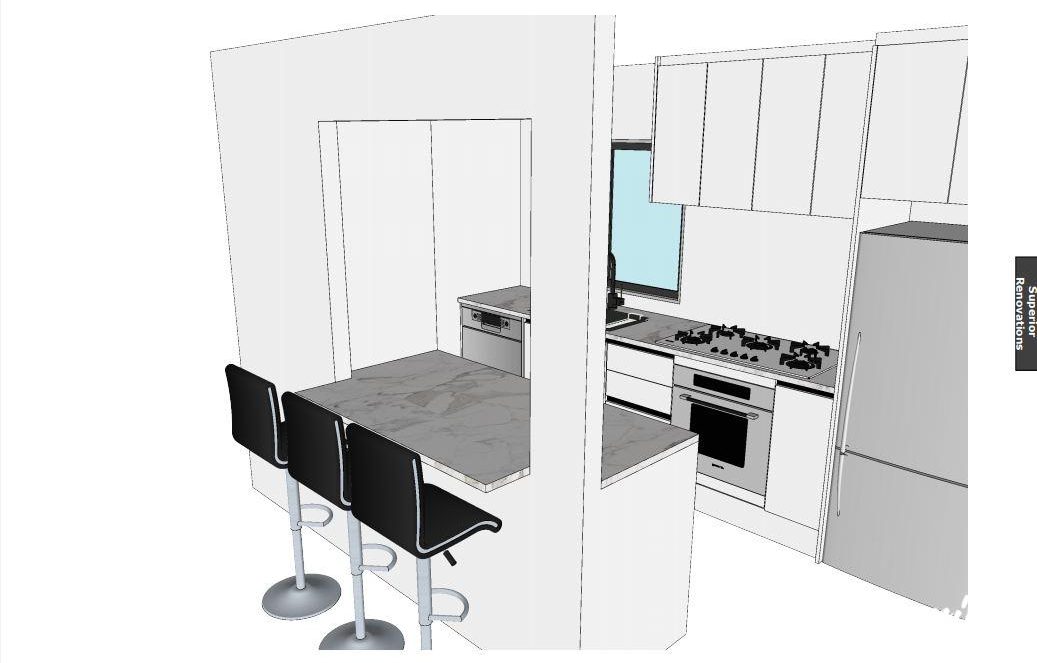
                  Services

                  Home RenovationKitchen RenovationBathroom RenovationOutdoor RenovationHouse ExtensionCommercialDesign ServicesOther

                  By submitting this form, you agree to receive communications from us via email or text regarding our services, you can unsubscribe at any time.

                  This site is protected by reCAPTCHA and the Google

                  Privacy Policy and Terms of Service apply.

                  Bucklands Beach kitchen with white gloss cabinetry, black sparkle stone benchtop, integrated rangehood and wall oven
                  Kitchen Renovation

                  26 Top Trends for Kitchen Design for 2023 (and What To Avoid)

                  This article has been republished to include further content on kitchen renovation trends and top 6 key features that a good kitchen design must include. This recommendation has been made by our in house kitchen designers .

                  Free cost calculator

                  How much will your kitchen renovation cost?

                  Get an instant Auckland price range for your project — no details required to see it.

                  Open the Kitchen Cost Calculator →

                  Hey Aucklanders, if you’re dreaming of a kitchen reno that nails modern functionality while feeling warm and inviting for family gatherings or summer barbies, these 26 top trends (with roots in solid ideas that have evolved into 2025) are pure inspiration. From smart tech and eco picks to bold colours and seamless outdoor links, it’s about creating spaces that handle our humid climate, maximise tight sections, and blend practicality with that effortless Kiwi style.

                  What’s Hot in Kitchen Trends for Auckland Homes Heading into Late 2025?

                  A lot of these classics are still going strong, updated with fresher twists like more biophilic greens and smarter sustainability. Standouts include:

                  • Smart tech integration → App-controlled lights, motion faucets, and energy-monitoring appliances—perfect for busy whānau cutting bills in spots like Massey or Parnell.
                  • Eco-friendly materials → Recycled composites, induction hobs, and water-saving taps, tying into grants for greener renos.
                  • Dark and bold cabinets → Black or deep tones for drama, with pops of blue or green islands adding personality without overwhelming small spaces.
                  • Streamlined textures → Clean lines, 3D tiles, or rough wood for depth—think Spanish-inspired backsplashes in Stanmore Bay vibes.
                  • Open or broken-plan layouts → Knocking walls for family flow, or zoned areas in Bucklands Beach-style homes.

                  Which Features Give the Biggest Wins for Functionality and Style?

                  Quartz benches remain king for durability against our steamy cooking, paired with clever storage like magic corners, tall larders, and multipurpose islands (single or double for big entertainers). Open shelves work wonders in compact units, hardwood or wood-look ceramics hold up well, and vibrant backsplashes or outdoor connections via bi-folds turn your kitchen into the ultimate hub—especially linking to decks for that proper Kiwi barbecue life.

                  Kitchen renovation trends usually change slightly from year to year with no big changes seen in the coming years. It is easy to change certain elements within your existing kitchen to keep up with the new trends. For example if you have a traditional white kitchen and want a change then you can easily add a pop of colour by adding a vibrant textured backsplash. If you are lacking in storage, then you could easily replace your existing island with a multi-functional kitchen island which could be used as a breakfast bar, storage unit as well as a cooking area.

                  What a kitchen means today for a family is very different from what they meant in the past. Traditionally kitchens have always been a place for cooking and cleaning only. Kitchens today are a place where most of the family congregates. It is a place that brings the family together whether it is in the form of a breakfast island bar or an open plan kitchen which opens into your living space.

                  In this article we will discuss the following:

                  1. the top 20 newest kitchen renovation trends for 2023
                  2. 10 trends that you should stay away from in the coming years.
                  3. 6 Key Features that every good kitchen design must include – Recommended by our Kitchen designers

                  Here’s what we concluded as the top kitchen renovation trends for 2023

                  1. Smart Kitchens
                  2. Eco-Friendly Kitchens
                  3. Cabinet Colours: Dark Colours Are Finally Here & White Is On Its Way Out!
                  4. Streamlined Designs, Materials and Textures
                  5. Open plan Kitchens and Broken plan kitchens
                  6. Quartz is Still King
                  7. Effective Storage Solutions
                  8. Open Shelves for Small Kitchens
                  9. Kitchens with a bar island for entertainment
                  10. Hardwood Flooring is Still the Shining Star but Ceramic Tile is on its Heels
                  11. Single Level Multipurpose Kitchen Islands
                  12. Double Islands
                  13. Ceiling high larders
                  14. Backsplash Trends
                  15. Connecting With The Great Outdoors
                  16. Adding a Pop of Colour
                  17. Mix and Match Metals
                  18. Steel Hoods
                  19. Statement Accessories
                  20. Hanging cups, Colourful pans and Colourful Appliances
                  21. Welcome with a Sociable Kitchen
                  22. Embrace a Wood Resurgence
                  23. Layered Lighting
                  24. Handle less Designs
                  25. Create a Space for a Pantry

                  Technology advances and changing social dynamics have contributed greatly to the rise of the newest kitchen renovation trends. There is a far bigger focus on open concept homes that revolve around the kitchen so everyone can be together.

                  As with any modern design trend, clean and simple styles have become favourites for homeowners with natural light becoming an essential aspect of the overall look and function of the kitchen space. There are 3 fundamental things that make a great kitchen design and it doesn’t often change, the three things are:

                  • Functional Layout that works with the given space
                  • Choice of materials/fittings – the quality of these are crucial and you will notice a difference.
                  • Storage – the design and placement is key to make sure you end up with a well-utilized space.

                  Need ideas? Check out our Kitchen Design Gallery or dive into our Bathroom Design Gallery for inspiration!


                  Trend #1. Smart Kitchen Design

                  Technology has entered the kitchen in full force and not just in the form of fancy gadgets and appliances. Today, you can have a kitchen with technology integrated into every function and appliance–from the faucets to the fridge to lighting. This is what we call a smart kitchen.

                  Smart kitchens are an evolving aspect of design. In fact, a lot of kitchens today are built smart from the ground up. For older kitchens, sensors, smart gadgets and other devices can be added to add convenience.

                  Kitchen renovation in Massey

                  Kitchen renovation trends in Massey: These ‘pop out power outlets’ were installed on the counter top which can be pulled up when needed and pushed back down when not in need

                  Read more…

                  Guru and Neeta’s Luxury kitchen renovation in Massey – Pictured above

                  Townhouse Luxury Urban renovation in Parnell

                  Easy add-ons are motion sense-equipped kitchen faucets that can sense the presence of hands underneath and will come on automatically or try a one-touch feature. Refrigerators that can alert you when your groceries items are running low or a coffee maker programmed to have your coffee ready when you wake up.

                  There is also a gadget that monitors your eggs, telling you which ones are almost going bad. Do not forget to update your lighting system–allowing you to control all the lights from your smartphone or tablet. Technology integrated kitchens are becoming more popular as homeowners experiment with novel technologies. This is one of the biggest trends going into 2023.

                  Trend #2. Eco-Friendly Kitchen Design

                  A growing kitchen renovation trends has been being eco-friendly. As the awareness around sustainability grows, people are getting more conscious about using materials that are environmentally friendly. Taking steps towards sustainability could include having built in recycling bins in the kitchen, installing an induction cook top to reduce energy waste, and installing a 3 in 1 hot water tap.

                  kitchen trends in Parnell AucklandA

                  Kitchen renovation in Parnell – the hot water tap is installed on the left side of the main tap fixture

                  Hot water tap is a great way of reducing water and energy waste. When boiling water we often boil too much water or use a kettle. When you install an instant hot water tap, you are using just the amount of water you need and less electric energy is being used to get the water to boil. This is also an added convenience to having access to instant boiling water for coffee or food preparation.

                  Trend #3. Cabinet Colours: Dark Colours Are Finally Here & White Is On Its Way Out!

                  Although white cabinets are a classic look that can be used in almost any kind of kitchen style, we are slowly starting to see them on the way out! We expect white to start declining in popularity throughout 2023 . To break up the monotony of all-white kitchens, expect to see islands in a variety of different paint colours or wood stain colours. The mixing of finishes creates a needed accent piece and additional pops-of-colour for the brave of heart.

                  Blue and green will be the most popular shades to add colour to your kitchen. Apart from natural and neutral shades green, emerald, and other earthy tones will also be popular this year.

                  Kitchen renovation in Massey

                  Kitchen renovation in West Auckland

                  Kitchen renovation trends in Massey: Our client in Massey wanted black cabinets against white to give a luxurious feel to his kitchen. LED lights were also installed under the cabinet handles to add to the glamour of the kitchen.

                  Dark kitchen cabinets portray elegance and a deep rich luxurious atmosphere. You must however be careful that the dark accents or cabinets you use does not overpower the room as it could make the room feel perpetually dark or dingy. But more homeowners are getting bolder and opting for a kitchen with dark cabinet colours in 2020. Expect to see tons of black and darker colour shades in the trendiest home of 2020.

                  Trend #4. Streamlined Designs, Materials and Textures

                  • Cabinets

                  While styles like farmhouse and mid-century modern are still popular, homeowners are getting more streamlined in their overall aesthetics, designs and alternative materials for kitchens. Simple looks are all about modern clean lines. They will continue to be a huge hit throughout 2023.

                  Removing upper wall cabinets has become a growing trend in the last few years since it opens up the visual space making the kitchen appear much larger and brighter. It allows you to utilise the countertop space more productively as most people cannot reach the top shelves anyway.

                  • Textures and Materials

                  A streamlined design does not equate to boring. It simply means that a design which is less cumbersome and more tasteful. Consider using materials with different textures. For example when using open shelving, consider rough cut wood as your material for a natural look or metal tubing for a more industrial look.

                  Kitchen remodel in auckland Mangere

                  Kitchen renovation trends in Mangere Bridge: American Ashwood was used as the benchtop to add texture and a natural element to the kitchen.

                  • Tiles as a focal point

                  Floor tiles in a natural stone or backsplash tiles that are sculpted, beveled, or stacked make for the perfect focal point. These interesting textures are very different compared to the usual polished or glossy finishes we see everywhere. You may even want to consider a ceiling treatment to add another dynamic to your kitchen.

                  kitchen renovation in orewa

                  Kitchen renovation in Stanmore Bay: The Spanish tiles installed in this kitchen are a great design element that can be used to enliven a space.

                  kitchen renovation parnell

                  Kitchen renovation in Parnell: We added textured 3D tiles as a backsplash for this client to add character and interest in the kitchen wall

                  For further ideas on using Tiles as a focal point in a Kitchen

                  Urban Luxury Kitchen in Parnell with 3d textured tiles

                  Spanish mosaic tiles as a feature in the kitchen in Stanmore Bay

                  Henry and Lynette’s kitchen in Bucklands Beach with dark hexagonal textured tiles

                  Trend #5. Open plan concept and Broken plan concepts

                  The open plan concept for kitchens has been a growing trend for many years now. Today’s homes are mostly made of 2 working parents where evenings are the only times that families get together to spend quality time. Open concept kitchens allow families to spend time even if one person is in the kitchen whereas the others in the living. Open plan kitchens are easily achievable by tearing down a few walls that separate the kitchen from the rest of the living space.

                  open-plan kitchen with black sparkle stone island bench hexagon tile splashback and bar stool seating

                  An open plan Kitchen: The above picture is an open plan concept as the room is very clearly divided from the living room by a wall and from the dining room with some counters. There are still some breaks in the room which divide the room into specific areas. The above kitchen was renovated by us in Bucklands Beach.

                  Broken plan kitchens are a trend of the next decade, taking the open plan concept to another level. Imagine a large room which has different zones for living, dining and cooking. These zones are not divided by any half or full walls. This makes an area look more spacious as there is little that is ‘breaking’ the large space or room.

                  broken-plan kitchen with stainless steel island rangehood open to a living room with fireplace

                  Broken Plan Concept: The above is a good example of a broken plan kitchen. The room is a large space where there are allocated zones for different purposes. However, there are no walls making a specific ‘break’ between the different zones.

                  Trend #6. Quartz is Still King

                  For high-end kitchen countertops, quartz still reigns supreme. The material is extremely hardy, can last virtually forever, is a breeze to maintain and is anti-microbial. Granite, the main competitor in the high-end bracket, requires slightly more maintenance.

                  When quartz countertops first came into the market, the main worry was lack of variety in terms of colours and finishes. But through technological advances, manufacturers can now provide a range of colours and patterns. You can even get quartz finished with elaborate swirls and large veining to imitate other materials like natural stone. These unique styles have become immensely popular.

                  bucklands beach kitchen renovationKitchen renovation in East Auckland

                  Kitchen renovation in Bucklands Beach: We engineered stone to look like black marble which was then infused with shiny specs to add a touch of luxury for this kitchen renovation

                  But there is a notable trend toward softer and more neutral colours. More and more homeowners are opting for colours like grey, taupe, creamy or white finishes. This follows the trend towards cleaner styles seen in most home spaces.

                  kitchen renovation orewa

                  Kitchen renovation in Stanmore Bay: Engineered stone used to look like pattered granite. The pattern chosen by our client was Autumn Leaf.

                  While we are still on the topic of countertops, it is important to mention the rising popularity of composite sinks. These are sinks made from the same material as the countertop. This creates a cleaner uniform look and makes cleaning and maintenance much easier. However, it is going to be a tough battle against the still very popular stainless steel, ceramin and Silgranit sinks.

                  <BR<

                  Trend #7. Effective Storage Solutions

                  One of the biggest drawbacks with kitchen cabinetry is the unnecessary waste of space. The way the basic shelves and drawers are structured leaves a lot of wasted space. Worst of all, available space is often too small for some of your larger things or the opposite: it’s too wide and does not give you a way to properly and efficiently organize the space.

                  One of the foundations to a functional kitchen is kitchen storage. If it is inadequate or ineffective, you will be faced with endless frustrations and challenges.

                  To counter these storage challenges, homeowners are starting to look for better storage solutions within the cabinetry. These can include:

                  • drawer dividers for cutlery & utensils
                  • pull-outs for spices
                  • tray dividers
                  • roll-out trays
                  • magic corners for pots & pans
                  • wastebasket cabinets for garbage and recyclables
                  • deep drawers.

                  Kitchen renovation west auckland

                  Pull out Rubbish and recycling bins

                  Kitchen renovation south auckland

                  Custom built Pantry drawers to add convenience and maximise storage

                  Kitchen renovation south auckland

                  Magic corners to utilise the space in corner cabinets

                  Kitchen renovation hillsborough

                  A different variation of a magic corner to effectively utilise corner space for cabinets

                  Kitchen renovation south Auckland

                  Custom built storage solution for cabinets to store condiments

                  The most popular storage solutions we have seen with our clients are the ‘magic corners’ as they effectively utilise the wasted space in the corners of the kitchen. The other popular storage solutions have been custom built cabinets with pull out drawers.

                  For more storage solution ideas…

                  Trend #8. Open Shelves for Small Kitchens

                  While Hidden storage solutions will always remain popular, they are not always feasible in a small kitchen. Small kitchens do not have the space for bulky cabinetry with storage drawers and hence need a different storage solution.

                  Open shelves for small spaces can provide effective storage solution and can also add a great design element. Following are some of the ways you can maximise storage in an open shelf for a small kitchen:

                  • Use magnetic holders for knives. These can be screwed on to the wall so you do not have a bulky knife holder on your counter top
                  • Laddle hangers and wall spice racks. Small hooks can be installed to hang all your spoons and laddles used for cooking. You can also find smart hangers where you can place your spice bootles.
                  • You can also create a wine glass hanger which would reduce the need for shelves.

                  Kitchen renovation Mangere

                  Floating open shelves were added to increase storage and add a design element to the kitchen

                  A great tip is also to buy colourful pots, pans, bowls etc which can be placed in the open shelves. This would create interest and also add a pop of colour to your kitchen.

                  Trend #9. Hardwood Flooring is Still the Shining Star but Ceramic Tile is on its Heels

                  Hardwood flooring is still very popular when it comes to kitchen flooring. But the second most popular option, ceramic flooring. Thanks to technology, ceramic flooring now comes in a wide variety of designs, styles and sizes.

                  For example, you can get ceramic tiles that look exactly like hardwood flooring. So if you want to retain the hardwood look but want a material that is easier to maintain, consider using ceramic tiles. In addition to wood, ceramic tiles can be designed to resemble a range of other materials including natural stone. Even the surface texture is changed to mimic these materials.

                  Kitchen renovation east auckland

                  Kitchen renovation in Bucklands Beach: Ceramic tiles which mimic hardwood were installed for easy maintenance and as a cost effective option

                  In terms of size, you do not have to go for traditional sizing any longer. It seems like the sky is the limit with variety and larger format tiles. You can get single plank tiles that resemble actual wide planks of hardwood once laid down on the floor. Or you can get custom cut tiles to create a uniquely patterned kitchen. Larger tiles make an are look bigger in space as compared to smaller sizes. This is because there are lesser grout lines and the area hence looks less ‘busy’.

                  Trend #10. Single Level Multipurpose Kitchen Islands

                  Kitchen islands are no longer an afterthought or something small to squeeze into the space. They have become the point and the hub of the kitchen. One of the changes emerging is the single level larger sizing, serving multiple uses. Large islands now also have ample shelving below to maximise storage.

                  Kitchen renovation Blockhouse bay

                  Kitchen renovation in Blockhouse Bay: Custom built large island which doubles as a storage solution with cabinets and as a breakfast and prep bar

                  Kitchen renovation Orewa

                  Kitchen renovation in Stanmore Bay: An island bar which doubles as a dining table and cooking bench

                  In the year 2023 large kitchen islands will become the jack-of-all-trades. They will have storage solutions and would be fitted with various under-counter appliances while also providing seating–serving as a casual dining and/or drinking bar. To accommodate the increased size, we are seeing a tendency for the kitchen island to extend into living room spaces in homes with open plan designs. This ensures the kitchen island can be multi-functional without cluttering up space in the kitchen.

                  kitchen renovation in West Auckland

                  Kitchen renovation in Massey: Kitchen island extending into the living room space to double as a bar that can be used for entertaining

                  Trend #11. Double Islands

                  If you have the space, then we would advice you to get two smaller island in your kitchen rather than 1 large island. Having 2 smaller islands improves the flow of the kitchen as well as the ease of movement. Having two separate islands also means that you could use of as a breakfast bar and the other as a counter top for preparation as well as installing a cook top.

                  Double islands have become a growing trend in the last year and are seen to be on the rise for large kitchen spaces as well as open plan living.

                  Trend #12. Ceiling high larders

                  Kitchen is not just a functional space these days. With the rise in open plan kitchens, it has become important to make kitchens aesthetically pleasing along with good functionality. Many people now prefer to have open shelves in their kitchen rather than bulky cabinetry as it makes kitchens look more spacious. Buy some colourful pots and pans and you have a beautiful focal point full of colours and textures.

                  The same logic applies to larders. The trend in 2023 is seeing a rise in larders that are open and built up to the ceiling. This gives you more storage and will also add a beautiful design aspect to your kitchen. To access the higher shelves on your larder, consider buying a trendy movable ladder that you can rest against your larder.

                  open pantry shelving with a rolling ladder storing jars crockery and kitchenware

                  The above is a great way to built an open larder with trendy storage containers and a larder to access the higher shelves. Add some light within the larder and you have a great focal point for your kitchen.

                  Trend #13. Backsplash Trends

                  First things first, subway tiles are out! Okay maybe not completely out, but they are no longer popular in the ‘white brick’ size. People are moving on to larger slabs of tiles with various textures and patterns. Adding a bright and vibrant backsplash will add the much needed character in a neutral kitchen. Neutral patterns with natural texture is another option for those looking for a classic look.

                  Kitchen remodel east auckland

                  Kitchen renovation in Bucklands Beach: Hexagon shaped black and grey textured tiles were added as a backplash to add interest, drama and texture to the kitchen

                  Another big change we’re seeing in tile backsplashes are their size and the portion of wall they cover. More people now opt for larger tiles to make the area look less ‘busy’. These slabs can be made to look like marble, quartz, wood, copper, stainless steel, glass…. the list goes on forever!

                  Trend #14. Connecting With The Great Outdoors

                  As discussed above, open plan living and kitchen has been a popular trend for a while now. In New Zealand we love Bbqs and entertaining our guests outdoors. This way of living in NZ has given rise to the trend of connecting the kitchen/dining area with the deck or outdoor area. Some of our previous clients have also used their outdoors as an extended kitchen area.

                  This is mostly done by building a covered outdoor area equipped with grills and cooking equipment which can be accessed from the kitchen through french doors.

                  Trend #15. Adding a Pop of Colour

                  As mentioned above, white will always be a popular colour for kitchens as it is a versatile colour to work with. In past people have always gone for a traditional look for kitchens with either white surfaces and cabinets or dark wood. The trend has now been changing towards adding colour to otherwise white kitchens.

                  Kitchen remodel in Papatoetoe South Auckland

                  A sky blue backplash was added to add some colour into a neutral themed kitchen in Papatoetoe

                  People are now looking at ways to add colour to their kitchens. We spend most of our time in this area of the house, entertaining our friends and family, so why not put our favourite colour in the space? We have and will be seeing this on cabinets, islands, hutches, and feature walls.

                  The colours predicted for these spaces are inspired by the elements with blues, earthy tones of green and red.

                  Trend #16. Mix and Match Metals

                  We get this question a lot: is it okay to mix metals in the kitchen? The answer is YES! Mixing metals adds character in the space, especially if it is done correctly. We will be seeing more of an eclectic style in 2023. Overly matched and coordinated spaces is a trend that is slowly fading. If you love gold fixtures, but don’t want it all over your kitchen, add a soft gold faucet with black or nickel hardware.

                  Light fixtures can be a completely different metal altogether, while having hints of the same metal you are using elsewhere. These pieces are the finishing touch to the space. Make them stand out! Another way to mix in metals, would be in your furniture selections for kitchen tables chairs or island stools. These can be easily interchangeable when you want to change things up a bit!

                  kitchen renovation in orewa

                  Kitchen renovation in Stanmore Bay: Textured Brass sink and tap fixtures added metal elements to this kitchen in Orewa

                  Textured metals that are the same colour as other pieces in the kitchen are a nice way of adding a different element, while not getting too crazy.

                  Trend #17. Steel Hoods

                  In 2023, we will be seeing homeowners focus on their hood designs. This piece can be a major focal point in the space, especially depending on the layout of the kitchen. Most of the time, we design the space with the range and hood on a wall that is seen from other rooms in the house. Why not make this piece a statement?

                  black stone kitchen island with a stainless steel steel hood rangehood and cactus plant

                  The Steel hood above adds a certain drama to the kitchen

                  Custom steel hoods are a way to add in a breaking point to a long row of wood cabinetry. These are a nice feature, but they do come with a cost. Custom steel hoods can range anywhere from $5-7k, but they sure do make a beautiful addition to your new kitchen, so make sure you budget for this correctly. Let’s get rid of those boring matching stainless hoods and be creative with your space! This is also your chance to add metal as a component to your kitchen.

                  Trend #18. Natural Wood Tones in Kitchen Design

                  Stained, treated or imitation wood has been used in kitchens for more than a decade. Natural wood is making a come back in the next year as natural forms of wood brings warmth into a kitchen and gives it a nice rustic feel.

                  Kitchen remodel in auckland

                  Kitchen renovation in Mangere Bridge: Natural wooden counter tops treated with Epoxy Urethin Vinyl to increase durability.

                  If you have a white toned kitchen then adding either a wooden island, drawers or counter-top will add a vintage charm to your kitchen. In order to increase durability of your natural wood elements in the kitchen simply apply Epoxy Urethin Vinyl Coating on your counter tops. Natural wood however can be used in its true form as a nice rugged looking breakfast bar.

                  Trend #19. Statement Bronze Accessories for your Kitchen design

                  Installing statement is a great way to liven your kitchen up and give it a unique design element. Use statement taps and fixtures like brass to give your kitchen a rustic look or industrial look.

                  Stanmore kitchen renovation

                  Brass sink and tap-ware added for our client to create a rustic look for this kitchen we renovated in Orewa

                  If you have a kitchen which is mostly designed in neutral and white colours then use black for all your taps, fixtures and cabinet handles to instantly make it a classic black and white kitchen without making any drastic changes.

                  Kitchen renovation in Stanmore Bay

                  Rustic looking bronze hanging lights also added to the rustic feature of this kitchen in Orewa

                  Trend #20 Plate racks, Hanging cups and colourful appliances

                  As mentioned above, a great way to spruce up you kitchen aesthetics is to bring some colour into the kitchen. If you are not looking for a big change then putting colourful crockery on display is a great idea to add some colour.

                  farmhouse kitchen with a wall-mounted plate rack timber benchtop and red cookware

                  The above kitchen looks dramatic and bold due to simple red utensils and black cabinets. The red utensils create a lot of interest to an otherwise monochromatic kitchen.

                  All you have to do is add some hooks for colourful cups or add a wall mounted plate rack complete with pattered plates to create interest into a drab kitchen.

                  open timber shelving displaying blue cookware bowls and plates above a kitchen sink

                  Another example of adding colour to a white toned kitchen.

                  If you are not afraid of colour, then add colourful appliances like a SMEG fridges or accessories can add some fun elements to your kitchen without having to renovate.

                  Trend #21 Welcome With a Sociable Kitchen

                  One of the kitchen renovation trends 2023 is the use of curved design elements to enhance the ergonomic benefits and functionality of the space. Rounded kitchen islands are becoming popular as they facilitate socialising and movement in open-plan kitchens with multiple entry and exit points. This kitchen renovation trend encourages smooth transition between spaces and is perfect for entertaining guests.

                  Kitchen renovation trend sociable kitchen

                  Open Plan Kitchen, Easier to Socialise

                  Modern full home renovation in Greenlane

                  Trend #22 Embrace a Wood Resurgence

                  Wood kitchen cabinets are becoming popular and may be part of kitchen renovation trends 2023. Using wood cabinets like walnut or oak kitchen cabinet ideas provides your kitchen with a timeless or classic look. A popular option amongst homeowners.

                  Trend #23 Layered Lighting

                  A major kitchen renovation trend 2023 is layered lighting to create a well-designed and functional kitchen. Instead of relying solely on task lighting in specific preparations area, layered lighting will create a more balanced and visually appealing look. This kitchen renovation trend of layering lighting is a key aspect of designing a successful kitchen.

                  Kitchen renovation trends task lighting

                  Task Lighting Above Sink

                  Want a price for your kitchen renovation?
                  Open the calculator →

                  Trend #24 Handle Less Design

                  The modern kitchen renovation trend 2023 is focusing on multi-functional, open-concept spaces with a minimalistic aesthetic. With the advancement of push-open and close doors, handle less kitchen cabinets are becoming increasingly popular as it provides a sleek and streamlined look. This trend emphasises simplicity, placing emphasis on the detail of cabinetry for a clean, uncluttered look.

                  Kitchen renovation trends 2023 handless design

                  Handle Less Design for Cabinets and Drawers

                  Read – Contemporary Kitchen Renovation with Rustic Features

                  Trend #25 Create a Space for a Pantry

                  Pantry cupboards are becoming increasingly popular in modern homes as they provide a convenient and organised solution for food items. This kitchen renovation trend 2023 emphasises the importance of having all food goods in one central location, instead of scattered around various wall cupboards. This not only makes it easier to keep track of groceries, but also creates a more orgnaised and functional kitchen space.


                  10 Kitchen Trends to avoid in 2023

                  It is always a great idea to not renovate your kitchen wholly after one trend. This is because some trends start becoming an eye sore after a time. We mostly recommend our clients to go for classic designs and use elements of upcoming trend to complement the kitchen as opposed to wholly changing the kitchen to suit a ‘current fad’.

                  We have compiled a list of trends that do not work well anymore and that you should avoid.

                  Trend #1 Themed Kitchen design

                  Kitchens that are fully renovated to emulate a certain time period or style can quickly run out of style, leaving you with a kitchen that you no longer like. An example of this would be a kitchen would be a retro themed kitchen. If you like retro styled kitchens then think about perhaps using a few elements from that era in an otherwise classic or modern kitchen.

                  Trend # 2 Kitchen desks and workstations within a kitchen design

                  Kitchen desks were very popular a few decades ago. The birth of kitchen desks came from an era where there was no internet or online accessibility of recipes. People used these desks to work on their menu and store recipe books. However, kitchens is a space which is prone to getting messy and you do not want your desk to bear the brunt of it. Re-locate your kitchen desk to another area of the house and instead add an extra pantry in the kitchen area.

                  Trend # 3 Dark wooden cabinets

                  Unless you have a large kitchen, dark cabinets can make your kitchen look bulky and cumbersome. It will close the space up and make your kitchen look dated. Opt for a lighter wood to open your space up and add a modern clean touch to your kitchen.

                  Trend # 4 Over the range microwave

                  Older kitchens mostly feature a space above the counters for microwaves. Not only is this cumbersome but it is also inaccessible sometimes with food being split or dropped ever so often. Instead, make a space for your microwave which is below eye.

                  Trend # 5 Tile Counter-tops

                  Tiled counter-tops may be cheaper compared to other materials but they are not easy to maintain. They are prone to chips and grouting stains which can become unsightly very soon. If marble or granite is not an option for you then try using engineered stone which can be made to look and feel like marble. They are a whole lot easier to clean and maintain.

                  Trend #6 White Subway tiles

                  Subway tiles have been used over and over again in the last decade or so. It is almost an overkill to use them when renovating a kitchen. Try glass, acrylic, stone or tile instead. If you do however like the ‘subway’ look then try colourful subway tiles instead so they add pop of colour to your kitchen.

                  Trend #7 Closed kitchens

                  As discussed above, closed off kitchens just do not suit our contemporary tastes anymore. Sure there is a pressure to keep your kitchen tidy in an open plan concept however, no one parent or two want to cook the evening away in a closed off kitchen while kids are hanging in the living room.

                  Trend #8 DIY backsplashes and cabinets

                  Doing a DIY job of either painting your cabinets or installing them will never give it the finish that you desire. If you are not a professional then stay away from doing a DIY job as it will only give you problems in the future.

                  Trend #9 Ornate Styles

                  If you prefer a rustic, classic or traditional kitchen then that is completely okay! Modern kitchens with sleek lines is not everybody’s style. Even if you are after a traditional kitchen, do not go for ornate decorations on cabinets, doors or oddly shaped islands. Ornate designs on wood etc make a kitchen look dates and unappealing. Instead, make the use of colours, wood and other accessories to bring out the traditional style.

                  Trend #10 Mismatched styles

                  When you think about renovating your kitchen it is always a good idea to see what the overall feel of your home is. If your home reflects a more classic traditional style then renovating your kitchen to a sleep modern kitchen would make it look like an eye sore. Instead you could have a traditional kitchen with modern elements to still maintain the theme of the rest of your house.

                  Trend #11 All White Kitchen

                  Minimalistic kitchen designs are trending, but to avoid a barren look, it’s important to incorporate neutral colours in addition to white. Incorporating colours such as tan, grey and black into a white kitchen can add depth and interest while maintaining a minimalistic aesthetic. This kitchen renovation trend 2023 focuses on simplicity and clean lines, so be sure to avoid having an all white kitchen.

                  Read – 10 Mistakes to avoid in your kitchen by our kitchen designers

                  6 Key features to incorporate within your Kitchen Design

                  There are several features that you can incorporate within your kitchen design when renovating a kitchen for comfort, functionality and aesthetics. A well planned kitchen design includes key features that maximise the space for the lifestyle of the homeowners. The good news is that there are several innovative solutions available today that work within small as well as large spaces. We spoke to our Kitchen designer and she listed the top 5 features that a good kitchen design should include.

                  #1 Layout is important for a Kitchen design

                  Deciding a layout of your kitchen will depend on the space available and how much your family uses the kitchen. If your kitchen is a high traffic area with various family members cooking together then your kitchen design should include a substantial amount of bench space. We have listed the most common layouts below:

                  One walled kitchens

                  These kitchens are best suited for smaller units or apartments in Auckland where space is limited. Units and apartments mostly feature open plan living. With one walled kitchens you can make a small area look less cumbersome and you get the flexibility of having a small dining area and a nice living room space.

                  Galley Kitchens

                  This layout works good for small spaces as well as it is a lean layout which is ideal for 1-2 person households. The galley kitchen layout features two walls or countertops running parallel to each other with a walkway in between. If you do have a small unit and a one wall kitchen does not provide ample space then a galley kitchen is the right type of layout for you. You can also use one of the countertop area as an island with bar stools and skip on a dining table. This will give you extra counterspace as well as an area to eat your meals.

                  L-Shaped Kitchens

                  L-shaped kitchens are great when you want to maximise the corner space of your home. L-shaped kitchens work well for small to medium sized homes as they do not make the area look cumbersome. These kitchens consist of countertops that on walls perpendicular to each other. An L shaped kitchen also provides more storage space as you can built additional storage cabinets on the wall above the counter. If you have the space then you can build an additional island which can act as a dining space as well.

                  U-shaped Kitchens

                  U shaped kitchens have counters or cabinets in three walls of a kitchen making a U shape. They work best for larger spaces and traditionally have worked best for kitchens that are not open plan. However as more people are leaning towards open plan living concepts, this U-shaped design has evolved to include an island instead of counters on all three walls. The modern version of U-shaped kitchens includes an L shaped kitchen along with an island. This also allows for easy foot traffic throughout the kitchen.

                  Islands in a Kitchen

                  As discussed above, it is possible to include islands within most layouts when designing a kitchen. The size of the island should however be in proportion to the space that you are working with. If you do have a one walled kitchens then you are probably working with a small space which means that the island that you install should be sleek and no overcrowd the space.

                  Want a price for your kitchen renovation?
                  Open the calculator →

                  Peninsular Islands

                  Peninsular islands can be seen as an extension of an L-shaped kitchen. They are attached to a part of the L shaped kitchen to form a U-shaped kitchen. Below is a great example of an Peninsular island that we designed in a full kitchen renovation in Bucklands Beach.

                  Kitchen design with a peninsular island

                  Peninsular island in Bucklands Beach which provides our client with extra counter space as well as a breakfast nook.

                  ReadOur complete 2021 guide on Planning the right Kitchen Layout for your kitchen

                  # 2 Storage

                  Storage is one of the most important aspects of achieving a functional kitchen. The first thing that we recommend all our clients is to draw up an inventory of all their large utensils and kitchen appliances. If there is anything that you do not use regularly then this would be a great time to get rid of them.

                  Next think about your pantry and how much groceries do you store on a regular basis. Do you need a larger pantry or are you satisfied with the current one? These questions are important before a renovation so your kitchen can be custom built according to your family’s functionality.

                  When working within tight spaces we incorporate space saving designs such as ‘magic corners’ for corner cabinets, pull out cabinets, pull out rubbish bins and pull out pantries. Such designs help save space, and maximise storage when not a lot of it is available.

                  # 3 Durable Benchtop

                  Benchtops need to be durable in any kitchen whether it is used often or now. Most times benchtops cannot just be changed without changing the carcass of your cabinets as well. This means that it is vital that your benchtops survives atleast 25 years. Most older homes in Auckland have durable benchtop made of laminate which are not prone to cracking or breaking but they are prone to staining. Laminate benchtops get stained very easily and hence start making your kitchen look shabby.

                  Stainless steel is a very durable benchtop as it will not stain and has a long life. Stainless steel is not for everyone though as it can make a kitchen look cold and more like a commercial kitchen. Stainless steel is not the best option if you are going for a traditional or classic kitchen. Stainless steel can work well with industrial, modern and contemporary styles.

                  Quartz is another material that works great for countertops as it comes in various designs and is very durable. Due to its versatile option in design, it can be used in all types of kitchen styles. It is however an expensive choice for benchtops which might not be right for everyone’s budget.

                  Engineered stone has become one of the most popular choices for our clients as it is durable as well as cost effective compared to quartz. Engineered stone is exactly as it sounds, it is engineered in the factory. It can be made to look like marble or any other material which makes it a versatile design choice. It is also not as expensive as marble or quartz and does fit into most budgets. Engineered stone does not stain like laminate and is a very easy to clean material.

                  # 4 Good durable Flooring

                  The floor of the kitchen can easily get dirty and messy. Most people live busy lives and cannot spend a long time cleaning and maintaining the floors. Tiled or Acrylic floors are the easiest to maintain when it comes to kitchens. Tiled and Acrylic floors now come in various textures, designs and patters and can be made to look like wooden floors or any other type of flooring. This means that you do not have to compromise on style and aesthetics. They are also very easy to maintain and do not get damaged with any water spillage.

                  Carpets and Real hardwood floors are easily the hardest to maintain. Carpets are easily stained and can be a nightmare to maintain in a kitchen even with a kitchen mat. Real hardwood floors can begin to rot overtime if there is constant water spillage which is often not avoidable in a kitchen. If you have real hardwood floors then a good idea will be to protect them in order to avoid them getting damaged.

                  We have renovated old bungalows in Auckland where our clients chose to keep their timber floors and we preserved them by taking the following steps:

                  • All the floors were cleaned thoroughly and then sanded
                  • All the rows of nail holes were fixed
                  • 3 coats of commercial grade water Born Polyurethane was applied on the floors
                  • After 5 days we then applied a satin finish of moisture cured and water based polyurethane.

                  # 5 Good Quality Fittings

                  If you’re considering which items to spend more on in your kitchen, it’s worth paying attention to the fittings. A standard cabinet can be lifted by a beautiful handle, while a basic sink can look high-end with the addition of a well-chosen tap.

                  The fittings in your kitchen are going to be used a lot, so it makes sense to invest in quality to ensure they’re strong, durable and nice to touch.

                  It is important to use good quality fittings when renovating a kitchen whether it is a DIY project or through a renovation company. You are not going to be renovating your kitchen every 5 years or so which means that the fittings you choose should be lasting you at least 15-20 years. It is better to put off your renovation for a few more years in order to save enough to invest in good quality fittings for your kitchen renovation.

                  Your fittings will be used a lot and quite regularly so there is a high chance of wear and tear. The materials you choose for your cabinets, benchtop, sink and door handles should be durable and sturdy.

                  # 6 Easy to clean splash back

                  A well chosen splashback can transform your kitchen in terms of design as well as reduce the time it takes you to clean while cooking. One of the key functions of a splashback is to protect the wall from the splatters made while cooking. Hence decide on a sleek tiled splashback without many grout lines or a glass splashback.

                  If there are too many grout lines or if the tile used is rough or textured then cleaning the splashback will be harder. If it is a smoother tile without too many grout lines then it would be a whole lot easier to clean your splashback.


                  Featured Projects

                  Urban Luxury Kitchen renovation in Parnell

                  This townhouse was centrally located in Parnell but the kitchen was tiny and lacked counter space. We completely changed the layout of this kitchen by first moving it from the left side of the area to the right. We then added cabinets in the dining area as an extended storage space. This cabinet featured shelves with internal lights which could be opened when required. To see Before and After pictures and project specifications see more

                  small kitchen design nz small kitchen design nz small kitchen design nz
                  kitchen renovation with timber overhead cabinets textured splashback and integrated oven small kitchen design nz

                  Entertainer’s Dream Kitchen and Bar

                  Guru and Neeta from Massey had a closed off kitchen which did not let them enjoy an open plan living. They wanted to renovate to introduce a feel of luxury but also make it an open space which could double as an entertaining space. We opened up the space for them and also extended the kitchen counter towards the lounge to act like a bar. The black and white see more

                  black and white marble kitchen island with twin sinks and mirrored splashback open-plan kitchen dining and living area with pendant lighting and a wall-mounted TV black kitchen island with timber overhead cabinets pendant lights and a feature globe ornament
                  three bronze perforated pendant lights hanging above a kitchen island round hammered mirror above a black and timber sideboard beneath a staircase black kitchen island with timber overhead cabinets knife block and globe ornaments

                  Kitchen, Lounge and Dining room renovation in Massey


                  Cottage Style Kitchen in Mangere Bridge

                  This was a special kitchen as it was about incorporating natural elements into the kitchen to reflect our client’s country surroundings. The kitchen was dated and was transformed into a chic country style kitchen complete with treated real wood as bench-tops, butler’s sink, floating shelves and cabinets that were wrapped in Dezignatek Thermoform with a ‘Ronda’ pattern to give them cabinets a vintage look see more

                  house interior design kitchens in auckland house interior design kitchens in auckland house interior design kitchens in auckland

                  Full kitchen renovation in Mangere Bridge, Auckland

                  Already have all your own trades and you’re comfortable managing them for your kitchen renovation?

                  Although we don’t recommend if you haven’t renovated a kitchen before and/or you don’t have trades people you can trust, most renovations if not all comes with it’s own surprises because not all homes are the same – this is where experience/project management plays an important role in minimises risks to maintain costs/delays giving you higher certainty of outcome/quality backed by associated guarantees and warranties.

                  However, if you do intend to manage the kitchen renovation yourself, it does work out more cost effective to contact a kitchen cabinetry manufacturer directly to get the kitchen cabinets designed, manufactured and installed – leaving you to manage the other trades such as flooring, demolition, painting, plastering, splashback/tiling, electrician, plumber, and sometimes a carpenter/builder.

                  Try Little Giant Interiors cost calculator below to see what you can expect to pay for cabinetry.

                  Further Resources for your house interior design

                  1. Featured projects and Client stories to see specifications on some of the projects.
                  2. Real client stories from Auckland.

                  Need ideas? Check out our Kitchen Design Gallery or dive into our Bathroom Design Gallery for inspiration!


                  How much does a kitchen renovation cost?

                  Kitchen renovations start from 23K and can go up to 50K depending on the level of customization and the type of products used. For a basic kitchen renovation with minimal layout changes and mid-range products/fixtures, you can get a fully renovated kitchen for around 23K. However, if the level of customization is high and premium-range products are used, costs can exceed 30K.

                  How do I budget for my kitchen renovation?

                  Start by listing the reasons for your kitchen renovation. Is it to increase functionality with modern amenities and a new layout? Is it for minor upgrades because things are looking outdated? Is it to convert a closed-off kitchen into an open-plan living space? Or is it to upgrade a rental property for better market rent? These goals will shape your budget. For an investment property aimed at adding value or increasing rent, opt for a basic renovation with minimal customization using mid-range supplies. If the goal is to enhance functionality and comfort, consider mid-range to premium suppliers and customize within your budget.

                  Do you have finance options for my kitchen renovation?

                  Yes, we provide finance options for clients renovating their kitchens with us. We understand that setting aside a large sum for a renovation isn’t always feasible, so we’ve partnered with Linda from Loan Market to offer financing solutions. For more details, visit our page: Guide to Financing Your Home Renovation.

                  Does a kitchen renovation increase the value of my home?

                  Kitchens and bathrooms are the two main areas that significantly increase your home’s overall value. Kitchens, in particular, are a focal point for buyers, as they’ve evolved beyond just cooking spaces. They’re now places for family gatherings, interaction, and entertainment, making them a top priority for homebuyers.

                  Where can I find help to design my kitchen?

                  Renovation companies like ours, which offer a full ‘design-to-build’ service, include kitchen design in their process, so you don’t need to hire a separate designer. Having the designer within the same team as the renovation company simplifies communication and coordination.

                  Do I need to get my own plumbers and electricians for my kitchen renovation?

                  This depends on the renovation company. Companies offering a complete ‘design-to-build’ service handle everything, including kitchen design, demolition, rubbish disposal, product supply (e.g., flooring, bathroom fixtures, showers, vanities), installation, all trades (electricians, plumbers, tilers), and project management. The cost of the renovation includes all these services. However, some kitchen manufacturers focus solely on manufacturing and installing the kitchen and do not provide electricians, plumbers, or tilers. Research your options to find what best suits your needs.

                  What are some kitchen backsplash trends?

                  A backsplash can transform your kitchen’s look. Whether you want a pop of color in an otherwise white-toned kitchen or a sleek, modern style with a glass backsplash, the options are vast. Read our article on the latest kitchen backsplash trends for 2020 and 2021 here: Kitchen Backsplash Trends.


                  18 months 0 percent interest long term finance badge

                  Have you been putting off getting renovations done?

                  We have partnered with Q Mastercard ® to provide you an 18 Month Interest-Free Payment Option, you can enjoy your new home now and stress less.

                  Learn More about Interest-Free Payment Options*

                  *Lending criteria, fees, terms and conditions apply. Mastercard is a registered trademark and the circles design is a trademark of Mastercard International Incorporated.


                  Still have questions unanswered?

                  Book a no-obligation consultation with the team at Superior Renovations,
                  we’d love to meet you to discuss your renovation ideas!

                    Services

                    Home RenovationKitchen RenovationBathroom RenovationOutdoor RenovationHouse ExtensionCommercialDesign ServicesOther

                    By submitting this form, you agree to receive communications from us via email or text regarding our services, you can unsubscribe at any time.

                    This site is protected by reCAPTCHA and the Google

                    Privacy Policy and Terms of Service apply.

                    Exceptional Kitchen Renovation Experience

                    We recently had our kitchen renovated by Superior Renovations on Wairau Road, and we couldn’t be happier with the entire experience and, most importantly, the finished result.

                    From the very first day of demolition through to the final cabinet installation, every person involved in the project was exceptional. The quality of workmanship was consistently excellent, and it was clear that everyone took pride in the work they were doing.

                    A special mention has to go to Neil, who managed the entire project brilliantly. The biggest thing that stood out to us was how well organised everything was. The timeline was adhered to week after week, and we always knew exactly what was happening and who would be coming each day. It made what could have been a stressful renovation feel incredibly smooth and well managed.

                    Alison, who helped us with the initial design, was fantastic. She came up with a wonderful design that we immediately loved, and she was always happy to take the time to answer our questions, talk through options and make sure we were comfortable with every decision.

                    The plumber, electrician and cabinet maker were all outstanding, and the quality of their work really shows in the finished kitchen.

                    The transformation from our old kitchen to the new one has been incredible, and we absolutely love our new space. The attention to detail, workmanship, communication and project management were all first class.

                    We would recommend Superior Renovations to anyone and everyone without hesitation. If you’re looking for a company that delivers a quality renovation, keeps to its timeline and provides excellent value for money, we would definitely recommend giving them a call.

                    Thank you to Neil, Alison and the entire Superior Renovations team for giving us a kitchen we absolutely love! 👏👏
                    We have always loved working with Superior renovations and in particular Kevin. We felt like we were getting special one-on-one treatment at all hours of the day. They always produce their work super quick and to a good standard.
                    We added a new bathroom and upgraded the rumpus.
                    Superior Renovations offered a reasonable price and delivered professional services and work.
                    We recommend Superior Renovations for the house renovation.
                    This is our final and exceptionally positive review for Superior Renovations. First and foremost, we must emphasize that they are outstanding!

                    Superior Renovations has completed a comprehensive renovation of our entire house, both externally and internally, including the kitchen, bathroom, painting, carpeting, electronic gate, and more. Throughout the various projects over the past few months, we have been thoroughly impressed by their work and are delighted with the results. Their expertise and service continue to amaze us; they truly listen to our needs and engage in discussions whenever they believe improvements can be made.

                    We extend our gratitude to Cici, who not only served as the sales manager but also as the designer, transforming our kitchen from an early 2000s style to a modern and stylish new one. Neil, our project manager, worked with us daily, attending to every detail and going the extra mile to help us achieve an excellent result.

                    From the very first day of collaboration, we encountered no issues whatsoever, whether in communication, design discussions, or the execution by the on-site teams. We highly recommend Superior Renovations to anyone considering home renovation. Contacting them will reveal why we are so pleased with their work on our home.

                    David and Emily
                    SUPERIOR RENOVATIONS
                    Renovations on one full bathroom and one small ensuite at my home in Sunnynook, Auckland, were completed on 26th June 2026.
                    I am fully satisfied with the work done at my home by all workers and contractors and delighted with the results that I am now enjoying. All work is of a very high standard and attention to care leading to excellent results.
                    All staff of Superior Renovations and associated contractors were at all times helpful and happy to explain all aspects of their work and respectful in listening to any of my concerns or questions, with any changes where necessary being quickly and effectively carried out.
                    I have no hesitation in recommending Superior Renovations as your choice for any bathroom renovation.

                    Valerie Hepburn
                    4 Stoneleigh Court, Auckland
                    In early June, I hired Superior Renovation company to thoroughly renovate our two bathrooms. The project has now been completed and we are very satisfied. Thank you sincerely, and we highly recommend it.
                    Despite some delays, Eunice, Neil and the team at Little Giants have done a really good job on out kitchen renovation. Great finishing and very responsive to fixing up any little thing we weren't happy with.

                    Good work team!
                    ​From the very first consultation, our experience with this team has been nothing short of stellar.

                    ​Working with Eunice, our sales consultant, set a high bar for the rest of the project.
                    Eunice is truly exceptional at what she does. When we first began our kitchen project, we went through several versions of our floor plan, and she was with us every step of the way—from the initial planning stages right through to the final concept. Her patience and dedication during the design process were remarkable.
                    Throughout the project, Eunice provided:
                    * **Invaluable Suggestions:** She has a keen eye for both aesthetics and functionality, pointing out details we never would have considered on our own.
                    * **Seamless Adjustments:** No matter how many tweaks we requested, she handled every change with professionalism and a "can-do" attitude.
                    * **Expert Guidance:** She transformed our vague ideas into a cohesive, stunning reality.

                    ​Once the planning was complete, Neil, our project manager, took the reins and truly blew us away. Neil is a consummate professional who balances technical expertise with fantastic communication.
                    ​ He kept us informed at every stage, ensuring we knew exactly what to expect and when.
                    Whenever a minor pivot was needed, Neil handled it with grace and efficiency, keeping the timeline on track.
                    His standards for the renovation work were incredibly high, ensuring the final result was polished and beautiful.

                    ​The transition from Eunice’s initial planning to Neil’s execution was flawless. If you are looking for a team that combines design expertise with top-tier project management, look no further. We are absolutely thrilled with our new kitchen and new flooring !
                    Superior Renovations has just finished a complete remodel of my bathroom. I can see, why the company has such a high reputation. At every stage, from sales, design, project management, and execution, the company excelled at every point. I am just so happy with the work that they have done and they have exceeded my expectations at every point.
                    Used Superior for a kitchen and bathroom renovation last year. They did an excellent job updating both rooms, communication was excellent ongoing tjrough the project, they coordinated all the tradies, synchronized so there was little downtime, and it all worked exactly as planned and on budget. Was really glad we chose Superior Renovations and plan to use again for our entrance way at some stage.
                    As I said to my work colleagues ‘I have just had the most pleasant experience’. When they realised it was with renovations at home they were shocked - ‘unheard of’ I was told.
                    Everything went to plan - timing, project management, costs, etc, etc. Neil communicated with me daily and made my whole bathroom renovation a pleasure.
                    The best decision I made was choosing Superior Renovations.
                    Thank you Kevin for our initial connection and for passing me on to Neil to manage the whole process.
                    We just finished a bathroom renovation and couldn’t be happier with the results. The craftsmanship is top-notch, and the attention to detail in the tiling and finishing is impressive. The team was professional, kept the workspace clean, and delivered exactly what we envisioned. Highly recommend them for anyone looking for a high-quality transformation.
                    Superior did an excellent job of renovating our ensuite. Project manager Jacob was easy to work with and communications were good.
                    This is our second review for Superior Renovations. They have done two projects earlier this year and we were so impressed by the work they have finished. After discussing and very careful consideration, we decided to go with more projects with them. So far, they have now completed stage 1 renovation of our house. We still amazed for their knowledge and services; they really listen to us and discuss anything with us if they feel/think could be better…
                    From the first day we work with them, we have no issue with them at all, from communication, discussing, designing to the teams working on the site.
                    Especially we are highly recommended to those who are considering doing the house renovation, please contact them and you will know why we are so pleased to have them to do our house renovation.
                    We are thanking Cici, Neil and the teams so much….
                    We are looking forward to seeing what the outcome will be.

                    David and Emily
                    We recently had our bathroom renovated by Superior Renovations and couldn’t be happier with the experience. Dorothy and Neil were an absolute pleasure to work with. They guided us through every step of the process, making what can be a stressful experience feel smooth and straightforward.
                    The quoting process was transparent and detailed, with no hidden fees or surprises. Neil was incredibly responsive and always available whenever we had questions or requests, which gave us real peace of mind throughout the project. We really love the end result and enjoy our new bathroom!
                    We’ll definitely be returning to the Superior Reno team for our next project. Highly recommended!
                    Our bathroom reno has just been completed & I am so happy. The whole process was easy & hassle free. Alison designed our bathroom & was very patient with our changes/then changes back again. Jacob our project manager was a delight to deal with. He always kept us informed of the scheduling & any other information we may have needed. All the tradies worked hard & the job was completed & signed off within 3 weeks. That's demo, full tiling, installation of new everything & delivery & pick up of the skip down a very tricky driveway. We absolutely love the new bathroom & would recommend Superior Renovations everyday. Future jobs I will definitely be contacting them again. Thank so much for your excellent work
                    Having explored our reno options, it was an easy decision to select Superior Renovations for our work. As first timers at anything like this we had to trust the system with grand old 100year old bungalow. We were so pleased to have Cici, Sonny and Kai working with us the whole way through. Be shout out to all the team, builders, plumbers, electricians, tilers and painters. A superb job delivered on budget and ahead of time. The communication from Cici and Sonny was first class. Would highly recommend working with Superior Renovations in fact, we already have more worked booked in. Thanks Superior you made Millie and Monty's parents very happy. 🐾
                    I am very happy with the recent renovation for my new kitchen.
                    The team worked really hard to get it done within the time frame.
                    The manager, Jacob, was very helpful and communicated well and always sorts out any issue immediately.
                    Thank you Irene
                    We couldn’t be happier with our new pergola! From start to finish, the team was professional, punctual, and easy to work with. They took the time to listen to what we wanted and offered great suggestions to make the design even better. The quality of the materials and workmanship is outstanding — everything feels solid, well-built, and beautifully finished. Kudos to Sinan Sun as she has been an amazing contact with the company.
                    We are very pleased with our bathroom reno by Superior Renovations! Jacob, Cici and the team always kept us up to date, were always friendly to deal with and finished ahead of schedule. Most importantly we are very happy with the quality of the work.
                    We have been working with Superior Renovations as a supplier now for over three years. In that time we have found the team to be very professional and well organised. Which is a welcome relief in this industry! Just recently we have become their sole supplier for portaloos, which recognises the collaboration we have forged over these three years.

                    In particular, Leanne and Elaine set a very high standard of communication and flexibility. This is of vital importance when scheduling deliveries and pickups with us, however, they understand not everything can be done at once and are willing to work with us for the best (supplier/contractor/client) outcome.

                    I would imagine this ethos would flow directly through to all their contracted renovation work. A pleasure to work with!
                    A very reliable supplier – we’ve been working with them for three years now, and they have never let us down. Well done to the team.
                    We have been working with these guys for the past 4 years and find them an awesome company to work with, very efficient and organised. I highly recommend!
                    Finding someone reliable for renovations has always been the most stressful thing for us. In the past, we had several painful renovation experiences—money was spent but the problems were never truly solved, and things often ended up worse than before. We really didn’t know where to find a trustworthy renovation company.

                    For more than ten years, our wish had been to renovate our bathroom, laundry, and toilet, so that we could finally enjoy a comfortable and functional living environment. Just when we were about to give up, we came across Superior Renovations online. We quickly made an appointment with Cici, who designed and provided us with a quote.

                    Throughout the whole process, I was deeply impressed by the professionalism of Superior Renovations. What stood out most was that they always delivered on their promises—everything agreed upon was completed on time. This built a relationship of trust and reliability. Up until completion, I was completely satisfied with their dedication and the quality of their workmanship.

                    During the renovation, we encountered some of the challenges that often come with older houses, but Cici and her team helped us resolve the discomforts we had been living with for years. We are truly grateful to the construction team.

                    Some say renovations are easy if you just have money, but I believe the most important thing is finding a trustworthy team that keeps their word, values quality, and cares about the customer’s experience.

                    Because of this renovation experience, we can now confidently plan our next project—the kitchen—and Superior Renovations will definitely be our first choice. We strongly recommend them.

                    Finally, I want to thank Cici and the team for helping us fulfill our dream.

                    Mark & Kate
                    Sinan is a very good consultant. She helps a lot during renovation. Very satisfied with their job.