
DSC05483 - Superior Renovations
House Renovation

Renovating a 1970s Brick-and-Tile Home in Auckland

Quick answer: A 1970s house renovation in Auckland usually means opening up a boxy layout, replacing tired wiring, plumbing and single-glazed aluminium joinery, and checking for asbestos before anything comes out. A full renovation of this stock typically runs $80,000 to $160,000.

Drive through Pakuranga, Manurewa, Glendowie or Henderson and you’re looking at the same house over and over: low-set brick-and-tile, aluminium windows, a tiled roof, and a floor plan that shuts the kitchen away from everyone else. Auckland built tens of thousands of these homes through the 1970s and into the 80s. They were solid for their day. Fifty years on, they’re cold, chopped up, and running on services well past their use-by date.

The good news is that these houses renovate beautifully. The brick is usually a veneer, not structure, so the inside can be reworked far more freely than people expect. The catch is what you find once the linings come off. This guide walks through what you’re actually working with, what tends to hide behind the walls, where the money goes, and the upgrades that make the biggest difference to how one of these homes lives.

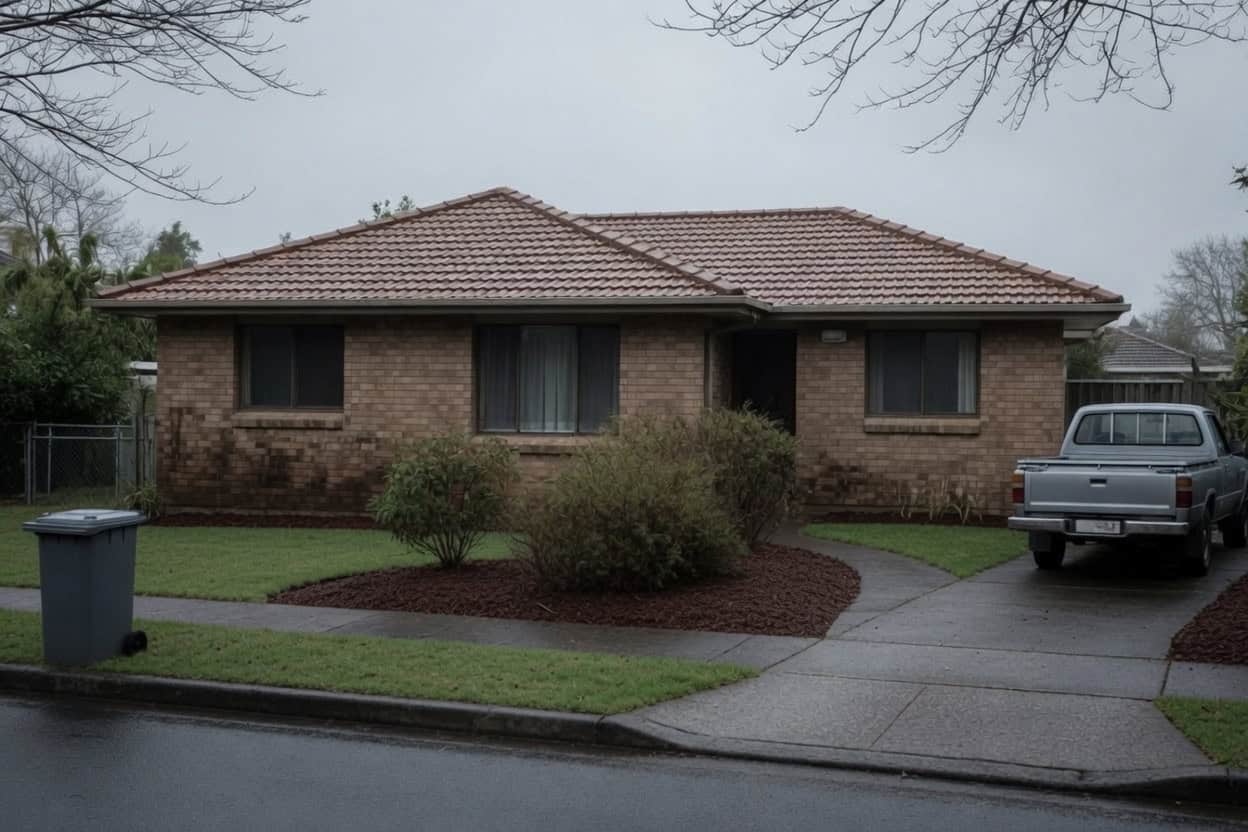
Brick-and-tile house seen from the street with a tiled hip roof and a vehicle in the driveway

Brick and Tile house


What You’re Actually Working With in a 1970s Brick-and-Tile Home

Free cost calculator

How much will your renovation cost?

Get an instant Auckland price range for your project — no details required to see it.

Try our free cost calculators →

Before you plan a single change, it helps to understand how these houses were put together. The construction is consistent enough across Auckland that most 70s and early-80s homes share the same handful of traits, and each one shapes what your renovation can and can’t do cheaply.

The Brick Is a Veneer, Not the Structure

This is the single most useful thing to know. On the vast majority of 1970s Auckland homes, the brick is a single skin sitting off a timber frame, with a cavity between the two. The frame carries the house; the brick keeps the weather out and gives it that face. It means most of your internal walls are ordinary timber partitions, and a surprising number of them aren’t load-bearing at all.

That’s why these homes suit open-plan so well. The wall boxing the kitchen off from the dining room is often just a partition you can take out, subject to a proper structural check. We’ve opened up plenty of them across Auckland where the wall looked like it was holding up the roof and turned out to be doing nothing but dividing two rooms. You still get a Licensed Building Practitioner and, where needed, an engineer to confirm it before anyone swings a hammer, but the potential is there in a way it rarely is in a solid-masonry home.

“The layout is where a 70s home changes the most. These houses were designed around separate little rooms, so people assume they’re stuck with it. Once you understand the brick is only a skin, the whole inside opens up. That’s the moment a client stops seeing a dark, dated house and starts seeing their actual home.”
— Dorothy Li, Design Manager, Superior Renovations

Slab-on-Grade, Aluminium Joinery and Low Ceilings

Most of this stock sits on a concrete slab-on-grade with integral footings rather than a suspended timber floor. That’s generally good news: no rotting piles, no bouncy floors, and a sound base to tile or polish. It does mean moving plumbing and drainage involves cutting the slab, which is doable but adds cost, so a layout that works with the existing drainage runs saves money.

The windows are almost always aluminium joinery that was never thermally broken, paired with single glazing. In winter these frames sweat and the rooms lose heat fast. Ceilings tend to sit around 2.4 metres, lower than the villas and bungalows a few suburbs over, which is worth remembering when you plan lighting and any raked or lifted ceiling feature.

💡 Quick tip: Before you fall in love with a new layout, get the drainage located. Keeping the kitchen sink, bathroom and laundry near the existing waste runs can save several thousand dollars in slab cutting and re-plumbing.


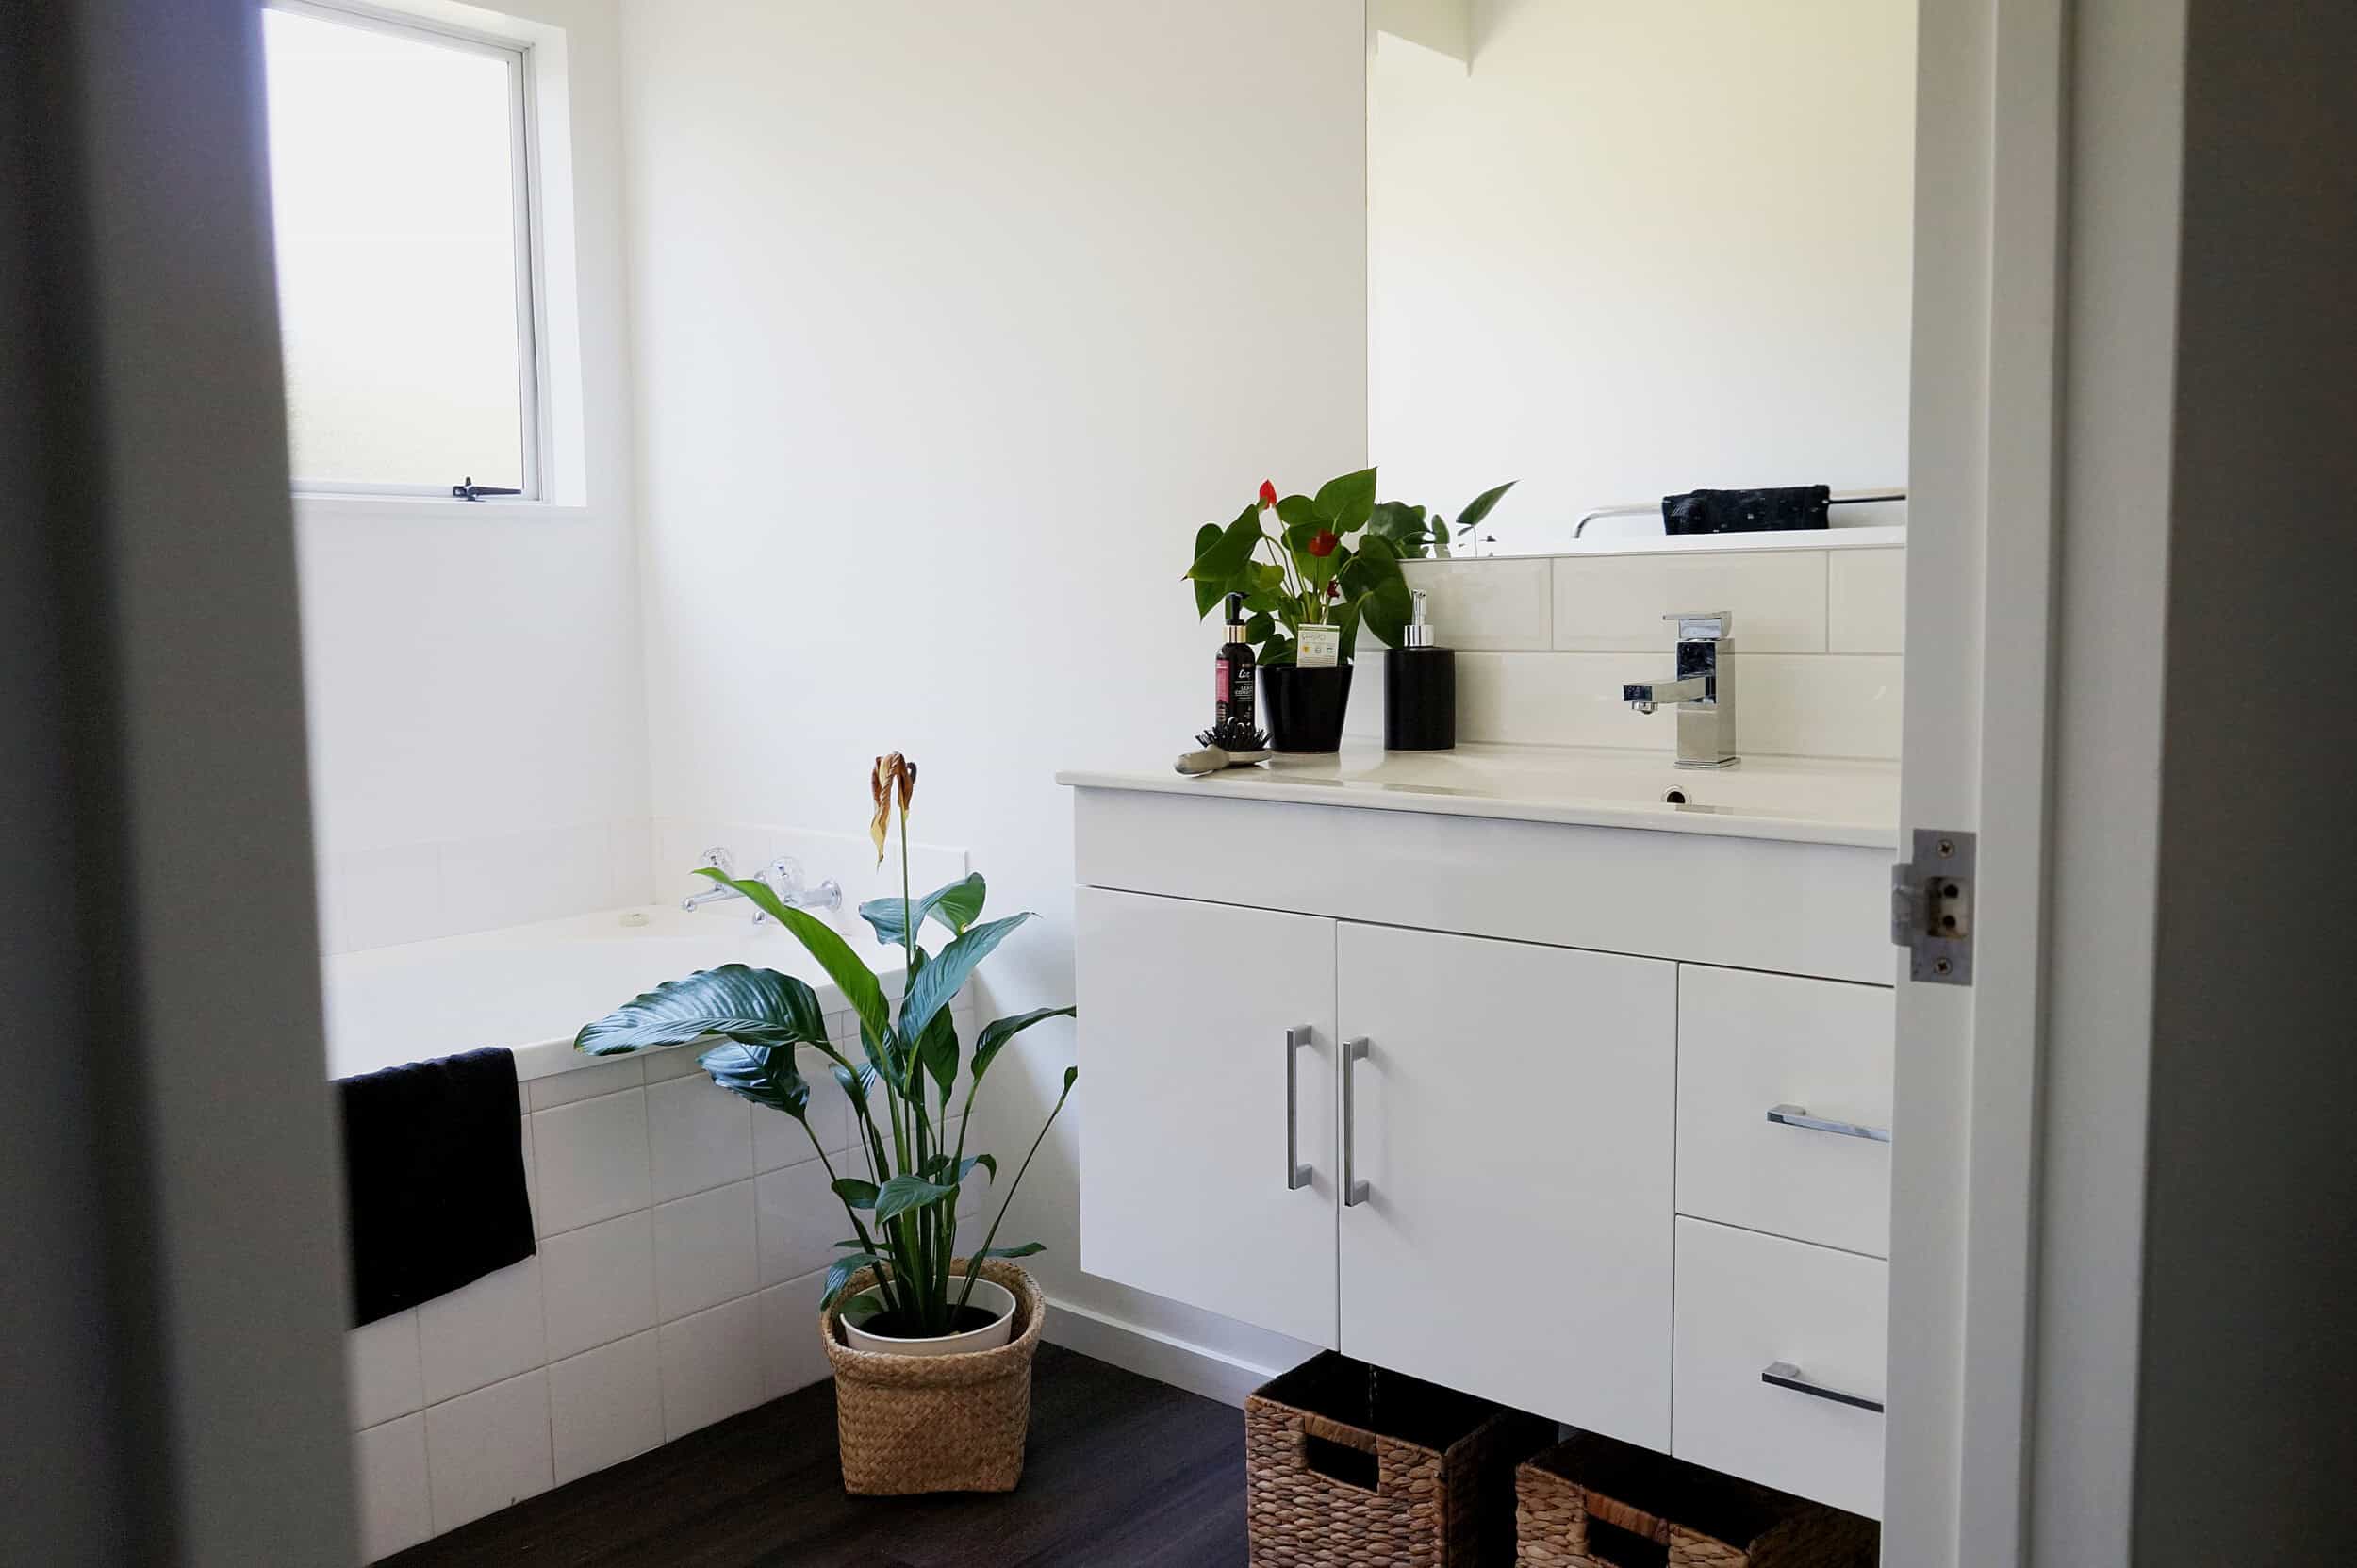
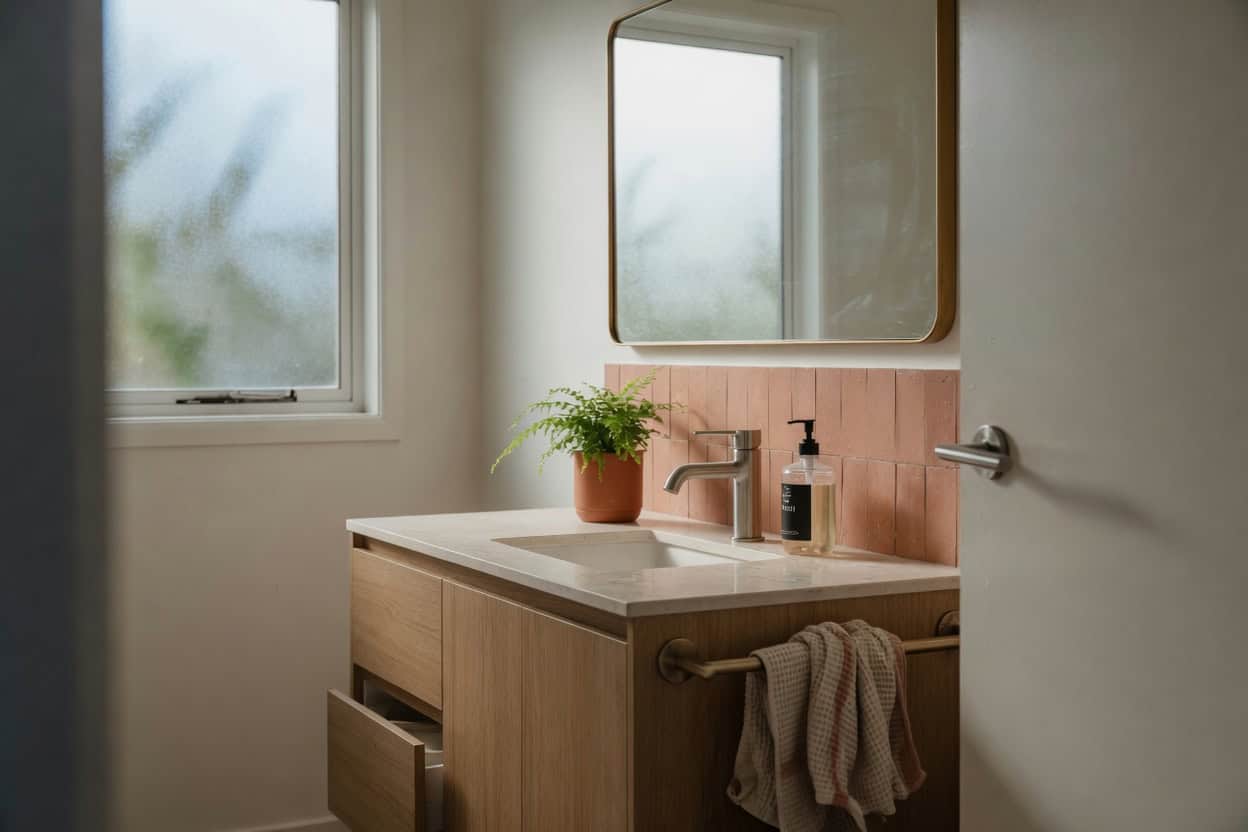
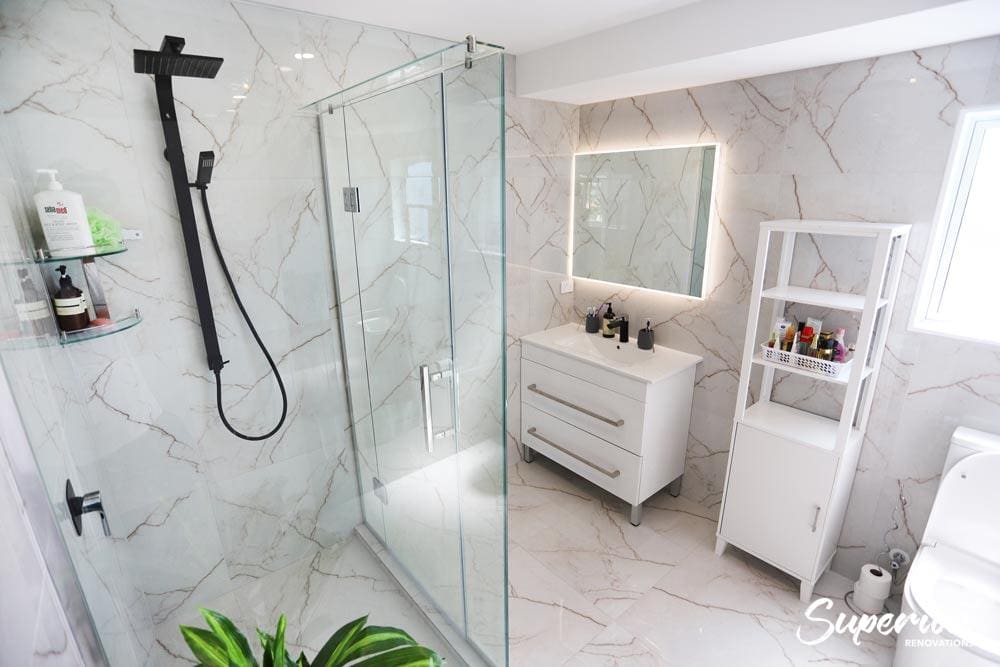
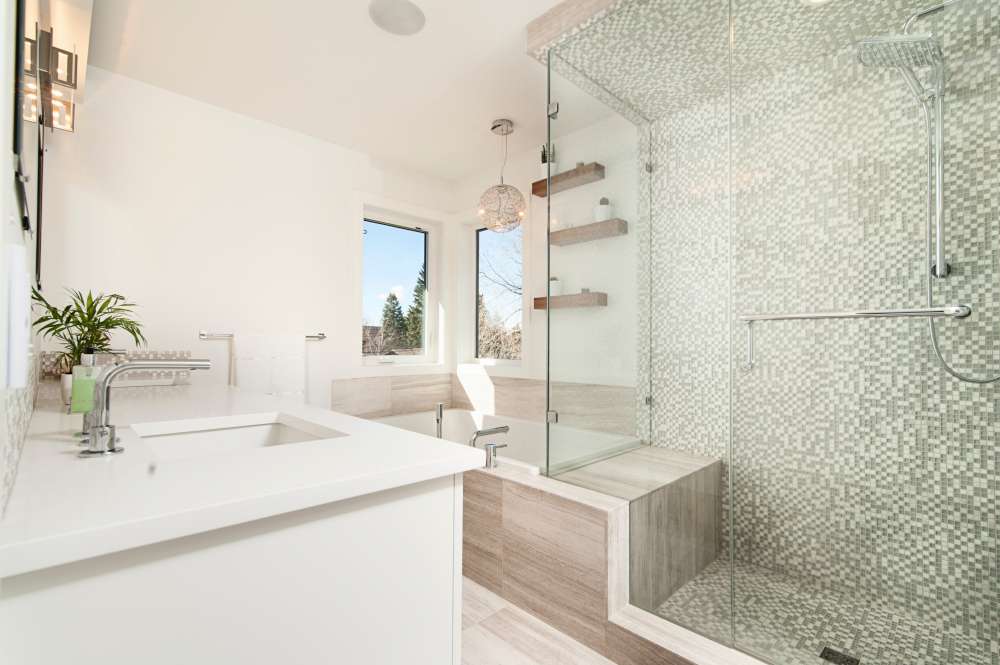
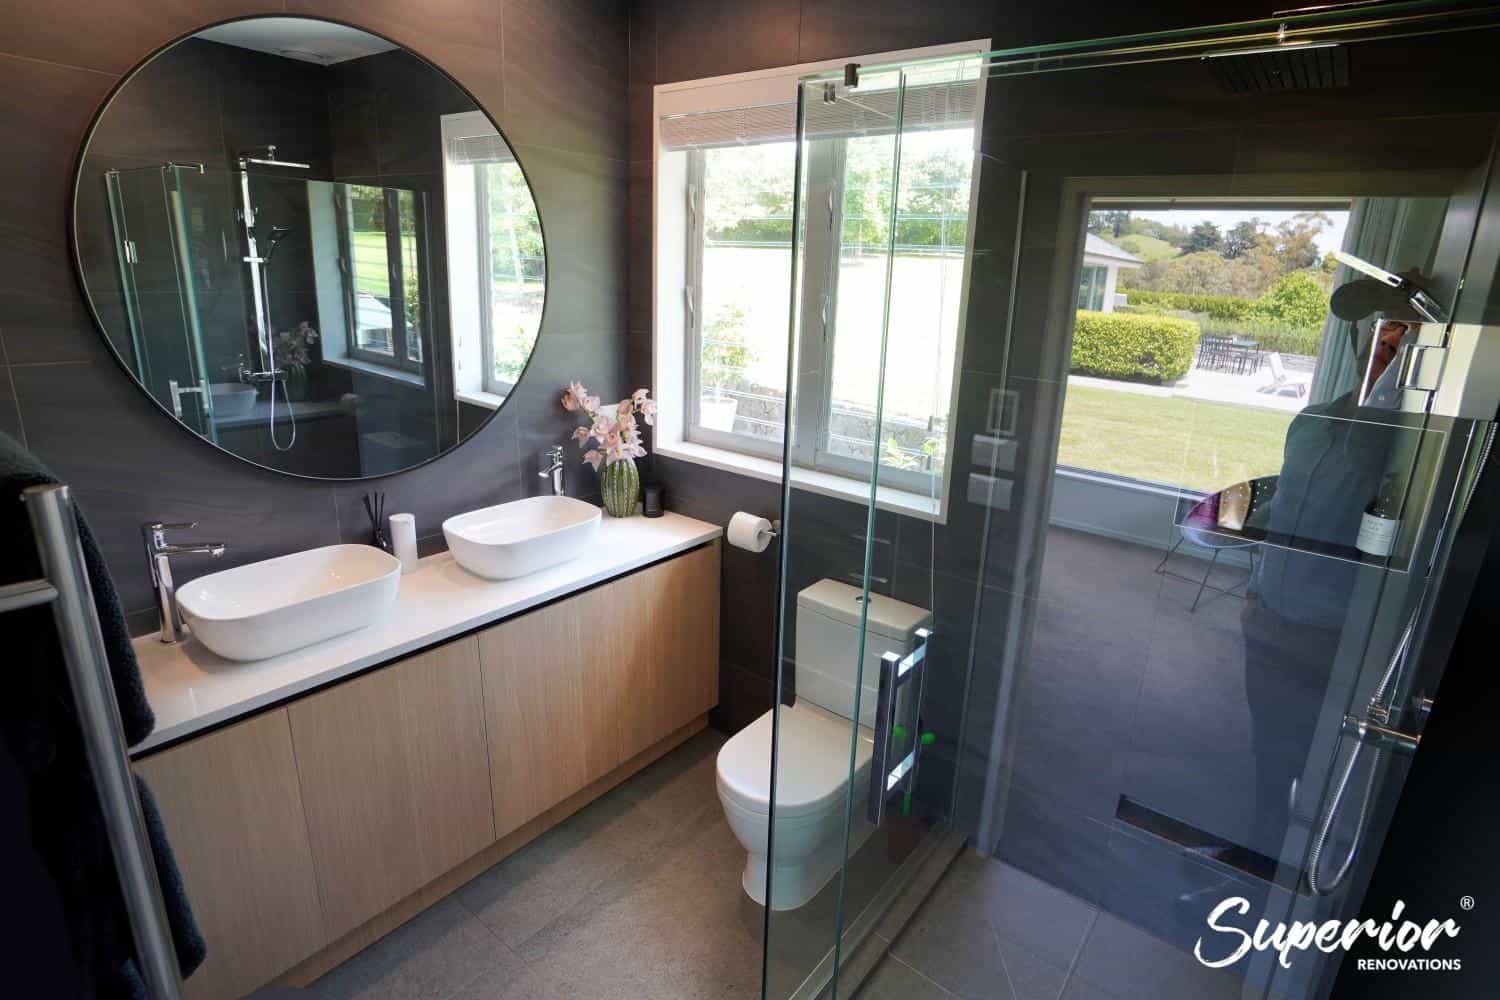
Renovated bathroom with a white vanity, a wall-mounted mixer and a potted plant


What’s Hiding Behind the Walls of an Older Auckland Home

Here’s the part most people underestimate. The surfaces of a 1970s home are easy to cost. It’s the services behind them, and one particular hazard, that decide whether your budget holds. On a house that hasn’t been touched in decades, assume the guts need work until proven otherwise.

Asbestos: Test First, Always

Any Auckland home built before 1 January 2000 may contain asbestos materials, and 1970s houses sit squarely in the highest-risk window. According to WorkSafe New Zealand, if there’s any doubt about a material, the law requires you to treat it as asbestos until a lab confirms otherwise. In homes of this era it commonly turns up in textured “popcorn” ceilings, vinyl floor tiles and their backing, some wall linings, and eaves and soffit sheeting.

The rule is simple and non-negotiable: don’t disturb it. Testing is a job for a competent, accredited assessor, and removal of anything significant is a job for a licensed asbestos removalist, not a general builder and definitely not a weekend of DIY. A proper renovator identifies and manages this before demolition starts, and factors testing into the plan from day one. It’s the one line in a 70s renovation you never gamble on.

Important note: Asbestos identification, handling and removal are governed by the Health and Safety at Work (Asbestos) Regulations 2016. Always have suspect materials assessed by an accredited professional before any renovation work begins, and refer removal to a licensed removalist.

Wiring, Plumbing and the Services You Can’t See

Fifty-year-old electrics are usually the next surprise. Many of these homes still run the original wiring with few or no RCDs on the switchboard, undersized for the way we use power now. A full or partial rewire is common in a whole-house renovation, and because it’s electrical work it needs a registered electrician and sign-off.

Plumbing tells a similar story. Galvanised steel supply lines from the 70s corrode from the inside, narrowing and discolouring the water, and copper of the same age is often near the end of its run. If the walls are open anyway, replacing tired pipework is far cheaper to do now than to retrofit later. The same logic applies to insulation: a 70s home typically has little to none in the walls, and while the linings are off is the one moment it’s genuinely affordable to bring it up to standard. We cover the detail in our guide to insulating your home during a renovation, including the current Building Code H1 minimums for Auckland.

None of this is glamorous, and none of it shows in the finished photos. It’s also exactly why a fixed-price quote on this kind of house should be built after a proper look at the services, not before. If you want to understand where the big-ticket items sit generally, our breakdown of renovation cost per square metre in Auckland is a useful reality check.


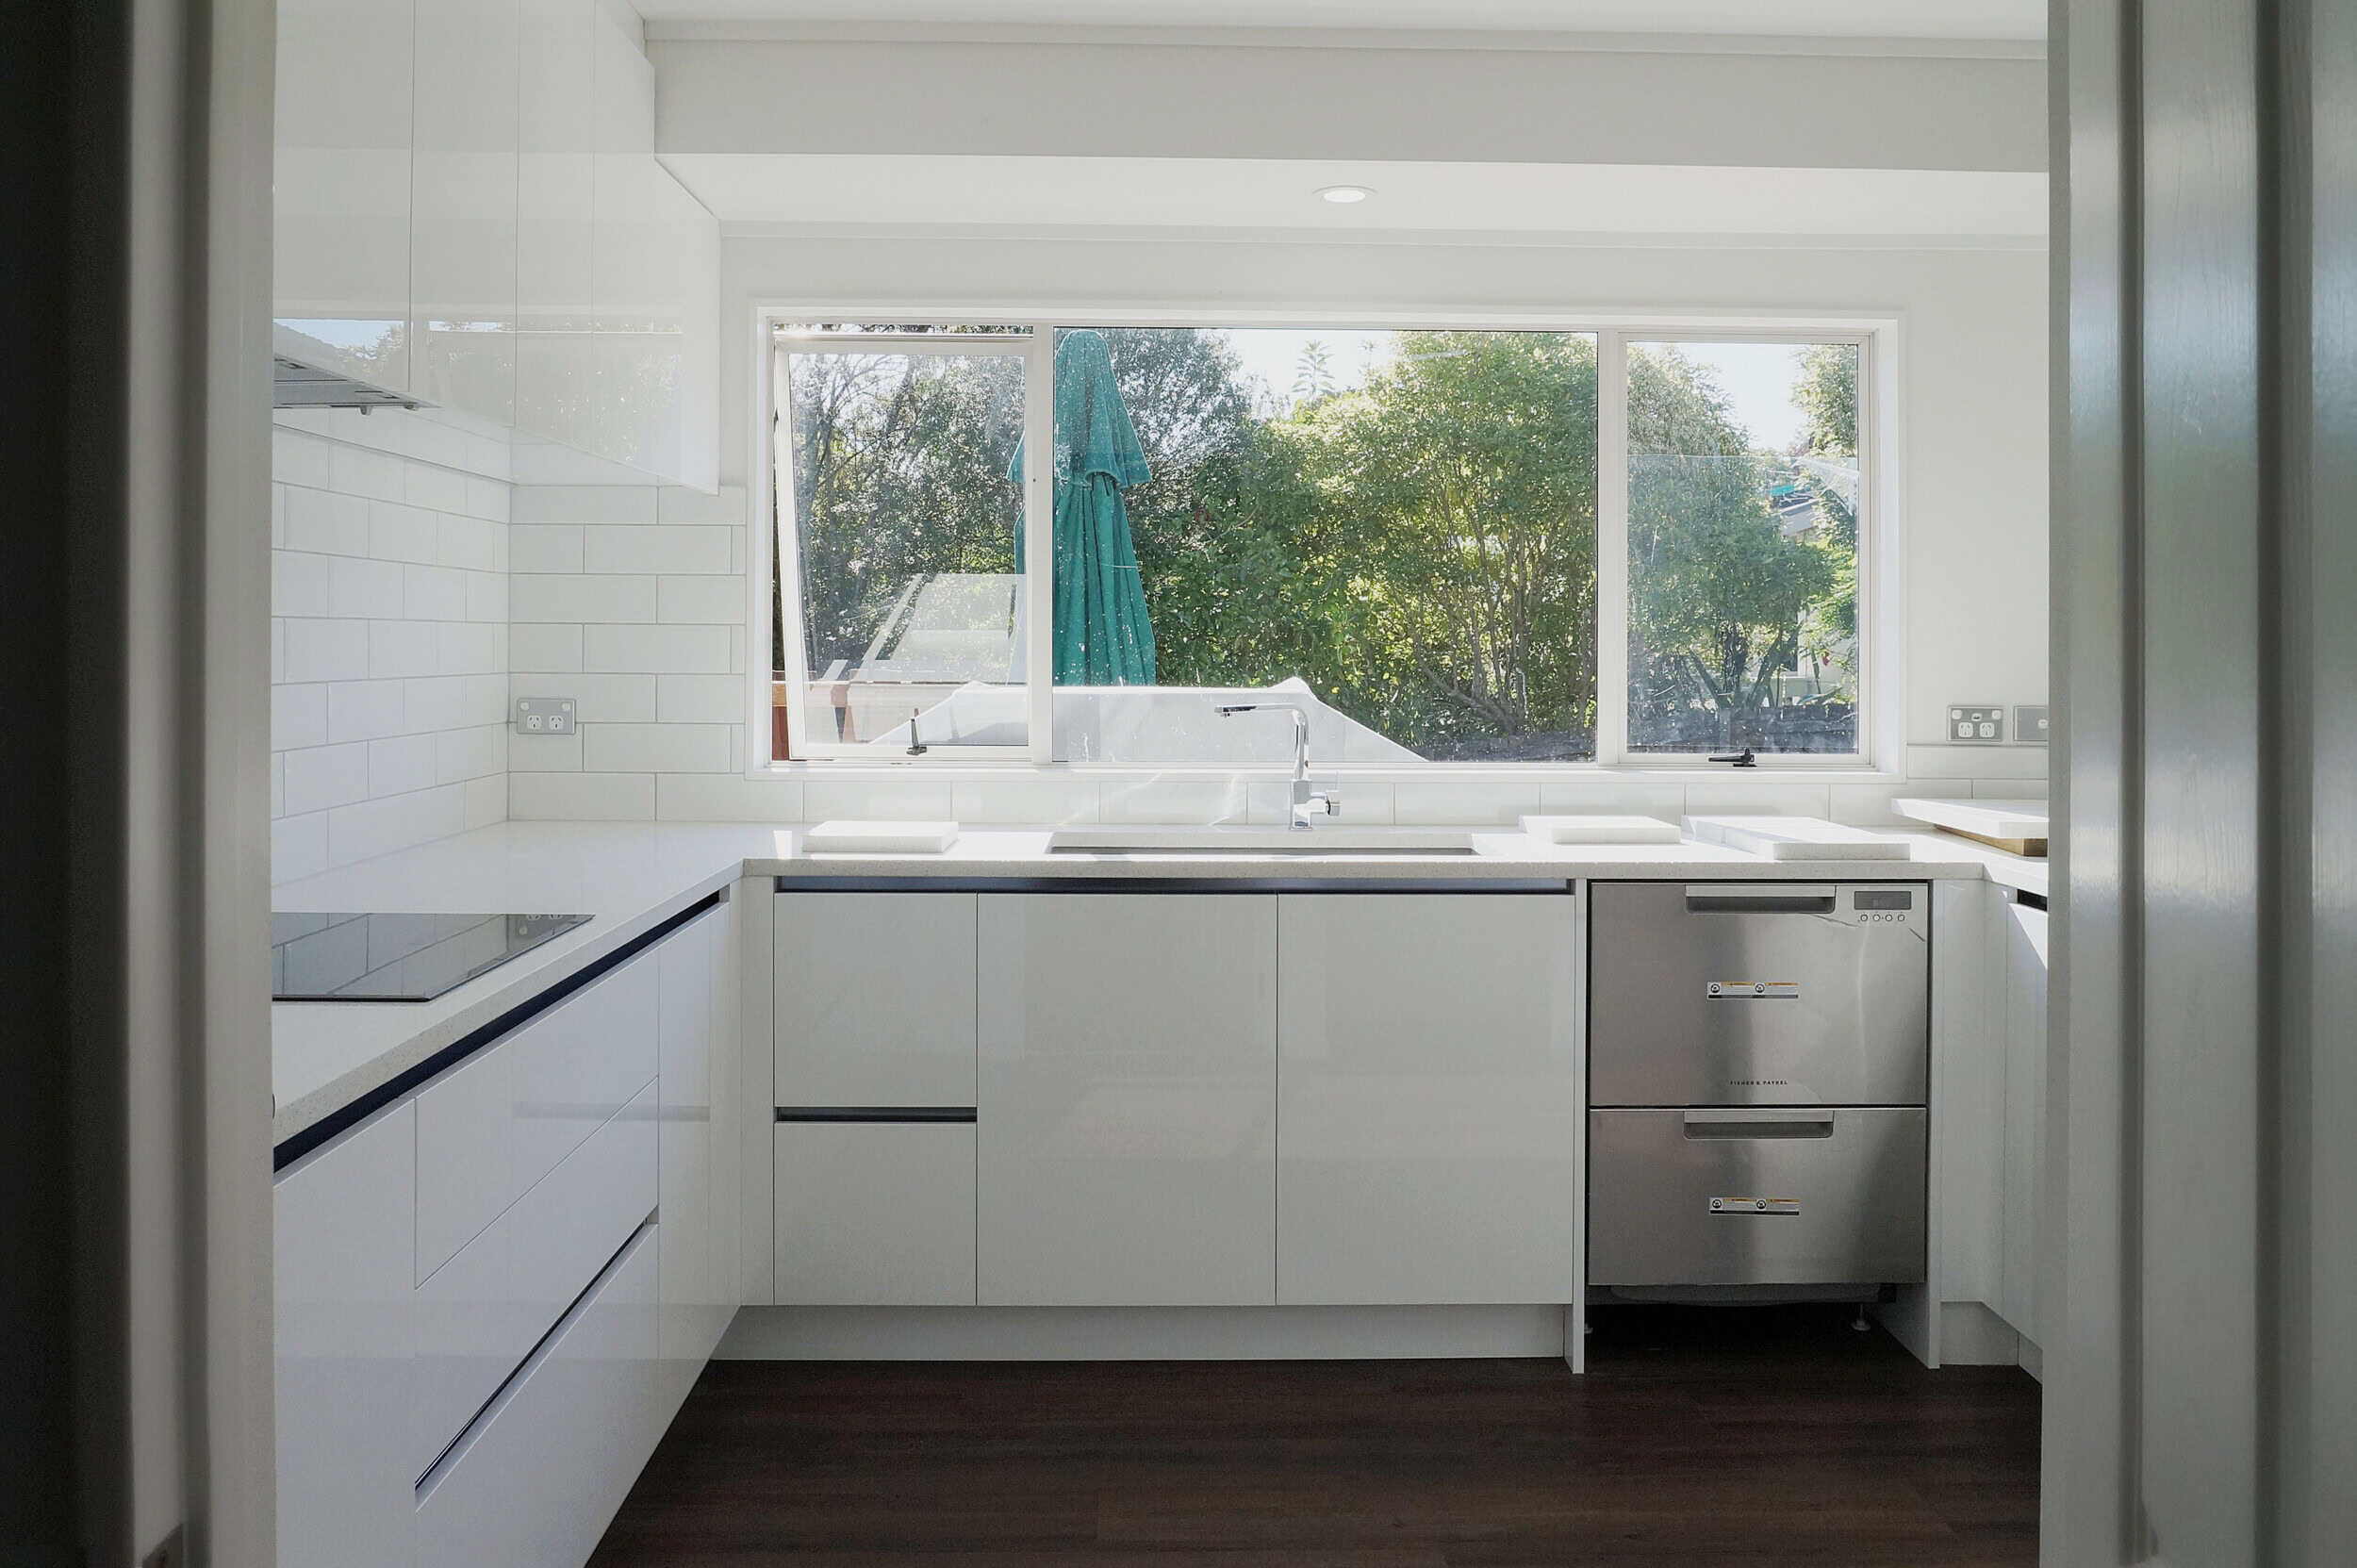
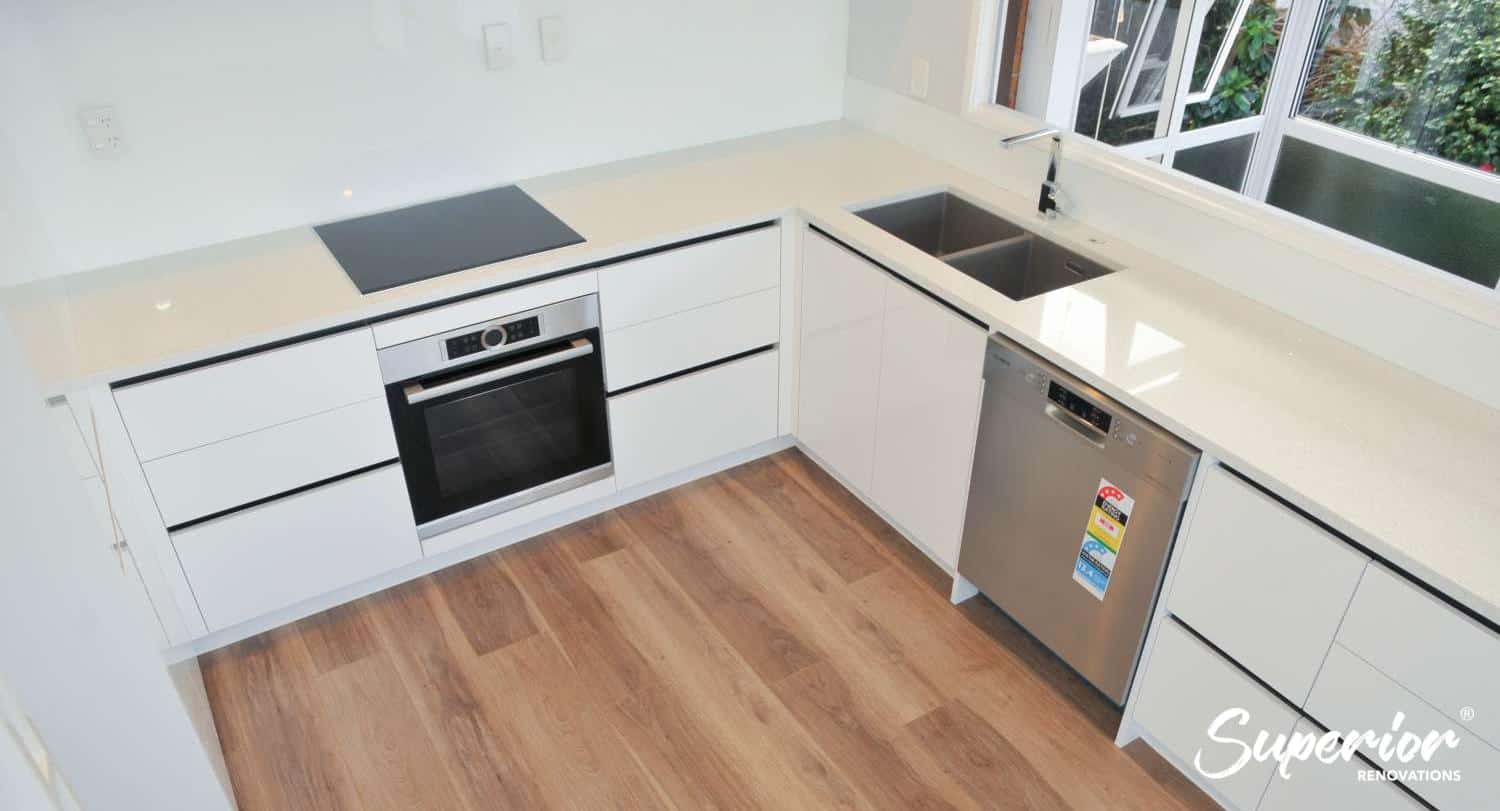
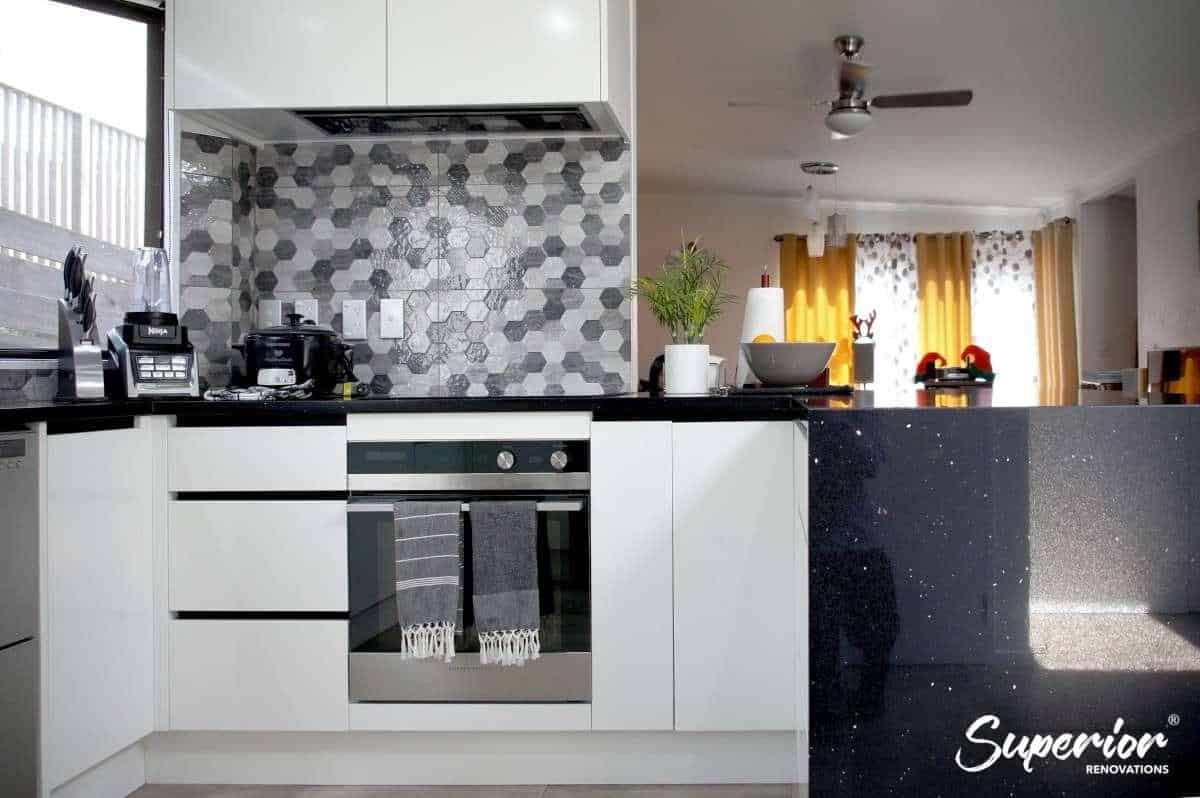
White gloss kitchen with handleless cabinetry and a window above the bench

Where a 1970s Home Really Transforms

Once the unseen work is sorted, the changes people actually see are where a 70s brick-and-tile home earns its keep. Three moves do most of the heavy lifting.

Opening Up the Compartmentalised Layout

The defining flaw of this era is the closed floor plan: a galley kitchen walled off from a formal lounge and a separate dining room, all fighting over limited light. Removing the right partition, or two, turns that into a single connected living space where the kitchen looks out over the family and the back garden. It’s the change clients react to most.

Concept plan · replanning the interior
The bones are usually fine. The plan is the problem.
Existing
Proposed
Houses of this era tend to have sound structure and a layout built for a different way of living. Reorganising the interior, rather than extending it, is where most of the gain is, and this pair of drawings shows how much of it is available. Concept plans by Sonder Architecture. Concept only, not consent documentation.

A good example is a 40-year-old family home in Māngere we reworked into open-plan living, connecting the kitchen, dining and lounge that had been shut off from one another. It’s the same bones as thousands of South and East Auckland homes, and the same transformation is on the table for most of them. If you’re weighing this up, our open-plan wall removal guide and our overview of the real risks in structural changes are worth reading before you commit to a layout.

“With these homes I always start with how the family moves through the space, not the finishes. Take one wall out and suddenly the cook isn’t isolated, the light travels, and a house that felt small feels generous. The footprint hasn’t changed at all. The way it lives has completely.”
— Cici Zuo, Head of Sales (NZ Dip. Interior Design), Superior Renovations

Bringing the Kitchen and Bathrooms Into This Decade

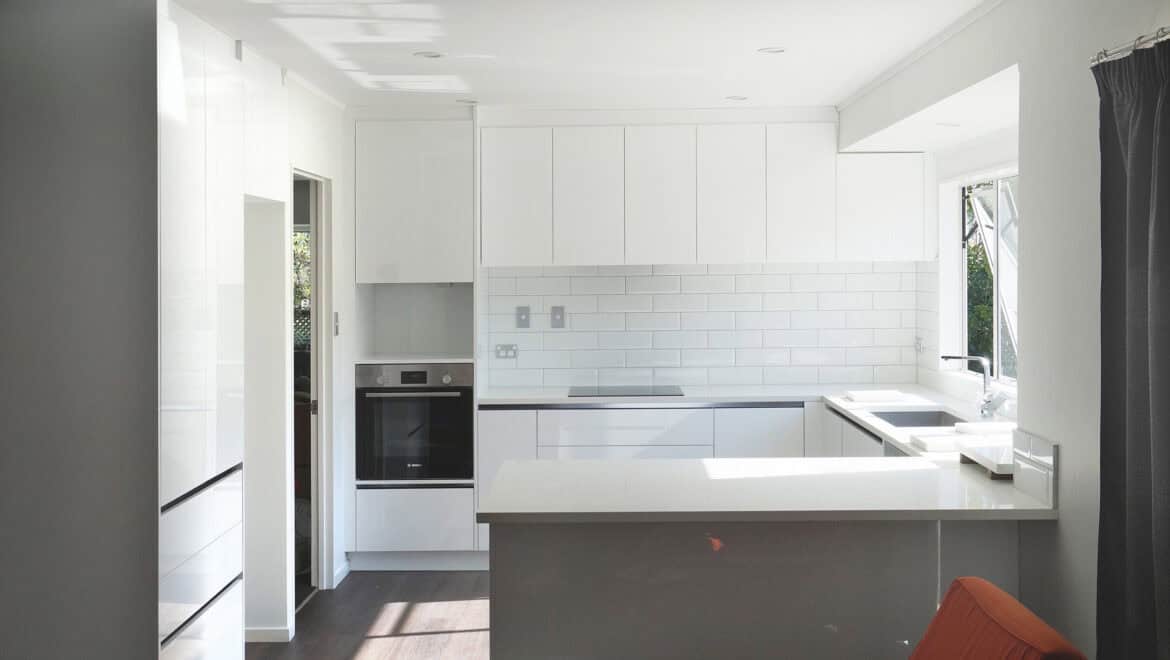
The original kitchen and bathrooms in a 70s home are almost always the first things to go, and they’re where day-to-day life improves most. A new kitchen that opens to the living area, and bathrooms taken back to the studs and re-waterproofed to current standards, reset the whole feel of the house. There’s real scope here to replace a closed-off 70s kitchen with an open, modern one, and to fully gut a tired brick-and-tile bathroom back to the studs rather than tiling over old problems.

Because the slab and drainage are already there, keeping wet areas roughly where they are keeps costs sensible. Move everything and you’re cutting concrete; work with the existing runs and the budget stretches further into the finishes you’ll actually notice.

Warmth: Glazing, Insulation and Heating

A 70s home with single glazing and bare walls is cold, and Aucklanders feel it most from June through August. Retrofit double glazing into the existing aluminium frames, or replacing the joinery outright, cuts the condensation and the heat loss dramatically. Paired with wall and ceiling insulation while the linings are open, it changes the house from something you heat constantly to something that holds its warmth. Our take on whether retrofit double glazing is worth it in Auckland runs through the options and the trade-offs.

💡 Quick tip: Sequence the warmth work in the right order. Insulation and glazing go in while walls and linings are open and cheap to reach. Retrofitting either after the house is buttoned up costs far more, so decide early rather than adding it later.


What a 1970s House Renovation Costs in Auckland

Cost depends entirely on scope, condition and finish, and a slab-on-grade brick-and-tile home is more predictable than most once the services are assessed. As a starting frame, a full renovation of one of these homes typically lands between $80,000 and $160,000, with larger and two-storey homes above that. The figures below come from our live pricing and are indicative starting points; your fixed-price quote will confirm exact scope and GST.

Full home renovation cost in Auckland — indicative starting points (2026)

Starting-from figures by scope. Final cost depends on condition, layout changes and finish.

Smaller full renovation

from $80,000

Single-level home

from $140,000

Two-storey home

from $180,000

Source: Superior Renovations — FAQ (live pricing). Ranges, not fixed prices; confirm scope and GST in your quote.

The Mellons Bay full-home renovation we completed shows how the scope adds up in practice: a new kitchen and four bathrooms, double glazing throughout, a re-roof, a full rewire and a repaint, delivered end to end in around six months. Not every 70s home needs all of that, but it’s a fair picture of what “the works” involves. You can see the range of jobs on our Mellons Bay project page, and run your own numbers through our renovation cost calculators.

Scope Indicative Auckland cost (2026) Notes
Kitchen (mid-range) $28,000–$35,000 Custom cabinetry and stone benchtops push toward the top and beyond
Bathroom (mid-range full) $25,000–$35,000 Back-to-studs rebuild with new waterproofing
Full home renovation $80,000–$160,000 Single-level from around $140,000 for the full works
Two-storey full renovation From $180,000 Scales with floor area and access

Milford full house renovation
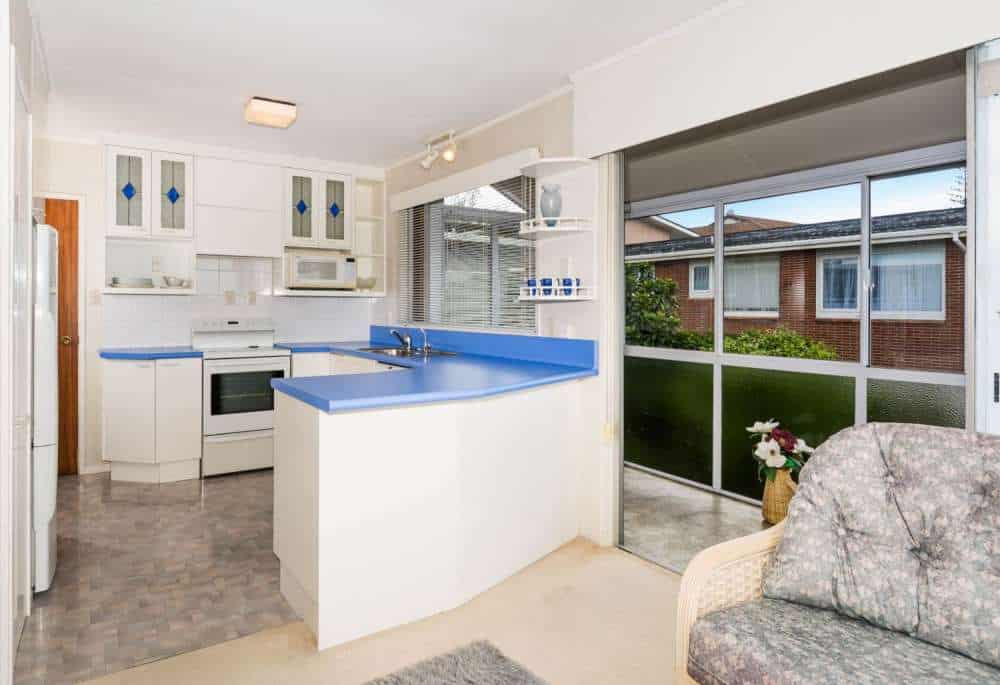
A blue laminate benchtop and what replaced it
Dated original kitchen with a blue laminate benchtop before the Milford renovationBefore
Modern white kitchen after a full house renovation in Milford, North Shore AucklandAfter
The original kitchen had a blue laminate benchtop, a peninsula closing off the room and cabinetry that had done its time. The replacement is a handleless white kitchen in the same corner of the same house. Houses of this era usually have sound bones and a layout built for a different decade.
See the full project

Want a ballpark for your renovation?
See the calculators →

Do You Need Consent for a 1970s Renovation?

Cosmetic work like new kitchens, linings, flooring and painting generally doesn’t need a building consent. The moment you touch structure, though, the picture changes. Removing or altering a load-bearing wall, most plumbing and drainage changes, and adding or relocating certain electrical work are Restricted Building Work and typically require a building consent and a Licensed Building Practitioner. Consent timeframes in Auckland usually add several weeks to the front of a project.

The honest answer for any specific job is to confirm it, not guess. We handle consents in-house as part of the design-to-build process, and we’d always recommend checking your particular scope with Auckland Council or a Licensed Building Practitioner before you lock in a plan. This is exactly the kind of house where taking a dated 1970s home back to the framing and rebuilding it properly pays off, because the planning is done once, up front, rather than in pieces.

How Long It Takes

A full renovation of a three-bedroom brick-and-tile home generally runs three to six months on site, with a typical three-bed, two-bathroom job around 12 to 16 weeks once design is finalised and materials are ordered. Add four to eight weeks at the front if the work needs council consent. Design, material selection and manufacturing happen before demolition, so the on-site clock is shorter than the whole project.


Is a 1970s Home Worth Renovating?

For most Auckland owners, yes. The bones are sound, the sections are often generous, and the locations, through the eastern bays, the North Shore and the south, are established and well-served. You’re improving a house you already own in a suburb you already like, usually for a good deal less than buying the equivalent renovated home down the road.

The case gets weaker only where the scope tips toward a near-rebuild, or where the section would genuinely suit something new. If you’re on that line, it’s worth pricing both paths properly before deciding. Either way, the starting point is the same: a proper look at the house, the services and the layout, so the plan is built on what’s actually there rather than what’s assumed.

➡ Book your free in-home consultation with Superior Renovations
➡ See how Auckland renovation costs break down per square metre
➡ Request a free feasibility report for your project


Frequently Asked Questions

How much does it cost to renovate a 1970s house in Auckland?

A full renovation of a 1970s brick-and-tile home in Auckland typically costs between $80,000 and $160,000, with a full single-level renovation starting from around $140,000 and two-storey homes from $180,000. A mid-range kitchen runs $26,000–$35,000 and a mid-range bathroom $25,000–$35,000. Final cost depends on condition, layout changes and finish, so these are indicative starting points rather than fixed prices. Figures are from Superior Renovations' live pricing.

Is the brick on a 1970s house structural?

On most 1970s Auckland homes the brick is a single-skin veneer sitting off a timber frame, with a cavity between. The timber frame carries the house; the brick is cladding. This is why these homes suit open-plan renovations, as many internal walls are non-load-bearing partitions that can be removed. Always confirm with a Licensed Building Practitioner, and an engineer where needed, before removing any wall.

Do 1970s houses in New Zealand have asbestos?

Any New Zealand home built before 1 January 2000 may contain asbestos, and 1970s homes are in the highest-risk period. It commonly appears in textured ceilings, vinyl floor tiles and backing, some wall linings, and eaves and soffit sheeting. Per WorkSafe, treat any suspect material as asbestos until a lab confirms otherwise, and never disturb it. Testing needs an accredited assessor and removal needs a licensed removalist.

Do I need building consent to renovate a 1970s home?

Cosmetic work such as new kitchens, flooring, linings and painting generally does not need consent. Removing load-bearing walls, most plumbing and drainage changes, and some electrical work are Restricted Building Work and usually require a building consent and a Licensed Building Practitioner. Consent typically adds several weeks in Auckland. Confirm your specific scope with Auckland Council or an LBP before finalising plans.

Can you make a 1970s house open-plan?

Usually, yes. Because the brick is a veneer and the frame carries the load, many of the internal walls dividing the kitchen, dining and living areas are non-load-bearing and can be removed to create open-plan living. It is the single biggest change you can make to this era of home. A structural check by a Licensed Building Practitioner or engineer confirms which walls can go and whether a beam is needed.

Should I rewire and re-plumb a 1970s house?

Often, yes. Fifty-year-old wiring is frequently undersized with few or no RCDs, and galvanised steel plumbing from the era corrodes internally and discolours water. When walls are already open during a renovation, replacing wiring and pipework is far cheaper than retrofitting later. Electrical work must be done by a registered electrician with sign-off. Budget for it early rather than treating it as an optional extra.

How long does it take to renovate a 1970s house?

A full renovation of a three-bedroom brick-and-tile home generally takes three to six months on site, with a typical three-bed, two-bathroom project around 12 to 16 weeks once design is finalised and materials ordered. Add four to eight weeks at the start if council consent is required. Design and manufacturing happen before demolition, so the on-site build is shorter than the whole project.

Is it better to renovate or rebuild a 1970s Auckland home?

For most owners, renovating wins. The slab and timber frame are usually sound, sections are generous, and you improve a home you already own in a suburb you like, generally for less than buying an equivalent renovated house. A rebuild only makes stronger sense when the scope approaches a full replacement or the section would better suit a new build. Price both paths before deciding.

Why are 1970s houses so cold in winter?

They were built before insulation and glazing standards existed. Walls typically have little or no insulation, and the aluminium joinery was never thermally broken and holds single glazing, so it loses heat and sweats with condensation. Adding wall and ceiling insulation while linings are open, plus retrofit or replacement double glazing, dramatically improves warmth and cuts condensation, which is a common priority in Auckland renovations of this stock.


Further Resources for your 1970s home renovation

  1. Featured projects and Client stories to see specifications on some of the projects.
  2. Real client stories from Auckland

Need more information?

Take advantage of our FREE Complete Home Renovation Guide (48 pages), whether you’re already renovating or in the process of deciding to renovate, it’s not an easy process, this guide which includes a free 100+ point check list – will help you avoid costly mistakes.

Download Free Renovation Guide (PDF)


Long Term Finance badge offering 18 months interest free

Want a ballpark for your renovation?
See the calculators →

Have you been putting off getting renovations done?

We have partnered with Q Mastercard ® to provide you an 18 Month Interest-Free Payment Option, you can enjoy your new home now and stress less.

Learn More about Interest-Free Payment Options*

*Lending criteria, fees, terms and conditions apply. Mastercard is a registered trademark and the circles design is a trademark of Mastercard International Incorporated.


Still have questions unanswered?

Book a no-obligation consultation with the team at Superior Renovations, we’d love to meet you to discuss your renovation ideas!

    Services

    Home RenovationKitchen RenovationBathroom RenovationOutdoor RenovationHouse ExtensionCommercialDesign ServicesOther

    By submitting this form, you agree to receive communications from us via email or text regarding our services, you can unsubscribe at any time.

    This site is protected by reCAPTCHA and the Google

    Privacy Policy and Terms of Service apply.


    References

    1. WorkSafe New Zealand — Asbestos in the home
    2. WorkSafe New Zealand — Where asbestos can be found
    3. Superior Renovations — Renovation costs and timelines (FAQ)
    d675d752 64e5 44ab 9af8 65752d94b8e1 - Superior Renovations
    Landscaping & Outdoor

    Louvre Roof NZ: Cost, Consent and Choosing a System That Lasts (Auckland 2026)

    Quick answer: A louvre roof in Auckland typically runs $15,000–$35,000 for a motorised aluminium system, and here’s the catch most people miss — a pergola is consent-exempt at any size only while it stays unroofed, so the moment you add a louvre roof, the council treats it as a roofed structure with its own consent rules.

    Every summer we get the same call. Someone’s deck bakes from about 11am, the outdoor table hasn’t been used since Waitangi weekend, and they’ve seen a neighbour in Howick or Torbay put in one of those adjustable-blade roofs that tilts open for sun and shuts for a southerly. They want one. What they don’t want is a $28,000 aluminium structure that either rusts near the coast or turns into a consent headache after it’s already bolted to the house.

    This is the guide we wish more of them read first. Real Auckland cost bands, the consent rules that trip people up, and how to choose a system that’s still working in ten years.


    What a Louvre Roof Actually Is (and How It Differs From a Pergola)

    Free cost calculator

    How much will a louvre roof cost?

    Get an instant Auckland price range for your project — no details required to see it.

    Open the Louvre Roof Calculator →

    A louvre roof is a pergola with a roof that moves. Instead of open beams or fixed slats, it has aluminium blades, called louvres, that pivot on a track. Open them flat and you get full sun. Angle them and you get filtered light and airflow. Close them and, on a decent system, you stay dry through light rain because the blades seal against each other and drain the water out through the frame’s gutters.

    That single moving part is what separates a louvre roof from the two things people often confuse it with.

    Louvre roof vs pergola vs solid patio roof

    A traditional timber or aluminium pergola is a frame — it breaks up harsh sun and looks the part, but it won’t keep rain off. A solid patio roof (polycarbonate or long-run steel) keeps everything off but also blocks the light on the days you actually want it. A louvre roof sits in the middle: you decide, blade by blade, how much sky comes through.

    Structure Keeps rain off? Adjustable light? Typical use
    Pergola (open) No No Shade, structure, planting
    Louvre roof Yes, when closed Yes Year-round outdoor living
    Solid patio roof Yes, always No Full cover, storage, shelter

    Manual or motorised?

    Smaller louvre roofs can be hand-cranked. Most people go motorised — a remote or a phone app, and often a rain sensor that closes the blades automatically when the first drops land. The motorised versions cost more and bring an electrical connection into the job, which matters for both budget and consent. We’ll come back to the wiring in a moment, because it’s not a DIY afternoon.

    💡 Quick tip: If you’re leaning motorised, ask whether the rain sensor is standard or an add-on, and where the manual override is. Power cuts happen, and you don’t want the blades stuck open in a downpour.


    What a Louvre Roof Costs in Auckland

    From our own Auckland outdoor builds, a motorised aluminium louvre roof typically lands between $15,000 and $35,000 (GST inclusive), depending on the span, the blade quality, and whether it’s freestanding or fixed to the house. That’s the structure itself. The number on your final invoice usually depends on what sits under and around it.

    Covered outdoor living — indicative Auckland pricing

    Installed ranges (GST inclusive) from our completed outdoor projects, 2026

    Motorised louvre roof$15,000–$35,000
    Timber pergola$5,000–$12,000
    Screening blinds$3,000–$8,000

    Source: Superior Renovations — indicative installed pricing from completed Auckland outdoor projects. Ranges, not fixed quotes.

    The costs a product-only quote leaves out

    A louvre roof has to land on something solid. If your deck can’t carry the point loads, or you’re building over lawn, you’re adding a deck or a footings-and-slab base underneath. Then there’s the electrical run for a motorised system, and building consent fees if your structure needs one. A quote that shows only the aluminium kit is telling you half the story.

    As a rough all-up guide, a designed and built covered outdoor area (base, structure, screens and finishing) is a $30,000-plus project once everything’s in, not a $15,000 one. Where it lands depends entirely on scope.

    💡 Quick tip: Run your own numbers before you ring anyone. Our louvre roof and covered-outdoor cost calculator gives you a ballpark in about a minute so you walk into quotes knowing roughly where you sit.

    “The louvre kit is the easy bit. What decides whether the job runs smoothly is the structure under it and the wiring — get the footings and the consent path sorted first, and the roof itself goes up in a day or two.”
    — Jeff Zhang, LBP & Site Manager, Superior Renovations


    Do You Need Building Consent for a Louvre Roof?

    This is where the internet gets it wrong, so read this bit carefully. A lot of installer websites say “louvred pergolas are usually exempt from consent.” That’s not quite how the rules read.

    Under Schedule 1 of the Building Act 2004, a pergola is exempt from building consent with no size limit — but only while it stays unroofed. A louvre roof, by definition, is a roof. So the moment you add closing blades, your structure is no longer an exempt pergola. It gets assessed like a porch or verandah instead.

    What Schedule 1 actually says

    Per Building Performance (MBIE), a roofed porch or verandah is generally exempt from consent up to 20m² when it’s attached at ground or first-storey level. Between 20m² and 30m², it can still be exempt — but only when the design or construction is carried out by a Licensed Building Practitioner. Above that, or where it doesn’t meet the conditions, you’re into a full building consent.
    Two things people forget: the structure still has to meet the Building Code even when it’s exempt, and Auckland Council’s site coverage and boundary (yard) rules under the Unitary Plan apply regardless of the consent exemption. A structure that’s fine under the Building Act can still breach a yard setback. Check both.

    Important note: Consent thresholds and exemptions are specific to your site and change over time. Treat this as a starting point, not advice for your build — confirm your project with Auckland Council or a Licensed Building Practitioner before you commit. Our sister brand covers the detail in what you can build without consent in NZ.

    The 20–30m² LBP pathway is genuinely useful, and it’s one reason we handle these as a build rather than a product drop-off. A licensed builder on the job can be the difference between an exempt project and a full consent, on the exact same structure.


    Choosing a System That Survives an Auckland Winter

    Auckland is hard on outdoor structures. Salt-laden air off both harbours, humidity, and the odd hard-out southerly that finds anything loose. A louvre roof that looks great in a Sydney showroom photo can pit and stain within a few years in Devonport or Mission Bay if the wrong grade of aluminium and coating go in.

    Aluminium grade and powder-coating

    Marine-grade aluminium with a quality powder-coat finish is the baseline near the coast. Ask what warranty covers the coating specifically, not just the motor. Come and see blade finishes in person at our Wairau Valley showroom (16B Link Drive) before you settle on a colour. Stainless fixings matter too — cheaper fasteners are usually where the first rust streaks appear, long before the frame itself gives up.
    Wind rating and the motor

    Exposed Auckland sites, anywhere with a clear run to the water, need a system rated for the wind zone. A good motorised unit will have a wind sensor that opens the blades to let a gust pass through rather than fighting it. That’s a feature worth paying for on a headland section, not a gimmick.

    Because a motorised roof needs power, the wiring is prescribed electrical work and has to be done by a registered electrician under New Zealand’s electrical safety rules — not the landscaper, not you. We build the electrical into the plan from the start so there’s a tidy, compliant supply to the motor and any integrated lighting.

    “The clients who get the most out of these are the ones who think of it as another room, not a garden gadget. Get the lighting, the heating and the floor right and you’ll use it in July, not just January.”
    — Eunice Qin, Designer, Superior Renovations


    Planning a louvre roof?
    Open the calculator →

    A Louvre Roof Works Best as Part of One Outdoor-Living Build

    The best outdoor rooms we’ve built weren’t a louvre roof bolted onto whatever was already there. They were designed as one job — the deck, the roof, the screening, the lighting and the power, all planned together so the proportions work and the trades don’t trip over each other.

    On a Mellons Bay full-home renovation, the Kwila deck was built to make the most of the sea views, with the covered-living zone planned around how the family actually used the space. In Cockle Bay, we ran a full Kwila deck rebuild and extension alongside interior work as one managed project. That’s the difference between an add-on and a room you’ll live in.

    How long it takes

    A full outdoor-living build (design, any consent, base, structure and finishing) typically runs 6 to 12 weeks of on-site work, with design and consent adding lead time before the tools come out. The louvre roof itself is quick once the structure’s ready; it’s the base and the approvals that set the timeline.

    If you’d rather have one team carry the whole thing, from design and consent through to deck and roof, that’s exactly how our team plans and builds an outdoor living area from deck to roof across Auckland.

    💡 Quick tip: If a full renovation’s already on the cards, price the outdoor room in at the same time. Sharing scaffolding, project management and trades across one build usually beats bolting it on as a separate job a year later.


    The Bottom Line on Louvre Roofs

    A louvre roof is one of the best-value ways to actually use your outdoor space year-round in Auckland — if you get the structure, the durability and the consent path right. Budget realistically, choose for the coast not the showroom, and treat the roof as part of a proper build rather than a product on its own.

    ➡ Book your free in-home consultation with Superior Renovations
    ➡ Explore our outdoor living and deck build service in Auckland
    ➡ Request a free feasibility report for your project


    Do I need building consent for a louvre roof in NZ?

    Often, yes. Under Schedule 1 of the Building Act 2004, an unroofed pergola is exempt at any size, but a louvre roof counts as a roof — so it is assessed like a porch or verandah. That is generally exempt up to 20m² when attached at ground or first-storey level, and between 20m² and 30m² only when a Licensed Building Practitioner does the design or build. Auckland Council site coverage and yard rules also apply. Confirm your site with the council or an LBP before you start.

    How much does a louvre roof cost in NZ?

    A motorised aluminium louvre roof typically runs $15,000–$35,000 for the structure in Auckland, depending on span, blade quality and whether it is freestanding or attached. Once you add the base or deck it sits on, the electrical run for the motor, and any consent fees, a designed and built covered outdoor area is usually a $30,000-plus project. A hand-operated system on an existing deck sits at the lower end.

    What is the difference between a pergola and a louvre roof?

    A pergola is an open frame that breaks up sun but does not keep rain off. A louvre roof has pivoting aluminium blades you can open for sun, angle for filtered light, or close to stay dry in light rain. The practical upshot is that a louvre roof lets you use the space year-round, while a pergola is more of a fair-weather structure. It also changes the consent position, since a louvre roof is treated as a roofed structure.

    Are motorised louvre roofs worth it?

    For most people, yes. A motorised system opens and closes from a remote or phone app, and better units include a rain sensor that shuts the blades automatically. The trade-off is cost and an electrical connection that must be installed by a registered electrician. If your budget is tight and the roof is small, a manual system still does the core job of opening and closing the blades.

    Do louvre roofs keep the rain out?

    A quality louvre roof keeps you dry in light to moderate rain when the blades are closed, because the blades seal against each other and channel water into the frame's built-in gutters. In heavy, wind-driven Auckland rain some spray can still get in around open sides, which is where screening blinds help. Ask the supplier how the system drains and whether the gutters connect to your stormwater.

    What is the best louvre roof material for Auckland's coastal weather?

    Marine-grade aluminium with a quality powder-coat finish and stainless fixings is the baseline near the coast. Salt air off Auckland's harbours pits cheaper aluminium and rusts low-grade fasteners within a few years. Ask specifically what warranty covers the coating, not just the motor, and confirm the fixings are stainless. On exposed sites, also check the system is rated for your wind zone.

    Can I attach a louvre roof to my house or does it have to be freestanding?

    Both are common. Attaching it to the house gives a sheltered flow from indoors out and is popular off a kitchen or living room. Freestanding suits a spot further down the section or where the roofline does not work. Attaching to the dwelling can affect the consent assessment and needs proper flashing so you do not create a leak, so it is worth planning with a builder rather than improvising.

    How long does it take to install a louvre roof?

    The roof itself goes up in a day or two once the structure is ready. The timeline is driven by everything else — a full outdoor-living build with design, any consent, a new base or deck and finishing typically runs 6 to 12 weeks on site, plus lead time for design and consent beforehand. Installing onto an existing, suitable deck is much quicker.

    Does a louvre roof add value to my Auckland home?

    Usable outdoor living is a genuine selling point in Auckland, where indoor-outdoor flow is high on most buyers' lists. A well-built, consented louvre roof that extends the living space tends to help presentation and appeal. Unconsented or poorly built structures can do the opposite, since a buyer's lawyer or building inspector may flag them, so keep your paperwork in order.

    Do I need an electrician for a motorised louvre roof?

    Yes. Wiring a motorised louvre roof is prescribed electrical work under New Zealand's electrical safety rules and must be done by a registered electrician — not a landscaper and not the homeowner. This covers the supply to the motor and any integrated lighting or heaters. Building the electrical into the plan from the start keeps it tidy and compliant rather than an awkward add-on later.


    Further Resources for your outdoor renovation

    1. Featured projects and Client stories to see specifications on some of the projects.
    2. Real client stories from Auckland

    Need more information?

    Take advantage of our FREE Complete Home Renovation Guide (48 pages), whether you’re already renovating or in the process of deciding to renovate, it’s not an easy process, this guide which includes a free 100+ point check list – will help you avoid costly mistakes.

    Download Free Renovation Guide (PDF)


    Long Term Finance badge offering 18 months interest free

    Have you been putting off getting renovations done?

    We have partnered with Q Mastercard ® to provide you an 18 Month Interest-Free Payment Option, you can enjoy your new home now and stress less.

    Learn More about Interest-Free Payment Options*

    *Lending criteria, fees, terms and conditions apply. Mastercard is a registered trademark and the circles design is a trademark of Mastercard International Incorporated.


    Still have questions unanswered?

    Book a no-obligation consultation with the team at Superior Renovations, we’d love to meet you to discuss your renovation ideas!

      Services

      Home RenovationKitchen RenovationBathroom RenovationOutdoor RenovationHouse ExtensionCommercialDesign ServicesOther

      By submitting this form, you agree to receive communications from us via email or text regarding our services, you can unsubscribe at any time.

      This site is protected by reCAPTCHA and the Google

      Privacy Policy and Terms of Service apply.


      References

      1. Building Performance (MBIE) — Exempt building work: 6.5 Pergolas
      2. Building Performance (MBIE) — Porches and verandas up to 20 square metres
      3. Building Performance (MBIE) — Porches and verandas between 20 and 30m² (Licensed Building Practitioner)
      4. Building Act 2004, Schedule 1 — Building work for which building consent not required
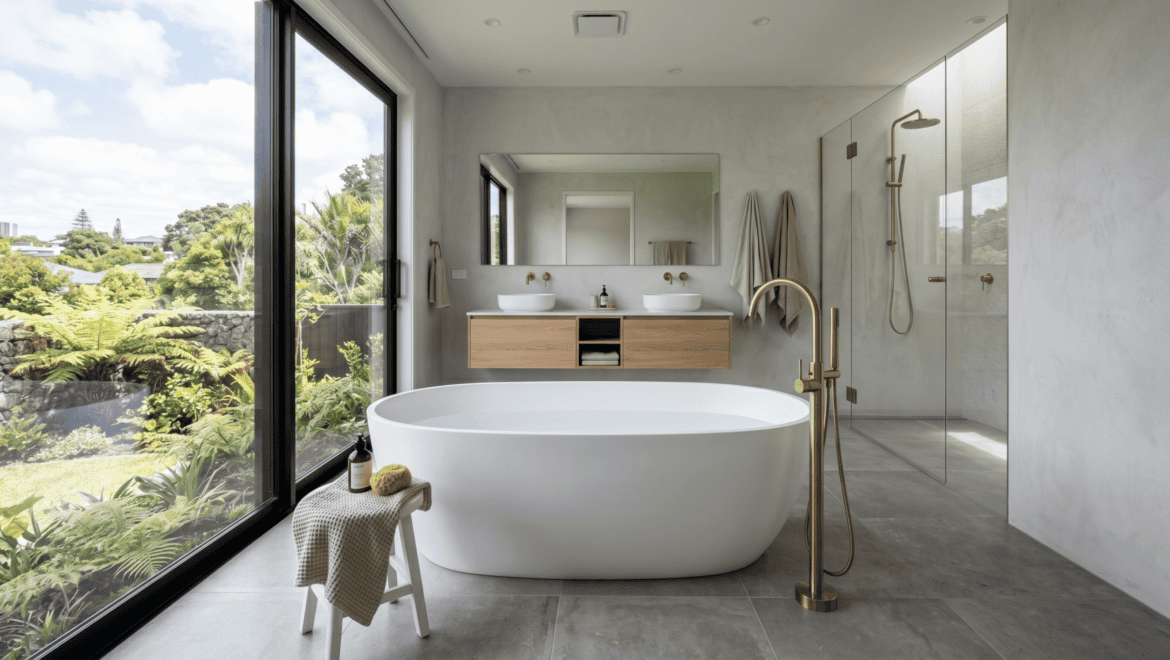
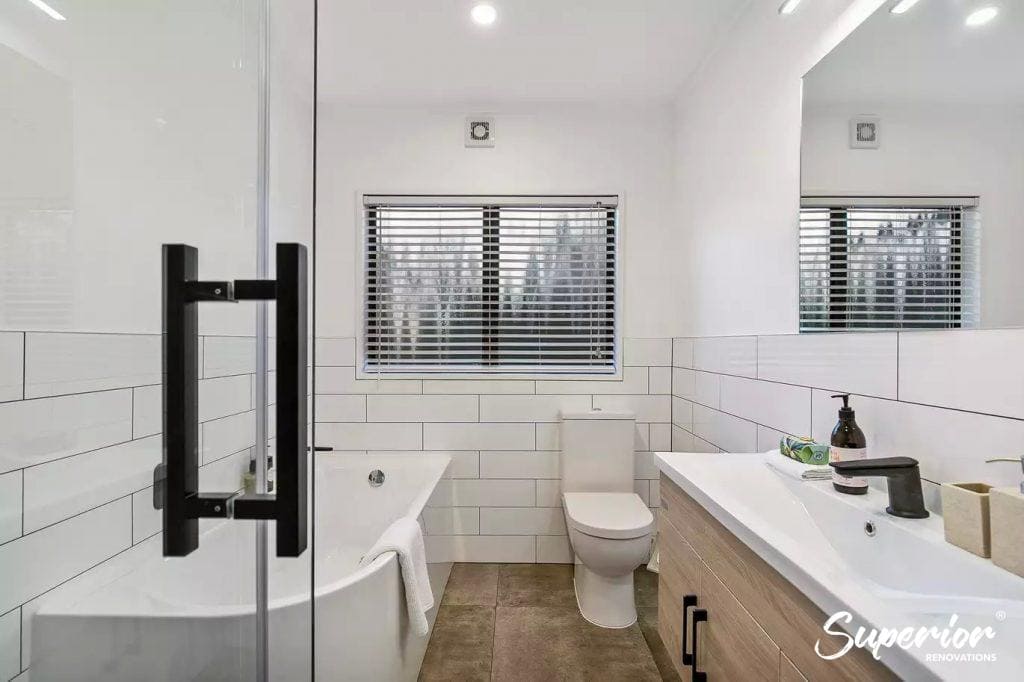
      freestanding bath in bathroom - Superior Renovations
      House Renovation

      Renovate or Rebuild? Auckland Cost & Consent Guide

      Renovate or Rebuild? The Real Cost and Consent Trade-Off for Auckland Homes

      Free cost calculator

      How much will your renovation cost?

      Get an instant Auckland price range for your project — no details required to see it.

      Try our free cost calculators →

      Quick answer: Whether to renovate or rebuild in Auckland comes down to totals, not rates — renovation runs $2,000–$4,500 per m² on only the areas needing work, while a rebuild pays for every square metre plus demolition, consents and a year of rent.

      Right now, Auckland Council’s public register shows additions and alterations being consented every week across Grey Lynn, Herne Bay, Mt Eden, Ponsonby and Devonport — the exact suburbs where owners most often assume their only options are a rebuild or a sale. They’re not. Renovation remains the most common path for character homes in Auckland’s heritage suburbs, and in many cases it’s the only path the Unitary Plan will actually let you take.

      We’ve completed more than 1,000 renovation projects across Auckland since 2018 — around $45.5 million of finished work. That dataset tells us something the generic pros-and-cons articles can’t: the per-square-metre rates for renovating and rebuilding have converged, but the total project costs haven’t. This guide walks through the real numbers, the consent rules that quietly decide the question for you, and an honest framework for when each option wins.

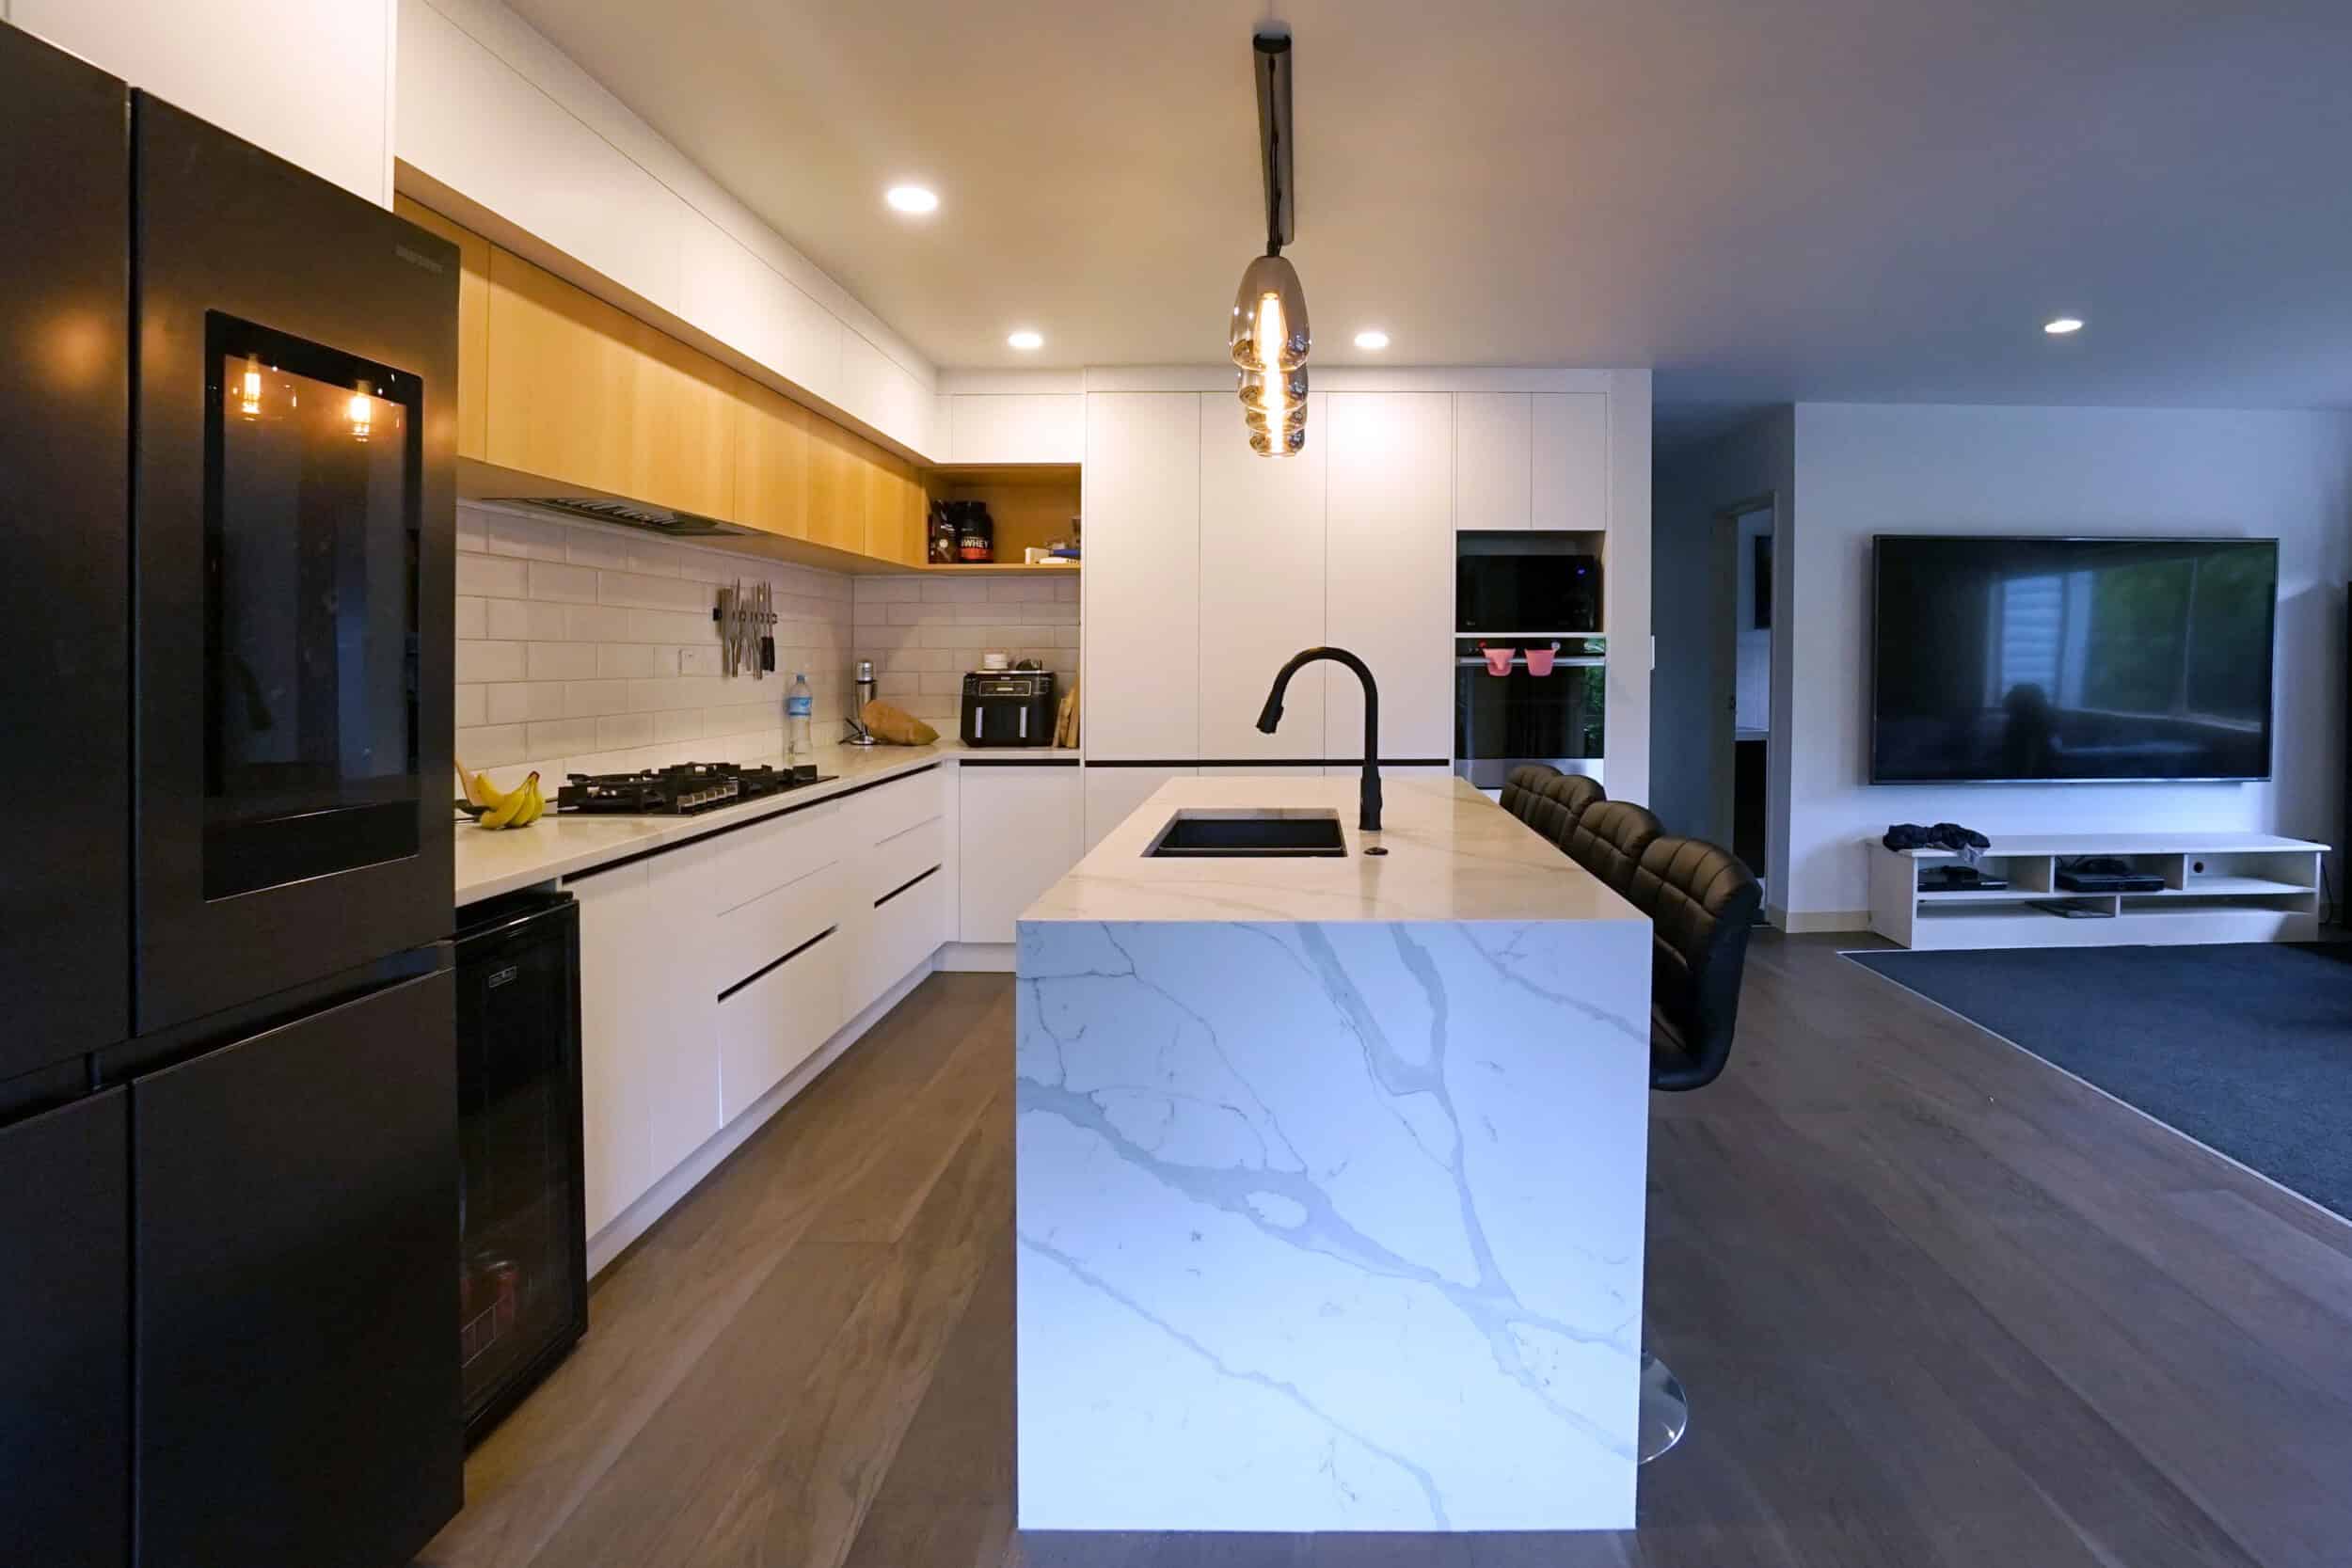
      open-plan kitchen and living area with marble-look island bench and black tapware


      What Renovating Actually Costs vs What Rebuilding Actually Costs

      Here’s the number that surprises most homeowners: per square metre, the gap between renovating and building new is smaller than you’d think. The problem is that per-metre rates hide the three costs that only apply to a rebuild.

      Renovation costs from our completed Auckland projects

      Across our completed projects, full home renovations in Auckland run $2,000–$4,500 per square metre, with mid-range whole-house renovations landing between $80,000 and $160,000. Larger character-home renovations — the villa or bungalow taken back to the framing, re-plumbed, rewired, insulated and reconfigured — commonly land between $200,000 and $500,000 depending on scope and finish level. These are ranges from completed jobs, not quotes; every home prices differently once we’ve seen what’s behind the GIB.

      The renovation advantage isn’t the rate. It’s that you don’t have to renovate all of it. A 220m² Remuera home might only need $180,000 of work concentrated in the kitchen, bathrooms and living areas — the other 120m² of sound bedrooms stays untouched. A rebuild charges you for every square metre whether it needed replacing or not.

      New build costs in 2026

      According to Trade Me Property’s April 2026 building cost guide, a basic new build starts around $2,500 per square metre, the average sits at $3,000–$4,500, and premium homes exceed $5,000. MoneyHub’s analysis of Stats NZ consent data puts the national average at $3,245 per square metre — and notes that external items like driveways, landscaping, earthworks and retaining can add 30–50% on top. Auckland sits at the expensive end of every one of those ranges.

      The three costs only a rebuild carries

      Demolition, full-footprint pricing, and somewhere to live. There’s no honest single figure for demolition. The contractor prices your site on size, access and materials, and fixed charges sit on top. Two of those are published: Vector charges $795 incl GST to permanently disconnect a standard pillar or pit electricity supply ($3,680 where a breach joint is needed), and Watercare charges $682.97 incl GST to disconnect a 15–25mm water meter. If your house went up before 2000, budget for an asbestos survey and removal on top, priced on what’s found. Then there’s accommodation: a knockdown-rebuild typically means 12+ months in a rental while you keep paying your existing mortgage. At Auckland rents, that’s comfortably tens of thousands of dollars that never touch the house itself.

      Cost item Major renovation (200m² home, ~120m² touched) Knockdown rebuild (200m²)
      Construction $240,000–$540,000 (only the areas that need work) $600,000–$900,000 (every square metre)
      Demolition, disconnections + asbestos Not required Contractor’s quote + Vector $795 + Watercare $682.97 + asbestos (pre-2000 homes)
      Site works, consents, externals Included in scope for most interior renovations +20–30% of build cost
      Accommodation during works Often nil — many clients live in through staged work ~12 months’ rent
      Realistic total $240,000–$540,000 $780,000–$1,200,000+

      💡 Quick tip: Before comparing quotes, work out how many square metres actually need work. Owners who count “the whole house” often find only 50–60% of the floor area genuinely needs touching — which changes the renovate-vs-rebuild maths completely.

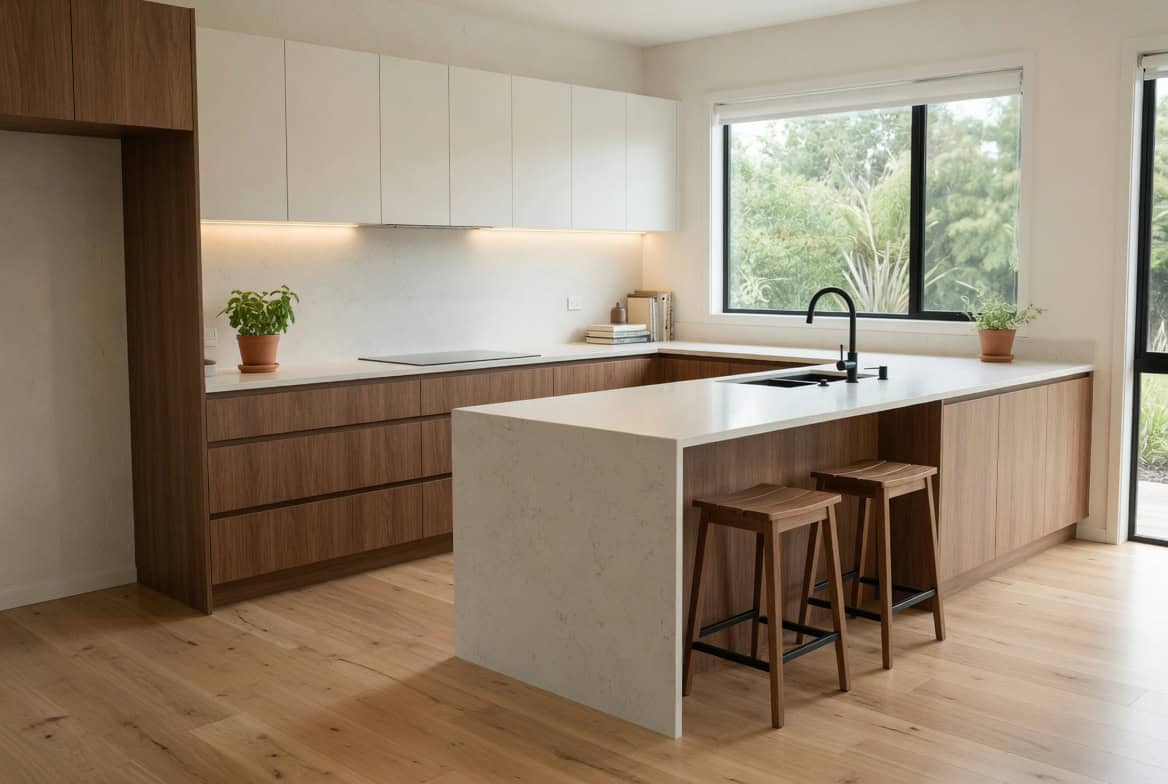
      timber kitchen with white overhead cabinets marble-look island and bar stool seating


      Want to test your own numbers first? You can run your figures through our renovation cost calculators before you talk to anyone.


      The Consent Trade-Off: Where the Council Quietly Makes the Decision for You

      Cost is only half the question. In large parts of Auckland, the consent pathway decides whether rebuilding is even realistic.

      Renovating: usually building consent only

      Most interior renovations — kitchens, bathrooms, reconfigured layouts within the existing envelope — need a building consent from Auckland Council, and some like-for-like work doesn’t even need that. Council must process a complete building consent application within 20 working days under the Building Act, per MBIE’s Building Performance guidance. It’s paperwork, but it’s predictable paperwork.

      Rebuilding: the demolition exemption, and the character-suburb gate

      A knockdown-rebuild needs a building consent to build. Taking the old house down usually doesn’t: Schedule 1 clause 30 of the Building Act exempts the complete demolition of a detached building of no more than three storeys from building consent, provided the work doesn’t breach any other enactment (section 42A). That exemption covers the Building Act only.

      Here’s the part that catches people: if your home sits in a Special Character Area, the Unitary Plan can still require resource consent to demolish. Under the Auckland Unitary Plan’s D18 Special Character Areas Overlay, total demolition, or substantial demolition exceeding 30% of wall elevations and roof area, is a restricted discretionary activity requiring resource consent on sites subject to the demolition control. That control covers the entire Isthmus A area and mapped sites across the other special character areas, and where it applies, council assesses your villa’s contribution to the streetscape before deciding whether it can come down at all.

      Concept plan · the case for renovating
      How much you can change without starting again
      Existing
      Proposed
      Relocated kitchen, rebuilt bathroom with the laundry folded in, a new master with ensuite and walk-in robe. All of it inside the existing external walls. When people ask whether renovating can really get them what they want, this is the honest answer to look at. Concept plans by Sonder Architecture. Concept only, not consent documentation.

      If your villa or bungalow sits inside a Special Character Area — and much of the pre-1940 housing stock in Grey Lynn, Ponsonby, Mt Eden, Herne Bay and Devonport does — the honest starting assumption is that demolition consent will be slow, expensive and uncertain, while a sympathetic renovation is the path the plan is designed to approve. Our group’s architectural studio has written a detailed guide to Auckland’s heritage and special character overlays if you want the full rulebook.

      And renovation activity in these suburbs isn’t theoretical. Auckland Council’s register of recent resource consent applications — updated weekly, covering the past 26 weeks — consistently shows additions and alterations to existing homes being lodged across the character suburbs. One note of honesty: lodgements aren’t approvals, and a resource consent isn’t a building consent. But the pattern is clear enough — owners in Auckland’s most protected suburbs are choosing to renovate, and the consenting system is set up to let them.

      “The first thing I check isn’t the kitchen or the bathrooms — it’s whether the fundamentals are right. If the entrance works, the living areas get sun, and the framing is sound, that home has earned the right to stay. You can fix a dated interior. You can’t buy back a demolished villa.”
      — Dorothy Li, Design Manager, Superior Renovations

      Converted Garage to Space

      Garage Conversion Auckland

      💡 Quick tip: Check whether your property sits in a Special Character Area before you spend a dollar on concept designs — Auckland Council’s GeoMaps shows the overlay for free, and it changes which options are actually on the table.


      When to Renovate or Rebuild: An Honest Framework From 1,000+ Projects

      We renovate homes for a living, so you’d expect us to tell you to renovate. We won’t — not every time. After a thousand-plus projects, the pattern is clear enough to state as a framework.

      Renovation wins when

      The structure is sound, you’re keeping most of the footprint, and character or location is part of the value. That covers the classic Auckland cases: the Grey Lynn villa with good bones and a terrible 1980s kitchen; the Mt Eden bungalow that needs insulation, rewiring and an opened-up living area; the 1970s brick-and-tile in Henderson where the layout is wrong but the shell is honest. Renovation also wins when you need to stay in the home — plenty of our clients live in through staged work, the way a family in St Heliers did during their four-level renovation. And it wins financially when less than about two-thirds of the floor area needs touching.

      Rebuilding wins when

      The structure itself is the problem. Failed foundations, widespread untreated framing rot, a monolithic-clad leaky home from the 1994–2004 era where the damage has gone past what recladding and targeted repair can economically fix, or a site where the existing house blocks the only good use of the land. It can also win when you’d be replacing more than 80–90% of the home anyway — at that point you’re paying renovation complexity for new-build scope, which is the worst of both. If that’s your situation, you’ll need an architect and a new-build contract, and the right move is a feasibility assessment before anything else — not a renovation quote from us, and not a rebuild sales pitch from anyone.

      The trap in the middle

      The expensive mistake isn’t picking the wrong side — it’s drifting between them. A renovation scoped optimistically, hit by surprises behind the cladding, stretched by mid-project changes of mind, can quietly climb to new-build money without delivering a new-build result. The defence is boring and effective: invasive pre-purchase-style inspection before you commit, a fixed scope, and a contingency you don’t touch for upgrades.

      “I tell clients to decide their walk-away number before we open a single wall. If the invasive inspection pushes the renovation past that number, rebuilding or selling deserves a genuine look — deciding that at the start costs nothing, deciding it halfway through costs tens of thousands.”
      — Cici Zuo, Head of Sales (NZ Dip. Interior Design), Superior Renovations

      warm looking bathroom

      Bathroom Designs

      Important note: Cost ranges in this article come from our completed projects and published NZ sources. They’re a planning guide, not a quote — site conditions, scope and finish level move every number, in both directions.

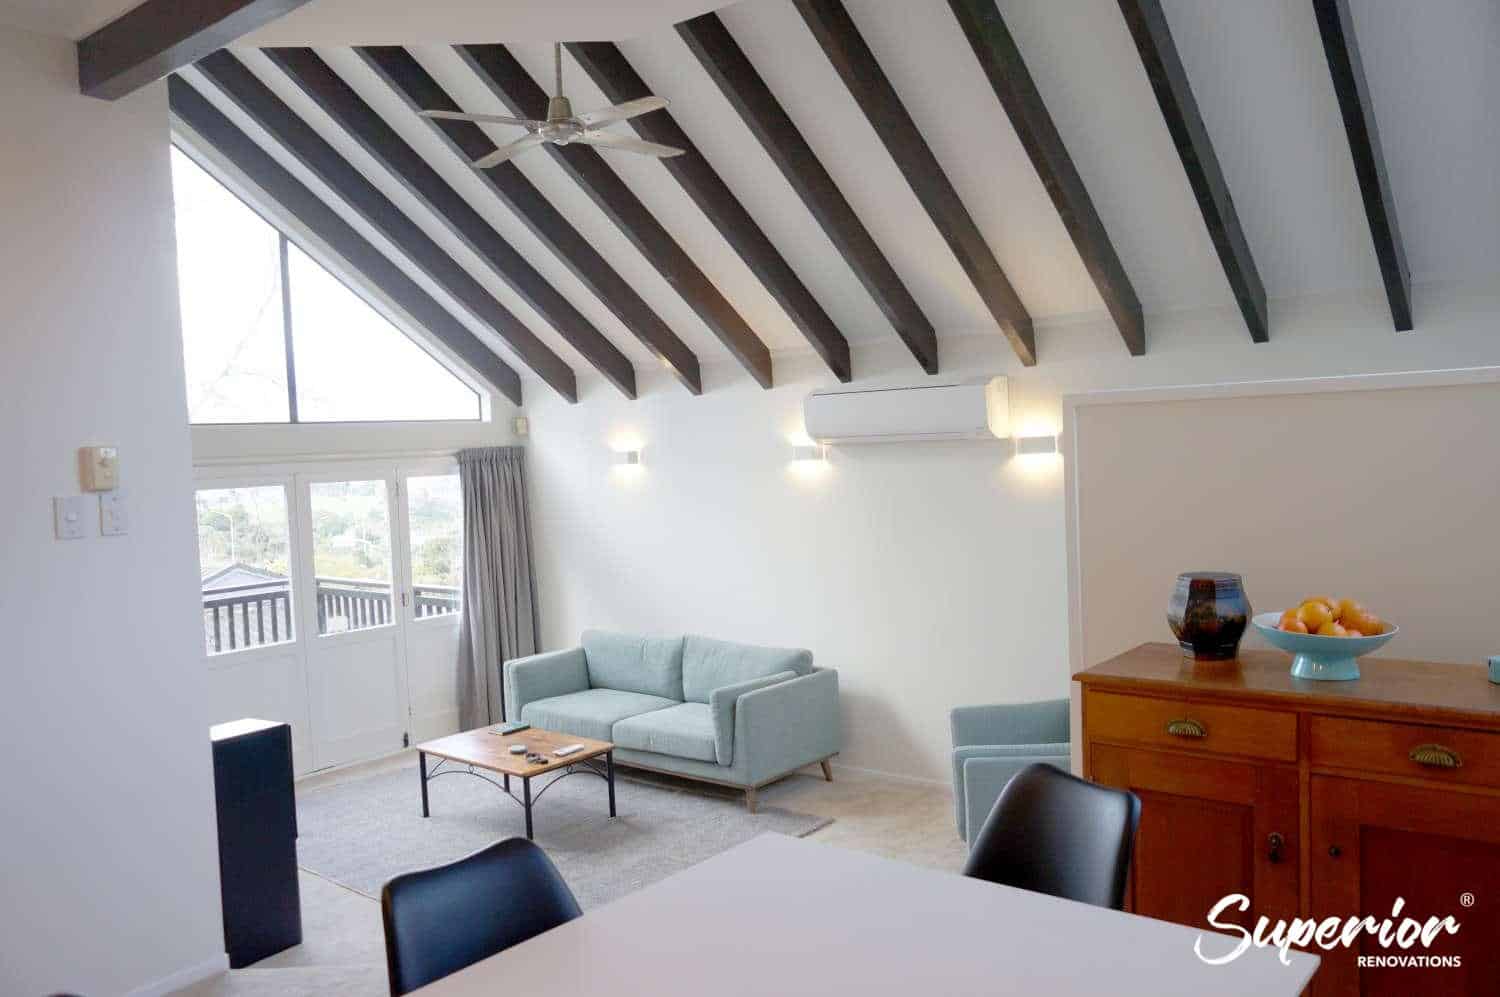
      Renovated open-plan living and dining under a raked beamed ceiling with a ceiling fan and a teal sofa

      Open-plan living and dining under a raked beamed ceiling in Hillsborough. The beams and the roof line are original. Keeping a structure that is worth keeping, and spending the money on what sits under it, is the argument for renovating over starting again.


      Want a ballpark for your renovation?
      See the calculators →

      The Character Home Question: What a Rebuild Can Never Give Back

      Sound familiar? You love the street, the neighbours, the school zone — it’s the house that doesn’t work. That’s the situation where the renovate-or-rebuild question gets emotional, and where the maths needs one more input: the things you can’t rebuild.

      Character has a market value, not just a sentimental one

      Native timber floors, high studs, original joinery, a villa frontage on a tree-lined Ponsonby street — replicating those features in a new build is either impossible or eye-wateringly expensive. When we renovated a historic Epsom bungalow, the brief was exactly this balance: modern kitchen and bathrooms inside a character shell the owners had no intention of losing. You can see how that lands in practice in our historic Epsom bungalow renovation.

      We’ve also had clients run the full renovate-or-go question with us. A Hillsborough family weighing whether to renovate or sell put the numbers side by side and chose a full home renovation in Hillsborough — kitchen, bathroom, the lot — rather than paying agent’s fees, moving costs and a premium for someone else’s finished house. The same logic applies against a rebuild: every dollar that doesn’t go into demolition, rent and full-footprint construction is a dollar that goes into the parts of the home you actually live in.

      acrylic shower

      💡 Quick tip: Before pricing anything, pull recent sale prices for renovated homes on your own street from homes.co.nz — that’s your realistic value ceiling, and it should shape your renovation budget before any design work starts.

      The overcapitalisation guardrail

      The honest limit runs the other way too. If your renovation budget pushes the total invested well past what comparable homes on your street sell for, you’re gifting money to the next owner. A useful rule: keep the renovation spend inside 10–20% of the home’s current value unless you’re planning to stay 10+ years — at which point you’re buying lifestyle, and that’s a legitimate purchase. This is where our design-and-build approach to major home renovations starts every project with a feasibility conversation rather than a quote — at our Wairau Valley showroom (16B Link Drive) or in your home: scope, value ceiling and consent pathway first, drawings second.

      Have you been putting the decision off because both paths feel enormous? That’s normal. The fix isn’t more browsing — it’s real numbers for your specific house.


      Renovate or Rebuild? Making the Call on Your Own Home

      So, should you renovate or rebuild? For most structurally sound Auckland homes — and especially anything pre-1940 in a character suburb — renovation delivers the result at a genuinely lower total cost, through a faster and more predictable consent path, without a year in a rental. Rebuilding earns its place when the structure has failed or you’d be replacing nearly everything anyway. The one unforgivable move is deciding on gut feel: get the invasive inspection, check the overlay, set the walk-away number, then commit properly to whichever side wins.

      We’ve put 1,000+ Auckland projects’ worth of that thinking into a free feasibility process — bring us the house, we’ll bring the numbers.

      ➡ Book your free in-home consultation with Superior Renovations
      ➡ See how we manage major renovations from design through to build
      ➡ Request a free feasibility report for your project


      Is it cheaper to renovate or rebuild a house in NZ?

      Usually renovating — but not because of the per-metre rate. Renovation in Auckland runs $2,000–$4,500 per square metre against $3,000–$4,500+ for a new build, and the rates overlap. The real saving is that a renovation only pays for the areas needing work, while a rebuild pays for every square metre plus demolition and service disconnections, 20–30% in site and consent extras, and around a year of rental accommodation.

      How much does it cost to renovate a whole house in Auckland?

      Based on Superior Renovations' completed projects, mid-range full home renovations in Auckland land between $80,000 and $160,000, or $2,000–$4,500 per square metre. Larger character-home renovations — full reconfiguration, rewiring, replumbing and insulation — commonly run $200,000–$500,000 depending on scope and finish. These are ranges from finished jobs, not quotes; an on-site assessment prices your specific home.

      How much does it cost to rebuild a house in Auckland?

      Trade Me Property's 2026 guide puts average new-build rates at $3,000–$4,500 per square metre, with premium builds over $5,000. A 200m² rebuild is realistically $600,000–$900,000 in construction, plus demolition (the contractor's quote, plus Vector's $795 and Watercare's $682.97 disconnection charges), plus 20–30% for site works, consents and externals, plus accommodation during the 12+ month build — commonly $780,000 to well over $1 million all-up.

      Do I need resource consent to demolish my house in Auckland?

      If your home sits in a Special Character Area under the Auckland Unitary Plan's D18 overlay, yes in most cases — total demolition, or substantial demolition exceeding 30% of wall elevations and roof area, is a restricted discretionary activity requiring resource consent on sites subject to the demolition control. That control covers all of Isthmus A and mapped sites in the other special character areas. Outside these overlays, the complete demolition of a detached house of up to three storeys doesn't need a building consent: Schedule 1 clause 30 of the Building Act exempts it, provided the work breaches no other enactment. Check Auckland Council GeoMaps to confirm what applies to your property.

      Can I renovate a house in a special character area in Auckland?

      Yes — sympathetic renovation is the pathway the Special Character Areas Overlay is designed to enable. Interior renovations generally need only building consent, while external additions and alterations may need resource consent depending on the zone. Auckland Council's public register shows additions and alterations being lodged consistently across Grey Lynn, Ponsonby, Mt Eden, Herne Bay and Devonport.

      How long does a building consent take in Auckland?

      Auckland Council must process a complete building consent application within 20 working days under the Building Act, per MBIE's Building Performance guidance. The clock stops if council requests further information, so well-prepared documentation matters. A knockdown-rebuild adds service disconnections, an asbestos survey on pre-2000 homes and, in character areas, a resource consent to demolish, which can extend the pre-construction phase by months.

      What does it cost to demolish a house in NZ?

      There's no honest single figure: the contractor prices each site on size, access and materials. The fixed charges are published. In Auckland, Vector charges $795 incl GST to permanently disconnect a pillar or pit electricity supply ($3,680 for a breach joint), and Watercare charges $682.97 incl GST to disconnect a 15–25mm water meter at 2026/27 prices. Homes built before 2000 need an asbestos survey, with removal priced on what's found. A detached house of up to three storeys needs no building consent to demolish, but a Special Character Area can trigger resource consent.

      Should I renovate or sell my Auckland home?

      Run both sets of numbers honestly. Selling costs include agent commission, marketing, moving, and buying someone else's finished home at a premium. Renovating keeps you in your location and school zone and directs the spend into your own asset — one of our Hillsborough clients ran exactly this comparison and chose a full home renovation. The renovation case weakens if the spend would push you well past your street's value ceiling.

      Is it worth renovating a villa or character home in Auckland?

      Often, yes — character features like native timber, high studs and original joinery are expensive or impossible to replicate in a new build, and demolition consent in character suburbs is uncertain at best. If the framing and foundations are sound, renovation typically delivers better value than fighting the overlay for a rebuild. An invasive inspection settles the structural question before you commit either way.

      How do I avoid a renovation costing as much as a rebuild?

      Three defences: commission an invasive inspection before committing so surprises surface on paper rather than mid-build; lock a fixed scope and resist mid-project upgrades; and set a walk-away number in advance — if the inspected cost passes it, rebuilding or selling deserves a genuine comparison. Renovations drift to new-build money through optimistic scoping and accumulated changes, not bad luck.


      Further Resources for your home renovation

      1. Featured projects and Client stories to see specifications on some of the projects.
      2. Real client stories from Auckland

      Need more information?

      Take advantage of our FREE Complete Home Renovation Guide (48 pages), whether you’re already renovating or in the process of deciding to renovate, it’s not an easy process, this guide which includes a free 100+ point check list – will help you avoid costly mistakes.

      Download Free Renovation Guide (PDF)


      18 months 0 percent interest long term finance badge

      Have you been putting off getting renovations done?

      We have partnered with Q Mastercard ® to provide you an 18 Month Interest-Free Payment Option, you can enjoy your new home now and stress less.

      Learn More about Interest-Free Payment Options*

      *Lending criteria, fees, terms and conditions apply. Mastercard is a registered trademark and the circles design is a trademark of Mastercard International Incorporated.


      Still have questions unanswered?

      Book a no-obligation consultation with the team at Superior Renovations, we’d love to meet you to discuss your renovation ideas!

        Services

        Home RenovationKitchen RenovationBathroom RenovationOutdoor RenovationHouse ExtensionCommercialDesign ServicesOther

        By submitting this form, you agree to receive communications from us via email or text regarding our services, you can unsubscribe at any time.

        This site is protected by reCAPTCHA and the Google

        Privacy Policy and Terms of Service apply.


        References

        1. Trade Me Property — Building cost per square metre in NZ (2026)
        2. MoneyHub NZ — What’s the Average Building Cost Per Square Metre?
        3. Building Act 2004 — Schedule 1, clause 30: Demolition of detached building
        4. Building Act 2004 — Section 42A: Building work for which building consent is not required
        5. Vector — Permanent electricity disconnection fees (from 22 April 2026)
        6. Watercare — 2026/2027 infrastructure growth and other charges
        7. Auckland Unitary Plan — D18 Special Character Areas Overlay (Residential and Business)
        8. Auckland Council — Recent resource consent applications
        9. MBIE Building Performance — Building consent process
        open plan kitchen, kitchen layout, kitchen design
        Kitchen Renovation

        翻新一个厨房需要花费多少钱?新西兰费用指南 — Superior Renovations

        在新西兰,通过装修公司完成一次标准的整体厨房翻新,平均费用为 19,000 至 29,000 纽币(含材料、设计、项目管理、人工、水电,不含电器)。选择 DIY 可能省钱,但如果没有受过专业训练,返工和隐患的风险也随之而来。翻新厨房的最终费用取决于很多因素——而翻新的目的,是决定预算的最主要因素。

        如果翻新只是为了出售房屋,我们建议使用中档标准的材料,不需要太多定制。但如果是为了提升舒适度和功能性、自己长期使用,我们会建议选择更高品质的产品——这样您能更长久地享受新厨房。

        这份指南罗列了所有可能影响厨房翻新总成本的因素。无论您打算 DIY 还是做高端定制翻新,它都能在您动工前的研究阶段派上用场。

        想直接获得自己厨房的估算?使用我们免费的厨房装修费用计算器——输入您的具体需求,结果几秒内发送到邮箱。


        扫描二维码,在小红书上找到我们

        Superior Renovations 小红书二维码

        体验家居改造的艺术,选择 Superior Renovations!我们是奥克兰首屈一指的浴室、厨房及全屋装修专家。从概念设计到完工,我们的团队确保每个细节都完美无缺。扫描二维码,在小红书上关注我们,获取最新项目、装修技巧和灵感。

        扫描二维码,通过微信联系我们

        Superior Renovations 微信二维码

        想开始您的装修之旅吗?通过微信与 Superior Renovations 联系,享受便捷、个性化的中文服务。立即扫描,提问、获取专家建议,踏出家居改造的第一步!


        本文目录

        1. 厨房翻新的平均费用是多少?
        2. 厨房翻新的预算分配明细
        3. 基础、中档与高端厨房的费用区间
        4. 小型厨房的翻新费用
        5. 大型厨房的翻新费用
        6. 各分项费用:橱柜、电器、台面、防溅板、地板
        7. 聘请厨房设计师的费用
        8. 人工费用:水管、电工、油漆、瓷砖与建筑许可
        9. 如何在预算内完成厨房翻新
        10. 厨房翻新的投资回报
        11. 翻新前后的实用建议
        12. 如何在奥克兰选对装修公司
        13. 特色案例:基础、中档与高端厨房

        1. 翻新一个厨房的平均费用是多少?

        在奥克兰,标准整体厨房翻新的平均费用为 19,000 至 29,000 纽币,包含材料、设计、项目管理、人工、管道和电气工程,不含电器。最终花费取决于橱柜、电器、台面和材料的选择、人工,以及是否需要改动布局。

        区间的两端差距很大:小型工程(更换橱柜门、表面重新喷漆、换防溅板)可能只需几千纽币;而涉及布局改动或厨房面积变化的完整定制翻新——定制橱柜、新台面、新地板、新防溅板、新灯具和全套新电器——费用通常从 41,000 纽币起。

        返回顶部 ↑


        2. 厨房翻新的预算分配明细

        翻新厨房的花费取决于您想在厨房里加入什么。下表展示了一个典型整体厨房翻新中,各个项目在总预算中的大致占比——它能帮您理解钱主要花在哪里,并据此分配自己的预算:

        项目 预算占比
        橱柜 约 28%
        安装与人工 约 18%
        家用电器 约 15%
        台面与防溅板 约 11%
        地板 约 7%
        灯具 约 5%
        油漆 约 5%
        窗户与门 约 4%
        设计师 约 3%
        管道工程 约 3%
        其他 约 1%

        橱柜是单项占比最大的开支(接近三分之一),其次是安装人工和电器——这三项加起来通常超过总预算的 60%。控制预算时,优先从这三项入手最有效。

        返回顶部 ↑


        3. 基础、中档与高端厨房的费用区间

        在确定档次之前,先问自己几个问题:

        1. 在现有空间里,您明确想实现什么?
        2. 您想从这次翻新中获得什么?
        3. 哪些部分要翻新?哪些部分保留不动?
        4. 您想为新厨房增加什么功能?
        5. 保持原有布局,还是做出改变?
        6. 您想要什么风格?
        7. 最后——您愿意为理想的厨房投入多少预算?

        如果翻新是为了出售房屋,业内的一般建议是:厨房翻新的投入控制在房屋价值的 5% 至 15% 以内。

        三个档次的费用与包含内容

        基础翻新 中档整体翻新(最常见) 高端定制翻新
        最高约 $20,700 $19,000 – $29,000 $41,000 起
        • 不改变布局
        • 修复并重新喷涂现有橱柜门
        • 小型/中档橱柜可选择更换
        • 现代化台面(层压板)
        • 复合地板
        • 更新灯具
        • 可含 DIY 成分
        • 可能涉及布局调整
        • 定制橱柜与柜门(喷漆)
        • 储物空间整理、内置垃圾桶橱柜
        • 定制食品柜与拉出式抽屉
        • 人造石、大理石、石英或玻璃台面
        • 瓷砖地板、设计款防溅板
        • 智能厨房功能、新电器
        • 含设计、项目管理与全部工种
        • 较大的布局改动
        • 新管道、重新布线
        • 大理石/实木地板或定制瓷砖设计
        • 全套新电器(含高端品牌)
        • 天然石材或混凝土台面
        • 现代化灯具、智能厨房功能
        • 转角设计与定制收纳系统
        • 从设计到完工的一条龙服务
        Hillsborough 基础厨房翻新 — Superior Renovations

        Hillsborough 的基础厨房翻新

        West Harbour 中档厨房翻新 — Superior Renovations

        West Harbour 的中档厨房

        Massey 中档厨房翻新 — Superior Renovations

        Massey 中档厨房翻新

        Stanmore Bay 中高档厨房翻新 — Superior Renovations

        Stanmore Bay 的中高档厨房

        这只是帮您建立框架的一般指南——实际上大多数客户并不会严格落在某一个档次里,而是从三个档次中各取所需,组合出专属于自己的厨房。

        注意:改变布局会产生额外费用。原因是改动区域需要新增管道和重新布线,而这些工程需要奥克兰市议会的建筑许可——许可涉及绘图、文件准备和验收,详见下文人工费用与许可部分。

        💡 省钱小妙招:修复厨房的橱柜和柜门,尝试抛光、翻新现有台面,而不是直接买新的。

        返回顶部 ↑


        4. 在新西兰,翻新一个小型厨房要花多少钱?

        小厨房翻新最常见的诉求是”更多储物空间”。好消息是,不需要新建柜体也能大幅提升收纳:

        1. 在现有橱柜内加装收纳装置——推拉篮、香料抽屉、餐具和碗盘抽屉,甚至墙角柜,都能在不扩建的前提下提供所需的储物空间。
        2. 在现有橱柜里安装储物抽屉,腾出更多备餐空间。
        3. 把台面空间最大化——选择现代单水槽而非双水槽,选 4 头炉灶而非更大的炉具。省下的台面就是备餐区,省下的钱可以投到您更在意的地方。

        延伸阅读:新西兰小型厨房设计理念指南

        动工之前,找专业的装修公司和设计师咨询总是值得的。他们会帮您兼顾功能与美感,推荐最适合您家庭的方案,并制作 3D 模型和效果图——材料、纹理、固定装置一目了然,您在开工前就能看到完工后的样子。

        Greenlane 小型厨房翻新 — Superior Renovations Greenlane 开放式小厨房 — Superior Renovations

        上图的小型厨房翻新位于奥克兰 Greenlane。Joanna 和 Steve 的老式封闭厨房需要升级——我们拆除了一面墙使其变为开放式,并选用中性色调主题,让厨房更通透明亮。查看 Joanna 和 Steve 的完整项目细节 + 前后对比图

        按面积参考:约 7 至 9 平方米的小厨房,翻新费用大致在 20,700 至 47,400 纽币之间;约 13 平方米(小厨房的常见平均尺寸),费用约为 27,600 至 62,100 纽币。

        返回顶部 ↑


        5. 在新西兰翻新一个大型厨房需要花费多少钱?

        大型厨房翻新(18 平方米及以上)的费用约为 62,000 至 138,000 纽币。这通常包括大量工程:双套电器、双岛台、餐具室(butler’s pantry)以及布局改动。

        Stanmore Bay 厨房翻新前 — Superior Renovations

        翻新之前

        Stanmore Bay 开放式大厨房翻新后 — Superior Renovations

        翻新之后

        项目详述(如上图):Mary Stuart 之前的厨房又旧又封闭。我们拆除了分隔厨房和客厅的墙,打造了一个乡村风格的大型开放式厨房。查看完整项目 + 前后对比

        💡 关于项目管理:管理一次厨房翻新,意味着要协调橱柜木工、产品供应商、地板安装、电工、水管工、油漆工、抹灰工、设计师和安装工——协调时间表、解决冲突。大多数人没有时间高效地管理这一切,所以更愿意选择能统筹整个项目的装修公司:这类公司提供全部工种和设计师,以批发价供应材料和电器,并由项目经理协调供应商交货、管理各工种,确保装修按期完成。

        奥克兰大型厨房翻新 — Superior Renovations

        Avondale 大型厨房翻新 — Superior Renovations

        这个位于 Avondale 的厨房,从一个破旧不堪的老厨房翻新成了现代化的宽敞厨房。

        查看更多厨房改造前后对比与项目详述

        返回顶部 ↑


        6. 各分项的费用:橱柜、电器、台面、防溅板与地板

        以下分项价格为一般参考区间,实际报价以现场评估和产品选择为准:

        翻新服务 平均费用(纽币)
        电气布线 $3,450 – $6,624
        水管设施 $4,140 – $8,280
        设计咨询 $552 – $4,830
        橱柜 $4,140 – $11,040
        家用电器 $3,450 – $12,420
        地板 $1,518 – $7,590
        重修橱柜表面 $1,518 – $12,420
        修复台面 $110 – $2,208
        全新台面 $1,242 – $6,900
        防溅板 $552 – $828
        喷漆 $1,380 – $3,450
        五金配件 $207 – $1,656

        厨房橱柜

        橱柜是厨房的门面,也是预算中占比最大的单项。整体橱柜的平均花费在 4,140 至 11,040 纽币之间:

        • 基础方案:保留原有柜体,只更换柜门或铰链,或重新刷漆——成本最低。
        • 中档方案:通过装修公司用中档产品定制橱柜。我们的大多数中档厨房采用 MDF Melteca 定制柜体和柜门。
        • 高端方案:预算充裕时选用更高端的定制材料,价格相应大幅提高。
        Epsom Melteca 定制橱柜 — Superior Renovations

        Melteca 定制橱柜(Epsom)

        Melteca 橡木纹橱柜 — Superior Renovations

        Melteca 橡木纹橱柜

        查看 Epsom 厨房改造的完整项目规格(见上图)

        橱柜翻新的两种经济方案

        都想要全定制厨房,但预算不一定允许。两种更经济的方式可以达到接近的效果:

        1. 表面抛光重涂:去除现有橱柜的旧漆并重新上漆。务必交给受过培训的专业人员处理,才能保证理想且持久的效果。费用约 2,070 至 4,120 纽币。
        2. 更换柜门(refacing):沿用现有柜体,只更换全部柜门——借此机会自由选择材料、颜色和设计。费用约 4,830 至 12,420 纽币。
        3. 更换五金件:严格说不算翻新方案,但更换抽屉和柜门的把手、旋钮,是花小钱改观感的最快方式——单件价格从几纽币到几十纽币不等。

        延伸阅读:整理厨房橱柜、抽屉和食品柜的实用方法

        厨房电器

        装修公司通常建议换装高质量的新电器——它能提升整个厨房乃至房屋的品质感。但电器很容易推高预算,因此不少业主选择保留仍能正常工作的旧电器:

        • 沿用旧电器:微波炉、烤箱等基础电器寿命很长。如果工作状态良好,继续使用即可,能省下数百到上千纽币。
        • 能源之星级电器:价格高于基础款,但能降低能耗开支、延长使用寿命、提升房屋的节能价值——长期看更省钱。入门价格参考:微波炉约 $414 起、洗碗机约 $1,200 起、烤箱约 $1,150 起、冰箱约 $1,500 起。
        • 高端智能电器:在节能基础上增加蓝牙、感应等现代功能,单件约 $1,380 至 $6,900。
        • 嵌入式定制电器:最昂贵的选项,需要按厨房设计嵌入安装,约 $2,070 至 $13,800——但整体效果最统一、最吸引人。

        厨房台面

        客户最常问的问题之一就是怎么选台面——市面上材料和价位的选择太多了。核心标准是:功能性强、耐磨、防水。

        人造石工程台面 — Superior Renovations

        Mary 厨房中的定制石材工程台面。我们让这种人造石呈现出带花纹花岗岩的光泽质感——图案名为”秋叶”,黄色和芥末色的底色与深色橱柜搭配得恰到好处。

        预算有限时,层压板或人造石台面是实惠之选——人造石(工程石)可以做出大理石或花岗岩的外观,适合基础和中档厨房,总费用约 2,760 至 6,210 纽币。预算充裕则可选天然石材(大理石、花岗岩),约 4,000 至 7,000 纽币起;追求现代豪华感的混凝土台面价格在 9,000 至 20,000 纽币之间。

        各类台面材料的每平方米参考价:

        台面材料 每平方米费用(纽币)
        瓷砖 $77 – $153
        亚克力 $30 – $416
        胶木 $230 – $460
        层压板 $383 – $613
        竹制台面 $383 – $920
        人造石 $498 – $924
        碎石板 $613 – $920
        可丽耐®(人造大理石) $613 – $920
        混凝土 $613 – $1,227
        皂石 $613 – $1,303
        大理石 $613 – $1,533
        凯撒石(人造石) $613 – $1,533
        纸纹石 $613 – $1,533
        花岗岩 $767 – $1,533
        水磨石 $767 – $1,533
        石英 $767 – $1,533
        缟玛瑙 $767 – $3,067
        石灰岩 $997 – $2,300
        玻璃 $1,227 – $1,533
        铜 $1,533 – $1,993

        💡 省钱小妙招:想在台面上省钱,可以继续使用现有台面,只对损坏处做修复。专业的台面修复服务费用约 110 至 2,208 纽币。

        厨房防溅板

        防溅板是厨房清洁的关键——安装在灶台后方的墙面,减少油污附着。常用易清洁的材料:玻璃、灌浆线较少的大块瓷砖,或人造石。

        Parnell 厨房防溅板 — Superior Renovations

        Parnell 的厨房翻新

        Bucklands Beach 厨房防溅板 — Superior Renovations

        Bucklands Beach 的厨房翻新

        项目规格:Parnell 的厨房装修(左上图) | Bucklands Beach 的厨房装修(右上图)

        预算有限时,陶瓷砖是最经济也最受欢迎的防溅板选择,约 153 纽币/平方米;另一个选项是不锈钢防溅板,约 383 纽币/平方米。

        厨房地板

        厨房地板承受的磨损远超其他房间,选材必须易清洁、不沾污、耐液体。购买前确认四点:耐用、耐磨、防水、脚感舒适。

        Bucklands Beach 木纹瓷砖厨房地板 — Superior Renovations

        Bucklands Beach 的厨房改造:安装了模仿硬木的瓷砖——易于维护,也是经济有效的选择

        查看以上厨房的完整项目规格

        • 复合木地板:外观和脚感都接近真木地板,但属于人造材料——奥克兰最流行、性价比最高的选择,约 2,070 至 5,520 纽币,易清洁、经久耐用。
        • 瓷砖:易维护的另一个好选择。如今的瓷砖工艺可以做出看起来、摸起来都像木材的效果——拥有木纹的颜值,免去天然木材难打理的麻烦。
        • 石基地板(高端选择):如 Tile Depot 的石基地板——终身保修、100% 防水、易维护、兼容地暖、抗阳光老化,平均约 1,380 至 4,830 纽币。
        地板选择 平均费用(纽币)
        瓷砖 $690 – $3,036
        木地板 $3,036 – $6,900
        混凝土地板 $2,070 – $9,522
        软木地板 $1,104 – $2,208
        复合地板 $2,070 – $5,520
        亚麻地板 $1,380 – $3,450
        板岩地板 $2,070 – $4,830
        石材地板 $1,380 – $4,830
        乙烯基地板 $1,656 – $2,346
        竹地板 $828 – $1,656
        大理石地板 $2,070 – $6,624
        西班牙别墅风厨房木纹瓷砖 — Superior Renovations

        Mary Stuart 的设计理念是让厨房呈现西班牙别墅的氛围,本应使用硬木地板。但硬木难以维护,我们改用木纹瓷砖——看起来、摸起来都像木头,保养却容易得多。

        返回顶部 ↑


        7. 聘请厨房设计师的费用是多少?

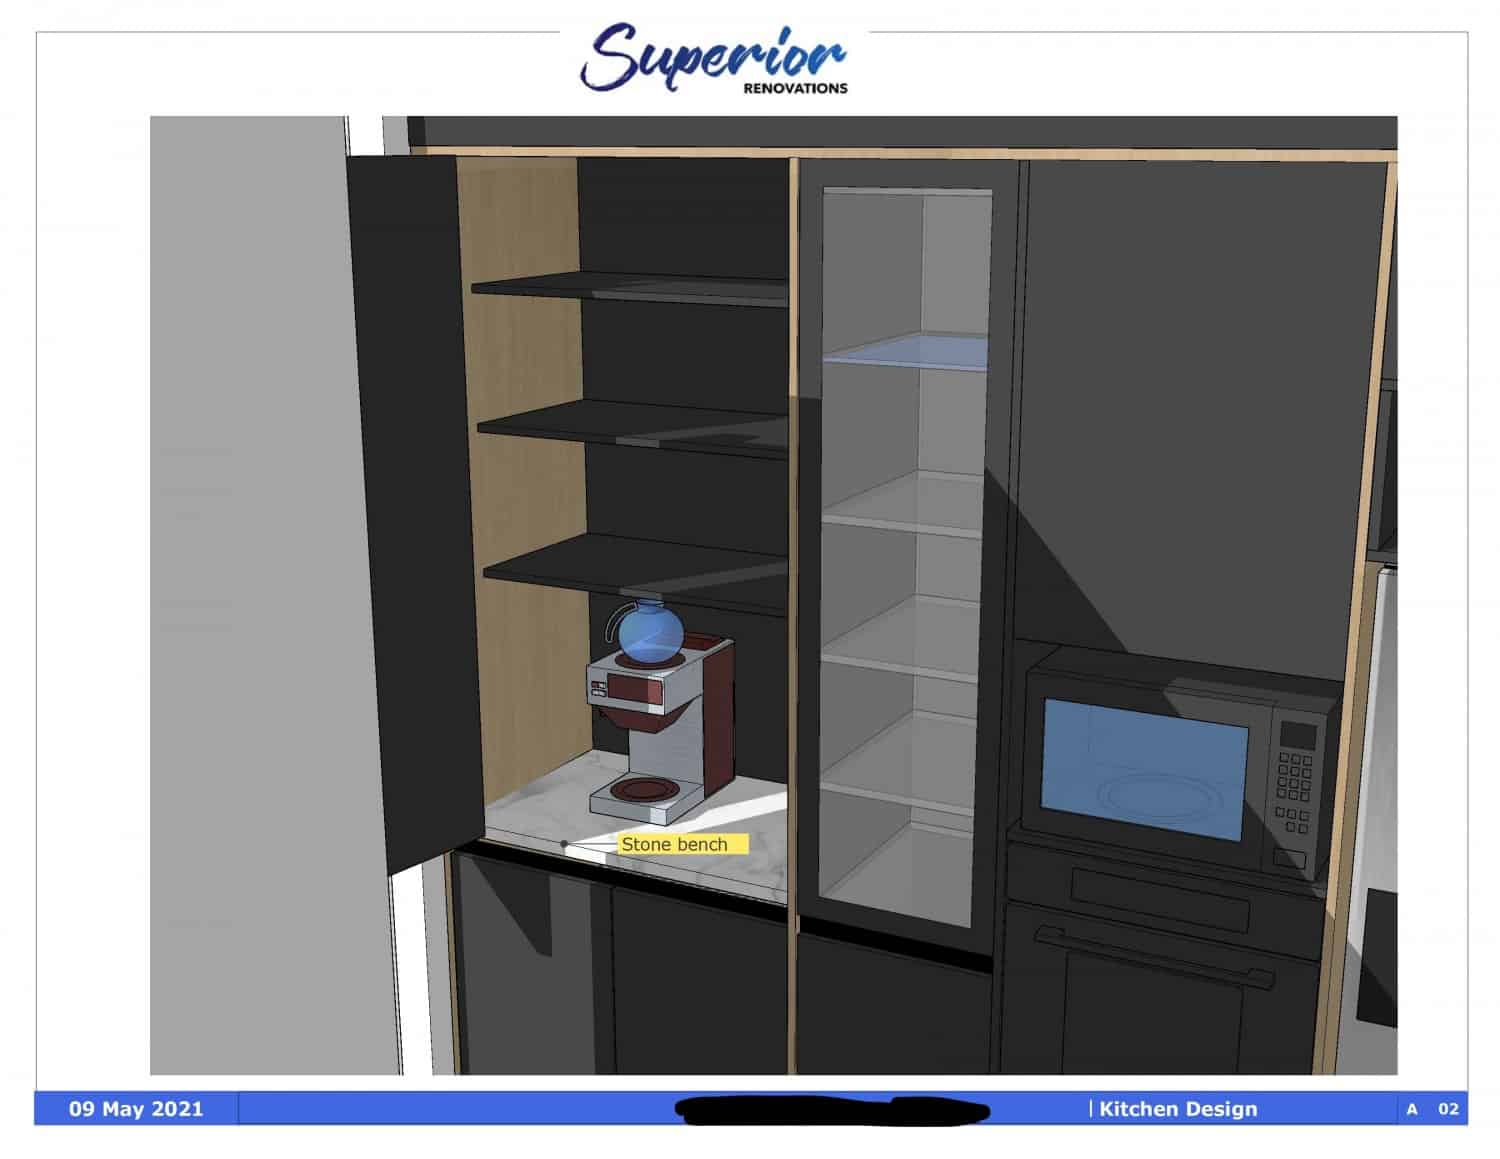
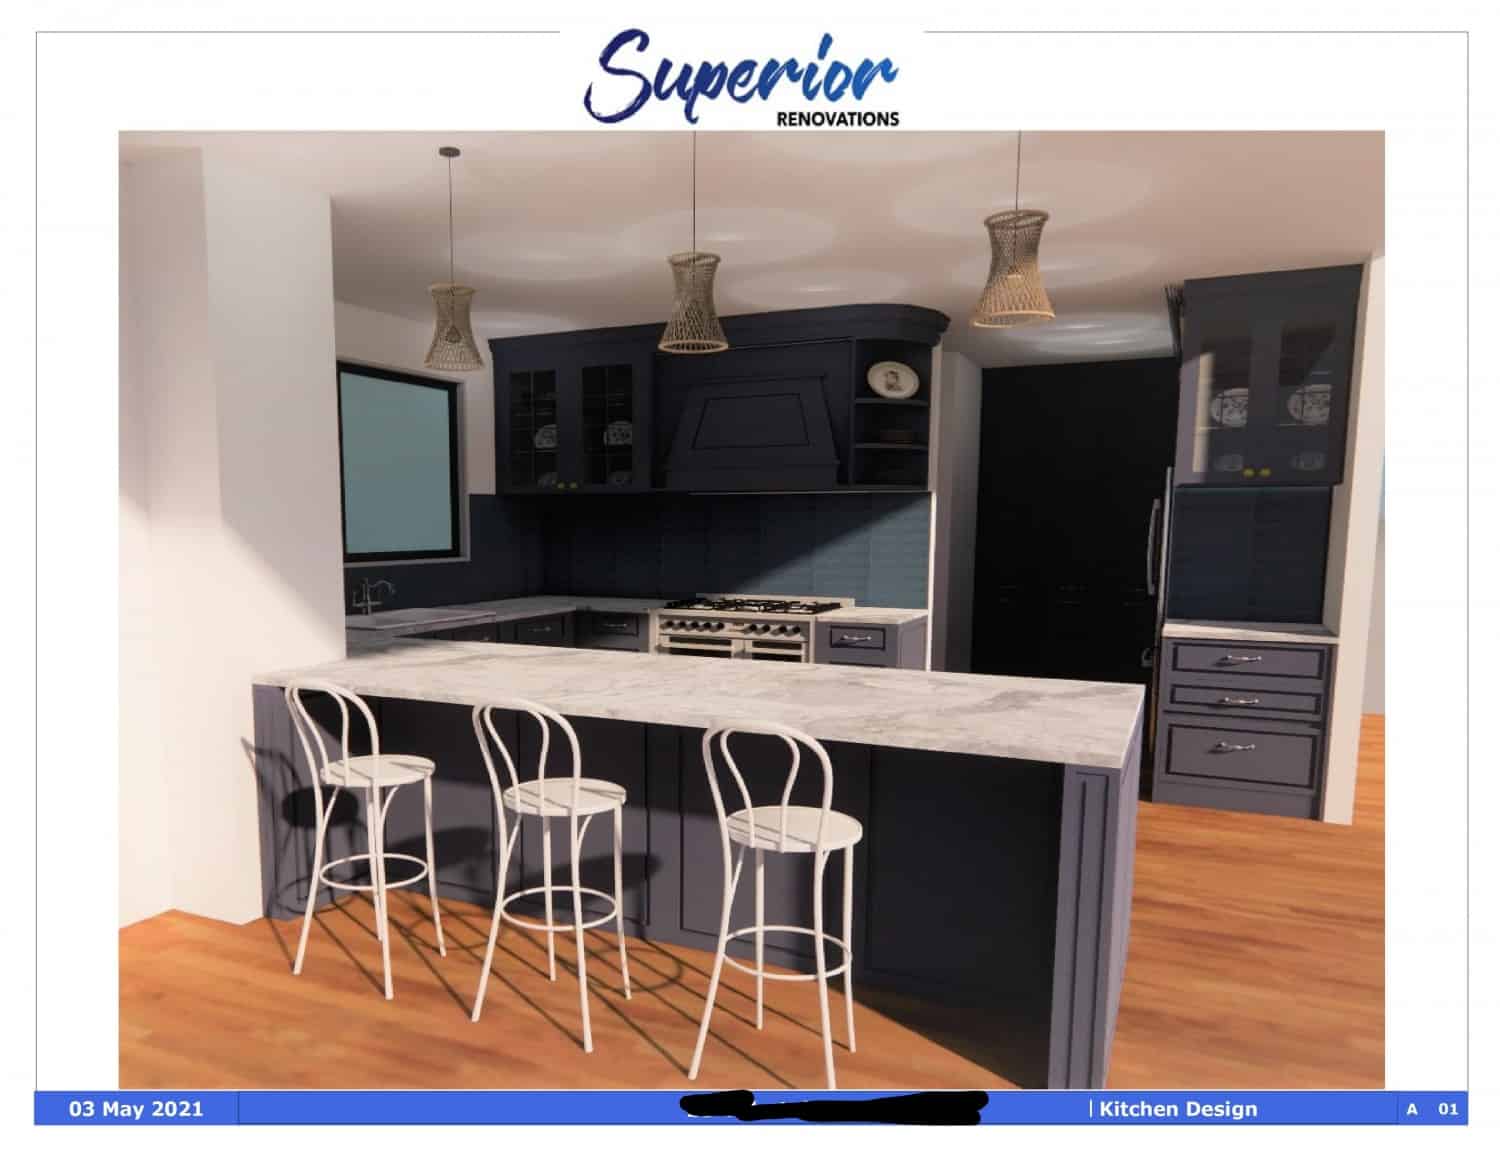
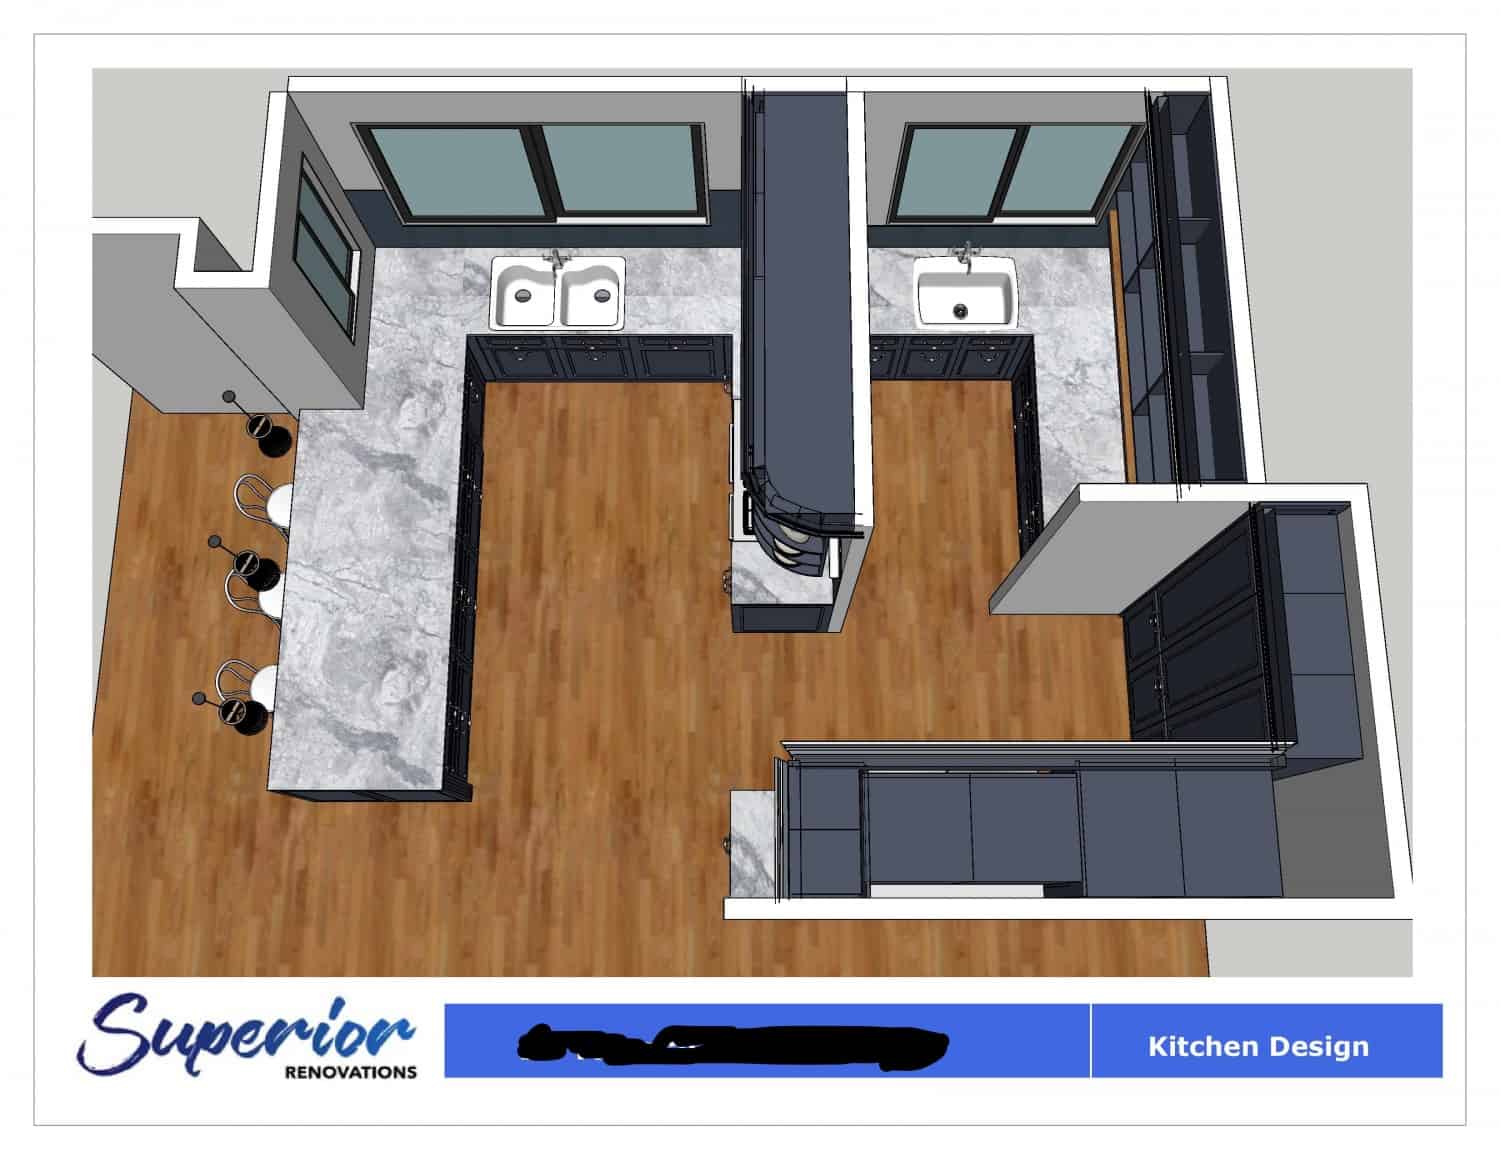
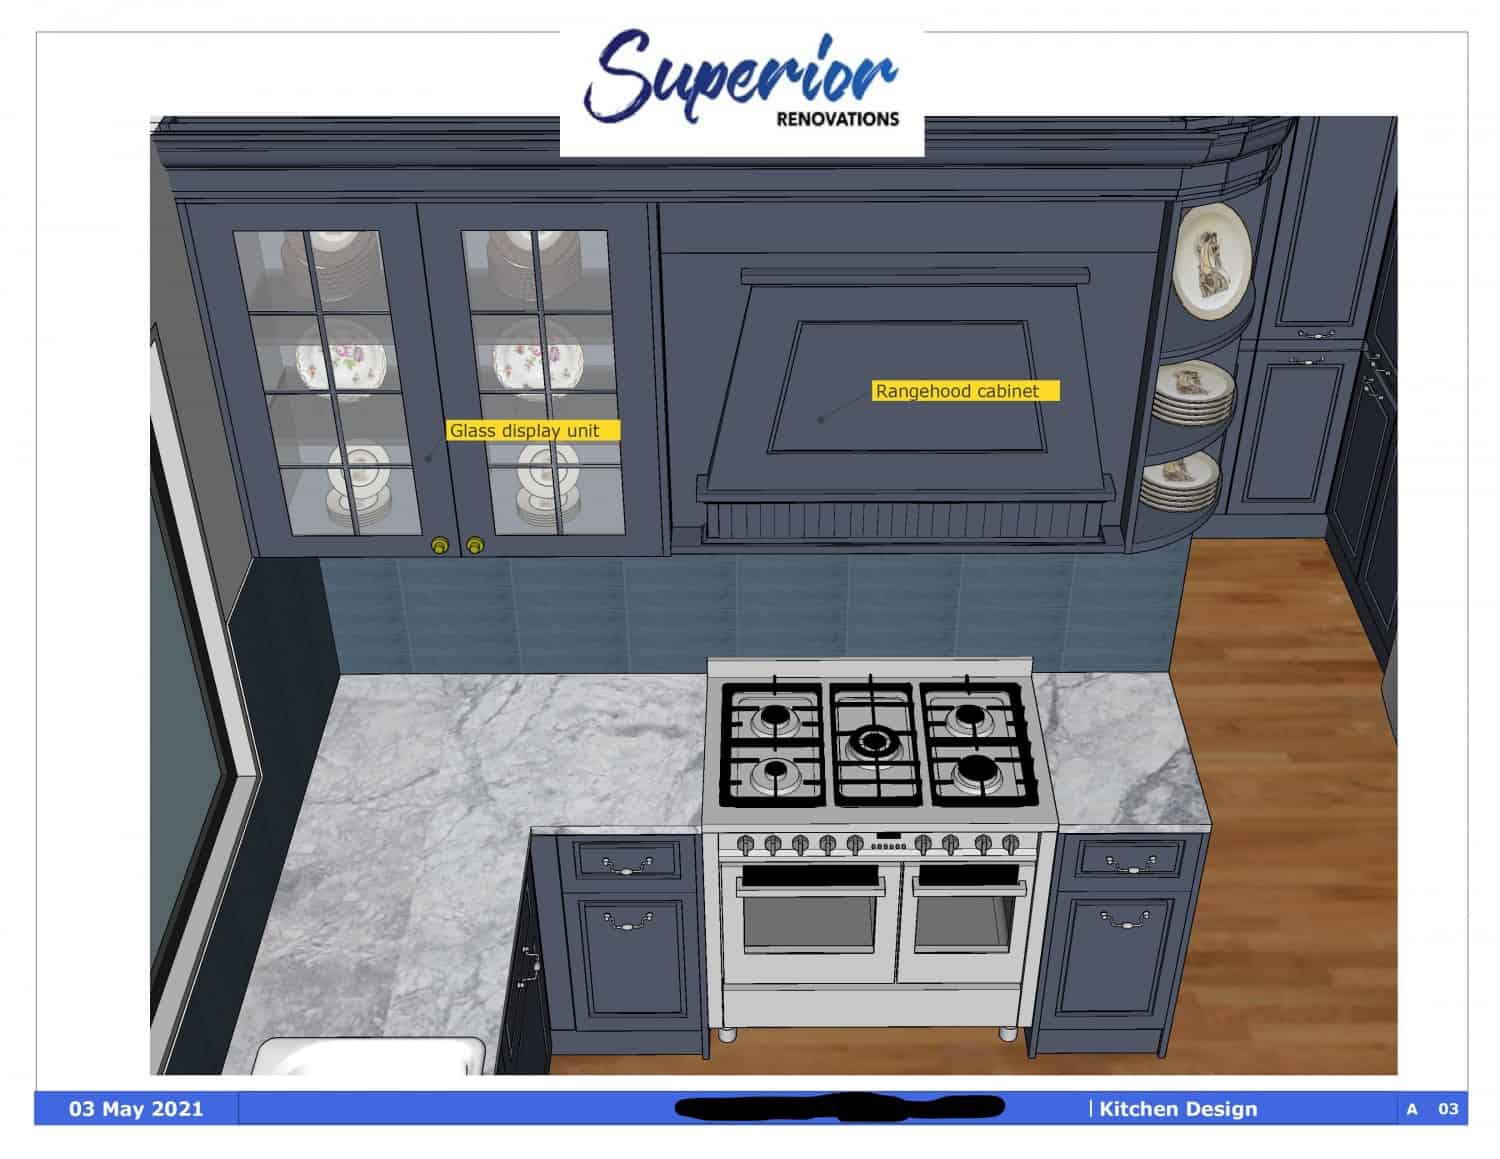
        有人认为翻新厨房不需要设计师——但对于中高档厨房翻新,装修公司通常都会建议引入设计师。设计师能在纹理、配色、材料和当下流行风格上给出专业建议,并制作 3D 模型和渲染效果图——油漆、材料、门把手、台面、电器全部呈现,让您在动工前就看到完工效果。

        厨房 3D 设计图 — Superior Renovations 厨房设计效果图 — Superior Renovations
        厨房 3D 设计图 — Superior Renovations 厨房设计渲染图 — Superior Renovations

        装修公司往往配有内部设计师,他们会在整个装修过程中与项目经理协作——确保图纸真正变成现实。

        厨房设计图 — Superior Renovations 厨房设计图 — Superior Renovations
        厨房设计图 — Superior Renovations 厨房设计图 — Superior Renovations

        以上是我们的设计师 Cici 为 Parnell 一位厨房装修客户制作的 3D 效果图与设计实例。

        认证设计师的收费约 6,900 纽币起,或在奥克兰按小时计费约 138 至 276 纽币/小时。

        延伸阅读:如何设计传统、古典、别墅、现代、当代和工业风的厨房

        返回顶部 ↑


        8. 翻新厨房的人工费用是多少?

        整个项目的多工种人工成本约在 2,760 至 10,280 纽币之间,涵盖水管工、电工、瓦工、灌浆工、油漆工、批灰工、安装工、建筑工、项目经理和设计师——如涉及建筑许可,还可能包括建筑设计师。

        管道费用

        适用于需要更换或改动管道的厨房——例如水槽的新管路、污水管等:

        • 基础厨房水龙头约 $207 至 $414;设计师款水龙头可达 $2,000。
        • 安装厨房水槽约 $345 至 $828。
        • 更换涉及水路的电器约 $621 至 $2,480。

        照明和电气工程费用

        电气工程约 69 至 138 纽币/小时,涵盖:

        • 安装嵌入式照明
        • 新电器布线——炉具、微波炉、洗碗机、烤箱
        • 开关插座——电源插头、USB 端口、柜内灯等
        • 橱柜底部灯带

        更换燃气管道必须由持证专业人员完成,是一笔不小的开支:约 345 至 2,500 纽币。

        油漆费用

        我们建议厨房交给专业刷漆——与 DIY 相比,专业施工的效果更好也更持久。专业油漆包含批灰、GIB 填充、两层底漆加两层面漆,施工人员还会保护好橱柜、协助移开电器并遮蔽电口。小厨房约 1,104 纽币起,大厨房可达 3,500 纽币。

        瓷砖和地板铺设

        整体翻新通常连地板一起换。复合地板的供应加安装约 80 至 140 纽币/平方米,其中人工约 50 至 80 纽币/平方米。铺贴瓷砖则需要瓦工和灌浆工:普通厨房瓷砖的人工费用约 1,000 至 3,500 纽币,取决于复杂程度——瓷砖越大、灌浆线越少,人工越低;小尺寸瓷砖的美缝工作量更大,人工相应更高。

        建筑许可(Building Consent)

        在奥克兰,房产的建筑许可由奥克兰市议会管理。如果厨房布局有较大改动——比如水管工需要新建管路,或要拆除承重墙——就需要申请建筑许可。

        流程是:议会审查您的建筑设计师图纸,判断拆除承重墙、重新布线或新增管道是否可行;许可获批后,承包商才能开工。奥克兰市议会的建筑许可费用约为 2,500 至 6,500 纽币,获批通常需要数周到数月。我们的建议是尽早提交申请,让工程能在圣诞节前开工并完成。

        返回顶部 ↑


        9. 如何在预算范围内改造厨房?

        无论出于什么原因翻新,预算管理都是关键——尤其当您投入的是辛苦攒下的钱。对想花的金额有清晰概念,设定固定预算,并在签约前从装修公司拿到一份固定报价。

        我们也会要求客户预留一笔应急资金——施工中可能出现不可预见的情况,比如发现水渍或腐烂的木材,这类问题通常会增加 1,000 至 2,000 纽币的开支。

        在预算内装修的 4 大技巧

        1. 能 DIY 的部分自己做。自行更换橱柜门、自己刷漆,可以省下人工和项目监管费用——但水管和电气属于专业项目,务必雇用持证专业人员。
        2. 自己决定橱柜方案。在”重修表面”和”翻新刷漆”之间做选择——对经济型厨房来说,两者都是非常划算的选项。
        3. 只升级必要的,不升级想要的。柜门把手、置物架、玫瑰金水龙头这类点缀,完全可以留到以后再加。
        4. 分阶段推进。预算紧张时,您可能需要自己管理项目——确保每一步都有计划,分阶段装修是控制现金流的好办法。

        返回顶部 ↑


        10. 厨房翻新的投资回报是多少?

        一般而言,厨房翻新可在房屋售价中收回约 54% 至 80% 的投入——基础翻新的回收比例通常高于豪华翻新,因为买家愿意为”崭新可用”买单,却不一定为高端定制买单。您的实际回报也取决于所在社区:周边房价越能支撑,升级的溢价空间越大。

        因此,如果翻新是为了出售,请把厨房投入控制在房屋价值的 5% 至 15% 以内,并优先选择简洁、耐看、低维护的中档产品组合。

        返回顶部 ↑


        11. 翻新前后的实用建议

        翻新之前

        先设定预算,并问自己:DIY 还是交给装修公司?然后:

        1. 研究最适合您厨房的布局——需要帮助时,让设计师介入布局规划。
        2. 围绕”需求”而不是”想要”做决定——锦上添花的项目可以日后再投入。
        3. 挑出最需要关注的部分优先修复——这能压低当期预算,但日后追加改动会有额外费用,要心里有数。
        4. 从拆除算起,厨房翻新一般需要 5 至 6 周(前提是设计已确认、定制部件已制造完成)——尽量安排在不太依赖厨房的时段,也可以在装修期间搭建临时厨房。
        5. 确认装修公司在施工现场有良好的健康与安全规范——装修粉尘吸入后可能造成长期健康损害。条件允许的话,施工期间不妨外出度个假。
        6. 需要完工清洁服务的话,提前和承包商确认——多数公司可以安排。

        延伸阅读:打造功能性厨房设计的布局规划指南

        翻新之后

        • 与承包商一起验收厨房,发现任何问题当场提出。
        • 确认粉尘清理后厨房一尘不染。
        • 向承包商索取电器、材料和工艺的保修文件。
        • 最后也是最重要的——好好享受您的新厨房!

        返回顶部 ↑


        12. 如何在奥克兰选择合适的装修公司?

        选定公司前要核实的 9 件事

        1. 研究:至少找到三家候选公司——通过亲友推荐,以及查看公司网站上的推荐信、在建项目和 Google 客户评价来核实口碑。

        2. 当面沟通:与项目经理见面,聊聊他们做过的类似项目,尽可能多提问——这能让您预判项目期间与他们的协作体验。

        3. 报价:不要接受拿到的第一份报价。多取几份报价进行比较,确保是固定报价,并明确列出可能产生变更的项目。最便宜的公司不一定是最好的。

        4. 供应商:主动询问公司的供应商是谁。选择与知名供应商合作的公司——这些供应商会为产品提供独立的质保和担保。

        5. 合法注册:所有公司都应合法注册经营。可在新西兰公司注册处核实:companies-register.companiesoffice.govt.nz

        6. 过往案例:选定前,要求查看他们过去完成的厨房改造——了解其他客户在装修过程中的真实体验。

        7. 与老客户交谈:请公司提供过往客户名单,直接询问他们:橱柜、台面、地板、防溅板用了什么材料?是否出现过缺陷?他们对成品满意吗?

        8. 保险与履约能力:确认公司有保险,以防施工中发生意外;同时观察公司是否敢于承诺按期完工——这往往反映出企业的系统是否健康。

        9. 合同:签约前,装修公司会在合同中列明步骤、报价、保险和项目时间安排。必要时咨询您的银行、会计师或律师,双方确认无误再进入下一步。

        总而言之:如果是为出售或提升租金收益而翻新,只做橱柜、油漆这类高回报升级;如果是为长期自住,选择耐用、易维护的材料,并让设计师通过布局优化和创新收纳把功能性做到最大。像我们这样的整体装修公司提供一条龙服务——设计、定制台面与橱柜、全部工种(电工、水管、瓦工、灌浆工、油漆工、建筑工)、议会许可、电器、固定装置和项目管理。

        延伸阅读:我们在奥克兰最具代表性的厨房装修照片合集

        返回顶部 ↑


        13. 特色项目:基础、中档与高端厨房

        基础厨房 — Papatoetoe 的全套厨房装修

        这个厨房为一个有小孩的年轻家庭而装修——设计必须简洁、材料必须易清洁。我们使用了瓷砖地板、石制台面和 Melteca 橱柜,并定制了带拉出式抽屉的茶水间,方便日常使用。查看装修前后图片和完整项目规格

        Papatoetoe 基础厨房翻新 — Superior Renovations Papatoetoe 厨房翻新细节 — Superior Renovations Papatoetoe 定制茶水间 — Superior Renovations

        基础厨房 — Hillsborough 的全套厨房装修

        这个厨房翻新的起因是外墙漏水需要修复,客户因此遭受了不少损失,最终决定整体翻新。我们以简洁的风格和低维护的材料完成了装修。查看完整的厨房改造 + 前后对比图片

        Hillsborough 厨房翻新前 — Superior Renovations

        翻新前

        Hillsborough 厨房翻新后 — Superior Renovations

        翻新后

        Hillsborough 厨房翻新后细节 — Superior Renovations

        翻新后


        中档厨房 — Bucklands Beach 的 Lynette 和 Henry

        这次装修采用深色石材工程台面,与白色缓冲橱柜形成戏剧性的对比。灰黑色调的六边形瓷砖防溅板成为厨房的视觉焦点,灰色大瓷砖地板一路延续到饭厅。查看完整项目细节

        Bucklands Beach 中档厨房翻新 — Superior Renovations Bucklands Beach 六边形瓷砖防溅板 — Superior Renovations

        中档厨房 — Mangere Bridge 的别墅式厨房

        这是我们最早翻新的别墅风格厨房之一——真正的木质台面经过修复和涂层处理以抵抗磨损,橱柜按平房(bungalow)风格定制,与房屋本身的年代感完美呼应。查看全部项目规格 + 更多图片

        Mangere Bridge 别墅式厨房 — Superior Renovations Mangere Bridge 乡村风厨房 — Superior Renovations Mangere Bridge 木质台面厨房 — Superior Renovations

        高端厨房 — Massey 的 Guru 和 Neeta

        这次翻新涉及结构改动:翻新前,这片空间是餐厅、厨房和客厅三个独立房间。我们拆除了所有隔墙,把整个区域改造成一个动线流畅的大空间——非常适合娱乐和家庭生活。查看改造前后图片 + 完整项目规格

        Massey 高端开放式厨房 — Superior Renovations Massey 高端厨房岛台 — Superior Renovations Massey 高端厨房细节 — Superior Renovations
        Massey 厨房收纳设计 — Superior Renovations Massey 厨房定制橱柜 — Superior Renovations Massey 开放式厨房全景 — Superior Renovations

        返回顶部 ↑


        常见问题

        翻新我的厨房需要多少钱?

        在奥克兰,通过装修公司完成一次标准整体厨房翻新的平均费用为 19,000 至 29,000 纽币,含材料、设计、项目管理、人工和水电工程,不含电器。涉及布局或结构改动的完整定制翻新通常从 41,000 纽币起。

        我必须自己找厨房设计师吗?

        不需要。如果您与我们合作装修,我们的内部设计师会提供专业建议,并在动工前为您制作 3D 模型和成品厨房效果图。

        我需要自己找电工、水管工或其他工人吗?

        不需要。我们是一站式厨房装修公司——报价包含设计、全部固定装置供应、定制台面与橱柜、电工、地板、照明、管道、油漆工、抹灰工,以及监督整个装修过程的项目经理。您无需另找任何工人。

        预算紧张时如何装修厨房?

        规划是关键。如果是为转售或提升价值而装修,建议只升级橱柜门、台面和重新刷漆——费用约在 4,000 至 10,000 纽币之间;自己动手 DIY 部分工作还能进一步压低成本。水电工程务必交给持证专业人员。

        厨房装修需要多长时间?

        一般来说,厨房装修从拆除之日起 5 到 6 周内完成。前提是设计稿已最终确认、厨房所需的定制部件已制造完成(需要额外制造时间的防溅板不包括在内)。

        改变厨房布局需要建筑许可吗?

        需要。布局改动通常涉及新增管道或重新布线,拆除承重墙更必须经过审批——这些都需要奥克兰市议会的建筑许可。许可费用约 2,500 至 6,500 纽币,获批通常需要数周到数月,建议尽早提交申请。

        厨房翻新能收回多少投资?

        一般而言,厨房翻新可在房屋售价中收回约 54% 至 80% 的投入。如果翻新是为了出售,建议将厨房投入控制在房屋价值的 5% 至 15% 以内,并选择简洁、低维护的中档产品组合。

        厨房预算应该怎么分配?

        典型整体厨房翻新中,橱柜约占 28%,安装与人工约占 18%,电器约占 15%,台面与防溅板约占 11%——这四项合计超过总预算的 70%。控制预算时优先从这几项入手最有效。


        还有问题没解决?预约 Superior Renovations 团队的免费咨询


          This site is protected by reCAPTCHA and the Google

          Privacy Policy and Terms of Service apply.

          由 Superior Renovations 撰写

          Superior Renovations 迅速成为奥克兰最受推荐的装修公司之一,这归功于我们友好的态度、透明的定价和公开的工作方式。当您的奥克兰房屋需要装修改造服务时,Superior Renovations 是您可以信赖的团队——高质量的工艺、高效的进度和具有成本效益的解决方案。

          或致电我们:0800 199 888


          18个月免息分期付款 — Superior Renovations

          一直在推迟您的装修计划吗?

          我们与 Q Mastercard® 合作,为您提供 18 个月免息分期付款方案——现在就享受您的新家,减少资金压力。

          了解更多:免息分期付款方案*

          *Lending criteria, fees, terms and conditions apply. Mastercard is a registered trademark and the circles design is a trademark of Mastercard International Incorporated.

          Superior Renovations Auckland 3 1000 1 - Superior Renovations
          House Renovation

          奥克兰房屋装修费用指南 | 每平方米单价与分项费用 — Superior Renovations

          无论是为了自住的舒适度,还是为了提升房产价值,房屋翻新都是奥克兰业主最常见、也最值得认真规划的投资之一。装修不只是让房子内外更美观——更重要的是提升功能性,让日常生活更便捷。

          但装修涉及大量技术环节,远不像调整家具摆放那么简单。无论您计划扩建房屋,还是只想对室内做一些改动,提前了解真实的费用区间,是整个项目最关键的第一步。这篇指南会为您拆解奥克兰房屋装修的各项费用——从每平方米单价、分项费用表,到扩建成本和如何选对装修公司。

          想了解装修贷款?

          很多人以为装修费用主要取决于房间或空间的大小,但事实并非如此。在奥克兰,装修费用更多取决于风格选择、布局改动、固定家具以及装修材料的档次。

          砖房翻新前后对比(新西兰)——一幢位于 West Harbour 的砖房外部翻新案例,包括:屋顶粉刷、新混凝土车道、墙砖粉刷、新雨水管、整屋升级双层玻璃窗、新电动院门、全外观维修及外墙隔板粉刷。


          本文目录


          扫描二维码,在小红书上找到我们

          Superior Renovations 小红书二维码

          体验家居改造的艺术,选择 Superior Renovations!我们是奥克兰首屈一指的浴室、厨房及全屋装修专家。从概念设计到完工,我们的团队确保每个细节都完美无缺。扫描二维码,在小红书上关注我们,获取最新项目、装修技巧和灵感。

          扫描二维码,通过微信联系我们

          Superior Renovations 微信二维码

          想开始您的装修之旅吗?通过微信与 Superior Renovations 联系,享受便捷、个性化的中文服务。立即扫描,提问、获取专家建议,踏出家居改造的第一步!


          1. 奥克兰业主为什么选择翻新?

          奥克兰的房屋翻新需求多年来持续旺盛。一方面,大量上世纪建造的老房子在保温、布局和管线上已经跟不上现代生活;另一方面,在搬家成本高企的市场环境下,翻新现有住宅往往比换房更划算,也是保持和提升房产价值最直接的方式。

          业主考虑装修,通常出于以下几个原因:

          • 扩建房屋,或在原有基础上加盖一层
          • 按个人喜好改造室内空间
          • 升级厨房或浴室
          • 分割或重组住宅的功能区域
          • 改善日常居住体验
          • 提升房产价值,为出售或出租做准备

          奥克兰厨房翻新案例 — Superior Renovations

          奥克兰以其房产和地段闻名——尤其在 Ponsonby、Mt Eden、Sandringham、Glenfield、Howick 等传统老区,有大量值得翻新的老房子。近年来,由于不少老房占地面积大,土地分割(subdivision)也越来越受欢迎。无论您的目的是自住升级还是提升市场售价,翻新方案都应该围绕目标买家和实际居住需求来设计。

          我们会结合客户的预算和生活方式进行设计,在可承受的范围内,尽可能为客户呈现最理想的装修成果。想了解更多,请参考自住房 vs 投资房装修指南——如何兼顾投资回报与居住舒适度。


          2. 在奥克兰,装修费用如何确定?

          确认装修成本是整个项目中最棘手、也最因人而异的环节——同样面积的房子,因为需求和方案不同,费用可能相差数倍。

          如果您正考虑购买一处需要翻新的房产,提前了解大致的装修费用,可以避免买房后预算不足的窘境。如果是翻新自住房,建议先解决日常必需的部分,再在预算允许时考虑更多升级。

          如果您清楚即将装修区域的面积,可以用每平方米单价提前估算一个参考值(注意这只是平均数)。无论项目大小,都请预留至少 10% 的应急预算——开工后总会出现不可预见的支出,比如临时想增加的项目,或需要更换的腐烂木材。

          整屋翻新案例

          奥克兰 St Heliers 整屋翻新包含:洗手间装修、两间卫浴装修、洗衣区装修、整屋内部粉刷、露台翻新、内部房间门换新、内部楼梯及玻璃围栏扶手安装、移除墙纸和墙面批灰、外部粉刷和扶手安装。

          更多不同需求的奥克兰整屋翻新案例:


          3. 奥克兰房屋扩建成本

          明明可以卖掉房子搬去更大的,为什么还要考虑扩建?通常出于以下四个理由:

          • 您喜欢现在居住的区域,不想搬离
          • 想要真正符合需求的改变,而不是将就于”还可以”的现状
          • 扩建的总成本可能低于换购更大的房子
          • 对现在的房子和社区有感情

          在奥克兰,50 平方米的底层房屋扩建费用一般为 100,000 至 150,000 纽币,相当于每平方米 2,000 至 3,000 纽币。差异主要来自建筑类型和建材品质。

          在确定扩建规模和具体内容之前,无法得出准确报价。仅扩建方案的设计费用,就会因复杂程度从 3,000 至 5,000 纽币不等。

          想了解自己扩建项目的定制估价?请使用 Superior Renovations 开发的免费房屋扩建成本计算器(新西兰)。

          奥克兰两层房屋扩建的费用

          如果两层楼面积相同,一个通行的估算规律是:在单层扩建成本的基础上增加约 50%,再加上约 20% 的专业服务费用和 15% 的消费税(GST)。例如:$150,000 + 50% × $150,000 = $225,000(未含专业费用和 GST)。

          预估扩建成本时,别忘了窗户和固定装置——务必把它们纳入规划和估算,否则收到最终发票时可能会大吃一惊。规划扩建是一项大工程,最好的起点就是先把成本算清楚——对总成本有了大致概念后,后续决策都会容易得多。

          新西兰房屋扩建的一般流程

          1. 向建筑/装修公司进行初步咨询
          2. 由建筑设计师进行可行性研究
          3. 拟定前期费用
          4. 客户确认初始费用
          5. 客户、设计师和施工方进行实地考察会议
          6. 起草扩建方案草案并向客户介绍
          7. 提交最终方案申请建筑许可(Building Consent)
          8. 建筑许可获批
          9. 施工方根据获批方案出具报价和规格书
          10. 客户确认
          11. 签署建筑合同
          12. 收取初始定金
          13. 确认开工日期及预计完工日期

          了解更多:在奥克兰,哪些翻新工程需要建筑许可?

          完整的内部翻新案例,包括:新围板、重新设计楼梯、安装玻璃栏杆、新吊灯、新地毯,以及全屋更换 LED 灯。


          4. 新西兰每平方米的装修费用

          在奥克兰,不同类型的装修费用从每平方米 1,800 至 2,500 纽币不等。

          整屋室内翻新通常从约 41,000 纽币起步,根据需求不同可能达到甚至超过 100,000 纽币。这只是基于奥克兰不同区域装修价格得出的基础参考。

          如何使用每平方米参考价

          每平方米费用并不精确,只是一个预估值,但可以帮您根据预算框定装修范围:每平方米 1,800 纽币属于入门档,2,500 纽币左右是平均水平,超过 3,000 纽币则属于高端定制档。

          新西兰每平方米装修费用参考 — Superior Renovations


          5. 房屋装修分项均价表

          以下为各分项费用的参考区间,实际报价以现场评估为准:

          房屋装修费用类型 价格区间(纽币)
          家装设计师费用 $2,000 – $6,000
          测量师/工程师费用 $1,500 – $4,000
          暖风机 $1,500 – $3,500
          翻新项目管理 $1,200 – $3,000
          电气工程 $2,200 – $4,400
          管道工程 $2,700 – $4,200
          施工团队 $15,000 – $25,000
          精细木工(窗户) $4,000 – $7,000
          保温层 $1,000 – $3,600
          屋顶 $4,400 – $9,600
          整屋室内翻新 $41,000 起,高端项目远超 $100,000
          浴室翻新 基础升级 $7,500 起;$12,000 – $19,000 为平均支出;全面重新设计远超 $25,000
          厨房翻新 标准整体厨房翻新平均 $19,000 – $29,000(含材料、设计、项目管理、人工、水电,不含电器)
          房屋扩建 $100,000 +
          重装外墙(Recladding) $150,000 +

          新西兰每平方米双层玻璃的成本

          相比更换全新的双层玻璃和窗框,在现有窗框上加装双层玻璃组件的费用要低得多——以 100 平方米的房子为例,大致费用在 15,000 至 18,000 纽币。

          不过,加装方案只适用于窗框状况良好的房子。奥克兰许多老房子的窗框因损坏或变形并不具备改造条件。如果您的房子较新、目前是单层玻璃,加装双层玻璃的保温效果与整窗更换接近,是更具性价比的选择。

          完整的双层玻璃成本分析,请查看:什么是双层玻璃?我们还提供双层玻璃成本计算器,输入您的信息即可获得预估费用。

          翻新后的浴室 — Superior Renovations

          Renovated Bathroom

          厨房与整屋翻新 — Superior Renovations

          Kitchen and House Renovation

          房屋翻新是否值得?

          很多业主纠结:装修到底能不能提升房产价值?如果您的房子在奥克兰,专业的翻新是提升房产价值和吸引力最可靠的方式之一。关键在于把预算和目标售价放在一起做利润分析——先确定装修预算和预期回报,再决定投入的档次和范围,而不是边做边加。

          无论您是打算翻新老旧厨房,还是想通过加建露台改善户外空间,规划装修的第一步永远是:弄清项目涉及的成本、工作量和时间。


          6. 让装修有个好开端的四个准备工作

          1. 做足调查,弄清自己想要什么。在询价和选材之前,先对需求形成清晰的概念。如果想翻新浴室但不确定风格,可以从家装设计杂志获取灵感,或在 Pinterest 和小红书上收藏喜欢的方案备用。

          2. 制定详细的计划。详细的装修计划是项目成功的关键。装修公司可以协助,但预算、偏好材料和期望效果这几件事,需要您提前自己想清楚。

          3. 为装修预留充足的时间。奥克兰的装修项目经常比预期耗时更长。把时间规划得比您认为需要的更宽裕,可以在进度放缓时避免不必要的压力。

          4. 确保比较过所有选项。做最终决定前,从多家奥克兰装修公司获取建议和报价进行比较。优质材料价格更高,经验丰富的承包商收费也往往更高——重点是核实承包商的口碑、多提问题、留意隐藏费用。

          要把奥克兰的房子装修得漂亮又经济,关键是先为自己设定清晰的目标,描绘出想要的完整画面,再在一家值得信赖的装修公司的指导下逐步推进——专业团队会在全程给出合理建议,帮您避开代价高昂的错误。


          7. 选择装修公司时应该注意什么?

          不要被华丽的网站和精美的工程车吸引。合适的装修公司需要的是经验、资源、组织能力,以及真正帮您实现理想家园的意愿。奥克兰业主在筛选装修公司时,最应关注以下六点:

          1. 有说服力的过往项目。查看案例研究和装修规格细节,并主动提问。完成过大量项目的公司,已经在别人的项目中踩过坑、积累过教训,能帮您避免重蹈覆辙。

          2. 在类似规模项目上有可靠记录。确保对方做过与您的项目类似甚至相同的工作。最常见的错误,是选了一家”什么都做、什么都不精”的公司。

          3. 良好的沟通。线索藏在客户主动留下的在线评价和视频推荐里(并非所有公司都有视频推荐——获得热情客户的真实反馈并不容易)。可以要求公司提供愿意接受电话核实的老客户名单——如果一家公司连 5 个客户都提供不出,这是危险信号。

          4. 优秀的组织能力。这一点体现在细节上:销售流程是否系统化?跟进是否主动?与办公室团队的预约是否顺畅?是否有明确的下一步指引?根据您的要求给出的建议是否准确?

          5. 来自第三方平台的真实评价。不要只看公司官网上的评价——去 Google 和 Facebook 查看他们的评论和帖子,留意是否有负面评价以及公司如何回应。

          6. 与信誉良好的供应商合作。弄清材料和零配件的来源,确保您拿到的是有质量保障的产品,并且享有独立的产品保修支持。


          8. 免费装修费用计算器

          应广大客户的要求,我们自主开发了三个免费成本计算器,帮助正在考虑或研究装修的您快速获得估算:


          房屋装修前后对比(新西兰)by Superior Renovations


          更多家庭装修资源

          1. 在奥克兰厨房装修图库中获取厨房设计灵感
          2. 在奥克兰卫浴装修图库中获取浴室设计灵感
          3. 特色项目与客户案例研究——了解真实项目的规格与预算
          4. 来自奥克兰客户的真实评价

          常见问题

          我可以自己选购并提供固定装置和零配件吗?

          当然可以。如果您想自行购买部分产品并在合适的时间交给我们安装,我们不反对。但我们通常建议客户选用我们的供应商,原因包括:我们对产品质量有信心、可以统一管理物流、能拿到批发价格,并且与供应商有直接联系,装修期间出现任何产品问题都能更快解决。

          我是否需要另外雇用其他工种的施工人员?

          不需要。一家完善的装修公司会统筹安排所有工种,并拥有长期合作的供应商资源,这样压力更小、成本效益更高。一次房屋装修通常涉及 8 到 10 个不同工种,任何一个环节不可靠都会拖累整个项目。因此如果客户希望单独雇用某个工种,我们很难保证整体进度和质量。

          很多建筑商都说能做我的项目,Superior Renovations 有什么不同?

          市面上的建筑商确实很多,但 Superior Renovations 不只是建筑商。我们专注于家居翻新——把现有房产改造成现代化住宅。我们的服务覆盖家装设计、与设计师的协调、建筑许可申请、供应商沟通和物流管理,是从设计到完工的一站式服务。

          厨房装修需要多长时间?

          一般来说,厨房装修从拆除之日起 5 到 6 周内完成。前提是设计稿已最终确认、厨房所需的定制部件已制造完成(需要额外制造时间的防溅板不包括在内)。

          浴室装修需要多长时间?

          一般来说,浴室装修从拆除之日起 3 到 4 周内完成。如果涉及建筑许可申请,时间会相应延长。

          如何规划房屋装修?

          首先准确确定您要完成的工作,并从装修公司获取详细的工程范围说明。有了这份信息,您就清楚需要考虑哪些事项。使用检查清单可以大幅简化流程——我们的免费装修电子书中包含一份 100 多项的装修检查清单可供使用。

          整屋装修需要多长时间?

          通常情况下,全屋装修需要 3 到 6 个月,取决于装修的范围、复杂程度和规模。

          全屋装修要花多少钱?

          在奥克兰,全屋装修(包括浴室和厨房)的平均花费在 80,000 至 160,000 纽币之间,取决于房屋大小、建筑要求、产品与设备的选择等因素。

          我的装修需要申请建筑许可吗?

          部分工程需要。需要建筑许可(Building Consent)的常见例子包括:任何结构性工程(新建、加建、改建、附属建筑、重新打桩)、改动原有的管道和排水系统、高于 1.5 米的挡土墙或顶部附近有建筑物或车道的挡土墙、高于 2.5 米的围栏及任何泳池围栏、游泳池,以及离地超过 1.5 米的露台。如有疑问,建议直接致电奥克兰市议会咨询您的具体项目。

          需要更多信息?

          下载我们免费的完整家庭装修指南(48 页)。无论您已经在装修,还是仍在做决定,这份指南都能帮上忙——其中包含一份 100 多项的免费装修检查清单,帮您避开代价高昂的错误。

          下载免费装修指南(PDF)


          还有问题没解决?预约 Superior Renovations 团队的免费咨询


            This site is protected by reCAPTCHA and the Google

            Privacy Policy and Terms of Service apply.

            由 Superior Renovations 撰写

            Superior Renovations 迅速成为奥克兰最受推荐的装修公司之一,这归功于我们友好的态度、透明的定价和公开的工作方式。当您的奥克兰房屋需要装修改造服务时,Superior Renovations 是您可以信赖的团队——高质量的工艺、高效的进度和具有成本效益的解决方案。

            或致电我们:0800 199 888


            18个月免息分期付款 — Superior Renovations

            一直在推迟您的装修计划吗?

            我们与 Q Mastercard® 合作,为您提供 18 个月免息分期付款方案——现在就享受您的新家,减少资金压力。

            了解更多:免息分期付款方案*

            *Lending criteria, fees, terms and conditions apply. Mastercard is a registered trademark and the circles design is a trademark of Mastercard International Incorporated.

            bathroom renovation cost 5 - Superior Renovations
            Bathroom Renovation

            奥克兰卫生间装修费用 | 浴室翻新多少钱 — Superior Renovations

            浴室装修看起来简单直接,其实并非如此。事实上,浴室往往是所有装修中最复杂的部分——因为它需要十来个工种在一个相对狭小的空间里协同施工。

            一次完整的浴室翻新涉及:设计师、拆除工、水管工、电工、瓦工、防水工、安装工、油漆工、注浆工和抹灰工。想象一下在几平方米的空间里协调这么多工种,您就能理解为什么浴室装修的关键在于组织和计划。如果有项目经理在现场统筹,浴室装修通常 3 至 4 周即可完成;如果您自己分别对接各个工种,很容易因为协调多家公司而导致预算超支或工期拖延。所以我们的第一个建议是:选择一家把项目管理包含在服务中的装修公司。

            在奥克兰,最受欢迎的中档整体浴室翻新平均费用为 21,000 至 24,000 纽币;基础翻新为 10,000 至 15,000 纽币;高端定制浴室为 27,000 至 32,000 纽币以上。这篇指南会逐项拆解这些费用——从淋浴房、瓷砖到马桶,并附上我们在奥克兰完成的真实案例。


            扫描二维码,在小红书上找到我们

            Superior Renovations 小红书二维码

            体验家居改造的艺术,选择 Superior Renovations!我们是奥克兰首屈一指的浴室、厨房及全屋装修专家。从概念设计到完工,我们的团队确保每个细节都完美无缺。扫描二维码,在小红书上关注我们,获取最新项目、装修技巧和灵感。

            扫描二维码,通过微信联系我们

            Superior Renovations 微信二维码

            想开始您的装修之旅吗?通过微信与 Superior Renovations 联系,享受便捷、个性化的中文服务。立即扫描,提问、获取专家建议,踏出家居改造的第一步!


            本文目录

            1. 在奥克兰,浴室装修的平均费用是多少?
            2. 为什么装修的原因决定您的浴室预算
            3. 降低浴室装修成本的技巧(含淋浴器更换费用表)
            4. 安装瓷砖淋浴房的费用
            5. 厕所翻新的费用
            6. 基础、中档与高端浴室装修的平均费用
            7. 我们在奥克兰完成的浴室翻新案例

            浴室装修费用计算器

            想快速获得自己浴室的估算报价?使用我们免费的浴室装修费用计算器——输入您的具体需求,估算结果几秒内发送到您的邮箱。


            1. 在奥克兰翻新一个浴室需要多少钱?

            无论您是在同一所房子里住了多年,还是刚买下一栋老房子,都可能面临翻新旧浴室的问题。大多数奥克兰业主都知道,浴室是单位面积造价最高的装修项目之一——所以第一个问题自然是:翻新一个浴室到底要多少钱?

            这恰恰也是最难一概而论的问题,因为”翻新浴室”对不同的人意味着完全不同的工程量。

            举例来说,一次较大型的浴室翻新可能包括:改变布局、更换全套浴室设备和固定装置、更换地板、重新粉刷,以及水管和电气改造——这类中档浴室翻新(最受欢迎的选择)平均费用在 21,000 至 24,000 纽币之间。另一个极端:如果只是刷新油漆加一些小改动,可能只需几千纽币。大多数浴室翻新的实际费用都落在这两者之间。

            中档浴室翻新案例:

            奥克兰浴室翻新 — Superior Renovations

            Superior Renovations

            如何估算自己浴室的翻新费用

            虽然平均费用因项目而异,但您可以按以下三步框定自己的预算:

            • 先确定装修的目的。是需要更大的空间?还是让浴室风格与全屋装饰统一?目的明确后,实现目标所需的工程量就清晰了。
            • 列出所有需要更换的项目——灯具、照明、油漆、瓷砖、橱柜、地板等。
            • 把人工费用计算在内——人工和项目管理在浴室翻新中占比远高于多数人的预期。

            预算紧张时,也可以先完成大项工程,之后再逐步加入细节升级,分摊总支出。完整的分项费用参考可查看奥克兰房屋装修费用指南。


            2. 为什么装修的原因决定您的浴室预算?

            有清晰的计划,才能确保钱花在正确的地方。不同家庭对浴室的需求不同——选什么配件、装浴缸还是淋浴间(或两者都要),都应该由您装修的理由来决定。

            ① 有幼儿的年轻家庭

            有蹒跚学步的孩子或即将出生的新生儿,而浴室里没有浴缸?在翻新中加入浴缸将是明智的选择——给孩子洗澡的便利性远超想象。参考案例:年轻家庭的浴室装修。

            ② 成长中的家庭 / 增加便利

            家庭成员增多,可能意味着需要增设独立厕所,或将套间拆分为厕所和浴室。如果家里有富余空间,加建一个完整的浴室能大幅提升日常便利。参考案例:Avondale 三代同堂家庭的整屋翻新。

            ③ 提升出售或出租价值

            如果是为卖房或出租做准备,我们反而建议客户不要过度投资。买家和租客想要的是不需要再动工的房子——简洁、崭新、几乎零维护。一般来说,浴室翻新每投入 1 纽币,约能带来 1.5 纽币的价值提升——但前提是用对地方:准备出售的话,没必要买 3,000 纽币的设计师洗手盆,它不会带来任何额外回报。参考案例:St Heliers 为提升售价进行的浴室翻新。

            ④ 提升生活品质,打造豪华浴室

            如果装修是为了自己长期享受,适度”过度投资”反而值得。空间小可以选择湿区式(wet room)浴室,营造温泉般的氛围——这时在 3,000 纽币的洗手盆上挥霍一把也无妨。您的预算决定效果的上限,可能性是无穷的。参考案例:Titirangi 的现代艺术风浴室、Parnell 的豪华浴室。


            3. 降低浴室装修成本的技巧

            平均费用只是估算值——以下几个方法可以实际压低您的浴室翻新成本:

            • 浴室橱柜:与其整柜更换,不如修复翻新,或粉刷成现代的新颜色。浴缸和洗手盆同样可以通过修复焕然一新。
            • 只换水龙头和把手,而不是全套设备:很多时候,仅更换洗手盆和浴缸的五金件,就足以让浴室显得现代。
            • 用浅色放大空间:想让浴室显得更宽敞,不一定要拆墙扩建——把墙面刷成浅色调,视觉效果同样立竿见影,成本却低得多。

            无论您想做完整翻新还是局部焕新,欢迎在工作时间(9:00–17:00)致电 0800 199 888,我们很乐意为您提供建议。

            奥克兰浴室翻新案例 — Superior Renovations

            Superior Renovations

            更换淋浴器的平均费用

            更换淋浴器的平均费用在 1,150 至 8,850 纽币之间,取决于尺寸和功能。安装新的亚克力淋浴房可能只需 1,150 纽币左右。瓷砖淋浴房更豪华,但也更难清洁——时间紧张的家庭往往更愿意选择易打理的亚克力淋浴房。如果需要新增水管或使用高端材料,总价会相应提高。

            项目 人工和材料费用(纽币)
            亚克力淋浴房 $700 – $1,600
            定制淋浴房 $1,200 – $3,200
            淋浴房玻璃门 $800 – $2,000
            新水龙头 $100 – $1,200
            新增水管设施 $700 – $1,800

            4. 安装瓷砖淋浴房的费用

            瓷砖淋浴房档次更高,价格也相应更高:安装一个新的瓷砖淋浴房需要 1,550 至 8,250 纽币。如果只需更换墙面和地面材料,重新铺设一个淋浴房的费用在 1,500 至 3,500 纽币之间——注意这不含防水费用。瓷砖在颜色、图案和设计上的选择远多于亚克力,精心设计的瓷砖墙面足以成为整个浴室的视觉焦点。

            瓷砖本身的价格约为每平方米 25 纽币起;天然石材等高端选择可达每平方米 75 纽币。

            更换一个淋浴房的费用拆解(纽币)
            拆除旧设备 $100 – $200
            清理杂物 $200 – $400
            表面准备 $400 – $900
            新淋浴房 $850 – $6,750
            总计 $1,550 – $8,250

            5. 厕所翻新的平均费用

            奥克兰许多家庭都有一个独立但长期被忽视的厕所——空间狭小、铺着老式变色的乙烯基地板,加一个旧马桶,实在难以令人满意。如果您正在翻新浴室,把厕所一并翻新是最划算的时机——两个空间同时施工,可以避免人工、资源和产品的双重浪费,总价比分开做更低。

            工程包括拆除厕所内的所有固定装置、马桶、洗手盆(如有)和配件,然后重新铺贴瓷砖和安装新设备。每个厕所约需 5 至 6 个工作日,新配件须在开工前购买到位。

            厕所翻新的分项参考价格(纽币):

            瓷砖工程
            1. 供应并铺设墙砖至天花板高度:$1,900 – $3,150(取决于尺寸和复杂程度)
            2. 供应并铺设厕所地砖:$800 – $1,000

            水管工程
            1. 供应并安装一套马桶和坐便器喷头:$520 – $850(取决于型号)
            2. 供应并安装一套洗手盆和水龙头:$250 – $420(取决于型号)
            3. 供应并更换马桶不锈钢管道:$450 – $800(取决于冷/热水)

            清运处理
            运输和处理施工垃圾:$350 – $600

            自购物品
            新马桶及翻新配件:$200 – $300 起

            厕所全面翻新的估算总价:约 6,000 纽币起。预计工期:5 至 6 个工作日。


            6. 基础、中档与高端浴室装修的平均费用

            明确装修原因后,就可以规划预算了。通过装修公司进行的完整浴室翻新,费用涵盖:拆除、产品与固定装置供应、安装、防水、地板、油漆,以及最重要的项目管理。

            浴室装修类型 平均费用(纽币)
            基础翻新(不拆除全部设备)
            想把费用控制在平均水平以下?保留洗手盆、浴缸、淋浴房和马桶的原有位置,只把旧型号换成新版本——不改布局,成本最低。
            $10,000 – $15,000
            中档翻新(最受欢迎)
            在主浴室增加洗手盆、改善照明、升级淋浴功能——这类升级不只让浴室更美观、功能更好,从长远看也最有回报。
            $21,000 – $24,000
            高端定制翻新
            预算充裕时的升级方向:定制石英或花岗岩台面、青铜或黄铜配实木的高端水龙头、釉面定制橱柜。
            $27,000 – $32,000 +

            浴室装修费用计算器

            想知道自己的浴室翻新大概要多少钱?使用我们免费的浴室装修费用计算器,按您的实际需求生成估算。


            7. 我们在奥克兰完成的浴室翻新案例

            由 Superior Renovations 完成:


            Sarah 在 Redvale 的豪华质感浴室装修

            我们翻新了其中两个浴室——视觉上的豪华感十足,实际却是一个中档预算的项目。亮点之一是定制洗手台,把浴室空间利用到了极致。查看完整项目详述 + 照片

            奥克兰 Redvale 豪华浴室翻新 — Superior Renovations Redvale 浴室定制洗手台 — Superior Renovations

            Todd Chandler 在 St Heliers 的中档浴室装修

            我们用现代风格的木纹瓷砖和橱柜,翻新了 Todd 家三间漏水的浴室。木纹瓷砖与白色洁具相映成趣,让浴室显得宽敞而现代。查看完整项目详述

            St Heliers 浴室翻新 — Superior Renovations St Heliers 完整浴室翻新 — Superior Renovations

            Titirangi 的豪华现代浴室装修

            客户希望翻新后的浴室与全屋的艺术风格相呼应。这次装修的亮点是瓷砖图案的巧妙运用,呈现出当代工匠的质感。查看完整项目详述 + 照片

            Titirangi 现代浴室翻新 — Superior Renovations Titirangi 浴室瓷砖设计 — Superior Renovations

            Mary Stuart 在 Stanmore Bay 的西班牙风格浴室

            Mary 在 Stanmore Bay 的厨房和浴室翻新以西班牙别墅为设计灵感。浴室刷成蓝色,墙面镶嵌马赛克瓷砖,黄铜洗手盆和水龙头进一步强化了西班牙乡村别墅的氛围。查看更多项目案例

            Stanmore Bay 西班牙风格浴室 — Superior Renovations 马赛克瓷砖浴室翻新 — Superior Renovations
            西班牙乡村风浴室 — Superior Renovations 奥克兰洗衣区翻新 — Superior Renovations

            常见问题

            在新西兰,更换一个淋浴器需要多少钱?

            更换淋浴器的平均费用在 1,150 至 8,850 纽币之间,取决于尺寸、功能和材质。安装新的亚克力淋浴房约 1,150 纽币起,瓷砖淋浴房则更高。

            安装一个瓷砖淋浴房的费用是多少?

            瓷砖淋浴房档次更高,安装一个新的瓷砖淋浴房需要 1,550 至 8,250 纽币。如果只更换墙面和地面材料,重新铺设的费用在 1,500 至 3,500 纽币之间,不含防水费用。

            翻新一个厕所的费用是多少?

            在新西兰,翻新一个独立厕所的平均费用约为 6,000 纽币起,包括产品、安装、管道和人工,工期约 5 至 6 个工作日。与浴室同时翻新可以分摊人工和资源,总价更低。

            中档整体浴室翻新需要花费多少钱?

            中档浴室翻新可能涉及改变布局、更换全套浴室用具和固定装置、更换地板、重新粉刷以及水电改造,平均费用在 21,000 至 24,000 纽币之间,是奥克兰最受欢迎的翻新档次。

            基础浴室翻新和高端浴室翻新分别要多少钱?

            保留原有布局、只把旧设备换成新版本的基础翻新约 10,000 至 15,000 纽币;使用定制台面、高端五金和定制橱柜的高端浴室翻新为 27,000 至 32,000 纽币以上。

            浴室装修需要多长时间?

            在有项目经理统筹的情况下,浴室装修一般从拆除之日起 3 至 4 周内完成。如果涉及建筑许可申请,时间会相应延长。

            浴室翻新能提升多少房产价值?

            作为一般参考,浴室翻新每投入 1 纽币约能带来 1.5 纽币的价值提升。若为出售做准备,建议选择简洁、崭新、低维护的产品组合,避免在单件高端设备上过度投资。

            为什么浴室是最复杂的装修项目之一?

            一次完整的浴室翻新涉及设计师、拆除工、水管工、电工、瓦工、防水工、安装工、油漆工、注浆工和抹灰工等约十个工种,且全部在狭小空间内协同施工。因此组织和项目管理是浴室装修成败的关键。


            还有问题没解决?预约 Superior Renovations 团队的免费咨询


              This site is protected by reCAPTCHA and the Google

              Privacy Policy and Terms of Service apply.

              由 Superior Renovations 撰写

              Superior Renovations 迅速成为奥克兰最受推荐的装修公司之一,这归功于我们友好的态度、透明的定价和公开的工作方式。当您的奥克兰房屋需要装修改造服务时,Superior Renovations 是您可以信赖的团队——高质量的工艺、高效的进度和具有成本效益的解决方案。

              或致电我们:0800 199 888


              18个月免息分期付款 — Superior Renovations

              一直在推迟您的装修计划吗?

              我们与 Q Mastercard® 合作,为您提供 18 个月免息分期付款方案——现在就享受您的新家,减少资金压力。

              了解更多:免息分期付款方案*

              *Lending criteria, fees, terms and conditions apply. Mastercard is a registered trademark and the circles design is a trademark of Mastercard International Incorporated.

              DSC06516 - Superior Renovations
              House Renovation

              16个紧凑型厨房设计理念(新西兰)| 小厨房装修指南 — Superior Renovations

              没有人愿意在烹饪时体验幽闭恐惧的感觉。对于空间紧凑的小户型公寓和住宅来说,厨房的局促感是个真实的问题——但只要空间得到有效利用,它很容易解决。

              规划是紧凑型厨房设计的关键。人工和项目管理等基础成本不会因为厨房小而减少——安装工、电工、水管工、瓦工、油漆工一个都不能少——但材料成本会更低:橱柜更少、瓷砖更少。省下来的预算,正好可以投入到创新的收纳方案上。

              比如:打造融入生活空间的隐藏式储物柜,把电器收进去而不让空间显得局促;或者定制通顶橱柜,把不常用的电器放在最上层,再配一把兼具装饰功能的梯子。Kitchen Things(我们的首选家电供应商)有大量专为小户型设计的顶级品牌电器——可以拆分收进橱柜,不占用任何台面空间。

              以下是 16 个针对新西兰紧凑型厨房的设计理念,全部来自我们在奥克兰完成的真实项目经验。


              扫描二维码,在小红书上找到我们

              Superior Renovations 小红书二维码

              体验家居改造的艺术,选择 Superior Renovations!我们是奥克兰首屈一指的浴室、厨房及全屋装修专家。从概念设计到完工,我们的团队确保每个细节都完美无缺。扫描二维码,在小红书上关注我们,获取最新项目、装修技巧和灵感。

              扫描二维码,通过微信联系我们

              Superior Renovations 微信二维码

              想开始您的装修之旅吗?通过微信与 Superior Renovations 联系,享受便捷、个性化的中文服务。立即扫描,提问、获取专家建议,踏出家居改造的第一步!


              厨房装修费用计算器

              想知道翻新自己的厨房大概要多少钱?使用我们免费的厨房装修费用计算器——输入您的具体需求,估算结果几秒内发送到邮箱。


              1. 玩转你的色彩

              有些颜色容易让空间显得狭小,有些则擅长营造空间放大的错觉。我们建议客户以中性色作为厨房的主色调——例如 Dulux 的 Mason Bay Quarter 或 Epsom 系列——让空间最大程度地舒展开。

              用中性色或深浅不一的白色,并不意味着厨房一定沉闷无聊:选择一块有色彩或有质感的防溅板来吸引视线、制造趣味;橱柜颜色可以适当加深以形成对比;再用彩色的把手和水龙头点缀色彩感。

              2. 灯光照明很重要

              自然采光是厨房里最好的照明。可以通过大型垂直窗户营造高度感,或增加天窗抬升视觉上的天花板高度(顺便为更多橱柜创造空间),最大限度地引入自然光。如果这些都做不到,仍有很多办法把照明融入厨房设计:

              • 贴近天花板的照明设备:考虑吸顶灯或贴近天花板的灯具,避免低垂的吊灯——它们会让小厨房显得笨重。省下墙面照明的位置,墙面就能用来装置物架。
              • 嵌入式照明:在不牺牲任何空间的前提下照亮厨房的特定区域,是小厨房的理想选择。
              • 吊线灯:由金属线或链条悬挂的单体灯具——枝形吊灯的轻量版,占用空间小。可以成组使用也可以只用一盏,既营造氛围又增添个性。
              • 橱柜下方的 LED 灯带:在橱柜和把手下方安装 LED 灯带,省空间又提氛围——大多数灯带可调光,氛围感再加一层。
              • 筒灯(埋入式照明):奥克兰多数房子都有筒灯——样式丰富、极度省空间。
              橱柜下方 LED 灯带 — 奥克兰小厨房设计

              橱柜下方的 LED 灯带

              吊线灯 — 奥克兰 Epsom 厨房翻新

              吊线灯

              吊线灯 — 奥克兰 Epsom 厨房翻新

              吊线灯

              厨房照明设计 — Massey 厨房翻新 厨房照明设计 — Parnell 厨房翻新 厨房照明设计 — 奥克兰厨房翻新

              以上是可以应用到您厨房设计中的照明实例。

              3. 明智地选择你的电器

              为厨房挑电器本来就不容易——空间小,就更难。好在厨房翻新中最实用的思路之一,就是选用更智能的新产品:专为狭小空间设计的电器,无论厨房多小,都灵活、多变、高效。博世(Bosch)和 Kitchen Things 都有专为小厨房设计的产品线——比如可以拆卸收进抽屉的电器,而不是常年占据台面的大家伙。

              一个例子:用可以收进抽屉的手持式搅拌机或研磨机,替代笨重的台式搅拌机。还可以考虑多功能电器——一台机器搞定搅拌、研磨、打蛋等多项任务,台面立刻清爽。

              4. 成为一名置物架大师

              翻新或设计紧凑型厨房,核心是规划合适的空间方案。很多室内设计师都认同:最好的厨房设计离不开恰当的收纳——这正是置物架的价值所在。

              壁挂置物架

              壁挂置物架是为厨房增加储物空间最物美价廉的方式——放香料、杯子、茶叶和咖啡壶都很合适,同时为厨房设计增添个人色彩。翻新厨房时,可以让悬浮置物架与其他橱柜搭配使用;它们同样适合加在用餐区。再配上彩色的杯盘和厨房配件,收纳和装饰一举两得。

              壁挂置物架 — Mangere Bridge 厨房改造

              位于 Mangere Bridge 的全厨房改造——壁挂置物架不仅是厨房的视觉焦点,还增加了存储空间

              抽屉和厨房储物架

              抽屉内的分层架让收纳更轻松——可以在抽屉里加架子存放餐具。另一个趋势是在储物柜内加装可拉出的储物架,让橱柜整洁不凌乱。这种收纳形式也可以延伸到厨房之外的其他生活区域。

              5. 厨房收纳

              收纳对任何厨房都重要,对紧凑型厨房则是生死攸关。最有效的扩容方式:在基础橱柜上方加装壁挂橱柜,直接把储物潜力翻倍。

              Papatoetoe 厨房收纳方案 — Superior Renovations 小厨房收纳设计 — Superior Renovations Papatoetoe 厨房拉出式收纳 — Superior Renovations
              Papatoetoe 厨房抽屉收纳 — Superior Renovations Papatoetoe 厨房储物设计 — Superior Renovations 厨房储物解决方案 — Superior Renovations

              以上是我们为奥克兰客户打造的收纳方案。

              紧凑型厨房收纳最大化的 5 种方法

              • 通顶开放式搁板:既实用,又能为厨房营造更开放的感觉。
              • 魔术角(Magic Corner):转角柜深处的空间常年被浪费——魔术角的拉出式手推车抽屉能把这块”死角”彻底盘活。我们常用 Blum 的产品,他们在紧凑型厨房收纳方案上非常创新。
              • 岛台兼作收纳:对多数人来说,储物空间永远不嫌多。早餐岛台可以定制储物柜和抽屉,把台面下方全部变成收纳。
              • 柜内收纳架:如上文所述,柜内收纳架让抽屉井井有条;食品柜抽屉(pantry drawers)也正在成为节省空间的流行方式。
              • 墙面挂钩:锅碗瓢盆和厨房器皿挂上墙,橱柜空间立刻释放。风格建议:选色彩鲜艳、有活力的器皿,挂出来也好看。

              6. 兼具储物和用餐功能的厨房岛台

              无论厨房大小,岛台都已是厨房设计的重要组成——它既是备餐台面,又能兼作用餐区和收纳空间,一物三用。

              Blockhouse Bay 厨房岛台 — Superior Renovations

              位于 Blockhouse Bay 的厨房改造——这个岛台提供了大量的储物柜以及台面空间

              展厅样板:岛台收纳最大化的案例

              应客户日益增长的需求,我们在奥克兰开设了家装展厅,完整展示我们装修的厨房和浴室品质。下图是展厅中由我们设计并施工的现代厨房——岛台两侧都有存储空间。

              Superior Renovations 奥克兰展厅样板厨房岛台

              我们的家装展厅位于奥克兰 Wairau Valley。乍看之下,这个岛台是一个无缝的整体,似乎没有任何橱柜或抽屉。实际上:朝向走廊的一侧有 2 个双层储藏柜和 1 个单层储藏柜;面向厨房的一侧有 2 个拉出式调味品柜和 2 个双抽屉,其中还藏着一个隐藏抽屉——正是这个隐藏式设计成就了无缝的外观。

              相关阅读:哪种布局更适合你的厨房?

              很多人以为紧凑型厨房装不下岛台——并非如此。紧凑型厨房常处于开放式生活空间中:一面墙容纳台面、灶台和洗碗机,中间加一个小早餐吧,就能把厨房和客厅自然”分开”。您甚至可以取消独立用餐区,让早餐吧同时充当餐桌和备餐台面。

              Greenlane 厨房岛台用餐区 — Superior Renovations

              位于 Greenlane 的厨房改造——岛台作为用餐区,配有水槽和操作台面,另一侧是橱柜形式的存储空间

              如果您的紧凑型厨房是封闭式的,考虑拆除厨房与客厅之间的墙——变成开放式后的宽敞感会让您惊讶。

              更多收纳方案灵感,请查看以下项目:

              7. 隐藏式厨房

              近几年逐渐流行的一个概念:隐藏式厨房——由柜门和抽屉分隔的紧凑型厨房空间,需要时可以瞬间”隐身”。有了这样的设计,您可以轻松藏起厨房的杂乱,几秒钟内把”带厨房的客厅”变回一个完整的客厅。

              8. 紧凑型厨房的布局

              改造紧凑型厨房的方法很多,但动工前必须先想清楚布局——布局直接决定厨房用起来顺不顺手、舒不舒服。无论是从零开始还是改造现有空间,都要思考您实际怎么使用厨房、最常做哪些事——不要停留在”早餐和晚餐”的层面,要更具体。

              如果您偏爱 L 形厨房,但它让空间显得拥挤,那就把橱柜集中在一侧,转而增加一个小岛台——既补回橱柜空间,又能兼作用餐区。封闭式厨房则考虑拆除与生活空间之间的墙:开放式厨房通常让空间显得更大,也让整个生活区更有整体感。

              9. 使用更大的瓷砖铺设厨房地板

              与直觉相反,更大的瓷砖反而让空间显得更大。如果厨房地面打算铺瓷砖,考虑 900×600 或 600×600 的规格——灌浆线更少,视觉”断裂”更少,地面自然显得开阔。想深入了解大尺寸瓷砖如何制造空间错觉,请阅读我们与 Tile Depot 的问答文章。

              10. 用抽屉取代厨房橱柜

              普通柜门式橱柜的储物效率其实不高——塞在最里面的东西很难拿到。改用拉出式抽屉,所有内容物一目了然,收纳效率立刻提升。

              相关阅读:奥克兰经典、传统、当代、现代、田园和工业风厨房的设计指南

              11. 关注橱柜的纹理,并合理运用镜子

              紧凑型厨房选材的原则:不让材料把空间”压小”。闪亮、光滑的表面会反射光线,让厨房显得更大。多数紧凑型厨房走简约现代风效果最好;如果那不是您想要的,至少记住别让材料过于花哨和灰暗——它们会让厨房显得更小。

              喜欢现代和当代风格的话,可以用玻璃做防溅板,制造空间错觉;走经典路线则可以在墙上加一面镜子——比如配白色画框的大平面镜。五金选择上:现代/当代风格选隐藏式把手;传统、乡村、古典或田园风格选小巧的亚光旋钮,而不是笨重的把手。

              12. 厨房小推车和高餐桌

              紧凑型厨房最缺的就是台面。两个有创意的补救办法:一是厨房小推车——备餐和储物的移动台面,不用时推走或折叠收纳;二是高餐桌——站立时可以直接当备餐台用,再配几把高脚凳,空间设计感也上来了。

              13. 把墙饰和背景墙作为设计元素

              紧凑型厨房的橱柜线条流畅,没有太多位置摆装饰品——但您可以用一面背景墙为厨房注入个性。避免在墙上挂画或摆饰(容易让小厨房显得封闭),改用鲜艳的瓷砖或与厨房其他部分形成对比的涂料来吸引视线;有纹理的瓷砖还能为厨房增加一个额外的维度。

              14. 将大自然带进你的紧凑型厨房

              自然元素能为厨房增添急需的温暖。大厨房可以自由混搭木材和石材,但紧凑型厨房如果堆太多木质元素,容易显得封闭。更聪明的做法:在橱柜角落摆绿植,或让爬藤类植物从柜顶垂落。

              真想要木质感的话,在背景墙上用木纹瓷砖——有木头的纹理和外观,却容易清洁。墙面使用木纹砖时,请选浅色而非深色。

              相关阅读:顶级厨房设计趋势与注意事项

              15. 让厨房橱柜与墙壁颜色协调统一

              橱柜颜色与墙面相匹配,能营造出轻快、宽敞的厨房。为了让中性厨房不显单调,可以加一面彩色背景墙,再用对比鲜明的灯具和橱柜把手提亮。

              16. 安装大水槽

              紧凑型厨房里装一个大水槽非常实用——尤其在没有洗碗机的情况下。大水槽不仅洗碗方便,做饭时还能把未洗的碗”藏”进去,台面始终保持清爽。


              小空间的特色厨房装修案例

              位于 Parnell 的豪华都市风厨房装修

              这栋联排别墅位于 Parnell 的中心位置,但厨房很小、台面空间不足。我们彻底改变了布局——把厨房从左侧区域移到右侧,并在用餐区增加了橱柜作为扩展存储。这组柜子配有带内部灯光的搁架,需要时可以打开展示。查看改造前后图片和项目细节

              Parnell 小厨房翻新 — Superior Renovations Parnell 厨房储物设计 — Superior Renovations Parnell 厨房布局改造 — Superior Renovations
              Parnell 厨房细节 — Superior Renovations Parnell 都市风厨房 — Superior Renovations

              位于 Greenlane 的紧凑型厨房

              Joanna 和 Steve 想让他们的老房子更现代化。原来的厨房是封闭式的——我们拆除了一面墙,把它变成开放式生活空间。空间有限,所以我们打造了一个早餐吧台:增加储物、扩充台面、兼作早餐吧,一举三得。了解更多

              Greenlane 紧凑型厨房早餐吧 — Superior Renovations Greenlane 开放式小厨房 — Superior Renovations
              Greenlane 厨房翻新 — Superior Renovations Greenlane 厨房改造细节 — Superior Renovations

              更多家居设计资源

              1. 了解更好的厨房收纳方案,请查看上文列出的四个项目详情(Bucklands Beach、Avondale、Papatoetoe、Hillsborough)
              2. 在我们的奥克兰厨房装修图库中获取设计灵感
              3. 特色项目与客户案例——查看真实项目的规格
              4. 来自奥克兰客户的真实评价
              5. 想了解翻新费用?阅读厨房翻新费用完整指南,或直接使用厨房装修费用计算器

              常见问题

              我需要自己找厨房设计师吗?

              不需要。作为一家提供从设计到装修全方位服务的公司,我们配有内部厨房设计师——帮您选择合适的装修材料、提供创意设计、打造更具功能性的空间,并制作 3D 设计图和效果图,让您在动工前就能直观看到未来的厨房。

              我需要自己找水管工或电工吗?

              不需要。我们不只是橱柜制造商——从设计、拆除旧厨房,到定制橱柜和台面并安装,我们提供全部装修工种:油漆工、电工、水管工、木工等。我们还会带您到供应商展厅以批发价挑选电器、地板和灯具。整个装修过程由项目经理统筹进度和交付,并作为您的唯一联系人。

              厨房装修需要多少钱?

              在奥克兰,通过装修公司完成一次标准整体厨房翻新的平均费用为 19,000 至 29,000 纽币,含设计、拆除、定制橱柜与台面、安装、水电和项目管理,不含电器。我们提供固定报价,具体金额取决于您选择的材料和厨房尺寸。您可以使用我们免费的厨房装修费用计算器获取个性化估算。

              小厨房可以安装岛台吗?

              可以。紧凑型厨房常处于开放式生活空间中——在厨房和客厅之间加一个小早餐吧台,既能自然分隔空间,又能同时充当用餐区、备餐台面和储物空间。岛台可以定制储物柜和抽屉,进一步扩充收纳。

              小厨房应该用大瓷砖还是小瓷砖?

              用大瓷砖。900×600 或 600×600 规格的瓷砖灌浆线更少、视觉断裂更少,反而会让小空间显得更大——这与多数人的直觉相反。

              什么颜色能让小厨房显得更大?

              以中性色和浅色调为主色——浅色和光滑闪亮的表面会反射光线,营造空间放大的错觉。再用有色彩或质感的防溅板、对比色橱柜和彩色五金件来避免单调。


              还有问题没解决?预约 Superior Renovations 团队的免费咨询


                This site is protected by reCAPTCHA and the Google

                Privacy Policy and Terms of Service apply.

                由 Superior Renovations 撰写

                Superior Renovations 迅速成为奥克兰最受推荐的装修公司之一,这归功于我们友好的态度、透明的定价和公开的工作方式。当您的奥克兰房屋需要装修改造服务时,Superior Renovations 是您可以信赖的团队——高质量的工艺、高效的进度和具有成本效益的解决方案。

                或致电我们:0800 199 888


                18个月免息分期付款 — Superior Renovations

                一直在推迟您的装修计划吗?

                我们与 Q Mastercard® 合作,为您提供 18 个月免息分期付款方案——现在就享受您的新家,减少资金压力。

                了解更多:免息分期付款方案*

                *Lending criteria, fees, terms and conditions apply. Mastercard is a registered trademark and the circles design is a trademark of Mastercard International Incorporated.

                new pergola cost
                Landscaping & Outdoor

                Pergola Cost Calculator NZ: 2026 Auckland Pergola Costs

                Pergola Cost Calculator NZ: What a Custom Auckland Pergola Costs in 2026

                Free cost calculator

                How much will a new pergola cost?

                Get an instant Auckland price range for your project — no details required to see it.

                Open the Pergola Cost Calculator →

                Quick answer: A professionally built pergola in Auckland costs between $10,000 and $45,000 in 2026, depending on size, material, and whether you go fixed-roof or motorised louvred. Use our free pergola cost calculator below to get a tailored estimate in under 60 seconds.

                Set on a fully motorised opening roof rather than an open pergola? Price it with our Louvre Roof Cost Calculator.

                The straight answer first: a professionally built pergola in Auckland in 2026 sits between $10,000 and $45,000 for most builds. The wider real range stretches from around $4,000 for a basic timber kit-set DIY at the bottom to $70,000+ for a premium louvred outdoor room with lighting, heating, and screening at the top.

                What the headline number doesn’t tell you is what your money actually buys. A $12,000 timber pergola and a $32,000 aluminium louvred pergola are two completely different products that happen to share a name. Knowing which one fits your section, your sun, and your budget is the difference between getting it right first time and replacing it in five years.

                This page breaks down what each tier gets you in Auckland in 2026, what drives costs up or down, and how to read your pergola quotes without missing the gaps. Our free pergola cost calculator gives you a tailored estimate based on your specific size, material, and finish — it takes under 60 seconds.

                Custom aluminium pergola Auckland 2026 — pergola cost calculator NZ


                How our pergola cost calculator works

                We built the calculator for the question we get asked most: “what’s this going to cost me before I get builders out?” It returns a realistic estimate for a custom aluminium-framed pergola in Auckland based on the five inputs that move the price the most — size, finish colour, roof type, site complexity, and whether it’s freestanding or attached to your home.

                You fill it in, your estimate lands in your inbox in under 60 seconds, and you’ll have a starting figure to work with before any quotes come in. We’ll follow up to walk through your number and answer questions — no pressure to book anything.

                ➡ Open the Pergola Cost Calculator
                Get your Auckland pergola estimate in your inbox in under 60 seconds.

                What the calculator covers

                • Custom aluminium-framed pergola (3mm thick — NZ standard spec for residential)
                • Powder-coated finish (black or white as standard)
                • Clear PVC or polycarbonate roof panel
                • Supply and installation in Auckland
                • Standard footings on a typical residential section

                What it doesn’t cover (these get costed separately)

                • Electrical works — LED lighting, motorised louvres, automation ($800–$2,000)
                • Adjustable louvre roof systems (different rate — typically $1,200–$2,500/m²)
                • Scaffolding if your site needs it
                • Deck construction or ground levelling
                • Screening blinds (Ziptrak-style) — $3,000–$8,000 per blind, manual or motorised
                • Outdoor heating units — $600–$1,200 per heater plus install

                💡 Quick tip: Run the calculator twice — once for your wishlist size, once for a slightly smaller version. The second number is often the one that gets the project moving without compromising the look you want.


                What does a pergola cost in NZ in 2026?

                Pergola pricing in 2026 lands on a per-square-metre rate of roughly $900–$2,200 fully installed. The bottom of that range covers a simple open timber structure on a flat, accessible site. The top covers a motorised louvred system with the bells. Here’s the proper breakdown by build type, all figures GST-inclusive for supply and professional installation.

                Pergola type 2026 cost range (Auckland) Best fit for
                Basic timber DIY kit-set (small) $4,000–$10,000 Confident DIYer, small section, simple shade
                Standard professional timber (entertaining size) $10,000–$22,000 Family homes, rustic look, mid-budget
                Powder-coated aluminium pergola $14,000–$30,000 Coastal sites, low-maintenance, modern
                Mid-range motorised louvred system $20,000–$35,000 Year-round use, adjustable shade and rain cover
                Larger premium louvred install $45,000+ Premium renovations, engineered structural
                Premium outdoor room (lights, heat, screens) $60,000–$70,000+ Full-spec four-season living space

                A few notes on the figures above:

                • Auckland labour sits at the higher end of the national scale — typically $85–$130 per hour for carpentry and structural work. Outside Auckland you can usually take 10–20% off.
                • A standard 20m² pergola takes two installers 2–4 days, depending on footing requirements and site access.
                • Aluminium has overtaken timber as the modern default for Auckland — it’s rust-proof in salty Takapuna or Piha air, doesn’t warp under our humidity, and skips the yearly reseal that timber needs.

                “Pricing a pergola isn’t like pricing a kitchen — there’s no fixed kitchen-shaped product to compare. A $12k pergola and a $32k pergola might both be 25m² in the same suburb. What changes is the material grade, the post and beam spec, the roof system, and what’s hidden in the footings. We walk every client through that breakdown before they sign anything.”
                — Dorothy Li, Design Manager, Superior Renovations

                ➡ Run your pergola through the cost calculator
                Get a tailored 2026 Auckland estimate based on your actual size and finish.


                What your pergola budget actually buys in Auckland (2026 tier breakdown)

                Cost ranges are useful for shock-proofing your expectations. What you actually need to know is what each tier gets you on the ground. Here’s what we see across our 1000+ completed Auckland projects when we slot builds into budget tiers.

                $10,000 — entry custom pergola

                What you get at this tier:

                • Treated timber pergola, freestanding, 12–15m²
                • Open beam roof or basic polycarbonate panels
                • Standard footings on a flat, accessible section
                • One coat of exterior stain or paint

                Suits: Smaller backyards in Henderson, Manurewa, or Hobsonville new builds where the section layout is straightforward. Schedule 1 exempt in most cases.

                What you don’t get: aluminium framing, oversized spans, electrical, screens, louvres.

                $20,000 — standard professional build

                What you get at this tier:

                • 18–25m² timber or basic powder-coated aluminium pergola
                • Better roof options: tinted polycarbonate or clear PVC
                • Footings rated for medium wind zone (most central Auckland suburbs)
                • Possible deck integration as an extra
                • LBP sign-off on structural work

                Suits: Typical 1970s brick-and-tile homes in Manurewa or Pakuranga, family villa rear extensions in Mt Eden where access is reasonable. Most builds in this tier stay Schedule 1 exempt if freestanding.

                $30,000 — proper aluminium custom

                What you get at this tier:

                • 20–30m² powder-coated aluminium pergola, black or white
                • Higher-spec roof: clear PVC or polycarbonate with proper drainage detail
                • LED lighting integration possible (separate electrical run)
                • Often paired with deck work or paving
                • LBP structural sign-off included

                Suits: Remuera or Glendowie character homes wanting indoor-outdoor flow off a kitchen-dining renovation. Coastal North Shore builds where rust-proof spec matters. Approaching the 30m² consent threshold — Sonder Architecture handles consent in-house if needed.

                Custom aluminium pergola Auckland with deck integration — pergola cost NZ

                $45,000+ — louvred outdoor room

                What you get at this tier:

                • 25–40m² motorised louvred pergola
                • Adjustable louvre system — open in winter sun, close before a shower hits
                • Integrated LED lighting and often outdoor heating
                • Engineered structural design for high or very-high wind zones
                • Often paired with screening blinds (Ziptrak) and complete new deck
                • Building consent included where required

                Suits: Premium renovations in Herne Bay, Westmere, Takapuna; clients wanting genuine four-season outdoor use. The premium isn’t the aluminium — it’s the louvre mechanism, the engineering, and the integration.

                💡 Quick tip: Adding a single Ziptrak screen ($3,000–$8,000) often makes a fixed-roof pergola feel as functional as a louvred one — for half the spend. Worth modelling both before you commit.

                “The mistake we see most often is clients pricing a louvred pergola without thinking about whether they’ll actually use the louvres. If the pergola faces north and you only use it in summer, a fixed-roof with a Ziptrak screen on the western side does the same job for $15k less. We always ask about orientation before we recommend a system.”
                — Alison Yu, Designer, Superior Renovations

                ➡ Get your tier estimate via the calculator
                Plug in your size and material — see where your build lands.


                What drives pergola costs up or down

                Six things move the number the most. Get a handle on these and you’ll read any builder quote far more confidently.

                1. Material

                Material is the single biggest cost lever. Roughly, supply rates per m² for NZ in 2026:

                • Treated pine: $200–$450/m² — most affordable, needs sealing every 1–2 years
                • Macrocarpa (NZ native): $400–$700/m² — natural durability, less chemical treatment
                • Cedar: $600–$900/m² — premium softwood, rich colour, resists warping
                • Fixed-frame aluminium (powder-coated): $500–$1,200/m² installed
                • Motorised louvred aluminium: $1,200–$2,500/m² installed

                Steel turns up occasionally for industrial-style builds. It’s heavy, needs galvanising or powder-coating to resist rust, and you’ll usually need a crane to install it. For most Auckland sections it’s not worth the complication.

                2. Size

                Bigger means more footings, more posts, more roof material, more labour hours, and at a certain point engineering sign-off. A 12m² and a 30m² pergola use similar materials per m², but the larger one needs structural calculations and may push you over the 30m² consent threshold (see consent section below).

                3. Roof type

                • Open beam: cheapest, no rain protection — fine for shade alone
                • Polycarbonate or PVC fixed: adds $100–$300/m² over open beam
                • Adjustable louvred (motorised): adds $700–$1,500/m² over a fixed roof, plus electrical install

                4. Footings and site work

                A flat, accessible site with stable ground gets standard footings, usually included in the quote. Steep section, clay soil, or restricted access (think a Grey Lynn villa with a 60cm side passage) costs extra. Expect $500–$1,500 added for concrete cutting and new footings on existing patios or decks.

                5. Electrical, lighting, and heating

                Running cabling from your switchboard for motorised systems, LED strips, or heaters: $800–$2,000 depending on distance and concealment. Infrared radiant heaters cost $600–$1,200 per unit plus install. For lighting and motorised louvre control, we usually spec products from PDL by Schneider Electric — purpose-built for NZ wiring standards.

                6. Finish and detail

                Powder-coat in standard Resene colours (black, white, Grey Friars, Ironsand) is included. Anything custom adds $400–$1,000. Timber finishes need a stain and seal every 1–2 years to keep the wood from greying out under Auckland UV — Resene’s exterior range from Mitre 10 handles this well.

                ➡ Estimate your build with these factors locked in
                The calculator accounts for size, material, finish, and site.


                Do you need consent for a pergola in Auckland? (And what it costs if you do)

                The good news for most homeowners: a pergola doesn’t need a building consent. Under Schedule 1 of the Building Act 2004, freestanding pergolas under 30m² are generally exempt building work, provided they meet a few conditions.

                Important note: Consent is generally required if your pergola is (1) attached to your house and over 20m², (2) freestanding and over 30m², (3) has a solid waterproof roof structure, or (4) breaches your boundary setback or daylight plane. Auckland heritage zones often add further restrictions — Ponsonby fringe, Parnell, Mt Eden character zones in particular.

                When consent applies, expect:

                • Building consent fee (Auckland Council): $1,500–$3,000, processing 10–20 working days. Confirm current fees with Auckland Council.
                • Resource consent (if you breach setbacks, daylight planes, or site coverage): $2,500–$5,000+
                • LBP-certified structural sign-off: required for attached pergolas 20–30m² — usually included if you’re using a Licensed Building Practitioner

                The Auckland Unitary Plan generally requires pergolas to respect yard setbacks (1.5–3m from boundaries depending on zone) and height limits (typically 3–4m). Overhanging public areas or a neighbour’s land needs written approval.

                “Boundary rules catch a lot of homeowners out — they assume their section is theirs to do what they like with, then find out they’re 80cm too close to the fence and the council wants the posts moved. We measure setbacks twice before anyone digs.”
                — Cici Zuo, Head of Sales (NZ Dip. Interior Design), Superior Renovations

                💡 Quick tip: We handle the consent application in-house when it’s needed — same process we use on our renovation consents — so you don’t have to deal with Auckland Council yourself.


                How to compare pergola quotes without getting caught

                A $5,000–$10,000 gap between two pergola quotes for the “same” build is normal. What’s not normal is accepting the gap without knowing what’s actually different.

                Here’s where the differences usually hide:

                1. Beam span and post spacing

                Cheaper quotes often use thinner beams spanning further, supported by fewer posts. Looks fine on paper. Sags or flexes in five years. Ask what beam dimensions are specified and at what spacing — a 240x90mm beam spanning 3m is a different product than a 200x50mm beam spanning 4m, even if both quotes call it a “pergola”.

                Planning a new pergola?
                Open the calculator →

                2. Footing depth and spec

                The NZ Building Code requires footings rated for your wind zone. Cheaper quotes may spec shallow footings sufficient for low wind but inadequate for Takapuna, Piha, exposed Westmere, or any coastal site. Ask: what depth, what diameter, what concrete spec? On a high wind zone site you should see 600–900mm deep footings minimum.

                3. Fixing grade

                Marine-grade stainless or hot-dip galvanised fixings cost more than basic zinc-plated. On a coastal pergola the difference is whether you’re replacing brackets in seven years or never having to touch them.

                4. Consent and engineering inclusion

                Some quotes exclude consent costs and engineering sign-off, expecting you to handle them. Get explicit confirmation either way — these are $1,500–$3,000 line items you do not want to discover after the fact.

                5. Standard inclusions on the extras

                Concrete footing preparation, removal of existing structures, anchoring to existing decks, gutter and downpipe integration — these are commonly excluded on cheap quotes. Ask line by line what’s in and what’s out.

                💡 Quick tip: Ask each quoting builder for their Licensed Building Practitioner (LBP) number and check it on the LBP register at lbp.govt.nz. If they can’t give you one for structural work, walk.


                Why two pergolas of the same size cost different across Auckland

                Two clients ask for a 24m² aluminium pergola. One quote comes back at $26,000, the other at $34,000. Same product, different number. Here’s what causes the gap.

                Site access

                A Hobsonville new build with flat lawn and driveway access takes a different approach than a 1930s villa rear courtyard in Grey Lynn with a 60cm side passage. On the second, materials and waste move in and out by wheelbarrow, scaffolding goes up by hand, and labour hours stack up. That’s an extra $2,000–$4,000 in many cases — not a builder being greedy, just the reality of the site.

                Ground conditions

                Auckland’s geology shifts suburb by suburb. Clay slopes in Titirangi or West Harbour need deeper footings than the flat sand in Albany. Volcanic-fringe sites near Mt Eden or One Tree Hill can mean rock breaking on the way down. We’ve seen footing costs vary by $1,500–$2,500 between two builds based on ground alone.

                Wind zone

                Most central Auckland suburbs sit in medium wind zone per the building.govt.nz wind maps. Coastal Takapuna, Piha, exposed Westmere, or hilltop Titirangi can hit high or very high. Higher zones require thicker posts (150x150mm timber or 100x100mm steel minimum), deeper footings, and diagonal bracing per the NZS 3604 framing standard. That spec adds real cost — and skipping it on the wrong site is how pergolas come down in southerlies.

                Sun, shade, and orientation

                The cheapest pergola is the one you actually use. A north-facing pergola in Remuera that gets baked from 11am needs a different shade strategy than a south-facing courtyard in Hillsborough that’s already shaded for half the day. Material and roof type both shift based on orientation — a $2,000 louvre upgrade on the wrong-facing site is wasted money; on the right-facing site, it’s the difference between using the space in February and not.

                Aluminium pergola Auckland north-facing — pergola cost factors

                “We always walk the site before we quote. Two sections that look the same on Google Maps can have totally different cost profiles once you stand on them — the wind, the access, the sun angle, the ground. A 30-minute site visit saves clients from variations later.”
                — Eunice Qin, Designer, Superior Renovations


                Pergola renovation cost: replacing or upgrading an existing structure

                Not every pergola job starts with bare lawn. A big share of the outdoor work we do in Auckland is a pergola renovation — you’ve already got a structure, it’s just past its best. The old treated pine has greyed off and started to rot at the post bases. The polycarbonate roof has gone brittle and yellow. Or the bones are sound but the thing was never much chop to begin with, and now the kitchen-dining reno behind it has raised the bar for the whole outdoor space.

                Pergola renovation cost runs differently to a new build, and the reason is simple: what you pay depends on how much of the old structure you can actually keep.

                What a pergola renovation actually costs in Auckland

                Three broad scenarios cover most of what lands on our desk. The gap between them is the difference between saving the old structure and starting again.

                Renovation scope 2026 cost range (Auckland) What’s involved
                Refresh existing pergola $3,000–$9,000 Reseal or repaint timber, replace roof panels, new fixings, minor repairs
                Upgrade and extend $10,000–$25,000 Keep footings and posts, add louvred or fixed roof, screens, lighting
                Tear down and rebuild $14,000–$45,000+ Remove old structure, new footings, new aluminium or timber build

                Here’s the trap: people assume keeping the old structure automatically saves money. Sometimes it does. Often it doesn’t. If the existing footings were never rated for your wind zone — and plenty of older DIY pergolas weren’t — building a heavier louvred roof onto them is a false economy that fails an engineer’s check. We’d rather tell you that before you spend $12,000 upgrading a base that has to come out anyway.

                When a refresh makes sense — and when it doesn’t

                A refresh is the right call when the structure is fundamentally sound: posts solid at the base, beams straight, footings adequate. At that point you’re spending on the parts that wear — the roof, the finish, the fixings — and getting most of a new pergola’s look for a third of the cost.

                A rebuild is the right call when the posts have rot at ground level, the footings are shallow, or you’re changing the roof type in a way the old frame can’t carry. Retrofitting a motorised louvre system onto a timber frame built for open beams is the classic example. The frame usually isn’t rated for the extra load, and you end up rebuilding anyway.

                💡 Quick tip: Before you spend anything on a pergola renovation, get the post bases checked. Push a screwdriver into the timber at ground level — if it sinks in, the rot is already there and a refresh is money down the drain. That five-minute check decides refresh versus rebuild.

                A pergola renovation rarely happens on its own. More often it’s one piece of a wider outdoor renovation — new deck, paving, planting, and the structure all done together so the finished space flows. Done in stages, you pay twice for site setup and the finished areas rarely line up. Planned as one job, they do. That’s where the tidiest budgets and the best results tend to come from.

                “People come to us wanting to save the old pergola, and sometimes we can — but the first thing we check is the footings and the post bases, not the timber up top. A tidy-looking pergola can be sitting on footings that won’t pass a wind-zone check. If that’s the case, spending on a refresh is throwing good money after bad. We’ll always tell you which side of that line you’re on before you commit.”
                — Dorothy Li, Design Manager, Superior Renovations

                If your pergola renovation is part of a larger outdoor project, it’s worth scoping the whole thing through our guide to outdoor renovations in Auckland — deck, structure, and planting planned together rather than in stages.


                Planning a new pergola?
                Open the calculator →

                Pergola finance — 18-month interest-free

                If you’d rather not deplete savings on outdoor work right now, we partner with Q Mastercard for 18-month interest-free finance on renovation projects from $1,000 up. Standard lending criteria apply — see our finance options page for the detail.

                For most clients, finance turns a $25,000 louvred pergola from a “next year” project into a “this summer” one. The interest-free term covers a full year of using the pergola before the standard rate kicks in.


                Ready to get your pergola costed?

                The fastest way to get a realistic 2026 figure for your specific build is the calculator — it’ll have an estimate in your inbox in under a minute. If you’d rather walk through the build face-to-face with one of our designers, our free in-home consultations cover all of Auckland. We’ll measure the site, talk through orientation and material, and bring sample finishes.

                If you’re earlier in the process and want a written feasibility brief before you commit to anything, request one of our free feasibility reports.

                ➡ Book your free in-home consultation with Superior Renovations
                ➡ Get your free pergola cost estimate in 60 seconds
                ➡ Request a free feasibility report for your project


                Pergola cost NZ — frequently asked questions

                How much does a pergola cost in Auckland in 2026?

                A professionally built pergola in Auckland costs between $10,000 and $45,000 in 2026 for most builds. The wider range stretches from $4,000 for a basic timber DIY kit-set up to $70,000+ for a premium louvred outdoor room with lighting, heating, and screening. The biggest cost levers are material (timber vs aluminium), size, and roof type (open beam vs fixed vs motorised louvred). Auckland labour rates ($85–$130 per hour) sit at the higher end of NZ — outside Auckland figures typically come down 10–20%.

                How much does an aluminium pergola cost in NZ?

                A custom powder-coated aluminium pergola in Auckland costs $14,000–$30,000 in 2026 for a fixed-roof build. Stepping up to a motorised louvred aluminium system pushes the price to $20,000–$35,000 mid-range, or $45,000+ for premium larger installs. Aluminium is the modern default for Auckland because it's rust-proof in salty coastal air, doesn't warp in our humidity, and skips the yearly reseal that timber needs. Powder-coat in standard black or white is included; custom colours add $400–$1,000.

                Do I need a building consent for a pergola in Auckland?

                In most cases, no. Under Schedule 1 of the Building Act 2004, freestanding pergolas under 30m² are exempt from building consent. Consent is generally required if your pergola is attached to your house and over 20m², freestanding and over 30m², has a solid waterproof roof, or breaches your boundary setback or daylight plane. Auckland heritage zones (parts of Ponsonby, Parnell, Mt Eden) often add further restrictions. When consent is required, expect $1,500–$3,000 in council fees and 10–20 working days processing time.

                How much does a louvred pergola cost in NZ?

                A motorised louvred pergola in NZ costs $20,000–$35,000 for a mid-range build and $45,000+ for premium larger installs. The premium isn't just the aluminium — it's the louvre mechanism (adjustable blades that open and close to control sun and rain), the motorisation, and the electrical run from your switchboard. Per square metre rates run $1,200–$2,500/m² fully installed. A useful comparison: a fixed-roof aluminium pergola with a single Ziptrak screen often delivers similar all-weather function for $15,000 less.

                What is the cost per square metre for a pergola in NZ in 2026?

                Pergola cost per square metre in NZ sits between $900 and $2,200 fully installed in 2026. The bottom of that range covers simple open timber structures on flat accessible sites. The top covers motorised louvred aluminium systems with electrical. By material: treated pine $200–$450/m² supply, macrocarpa $400–$700/m², cedar $600–$900/m², fixed-frame aluminium $500–$1,200/m² installed, motorised louvred aluminium $1,200–$2,500/m² installed. Add labour, footings, and site work to get the total.

                Is it cheaper to build a pergola myself or hire a builder?

                A timber DIY kit-set from Mitre 10 or Bunnings can save $2,000–$5,000 in labour on a small pergola, with materials starting around $1,500–$3,000. The catch: you take on the structural compliance, the wind-zone footing spec, the boundary setback check, the LBP requirement (if attached over 20m²), and you don't get a warranty. Skipping a step risks Auckland Council asking you to remove or remediate the structure later. For pergolas $15,000+ or anything attached to the house, professional install is almost always the right call.

                How long does it take to install a pergola in Auckland?

                A standard 20m² aluminium pergola in Auckland takes two installers 2–4 days on site, depending on footing requirements and site access. Add 10–20 working days for council processing if consent is required, plus 4–8 weeks for custom aluminium fabrication lead time. Larger louvred builds or sites with restricted access (think a Grey Lynn villa rear with a narrow side passage) can stretch installation to a full week. Weather plays a role — we don't pour footings in heavy rain.

                Do I need an LBP for my pergola?

                Yes for any pergola attached to your house with restricted building work — that means anything affecting the building's structure, weathertightness, or fire safety. For freestanding pergolas, an LBP isn't legally required if the build is Schedule 1 exempt. In practice, any pergola 20m² or larger benefits from LBP-certified structural sign-off — it confirms the build meets the NZ Building Code and gives you cover if you sell the property later. Ask your builder for their LBP number and check it on the register at lbp.govt.nz.

                What is the best material for an Auckland pergola?

                For most Auckland sites, aluminium is the best modern default — rust-proof in salty coastal air, low-maintenance, and available in standard powder-coat colours like Resene Grey Friars or Ironsand. Timber (cedar or macrocarpa) suits rustic or character home settings, especially villas and bungalows in Grey Lynn, Mt Eden, or Devonport — but expect yearly UV reseal. Steel is rare for residential pergolas — heavy, needs galvanising, usually overkill. The right material also depends on wind zone — coastal Takapuna, Piha, or exposed Westmere builds need spec rated for high winds.

                Does a pergola add value to my Auckland home?

                A well-built pergola adds real value to an Auckland home, particularly in entertaining-focused suburbs like Remuera, Herne Bay, Glendowie, and Takapuna. Outdoor living space functions as an additional room — buyers in the Auckland market consistently respond to that. The value-add is highest when the pergola integrates with existing deck and indoor-outdoor flow, rather than sitting as a standalone structure. As with any renovation, build quality matters: a $30,000 aluminium louvred pergola with engineering sign-off adds more value than a $30,000 timber pergola that's already showing UV damage.

                Can I finance a pergola through Superior Renovations?

                Yes — we partner with Q Mastercard to offer 18-month interest-free finance on renovation projects from $1,000 up, which covers most pergola builds. Standard lending criteria apply, including a credit check. For a $25,000 louvred pergola, that's effectively a year of using the pergola before the standard rate kicks in. Finance is a useful lever for clients who don't want to deplete savings on outdoor work right now, especially when the build is timed for summer. Our finance options page covers the full terms.

                What is included in the Superior Renovations pergola cost calculator estimate?

                Our pergola cost calculator estimates the cost of a custom aluminium-framed pergola (3mm aluminium, NZ standard) in either black or white powder-coat, with a clear PVC or polycarbonate roof, supplied and installed in Auckland on a standard residential site. It excludes electrical works (LED, motorised louvres, automation), scaffolding if your site needs it, adjustable louvre roof systems, deck construction, screening blinds (Ziptrak), and outdoor heaters. Those get costed separately during consultation. The estimate lands in your inbox in under 60 seconds.

                How much does a pergola renovation cost in Auckland?

                A pergola renovation in Auckland costs $3,000–$9,000 for a refresh (reseal or repaint, new roof panels, new fixings), $10,000–$25,000 to upgrade and extend an existing structure with a new roof or screens, or $14,000–$45,000+ to tear down and rebuild. The deciding factor is how much of the existing structure is sound — particularly the footings and post bases. Keeping an old frame only saves money if it's rated for your wind zone; retrofitting a heavier louvred roof onto footings that aren't rated usually forces a rebuild anyway.

                Is it cheaper to renovate a pergola or build a new one?

                Renovating an existing pergola is cheaper only when the structure is fundamentally sound — solid posts, straight beams, and footings adequate for your wind zone. A refresh of a sound pergola runs $3,000–$9,000 versus $14,000+ for a new build. But if the post bases have rot at ground level or the footings are shallow, a rebuild is the honest call. The five-minute test: push a screwdriver into the timber at ground level. If it sinks in, budget for a rebuild rather than a refresh.


                Further Resources for your pergola project

                1. Featured projects and client stories to see specifications on some of our completed Auckland pergola projects.
                2. Full pergola design, materials, and builder guide for NZ — the design and materials companion to this cost article.
                3. Our landscaping and outdoor renovations service — full scope of outdoor work Superior Renovations covers in Auckland.
                4. Real client stories from completed Auckland renovation projects.

                Need more information?

                Take advantage of our FREE Complete Home Renovation Guide (48 pages), whether you’re already renovating or in the process of deciding to renovate, it’s not an easy process, this guide which includes a free 100+ point check list – will help you avoid costly mistakes.

                Download Free Renovation Guide (PDF)


                Still have questions unanswered?

                Book a no-obligation consultation with the team at Superior Renovations, we’d love to meet you to discuss your renovation ideas!

                  Services

                  Home RenovationKitchen RenovationBathroom RenovationOutdoor RenovationHouse ExtensionCommercialDesign ServicesOther

                  By submitting this form, you agree to receive communications from us via email or text regarding our services, you can unsubscribe at any time.

                  This site is protected by reCAPTCHA and the Google

                  Privacy Policy and Terms of Service apply.


                  WRITTEN BY SUPERIOR RENOVATIONS

                  Superior Renovations is quickly becoming one of the most recommended renovation company in Auckland and it all comes down to our friendly approach, straightforward pricing, and transparency. When your Auckland home needs renovation/ remodeling services, Superior Renovation is the team you can count on for high-quality workmanship, efficient progress, and cost-effective solutions.

                  Get started now by booking a free in-home consultation.

                  Request Your In-home Consultation

                  Or call us on 0800 199 888

                  www.superiorrenovations.co.nz


                  18 months 0 percent interest long term finance badge

                  Have you been putting off getting renovations done?

                  We have partnered with Q Mastercard ® to provide you an 18 Month Interest-Free Payment Option, you can enjoy your new home now and stress less.

                  Learn More about Interest-Free Payment Options*

                  *Lending criteria, fees, terms and conditions apply. Mastercard is a registered trademark and the circles design is a trademark of Mastercard International Incorporated.

                  kitchen cost
                  Kitchen Renovation

                  厨房装修计算器(新西兰)- Superior Renovations

                  奥克兰厨房翻新完工实景 — Superior Renovations

                  厨房是全屋使用频率最高的空间之一,也是翻新时最值得投入的区域。一次专业的厨房翻新最多可为房屋增值约 10%——不过我们大多数客户翻新厨房的首要原因,并不是为了卖房,而是想让厨房更好用、更舒适,更贴合自家的生活方式。

                  在奥克兰,一次标准的整体厨房翻新(含材料、设计、项目管理、人工、水电)平均费用为 19,000 至 29,000 纽币,不含电器。实际花费取决于您的布局、橱柜与台面的材质选择,以及是否涉及结构改动。这篇指南会带您了解完整的装修流程、最容易被低估的几项费用,以及如何制定切合实际的预算。

                  👉 直接跳转至厨房装修费用计算器——输入您的具体需求,估算结果将在几秒钟内发送到您的电子邮箱。


                  整体厨房装修包括哪些步骤?

                  一个完整的厨房翻新项目通常按以下八个阶段推进,整体工期从几周到数月不等,具体取决于项目范围和施工中是否出现意外情况。

                  1. 规划与设计:装修的第一步是规划新厨房的布局。这一阶段需要平衡您的需求、使用习惯和现有空间的限制。在 Superior Renovations,我们的设计师会为您制作新厨房的 3D 效果图,让您在动工前就能直观看到最终效果。
                  2. 拆除:拆除旧橱柜、台面和电器。视情况可能涉及拆墙、起除地板,以及断开原有的水管和电路。
                  3. 结构改造:如果方案中包含结构性改动——比如拆除隔墙、打通开放式空间或新增窗户——通常在这一阶段完成。
                  4. 水管与电路改造:旧厨房拆除后,按新布局调整或移位水管和电路系统,包括安装新的给排水管件、重新布线,以及增加插座和开关。
                  5. 地板与墙面:水电工程完成后铺设新地板(瓷砖、实木或复合地板)并处理墙面——粉刷或铺贴新墙纸。
                  6. 橱柜与台面:安装按新布局定制的橱柜,以及您选定的台面材料——花岗岩、石英石或大理石等。橱柜往往是整个预算中占比最大的单项。
                  7. 电器安装:橱柜和台面就位后安装电器——冰箱、灶台、烤箱、洗碗机以及设计方案中的其他设备。
                  8. 收尾修饰:安装照明灯具、橱柜五金件和装饰元素,让整个厨房呈现完整、精致的最终效果。

                  选择一家信誉良好、流程透明的装修公司,是控制工期和预算最关键的一步。专业的项目管理可以在意外出现时及时调整方案,确保最终结果符合您的预期。您可以先浏览我们的厨房设计案例库,了解我们在奥克兰完成的真实项目。


                  厨房装修中最容易被低估的五项费用

                  翻新厨房让人兴奋,但在精美的样板图背后,往往藏着让预算失控的意外开支。以下五项费用是我们在奥克兰数百个厨房项目中,最常见到业主低估的地方。

                  1. 结构改动——沉默的预算杀手

                  很多业主梦想拥有开放式厨房,却没有意识到拆墙意味着结构改动。涉及承重墙的改建需要工程评估、建筑许可(Building Consent)和电路改线,费用会显著高于普通翻新。如果预算有限,沿用现有布局是控制成本最有效的方式。

                  2. 藏在表面之下的隐患

                  拆除开始后,老化的水管、不合规的电路或结构缺陷都可能浮出水面——这在奥克兰的老房子中尤其常见。根据我们的项目经验,这类意外问题平均会让翻新费用增加 1,000 至 3,000 纽币。动工前做一次全面检查,并预留应急预算,是避免预算飙升的最好办法。

                  3. 橱柜——质量与成本的平衡

                  橱柜决定了厨房的颜值和实用性,但优质橱柜的成本经常被低估。低价橱柜看似省钱,却往往经不起日常使用的考验。定制橱柜的价格通常在 5,000 至 25,000 纽币之间,材质和五金配置不同,差距可以非常大。

                  4. 电器升级的真实代价

                  一整套高端电器很容易让预算增加数千纽币。我们建议预留总预算的 10–15% 用于电器,并把配送和安装费用一并计入。

                  5. 专业费用与建筑许可

                  设计师、工程师的费用以及结构改动所需的建筑许可,是初期预算中最常被遗漏的项目——许可费用可能从数百到数千纽币不等。在做预算时务必把这部分计入,而不是等到中途才发现。更多常见问题可以查看我们的装修常见问题解答。


                  扫描二维码,在小红书上找到我们

                  Superior Renovations 小红书二维码

                  体验家居改造的艺术,选择 Superior Renovations!我们是奥克兰首屈一指的浴室、厨房及全屋装修专家。从概念设计到完工,我们的团队确保每个细节都完美无缺。扫描二维码,在小红书上关注我们,获取最新项目、装修技巧和灵感。

                  扫描二维码,通过微信联系我们

                  Superior Renovations 微信二维码

                  想开始您的装修之旅吗?通过微信与 Superior Renovations 联系,享受便捷、个性化的中文服务。立即扫描,提问、获取专家建议,踏出家居改造的第一步!


                  翻新前 — 奥克兰厨房装修对比
                  翻新前 — Kitchen Renovation
                  翻新后 — 奥克兰厨房装修对比
                  翻新后 — Kitchen Renovation

                  如何制定厨房装修预算?

                  陈旧的装饰、不顺手的布局、时好时坏的电器——这些往往是业主萌生翻新念头的起点。但很多人因为不知道从哪里开始,把项目一拖再拖。制定预算其实只需要三步:

                  第一步:评估您当前的厨房

                  退一步审视您的厨房:让日常使用变得不便的,究竟是空间不够、布局不顺,还是过时的台面和橱柜?接下来思考全家人的使用习惯——如果您经常招待客人,岛台可能是值得的投资;如果您不常下厨,也许只需升级部分设备即可。装修方案应该围绕家人实际使用厨房的方式来定,而不是单纯追求样板间效果。

                  第二步:确定预算范围

                  您的预算最终决定装修的范围。移动水管和电源插座的费用可能很高——如果预算有限,优先考虑沿用现有布局。下方的费用计算器可以帮您了解,在奥克兰,厨房翻新的各个部分大致需要多少钱。

                  第三步:研究并选对装修公司

                  每家公司的服务方式不同,并不是每一家都适合您的项目。建议在网上做足功课,并与多家公司当面沟通,感受他们的专业程度和沟通方式。会面时一定要询问:过往的完整案例、老客户的评价,以及他们提供的保修和质量保证。您也可以直接预约一次免费上门咨询,让我们的设计师到您家中实地评估。


                  关于厨房费用计算器(新西兰)

                  在比较厨房装修报价时——尤其在奥克兰——最重要的是搞清楚报价里到底包含了什么。我们的计算器估算涵盖:橱柜及储物柜、拆除、水管工程、地板铺设、电气工程、燃气安装,以及全部安装费用。估算不包含电器费用(烤箱、冰箱、抽油烟机、洗碗机等)。

                  估算价格基于我们完成的全套定制厨房翻新项目的平均值,而非局部改造。由于每个项目情况不同,请在估算结果基础上预留 10–15% 的浮动空间。填写您的详细信息后,结果将直接发送到您的电子邮箱(请记得检查垃圾邮件文件夹)。

                  免费工具
                  获取奥克兰厨房装修费用的即时估算

                  打开厨房装修费用计算器 →


                  常见问题

                  厨房翻新成本计算器(新西兰)是免费使用的吗?

                  是的。该计算器由 Superior Renovations 开发,免费向所有访客开放,用于为奥克兰住宅的厨房翻新项目生成成本估算,部分是应客户的普遍要求而开发的。

                  标准厨房翻新的平均费用是多少?

                  在奥克兰,标准整体厨房翻新的平均费用为 19,000 至 29,000 纽币,包含材料、设计、项目管理、人工、水管和电气工程,具体取决于材料和配件的选择。该费用不包含电器。

                  翻新厨房是否需要建筑许可(Building Consent)?

                  一般的厨房翻新不需要建筑许可,除非涉及建筑结构的改动,例如拆除墙壁。涉及结构改动时,许可费用可能从数百到数千纽币不等。

                  计算器的估算包含哪些费用?

                  估算涵盖橱柜及储物柜、拆除、水管工程、地板铺设、电气工程、燃气安装以及安装费用。估算不包含电器,如烤箱、冰箱、抽油烟机和洗碗机。

                  厨房翻新需要多长时间?

                  一个完整的厨房翻新项目通常需要几周到数月时间,具体取决于项目范围、是否涉及结构改动,以及施工过程中是否出现意外情况。

                  电器预算应该预留多少?

                  建议预留总预算的 10% 至 15% 用于厨房电器,并将配送和安装费用一并计入。一整套高端电器很容易增加数千纽币的开支。

                  计算器的估算结果有多准确?

                  估算基于 Superior Renovations 完成的全套定制厨房翻新项目的平均成本,仅供参考。由于每个项目的实际情况不同,请在估算结果基础上预留 10% 至 15% 的浮动空间。

                  Superior Renovations 提供奥克兰以外地区的服务吗?

                  目前我们的服务范围仅限大奥克兰地区,包括中部、东部、南部、北部、西部奥克兰及斯坦莫湾区域,暂不提供奥克兰以外地区的服务。

                  请注意:尽管所有信息在发布之日均被认为真实、准确,但发布后情况的变化可能影响信息的准确性。信息如有变更,恕不另行通知。Superior Renovations 对打印或存储的任何信息的准确性,以及用户以任何方式解读和使用信息所产生的后果,不承担任何责任。

                  superior renovations management team - Superior Renovations
                  Media

                  Our Management Team: Four Department Heads

                  In January 2025 we formed our management team.

                  Why we added a management layer

                  The business had grown to the point where it needed a proper layer between the directors and the day-to-day running of each department. So we appointed four department heads, most of them promoted from within.

                  We’d come a long way since 2017. More renovations running at once, more people on the team, and more brands under the wider group. At a certain size, the directors can’t stay across every department every day, and trying to leaves decisions waiting on the wrong desk. A middle-management layer is how a growing company keeps decisions close to the people doing the work.

                  The four department heads

                  Swati Tiwary stepped up to Head of Marketing. She’s been with us for years; she was our Marketing Manager back when the showroom opened in 2022, so it was a natural move. She now leads how the company presents itself, from the brand to the website.

                  Cici Zuo became Head of Sales, leading the team that runs those first design-led conversations with clients. Dorothy Li took on Head of Design, leading our in-house Design Department and the interior and material side of every project. And Elaine Liu leads our accounts function as Head of Accounts, keeping the financial side of the business running day to day.

                  Between them, the four heads cover the parts of the business a renovation touches from first enquiry to final invoice: how you find us, the conversations you have, the design you sign off, and the paperwork behind it all.

                  What this means for you

                  None of this is the flashy part of a renovation company. It’s the opposite. It’s the structure that lets the visible work happen properly. As we take on bigger projects and more of them at once, the difference between a good year and a messy one comes down to whether the right people own the right decisions.

                  For you, it means clear ownership. Each part of your project has an accountable lead, so things are less likely to fall between the cracks when several jobs are running at once. Promoting from within mattered to us here. The people now heading these departments already knew the business, the clients and the way we work. That’s four experienced people stepping up, not four new faces learning the ropes.

                  Common questions about our team structure

                  Who leads each department at Superior Renovations?

                  Since January 2025 we've had four department heads: Swati Tiwary (Head of Marketing), Cici Zuo (Head of Sales), Dorothy Li (Head of Design) and Elaine Liu (Head of Accounts), sitting between the directors and the day-to-day running of each team.

                  When did Superior Renovations form its management team?

                  In January 2025. The business had grown enough to need a layer of department heads between the directors and the daily running of each department, so we appointed four.

                  Were the department heads hired in or promoted from within?

                  Most were promoted from within. Swati Tiwary, for example, was our Marketing Manager when the showroom opened in 2022 before stepping up to Head of Marketing. They already knew the business, the clients and how we work.

                  Does a bigger team change how my renovation is handled?

                  The point of the structure is that it doesn't, in the way that matters. Clear department ownership is what keeps your project moving smoothly as the company takes on more work at once, so you still get a single, accountable line of responsibility.

                  Great work, good communication, very easy to work with. For downstairs bathroom upgrade.
                  We worked with Alison (kitchen design) and Neil (project management) during our kitchen renovation and had a great experience.

                  Communication was great, there was no 'hard sell', and the team was always available and extremely responsive. The works were completed to our satisfaction and even when things were done in a way we didn't like or was incorrect, all we had to do was point the error out and a team member was sent out immediately to rectify the issue.

                  The end result exceeded our expectations- all done without breaking the bank and within the timeline agreed to at the start.

                  We look forward to enjoying our new kitchen and are already thinking about our next project with the team from Superior renovations.
                  Exceptional Kitchen Renovation Experience

                  We recently had our kitchen renovated by Superior Renovations on Wairau Road, and we couldn’t be happier with the entire experience and, most importantly, the finished result.

                  From the very first day of demolition through to the final cabinet installation, every person involved in the project was exceptional. The quality of workmanship was consistently excellent, and it was clear that everyone took pride in the work they were doing.

                  A special mention has to go to Neil, who managed the entire project brilliantly. The biggest thing that stood out to us was how well organised everything was. The timeline was adhered to week after week, and we always knew exactly what was happening and who would be coming each day. It made what could have been a stressful renovation feel incredibly smooth and well managed.

                  Alison, who helped us with the initial design, was fantastic. She came up with a wonderful design that we immediately loved, and she was always happy to take the time to answer our questions, talk through options and make sure we were comfortable with every decision.

                  The plumber, electrician and cabinet maker were all outstanding, and the quality of their work really shows in the finished kitchen.

                  The transformation from our old kitchen to the new one has been incredible, and we absolutely love our new space. The attention to detail, workmanship, communication and project management were all first class.

                  We would recommend Superior Renovations to anyone and everyone without hesitation. If you’re looking for a company that delivers a quality renovation, keeps to its timeline and provides excellent value for money, we would definitely recommend giving them a call.

                  Thank you to Neil, Alison and the entire Superior Renovations team for giving us a kitchen we absolutely love! 👏👏
                  We have always loved working with Superior renovations and in particular Kevin. We felt like we were getting special one-on-one treatment at all hours of the day. They always produce their work super quick and to a good standard.
                  We added a new bathroom and upgraded the rumpus.
                  Superior Renovations offered a reasonable price and delivered professional services and work.
                  We recommend Superior Renovations for the house renovation.
                  This is our final and exceptionally positive review for Superior Renovations. First and foremost, we must emphasize that they are outstanding!

                  Superior Renovations has completed a comprehensive renovation of our entire house, both externally and internally, including the kitchen, bathroom, painting, carpeting, electronic gate, and more. Throughout the various projects over the past few months, we have been thoroughly impressed by their work and are delighted with the results. Their expertise and service continue to amaze us; they truly listen to our needs and engage in discussions whenever they believe improvements can be made.

                  We extend our gratitude to Cici, who not only served as the sales manager but also as the designer, transforming our kitchen from an early 2000s style to a modern and stylish new one. Neil, our project manager, worked with us daily, attending to every detail and going the extra mile to help us achieve an excellent result.

                  From the very first day of collaboration, we encountered no issues whatsoever, whether in communication, design discussions, or the execution by the on-site teams. We highly recommend Superior Renovations to anyone considering home renovation. Contacting them will reveal why we are so pleased with their work on our home.

                  David and Emily
                  SUPERIOR RENOVATIONS
                  Renovations on one full bathroom and one small ensuite at my home in Sunnynook, Auckland, were completed on 26th June 2026.
                  I am fully satisfied with the work done at my home by all workers and contractors and delighted with the results that I am now enjoying. All work is of a very high standard and attention to care leading to excellent results.
                  All staff of Superior Renovations and associated contractors were at all times helpful and happy to explain all aspects of their work and respectful in listening to any of my concerns or questions, with any changes where necessary being quickly and effectively carried out.
                  I have no hesitation in recommending Superior Renovations as your choice for any bathroom renovation.

                  Valerie Hepburn
                  4 Stoneleigh Court, Auckland
                  In early June, I hired Superior Renovation company to thoroughly renovate our two bathrooms. The project has now been completed and we are very satisfied. Thank you sincerely, and we highly recommend it.
                  Despite some delays, Eunice, Neil and the team at Little Giants have done a really good job on out kitchen renovation. Great finishing and very responsive to fixing up any little thing we weren't happy with.

                  Good work team!
                  ​From the very first consultation, our experience with this team has been nothing short of stellar.
                  ​
                  ​Working with Eunice, our sales consultant, set a high bar for the rest of the project.
                  Eunice is truly exceptional at what she does. When we first began our kitchen project, we went through several versions of our floor plan, and she was with us every step of the way—from the initial planning stages right through to the final concept. Her patience and dedication during the design process were remarkable.
                  Throughout the project, Eunice provided:
                  * **Invaluable Suggestions:** She has a keen eye for both aesthetics and functionality, pointing out details we never would have considered on our own.
                  * **Seamless Adjustments:** No matter how many tweaks we requested, she handled every change with professionalism and a "can-do" attitude.
                  * **Expert Guidance:** She transformed our vague ideas into a cohesive, stunning reality.
                  ​
                  ​Once the planning was complete, Neil, our project manager, took the reins and truly blew us away. Neil is a consummate professional who balances technical expertise with fantastic communication.
                  ​ He kept us informed at every stage, ensuring we knew exactly what to expect and when.
                  Whenever a minor pivot was needed, Neil handled it with grace and efficiency, keeping the timeline on track.
                  His standards for the renovation work were incredibly high, ensuring the final result was polished and beautiful.
                  ​
                  ​The transition from Eunice’s initial planning to Neil’s execution was flawless. If you are looking for a team that combines design expertise with top-tier project management, look no further. We are absolutely thrilled with our new kitchen and new flooring !
                  Superior Renovations has just finished a complete remodel of my bathroom. I can see, why the company has such a high reputation. At every stage, from sales, design, project management, and execution, the company excelled at every point. I am just so happy with the work that they have done and they have exceeded my expectations at every point.
                  Used Superior for a kitchen and bathroom renovation last year. They did an excellent job updating both rooms, communication was excellent ongoing tjrough the project, they coordinated all the tradies, synchronized so there was little downtime, and it all worked exactly as planned and on budget. Was really glad we chose Superior Renovations and plan to use again for our entrance way at some stage.
                  As I said to my work colleagues ‘I have just had the most pleasant experience’. When they realised it was with renovations at home they were shocked - ‘unheard of’ I was told.
                  Everything went to plan - timing, project management, costs, etc, etc. Neil communicated with me daily and made my whole bathroom renovation a pleasure.
                  The best decision I made was choosing Superior Renovations.
                  Thank you Kevin for our initial connection and for passing me on to Neil to manage the whole process.
                  We just finished a bathroom renovation and couldn’t be happier with the results. The craftsmanship is top-notch, and the attention to detail in the tiling and finishing is impressive. The team was professional, kept the workspace clean, and delivered exactly what we envisioned. Highly recommend them for anyone looking for a high-quality transformation.
                  Superior did an excellent job of renovating our ensuite. Project manager Jacob was easy to work with and communications were good.
                  This is our second review for Superior Renovations. They have done two projects earlier this year and we were so impressed by the work they have finished. After discussing and very careful consideration, we decided to go with more projects with them. So far, they have now completed stage 1 renovation of our house. We still amazed for their knowledge and services; they really listen to us and discuss anything with us if they feel/think could be better…
                  From the first day we work with them, we have no issue with them at all, from communication, discussing, designing to the teams working on the site.
                  Especially we are highly recommended to those who are considering doing the house renovation, please contact them and you will know why we are so pleased to have them to do our house renovation.
                  We are thanking Cici, Neil and the teams so much….
                  We are looking forward to seeing what the outcome will be.

                  David and Emily
                  We recently had our bathroom renovated by Superior Renovations and couldn’t be happier with the experience. Dorothy and Neil were an absolute pleasure to work with. They guided us through every step of the process, making what can be a stressful experience feel smooth and straightforward.
                  The quoting process was transparent and detailed, with no hidden fees or surprises. Neil was incredibly responsive and always available whenever we had questions or requests, which gave us real peace of mind throughout the project. We really love the end result and enjoy our new bathroom!
                  We’ll definitely be returning to the Superior Reno team for our next project. Highly recommended!
                  Our bathroom reno has just been completed & I am so happy. The whole process was easy & hassle free. Alison designed our bathroom & was very patient with our changes/then changes back again. Jacob our project manager was a delight to deal with. He always kept us informed of the scheduling & any other information we may have needed. All the tradies worked hard & the job was completed & signed off within 3 weeks. That's demo, full tiling, installation of new everything & delivery & pick up of the skip down a very tricky driveway. We absolutely love the new bathroom & would recommend Superior Renovations everyday. Future jobs I will definitely be contacting them again. Thank so much for your excellent work
                  Having explored our reno options, it was an easy decision to select Superior Renovations for our work. As first timers at anything like this we had to trust the system with grand old 100year old bungalow. We were so pleased to have Cici, Sonny and Kai working with us the whole way through. Be shout out to all the team, builders, plumbers, electricians, tilers and painters. A superb job delivered on budget and ahead of time. The communication from Cici and Sonny was first class. Would highly recommend working with Superior Renovations in fact, we already have more worked booked in. Thanks Superior you made Millie and Monty's parents very happy. 🐾
                  I am very happy with the recent renovation for my new kitchen.
                  The team worked really hard to get it done within the time frame.
                  The manager, Jacob, was very helpful and communicated well and always sorts out any issue immediately.
                  Thank you Irene
                  We couldn’t be happier with our new pergola! From start to finish, the team was professional, punctual, and easy to work with. They took the time to listen to what we wanted and offered great suggestions to make the design even better. The quality of the materials and workmanship is outstanding — everything feels solid, well-built, and beautifully finished. Kudos to Sinan Sun as she has been an amazing contact with the company.
                  We are very pleased with our bathroom reno by Superior Renovations! Jacob, Cici and the team always kept us up to date, were always friendly to deal with and finished ahead of schedule. Most importantly we are very happy with the quality of the work.
                  We have been working with Superior Renovations as a supplier now for over three years. In that time we have found the team to be very professional and well organised. Which is a welcome relief in this industry! Just recently we have become their sole supplier for portaloos, which recognises the collaboration we have forged over these three years.

                  In particular, Leanne and Elaine set a very high standard of communication and flexibility. This is of vital importance when scheduling deliveries and pickups with us, however, they understand not everything can be done at once and are willing to work with us for the best (supplier/contractor/client) outcome.

                  I would imagine this ethos would flow directly through to all their contracted renovation work. A pleasure to work with!
                  A very reliable supplier – we’ve been working with them for three years now, and they have never let us down. Well done to the team.
                  We have been working with these guys for the past 4 years and find them an awesome company to work with, very efficient and organised. I highly recommend!