Hey Kiwis, if you’re knee-deep in an Auckland bathroom reno and scratching your head over shower glass, this guide’s your mate. It breaks down types like clear or frosted, textures for that perfect privacy-light balance, top suppliers, must-have certs, install tips, and maintenance hacks—all tailored to our humid weather and quirky home styles, so you avoid leaks and stay code-compliant without the drama.
What’s the Best Shower Glass Type for My Auckland Pad?
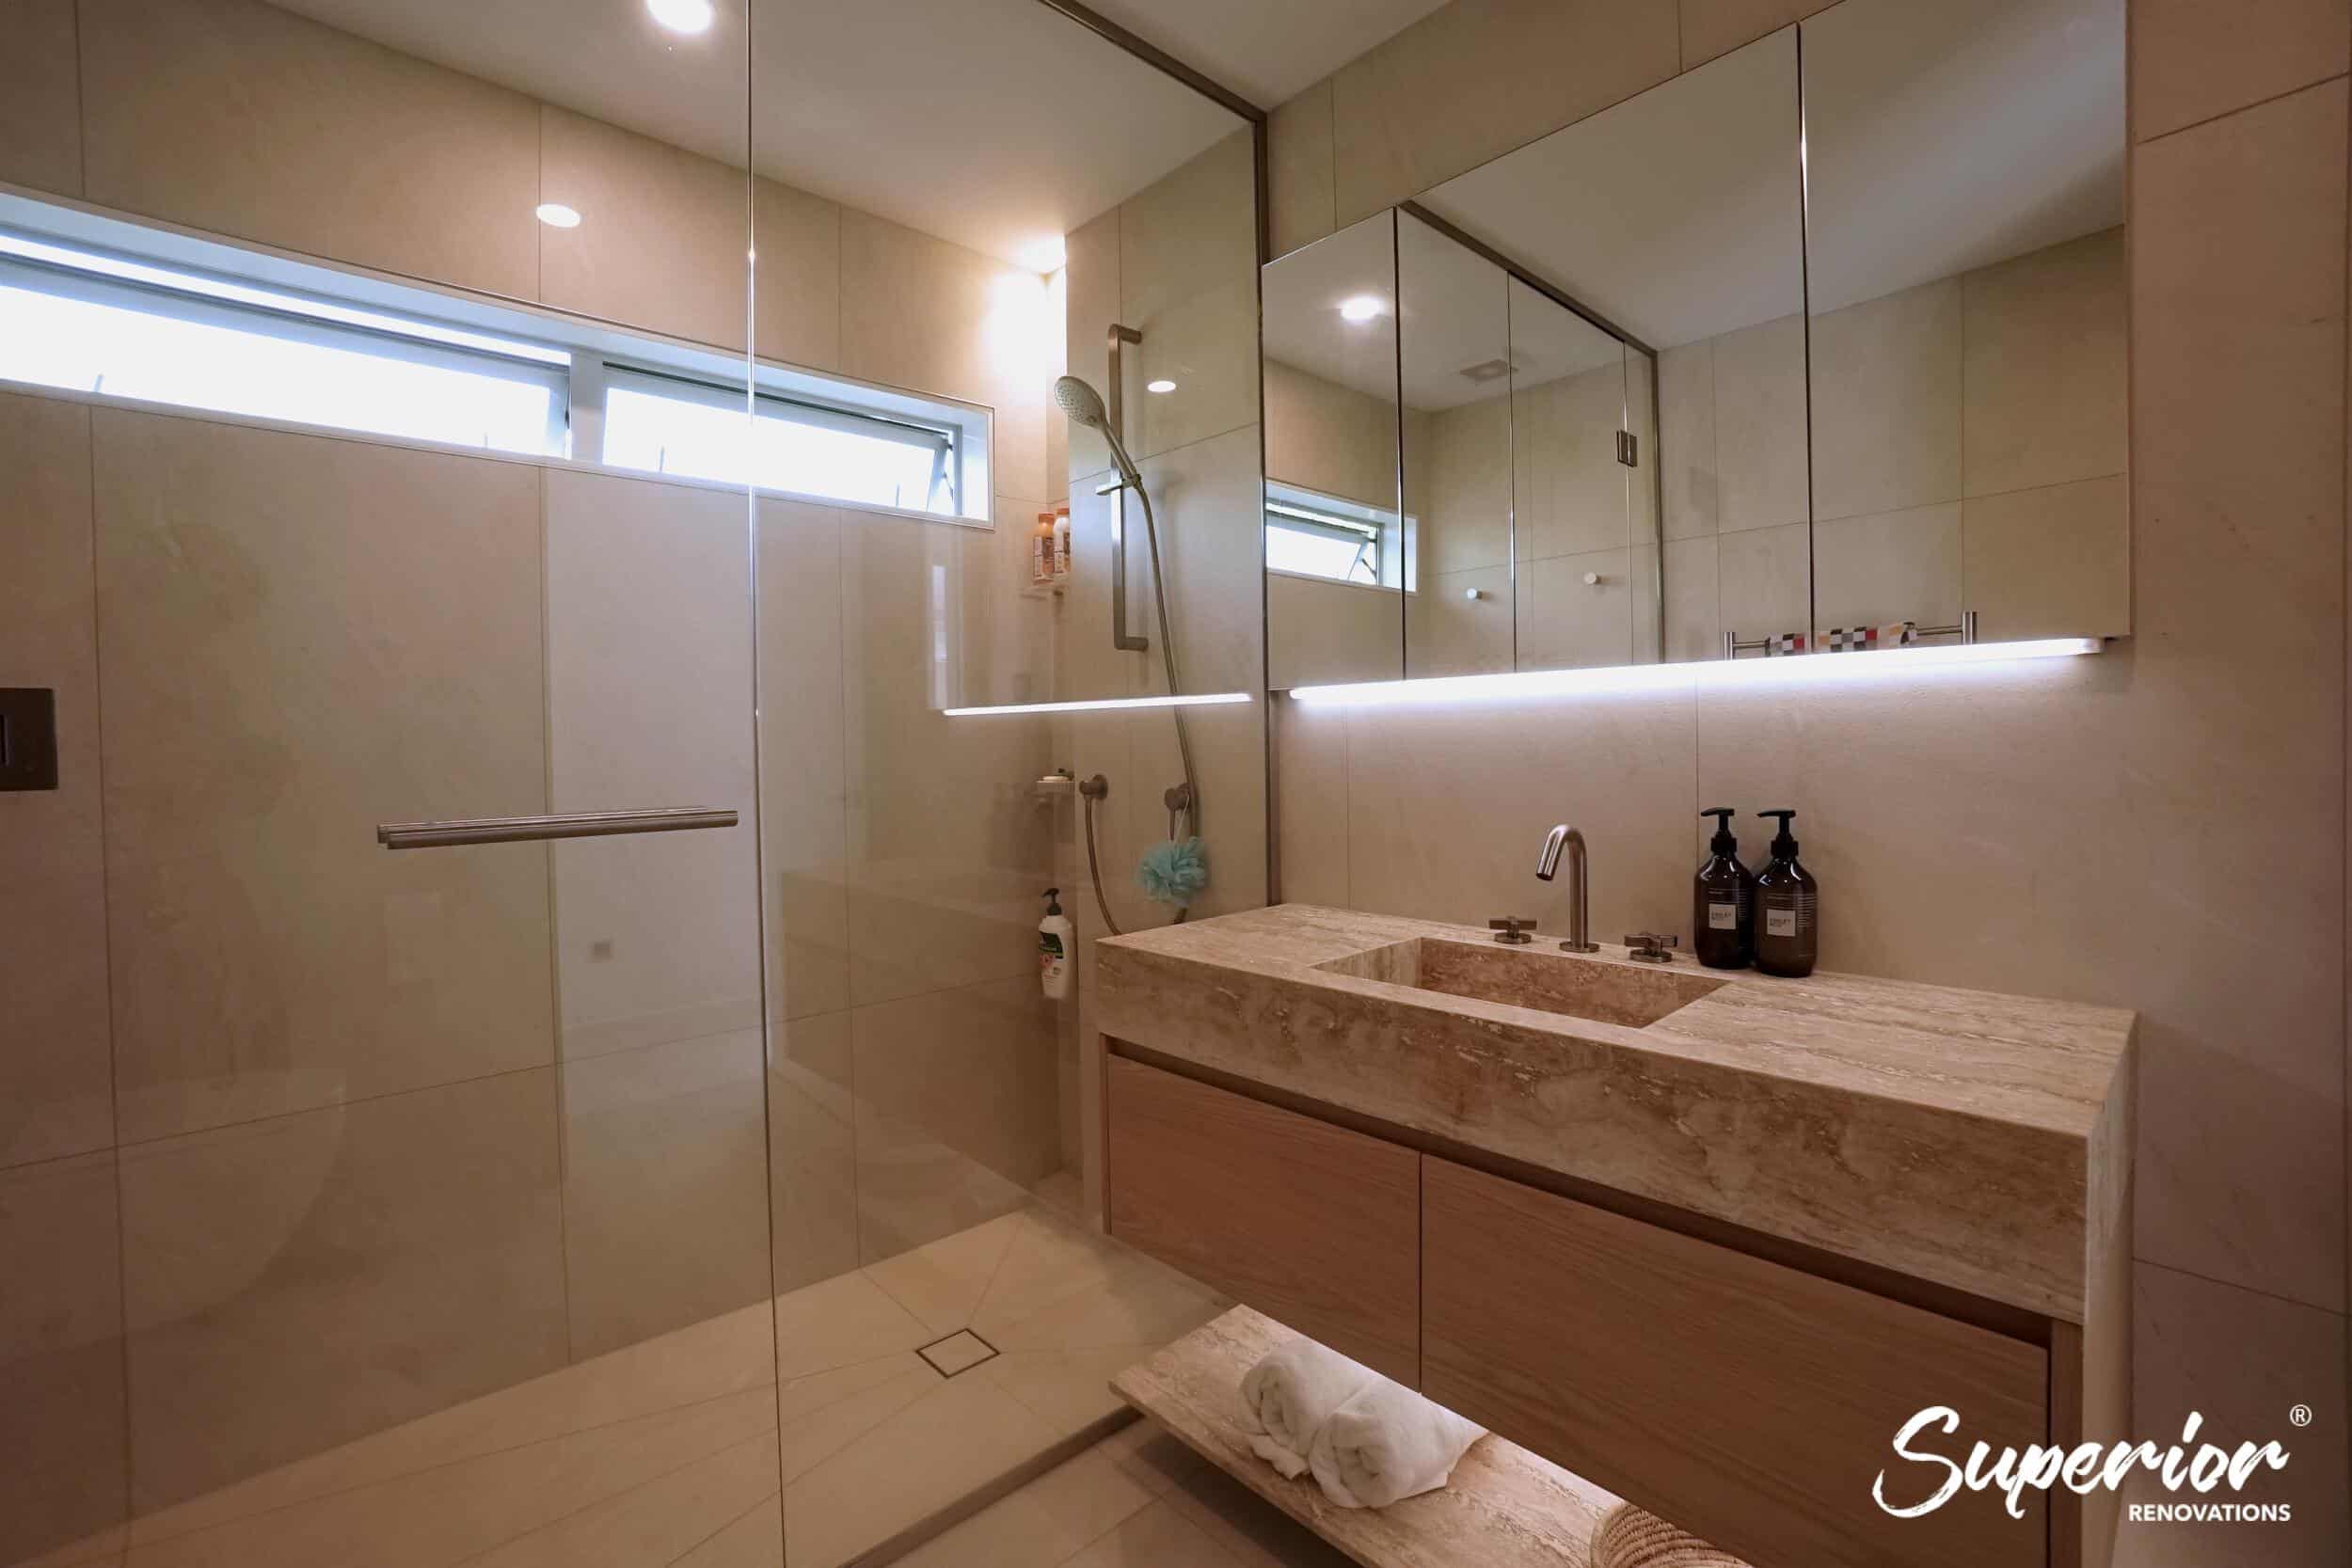
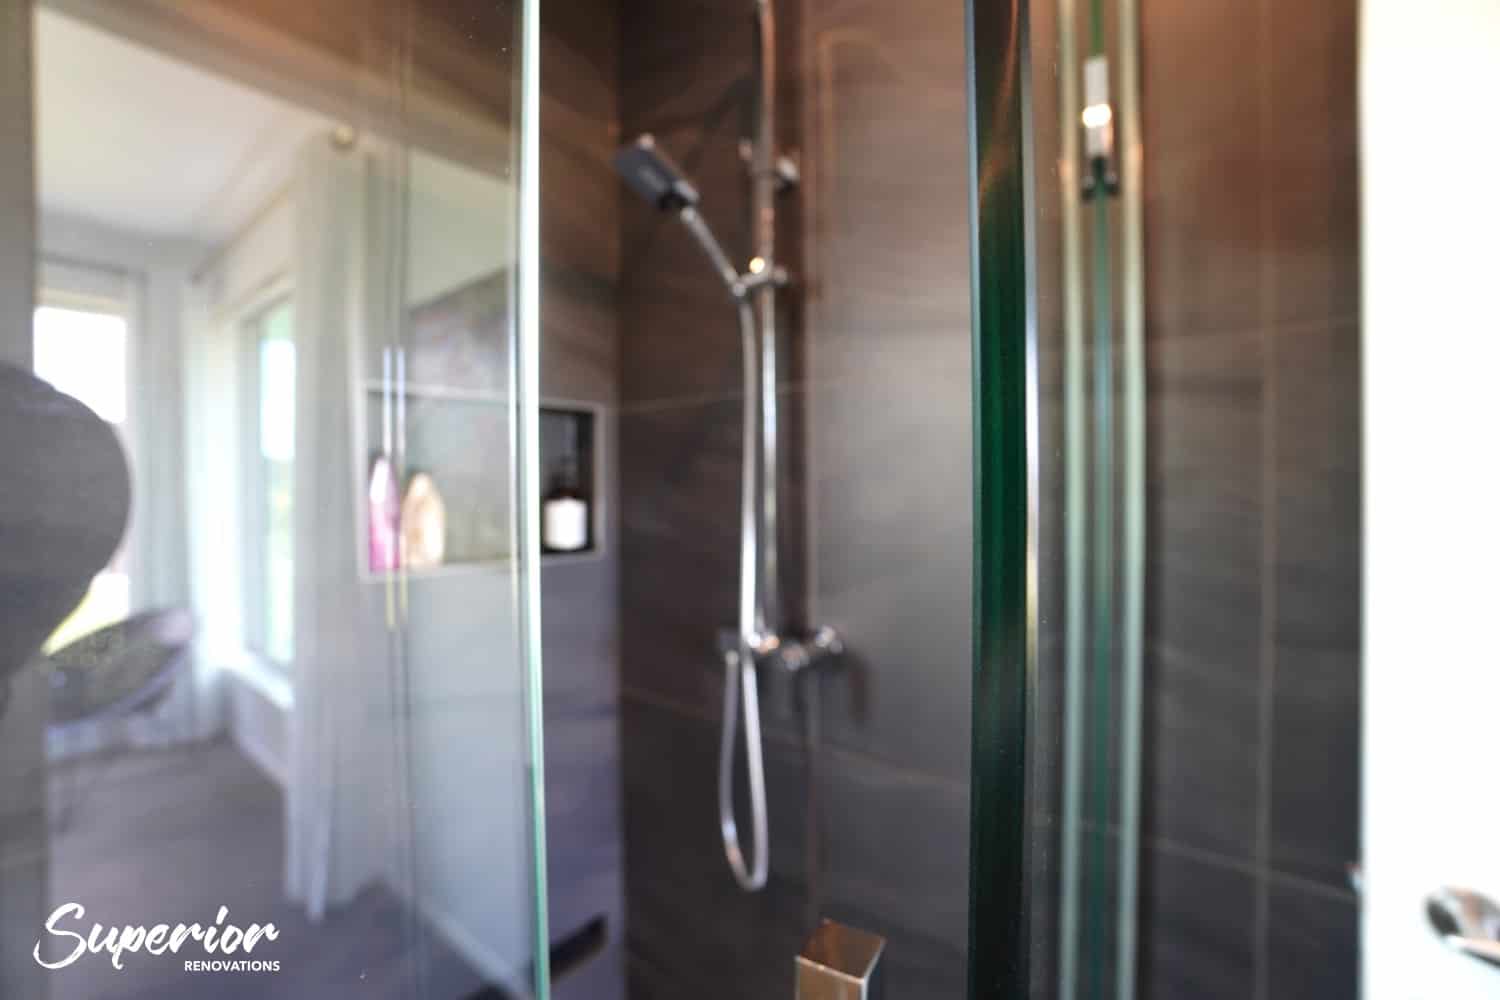
Look, choosing shower glass boils down to your space and vibe. Clear’s ace for making tiny CBD apartments feel bigger, showing off those flash tiles, but it needs regular wipes to beat water spots. Frosted nails privacy in busy Remuera family homes, letting light in without the peep show. Tinted adds moody flair for Grey Lynn lofts, while textured like fluted hides grime better in coastal spots like Mission Bay. Low-iron? That’s the premium pick for ultra-crisp looks in St Heliers renos. Our designer Kevin Yang reckons clear or low-iron boosts that open Kiwi feel, and with NZ’s salty air, go toughened for longevity—saves you heaps long-term.
How Do You Pick Textures and Transparency Without Stuffing Up Privacy or Light?
It’s all about that sweet spot, eh? Fully clear transparency maximizes sun in south-facing Howick homes but offers zilch privacy—great for solo ensuites. Semi-transparent tinted or low-iron dials it back for a bit of hideaway, ideal in shared Pakuranga bathrooms. For obscured frosted or etched, you get soft light diffusion without feeling boxed in, perfect for humid Auckland winters. Textures wise: smooth’s easy-clean but shows marks; fluted catches light beautifully and masks condensation in Mt Albert bungalows. Patterned adds artsy oomph but can trap soap. Cici Zou from our team says, “Fluted’s a game-changer for balancing privacy and that fresh NZ vibe—test samples under your lights to nail it.”
Who Are the Go-To Suppliers in Auckland for Solid Shower Glass?
Don’t muck around—Metro Glass is tops for durable clear and frosted panels, starting at $600, with custom tints for Remuera villas and AS/NZS 2208 certs baked in. Mico’s your budget buddy from $400, strong on textured doors for Takapuna coastal cribs, plus rust-proof hardware. Reece brings premium low-iron and tinted from $800, ace for Viaduct apartments with easy-clean coatings. Compare ’em: Metro for luxury, Mico mid-range, Reece custom. Wendy Chen notes they’re all code-compliant, speeding up Auckland Council consents—grab samples and quotes to match your reno.
Fancy a sleek shower upgrade? Hit us up at Superior Renovations for a free consult—what’s holding back your bathroom glow-up?
Whether you’re a homeowner in bustling Parnell planning a full reno or a DIYer in South Auckland sprucing up an ensuite, understanding shower glass doors, panels, and all the extras is key. In this series, we’ll cover everything from types and textures to suppliers, certifications, installation, maintenance, frameless options, and hardware. Tailored for New Zealand audiences, especially Aucklanders dealing with our unique climate and building codes, we’ll draw on expert insights, local tips, and practical advice. Why focus on shower glass? It’s the centerpiece that can elevate your bathroom’s look while ensuring durability and ease. Dive in to discover how to choose, install, and care for the perfect shower glass panel for your home.
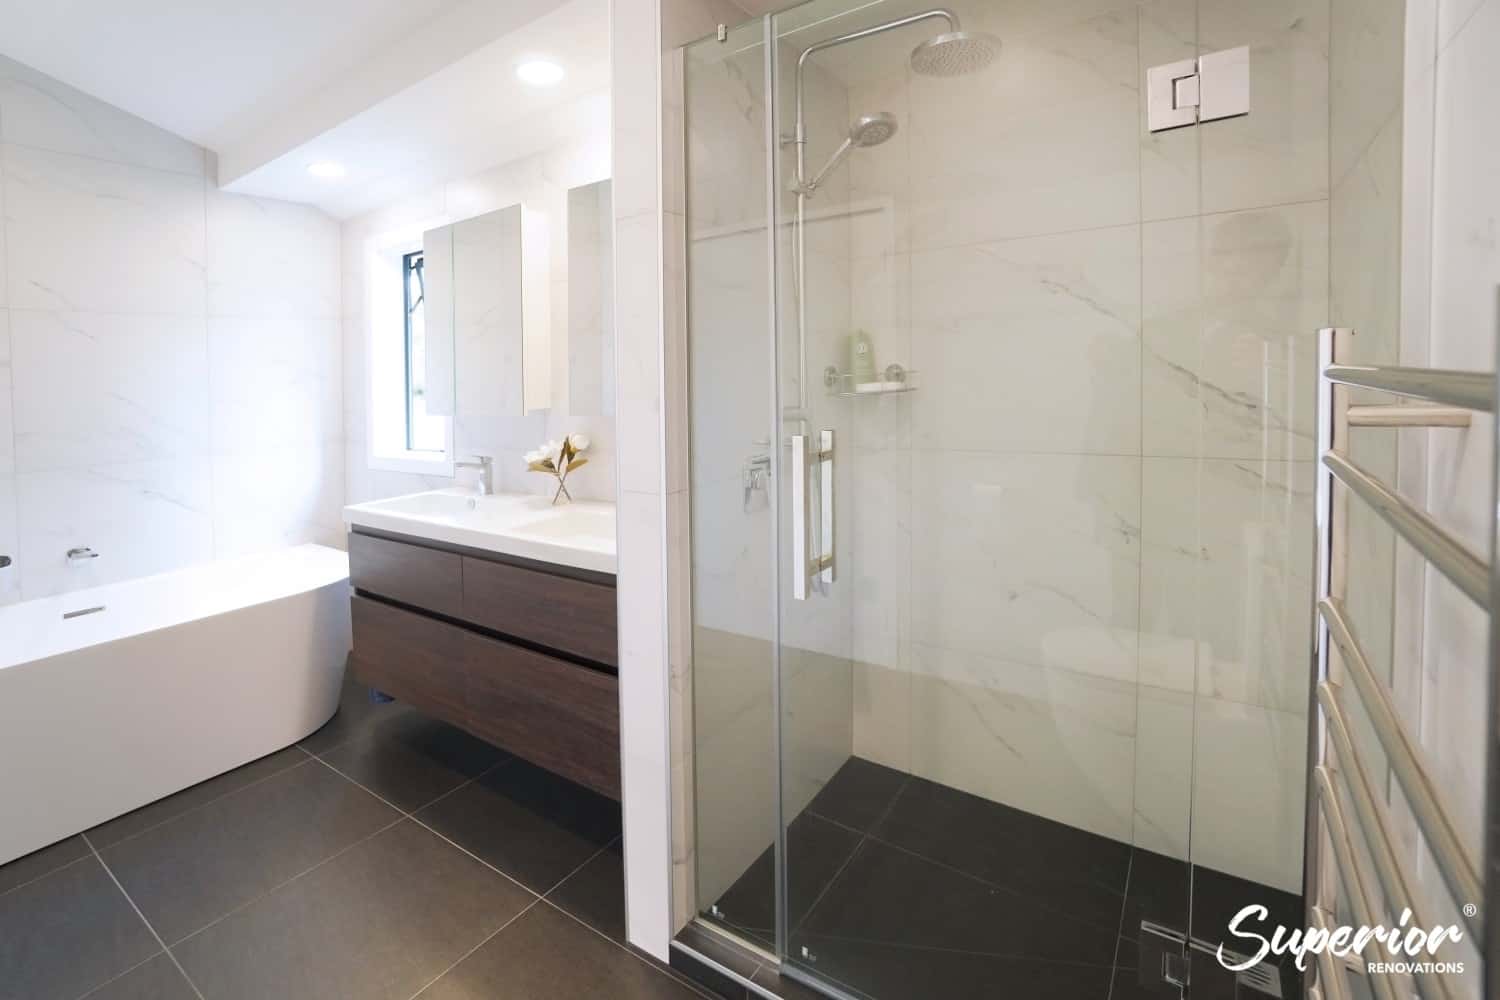
Exploring Shower Glass Types for Your Auckland Bathroom Renovation
Choosing the right shower glass for your Auckland bathroom can feel like navigating the Waitematā Harbour in a storm—exciting but a bit overwhelming! With so many options, from clear to frosted to tinted, it’s easy to get lost in the choices. As Auckland homeowners, we’re often after that perfect blend of style, practicality, and durability to suit our unique Kiwi lifestyles. Whether you’re renovating a Ponsonby villa or a modern Mt Eden apartment, the type of shower glass panel you pick can make or break your bathroom’s vibe. Let’s break down the main types of shower glass, their pros and cons, and how they fit into Auckland’s renovation scene. Ready to find the perfect fit for your dream bathroom? Let’s dive in!
What Are the Main Types of Shower Glass?
When it comes to shower glass doors or panels, the type of glass you choose sets the foundation for both aesthetics and functionality. Here’s a rundown of the most popular options you’ll find in New Zealand, with a focus on what works best for Auckland homes.
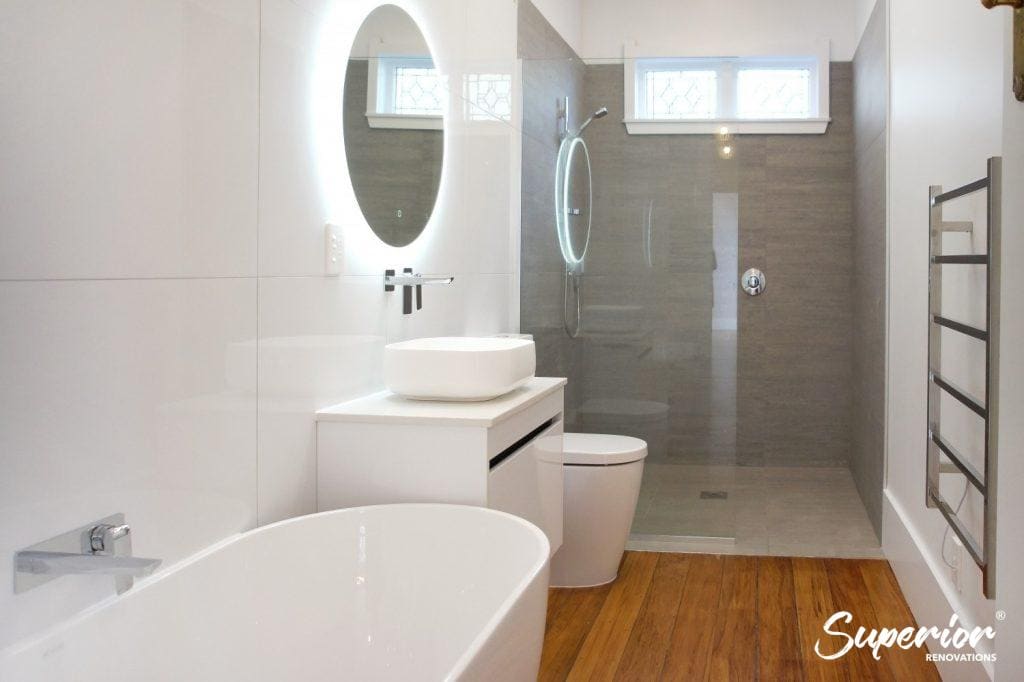
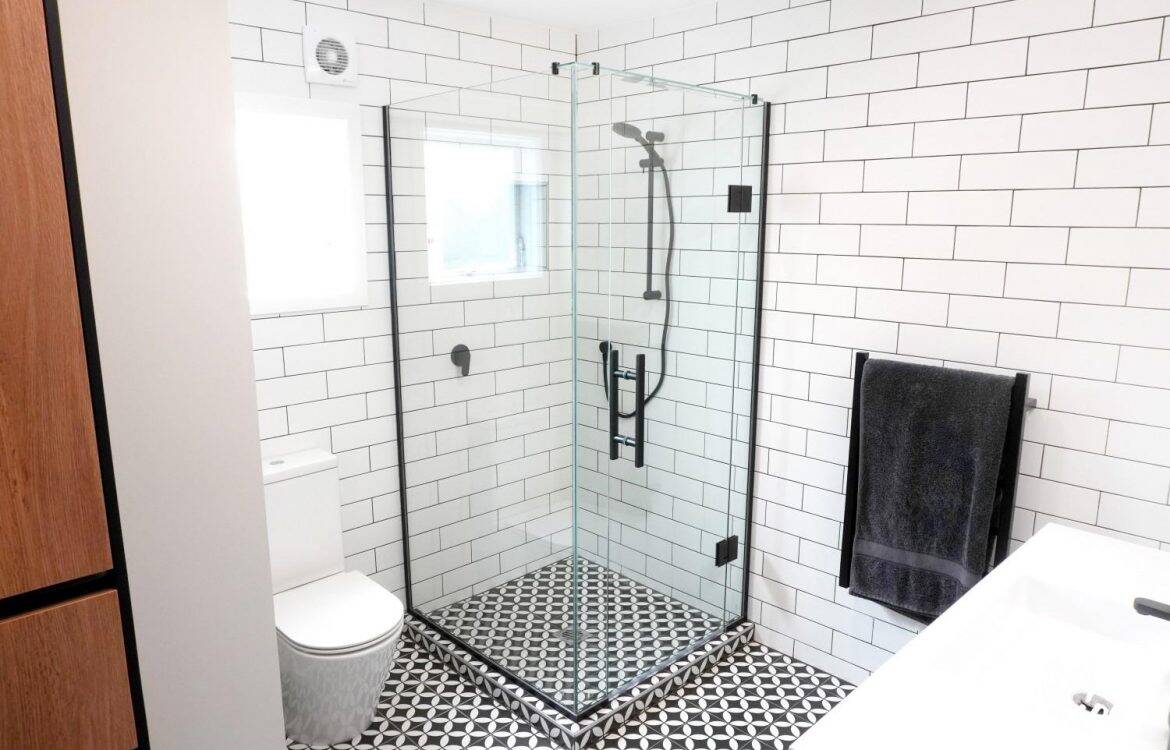
- Clear Glass: The go-to for a sleek, open look. Clear glass makes small bathrooms, like those in Auckland’s inner-city apartments, feel larger and more spacious. It’s timeless and shows off your beautiful tiles, but it does require regular cleaning to keep water spots and soap scum at bay.
- Frosted Glass: Perfect for privacy, frosted glass diffuses light and obscures visibility while still letting your bathroom feel bright. It’s a great choice for shared bathrooms in family homes across suburbs like Remuera or Epsom.
- Tinted Glass: Want a bit of drama? Tinted glass in shades like grey or bronze adds a modern edge, ideal for contemporary Auckland homes in areas like Grey Lynn. It offers some privacy but can make a space feel darker, so good lighting is key.
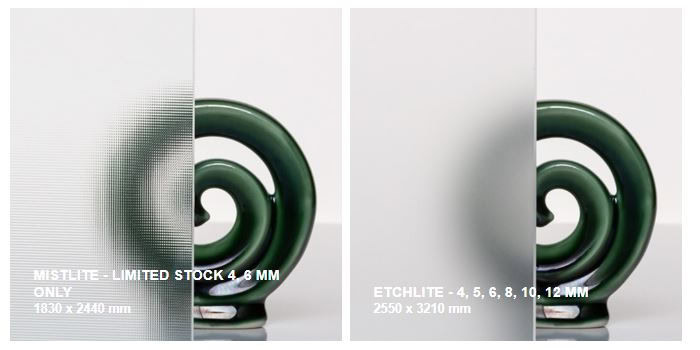
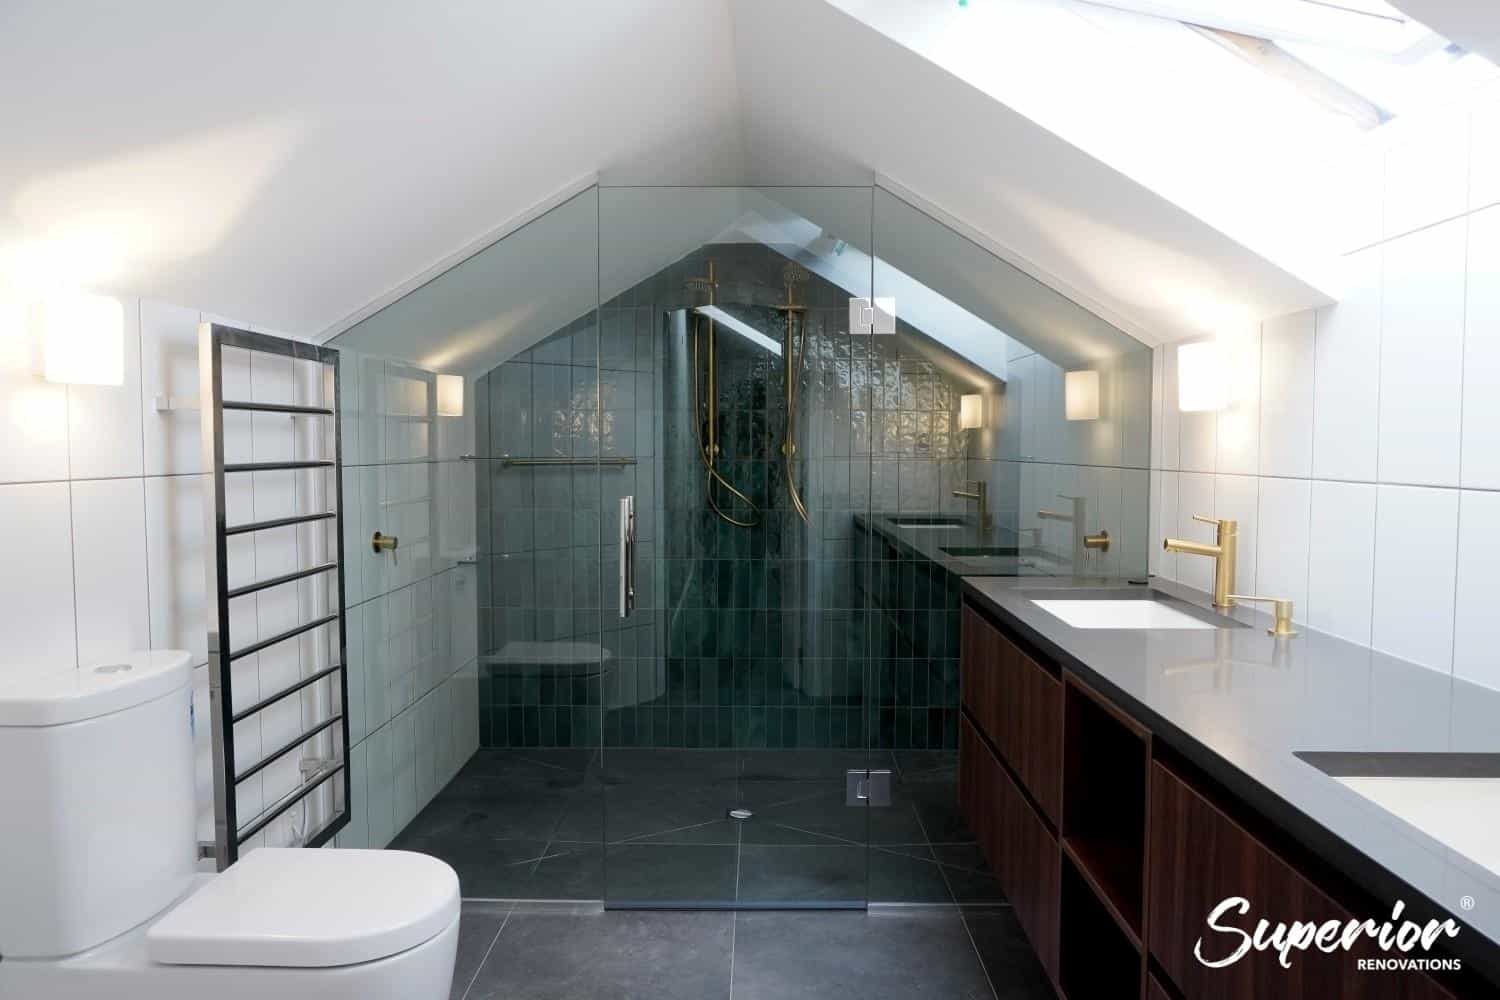
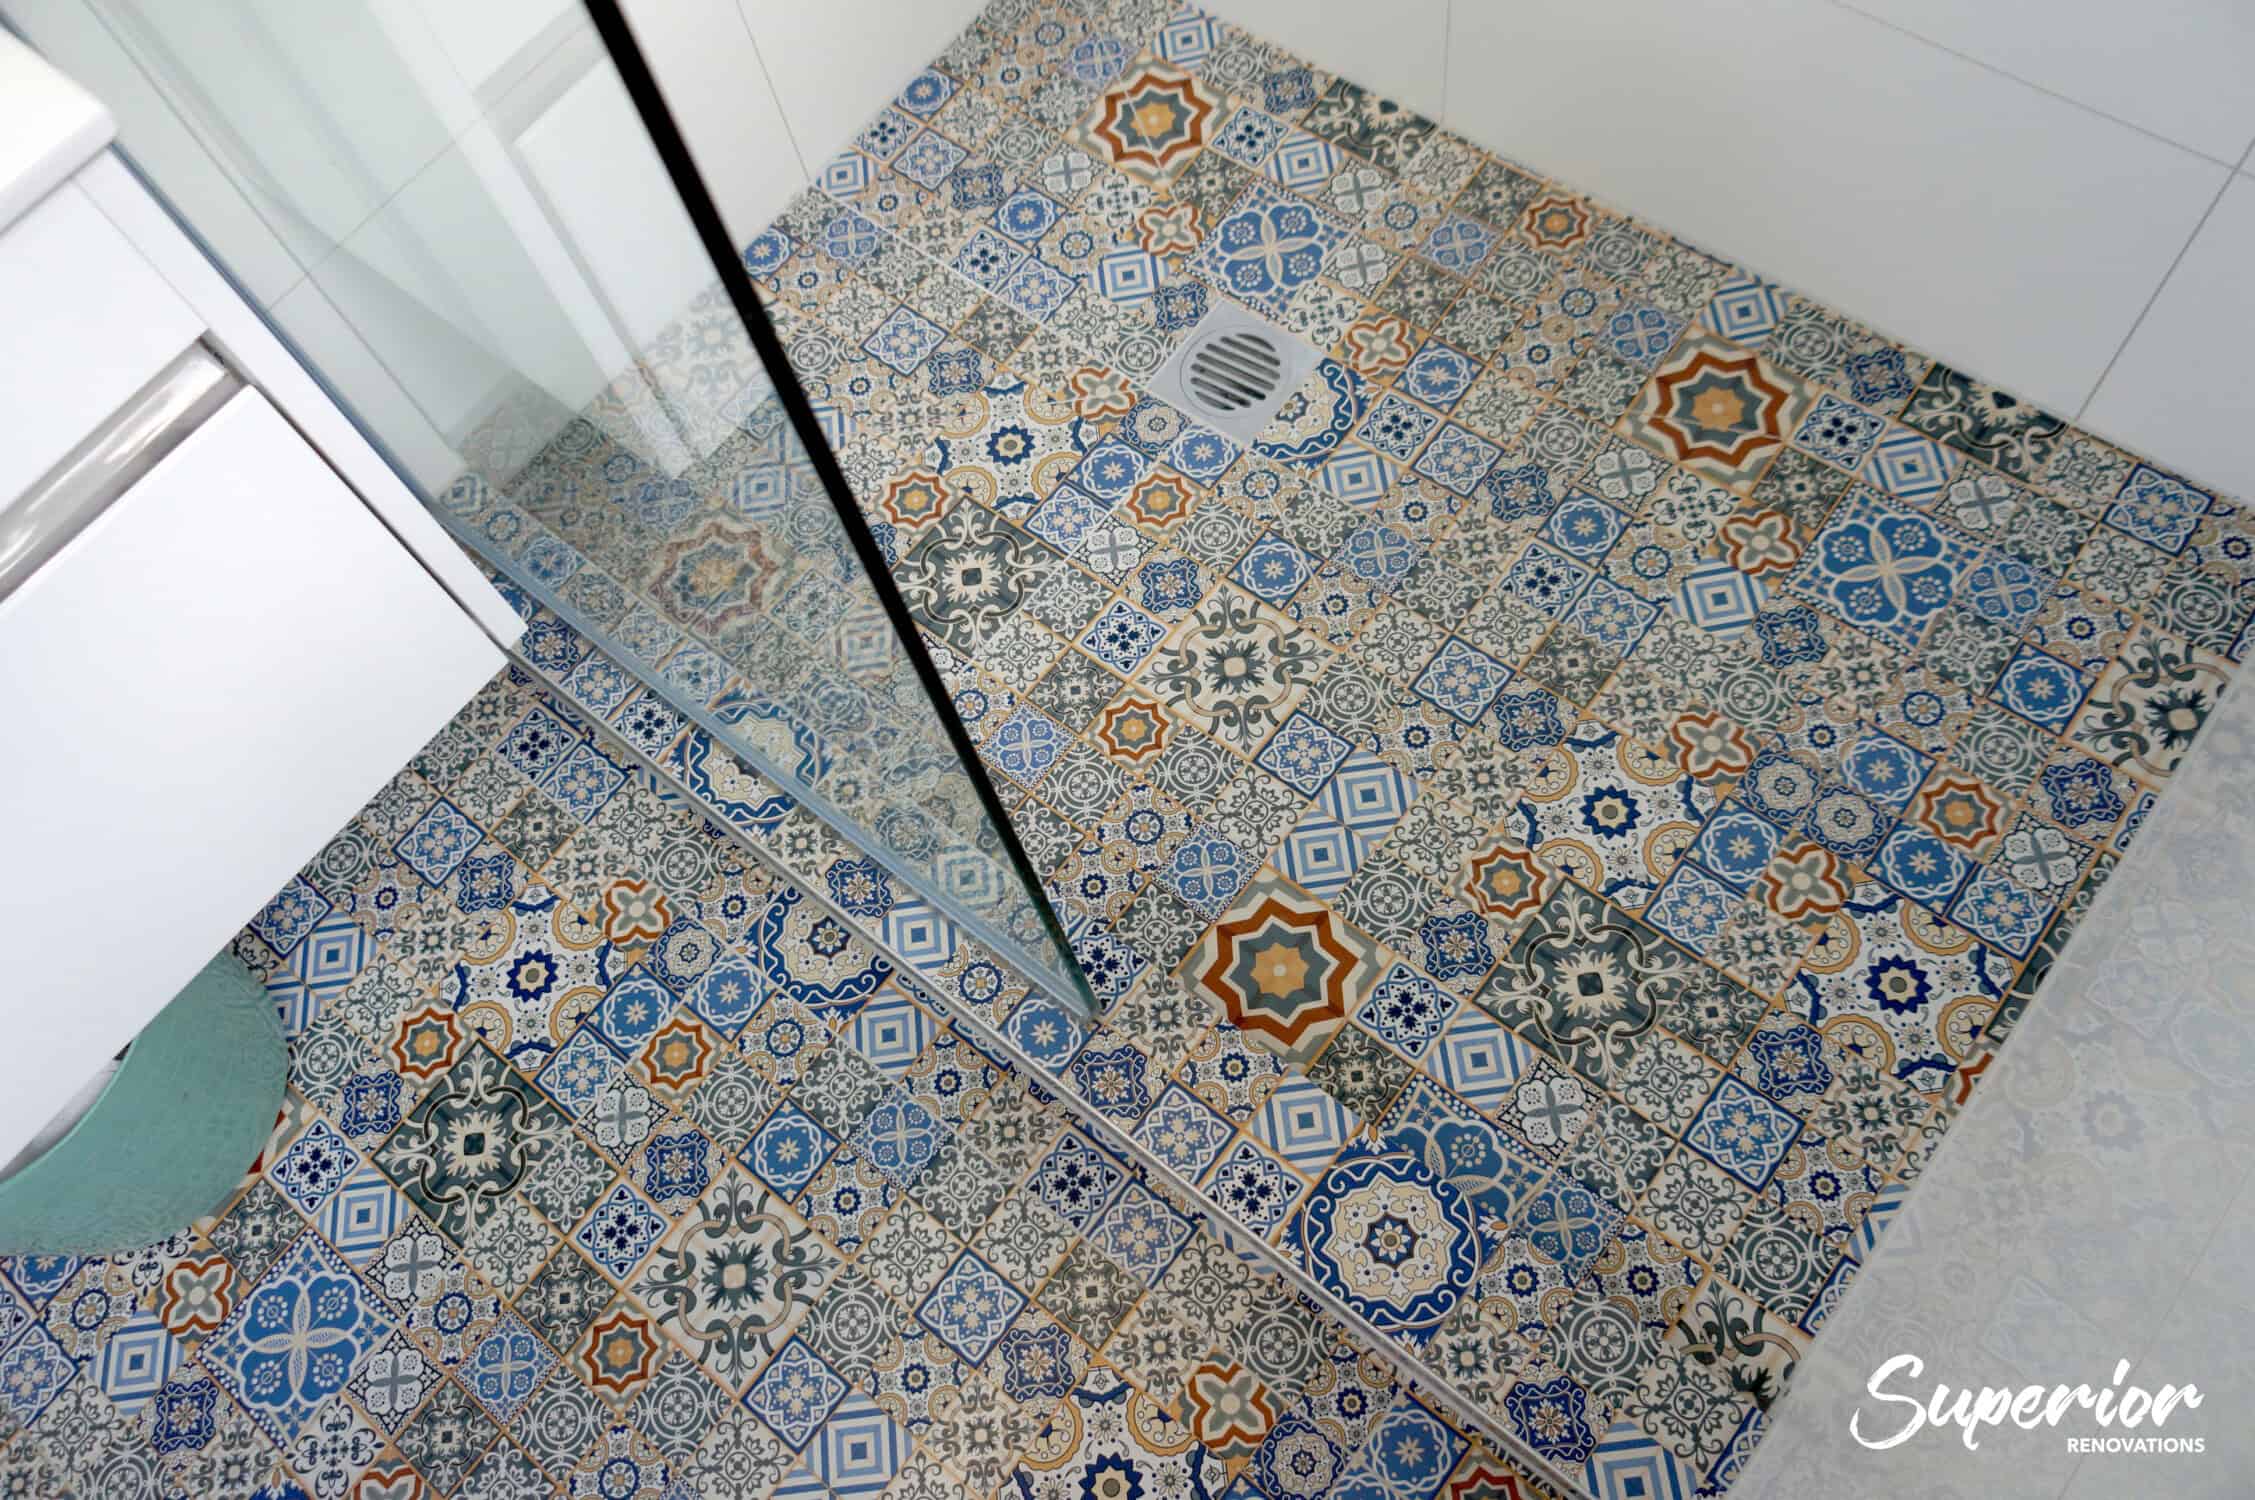
- Textured Glass: From rain patterns to fluted designs, textured glass adds a unique flair. It’s both decorative and functional, offering privacy while hiding water marks better than clear glass. Popular in high-end renovations across Herne Bay.
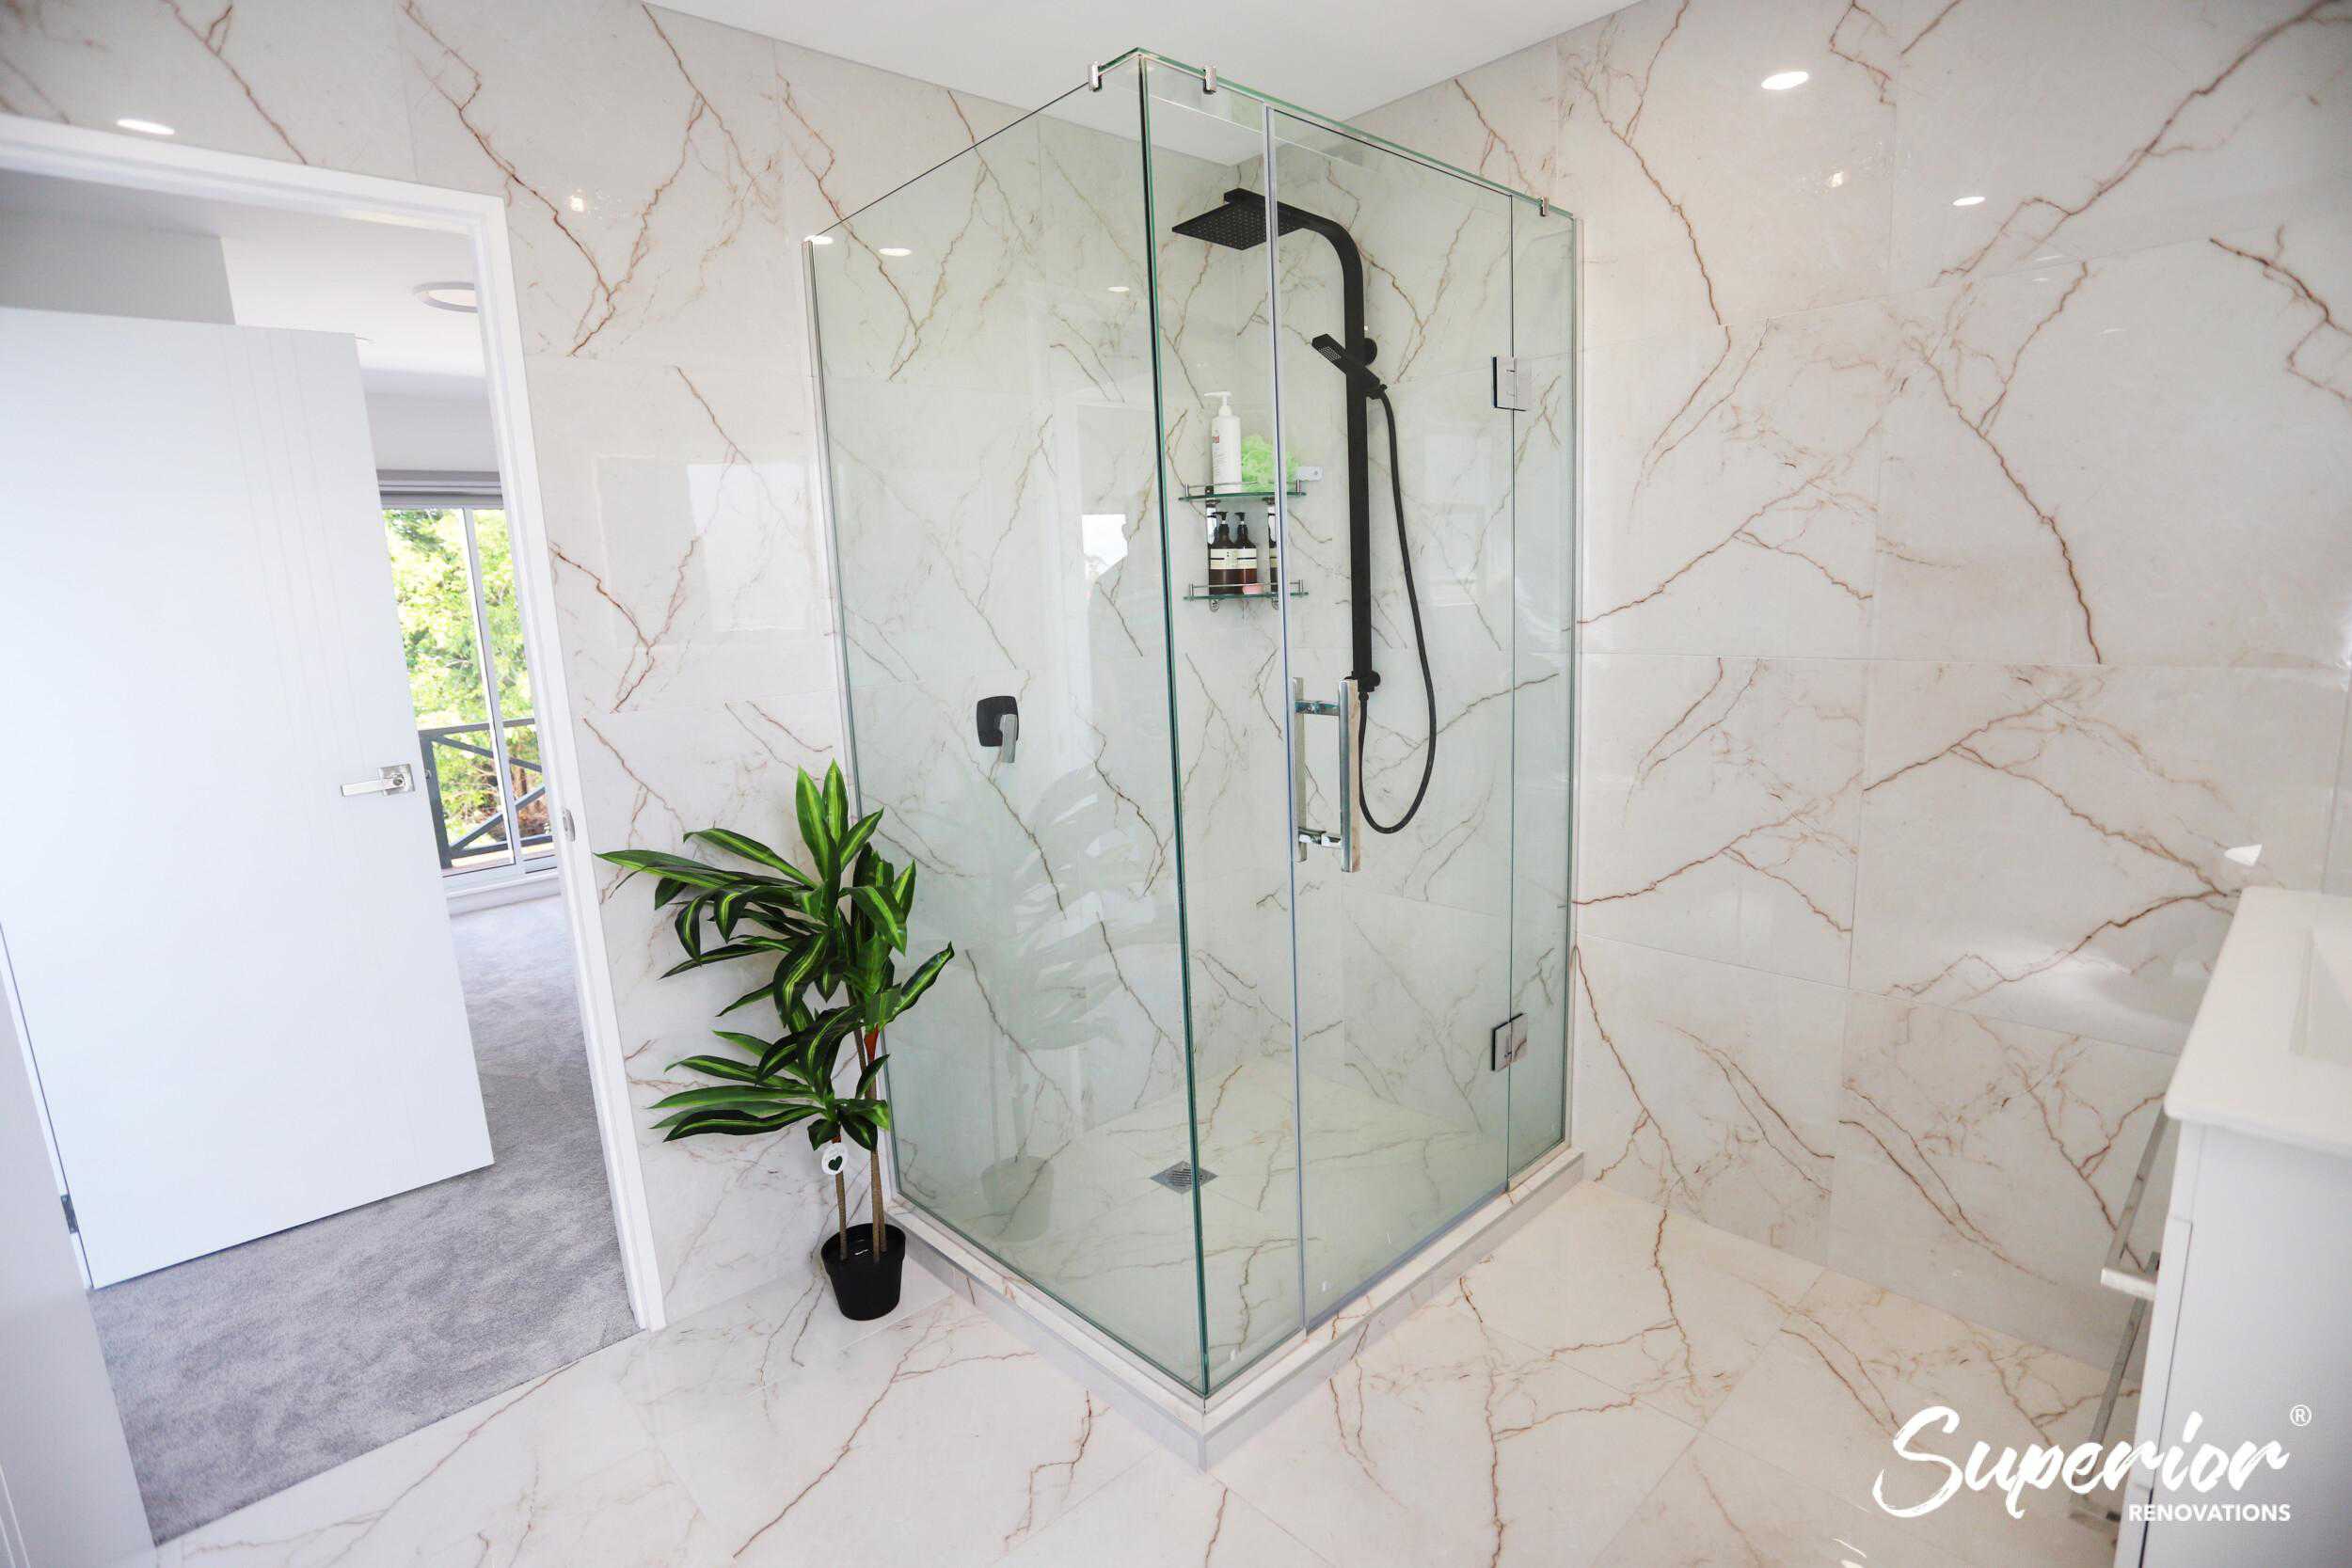
- Low-Iron Glass: Also known as ultra-clear glass, this option eliminates the slight green tint of standard glass, giving a crystal-clear finish. It’s a premium choice for showcasing intricate tile work, often seen in luxury builds around St Heliers.
Tip for Aucklanders: If you’re in a coastal suburb like Mission Bay, consider low-iron or frosted glass to combat the salty air that can accelerate wear on standard clear glass.

https://royalglass.co.nz/services/reeded-glass/
Shower Glass Textures and Transparency: Choosing the Right Level for Auckland Bathrooms
Ever stepped into a bathroom and felt like the shower glass was either too see-through or too foggy? In Auckland, where our homes range from cosy bungalows in Grey Lynn to spacious family pads in Howick, getting the texture and transparency of your shower glass panel just right is crucial. It’s not just about looks—it’s about privacy, light flow, and that all-important easy-clean factor. Let’s chat about the different textures and transparency options available in New Zealand, and how they can transform your bathroom renovation. Whether you’re after a crystal-clear view or a subtle blur, we’ve got the scoop to help you decide.
Why Texture and Transparency Matter in Shower Glass
Texture and transparency in shower glass doors aren’t just fancy terms—they directly impact how your bathroom feels and functions. Transparency controls how much you can see through the glass, while texture adds patterns or surfaces that can diffuse light or add grip. For Aucklanders dealing with our variable weather, choosing the right combo means a brighter space on those grey days or more privacy in shared homes. Plus, with rising energy costs, options that maximize natural light can even help with efficiency, as noted in guidelines from EECA’s energy-efficient homes resources.
Quick Tip for Skimmers: If privacy is your top concern, go for higher opacity like frosted or textured glass; for an open feel, stick with clear or low-iron varieties.
Exploring Transparency Levels in Shower Glass
Transparency in shower glass ranges from fully clear to completely opaque, and everything in between. Here’s a breakdown to help you visualize:
- Fully Transparent (Clear Glass): Lets in maximum light and creates an illusion of space. Great for small Auckland apartments in the CBD, but offers zero privacy.
- Semi-Transparent (Tinted or Low-Iron): Tinted glass adds a subtle hue for moderate privacy, while low-iron glass provides ultra-clarity without the green tint of standard clear glass. Ideal for modern homes in Parnell.
- Obscured (Frosted or Etched): Diffuses light and blurs visibility for high privacy. Perfect for family bathrooms in suburbs like Pakuranga, where multiple users need discretion.
- Opaque (Heavily Textured or Patterned): Almost no see-through, but still allows light. Suited for guest bathrooms or ensuites in older Auckland villas.
According to New Zealand’s building standards, all shower glass must be safety-rated, often toughened to prevent breakage, as outlined in Building Code B1 for structure. This ensures even transparent options are safe for daily use.
A Closer Look at Shower Glass Textures
Textures add personality to your shower glass panel. They can be smooth, ridged, or patterned, each offering unique benefits. Let’s get into the nitty-gritty.
Smooth Textures: The baseline for most glass, smooth surfaces are easy to clean but show fingerprints and water spots. Pair with clear transparency for a minimalist look, or tinted for a sleek edge.
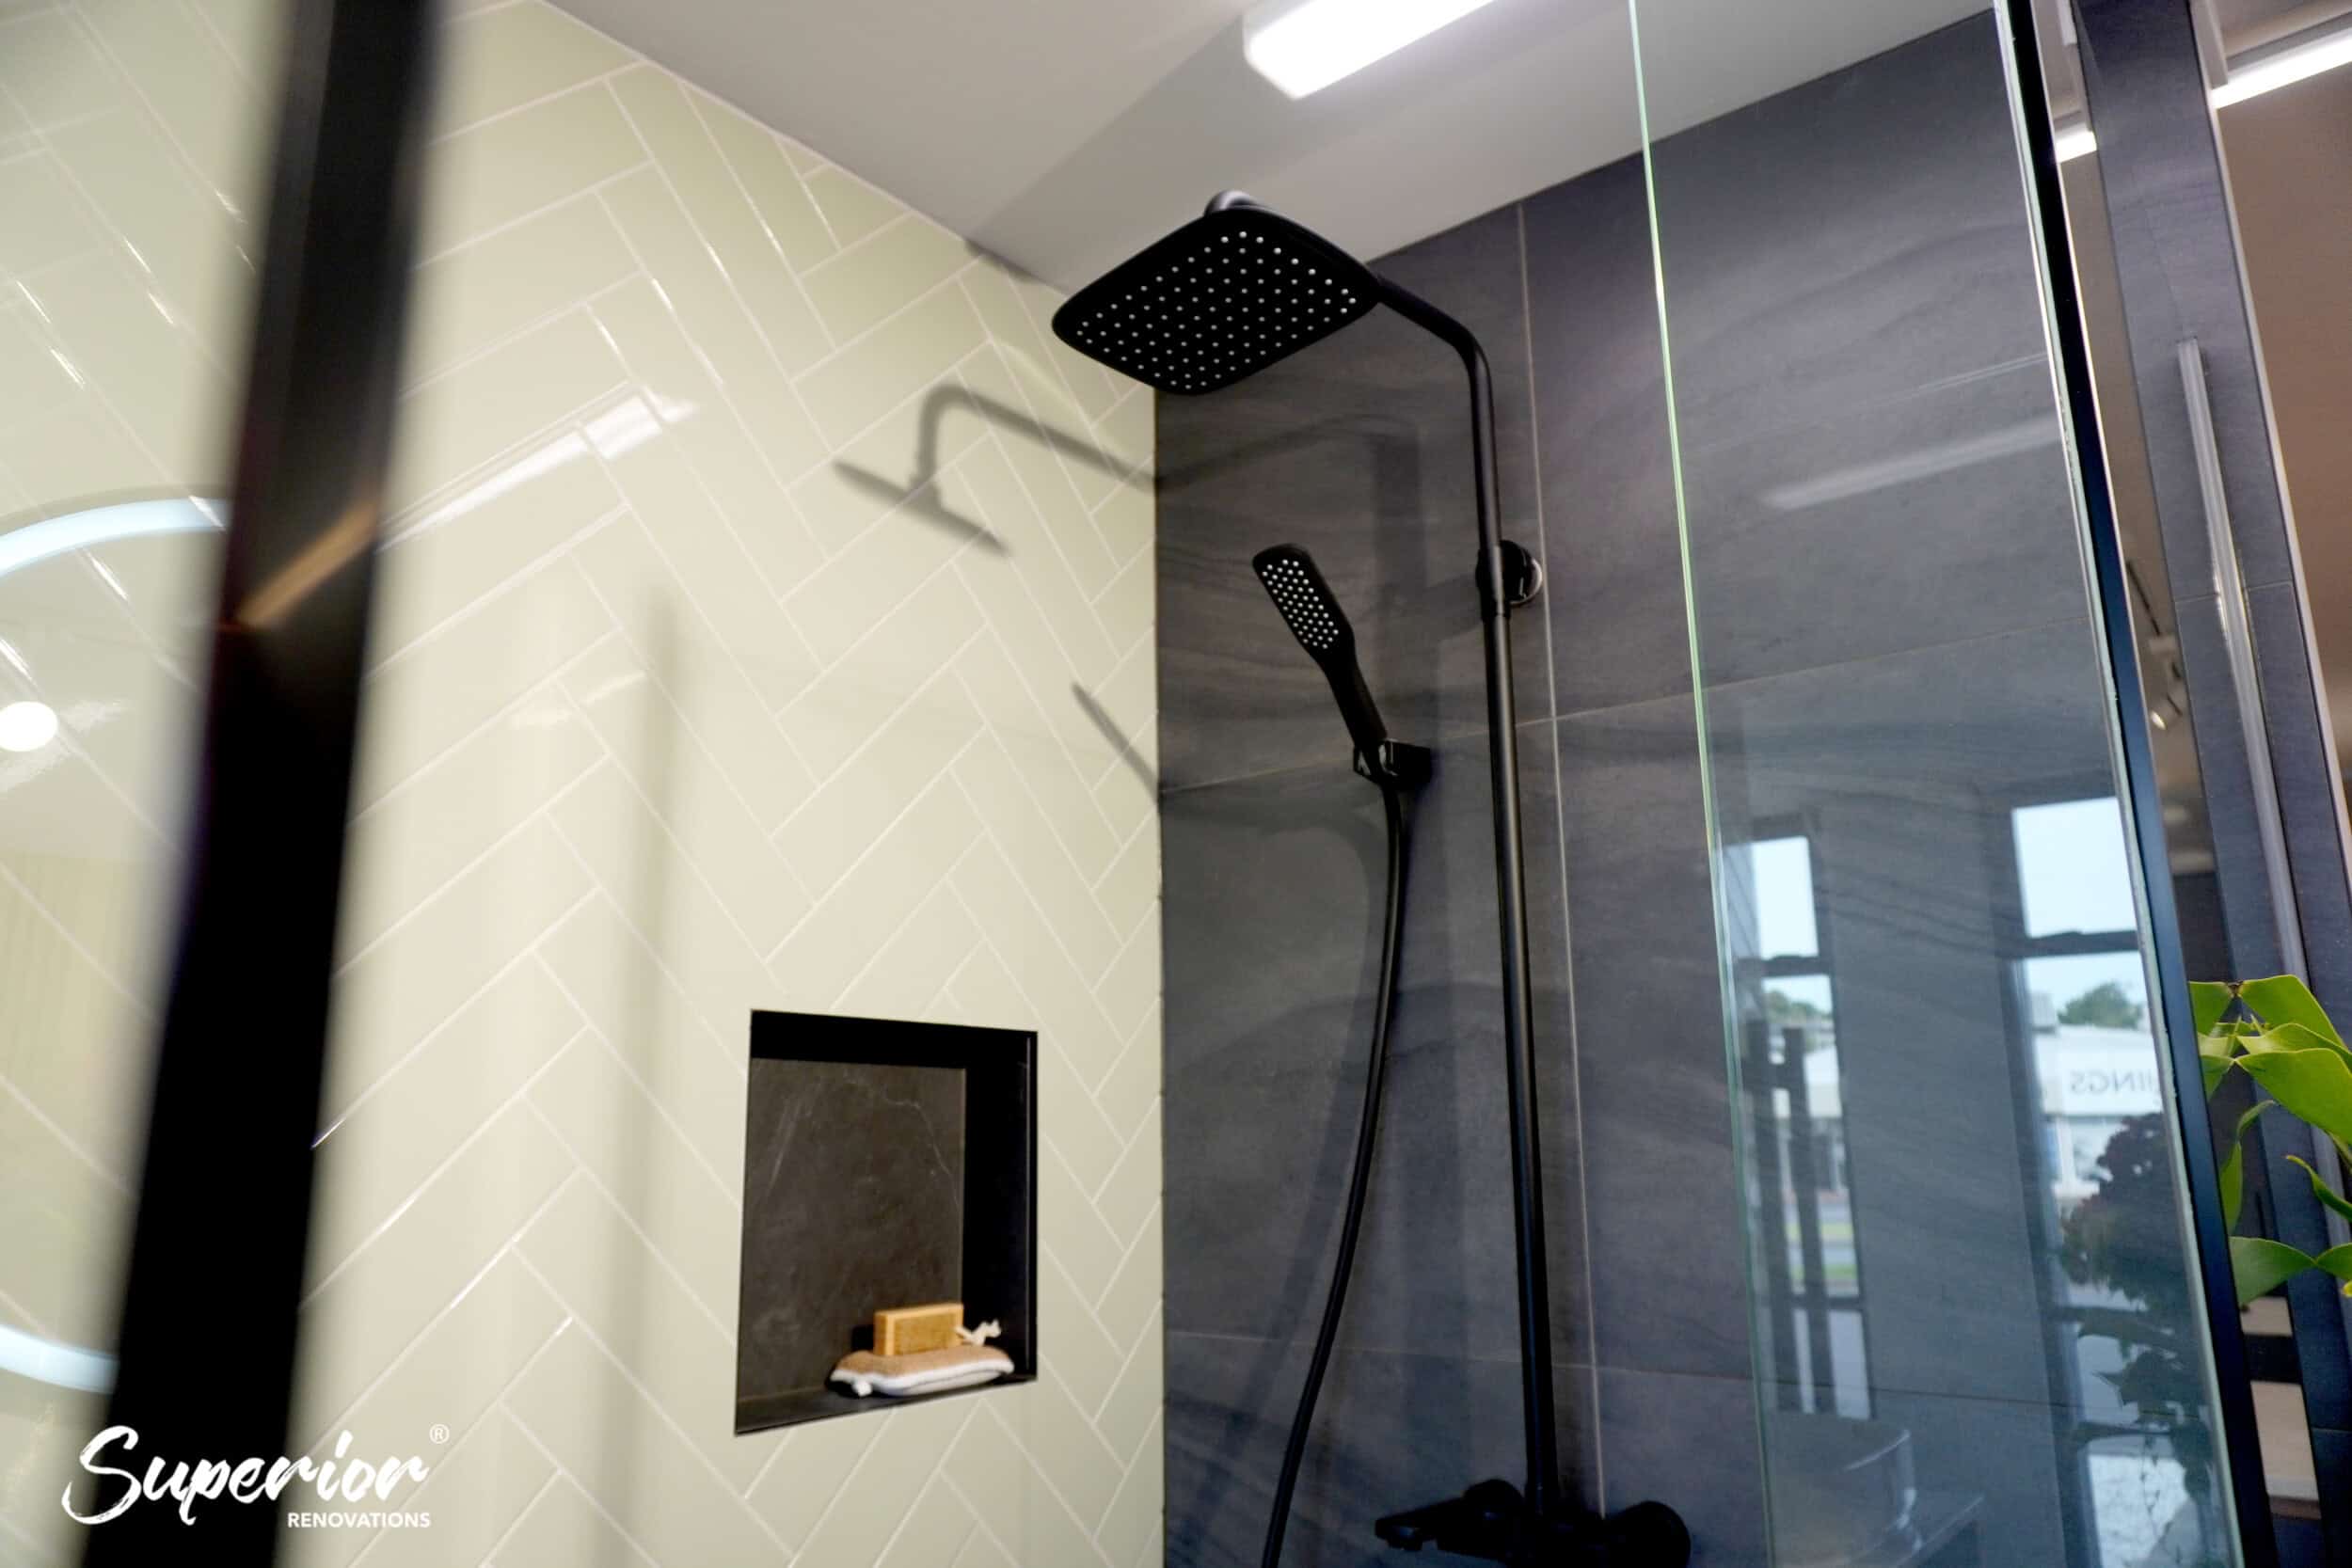
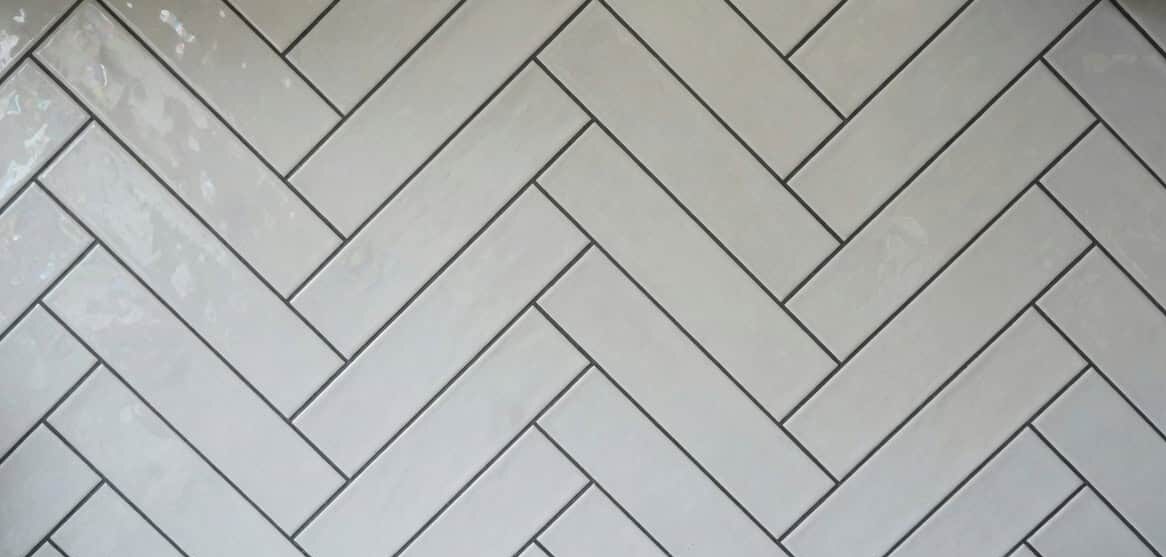
Fluted or Reeded Textures: These feature vertical ridges that catch light beautifully, providing privacy without blocking it entirely. As inspired by local options, fluted glass hides water marks better than smooth varieties and adds a touch of elegance to Auckland’s contemporary renovations.
Frosted or Etched Textures: Created by acid-etching or sandblasting, these give a matte finish that scatters light. They’re popular for their low-maintenance appeal—less visible grime—and comply with privacy needs in NZ homes.
Patterned Textures: Think rain glass or hammered effects; these add artistic flair while obscuring views. They’re fantastic for hiding imperfections and bringing a custom feel to your shower setup.
Anecdote Time: Picture this: A client in Mt Albert wanted to renovate their 1950s bathroom. They chose fluted glass for the shower door, and suddenly, the space felt modern yet respectful of the home’s heritage. “It was like adding a veil of sophistication,” they laughed. Small changes like this can make a big difference in Auckland’s diverse housing stock.
Comparing Textures and Transparency: A Handy Table
To make your choice easier, here’s a table comparing popular textured shower glass options based on NZ availability and user feedback.
| Texture Type | Transparency Level | Pros | Cons | Best For Auckland Homes |
| Smooth | High (Clear/Tinted) | Easy to clean, modern look, maximizes light | Shows spots, low privacy | Compact city apartments |
| Fluted/Reeded | Medium | Hides marks, adds style, good privacy-light balance | Can trap soap, pricier | Family homes in suburbs |
| Frosted/Etched | Low | High privacy, low maintenance, diffuses light softly | Less transparent, may feel enclosed | Shared bathrooms |
| Patterned | Low to Medium | Decorative, unique, conceals grime | Harder to clean patterns, custom cost | Designer renovations |
Helpful Advice: In Auckland’s humid climate, textured glass like fluted can reduce visible condensation buildup. Test samples under your bathroom lighting to see how transparency plays out.
Local Suppliers Offering Texture and Transparency Variety
Auckland has some top-notch suppliers for shower glass with diverse textures and transparencies. Metro Glass stands out with their obscured, etched, and frosted options, perfect for privacy-focused designs. Check their obscured and frosted glass range for thicknesses and patterns that meet NZ standards.
https://metroglass.co.nz/glass-types/decorative/obscured-frosted
Reece offers a selection of tinted and clear glass panels, ideal for custom transparency levels. Their shower screens collection includes options with subtle textures for added flair.
Mico provides practical choices like low-iron glass for ultimate clarity. Explore their shower doors and panels for transparent and semi-transparent picks.
Pro Tip: Always verify certifications like AS/NZS 2208 for safety glass to ensure your choice is compliant and durable.
Balancing Privacy, Light, and Style in Your Shower Design
Finding the sweet spot between texture and transparency can elevate your bathroom from functional to fabulous. For instance, in a north-facing Auckland home with plenty of sun, a semi-transparent tinted glass might prevent glare while keeping things bright. But in a south-facing spot, go for higher transparency to avoid a dim feel.
Designer Quote: “Textures like fluted glass are a game-changer for Auckland bathrooms—they offer privacy without sacrificing that fresh, open Kiwi vibe we all love,” says Cici Zou, Designer at Superior Renovations.
Common Mistakes to Avoid with Textures and Transparency
Don’t overlook maintenance: Textured glass might hide spots but can trap residue if not cleaned properly. Also, consider your household—high transparency isn’t ideal for kids’ bathrooms.
Witty Aside: Choosing shower glass is a bit like picking sunglasses—too dark and you can’t see, too clear and everyone sees you! Get it right, and your bathroom will shine.
What’s your take on textured shower glass doors? Would you go bold with patterns or keep it simple? Drop a comment below!
Top Shower Glass Suppliers in Auckland: Where to Source Quality Panels and Doors
Finding the right supplier for your shower glass doors or panels in Auckland can be a game-changer for your bathroom renovation. With the city’s mix of heritage homes in Devonport and sleek new builds in Wynyard Quarter, you need suppliers who understand local needs—like durable glass that handles our humid weather and complies with NZ standards. Whether you’re hunting for budget-friendly options or premium custom pieces, let’s explore the top suppliers, what they offer, and tips to pick the best one. Think of this as your insider guide to sourcing shower glass that’ll make your bathroom pop without breaking the bank.
Why Choosing the Right Supplier Matters for Your Shower Glass
In Auckland, where renovations are booming thanks to our growing population and love for modern living, a good supplier ensures your shower glass panel is not only stylish but also safe and long-lasting. They provide certified products that meet the Building Code, offer installation advice, and often have warranties to back it up. Plus, local suppliers mean quicker delivery and better support—handy when you’re knee-deep in a reno timeline. As per Consumer NZ’s renovation tips, opting for reputable suppliers reduces risks like poor-quality materials that could lead to costly fixes down the line.
Fast Fact for Busy Readers: Look for suppliers with AS/NZS 2208 certification to guarantee safety and quality—it’s a must for NZ bathrooms.
Key Factors to Consider When Selecting a Shower Glass Supplier
Before diving into specific names, let’s talk about what makes a supplier stand out in Auckland’s market. First, variety: Do they offer clear, frosted, tinted, and textured options? Second, compliance: All glass should be toughened safety glass per Building Code G12. Third, service: From custom cuts to delivery, good suppliers make the process smooth.
Auckland-Specific Tip: With our rainy climate, choose suppliers who offer glass with anti-corrosion coatings or easy-clean treatments to combat water spots.
Spotlight on Metro Glass: Auckland’s Go-To for Durable Shower Solutions
Metro Glass is a heavyweight in the NZ glass scene, with a strong Auckland presence. They specialize in toughened shower glass that’s perfect for everything from frameless panels to sliding doors. Their range includes clear, low-iron, and frosted options, all meeting stringent safety standards. For instance, their shower glass collection features 10mm thick panels that are ideal for larger bathrooms in areas like Remuera.
One standout is their obscured glass line, which provides privacy without skimping on light—great for family homes. Metro also offers custom tinting, so if you’re after a bronze hue to match your Mt Eden villa’s aesthetic, they’ve got you covered. Prices start around $600 for basic panels, scaling up for custom work.
Designer Note: “Metro Glass’s low-iron shower panels are fantastic for creating that seamless, high-end look in Auckland’s luxury renovations,” says Kevin Yang, Lead Designer at Superior Renovations.
Mico: Versatile Options for Every Budget and Style
Mico is another Auckland favourite, known for their extensive bathroom supplies. Their shower glass doors and panels come in various configurations, from pivot doors to fixed screens. Check out their shower doors and panels range, which includes affordable clear glass starting at $400 and premium frosted options up to $1,200.
They’re particularly strong in semi-framed and frameless designs, with hardware that’s rust-resistant—essential for Auckland’s coastal suburbs like Takapuna. Mico also stocks textured glass, like rain patterns, adding a spa-like feel to your shower.
Reece: Premium Selections for Custom Shower Glass Projects
For those seeking upscale shower glass panels, Reece delivers with their high-quality imports and local fabrications. Their shower screens lineup includes ultra-clear low-iron glass and elegant tinted varieties, perfect for contemporary Auckland apartments in Viaduct Harbour.
Reece shines in custom work, offering thicknesses from 8mm to 12mm and textures like etched or fluted. Their products often come with easy-clean coatings, reducing maintenance in humid NZ conditions.
Pro Advice: Reece’s frameless options pair beautifully with minimalist designs—ideal if you’re aiming for that open-plan bathroom trend popping up in New Lynn developments.
Comparing Auckland Shower Glass Suppliers: A Quick Guide
To help you decide, here’s a table summing up these top suppliers based on key features relevant to Auckland renovations.
| Supplier | Specialties | Price Range (NZD) | Best For | Certifications |
| Metro Glass | Clear, frosted, low-iron, custom tinting | $600–$2,000 | Luxury and custom renos | AS/NZS 2208, NZ Building Code compliant |
| Mico | Pivot doors, fixed screens, textured glass | $400–$1,500 | Budget to mid-range projects | Safety glass standards, warranties available |
| Reece | Low-iron, tinted, frameless screens | $800–$2,500 | Premium custom designs | AS/NZS 2208, energy-efficient options |
Scenario Spotlight: Imagine renovating a 1970s home in Titirangi—Metro Glass’s durable panels would handle the bushy, moist environment, while Mico’s affordable doors keep costs down for the rest of the build.
Other Notable Auckland Suppliers Worth Mentioning
Beyond the big three, consider Plumbing World for their practical shower glass selections, often with bundle deals for full bathroom fits. Or Mitre 10, great for DIYers with off-the-shelf panels. For specialized frameless options, Stake Glass offers bespoke services tailored to Auckland’s architectural quirks.
Designer Quote: “Sourcing from local suppliers like these ensures your shower glass integrates seamlessly with Auckland’s diverse home styles,” says Wendy Chen, Designer at Superior Renovations.
Tips for Negotiating and Buying from Suppliers
When dealing with suppliers, ask about bulk discounts if you’re doing multiple bathrooms. Get quotes in writing, including delivery to your Auckland site—traffic can delay things! And always inspect samples for quality. If energy efficiency is a goal, look for suppliers aligned with EECA’s Energy Star ratings, even for glass products.
Which supplier are you leaning towards for your shower glass doors? Share in the comments, and let’s discuss!
Essential Certifications for Shower Glass in New Zealand Bathrooms
When renovating your Auckland bathroom, picking shower glass panels isn’t just about style—it’s about safety and compliance too. In New Zealand, certifications ensure your glass can handle the steamy, wet environment without risking injury or failing inspections. Imagine installing a stunning frameless shower only to find it doesn’t meet code; that’s a headache no Aucklander wants amid our busy lives. Let’s unpack the key certifications for shower glass doors, why they matter, and how to spot them. We’ll draw from official NZ sources to keep things legit and helpful for your next project.
Understanding Why Certifications Are Crucial for Shower Glass
Certifications aren’t bureaucracy—they’re your assurance that the glass is tough, safe, and built to last in Auckland’s humid climate. The New Zealand Building Code mandates standards for materials in wet areas to prevent accidents like slips or breaks. For instance, Building Code G12 on water supplies covers waterproofing and safety in bathrooms. Without proper certs, you could face insurance issues or resale problems down the line. Plus, certified glass often comes with better warranties, giving peace of mind for families in suburbs like Henderson or Botany.
Quick Tip for Readers: Always request certification proof from suppliers before buying—it’s your first line of defense against subpar products.
The Gold Standard: AS/NZS 2208 Safety Glass Certification
At the heart of NZ shower glass standards is AS/NZS 2208, the joint Australian/New Zealand standard for safety glazing materials. This cert ensures the glass is toughened or laminated to shatter safely if broken—into small, blunt pieces rather than sharp shards. For shower glass, it’s non-negotiable, especially in frameless designs where glass bears more weight.
Why does it matter in Auckland? Our homes often have kids or elderly residents, and this standard minimizes injury risks. As per Building Code B1 for structure, all glazing in high-risk areas like showers must comply. Look for the AS/NZS 2208 mark etched on the glass itself—it’s a permanent sign of quality.

Real-Life Scenario: A client in Onehunga renovated their bathroom with uncertified glass from overseas. During inspection, it failed, leading to a costly replacement. Sticking to certified options from local suppliers avoids such pitfalls.
Building Code Compliance: Key Clauses for Shower Glass
New Zealand’s Building Code is your bible for renovations. For shower glass panels, focus on:
- B1 Structure: Ensures glass can withstand impacts and loads, like someone leaning on a door.
- G12 Water Supplies: Covers waterproofing around showers to prevent leaks, which certified glass helps achieve.
- F2 Hazardous Building Materials: Mandates safety glass to reduce injury from breakage.
These clauses, detailed on building.govt.nz, require evidence of compliance during council consents. Auckland Council often inspects bathrooms closely, so certified glass speeds up approvals.
Designer Insight: “In Auckland, where we see a mix of old and new homes, AS/NZS 2208 compliance is key to blending style with safety,” says Dorothy Li, Senior Designer at Superior Renovations.
Energy Efficiency Certifications: EECA and Beyond
While not mandatory for glass, energy certifications add value in eco-conscious Auckland. The Energy Efficiency and Conservation Authority (EECA) promotes products that reduce heat loss, like insulated glass units. For showers, look for low-emissivity (low-E) coatings on glass to minimize condensation and improve energy efficiency, aligning with EECA standards.
In colder Auckland winters, certified energy-efficient glass keeps bathrooms warmer, cutting heating bills. Suppliers like Metro Glass offer options with these features in their insulated glass range, though primarily for windows—ask about adaptations for showers.
Consumer Protection: What Consumer NZ Says About Certifications
Consumer NZ emphasizes verifying certifications to avoid dodgy products. Their guides on glazing highlight the importance of AS/NZS standards and warn against unbranded imports. For shower glass doors, they recommend checking for third-party testing to ensure claims hold up.
Table of Key Certifications for Shower Glass
| Certification | Description | Why It Matters in NZ | Where to Find It |
| AS/NZS 2208 | Safety glazing standard | Prevents sharp breaks, mandatory for wet areas | Etched on glass, supplier docs |
| Building Code B1/G12/F2 | Structural, water, hazard compliance | Ensures installation passes council checks | Building.govt.nz, consent applications |
| EECA Energy Ratings | Efficiency for heat retention | Reduces energy use in humid climates | EECA.govt.nz, product labels |
| NZCB Recommendations | Builder-endorsed standards | Guides quality for renovations | NZCB.nz resources |
NZ Certified Builders (NZCB) and Shower Glass Standards
NZCB, a go-to for trusted builders, stresses using certified materials. Their site resources include checklists for bathroom renos, recommending AS/NZS 2208 glass to meet code. Partnering with NZCB-approved pros ensures your shower glass installation ticks all boxes.
Common Pitfalls: Skipping certs for cheaper glass might seem smart, but Auckland Council fines can hit hard. Always cross-check with official sites.
Auckland Council Specifics: Local Compliance for Shower Installs
In Auckland, council consents often require proof of certifications. Visit aucklandcouncil.govt.nz for forms showing glazing must comply with NZS 4223 (glazing in buildings). For showers, this ties back to safety standards, ensuring your reno in places like Mangere or Pukekohe passes muster.
Witty Note: Certifications are like seatbelts for your shower—boring until you need them, then lifesavers!
Supplier Spotlights with Certified Products
Metro Glass excels with AS/NZS 2208-certified shower glass.
Mico offers compliant doors in their range, often with energy-efficient add-ons.
Reece provides certified panels via their screens, perfect for code-approved custom work.
Designer Quote: “Certifications give us the confidence to design bold, safe bathrooms that Auckland families love,” says Alison Yu, Designer at Superior Renovations.
Shower Glass Installation Process: Step-by-Step Guide for Auckland Renovators
Installing shower glass doors or panels can turn a basic bathroom into a sleek sanctuary, but getting it right is key—especially in Auckland, where our homes deal with everything from seismic shakes to steamy humidity. Whether you’re a DIY enthusiast in Papakura tackling a weekend project or hiring pros for a full reno in Herne Bay, understanding the installation process helps avoid leaks, cracks, and costly do-overs. We’ll walk through the steps, compare DIY vs professional install, and share tips tailored to NZ standards. Remember, improper installation can void warranties, so let’s make sure your shower glass panel setup is spot on. Ever tried fitting glass yourself? It’s rewarding, but one wrong measurement and you’re in hot water—literally!
The Basics of Shower Glass Installation: What You Need to Know
Before diving in, know that shower glass installation involves precise measurements, secure fittings, and waterproof sealing to comply with New Zealand’s Building Code. Section G12 emphasizes watertightness, while B1 covers structural integrity Building Code G12. In Auckland, council consents might be needed for major changes, so check Auckland Council early. Tools you’ll need include a level, silicone sealant, drill, and safety gear—glass is heavy and sharp!
Tip for Skimmers: Always use toughened safety glass (AS/NZS 2208 certified) to prevent accidents; it’s a legal must in NZ bathrooms.
Preparing Your Bathroom for Shower Glass Installation
Start with prep: Clear the area, ensure walls are plumb and tiled, and measure twice. For a standard alcove shower, measure the width at top and bottom—walls aren’t always straight in older Auckland homes like those in Mt Eden. If installing over a bath, account for the lip. Remove old fittings carefully to avoid damaging waterproofing, as per Consumer NZ waterproofing advice.
Anecdote: I recall a homeowner in Ellerslie who skipped measuring the slope—ended up with a wonky door that wouldn’t close. Lesson learned: Use a digital level for accuracy!
Superior Renovations
Step-by-Step Installation Process for Framed Shower Glass
For framed shower glass doors, it’s more forgiving for beginners. Here’s the breakdown:
- Assemble the Frame: Follow manufacturer instructions—usually screw channels to walls using wall plugs for concrete or timber studs common in Auckland builds.
- Fit the Glass: Slide panels into the frame, securing with clips or seals. Use a helper; glass can weigh 20-30kg.
- Install Hardware: Attach hinges, handles, and rollers. For sliding doors, ensure tracks are level to prevent jamming.
- Seal It Up: Apply silicone around edges, letting it cure for 24 hours. Test for leaks by running water.
- Final Checks: Ensure doors swing or slide smoothly, and clean off fingerprints.
Time estimate: 4-6 hours for DIY. Cost savings: Up to $500 vs pro install.
Installing Frameless Shower Glass: A Pro-Level Challenge
Frameless shower glass panels offer that seamless look but require precision. Steps include:
- Mark and Drill: Position brackets or channels, drilling into tiles carefully to avoid cracks.
- Secure Fixings: Use stainless steel hardware to resist Auckland’s moisture—rust is a killer here.
- Position Glass: Lift heavy panels (10-12mm thick) into place, using suction cups for safety.
- Adjust and Seal: Shim for level, then silicone joints. Allow full cure before use.
- Add Finishing Touches: Install handles or bars, checking for stability.
Warning: Frameless installs often need pros due to weight and alignment—DIY mishaps can lead to glass breakage, costing hundreds.
DIY vs Professional Installation: Pros and Cons Table
Deciding between DIY and hiring help? This table breaks it down for Auckland contexts.
| Approach | Pros | Cons | Best For | Cost Estimate (NZD) |
| DIY | Cost-effective, satisfying, flexible timing | Risk of errors, time-consuming, no warranty on labor | Simple framed setups in straightforward bathrooms | $100–$300 (tools/seals) |
| Professional | Expert finish, compliant with code, warranties included | Higher cost, scheduling waits | Frameless or complex installs in heritage homes | $500–$1,500 |
Common Tools and Materials for Shower Glass Setup
You’ll need: Measuring tape, spirit level, drill with masonry bits, silicone gun, hacksaw for trimming, and protective gloves. For materials, opt for high-grade silicone that’s mould-resistant—vital in Auckland’s damp climate. Suppliers like Mico offer installation kits with their shower panels.
Reece provides robust brackets in their range, perfect for frameless jobs.
Troubleshooting During Installation
Issues like uneven walls? Use adjustable channels. Leaks? Double-check seals. Glass not fitting? Recut or return—measure thrice! For energy efficiency, ensure good ventilation to reduce condensation.
Designer Quote: “A flawless installation starts with prep; in Auckland’s varied homes, pros can adapt to any quirk for a leak-free finish,” says Cici Zou, Designer at Superior Renovations.
Post-Installation Checks and Compliance
After install, test for stability, leaks, and smooth operation. Get a certificate of compliance if needed for council records. In Auckland, this ensures your reno adds value without future hassles.
When to Call in the Professionals
If your bathroom has odd angles, like in many Ponsonby terraces, or you’re going frameless, pros are worth it. They handle permits, ensure waterproofing, and often bundle with other reno work.
Witty Aside: DIY shower install is like cooking a fancy meal—fun if it works, but a mess if it doesn’t. Sometimes, calling the chef (or installer) is smarter!
Shower Glass Warranties: Protecting Your Investment in Auckland Bathrooms
When you’re shelling out for a shiny new shower glass door or panel in your Auckland renovation, the last thing you want is for it to fog up, crack, or fail prematurely. That’s where warranties come in—they’re your safety net against defects and wear. In New Zealand, warranties vary by supplier and product, but understanding them can save you headaches and cash down the road. Whether you’re upgrading a compact ensuite in an Auckland apartment or a spacious family bathroom in Albany, let’s break down what warranties cover, how to claim them, and tips for Aucklanders. Picture this: You’ve just installed a sleek frameless panel, only to spot a flaw months later. A solid warranty turns that frown upside down. So, how do you ensure your shower glass panel is backed properly? Let’s explore.
What Do Shower Glass Warranties Typically Cover?
Warranties for shower glass in NZ usually protect against manufacturing defects, like bubbles in the glass or faulty tempering, but not against misuse or poor installation. Standard coverage might include breakage under normal use, discolouration, or seal failures. In Auckland’s moist environment, look for warranties that address corrosion on hardware or moisture-related issues, as humidity can accelerate problems. According to Consumer NZ on guarantees and warranties, all products must be fit for purpose under the Consumer Guarantees Act (CGA), which acts as a baseline even without a written warranty.
Quick Advice for Readers: Always read the fine print—warranties often exclude damage from harsh cleaners or improper handling.
Types of Warranties for Shower Glass Products
Not all warranties are created equal. Here’s a rundown of common types you’ll encounter in Auckland:
- Manufacturer’s Warranty: Covers defects in the glass itself, typically 5-10 years. For toughened glass, it might include shattering due to flaws, but not impact damage.
- Installation Warranty: If pros install it, they often provide 1-2 years on labour, ensuring no leaks or misalignment.
- Extended Warranty: Optional add-ons for longer coverage, say 15 years, often for premium products like low-iron glass.
- Hardware Warranty: Separate for fittings, usually 5 years against rust or failure—crucial in coastal Auckland spots like Mission Bay.
Under NZ law, the CGA overrides weak warranties, mandating remedies like repair or replacement if the product fails prematurely Consumer Guarantees Act details.
How Long Do Shower Glass Warranties Last?
Duration varies: Basic glass might get 2-5 years, while high-end options from reputable suppliers offer 10+ years. For instance, toughened safety glass compliant with AS/NZS 2208 often comes with longer warranties due to its durability Building Code B1. In Auckland, where salt air can corrode faster, opt for warranties that factor in environmental wear—some suppliers adjust for coastal vs inland homes.
Auckland Anecdote: A friend in Browns Bay had their shower door hardware rust after a year. Their warranty covered it because the supplier accounted for seaside conditions—always ask about location-specific terms!
Claiming a Warranty: Step-by-Step Process
Need to make a claim? Don’t panic—it’s straightforward if you’re prepared. Steps include:
- Document the Issue: Photos, purchase receipts, and installation dates are key.
- Contact the Supplier: Reach out within the warranty period; most have online forms or hotlines.
- Inspection: They might send a rep to assess—common in Auckland for local suppliers.
- Resolution: Repair, replace, or refund per CGA guidelines.
- Follow-Up: Keep records; if unresolved, escalate to Disputes Tribunal.
Comparing Warranties from Top Auckland Suppliers
Let’s see how major players stack up in warranties for shower glass doors.
| Supplier | Warranty Length (Glass) | Coverage Highlights | Exclusions | Best For |
| Metro Glass | 10 years | Defects, shattering, hardware (5 years) | Installation errors, abuse | Coastal homes |
| Mico | 5-7 years | Manufacturing flaws, seals | Chemical damage, DIY installs | Budget renos |
| Reece | 10-15 years | Extended on premium lines, corrosion | Normal wear, improper cleaning | Luxury projects |

Warranties and the Consumer Guarantees Act: Your Rights
The CGA is your ace card—it guarantees products are durable for a reasonable time, even post-warranty. For shower glass panels, “reasonable” might mean 5-10 years depending on price and use. If a $2,000 frameless panel fails after 3 years, you could claim under CGA. Consumer NZ advises keeping proof of purchase and noting issues early CGA repairs and replacements.
Designer Perspective: “A good warranty isn’t just paper—it’s assurance that your bathroom will stay stunning for years in Auckland’s challenging climate,” says Kevin Yang, Lead Designer at Superior Renovations.
Common Warranty Exclusions and How to Avoid Them
Watch out for exclusions like damage from abrasive cleaners, impacts, or non-professional installation. In Auckland, where hard water is common, warranties might not cover mineral buildup—use water softeners to prevent this. Always follow care instructions to keep coverage intact.
Extending Your Warranty: Is It Worth It?
Extended warranties can add 5-10 years for a fee (around $100-$300). Worth it for expensive setups in high-use homes, but weigh against CGA protections.
Scenario: Renovating a rental in Manukau? Opt for basic warranties to keep costs low, but for your forever home in St Heliers, go extended.
Auckland Council and Warranties: Compliance Ties
During consents, Auckland Council doesn’t check warranties, but compliant products (per Building Code) often have better ones.
Witty Thought: Warranties are like umbrellas in Auckland—you hope you don’t need them, but when the rain (or leak) hits, you’re glad they’re there!
How to Clean and Maintain Shower Glass: Tips for Sparkling Results in Auckland Homes
Keeping your shower glass doors spotless in Auckland’s humid climate can feel like a never-ending battle against water spots and soap scum. But with the right techniques, you can maintain that just-installed shine without spending hours scrubbing. Whether your bathroom faces the salty breezes of the Hauraki Gulf or the urban hustle of the CBD, proper cleaning and maintenance extend the life of your shower glass panel, keeping it clear and functional. Let’s chat about effective methods, common mistakes, and Auckland-specific hacks. Imagine coming home after a rainy day in the city and stepping into a pristine shower—sounds good, right? Well, it’s achievable with a bit of know-how.
Why Regular Maintenance Matters for Shower Glass
Shower glass isn’t invincible; hard water minerals, soap residue, and mould thrive in Auckland’s moist environment, leading to buildup that dulls the surface and can even etch the glass over time. Regular cleaning prevents this, preserves warranties, and maintains hygiene—important for families or those with allergies. As per Consumer NZ on cleaning products, using the right methods avoids damage while keeping things eco-friendly. Plus, well-maintained glass enhances your bathroom’s appeal, potentially boosting home value in Auckland’s competitive market.
Fast Tip: Clean your shower glass weekly to prevent tough buildup; it’s easier than tackling months of grime.
Essential Tools and Products for Cleaning Shower Glass
You don’t need fancy gadgets—just a few basics. A squeegee for daily wipes, microfibre cloths for polishing, and a soft sponge for scrubbing. For products, opt for vinegar-based solutions or commercial cleaners like those rated well by Consumer NZ. Avoid abrasives that scratch; instead, use pH-neutral options safe for toughened glass per Building Code G12.
In Auckland, where water hardness varies, consider water softeners for prevention. Suppliers like Mico offer easy-clean coated glass in their range, which repels water better.

Step-by-Step Guide to Cleaning Shower Glass
Here’s a simple routine for sparkling shower glass:
- Daily Wipe-Down: After each shower, squeegee off water to prevent spots. Takes 30 seconds and makes a huge difference in humid Auckland.
- Weekly Deep Clean: Mix equal parts white vinegar and water, spray on, let sit 5-10 minutes, then scrub gently with a sponge. Rinse and squeegee dry.
- Tough Stains: For limescale, use a baking soda paste—apply, wait 15 minutes, scrub, and rinse. Avoid on coated glass; check manufacturer guidelines.
- Polish: Buff with a microfibre cloth for streak-free shine. For extra protection, apply a rain-repellent like those used on car windshields.
- Ventilation: Use exhaust fans to reduce moisture, preventing mould as recommended by EECA for energy-efficient bathrooms.
Anecdote: An Auckland client in Henderson struggled with foggy glass until they adopted the vinegar routine. “It’s cheap, natural, and my shower looks new every time,” they shared. Simple swaps like this work wonders.
Natural vs Commercial Cleaners: Which to Choose?
Natural options like vinegar are eco-friendly and cheap, great for Auckland’s green-conscious homeowners. Commercial cleaners offer convenience and targeted formulas for hard water. Per Consumer NZ tests, some eco-brands perform as well as chemicals without harsh fumes.
| Cleaner Type | Pros | Cons | Best For |
| Natural (Vinegar/Baking Soda) | Affordable, non-toxic, readily available | May require more elbow grease | Eco homes, mild buildup |
| Commercial (Sprays/Gels) | Fast-acting, specialized for stains | Can be pricey, chemical smells | Heavy use bathrooms, hard water areas |
Helpful Hint: Test cleaners on a small area first to ensure no damage, especially on textured glass.
Maintaining Different Types of Shower Glass
Clear glass shows spots easily, so daily squeegeeing is key. Frosted or textured? They hide marks but trap residue in grooves—use a soft brush. For coated glass from suppliers like Metro Glass, avoid harsh chemicals to preserve the coating Metro Glass shower products.
In coastal Auckland, rinse salt residue weekly. Reece’s easy-clean screens here make maintenance a breeze with their repellent surfaces.
Preventing Common Problems: Mould, Limescale, and Scratches
Mould loves Auckland’s humidity—combat it with good ventilation and anti-mould sprays. Limescale? Install a filter or use descalers monthly. Scratches? Use only soft tools; if they occur, polish kits can help but prevention is best.
Designer Quote: “Maintenance is about consistency; in Auckland, a quick daily routine keeps your shower glass looking premium without the hassle,” says Wendy Chen, Designer at Superior Renovations.
Eco-Friendly Maintenance Tips for NZ Homes
Go green with reusable cloths and natural cleaners to align with EECA’s sustainability push. Reduce water use by cleaning during showers—spray, let sit, rinse off. For energy savings, maintain clear glass to maximize natural light, cutting down on artificial lighting.
Local Advice: In hard water areas like South Auckland, consider professional deep cleans yearly to tackle buildup effectively.
When to Call Professionals for Shower Glass Maintenance
For etched glass or major damage, pros can restore with specialized treatments. If your warranty covers it, use supplier services for best results.
Witty Note: Cleaning shower glass is like flossing—skip it, and problems build up; do it regularly, and everything stays smooth!
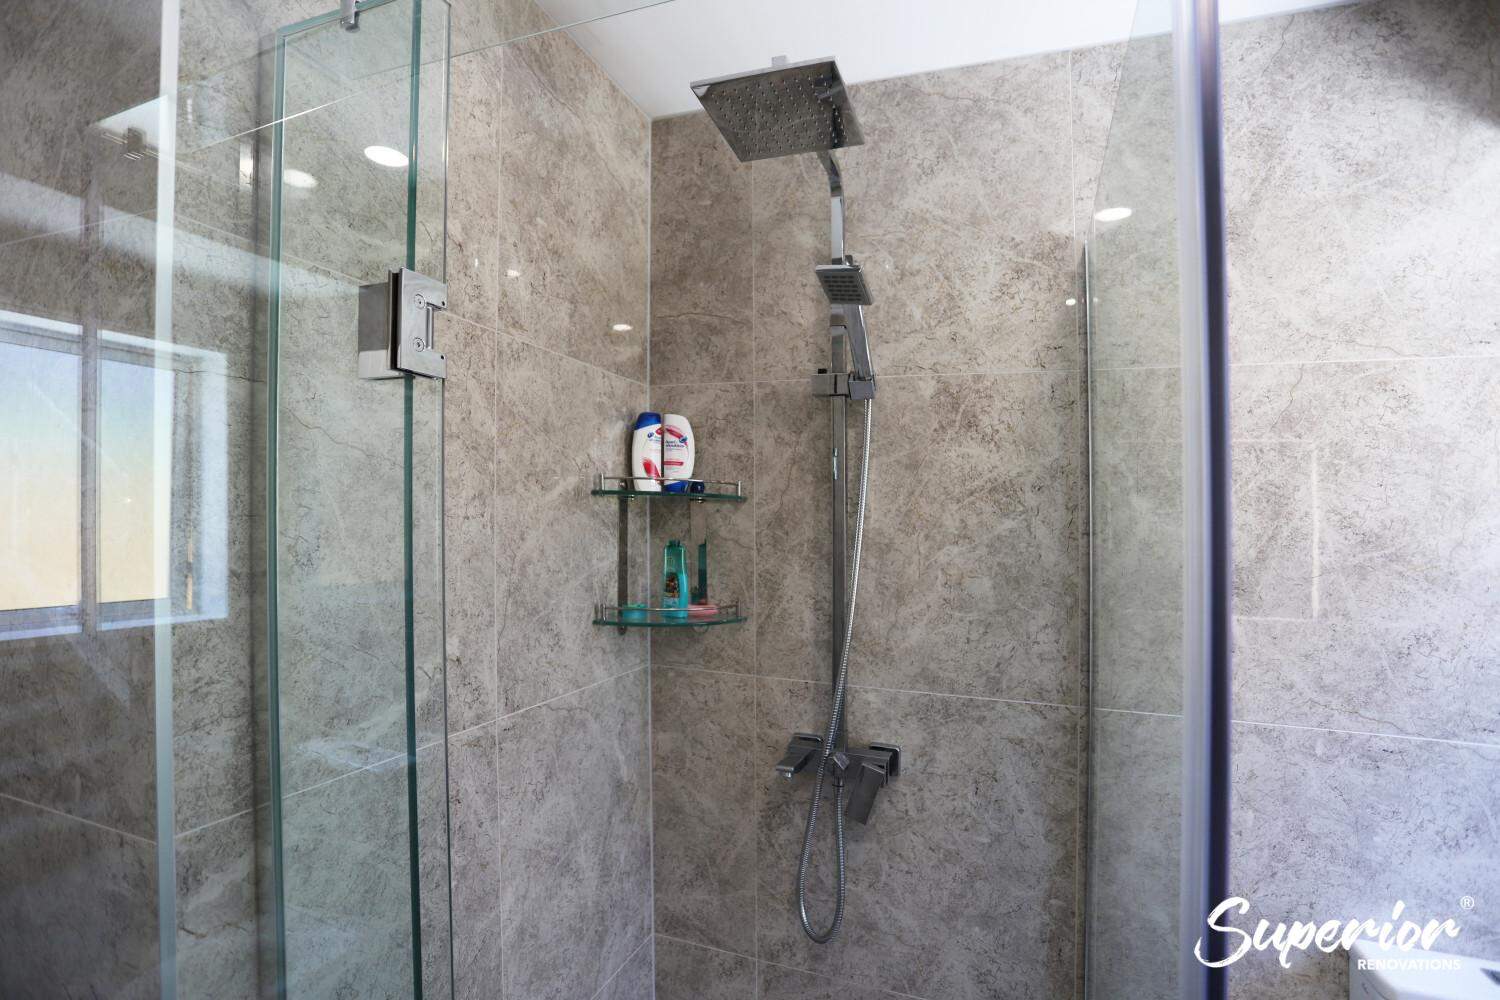
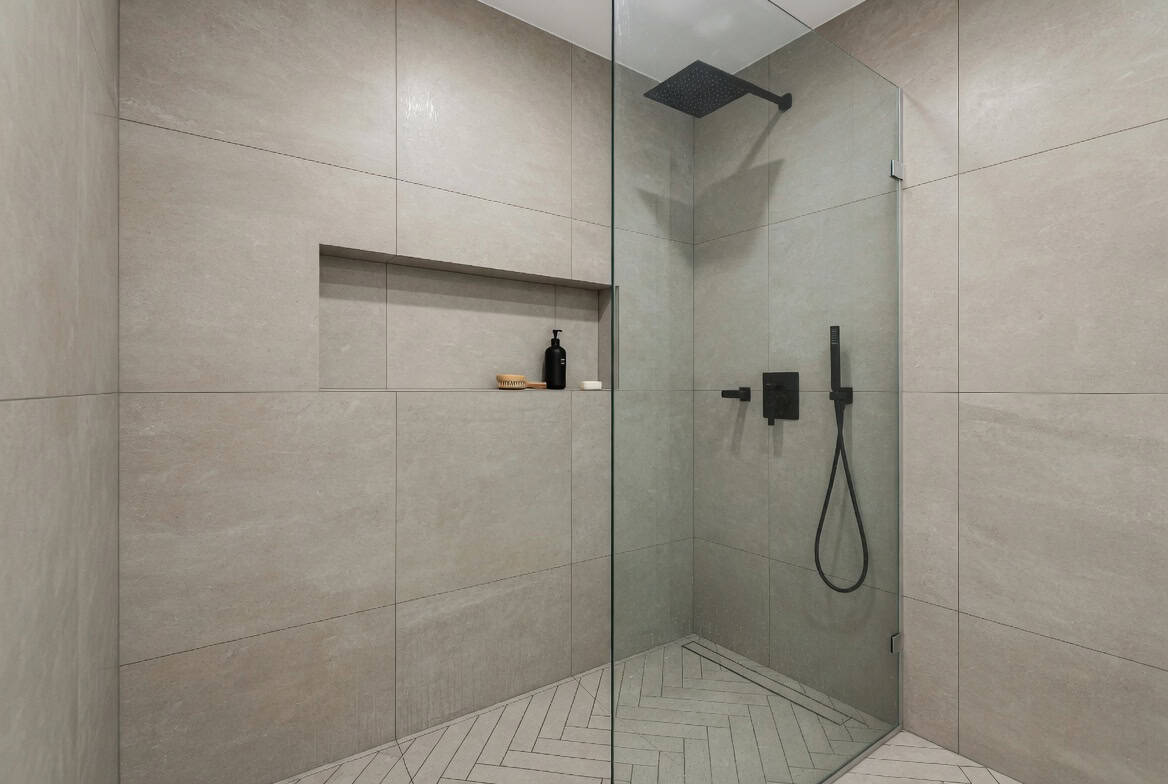
Frameless Shower Glass: The Sleek Choice for Modern Auckland Bathrooms
If you’re dreaming of a bathroom that feels like a high-end spa right in your Auckland home, frameless shower glass might just be the star of the show. Without those bulky metal frames, it offers a seamless, open look that makes even the smallest ensuites in city apartments feel bigger and brighter. But is it right for every Kiwi bathroom? In Auckland, where we blend modern vibes with practical living—think open-plan homes in Wynyard Quarter or cosy villas in Ponsonby—frameless options are surging in popularity. Let’s unpack what frameless shower glass enclosures are all about, their perks and pitfalls, and how they fit into local renovations. Ever wondered why your shower feels cramped? Ditching the frame could be the fix. Stick around as we explore this trend that’s transforming Auckland bathrooms one panel at a time.
What Exactly Is Frameless Shower Glass?
Frameless shower glass doors and panels use thick, toughened glass—usually 10mm to 12mm—held in place by discreet brackets, hinges, or channels instead of full frames. This design creates a minimalist aesthetic, letting the glass take center stage. In New Zealand, it must meet safety standards like AS/NZS 2208 to ensure it’s shatter-resistant Building Code B1. For Aucklanders, frameless setups work well in contemporary spaces, but they require precise installation to avoid leaks in our rainy climate.
Quick Insight: Frameless isn’t completely without support—subtle hardware keeps it stable, but the visual effect is all about that uninterrupted glass flow.
Benefits of Going Frameless in Your Shower Design
The appeal? It’s all in the details. Frameless shower glass panels make bathrooms feel larger by eliminating visual barriers, perfect for compact Auckland units in the Viaduct. They’re easier to clean—no crevices for mould—and let light bounce around, brightening dim spaces on overcast days. Durability is another win; the thicker glass stands up to daily use, and with proper seals, it handles humidity like a champ. According to Consumer NZ bathroom renovation guides, frameless options can add a premium feel, potentially increasing home value in Auckland’s hot property market.
Plus, customization is huge—you can go for clear, frosted, or textured glass to match your style, whether it’s a beachy vibe in Takapuna or urban chic in Britomart.
Drawbacks to Consider Before Choosing Frameless
It’s not all smooth sailing. Frameless shower glass costs more—expect 20-50% higher than framed due to thicker glass and specialized fittings. Installation demands pros, as even slight misalignments can cause leaks or instability, especially in Auckland’s older homes with uneven floors. Water containment might be trickier without frames, so good sealing is essential to prevent slips on wet tiles. In windy coastal areas like Piha, ensure hardware is corrosion-resistant to battle salt air.
Anecdote from the Field: A homeowner in Grey Lynn opted for frameless in their 1920s bungalow reno. “It opened up the space beautifully, but we had to reinforce the walls for the weight—worth it, though, for that wow factor,” they recalled with a grin.
Framed vs Frameless Shower Glass: A Comparison Table
Still deciding? This table highlights key differences tailored to Auckland renovations.
| Aspect | Framed | Frameless |
| Cost | Lower ($500-$1,500) | Higher ($1,200-$3,000) |
| Aesthetics | Traditional, structured | Modern, seamless |
| Installation | Easier, forgiving for DIY | Requires pros, precise |
| Maintenance | Frames can trap dirt | Easier clean, but seals need attention |
| Durability | Good, but frames may corrode | Excellent with thick glass |
| Best For | Budget family bathrooms | Luxury, open-plan designs |
Installation Essentials for Frameless Shower Glass
Installation is where frameless shines—or shatters if done wrong. Start with waterproofed walls and a level base; Auckland Council often requires consents for structural changes.. Pros use clamps or U-channels to secure glass, applying silicone for watertight seals. Expect 1-2 days for a standard setup, longer for customs.
Common Mistake: Skipping wall reinforcements—frameless glass is heavy, so studs or blocking are crucial in timber-framed Auckland homes.
Cost Factors for Frameless Shower Glass in Auckland
Budgets vary: A basic single-panel setup might run $1,200-$2,000, while a full enclosure with doors could hit $3,000+. Factors include glass type (clear vs tinted), size, and hardware quality. Installation adds $500-$1,000.
Designer Quote: “Frameless shower glass brings that effortless elegance to Auckland bathrooms, making small spaces feel luxurious and airy,” says Dorothy Li, Senior Designer at Superior Renovations.
Choosing the Right Glass for Your Frameless Setup
Go for 10mm+ thickness for stability; low-iron for ultra-clarity or frosted for privacy. In family homes across Manurewa, textured options hide water marks while maintaining the frameless sleekness. Ensure it’s safety-rated to avoid accidents—key in homes with kids or elderly.
Local Suppliers Specializing in Frameless Shower Glass
Auckland has great options. Metro Glass offers custom frameless panels with their shower screens, known for durability.
Mico’s frameless doors collection include pivot and sliding styles, perfect for space-saving.
Reece provides premium frameless screens here, with options for tinted glass in upscale renos.
Maintenance Tips for Frameless Shower Glass
Keep it simple: Squeegee after use, clean weekly with vinegar to fight Auckland’s hard water. Check seals annually for wear—replace to prevent leaks. Easy-clean coatings from suppliers extend that new look.
Witty Aside: Frameless glass is like a good haircut—subtle, but it makes everything look better. Just don’t forget the upkeep, or it’ll go from chic to streak!
Is Frameless Right for Your Auckland Home?
If you crave modern minimalism and have the budget, yes. For budget-conscious or traditional styles, framed might suit better. Consider your lifestyle—busy households in Papatoetoe might prefer low-maintenance textures.
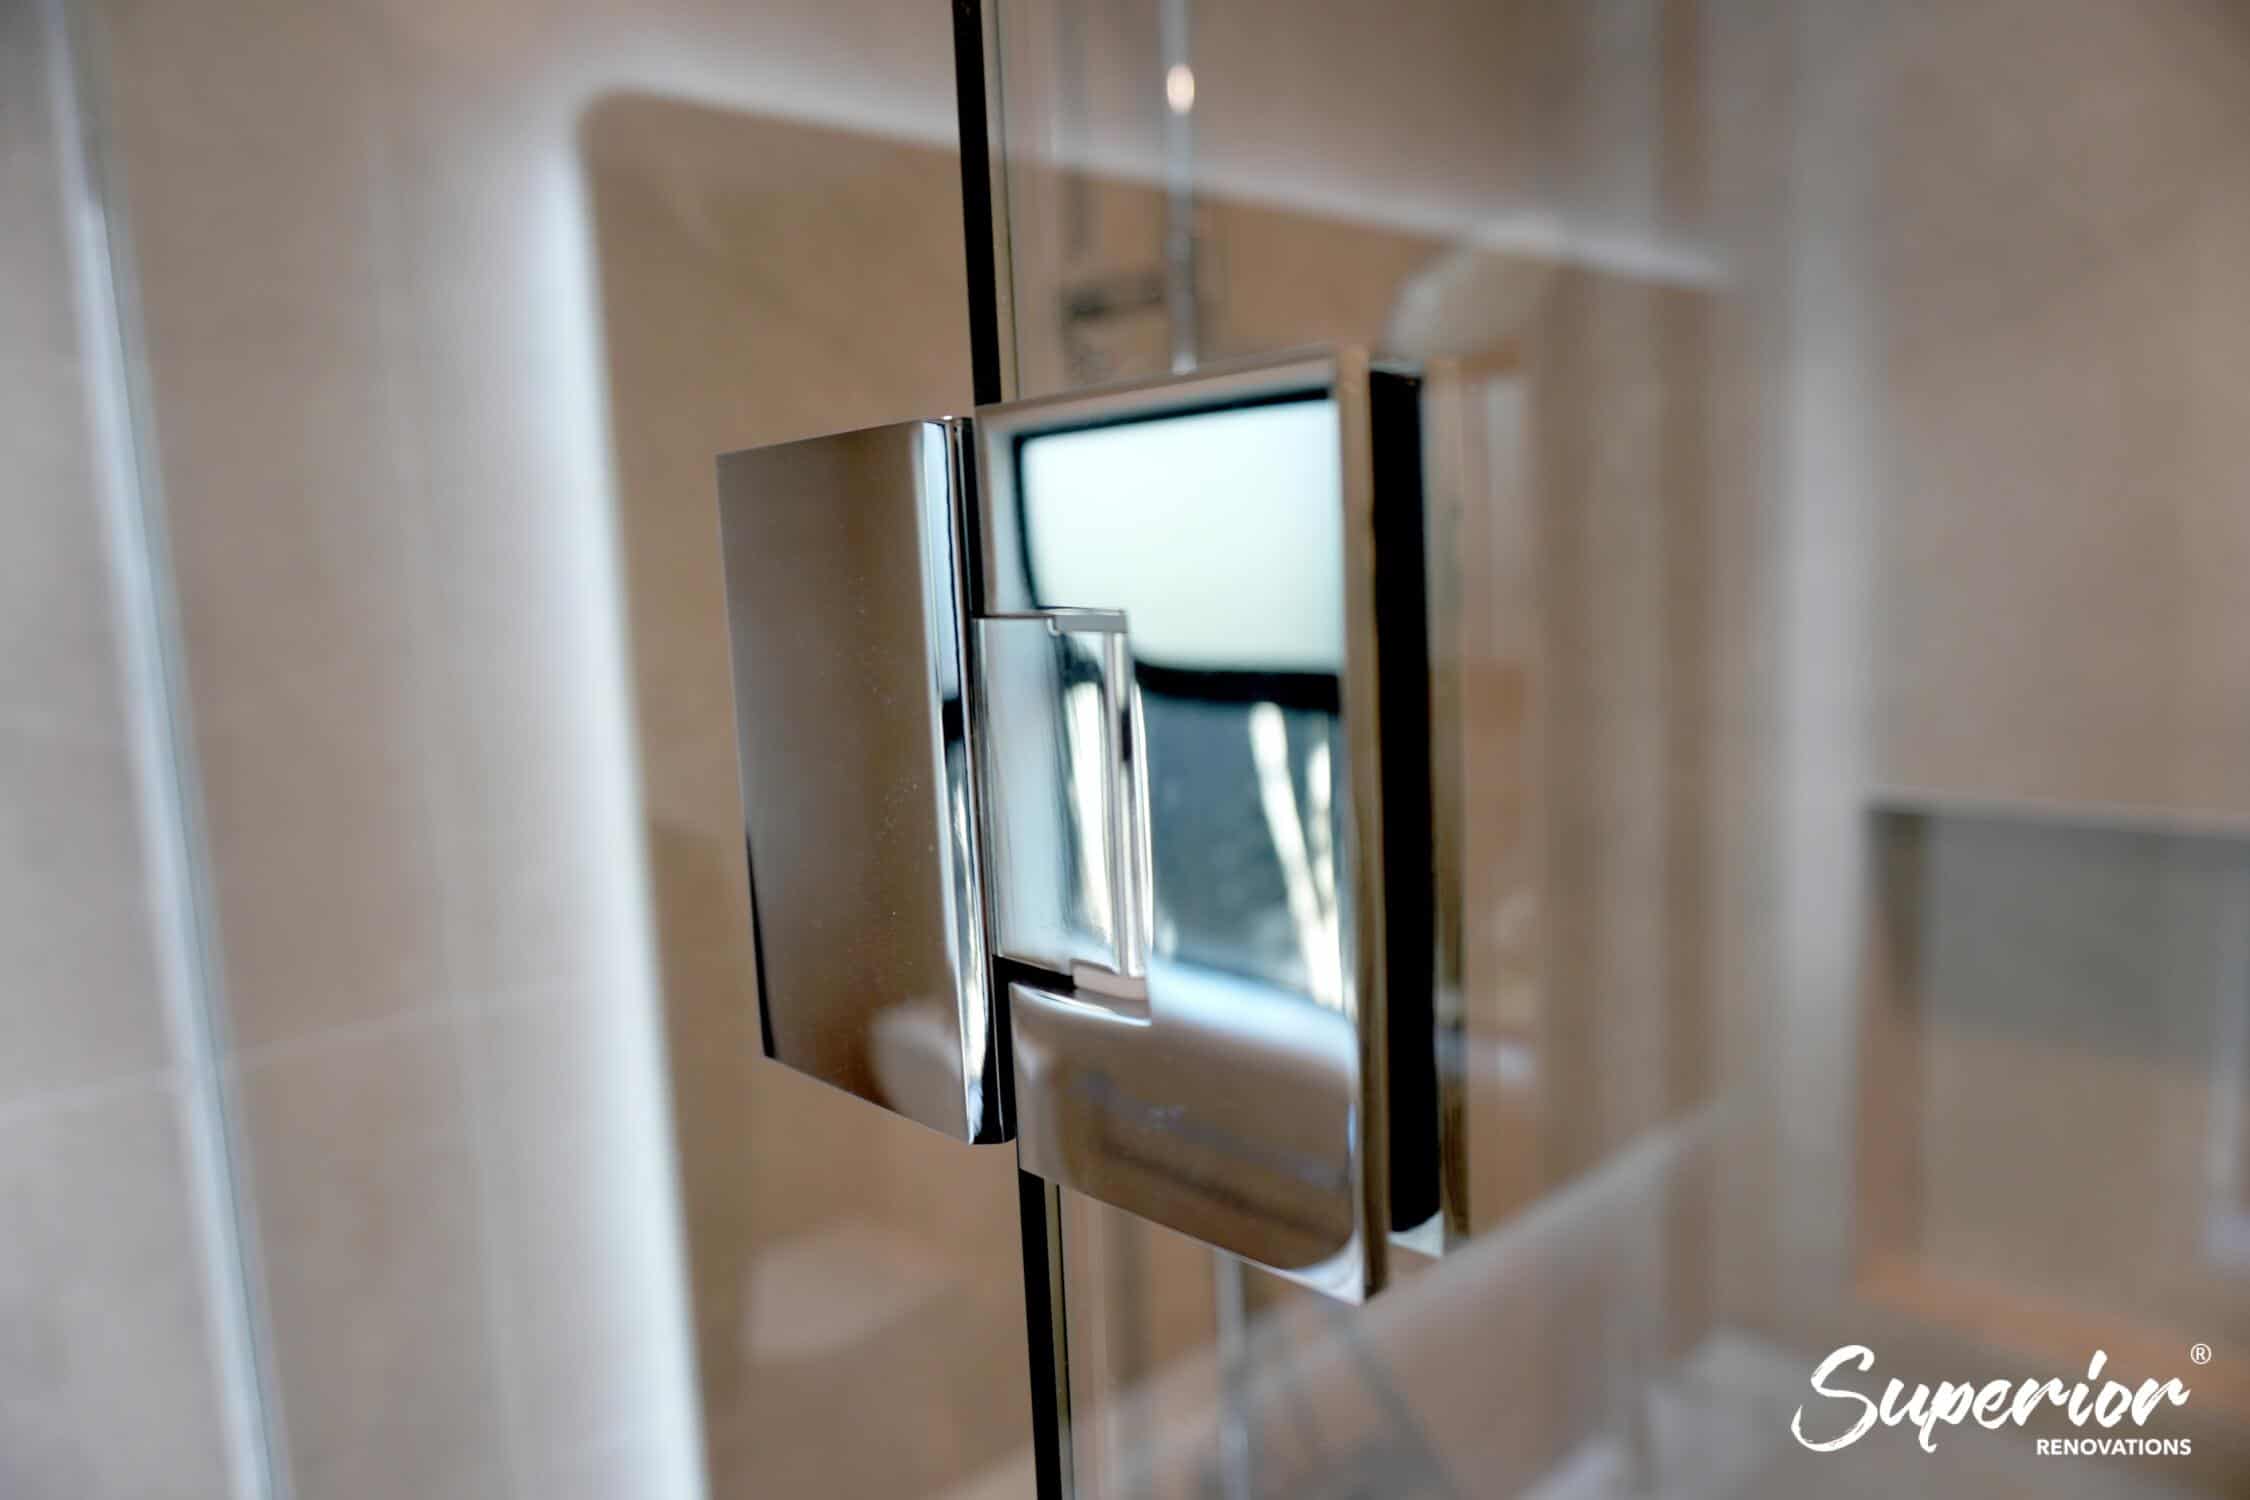
Shower Glass Hardware and Fittings: Key Elements for Durable Auckland Showers
When it comes to assembling the perfect shower glass enclosure, the hardware and fittings are the unsung heroes that hold everything together—literally. In Auckland, where bathrooms endure everything from steamy mornings to occasional earth tremors, choosing the right shower glass hardware ensures your setup is secure, stylish, and splash-proof. Whether you’re fitting a frameless panel in a sleek Newmarket apartment or a framed door in a family home in Henderson, these components make the difference between a wobbly mess and a solid sanctuary. Let’s break down the essentials, from hinges to handles, and how they tie into local needs. Ever had a shower door that squeaks or leaks? Blame the fittings! But fear not—we’ll guide you through picking the best for your reno.
Understanding Shower Glass Hardware: The Basics
Shower glass fittings include all the bits that support, seal, and operate your glass—think hinges, clips, channels, handles, and seals. They need to be rust-resistant, strong, and compliant with NZ standards to handle moisture and use. In Auckland’s humid subtropical climate, opt for stainless steel or brass to fend off corrosion, as salty air from the Waitematā can accelerate wear. The Building Code requires fittings to contribute to overall stability and watertightness Building Code G12. Poor choices lead to leaks or failures, so investing here pays off in longevity and safety.
Tip for Quick Readers: Always match hardware to your glass type—frameless needs heavy-duty fittings, while framed can use lighter ones.
Types of Shower Glass Hardware and Their Functions
Hardware varies by design, but here’s a rundown of common types for Auckland bathrooms:
- Hinges: For pivot or swing doors, hinges allow smooth opening. Self-closing ones prevent slams, ideal for busy households.
- Clips and Brackets: Secure fixed panels in frameless setups, often wall-mounted for stability.
- U-Channels: Metal tracks that hold glass at the base or sides, providing support without full frames.
- Handles and Knobs: For easy gripping; choose ergonomic designs to avoid slips on wet hands.
- Seals and Gaskets: Rubber or silicone strips that prevent water escape, crucial for Auckland’s wet winters.
- Rollers and Tracks: For sliding doors, ensuring effortless movement without jamming.
Materials matter: Stainless steel grade 304 or 316 is best for corrosion resistance, especially in coastal suburbs like Devonport. Consumer NZ advises checking for durability ratings to ensure they withstand daily tugs and humidity.
Choosing Hardware for Frameless vs Framed Showers
Frameless shower glass fittings demand robust, minimalistic hardware like glass-to-glass hinges or point-fixed clamps to maintain that clean look. They’re pricier but offer a premium feel in modern Auckland lofts. Framed setups use simpler tracks and rollers, which are more forgiving and budget-friendly for DIYers. In quake-prone Auckland, ensure fittings have some flexibility to absorb movement, aligning with Building Code B1 for structure.
Scenario Spotlight: Picture renovating a 1980s home in Titirangi—the bushy dampness calls for sealed, rust-proof fittings. A client there chose stainless hinges, and their shower’s still leak-free years later. “It was the hardware that made it reliable,” they noted.
Key Features to Look for in Shower Glass Fittings
When shopping, prioritize:
- Corrosion Resistance: Essential in Auckland; look for marine-grade materials.
- Load-Bearing Capacity: Must support glass weight—check specs for 10mm+ panels.
- Adjustability: For uneven walls common in older homes.
- Aesthetics: Matte black, chrome, or brushed nickel to match your decor.
- Ease of Installation: Pre-drilled or template-included for smoother fits.
For energy efficiency, fittings that allow for better sealing can reduce draughts.
Comparing Popular Shower Glass Hardware Options
To help decide, here’s a table of hardware types suited to Auckland conditions.
| Hardware Type | Material Options | Pros | Cons | Price Range (NZD) | Best For |
| Hinges | Stainless Steel, Brass | Smooth operation, durable | Can be visible | $50–$150 each | Swing doors |
| Clips/Brackets | Aluminium, Steel | Minimalist, strong hold | Require precise drilling | $20–$80 per set | Frameless panels |
| Handles | Chrome, Nickel | Easy grip, stylish | Fingerprints show | $30–$100 | All doors |
| Seals | Silicone, Rubber | Waterproof, flexible | Wear over time | $10–$50 per meter | Leak prevention |
| Rollers/Tracks | Stainless Steel | Smooth slide, space-saving | Can accumulate dirt | $100–$300 set | Sliding enclosures |
Advice for Aucklanders: In high-wind areas like West Auckland, choose fittings with wind-load ratings to keep things secure.
Installation Tips for Shower Glass Hardware
Installing shower glass hardware requires accuracy—measure thrice, drill once. Use waterproof silicone for seals, and ensure brackets are anchored into studs for strength. For frameless, pros are recommended to handle the weight.
Common Error: Overtightening screws— it can crack glass. Go gentle and use torque settings if possible.
Maintenance and Care for Hardware and Fittings
Keep fittings shining with weekly wipes using mild soap—avoid abrasives. Lubricate hinges annually with silicone spray to prevent squeaks. In Auckland’s dampness, check seals quarterly for cracks and replace as needed to avoid leaks. This extends life and maintains efficiency, reducing water waste per EECA guidelines.
Designer Insight: “The right hardware elevates your shower from functional to fabulous, blending seamlessly in Auckland’s diverse home styles,” says Alison Yu, Designer at Superior Renovations.
Where to Source Quality Shower Glass Fittings in Auckland
Local suppliers offer top-notch options. Pumbline has a range of hinges and handles in their shower components.
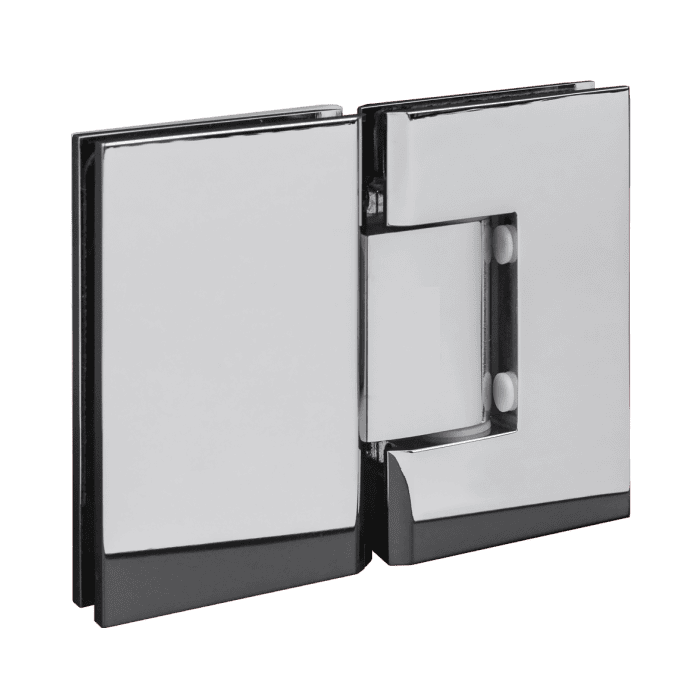
https://plumbline.co.nz/buddy-glass-to-glass-180-degree-shower-hinge
Bringing It All Together for Your Ideal Shower Glass Setup
There you have it—Auckland’s ultimate rundown on shower glass enclosures, from selecting the right type and texture to sourcing suppliers, ensuring certifications, mastering installation, understanding warranties, maintaining sparkle, embracing frameless designs, and picking perfect hardware. In our humid, coastal city, the right shower glass isn’t just about aesthetics; it’s about creating a resilient, beautiful space that fits your lifestyle, whether in a heritage villa or a modern high-rise. By now, you should feel equipped to make informed choices that comply with NZ standards and enhance your home’s value. Remember, quality materials from trusted suppliers like Metro Glass, Mico, and Reece, combined with professional advice, lead to lasting results.
What are the best types of shower glass for small Auckland bathrooms?
Clear or low-iron glass maximizes space and light, making compact areas feel larger. Frosted options add privacy without closing in the room.
How do I choose between framed and frameless shower glass doors?
Frameless offers a modern, seamless look but costs more and requires pro installation. Framed is budget-friendly and easier for DIY, ideal for families.
What certifications should I look for in NZ shower glass panels?
AS/NZS 2208 for safety glass is essential, plus compliance with Building Code sections like B1 and G12 for structure and water supplies.
Which suppliers in Auckland offer the best shower glass options?
Metro Glass for durable, custom panels; Mico for versatile doors; Reece for premium screens—all with local stock and expertise.
How often should I clean my shower glass to prevent buildup?
Daily squeegee wipes and weekly deep cleans with vinegar keep it spotless, especially in Auckland's hard water areas.
What's the typical warranty on shower glass hardware?
5-10 years for glass defects, 1-5 years for fittings; always check with suppliers and know your rights under the Consumer Guarantees Act.
Can I install frameless shower glass myself?
It's possible but not recommended—precision is key to avoid leaks. Hire pros for compliance and safety in Auckland homes.
What's the cost range for a basic shower glass installation?
$500-$2,500 depending on type and size; use our calculator for a tailored quote including materials and labor.
Need more information?
Take advantage of our FREE Complete Home Renovation Guide (48 pages), whether you’re already renovating or in the process of deciding to renovate, it’s not an easy process, this guide which includes a free 100+ point check list – will help you avoid costly mistakes.
Still have questions unanswered?
Book a no-obligation consultation with the team at Superior Renovations,
we’d love to meet you to discuss your renovation ideas!
WRITTEN BY SUPERIOR RENOVATIONS
Superior Renovations is quickly becoming one of the most recommended Kitchen Renovation & Bathroom Renovation company in Auckland and it all comes down to our friendly approach, straightforward pricing, and transparency. When your Auckland home needs renovation/ remodeling services, Superior Renovation is the team you can count on for high-quality workmanship, efficient progress, and cost-effective solutions.
Get started now by booking a free in-home consultation.
Request Your In-home Consultation
Or call us on 0800 199 888
www.superiorrenovations.co.nz
Have you been putting off getting renovations done?
We have partnered with Q Mastercard ® to provide you an 18 Month Interest-Free Payment Option, you can enjoy your new home now and stress less.
Learn More about Interest-Free Payment Options*
*Lending criteria, fees, terms and conditions apply. Mastercard is a registered trademark and the circles design is a trademark of Mastercard International Incorporated.


 74")